Here you will learn how to disassemble an aluminum heating radiator with your own hands: the pros and cons of aluminum heaters, as well as the sequence of actions when assembling and disassembling battery sections.
For the first time, aluminum radiators appeared on the world markets for heating equipment in the 80s of the 20th century. Next to the heavy ribbed "monsters" of cast iron, they looked elegant and stylish.
Naturally, the demand for them was huge, but only a decade later, the first aluminum batteries showed their shortcomings.
To date, manufacturers have significantly improved the performance of aluminum batteries, so they now have much more positive qualities than before. The assembly of aluminum heating radiators has also been simplified and now they can be installed or disassembled without the involvement of specialists.
Pros and cons of aluminum heaters
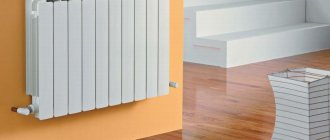
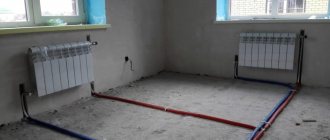
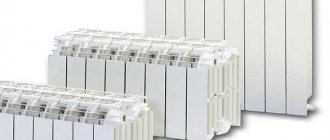
Aluminum radiators have become frequent "guests" of private houses and apartments in houses with centralized heating.
This became possible thanks to the qualities that have won the hearts of consumers around the world:
- Aluminum is one of the best heat conductors, giving it to the surrounding space in two ways: radiation and thermal convection. This feature is especially in demand in heating systems with unstable carrier pressure.
- Assembly of sections of aluminum radiators is possible without the involvement of additional forces. Since their low weight allows you to do everything yourself. They are easy to transport and install.
- These batteries are capable of withstanding pressures from 16 to 25 atmospheres, which makes them desirable in the places that were occupied by cast-iron "accordions". There are 2 types of aluminum radiators. One of them is suitable for autonomous heating systems, where the load rarely exceeds 10 atmospheres. The second is for batteries connected to centralized heating, where drops of up to 15 atmospheres occur.
- Aluminum radiators are much lower than steel or bimetallic counterparts. This is one of the most important factors that attract consumers.
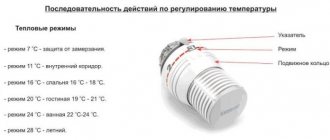
- They are easily adjustable, which allows you to create the necessary microclimate in the room and save money on heating.
- They have an attractive designthat fits easily into any interior.
These qualities have made aluminum batteries in demand all over the world, despite the fact that they have minor disadvantages:
- Aluminum is not resistant to corrosion, but modern radiators are treated with special agents that prevent corrosion. But even after processing, it is better to keep such heaters filled with a coolant, which is difficult to do in a centralized heating system, where water is discharged after each end of the season. That is why aluminum batteries are more in demand in autonomous systems where there are no such discharges.
- Batteries of this type are prone to air bubbles, therefore, at the beginning of the heating season, excess air must be vented from them.
- The threaded connection in aluminum models is weak and with a strong water hammer, leakage may appear at the joints. This defect can be eliminated only by knowing how to assemble an aluminum heating radiator using additional gaskets.
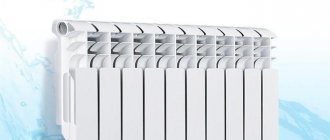
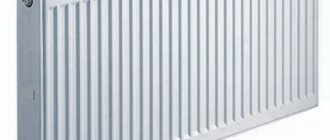
This type of radiator is available in two types: one-piece and sectional. The second is most common in private homes and apartments.
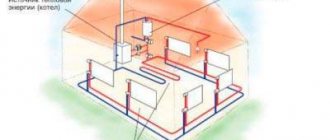
Product design
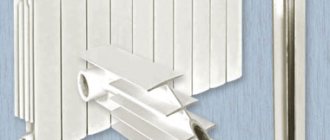
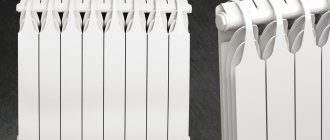
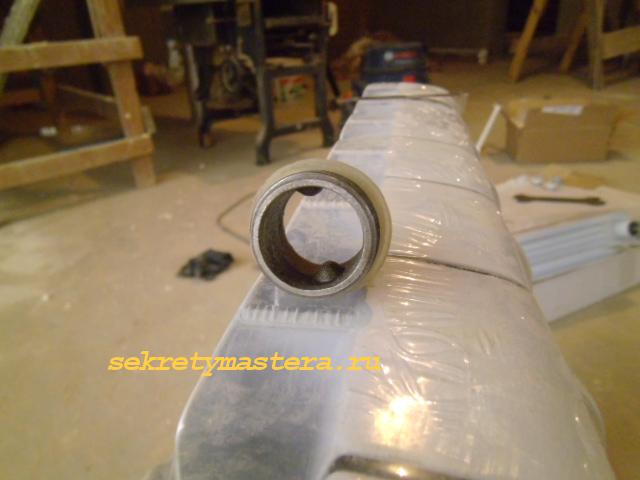
An aluminum radiator is a structure of separate sections, interconnected by means of nipple nuts.In fact, this connecting element is a cylinder, on each side of which an external thread is made. The cylinder is empty inside. Radiator sections are screwed onto each nipple-nut from both sides.
Connectors are located at both the top and bottom of the battery. Thus, each section of the radiator is attached to the adjacent one at four points. The nipple-nut is made in such a way that it is completely invisible in the assembled product.
There are projections on the inside of each connector that serve for the installation procedure. A special tool clings to them, with the help of which the nut is untwisted and tightened. In this case, the direction of the thread should be taken into account - on some elements it is right-hand, on others it is left.
In order not to play the guessing game, just pay attention to the markings in the corresponding areas. If the letter D is indicated there, it means that the thread is right-hand. The S indicates the left one. It is very important not to be confused, as an attempt to unscrew the nut in the opposite direction can lead to thread stripping and, consequently, damage to the element.
Battery assembly
In principle, having the necessary tools at hand, even a beginner will be able to assemble or disassemble an aluminum radiator with his own hands.
To install an aluminum radiator heater with your own hands, you must:
- Place the battery on a flat surface. This is necessary in order to inspect the device before installation and check all the joints for possible cracks or chips.
- Before connecting the elements of the heater, the threads at the joints are cleaned not only of debris, but also of factory paint. This is done using fine-grained sandpaper. This is important, as the paint layer can crack in the future, leading to a leak. For the sake of presentation, manufacturers paint not only sections of radiators, but also their joints.
When cleaning the battery from paint, you need to make sure that the sandpaper does not leave scratches on it, which can also cause leaks in the future. - All gaskets should be washed in soapy water, and if antifreeze is supposed to be used in the heating system, then they need to be degreased, since this carrier is able to penetrate into any, even the smallest, irregularities.
- Before connecting the sections, it is advisable to study the drawing of the key for assembling an aluminum radiator in order to know how to use it. This metal is very soft, so any too much force can damage the threads and then you will have to buy a new section.
- A paronite seal is put on the nipple nut on both sides. The key is placed on top and can be easily turned a couple of times, the same is done with the bottom hole. Only after the joints have been tacked can you tighten them with a lever more tightly.
- The hole that will not be used is closed with a plug, and a Mayevsky crane is attached to the other and the assembly of the aluminum radiator is ready.
After all sections of the radiator have been assembled, it can be connected to the heating system and checked for possible leaks. Since aluminum batteries are quite lightweight, they can be easily connected by hand, even without the appropriate skills.
How to add a radiator section
Hello dear homemade products.
A post for those who need to add or subtract a section near a heating radiator.
It is better to get a special key for this kind of work, something like this, but we will proceed from the fact that there is no such key, and we will do everything with improvised means.
The most handy tool is a jackdaw, and if the radiator is aluminum, that is, all white and pretty, then at least an open-end wrench will be needed in order to unscrew the input element, if it is already installed, and not damage the enamel.
Of course, between the key and the shoe, you will need to additionally put a spacer, usually a piece of cloth.
You will have to disassemble the radiator itself if you take the additional section from another radiator, but if it is purchased, then everything will be limited to assembly. But first about the disassembly.
So, the foot is turned inside out, and then the very interesting begins. The radiator has four holes into which the input elements are screwed, two from one side, and two from the other, and so, on one side they have a right thread, and on the other left.
So if you need to turn them out, do not try to use all your strength to turn the key in one direction.
Try in one direction first, if not, in the other. If the radiator is aluminum, then special efforts will not be required, even if it is used.
True, there may be an ambush in the event that someone has already put a hand on this radiator before you and assembled it on Tangit UNI-LOCK. Well, if this "miracle" material has a place to be, then forget about disassembly, you will not turn anything away anyway.
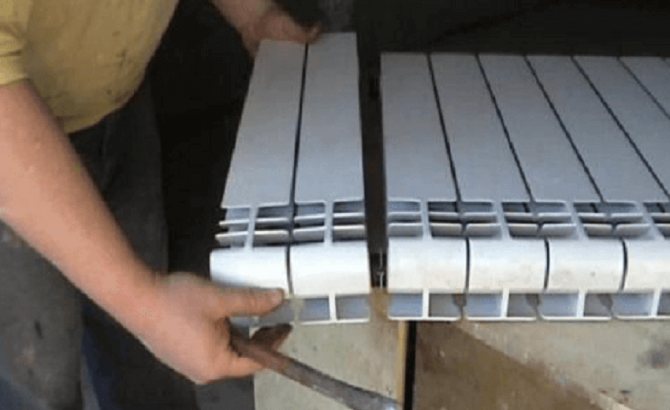
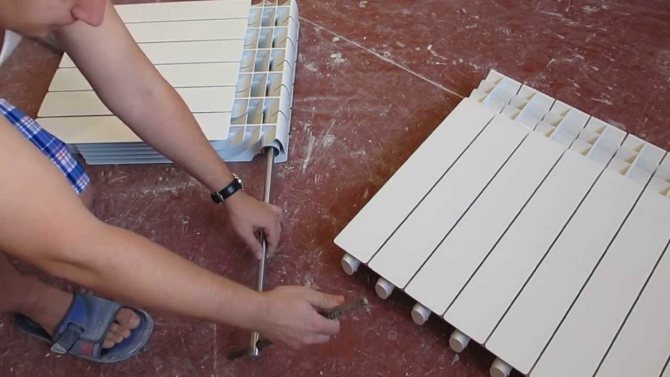
After the direction of the thread is determined, and the input element is turned out, we take the daw and insert into the hole of the radiator, its handle, the part that is not threaded, until it stops. It will engage the clutch connecting the radiator sections.
And we begin to turn the jackdaw by its working part, in the same direction in which the input fittings were turned away. In this case, the handle may be slightly deformed along the longitudinal axis. Nothing wrong. When you wrap it up later, everything will fall into place.
We make one turn on one side, then one turn on the other, and so on until the radiator section turns away.
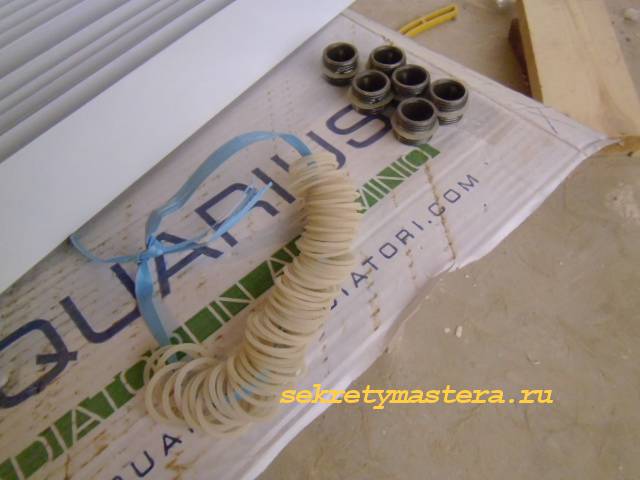
As a result, such a clutch with a gasket will be unscrewed:
If you add a radiator section, then you may have to buy two such couplings, and be sure to inter-section gaskets, which are best replaced before assembly.
There were times when the old ones started crying. If there is water in the system, then they will cry and stop, (as in life), but if there is antifreeze, then it's a "pipe".
.
The next stage is assembly. First, couplings are inserted into the holes of the radiator, with new gaskets. You don't even need to bait them, since they stand up very tightly.
Then, on top of them, a radiator section is installed, also very tight. If everything is okay, then the section does not flounder at all, although it is not twisted.
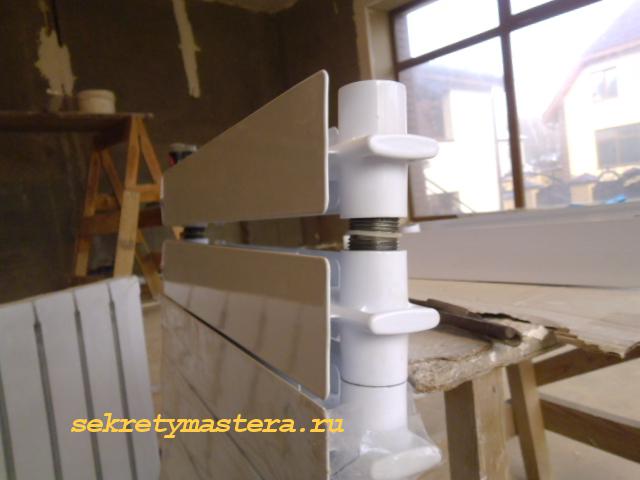
Now we take the daw, and we begin to twist, just as when disassembling, 1 - 1.5 turns each, until the section is pulled up. In the end, you will have to make an effort to straighten the handle, deformed during disassembly, and at the same time tighten the connection.
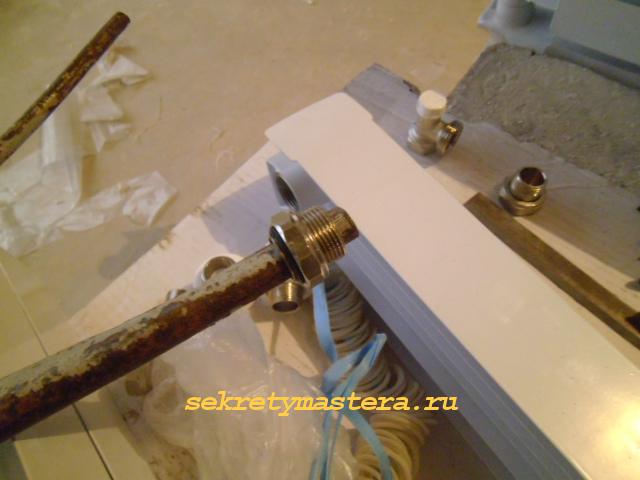
Well, to the heap - with a daw, according to the same principle, you can screw an American into the input elements. Once I ran for half a day in search of a hexagon under it, until one craftsman showed how to do it. Works on both hexagons and ears.
For cast-iron radiators, the principle of disassembly-assembly is exactly the same. The only difference is that second-hand cast iron, with a handle from a jackdaw, cannot be disassembled.
And there was also a case when, despite all efforts during assembly, the sections cried, that is, the gaskets did not want to hold the pressure in any way. Since then, I have been using linen winding on all cast-iron radiators. The very case when it is better to overshoot.
I wish you success in your work.
Section Construction >>> Subsection Heating >>>
Well, what else is interesting there
Heating scheme Leningrad Welding pipes from polypropylene How to wind flax How to make a water-heated floor Heating a house with warm floors If a warm floor has been punched How to make a floor in a bathhouse warm Heating in walls How to make a fireplace for a sauna
How to disassemble an aluminum heating radiator with your own hands?
Removal of the aluminum battery occurs in the following cases:
- When the system changes completely.
- It is necessary to increase or remove the extra section.
- Eliminate the leak.
Before disassembling the aluminum radiator, you need to prepare a set of wrenches and a screwdriver.
Further actions are performed in the following sequence:
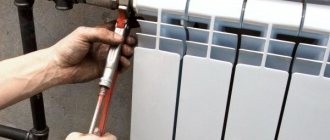
- The coolant is discharged from the system. If disassembly takes place during the heating season, then you should wait until the battery cools down.
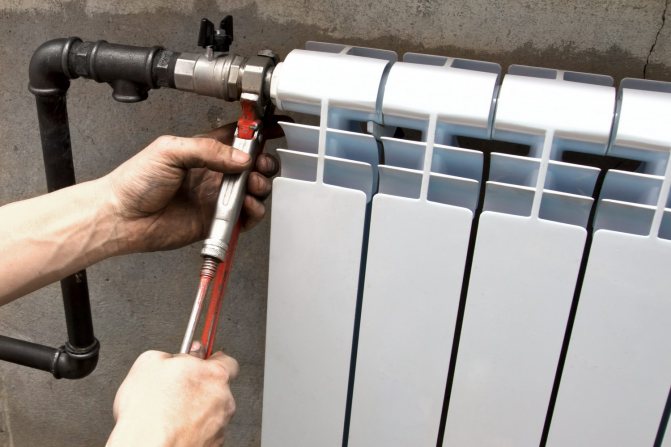
- Using a wrench, unscrew the clutch, which connects the hose from the battery to the heating pipe.
- The disconnected radiator must be freed of water residues and put on a flat surface with the right side up.
- Remove the filter from the battery and rinse thoroughly. This must be done immediately, since the dirt accumulated in it can harden and then it will be extremely difficult to remove it.
- Further work is the analysis of the battery into sections. They are interconnected with special nipple nuts. To remove them, you need a key for disassembling aluminum radiators, turning it counterclockwise, they can be easily removed from the radiator. This must be done with extreme caution to avoid skewing.
After disassembly, the battery cells are washed and reassembled in the same sequence.
If it is necessary to eliminate the leak, then a special solution of epoxy resin with the addition of bronze powder is suitable for aluminum radiators. You need to work with this composition quickly, as it dries up in a matter of minutes, so the leakage site must be cleaned up and prepared in advance.
Step-by-step description of dismantling works
A few words about when you may need to disassemble the heating battery:
- In the case of replacing the old radiator with a new one with greater performance and better appearance.
- If you need to add additional sections for the battery.
- If it is necessary to replace a single section or gasket that has leaked.
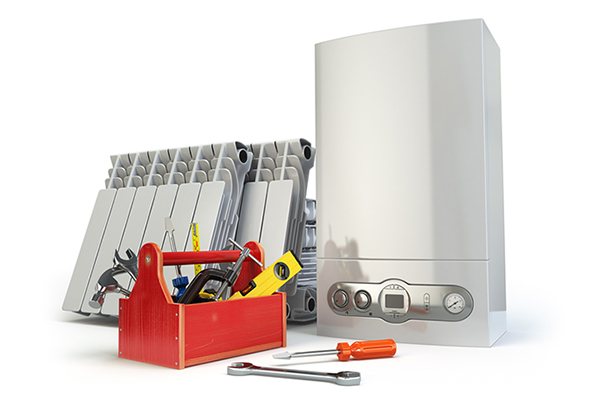
The instruction begins with the preparation of the necessary tools:
Step # 1: preparing the tools
Photo of nipple wrench
| Name | Appointment |
| Nipple wrench | Dismantling the radiator sections |
| Gas wrench | Disconnecting the battery from the pipes of the heating system |
| Bulgarian or gas cutter | Cutting squeegees in case of jamming |
| A piece of steel pipe or crowbar | Increase the lever of the nipple wrench |
| Blowtorch and metal brush | Removing paint from the squeegee, warming up futures |
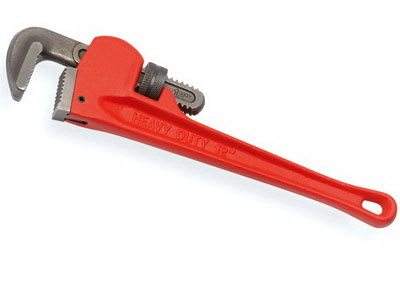
Sample gas wrench
Advice: a nipple wrench, given that it is rarely needed on the farm, and its price is not the lowest, it is recommended not to buy, but to rent. This will save your family budget.
Step # 2: disconnecting the battery
Before disassembling an aluminum or cast iron radiator, it is necessary to disconnect it from the heating system. To do this, it is imperative to turn off the heating and drain the water from the riser, otherwise you will simply flood the room and get burns.
Advice: it is recommended to cover the floor under the battery with a film, rags or at least newspapers before starting dismantling to avoid getting any residual liquid on it, which may end up in the circuit even after draining the riser.
Further, depending on the complexity, three situations can be distinguished:
- Polypropylene pipes... In this case, the sleeve joint, as a rule, is twisted with bare hands, without causing any difficulties.
- Steel new... With some effort, you will most likely be able to spin the battery inlet and outlet with a gas wrench.

Disconnecting new steel pipes
- Old steel or cast iron pipes... First, we try, removing the paint from the docking place with a blowtorch and a metal brush, we try to untwist the connection as described in the previous version. But in systems that have worked for a long time, most often this does not work, and then we simply cut off the drive with a "grinder" or autogenous.
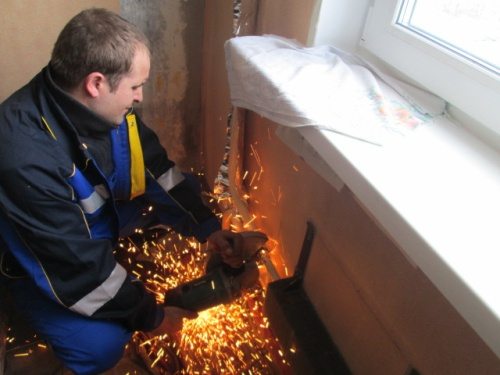
Cutting old sills using a "grinder"
After disconnecting the battery from the pipes, remove it from the hooks and place it on a flat surface.
Step # 3: disassemble the radiator
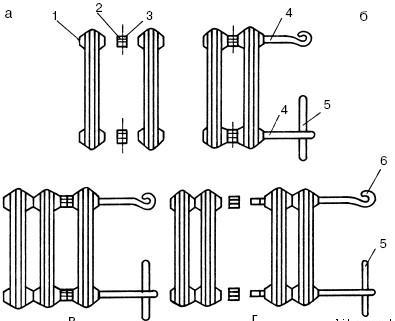
Battery section disconnection diagram
| Designation in the diagram | Name |
| 1 | Radiator section |
| 2 | Nipple |
| 3 | Sealing gasket |
| 4 | Nipple wrench |
| 5 | A piece of pipe or crowbar |
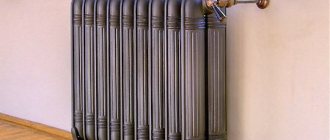
The battery can be cast iron, aluminum or bimetallic.
The most difficult option for parsing is the first of the listed ones, and we'll start with it:
- How to disassemble a cast-iron heating radiator on your own:
- Carefully, we check the thread on the futures or plugs, which can be either left or right.
- We insert the nipple wrench inside, we increase its torque using a piece of pipe or a crowbar.
- We tear off the thread by scrolling the tool a quarter of a turn, first at the top and then at the bottom.
- Then we also alternately continue to unscrew the nipples so that the radiator does not warp.
- The main problem with old batteries is that the fuses can become stuck in the course of many years of use and not give in to the key. In this case, the junction must be warmed up in a circular motion with a blowtorch, and then again try to unscrew the nipple. We repeat the procedure until the thread gives in. If, however, nothing comes of it, then you have to cut it with an autogenous gun.
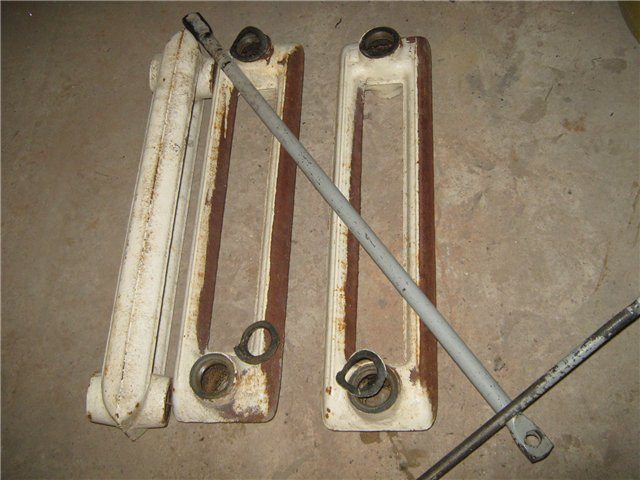
Disassembled old cast-iron heating battery
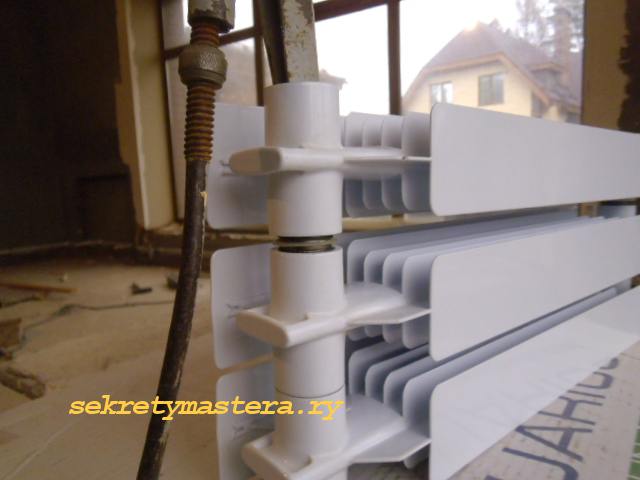
- Let's find out how to disassemble a bimetallic or aluminum radiator? The procedure is almost the same as described above, but has several differences:
- A smaller nipple wrench is used.
- It does not require as much effort when unscrewing the nipples.
- Plugs and futurocks are marked with the direction of the thread in the form of the letters S and D, where the first designates the left stroke, and the second - right.
- The metal gaskets between the sections are wiped, sanded and stored until the battery is reassembled.
Dismantling the aluminum battery
After completing the described tasks, you can replace the leaking part, add a section, or even install a new radiator in place of the old one.
Parsing into segments
To properly disassemble the aluminum radiator, you will need a special tool - a nipple wrench, which is made for this particular job. As a rule, it is not in stores, since it is a product of the mind and work of plumbing workers. You can get it in two ways.
The first is to try your luck in the local market (if there is one), where various used tools and other useful things in the household are sold. It is likely that you will find what you are looking for there, and at a reasonable cost. The second option is to contact any plumbing workshop and ask them for a nipple wrench for rent.
Related article: Film underfloor heating under linoleum - what the doctor ordered
When your search is successfully completed, you can start directly disassembling the equipment. There is a specific order for this procedure.
- The first thing to do is to shut off the water in the riser to which the radiator is connected and drain the coolant from the system. If you are the owner of a private house, you can do it yourself. If you are dealing with a centralized heating system, then such issues can only be resolved through the organization that manages the building. To do this, you need to write a statement and then wait for the arrival of a specialist. By the way, in the case of living in an apartment building, you can perform such work only during the period when the heating season is already over. Otherwise, you simply will not be able to get permission, since stopping the centralized heating system will bring cold not only to yours, but also to your neighbors' apartments.
- After you figured out the disconnection of the water in the system, place containers under the joints of the radiator and the main line to collect the remaining coolant that will flow out during the separation of the equipment.
- Unscrew the fittings connecting the battery to the line. Check their condition at the same time. If you notice any shortcomings - cracks or "smoothed" threads - it is better to replace these elements with new ones. Just keep in mind that not all metals are combined with aluminum radiators. For example, fittings made of brass or copper cannot be used categorically, as this may cause an electrochemical reaction that will lead to the onset of corrosive processes.
- After detaching, remove the radiator from the brackets holding it.
- Now it's time to use the very tool that you worked hard on getting it. The nipple wrench must be inserted into the battery exactly to the point that you are going to dismantle. Then you need to get the end of the tool into the hole provided for this on the connecting element. Once you have succeeded, turn the nut in the desired direction half a turn. In general, for this stage, it is advisable to invite an assistant who will fix the radiator in one place while you are fiddling with the connections. So, turned the nut half a turn, go to the one on the opposite side, and there repeat the same operation. Thus, by gradually unscrewing each element in turn, you can completely separate one section from the other. Be careful and patient - each nut needs to be turned just a little, about 5-7 mm. Otherwise, the section can be strongly skewed, resulting in damage to the radiator elements, and there will be a need to replace them.
- After unscrewing the correct nuts, remove the segment, and then check all the gaskets supplied with it. The quality and condition of the rubber seals plays an important role. Deformed gaskets can cause leakage. Therefore, in case of the slightest doubt about their suitability, it is better to replace these elements with new ones. Moreover, it is advisable to purchase paronite gaskets, since this material has proven itself best of all. If this is not possible, then try to find at least silicone seals. It is not recommended to put rubber ones, as they quickly fail.
Related article: Choosing between a bathroom and a shower: which one is better and why