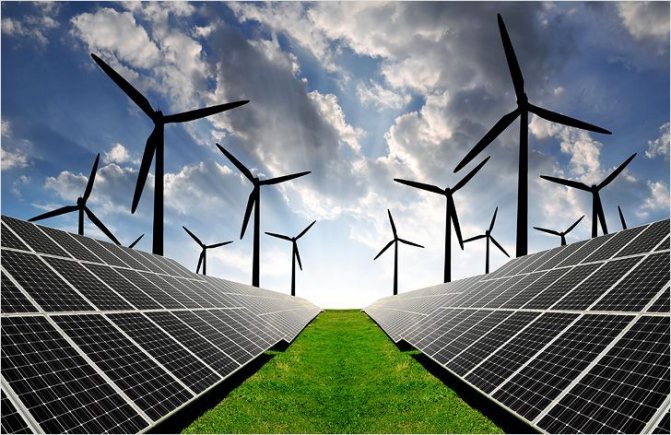
Sources of energy that do not harm the environment, in the light of large-scale man-made disasters, are of particular importance.
The comfort of our life is provided by a huge number of all kinds of electrical appliances, which entails an increasing dependence on the supply of electricity, which is not always stable.
This factor also contributes to the increase in the number of mini-power plants to meet the personal needs of private home owners.
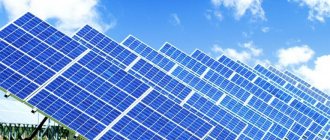
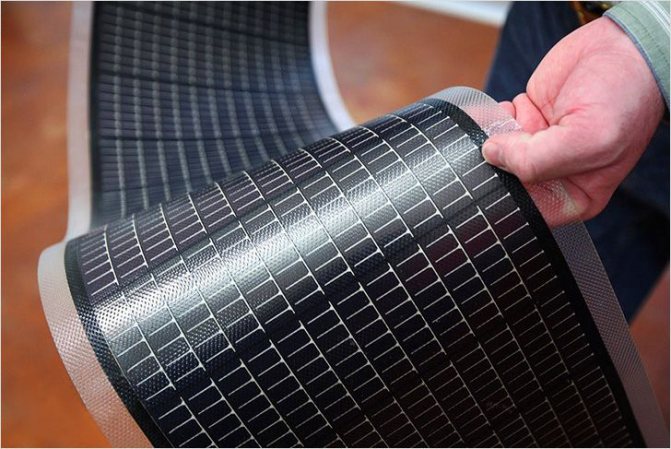
The cost of solar panels is decreasing every year, and nowadays the installation of a home solar-powered power plant is quite a rewarding undertaking.
To prevent this undertaking from turning into costs that will never pay off, careful calculations must be made before installing such a system.
Installation site - roof
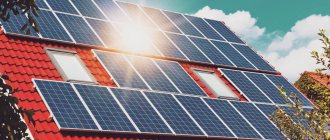
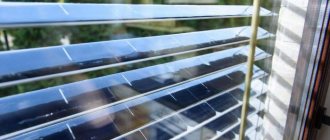
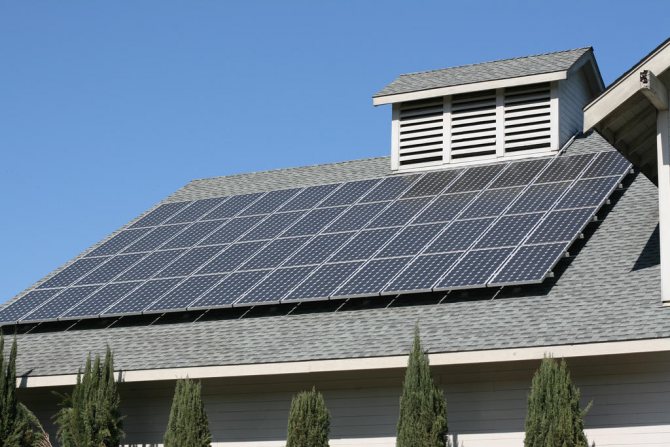
Photovoltaic systems are mounted on the facades of buildings, installed on the walls, but, of course, the most suitable place for installing solar panels is the roof - here the maximum illumination of the elements is ensured.
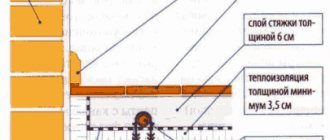
The gap between the roofing and the photovoltaic module must be at least 5-10 cm, as the elements are heated strongly during operation.
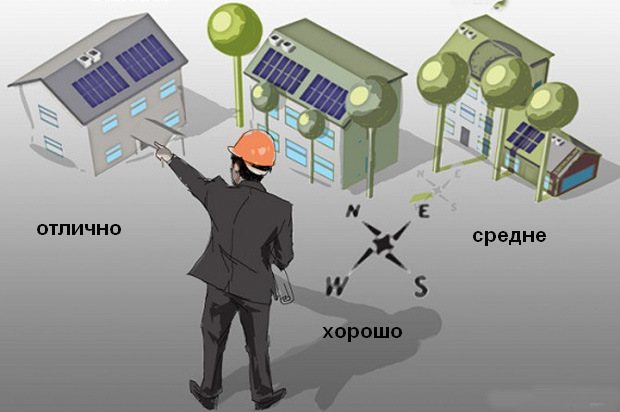
The optimal orientation of the battery is directly to the south, and acceptable efficiency is achieved in the southeast and southwest direction.
To increase efficiency, a special mobile solar tracking system has been developed, which automatically rotates the solar array in order to provide the best orientation at this moment.
The degree of inclination of the surface of the photovoltaic module is also of great importance. An inclined placement is considered optimal: at an angle of 15 to 90 degrees, depending on the geographical latitude of the area. For the European part of Russia, these values range from 30 to 60 degrees.
In practice, the location of the solar battery primarily depends on the roof structure; during installation, you need to choose the orientation and angle of inclination that are as close as possible to the optimal calculated ones.
How solar panels are installed
The installation of solar panels must follow strict rules. Below is the sequence of steps:
- First you need to determine the location of the batteries. If you turn to the services of specialists, they will be able to determine the optimal place where the greatest amount of sunlight falls.
- A work plan is drawn up.
- The calculation of the necessary consumables is made, and a drawing of the frame is also created.
- The frame is assembled taking into account all the recommendations - the optimal angle of inclination, size, shape.
- The frame is installed and the photocells are connected
- The inverter starts up.
- Checking the correctness of work.
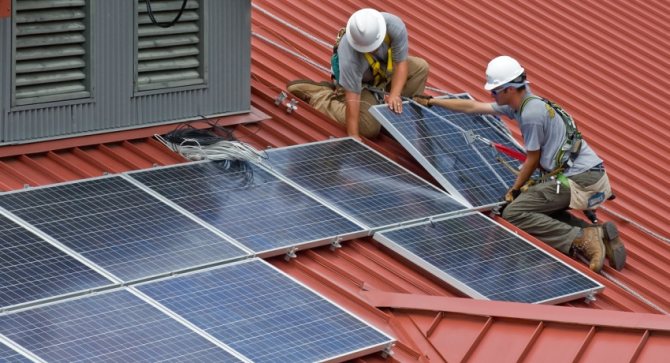
Of all the steps, the most difficult is installing solar panels, especially if you plan on placing them on the roof. You won't be able to do such work on your own. Here you will need to bring in a friend for help or contact a specialized team. Before installing and connecting the panels to the electrics, be sure to take into account the weather conditions.
Installation of solar panels

There are three main types of modules:
- inclined - suitable for pitched roofs;
- horizontal - placed on flat roofs;
- free-standing - mounted using a separate structure.
The novelties of the construction market can be distinguished in an independent form - these are photovoltaic panels integrated into the architectural elements of the building structure.
The Tegosolar photovoltaic roofing tile is a prime example: a roof covering capable of generating electricity.
The reason for the decrease in efficiency may be trees, fallen leaves, chimneys, antennas, buildings located in the neighborhood, or other objects, the shadow of which completely or partially covers the battery installed on the roof.
This factor has a great influence on the operation of the system, and it must be taken into account during installation.
The battery, inverter, control unit and other necessary elements can be placed in any convenient place - for example, in a utility room.
Fasteners, racks, rails are made of metal.
This could be:
- steel;
- aluminum;
- galvanized iron.
Main characteristics of the installation system
Depending on the place of installation of solar panels, different types of installation systems are used.
- Oblique: if the anchorage is on a sloped roof;
- Horizontal: if the roof is flat;
- Free standing: if the battery is placed on supporting structures on the ground;
- Integrated: if you plan to make the battery part of the building.
The mounting system includes a specific set of fasteners. They are selected taking into account one of the above types of attachment and the location of the photo structure. Fasteners are made of high quality materials - steel, zinc, aluminum - and are endowed with a certain level of rigidity for a secure installation even in bad weather and strong winds. Our website contains high quality aircraft grade aluminum solar panel mounts, which can be viewed in the catalog.
Design features
Without going into details, we can say that the photovoltaic module
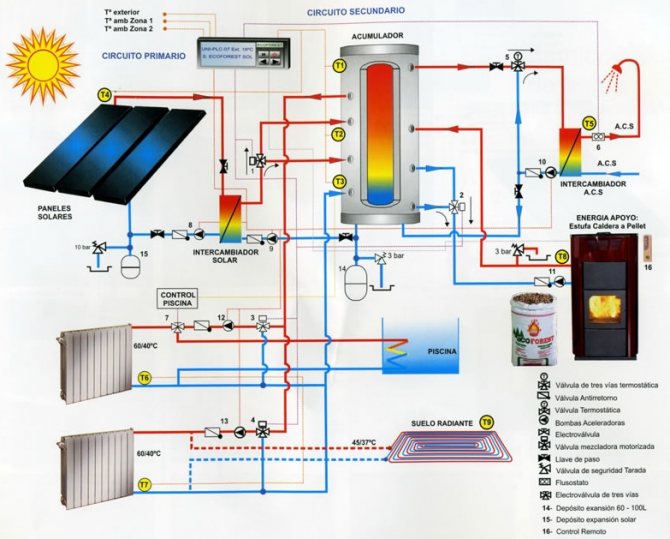
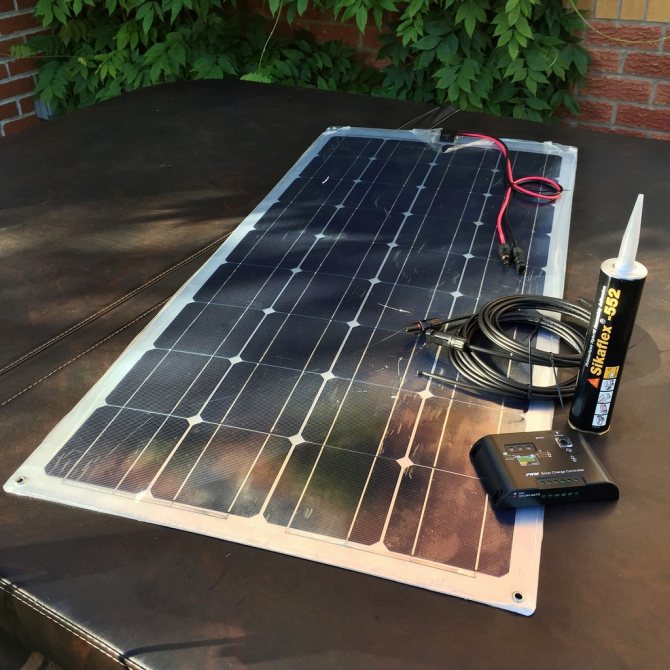
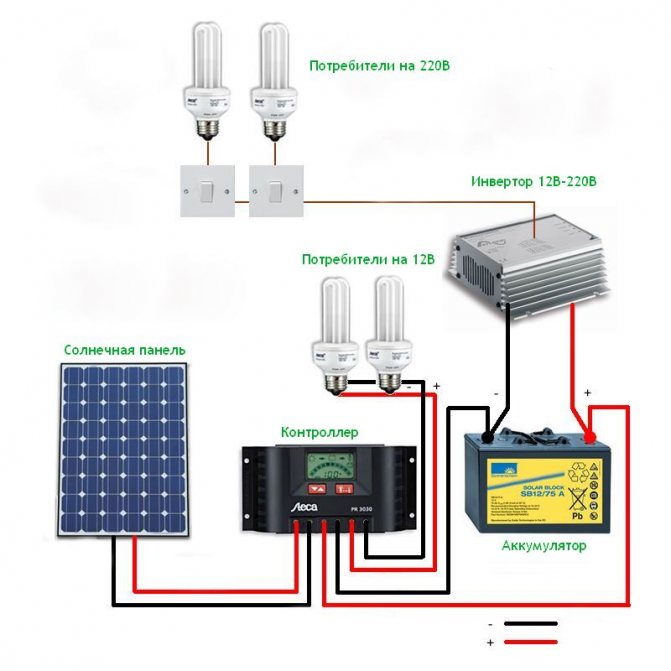
consists of two thin plates - a semiconductor, through which solar energy is converted into electricity.
A direct current is generated, an inverter is used to convert it into alternating current.
Also, the power supply system includes batteries - after all, the intensity of solar radiation is uneven throughout the day, and the controller.
For a low-power system, voltage losses in the cable are significant - it should be kept as short as possible.
Installation of solar panels ↑
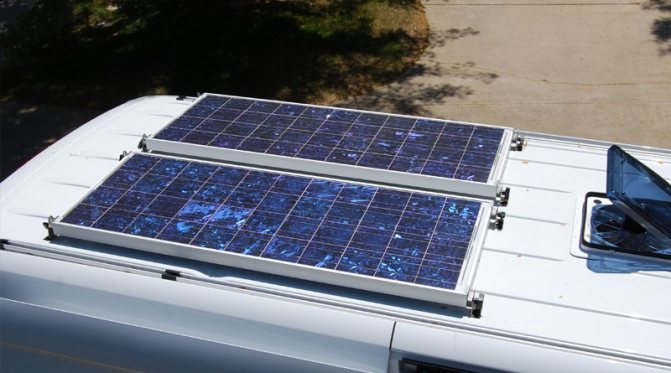
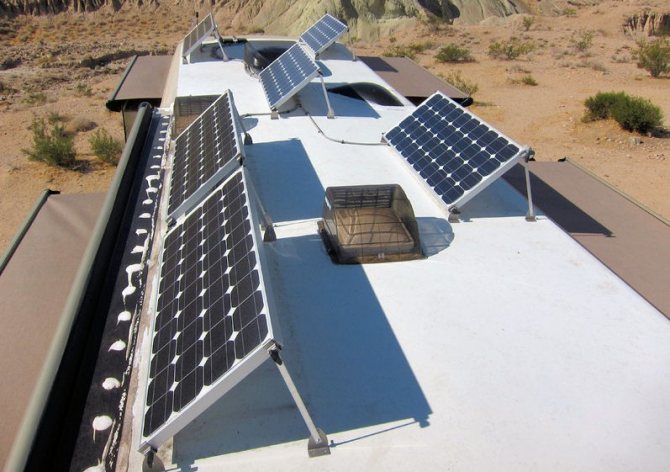
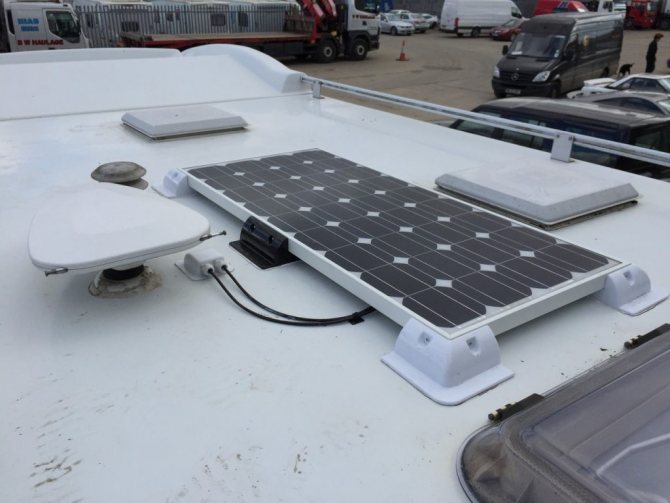
The panels are installed both directly on the roof and on a supporting structure specially designed for this purpose.
In the first version, the panels will be placed at a fixed angle, which will create certain difficulties in their operation, for example, during periods of low sun intensity. Thus, the only acceptable type of panels will remain only those that do not depend on the activity of the sun.
More often during installation, the second method is used, especially since it is applicable to any roof. The supporting structure, in addition to providing resistance to atmospheric influences, for example, strong gusts of wind, makes it possible to regulate the angle of inclination.
On a note
The roof of the house can have any configuration, except for pitched ones with a slope of more than 40 °.
- If the slope of roofs for solar panels does not exceed 40 °, then in this case the installation is carried out either on a frame structure or without it.
- On flat roofs, installation is performed on an inclined plane of a special metal frame.
- Such batteries are rarely installed on the wall. As in the previous case, installation is performed on a frame structure, always with an inclination.
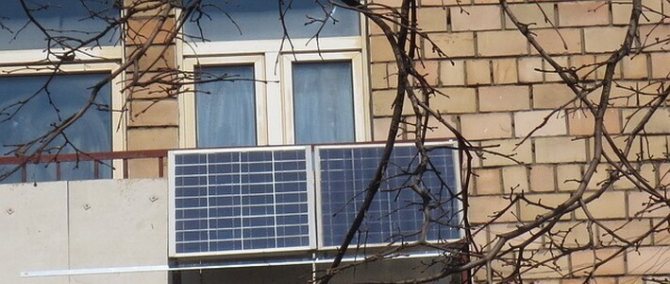
- Solar systems in apartments are usually installed either on the roof of a balcony or loggia or on the outside.
Useful
Although solar panels on the roof of an apartment building will be more expensive than individual ones at a total cost, they will reduce operating costs. Do not forget that there is no darkening on the roofs of high-rise buildings, which means that the modules on them will work with higher performance.
Installation on the ground is performed on a special support structure located at least half a meter from the ground. This option is recommended, in particular, for regions with heavy snowfall.
What points you need to pay attention to during installation.
- Check if the roof is able to withstand the combined load caused by the weight of the frame and the panel itself.
- Nearby objects should not cast a shadow on the panel. Otherwise
- due to a lack of solar energy, the efficiency of the equipment will decrease,
- in the system, a number of panels will not work due to the shadow falling on their surface,
- under these conditions, so-called stray currents can occur, which will damage the battery.
- It is necessary to eliminate the effect of windage so that the autonomous system is protected from gusts of wind.
What data is needed for calculations
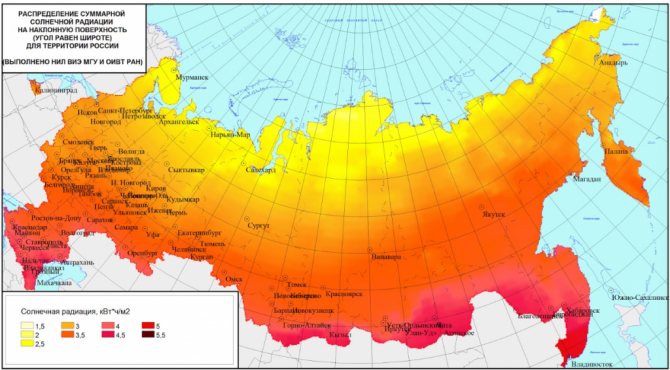
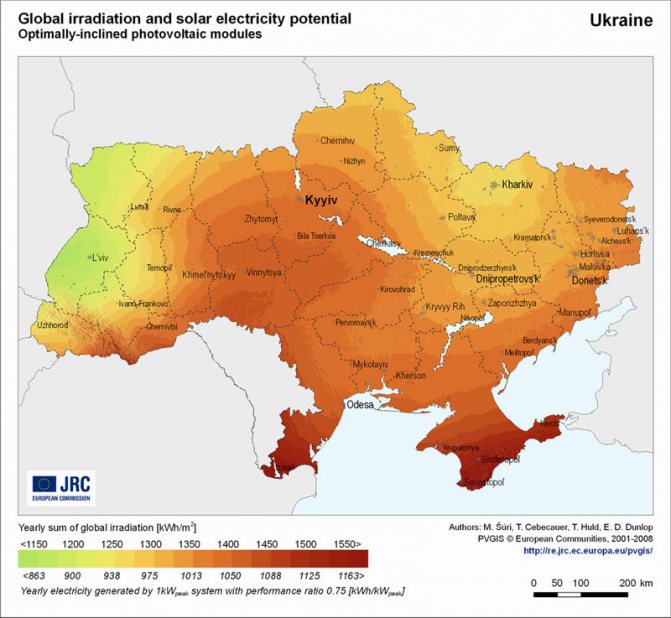
Let's start with the fact that you need to determine the solar insolation coefficient. The intensity of sunlight for your region can be found in the meteorological tables: there the level of solar radiation is indicated for each city on a monthly basis.
The second thing you need to know is the power of the electrical consumers. You can power up the whole house completely, as well as several appliances and light bulbs, for other consumers by supplying power from a regular electrical network.
These indicators are calculated as follows: the rated power of the consumer is multiplied by the number of hours of work per day.
The data for all consumers who will be supplied with energy from the solar panel are summarized.
Battery 1 sq. m will be able to provide electricity to a device with a capacity of 120 W - this is an average value.
A solar battery as a source of energy can be used in a house located at a long distance from electrical networks, when connection to a stationary power supply is not economically justified.
Of particular note is the fact that the capacity of a home power plant can be increased gradually by increasing the number of batteries.
The calculations should also take into account the charge-discharge losses of the battery, the difference between the optimal calculated and real tilt and orientation of the panels. These data are entered into the calculation formulas using correction factors.
Types of fasteners
When attaching solar radiators, the place of installation of the batteries must be taken into account, in the case of installation on a roof - the roof material.
Depending on the installation location
First you need to choose a place where it is most convenient and correct to place the solar panels. If the above-ground type of installation suits you, then we can offer the following types of their fastening:
- Wooden frame... Working with wood is quite problematic at home. Often it is required to involve special equipment. The frame is installed at an angle of 30 degrees in case of summer use of solar panels with active sun. The horizontal beam must be placed higher from the ground, so that in case of winter snowfalls, snowdrifts do not interfere with the operation of the panels or reduce their efficiency.
- Wooden-metal frame... It uses wood beams using extruded aluminum shelving. Such a frame is suitable for placing no more than two vertical solar panels in height. When calculating the height of the frame, take into account the fact that under the influence of precipitation, the wood expands and sags, so raise the foundation higher and thereby extend the service life of wooden beams.
- Tubular frame... A metal frame made of pipes is considered a reliable rack.You can install it on concrete piles. The pipes can be made of zinc or aluminum. Regarding reliable fastening, use the four mounting holes that are already in the panels, try not to drill new ones, thereby you can reinsure yourself if they are returned during the warranty period.
Do not use a tube frame to be placed more than three solar panels in height. Such a fastening system will be unreliable.
Depending on the roof material
If you plan to use the roof to place panels, then here you should think not only about the method of fastening, but also about the material of the flooring. Depending on this, either fasteners will be selected that do not violate the integrity of the roofing material, or those that will penetrate the roofing material for reliable fixation.
- Metallic coating... If the roof is covered with metal decking with butt seams, then the fastening can be used without compromising the integrity of the roof. And if the metal sheets correspond to the wave or geometry of the tiles, then it will be necessary to break the metal coating for reliable fastening.
- Tiled roof... The standard type of fastening allows you to install solar panels at the junction of the sheets without violating the integrity of the tiled roof. In this case, the shingles can be made from both cement and other materials.
- Slate... Due to the fragility of the material (slate), experts do not recommend installing solar power systems on the roof of such a house. Firstly, you cannot do without drilling the roof, and secondly, cracks can appear in the areas damaged by the drill, and the destruction of the integrity of the roof will only be a matter of time.
- EPDM coatings... Here, a similar scheme of work is used, as with tiled roofs, that is, the fastening is carried out without additional holes. In this case, it does not matter on which roof the panel will be installed - flat or inclined.
- PVC cover... The working principle of PVC coated is the same as EPDM. A similar fastening system will be used here.
Even if during installation you need to drill the roof, you should be aware that the fasteners are equipped with special gaskets to prevent the possibility of leakage during precipitation.
Roof material when installing solar panels
If you want to receive solar energy at a summer cottage or a country cottage, where it has recently become relevant to build a house entirely of wood, then in this case experts categorically discourage mounting on the roof. Since it is simply impossible to do without drilling when installing panels, as a result of which the material will become unusable. Therefore, consider alternative placements.
Things to Consider When Installing Solar Panels
Regardless of which installation method you choose, it is very important to follow these rules:
- Consider the angle of inclination... Whatever the installation, it is very important to monitor the angle of inclination, as the functions of the solar panels are lost or reduced.
- Consider the moment of blackout... The batteries can overlap each other when the sun changes trajectory and thus create a shadow effect, which reduces energy production. Here you need to observe the required distance to avoid this error, especially if the panels are on the same level (plane).
Experts advise to combine different approaches when installing solar panels and strictly observe the distance. Alternatively, they can be installed not only on the roof of the house, but also on special ground devices.
Correct operation will result in maximum power generation depending on the area of the solar panel. This decision is especially relevant for owners of private houses and households.If you doubt your strength or the success of the attachment, then it is better to seek help from professionals. This will avoid mistakes and provide you with a guarantee of correct operation.
Installation Recommendations
- Before installation, the correctness of the calculations can be checked using special computer programs.
- Protect solar panels from mechanical damage. If necessary, snow guards or snow deflectors can be installed above the element.
- The battery must be reliably protected from moisture ingress.
- The panels must be fastened securely - they will have to withstand gusts of wind, snowfalls and other weather conditions.
Nobody can give guarantees of good weather, the number of sunny days in a year indicated in the handbook is an average indicator, and in practice the values often differ from the average. Besides, occupying a vast area, solar panels have low efficiency.
However, the desire to provide your home with electricity from an independent from public networks and, moreover, an environmentally friendly source in regions with a large number of sunny days a year is economically justified.
The regular rise in electricity prices significantly reduces the payback period of an autonomous system. After all, having paid for the purchase and installation of equipment once, you can use free electricity for many years.
What is included in the installation system
To install solar panels, you just need to get a ready-made set of mounting system. If you are planning to use rooftop solar sources, then you will need:
- aluminum profile;
- edge clamp;
- middle clamp;
- grounding clip;
- grounding clamp;
- bolt with an internal hex head;
- T-bolt and T-nut;
- guide nut.
Mounting brackets are not included in this kit. The number of elements of the installation system is calculated individually, depending on the number of batteries. All mounting elements are made of durable and resistant metal, adapted to all weather conditions. With the help of fasteners, you can install solar panels on the roof from any roofing material - metal, slate, corrugated board, galvanized roof, shinglass and others.