Here you will find out:
- What is a household solar panel
- Solar cell device
- Types of photocells
- Connection options
- How to connect solar panels to the maximum using the capabilities of all elements
- Stages of connecting panels to SES equipment
- Economic feasibility
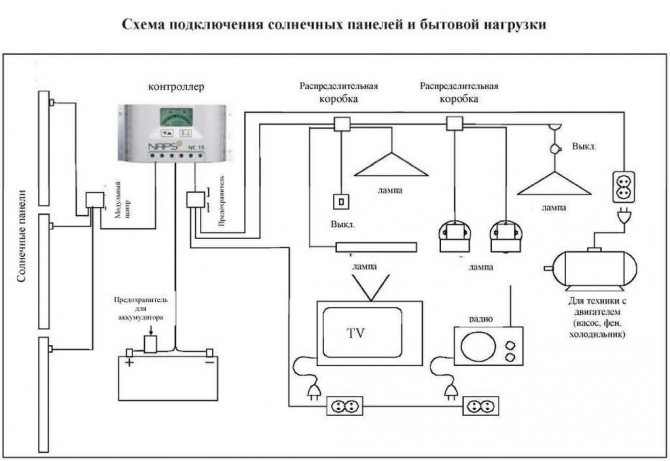
Diagrams for connecting solar panels When installing solar power plants, the question inevitably arises - how to connect solar panels and in what order to connect them to the power supply system of the house. Now we will analyze everything in detail.
What is a household solar panel
Solar energy is a real find for obtaining cheap electricity. However, even one solar battery is quite expensive, and in order to organize an effective system, a considerable number of them are needed. Therefore, many decide to assemble a solar panel with their own hands. To do this, you need to be able to solder a little, since all elements of the system are assembled into tracks, and then attached to the base.

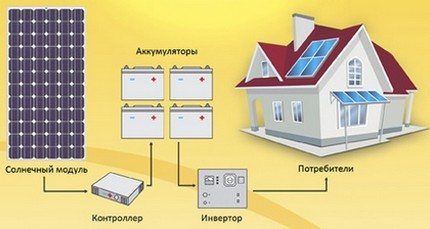
To understand whether a solar station is suitable for your needs, you need to understand what a household solar battery is. The device itself consists of:
- solar panels
- controller
- battery
- inverter
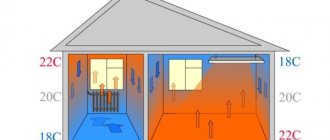
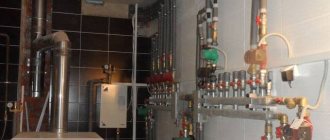
If the device is intended for home heating, the kit will also include:
- tank
- pump
- automation kit
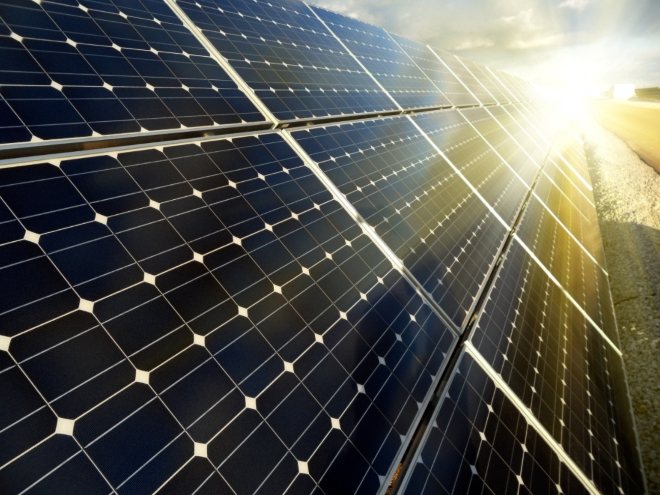
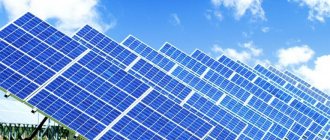
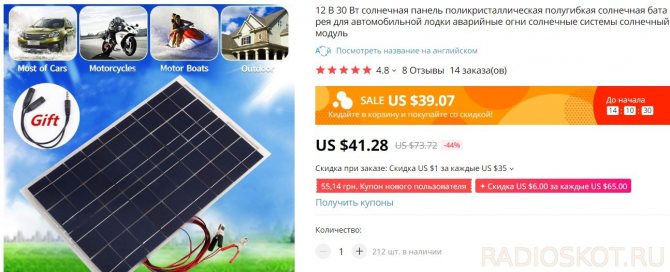
Solar panels are rectangles 1x2 m or 1.8x1.9 m. To provide electricity to a private house with 4 residents, 8 panels (1x2 m) or 5 panels (1.8x1.9 m) are needed. Install the modules on the roof from the sunny side. The angle of the roof is 45 ° with the horizon. There are rotating solar modules. The principle of operation of a solar battery with a rotating mechanism is similar to a stationary one, but the panels rotate after the sun thanks to photosensitive sensors. Their cost is higher, but the efficiency reaches 40%.
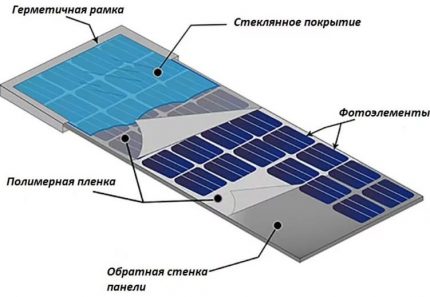
The construction of standard solar cells is as follows. The photovoltaic converter consists of 2 layers of n and p type. The n-layer is made on the basis of silicon and phosphorus, which leads to an excess of electrons. The p-layer is made of silicon and boron, resulting in an excess of positive charges ("holes"). The layers are placed between the electrodes in this order:
- anti-glare coating
- cathode (electrode with negative charge)
- n-layer
- thin separation layer that prevents free passage of charged particles between layers
- p-layer
- anode (electrode with a positive charge)
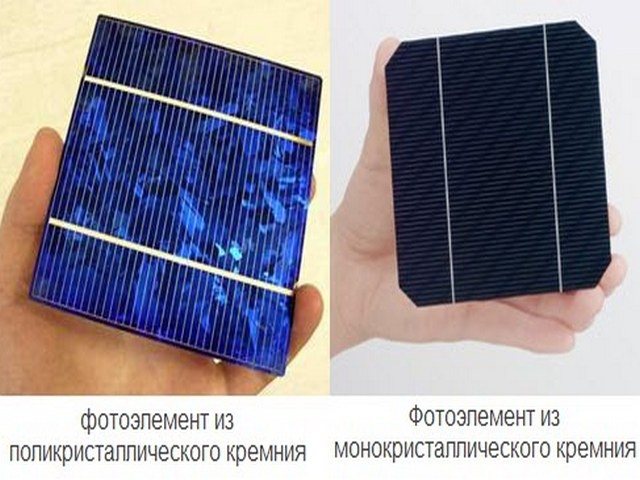
Photovoltaic modules are produced with polycrystalline and monocrystalline structures. The former are distinguished by their high efficiency and high cost. The latter are cheaper, but less effective. Polycrystalline capacity is sufficient for lighting / heating a house. Monocrystalline ones are used to generate small portions of electricity (as a backup energy source). There are flexible amorphous silicon solar cells. The technology is in the process of modernization, as The efficiency of an amorphous battery does not exceed 5%.
Solar cell device
When planning to connect solar panels with your own hands, you need to have an idea of what elements the system consists of.
Solar panels consist of a set of photovoltaic batteries, the main purpose of which is to convert solar energy into electrical energy. The current strength of the system depends on the intensity of the light: the brighter the radiation, the more current is generated.
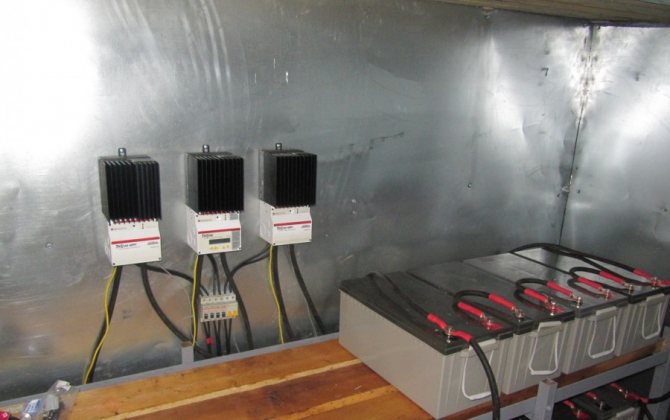
In addition to the solar module, the device of such a power plant includes photovoltaic converters - a controller and an inverter, as well as batteries connected to them.
The main structural elements of the system are:
- Solar Cell - Converts sunlight into electrical energy.
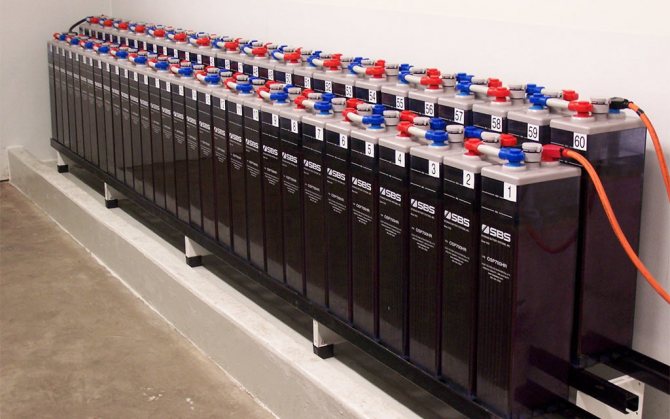
- A battery is a chemical current source that stores generated electricity.
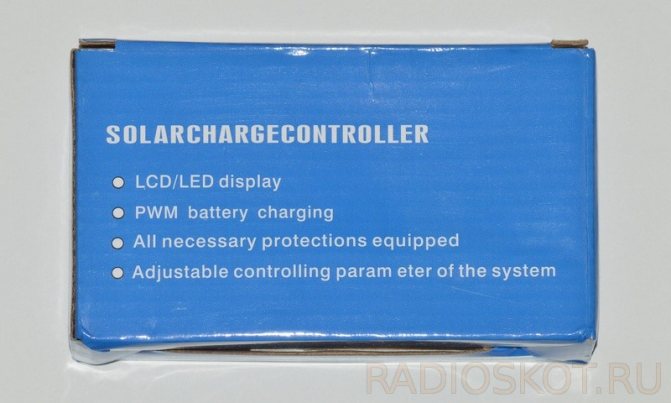
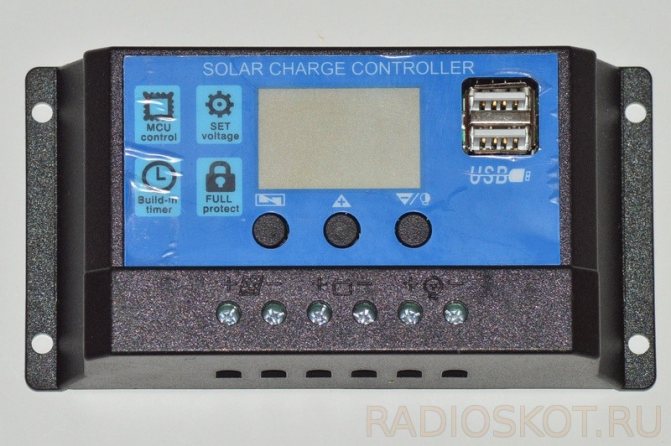
- Charge controller - monitors battery voltage.
- An inverter that converts the constant electric voltage of the battery into an alternating voltage of 220V, which is necessary for the functioning of the lighting system and the operation of household appliances.
- Fuses installed between all elements of the system and protecting the system from short circuits.
- A set of connectors standard MC4.
In addition to the main purpose of the controller - to monitor the voltage of the batteries, the device turns off certain elements as necessary. If the reading at the battery terminals during the daytime reaches 14 volts, which indicates that they are overcharging, the controller interrupts charging.
At night, when the battery voltage reaches an extremely low level of 11 Volts, the controller stops the operation of the power plant.
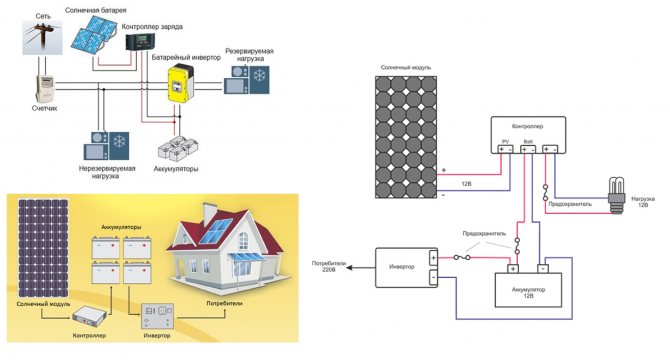
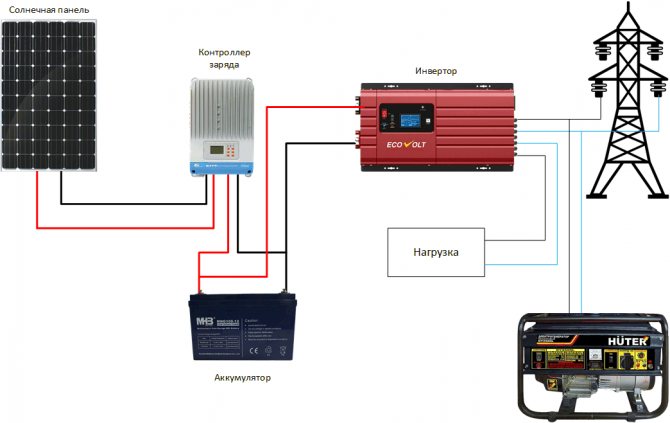
The scheme of the solar battery.
Solar panels are mounted in open, unshaded areas facing south, at an angle of 45 ° to the horizon. You can mount the panel on an automatic panning device that gradually pivots towards the sun throughout the day.
The solar battery, under the influence of sunlight, generates a voltage that is supplied to the controller. In turn, the controller charges the battery, which is connected to the inverter.
A direct current is supplied to the inverter, for example 12V, at the output of the inverter we receive an alternating current of 220V, consumers of electricity are connected to the output of the inverter - a laptop, a TV, etc.
Even a small solar power plant can power household appliances such as a laptop, TV, phone chargers, lighting lamps, and other low power household appliances.
Types of photocells
The main and rather difficult task is to find and buy photovoltaic converters. They are silicon wafers that convert solar energy into electricity. Photovoltaic cells are divided into two types: monocrystalline and polycrystalline. The former are more efficient and have a high efficiency - 20-25%, and the latter are only up to 20%. Polycrystalline solar cells are bright blue and less expensive. And mono can be distinguished by its shape - it is not square, but octagonal, and the price for them is higher.
If the soldering does not work very well, then it is recommended to purchase ready-made photocells with conductors to connect the solar battery with your own hands. If you are confident that you will be able to solder the elements yourself without damaging the converter, you can purchase a set in which the conductors are attached separately.
Growing crystals for solar cells on your own is a rather specific job, and it's almost impossible to do it at home. Therefore, it is better to buy ready-made solar cells.
Connecting solar panels to the grid
This can be done both independently and with the assistance of specialists.
The correct orientation is calculated based on the geographic location of the building. For the correct placement of solar panels during their installation, you must adhere to the principles listed below.
Plexiglass cannot be used as a cover, as it overheats and due to this, the contacts between the panels become unusable, and the system itself can be depressurized.The accumulator of the generated energy is a battery.
Then the load is removed, and the plywood and mat are removed. Of course, if you use a mobile photo battery to recharge your smartphone on a multi-day hike, this technology is not required. If insolation allows, then you can install a solar panel on the outside of the balcony.
Since they are sold as corners, you will need to assemble them yourself. Do-It-Yourself Installation Knowing how to connect a solar panel to your home's power supply can save you money on installers. If you are confident that you will be able to solder the elements yourself without damaging the converter, you can purchase a set in which the conductors are attached separately.
Let's consider three connection methods that will be applicable for self-assembly of modules from solar cells. After the initial investment, the electricity received is conditionally free, some funds are required for maintenance at the end of the service life. Since they are sold as corners, you will need to assemble them yourself. In conclusion, it should be noted that our planet will receive the greatest benefit from the use of solar panels, since this energy source does absolutely no harm to the environment.
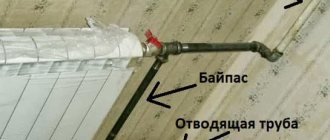
Installation of the structure First of all, you need to decide on the place of installation - either directly on the roof, or using a frame made of special trusses as a support. It monitors the battery voltage: when the battery is recharged in the daytime at 14 Volts at the terminals, it automatically turns off charging, and at night, in the event of a discharge, that is, an extremely low voltage of 11 Volts, stops the operation of the power plant. Where is the best place to install the panels? With the same characteristics, the next type of panels - thin-film, will require a larger area for installation in the house. If this problem cannot be solved, then it is better to install the panels not on the roof, but on separate posts in the yard.
Reducing gas and electricity consumption in your home thanks to the use of solar panels. How to connect a solar battery How to connect a solar battery The question of how to connect a solar battery is solved with the help of the completing system of elements. Diagram of connecting solar panels to the instrument panel.
Connection options
There are no questions when connecting one panel: minus and plus are connected to the corresponding connectors of the controller. If there are many panels, they can be connected:
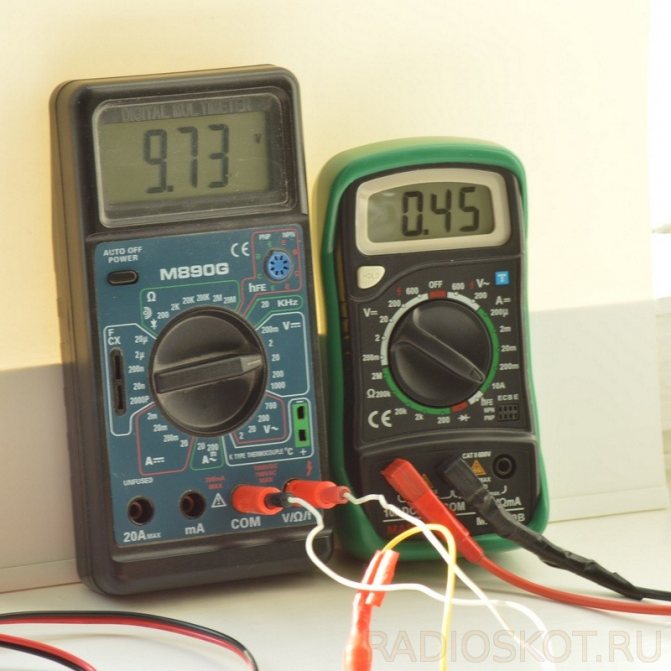
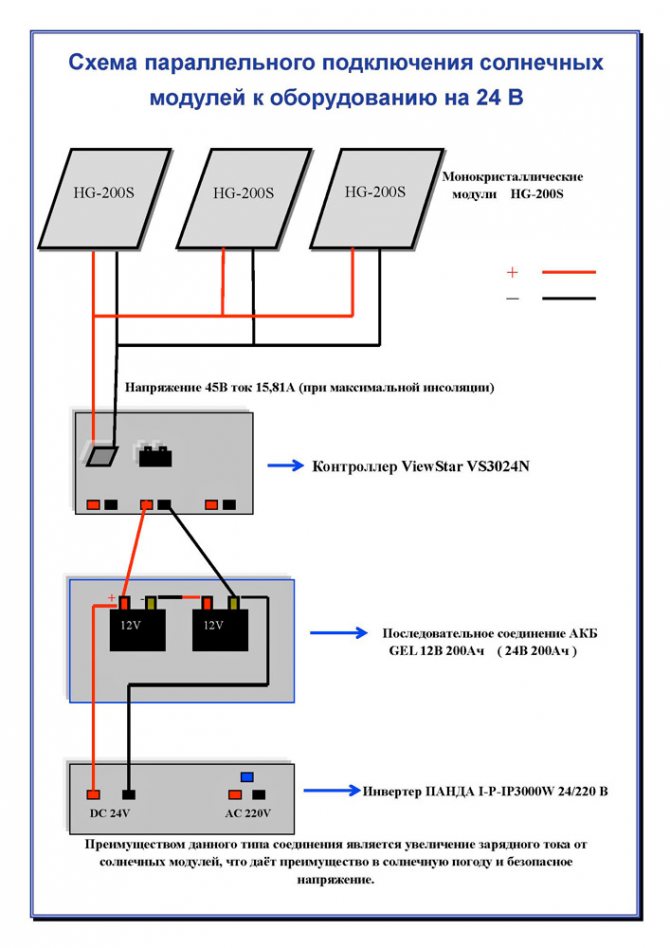
- in parallel, i.e. we connect the terminals of the same name and, having received a voltage of 12V at the output;
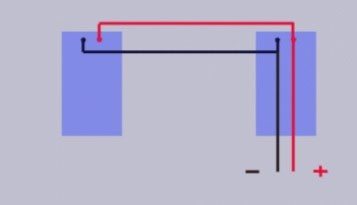
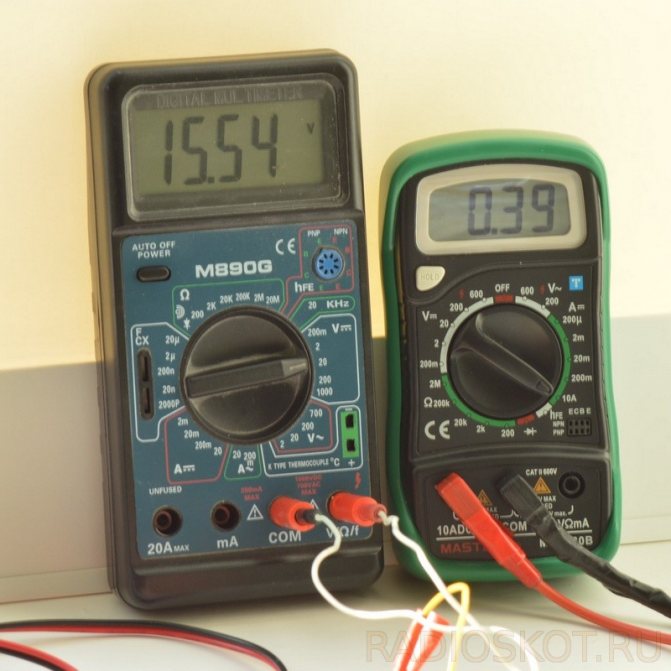
- sequentially, i.e. connect the plus of the first with the minus of the second, and the remaining minus of the first and plus of the second - to the controller. The output will be 24 V.
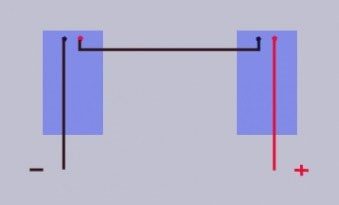
- serial-parallel, i.e. use a mixed connection. It implies such a scheme that several groups of batteries are interconnected. Inside each of them, the panels are connected in parallel, and the groups are connected in series. This output circuit gives the most optimal performance.
To understand in more detail with the connection of alternative sources in the house, the video will help:
Such power plants with the help of rechargeable batteries accumulate the charge of the Sun for the house and store it, reserving it in battery banks. In America, Japan, European countries, hybrid power supply is often used.
That is, two circuits work, one of which serves low-voltage equipment powered by 12 V, the other circuit is responsible for the uninterrupted supply of energy to high-voltage equipment operating from 230 V.
How to connect solar panels to the maximum using the capabilities of all elements
Mixed backup connection scheme. They will depend on the dimensions of the panels themselves and their number.
Now there is little to do.
With the same characteristics, the next type of panels - thin-film, will require a larger area for installation in the house. Of course, at your own peril and risk, you can connect the panel directly and the battery will be charged, but such a system should be supervised.
If the house is in the shadow of other buildings, then the installation of solar panels is advisable unless only polycrystalline, and then the efficiency will be reduced. In all cases, there should be no darkening. Natural blowing of the battery will help to solve this problem. All these factors must be taken into account when choosing an installation site and install panels according to the most convenient option.
Of course, at your own peril and risk, you can connect the panel directly and the battery will be charged, but such a system should be supervised. This is interesting: Many of the standard radio components can also generate electricity when exposed to bright light.
At this stage, it is important not to confuse the back of the panel with the front. This is the most important point, since their productivity, and hence the amount of electricity generated, will depend on whether the panels are in the shade of other buildings or trees.
When several panels are connected in series, the voltage of all panels will add up. The frame is assembled using bolts with a diameter of 6 and 8 mm. There will be no voltage change in this case.
A mixed connection scheme is often used. It turns out that correctly installed solar panels will work with the same performance both in winter and in summer, but under one condition - in clear weather, when the sun gives off the maximum amount of heat. It is recommended to mount the photocells on the long side to avoid damage, individually choosing the method: the bolts are fastened through the frame holes, clamps, etc. It can be fixed with a thin layer of silicone sealant, but it is better not to use epoxy resin for these purposes, since it will be extremely difficult to remove the glass in case of repair work and not damage the panels.
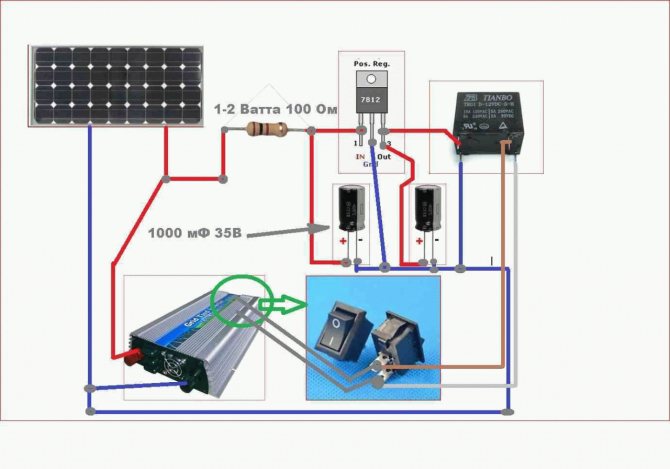
Solar panels. How to make a cheap and efficient solar power plant.
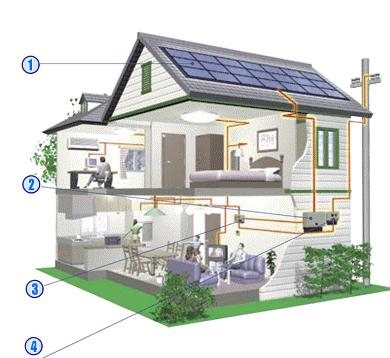
Diagram of a solar power plant
Consider how the solar system for a country house is arranged and works. Its main purpose is to convert the energy of the sun into electricity of 220 V, which is the main source of power for household electrical appliances.
The main parts of which the SES consists:
- Batteries (panels) that convert solar radiation into constant voltage current.
- Controller that regulates the battery charge.
- Battery pack.
- An inverter that converts the battery voltage to 220 V.
The design of the battery is thought out in such a way that allows the equipment to function in various weather conditions, at temperatures from -35 ° C to + 80 ° C.
It turns out that correctly installed panels will work with the same performance both in winter and in summer, but under one condition - in clear weather, when the sun gives off the maximum amount of heat. In a cloudy work efficiency is sharply reduced.
The efficiency of SPP in mid-latitudes is great, but not enough to fully provide electricity to large houses. More often the solar system is considered as an additional or backup source of electricity
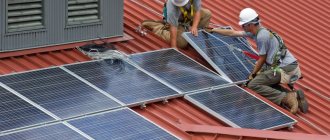
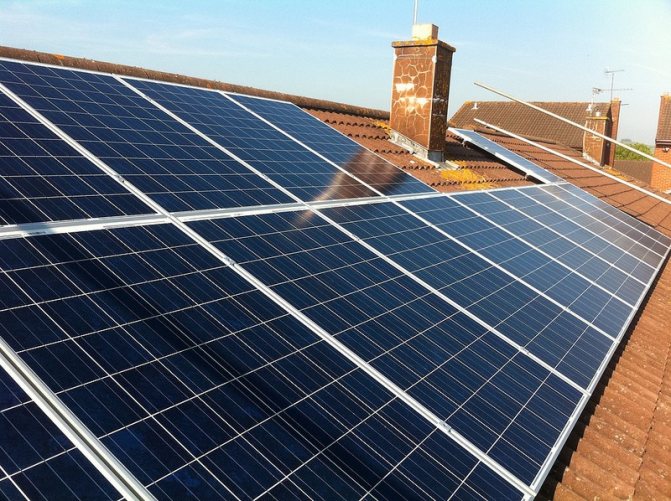
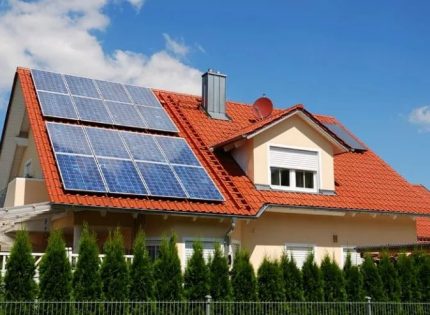
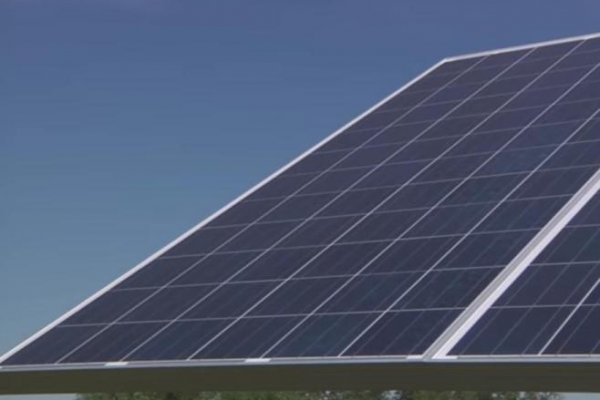
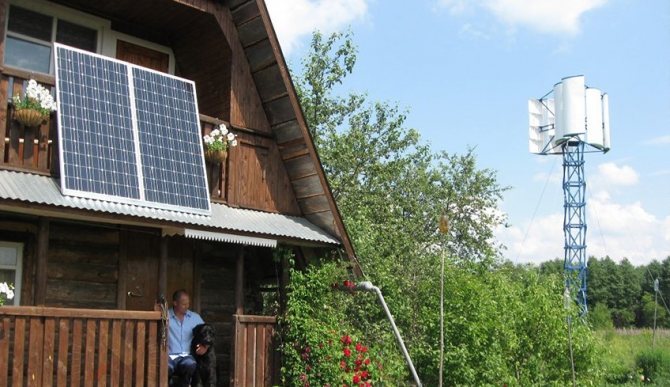
The weight of one 300 W battery is 20 kg. Most often, panels are mounted on the roof, facade or special racks installed next to the house. Prerequisites: a turn of the plane towards the sun and an optimal inclination (on average 45 ° to the earth's surface), which ensures the perpendicular incidence of the sun's rays.
If possible, a tracker is installed that tracks the movement of the sun and adjusts the position of the panels.
The top surface of the batteries is protected by toughened impact-resistant glass, which easily withstands the impact of hail or heavy snow drifts.However, it is necessary to monitor the integrity of the coating, otherwise damaged silicon wafers (photocells) will stop working.
The controller performs several functions. In addition to the main one - automatic regulation of the battery charge, it controls the supply of energy from solar panels, thereby protecting the battery from complete discharge. When fully charged, the controller automatically disconnects the battery from the system. Modern devices are equipped with a control panel with a display showing the battery voltage.
For homemade solar systems, the best choice is gel batteries, which have a continuous life of 10-12 years. After 10 years of operation, their capacity decreases by about 15-25%. These are maintenance-free and absolutely safe devices that do not emit harmful substances.
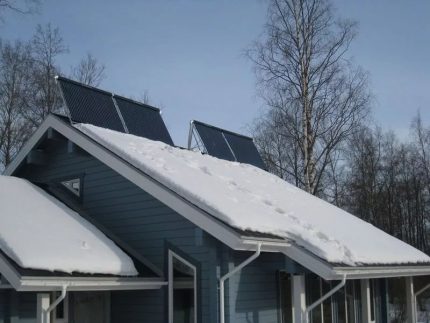
In winter or in cloudy weather, the panels also continue to work (if they are regularly cleaned of snow), but energy production is reduced by 5-10 times
The task of inverters is to convert the DC voltage from the battery into an AC voltage of 220 V. They differ in such technical characteristics as the power and quality of the voltage received. Sinus equipment is capable of serving the most "capricious" devices in terms of current quality - compressors, consumer electronics.
Household SPP overview:
Image gallery
Photo from
It is estimated that about 1 kW of solar energy falls on 1 m² of the planet's surface, and 1 m² of solar cells converts about 160-200 watts. Consequently, the efficiency is 16-20%. With the right device, this is quite enough to supply electricity to all low-power appliances in the house.
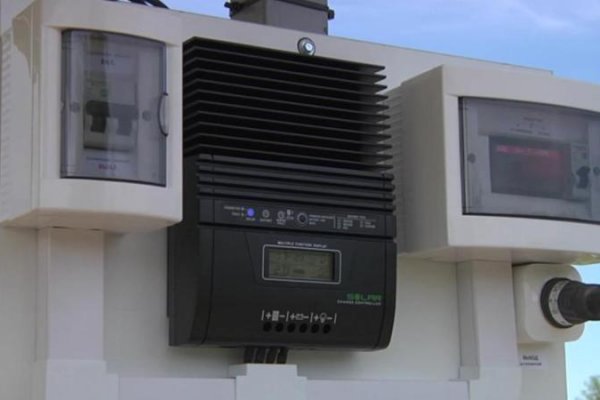
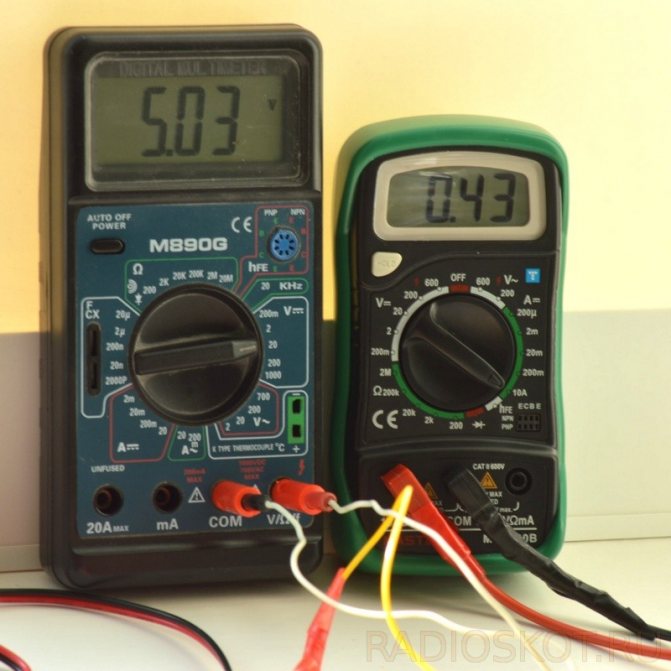
The controller displays the battery charge in percentage terms. If the 24-volt equipment shows a 27-volt battery charge, then they are 100% full.
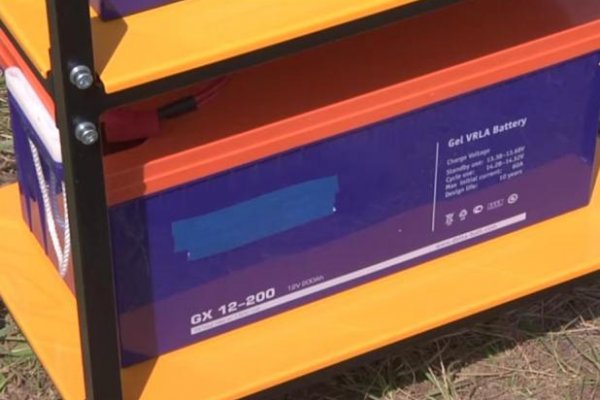
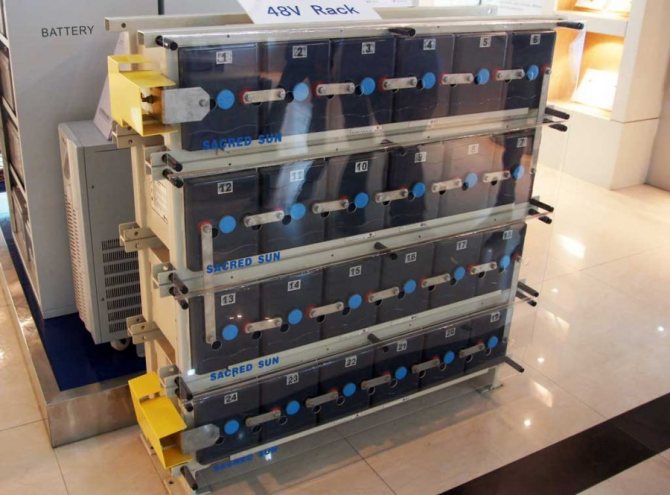
A pair of powerful 200 Ah s gel batteries (power rating 4.8 kW). This is a day of operation of electrical appliances with non-stop consumption of 180-200 watts. Energy storage devices are frost-resistant, that is, they can be installed in the attic, and since they are safe, they can also be installed next to living quarters.
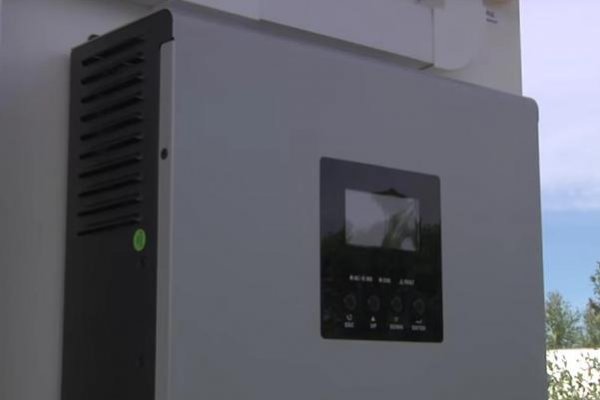
The digital display of an inverter usually shows two parameters: the consumed power and the total voltage of the power system. An additional charger option allows you to connect an electric generator and quickly charge the battery (if there is no sun)
Solar panels - batteries with photovoltaic cells
Controller for regulating the battery charge
Gel battery pack
Inverter - voltage converter to 220 V
It is worth knowing that household power plants are capable of servicing a constantly operating refrigerator, a periodically started submersible pump, a TV, and a lighting system. To provide energy for the functioning of a boiler or even a microwave oven, more powerful and very expensive equipment will be required.

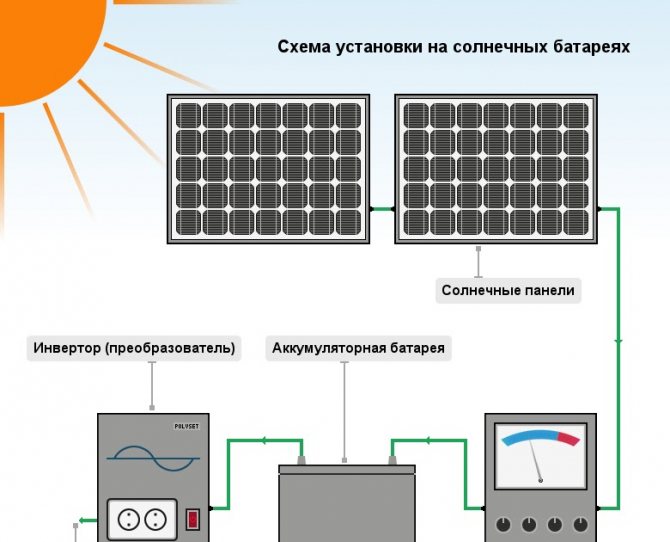
The simplest scheme of a solar power plant, including the main components. Each of them performs its function, without which the work of the SES is impossible.
There are other, more complex schemes, but this solution is universal and most in demand in everyday life.
Stages of connecting panels to SES equipment
Connecting solar panels is a step-by-step process that can be performed in different order. Usually, the modules are connected to each other, then a set of equipment and batteries are assembled, after which the panels are connected to the devices. This is a convenient and safe option that allows you to check the correct connection of all elements before energizing. Let's take a closer look at these stages:
To battery
Let's figure out how to connect a solar battery to a battery.
Attention! First of all, you need to clarify - they do not use direct connection of panels to the battery.Uncontrolled energy generation is dangerous for the batteries and can cause both over-consumption and over-charging. Both situations are fatal, as they can permanently disable the battery.
Therefore, between the photovoltaic cells and batteries, a controller must be installed, which provides a regular mode of charging and energy output. In addition, an inverter is usually installed at the output of the controller in order to be able to convert the stored energy into a standard voltage of 220 V 50 Hz. This is the most successful and efficient scheme, which allows the batteries to give or receive a charge in the optimal mode and not exceed their capacity.
Before connecting the solar panel to the battery, it is necessary to check the parameters of all system components and make sure they match. Failure to do so could result in the loss of one or more instruments.
Sometimes a simplified scheme for connecting modules without a controller is used. This option is used in conditions when the current from the panels will certainly not be able to create an overcharge of the batteries. Usually this method is used:
- in regions with short daylight hours
- low position of the sun above the horizon
- low-power solar panels that are not able to provide an excess charge of the battery
When using this method, it is necessary to secure the complex by installing a protective diode. It is placed as close as possible to the batteries and protects them from short circuits. It is not scary to the panels, but it is very dangerous for the battery. In addition, if the wires melt, a fire can start, which poses a danger to the whole house and people. Therefore, providing reliable protection is the primary task of the owner, the solution of which must be completed before the kit is put into operation.
To the controller
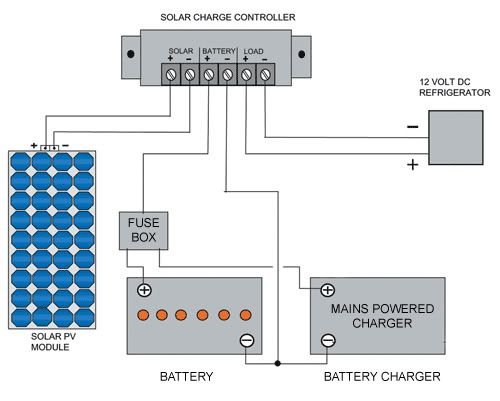
The second method is often used by owners of private or country houses to create a low-voltage lighting network. They purchase an inexpensive controller and connect solar panels to it. The device is compact, comparable in size to a medium-sized book. It is equipped with three pairs of contacts on the front panel. Solar modules are connected to the first pair of contacts, a battery is connected to the other, and lighting or other low-voltage consumption devices are connected to the third pair.
First, the first pair of terminals is supplied with a voltage of 12 or 24 V from the batteries. This is a test step, it is needed to determine the health of the controller. If the device has correctly determined the amount of battery charge, proceed to the connection.
Important! The solar modules are connected to the second (central) pair of contacts. It is important not to reverse the polarity, otherwise the system will not work.
Low-voltage lamps or other consumption devices powered by 12 (24) V DC are connected to the third pair of contacts. You cannot connect such a kit with anything else. If you need to provide power to household appliances, you need to assemble a fully functional set of equipment - a private SES.
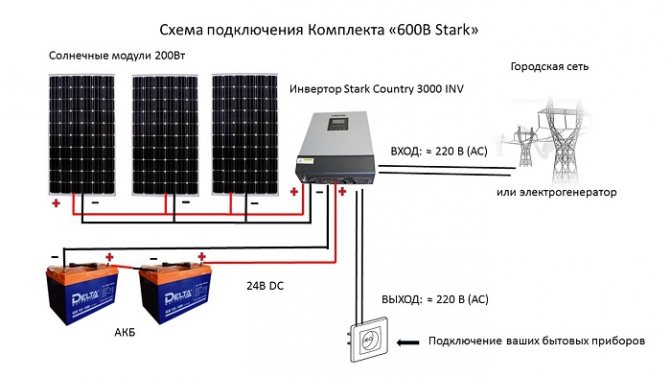
To inverter
Let's take a look at how to connect a solar panel to an inverter.
It is only used to power standard consumers requiring 220 VAC. The specificity of using the device is such that it has to be connected last of all - between the battery pack and the end consumers of energy.
The process itself is not difficult. The inverter comes with two wires, usually black and red ("-" and "+"). On one end of each wire there is a special plug, on the other there is an alligator clip for connecting to the battery terminals. The wires are connected to the inverter according to the color indication, then connected to the battery.
How to connect solar panels?
The scheme for connecting solar panels for a trained person does not present any noticeable difficulty, but for inexperienced users some clarification is needed.You need to know how the solar panels are connected to each other, how the solar panels are connected to the rest of the devices included in the kit. There are different connection options that are used to obtain specific output current and voltage parameters.
The scheme for connecting solar panels of a country house is a system for connecting all components, which, in turn, are also connected to each other in a certain way. For example, you need to know how to connect solar panels - in parallel or in series. In addition, it is necessary to choose one or another method of connecting the batteries to the battery.
Diagram of a solar power plant
Before connecting a solar panel, you need to find out its configuration. The solar power plant, in addition to solar modules, includes a set of equipment, including the following devices and devices:
- charge controller
- rechargeable batteries (accumulators)
- inverter
- switching devices, fuses
The controller performs dispatching functions, switching the system either to the battery charging mode, or to supply power to consumers. Batteries receive charge and store it, releasing energy as needed. If the battery voltage reaches 14 V, the controller will stop the process, otherwise the batteries will be damaged from overcharging. An inverter is a device that converts direct current into alternating current and raises the voltage to standard values.
As a rule, the entire kit is used in its entirety. However, there are other, simplified configuration options. In some cases, DC-powered consumers are connected directly to the modules. This is possible only during the daytime, therefore it is found only in specialized devices.
There are also solar-powered lighting systems that do not need inverters and are directly powered by batteries. Sometimes the inverter is excluded from the kit if the load voltage does not exceed 12 VDC. This option is also not common and is used whenever possible.
Soldering and panel assembly
To power consumers, a certain number of modules are used, which are connected in one order or another. First, a connection diagram for solar panels is developed, which allows you to get maximum efficiency from them.
Parallel or sequential?
Typically one panel has a voltage of 12 V and a power of 1.5 to 4.5 W, depending on the size and number of PV cells.
- Parallel connection will increase the amperage (and power) while keeping the voltage constant.
- Daisy chaining solar panels will boost the voltage to 24V if you connect 2 modules. They do not do it anymore, since there are only 2 valid options for batteries - either 12 or 24 V.
Therefore, it is necessary to combine, ensuring that the scheme for connecting the solar battery to the battery gives the most successful result.
Contact compartment
In addition, you need to have a clear idea of how to connect solar panels to each other. All modules are equipped with a dedicated contact compartment located on the back. It is designed very simply - two threaded clamps marked with "+" and "-" signs. Soldering as such is not required, since the installation is carried out in difficult conditions, where work with a soldering iron is not always possible. However, if it is possible to make the contact more reliable and protect it from oxidation, there are no contraindications.
Wire type
For the connection, a single-core copper wire with a cross section of 4 mm2 is usually used. It is important that its insulation is UV resistant. If this is not the case, the wires are laid in a protective corrugated sleeve.
Module locations
When connecting, consider the way the modules are positioned. If they are turned at the same angle to the sun, then they will all work in the same mode. However, sometimes it is necessary to install multidirectional panels. This can be caused by a special roof structure, or a desire to provide a more even supply of power throughout the day.
Important! It should be taken into account that a more illuminated module will produce a maximum current, which will be partially consumed for heating less loaded planes. To eliminate this effect, cut-off diodes are used, which are soldered between the plates from the inside.
Economic feasibility
The payback period for solar panels is easy to calculate. Multiply the daily amount of energy produced per day by the number of days per year and by the service life of the panels without derating - 30 years. The electrical installation considered above is capable of generating an average of 52 to 100 kWh per day, depending on the length of daylight hours. The average value is about 64 kWh. Thus, in 30 years, the power plant, in theory, should generate 700 thousand kWh. With a one-part rate of 3.87 rubles. and the cost of one panel is about 15,000 rubles, the costs will pay off in 4-5 years. But the reality is more prosaic.
The fact is that the December values of solar radiation are less than the average annual by about an order of magnitude. Therefore, fully autonomous operation of the power plant in winter requires 7-8 times more panels than in summer. This significantly increases investment, but reduces the payback period. The prospect of introducing a “green tariff” looks quite encouraging, but even today it is possible to conclude an agreement for the supply of electricity to the grid at a wholesale price that is three times lower than the retail tariff. And even this is enough to profitably sell 7-8 times the surplus of generated electricity in the summer.