Required tools
First, let's look at a number of tools for doing work. Some of them are quite specific and will only be needed for one time, so look, ask around your friends, so as not to waste money.
- Hammer, ruler, tape measure, pencil;
- Fum tape, paste for sealing threaded connections;
- Sandpaper, hedgehog;
- Level (you can laser - save time);
- Adjustable wrench and wrench (preferably small and large of each type);
- Screwdriver or screwdriver set;
- Drill, in some cases a hammer drill;
- Manual or electric pipe cutter;
- Bulgarian;
For plastic pipes:
- Machine for soldering plastic pipes with various nozzles;
For copper pipes:
- Blowtorch for brazing copper pipes;
- Solder for copper pipes, flux paste;
Radiator types
This is one of the most important points. It is through the radiator that the air and the room itself are heated. When choosing the type of heating element, be guided not only by the appearance and aesthetics, but also by its main characteristics: power, operating and maximum pressure and operating temperature. This is especially important if you plan to connect it to a centralized heating system, where 4-10 atmospheres is the normal operating pressure. And with the onset of the heating period, it increases by one and a half times (to check the tightness).
But if the plans include autonomous heating, then these nuances disappear. A radiator operating under pressure up to 6 atmospheres is enough for you.
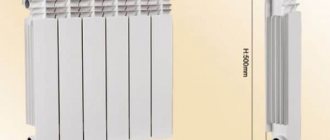
The most popular today are 4 types: aluminum, steel, bimetallic and cast iron radiators.
Aluminum radiators
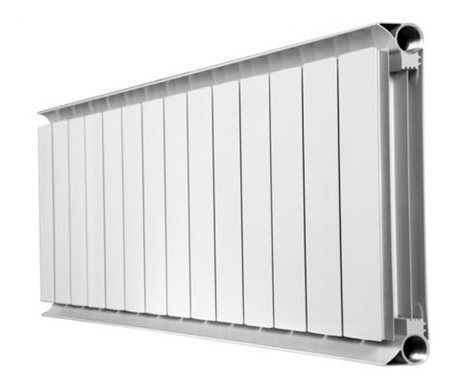
Aluminum radiators are considered to be very efficient due to the high heat dissipation of the material. After turning on, these radiators quickly heat up the room and cool down just as quickly if you turn off the heating. This is also due to the small volume of the device.
Very often, aluminum radiators are installed together with a regulating thermal head to automatically increase or decrease the hot water supply.
Outside, aluminum radiators are very aesthetic. Rectangular plates, mostly white, covered with a special heat-resistant enamel that is resistant to high temperatures. This is another plus, since it will not be necessary to paint anew every year. Like cast-iron radiators, in aluminum radiators, you can increase the power by changing the number of sections. They are resistant to condensation and humid air, so they can be safely used in the bathroom and in the kitchen.
If the advantages of this type of radiator are light weight, high operating pressure and compactness, then of the minuses stands out the possibility of corrosion... Aluminum easily reacts with copper parts, and it is also difficult to tolerate high pH levels (acceptable 7.5). For this reason, it is better not to use them for a centralized heating system.
Due to possible chemical reactions, aluminum radiators are mounted together with a Mayevsky valve to remove the generated gas.
Another disadvantage when used in a central heating center is the operating temperature. For aluminum radiators, it is 45-60 degrees, and in the central heating system, it can reach 85 degrees.
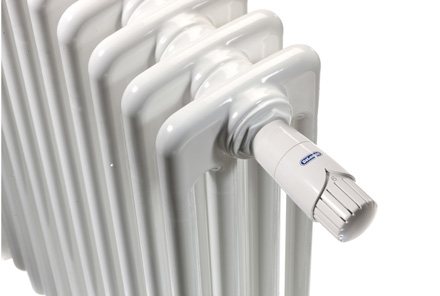
Steel radiators
Modern steel radiators have a very attractive design. Like aluminum, they are covered with special paint, mostly white, but can be painted in any shade at the request of the customer. The advantage of such radiators is their relatively low price and high heat transfer. This type of radiator is also one of the most hygienic.
There are two types of steel radiators - panel and tubular.
Panel
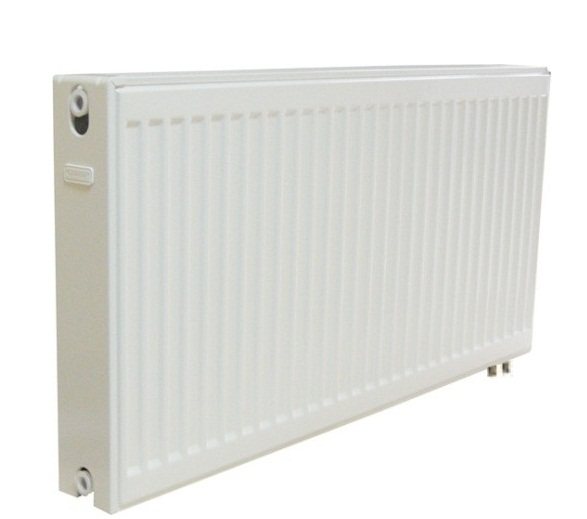
This type has been used in heating systems for about 60 years. The working pressure is quite high and reaches 10 atmospheres.
The design of the radiator is made up of welded steel plates that form the panel. Inside, between the panels, horizontal collectors and sometimes a convective grating are placed, due to which the space heats up quickly enough. Multiple threaded connections in these radiators minimize the risk of leakage.
Of the minuses, a small radiator area can be distinguished, and susceptibility to corrosive processes under the influence of oxygen in the coolant, but this is not a problem with a closed heating system.
Tubular
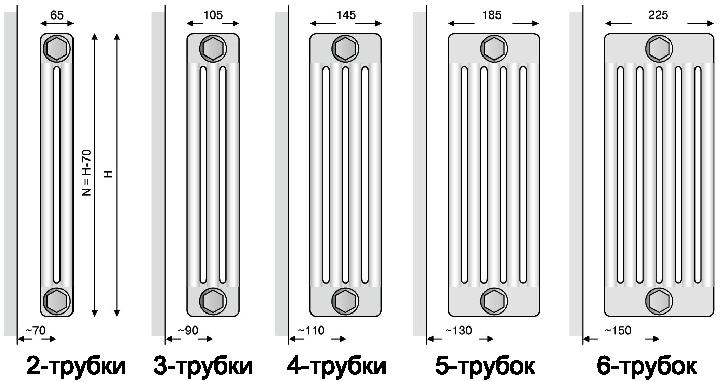
These radiators primarily differ from the panel type in a much larger heating area. It is possible to adjust the power even at the stage of purchase (ordering) by increasing / decreasing the height of the pipes and their number. On the subject of color and coating, everything is the same as in panel ones.
Big the plus of this type it is possible to create a variety of radius or angular convector shapes.
The structure itself is represented mainly by vertical pipes, forming sections with a width of up to 45 cm, which are connected by welding collectors. The working pressure is also 10 atmospheres, and the temperature is 120 degrees.
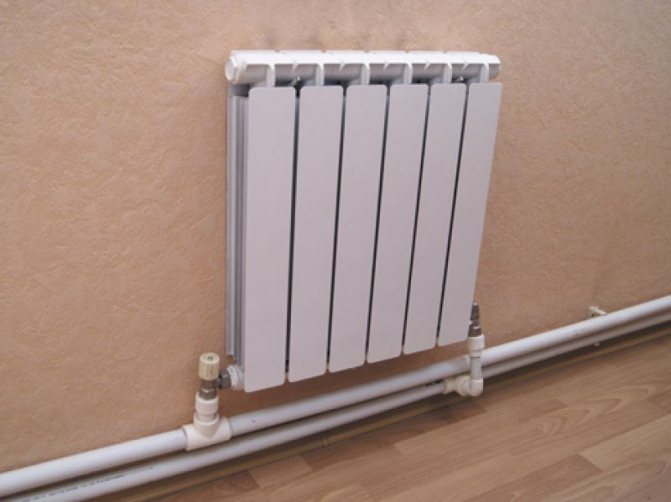
Bimetallic radiators
From the name it is clear that this type combines the advantages of both materials. The inner shell, which is in direct contact with water, is made of steel and covered with an aluminum layer on top. Because of this, the radiators have excellent heat dissipation, light weight and aesthetically pleasing look.
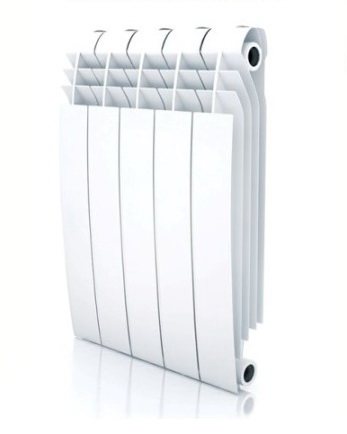
The system of bimetallic radiators is such that a coolant (mainly water) is supplied through the steel core, and then heat is transferred through aluminum plates, heating the room. Heat transfer in such designs reaches 170-190 W.
The working pressure is from 20 to 40 atmospheres, which will noticeably add to the durability of the radiator. Of course, the price for them is higher than a conventional steel or aluminum radiator, but it is quite justified.
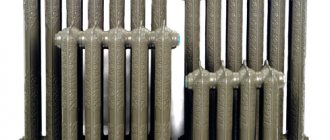
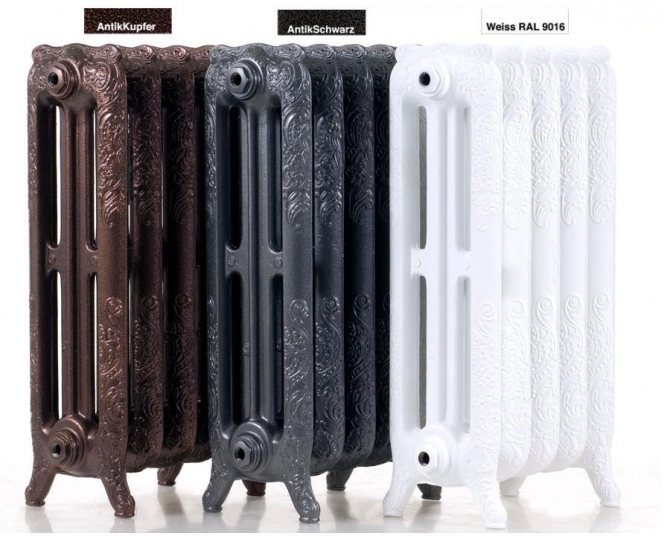
Cast iron radiators
Probably the most common type of radiator today. Partly due to the fact that almost everywhere where batteries have not been changed for a long time, there are cast-iron ones. This is the oldest type of radiator and the most reliable, with an average service life of 50 years.
Significant disadvantage appeared after the spread of individual heating systems with automation. The enormous inertness of cast iron radiators is incompatible with modern electronics.
But a big advantage over other types of radiators is absolute corrosion resistance. They are also insensitive to seasonal drainage.
Speaking about the inertness of cast-iron radiators as a bad side in terms of adjusting the temperature in the room, do not forget that this has its own plus. When other types of radiators are turned off, they immediately cool down, while the cast iron still continues to radiate heat.
Another plus, which many consider to be a minus: slow air heating and section power of about 100 W, which is 1.5 times less than other radiators. Here's your focus. The fact is that cast-iron, unlike other radiators, have a radial type of heating. This completely compensates for the disadvantages, since in addition to air, walls and objects that themselves begin to radiate heat heat up from cast-iron radiators.
The weight of a cast-iron radiator is the largest of all (one empty section weighs 5-6 kg), but this is not a very significant disadvantage. Another drawback was the appearance of standard radiators. But with the development of technology, radiators are so beautiful today that they can be equated with works of art. Well, such a thing is not cheap, so the choice is yours.
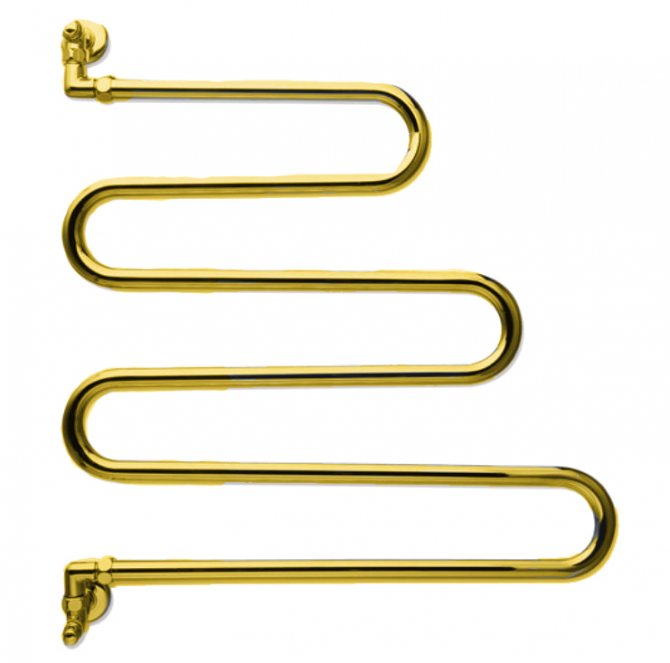
Heated towel rails
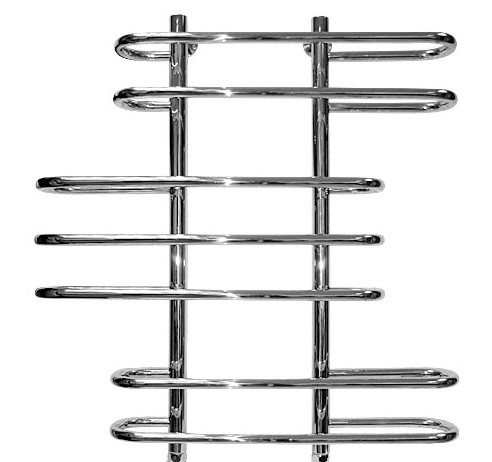
A special type of bathroom heater, the name of which speaks for itself. You can divide heated towel rails into 4 groups:
- Standard - the shape of the letters "P" and "M" with a heat transfer coefficient of 0.6 kW;
- Modernized - an analogue of the previous ones, with additional sections on each pipe;
- Elegant - they have a heat transfer of up to 2.1 kW and a variety of shapes;
- With a double heat exchanger - the feature here is that the stainless steel pipe is separated from the very structure of the heated towel rail and is built into a riser with hot water, which increases its circulation to the system.
Heated towel rails are made of stainless steel, ordinary steel and non-ferrous metals, the heat transfer of the latter is the highest. When buying, pay attention to indicators such as:
- Allowable pressure;
- Pipe coating;
- No seams on the pipe (less risk of leakage over time);
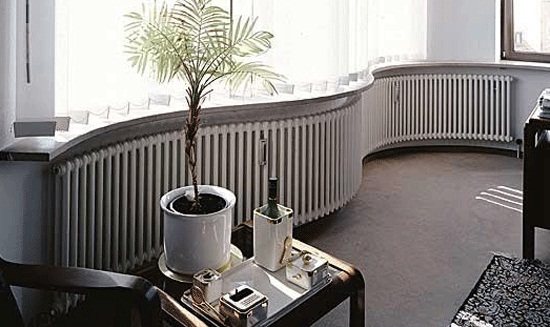
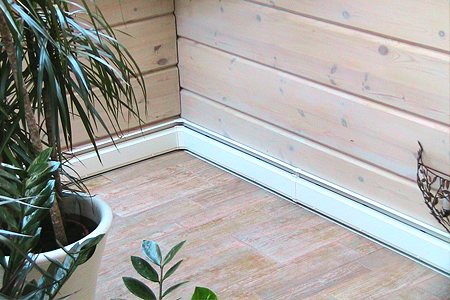
Skirting radiators
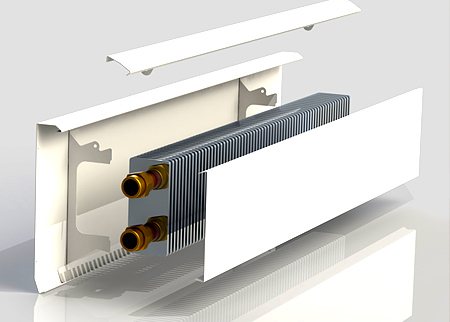
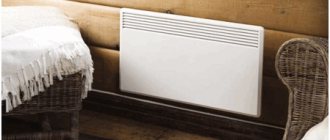
Technologies do not stand still, and today skirting heating is becoming more and more popular. There are two types - electric and water.
Water type consists of parts such as a radiator block, a manifold part and plastic pipes. The principle of operation is based on the law of physics about the attraction of air flow to nearby surfaces. The air is heated by a skirting radiator convectively. It enters the slot in the lower part of the skirting board, heats up and exits through the upper slot, rising along the wall. Thus, some time after turning on the heating, you will get heated walls, which themselves will radiate heat into the room.
The design of the convector uses aluminum and copper, which have excellent heat transfer. Thus, when the operating temperature of the skirting convector is 40 °, the walls are heated up to 37 °.
Of the advantages this kind of heaters can be distinguished:
- Uniform heating of the room;
- The problem of moisture on the walls, leading to mold and mildew, disappears;
- Small size and aesthetics of the radiator, as well as ease of installation and repair in any room;
- Possibility of connecting automation;
- Heating to a comfortable temperature for the body;
- No accumulation of warm air masses under the ceiling;
Of the shortcomings the price stands out - 3000 rubles per 1 meter, the maximum length is only 15 meters and the most problematic is the need for free space not obstructed by furniture and other items.
What is needed to connect heating radiators to each other
Before connecting the tap to a radiator in the heating system and installing additional sections, you need to prepare tools and accessories. The basic set includes:
- radiator key;
- breeder;
- stubs;
- nipples;
- gaskets made of resilient elastic materials;
- emery;
- paronite inserts;
- additional sections.
It is better to check before starting work if everything is ready. A ready-made connection kit for a 3-4 radiator can be used.
Types of pipes
A very important element in the installation process is the correct selection of pipes. There are such varieties as:
- Steel tubes;
- Copper pipes;
- Stainless steel pipes;
- Plastic pipes;
In most cases, all of these types will work for your heating system. But there are still times when some are better and others are worse in certain situations. Below we take a closer look at each species.
Steel tubes
This type of pipe is very durable, but, despite this, it has some flexibility. This allows them to be bent, cut and welded. One of the strengths of steel pipes is the slight expansion under the influence of high temperatures, so they can be embedded in concrete.
There are 3 types of these pipes - brazed, seamed, seamless. For heating a house, the best option would, of course, be seamless, the risk of leakage of which is several times lower. Diameter from 10 to 25 mm.
Of the minuses of these pipes the following can be distinguished:
- Low resistance to aggressive media in comparison with other pipes; 6-7 years - this is how long the pipe will last before corrosion begins.
- Poorly withstands pressure surges;
- Outwardly, they are very poorly combined with the interior of the room;
- High price;
- Low bandwidth;
There is an important point to be aware of when purchasing steel pipes. They are sometimes coated with zinc to prevent corrosion. In such cases, never use welding to join the pipes. The zinc coating will simply burn out, and the weld will turn into the weakest link in the heating system.
Copper pipes
The first and most important quality of copper pipes is that they hardly corrode. The only thing that can seriously harm copper pipes is the galvanic vapor formed as a result of a chemical reaction with other metals. Therefore, you need to carefully monitor which radiators you are going to install. In some cases, manufacturers can cover pipes with a layer of polyethylene, which improves the appearance and protects against external moisture and condensation.
Copper pipes with a diameter of 10-54 mm are produced. There are two types - soft and hard. Other advantages include working temperature limits from -200 to + 200 ° and bactericidal effect. Copper pipes withstand pressure surges better and have a lifespan of up to 100 years. The price, of course, is far from average and high thermal conductivity is also a significant disadvantage.
You can connect pipes in 3 ways:
- Coupling;
- Thread cutting;
- Spike;
Stainless steel pipes
Another type of pipe that is highly resistant to all types of corrosion. There are two types: seamless and electrowelded. The first ones are 5 - 126 mm in diameter, the second - 6 - 1420 mm. As in the previous cases, it is recommended to use the seamless option.
Pros:
- Large throughput;
- Withstanding pressure surges;
- The service life reaches 100 years.
A significant disadvantage for most buyers is the high price. And high thermal conductivity will have a bad effect on the temperature of the heater. Stainless steel pipes are also connected using couplings, threads or welding.
Plastic pipes
Some of the most popular pipes today are plastic. The most important advantage of these pipes, which makes them so popular, is their absolute resistance to favorite types of corrosion. Plastic pipes will last at least 50 years. An important point is the absence of noise from water flowing through them.
An important factor is the lowest thermal conductivity among all types of pipes. This will save some heat. Also, plastic pipes can withstand high pressure and pressure surges, they are the cheapest and easiest to install. Below we will consider the types of plastic pipes.
Reinforced-plastic pipes
The structure of these pipes is made up of the outer and inner layers of plastic and aluminum foil with a thickness of 0.2-0.3 mm between them. The polyethylene itself is very durable, with a roughness of about 0.004, a rupture limit of 70 bar, and an operating temperature of up to 95 °.
The aluminum ball plays a very important role in the construction of the pipe. Thin and elastic, it is at the same time strong, prevents deformation of the pipe and its elongation when exposed to temperature.
Reinforced-plastic pipes withstand pressure up to 10 bar at 95 degrees temperature. For some time they can tolerate a temperature rise of up to 130 °. The service life of the pipes reaches 50 years.
Polyethylene pipes
Polyethylene pipes are environmentally friendly, corrosion resistant and abrasion resistant. The advantages include low weight, strength and flexibility, ease of installation.
- Features of polyethylene pipes:
- The service life is 60-100 years;
- Withstand very low temperatures;
- Withstand pressure drops and mechanical stress, due to which they are used in seismically active zones;
- Working pressure at 0-25 ° reaches 25 bar;
- A short period of time are able to work at a temperature of 100 °;
Polypropylene pipes
This type is more rigid than the rest, because they are bent under a large radius. More corner fittings are also needed for these pipes. The installation process itself is more laborious and costly than that of the same metal-plastic pipes.
Specifications:
- Working temperature = 70 °;
- Working pressure 10-25 bar;
- Service term 50 years;
PVC (polyvinyl chloride) pipes
PVC pipes are made from a thermoplastic polymer. The operating temperature of these pipes is the lowest of the plastic family - 70-90 °. The peculiarity of PVC pipes is chemical resistance and low flammability. Like other plastic pipes, they are characterized by resistance to corrosion, strength, low price, high working pressure.
Heating system installation
This process involves disconnecting and dismantling old radiators and pipes. Selection of new radiators by calculating and determining the type of pipes that will be used in the heating system. Soldering pipes and fixing pipes and radiators to walls. Connection of all elements of the system and connection to a heat source.
Small calculations
In order to choose the right radiators for your heating system, you need to at least determine the place where it will be installed, the number of windows and the number of external walls.
To heat a room with 1 window and 1 outer wall, up to 3 meters high, you need about 100 watts. Then just add power based on the following calculations:
- +1 outer wall + 20% power;
- +1 outer wall and 1 window + 30% to power;
- +1 window facing north + 10% power;
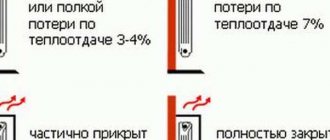
- If the radiator is covered with a panel, then + 15%, and if it is in a niche, then + 5% to power;
When adding up several points, additional percentages of power are also added up.
The approximate dimensions of the radiator are determined using some rules:
The distance from the window sill to the radiator is at least 10 cm, from the radiator to the ceiling 6 cm. In width, the radiator should occupy at least half the width of the window, and preferably 75%.
Disconnecting the water supply
Very often there are problems with disconnecting the riser, for replacing or repairing the heating system. The riser is a public property. The municipal service has access to it. If you receive a refusal to disconnect the riser during work, be sure to require that the refusal be submitted in writing. Then you will have something to go to court with. Everyone understands this very well, and in most cases it does not come to this. The management company is simply required to fulfill the requirements of the tenant. But this service (disconnection of the riser) is paid. The price varies from 500 to 1500 rubles per hour in different areas.
There is another pitfall in the process of replacement or repair - neighbors. There are situations when you need access to neighboring apartments and "friendly" neighbors refuse to provide it. Of course, this is their private territory, but there are standards (housing code, Articles 3, 8, 36, 37, 129), according to which permanent access to a public riser can be provided even without their consent. Therefore, you again have the opportunity to go to court. Having explained this well to the neighbors, you can get by with just one conversation.
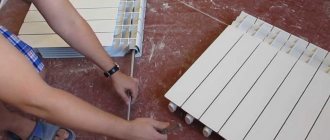
Radiator preparation
Pack the radiator before installing it. This is the name of the process of installing plugs, fittings and a Mayevsky tap into the radiator holes.
To begin with, we take the footwear and screw it in 4 places. Usually there are 2 with a left and 2 with a right thread, tighten them with an adjustable wrench with medium effort. They already come with a silicone gasket, so there is no need to seal them with anything else. Next, we find the front side of the radiator and determine from the old radiator which side the eyeliner is coming from. For example, on the left. Then we screw in the plug on the bottom right, and the Mayevsky tap on top. It is needed to remove air when filling the radiator with water.
Now, on the left side, bottom and top, we install 2 fittings with an external thread and a crimp for supplying pipes to the radiator. We take the fum tape, wind it on the external thread of the fitting and apply a paste to seal the threaded connections. The paste layer should be approximately 2-3 mm. This paste will dry out during the cold season during the heating season and additionally make the connection more reliable. We put the fittings on the threads and tighten with an adjustable wrench until the foot begins to unscrew, then we pull the foot back with the same key. Remove excess pasta with a towel. Actually, this completes the preparation of the radiator.
Dismantling the old heating system
After the water in the riser is shut off, you need to drain the water from the radiators. To do this, connect a hose to the radiator drain valve, and let the other end out into the street through the balcony or into the sewer. Place an empty container under the place where the hose and valve are connected in case of a leak. If the system has air taps, open them to speed up the process of draining the water. Then you can proceed to the next stage.
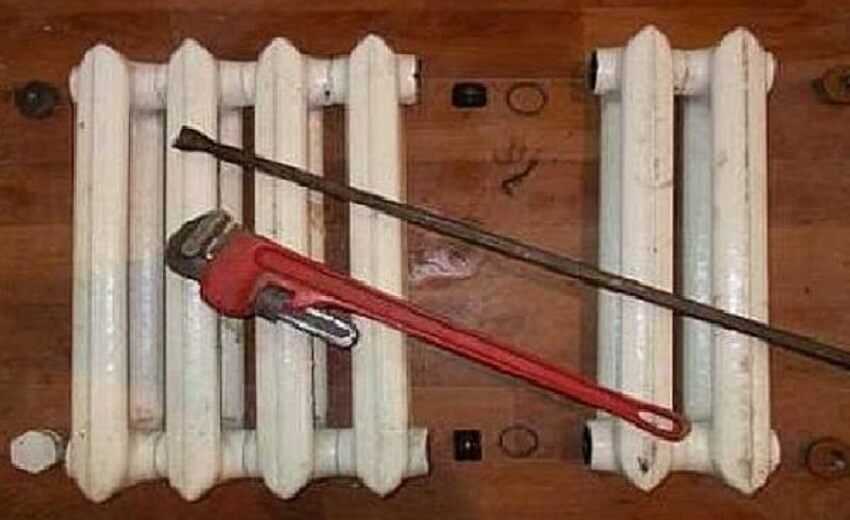
Using a grinder, make two cuts on the pipe you plan to replace. The incisions are made at a distance of 5-15 cm from each other, deep, almost completely cutting the pipe. Now we take a gas wrench and, clamping the place between the cuts, we break out this section. It is not worth cutting the pipe completely, it is fraught with jamming of the grinder's disk and even traumatic.
We remove as much of the old pipe as possible. It all depends on the specific situation. In most cases, this is the distance from the radiator to the routing in the riser or to the swivel fitting or to the plug of the adjacent radiator. Next, remove the old radiator from the wall. Here we either remove from the hinges, or together with them, if they have "grown together" for a long time. If the hinges remain in the wall, they can be unscrewed, but sometimes they hold very firmly then, simply saw off these loops with a grinder near the wall itself.
Next, using a gas wrench, unscrew the remaining parts of the old pipes. This must be done carefully so as not to damage or disrupt the rest of the pipes and connections. If the thread does not lend itself, you can knock on it. In especially severe cases, heating the problem area with a blowtorch helps.
Now you can start installing the radiator itself.
Radiator installation
We take a level to make marks. We attach it to the wall opposite the thread of the liner, from where a piece of the old pipe was twisted. Place the marks at the level of the middle of the supply and return holes. In this way, we reach the radiator holes. Now you need to substitute something under the radiator so that the middle of its threaded holes coincide with the marks, and makes notches on the wall for fastenings.
Next, we drill holes for the dowels and screw in the hooks that will hold our radiator in weight. Hang up the radiator and use a level to check how smoothly it sits in place.
Assembly of pipelines
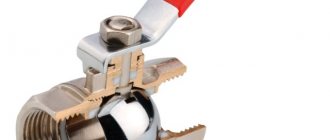
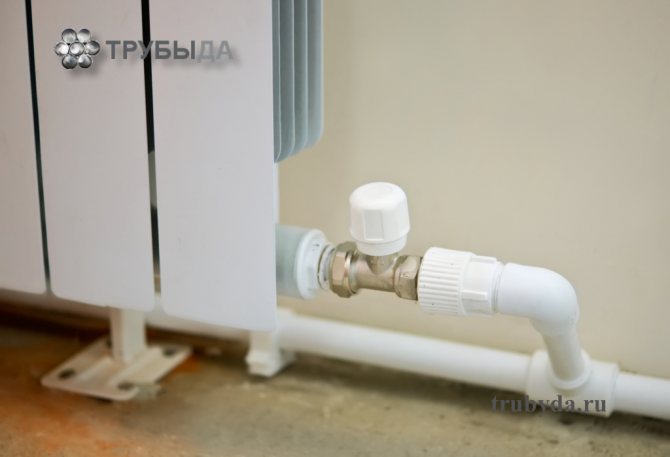
So far, the work with the radiator is over. We turn to the liners from the riser. They need to screw in two ball valves. To do this, the tap must be with an external thread on one side and an internal thread on the other. If you have a faucet with two internal ones, then simply screw in a special nipple on one side. All diameters are selected based on those that are already in the liners. This is usually ¾ inch or 20 mm. It is necessary to screw in the taps by wrapping the thread of the fum with tape and lubricating it with paste; you can also use tow and flax. Now put the tap on the thread and tighten with an adjustable wrench, remove the protruding paste residues with a towel.
Tip: try to screw the taps so that the valve handle is at the bottom. This will avoid accidentally opening or closing the tap if you catch it. It is very important if there are children in the house.
In most cases, pipe diameters are taken 20 mm for the distribution of apartment heating and 25-32 mm for the riser.
We take transition fittings for soldering copper or plastic pipes and screw them into the wiring. It all depends on what type of pipes you have chosen. Next, we will consider in detail 2 ways of installing a pipeline for copper and plastic pipes.
Copper pipes
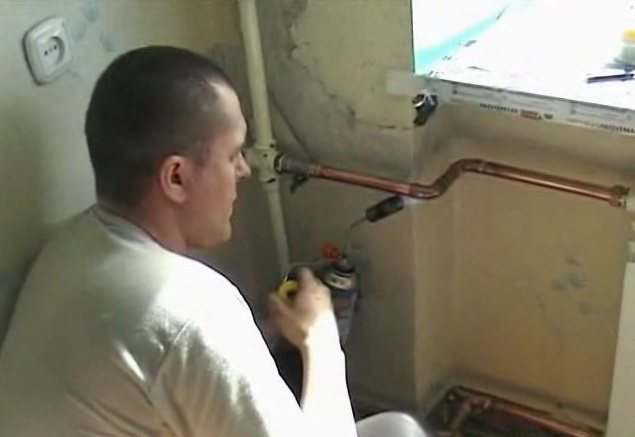
If there are copper pipes, then screw the fittings only to try on, then unscrew them back. Measure the required pipe length to the swivel fitting. Take the pipe and cut off the desired piece. After that, we clean the edges with the same grinder. Place it lying down and drive the end of the tube in a rotating circle. Prepare a blowtorch. It is desirable with a narrow end of the flame, but these are a little more expensive, so if there is no possibility, then you can get by with the simplest one for 150-200 rubles. We prepare the solder. Solder the transition fitting (from the riser wiring) to the tube separately, and then screw the fitting with the tube into place. If you do the opposite, there is a risk of burning the valve in the ball valve.
The end of the tube that will be soldered needs to be cleaned. For this, ordinary sandpaper is suitable, you just need to wrap the tube with it and rotate it in one or different directions until the end becomes noticeably lighter. Next, use a hedgehog to clean the inside of the fitting. Lubricate the end of the tube with flux paste and insert it into the fitting until it stops. Remove excess pasta with a towel. Now we heat the place of soldering with a soldering iron and for 30-40 seconds (the paste starts to turn white) and lower the solder. We repeat the same with another tube (we need 2 of them) and wait until it cools down.
Next, screw the fittings into the supply and return, having previously wrapped them with fum tape and coated with paste to seal the threaded connections. Then we put the swivel fittings on the tubes and measure the length of the pipe sections we need, cut and insert them into the same swivel fittings, and put the swivel fittings on the other ends and also measure the remaining distance.
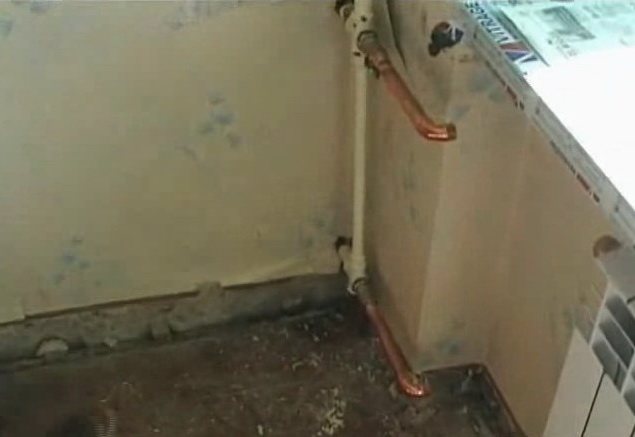
Now we solder in the same way, just starting from the radiator. First, we insert the tubes into the radiator and fix with clamps. In these places, it is better to use this type of connection, since in the future it may be necessary to remove the radiator. Next comes the spike of all connections in turn. Last, we weld the pipe from the riser to the swivel fitting, having previously connected the entire system together and adjusted by moving the radiator left-right. That's it, the heating system using copper pipes is ready.
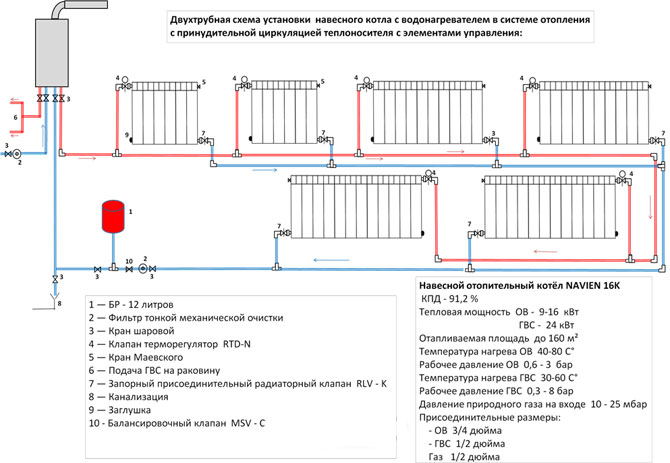
Heating system options
An autonomous heating system (in a private house, a small cottage) allows you to choose from two possible options for the heating system device.
It:
- Single-circuit (single-pipe) - classic, which has been used for a long time and everywhere.
- Double-circuit (two-pipe) - more efficient in operation, with the ability to regulate heat transfer.
Note! When choosing polypropylene as a material for installation, metal pipes should be completely abandoned. A high-quality heating system provides only polypropylene pipes. Combining is prohibited here.
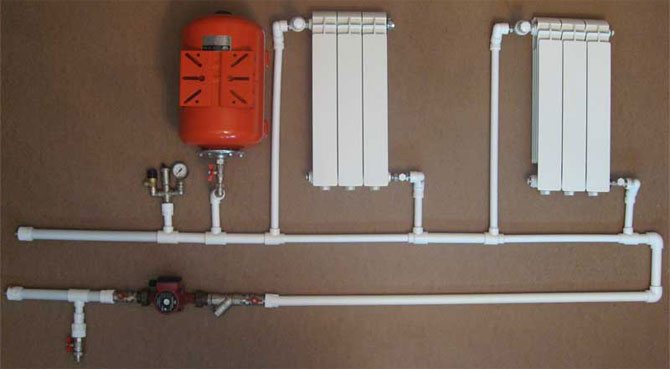
Single-circuit heating system
The radiator is connected to polypropylene pipes in a single-circuit system in series.
We recommend that you familiarize yourself with: How to independently seal a leak in a heating pipe without draining the water
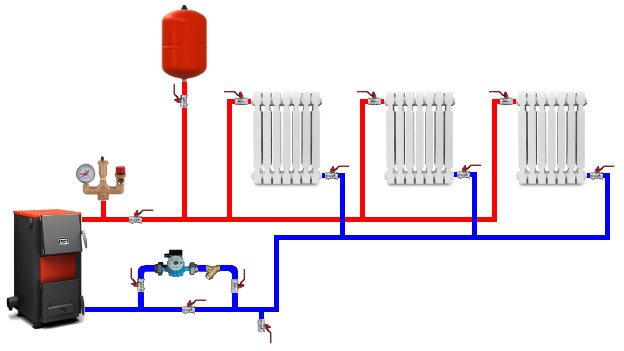
Schematically, a device of this type is simple:
- A pipe coming from the boiler (supply) is connected to the upper inlet of the radiator.
- A chilled coolant outlet (return) is connected to the lower one.
Supply and return are carried out in one pipe. In a one-story building, this is a horizontal pipe around the perimeter of the system. In apartment buildings, this is a vertical riser pipe.
The subtlety of installing a single-circuit system is that you need to mount a bypass here.
A bypass is a pipe (jumper) built-in between the supply and return with a valve or check valve.A bypass is necessary for autonomous disconnection of one battery from the circuit when the system is running (for example, for repairs).
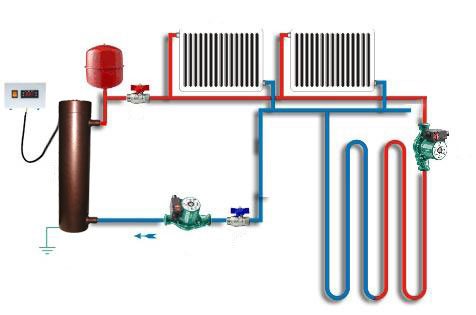
Dual-circuit system
With a two-circuit system, the batteries are installed in parallel. The coolant is injected from the outlet from the main supply pipe. The return return takes place according to the same scheme, along the second (separate) pipe. A separate input for each radiator eliminates the need for additional parts in the form of a bypass. A shut-off valve (valve) is mounted on the supply, which is used to shut off the supply if necessary.
A two-circuit heating system is more efficient in terms of heat transfer by about 10% and is considered more modern.
Brackets or special hooks are required to mount the battery to the wall. For lightweight radiators, 2 supports are sufficient. The number of brackets for heavy batteries is calculated from the need for 1 attachment per three sections.
Note! Radiators are always installed under windows. This improves the circulation of warm air from the batteries and prevents the room from cooling. Cold air from the windows goes down to the radiator and, warming up, spreads around the room.