Creating a homemade heater for the garage and other premises
As for a person, warmth is important, so it is important for a car to be within a certain temperature to maintain the longest line of operation. It is important for us that the car is always ready for work, therefore it is necessary to maintain the correct temperature in the garage, so that the parts of the car do not "freeze" and do not lose their properties.
A car is like a family member and it is important to pay special attention to it too, since it helps out more than once in life situations.
The theme of garage heating is very relevant among motorists. Garages do not have a heating system, so motorists often buy different models of heaters or make a homemade heater.
Moreover, if the purchased equipment can somehow correspond to fire safety, then home-made models do not guarantee this very safety and often it all ends very badly.
Making a homemade garage heater
Requirements for composing a heater for a garage
The most important thing is the safety of this device, since it will be in a closed room and with very flammable devices. However, you will not be able to constantly be around.
If at home we somehow control the heat, constantly monitor safety, then we will not be able to constantly monitor the car, therefore it is very important to choose a really safe heating device so that our car remains both warm and safe.
Therefore, it is very important that a homemade heater does not pose a threat of ignition or, worse, an explosion. Also, the heater, naturally, does not burn oxygen and does not emit a certain burning smell.
The unit quickly heats up the room and maintains this temperature for a period of time. The device should be portable and does not take up much space, but it should be very powerful and efficient.
Types of heaters
A home craftsman who wants to get a homemade "heating pad" can be offered a choice of several options:
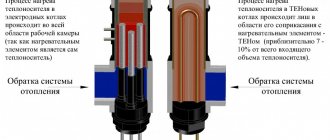
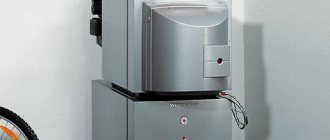
It is a container equipped with a tubular electric heater (TEN) and filled with oil.
The main element of the heating element is a spiral made of nichrome or other material with high electrical resistance, which, when an electric current is passed through it, begins to warm up. The spiral is placed in a copper tube filled with sand.
The oil removes heat from the heating element, distributes it over the surface of the case and, in addition, serves as a heat accumulator (after a power outage, the device continues to heat the surrounding air for some time).
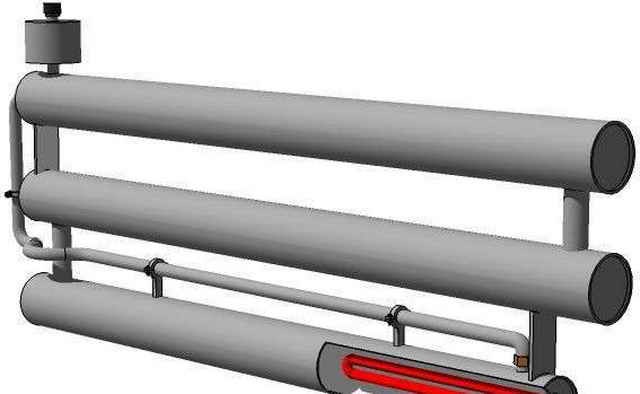
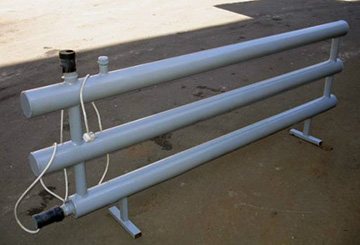
Vapor drip
In terms of its design, a vapor-drop heater is very similar to an oil heater, only water vapor is used as a heat distribution medium. It is formed from a small amount of water that is poured into the housing.
This solution provides two significant advantages:
- When freezing, the vapor-droplet heater will not burst, since water occupies only an insignificant part of its volume.
- Steam is an extremely high capacity heat accumulator. More precisely, not so much steam as the process of evaporation: it is during the transition from a liquid state to a gaseous state that water accumulates a large amount of thermal energy, which is returned when steam condenses on the walls of the heater.
Having given off heat to the body of the device, the condensed steam in the form of water flows down to the lower part, where the heating element is installed. The power of the heating element and the volume of water are selected in such a way that the rupture of the heater with steam pressure is excluded.
Due to the fact that the body of the device is hermetically sealed, its walls from the inside do not rust from high humidity.
The flame of a candle is known to emit not only light, but also some heat.
Only it usually evaporates under the ceiling in the form of convective air currents and there is "smeared" over the entire area of the room.
Why not install a heat trap above the candle? We will tell you about what it is in the next section.
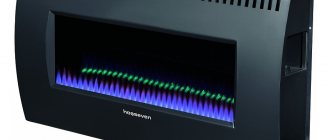
Infrared (IR)
Any substance with a temperature other than absolute zero emits "thermal" electromagnetic waves, which are called infrared.
The intensity of this radiation is in direct proportion to the temperature of the substance. Water and oil radiators also emit infrared waves, but in very small quantities, since their surface is relatively cold.
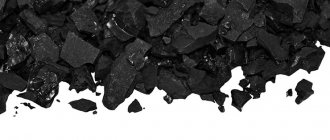
To turn a metal object into an IR emitter, it is enough to heat it up to a red glow temperature. If we use special materials, for example, graphite, then sufficiently perceptible "heat" waves can be achieved even at relatively low temperatures.
Knowing these subtleties will help us make an IR heater with our own hands, which will give us heat directly, that is, without the participation of air as an intermediary.
Other types
Since electricity is not available everywhere, structures that run on gas or solid fuels have the right to life. The latter include potbelly stoves.
Homemade electric heater
The product fully meets all the necessary requirements, it is made of fiberglass, glue and, of course, nichrome wire. This homemade heater is like a factory one. Two sheets are fixed to each other and installed for heating directly in the garage.
What materials will you need?
What is necessary:
- two sheets of fiberglass
- nichrome wire
We take glass oxide and attach a wire spiral to them. Heat will radiate from the entire surface area of this device. This is why it is so effective.
Video on the topic
How to make a 12 volt heater with your own hands: detailed photo instructions.
This simple heater works on the principle of a heat gun, a fan drives air onto a heated coil, resulting in a stream of warm air. The device works from a 12 V power source, it can be connected to the vehicle's on-board network or to a 12 V battery.
To make homemade products, you will need materials:
- Can.
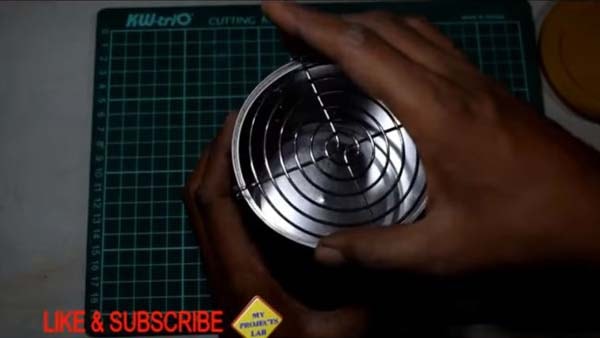
- Cooler with a grid from a computer for 12 V.
- Nichrome wire.
- Gypsum.
- Syringe.
- Wires.
- Switch.
- A piece of steel wire.
The whole process of making a homemade heater is shown in these photos.
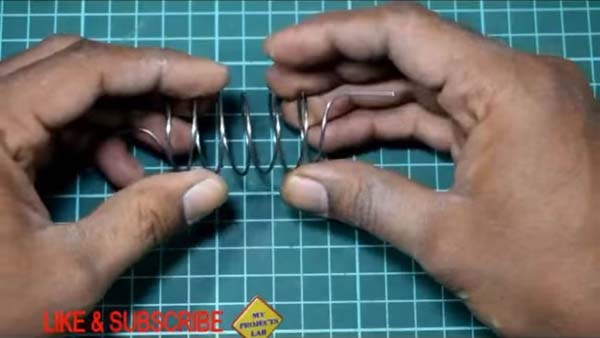
As a heating element, the author used a piece of nichrome wire 1.8 mm thick, 61 cm long. The wire needs to be wound in the form of a spiral, here the author has wound the wire on a 30 cc medical syringe.
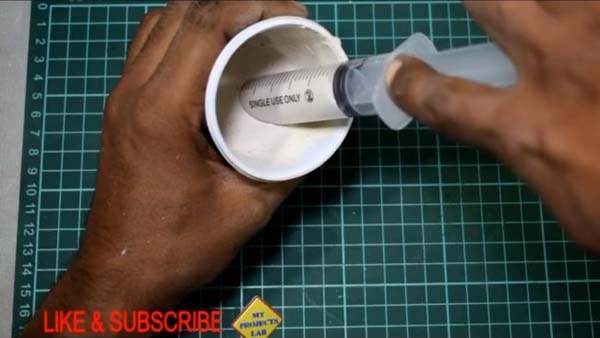
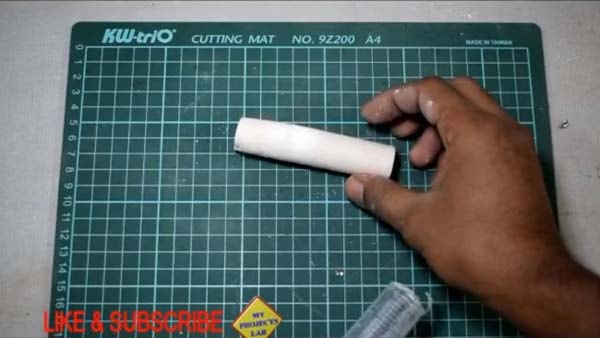
Now you need to make a base on which the spiral will hold, it is made of plaster. Gypsum is mixed with water to a liquid consistency, we collect liquid gypsum into a syringe.
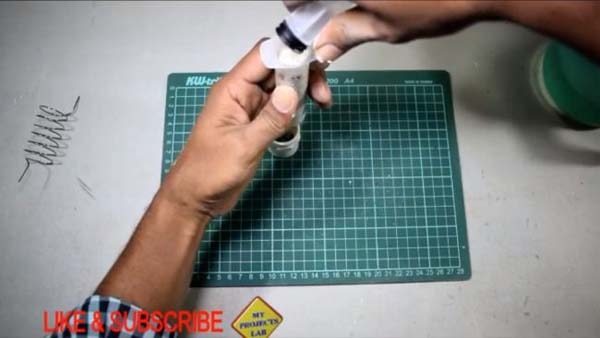
After half an hour, the gypsum will harden and can be removed by cutting the syringe in half.
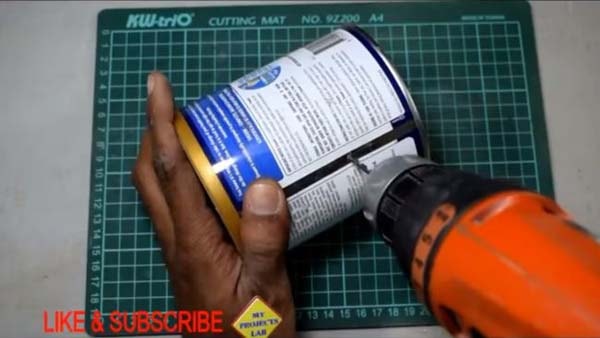
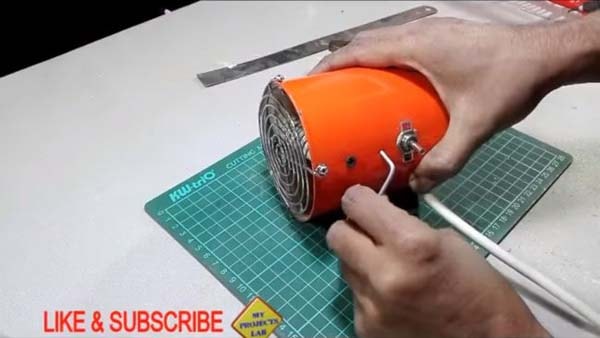
We will make a body from a tin can.
We install the grill from the fan on the can.
We attach a fan to the back cover.
We remove the frozen gypsum from the syringe.
At the ends of the plaster blank, we make holes for attaching to the body of the can.

We put on a nichrome spiral.
We connect the switch and wires.
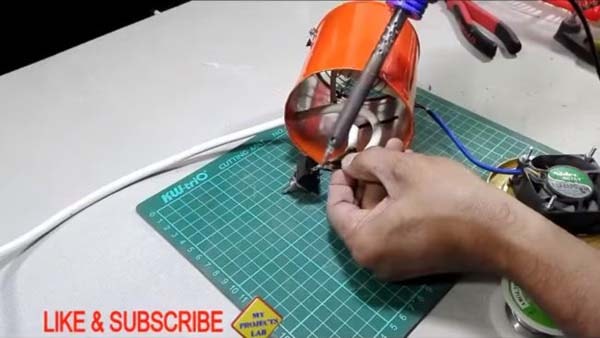
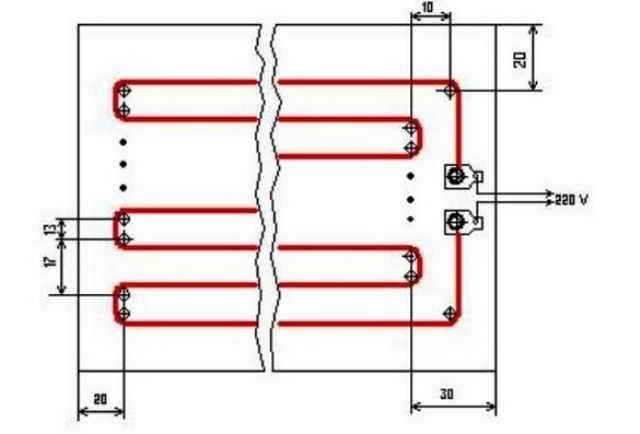
Here is the wiring diagram for the spiral and fan for the heater.
Bend the legs for the heater out of the steel wire.
The author measured the temperature of a working heater.
Here is such a homemade 12 volt heater you can make with your own hands from scrap materials.
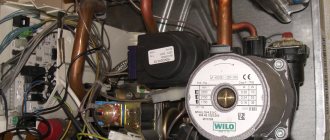
Here again winter has come and now again the drivers have an acute question of starting the car engine in the cold. When the temperature drops too much, the battery loses its power, and at the same time it is very difficult to crank the engine, so it can be problematic to start the car right away. This problem can be solved by installing a special device that can warm up the engine coolant before starting. Of course, you can buy such a device, but the cheapest option is, of course, homemade.
How to assemble a heater
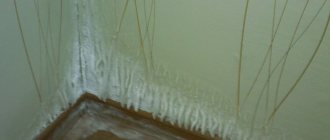
At the end of the preparatory work, you can build this device. To begin with, we process the inside of the fiberglass with sandpaper, then make an indent (two cm), and on the sides (three cm). Then we take a sheet to which we will directly attach the wire spirals and calculate the number of curls directly.
After we lay the wire according to the already prepared scheme, we try to tighten the wire tightly.
After laying 5-7 turns, we fix everything with paper and go through with glue. We remove the matches, fix the elements with paper. The edges of the curls are fixed with glue and paper strips.
After that, metal rivets are inserted into the holes, and wound on the end of the wire material. The main thing is to calculate the wire in order to fix everything correctly. We fix it with washers, it is very important that the wire does not come off. This is how a homemade heater is created.
Idea 1 Compact model for local heating
The easiest way to make an electric heater is this one. To get started, prepare the following materials:
- 2 identical rectangular glasses, each with an area of about 25 cm 2 (for example, measuring 4 * 6 cm);
- a piece of aluminum foil, the width of which is no more than the width of the glass;
- cable for connecting an electric heater (copper, two-core, with a plug);
- paraffin candle;
- epoxy adhesive;
- sharp scissors;
- pliers;
- wooden block;
- sealant;
- several ear sticks;
- clean cloth.
As you can see, materials for assembling a home-made electric heater are not at all in short supply, and most importantly, everyone can be at hand. So, you can make a small electric heater with your own hands according to the following step-by-step instructions:
- Thoroughly wipe the glass with a cloth from dirt and dust.
- Using pliers, gently grasp the edge of the glass and burn one side with a candle. The soot should cover the entire surface evenly. Similarly, you need to burn one of the sides of the second glass. In order for carbon deposits to better settle on the surface, it is recommended to cool the glass before assembling the electric heater.
- After the glass pieces have cooled down, gently use ear sticks to clean the edges no more than 5 mm around the entire perimeter.
- Cut two strips out of the foil, exactly the same width as the smoked area on the glass.
- Apply glue to the glass over the entire fired surface (it is conductive).
- Arrange the pieces of foil as shown in the photo below. Then apply glue to the other half and connect them.
- Then seal all joints.
- Use a tester to measure the resistance of a homemade heater yourself. After that, calculate its power using the formula: P = I 2 * R. How to use a multimeter. we talked about in the corresponding article. If the power does not exceed the permissible values, proceed to the completion of the assembly. If the power is too high, you need to redo the heating element - to make the carbon layer thicker (the resistance will become less).
- Glue the ends of the foil to one side.
- Make a stand out of a block by placing the contact pads connected to the electrical cord on it.
Using this technology, you can make an electric mini heater with your own hands. The maximum heating temperature will be about 40 o. which will be quite enough for local heating. However, for heating a room, such a homemade product will be, of course, not enough, so below we will provide more efficient options for homemade electric heaters.
How to check the performance of a homemade heater?
Checking the effectiveness and safety of this device, you first need to connect it to an ohmmeter, and then directly to the mains. We take epoxy glue, it is not recommended to overdo it with it (no more than 150 grams). This glue is applied along the turns of the heater, after which a new sheet of fiberglass is laid. To glue two sheets together, a load of at least 50 kg is used. It is very important that the sheets are under just such a weight for maximum bonding to each other. The device can only be used in a day.
A self-made heater is quite effective and does not require special economic costs. All that is required is patience and following the instructions. Indeed, it is very important that the car is warm and can work at any time we need, while serving us longer.
Each technique needs special care and it is very good that car consumers understand this and take care of their property. This method of heating the garage is really safe, unlike the others, which can lead to irreparable consequences, such as simply an explosion of the garage and, accordingly, the car.
Insulating the garage with fiberglass and nichrome wire is very safe and will not lead to bad consequences. It is better to make the insulation yourself and be confident in it than to trust various standard heaters that are not suitable for the garage, since we are not there all the time and cannot control the entire heating process
How not to freeze without electricity and heating: 4 homemade heaters with improvised means11
No one is insured against the shutdown of such benefits of civilization as heating or electricity. In such an unpleasant situation, you will not be allowed to freeze ingenuity and a little effort.
Here are the most popular and proven methods of heating a small room, heating food and improvised heating pads from scrap materials.
1. Candle heater
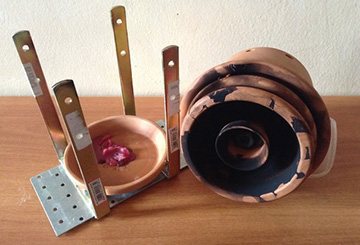
California inventor Doyle Doss and his company DOSS Products offer the original Kandle Heeter system, the "Candle Heater". This strange-looking candlestick, its creator claims, can be indispensable during a power outage. Its height is about 23, and its width is about 18 centimeters. And from its appearance, the inverted pot above the candle attracts attention. The main highlight of the system is hidden in this pot.
The pot is made of three pots of different diameters, nested one inside the other and connected by a long metal bolt, on which are threaded washers and nuts. An ordinary candle, burning in a room, gives out, as it seems, very little heat. And the point is that its hot "exhaust" simply goes up and quickly evaporates with ventilation.

Meanwhile, the supply of energy in the candle is not so small. Moreover, with the hot stream of combustion products, most of its energy content leaves, and only a smaller part passes into light.
The labyrinth hood above the flame collects energy and carefully stores it, heating up quite strongly (the central rod is especially hot). And then this heat is slowly transferred to the air by the entire surface of the ceramic radiator.
The pots also help trap soot from the flames, which is beneficial for the cleanliness of the ceiling.
The inventor emphasizes that one such device will in no way save you in the winter when the heating and electricity are turned off, but, on the other hand, it is better than nothing at all.
Note that clay pots are not thermally conductive enough and it is better to replace them with a similar metal structure. For example, from cans of different sizes or old Soviet cans from loose products.
2. Mini Tea Candle Heater
This is a tealight-powered tent heater. Several of these heaters save fishermen in tents from freezing. This means that a few candles in cans with openings for air intake are also suitable for a small room or study.
3. Alcohol lamp
The design is known abroad under the name alcohol stove, or in Russian - an alcohol lamp. The Swedish army was even adopted. Alcohol is used because it does not smoke when it burns. This means that the dishes remain clean and soot and smoke do not fly in the air. The design is simple, and in a few minutes it can be made from any materials at hand. As a donor for the stove, for example, a beer can, a can of coffee or condensed milk is suitable. That is, you need a small iron container with an iron lid, or you will have to cover it with something.
So: we take a jar, a ruler, a strip of leaf in a box and a marker or any drawing or scratching object.
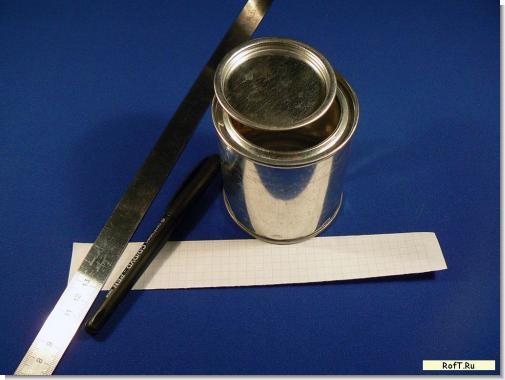
- We mark a strip on the bank, stepping back from the top by a third. The easiest way to do this is to scroll the jar while holding the marker in one position.
- We wrap a strip of paper around the edge of the mark and fasten it with a piece of tape or glue.
- We begin to drill, pierce with an awl or cut holes with a knife along the marked strip. In this case, it is a row of holes with a diameter of 0.8 mm every 10 mm and every 5 mm. A small diameter of holes for proper combustion is better than a large one, but you can make 3-5 holes and a centimeter.
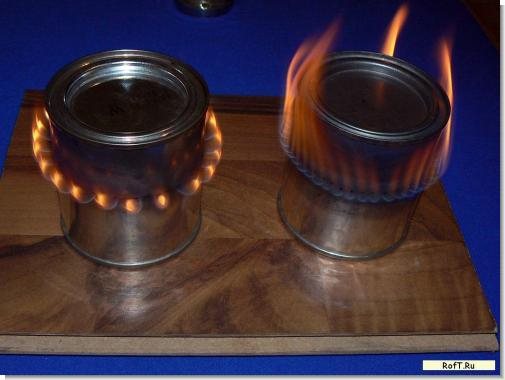
To light the spirit lamp, you need to pour alcohol and close the lid, 50 ml burns for 15 minutes. The spitovka should be placed on a non-combustible surface and shaken slightly so that the alcohol sprinkles the outside of the jar through the holes. We set fire to alcohol outside and wait until it burns out. We repeat the procedure until we get a self-sustaining flame from improvised nozzles around the can. Usually it is enough to repeat 2-3 times and everything starts working by itself.
The principle of its operation is simple: the flame heats the walls of the can, the heat along the walls is transferred down to the alcohol, the alcohol boils at the walls and the pressure inside rises, the alcohol vapor comes out under pressure through the holes and, mixing with the air, burns beautifully. Now we put a kettle, kettle, mug on top, or just warm ourselves.
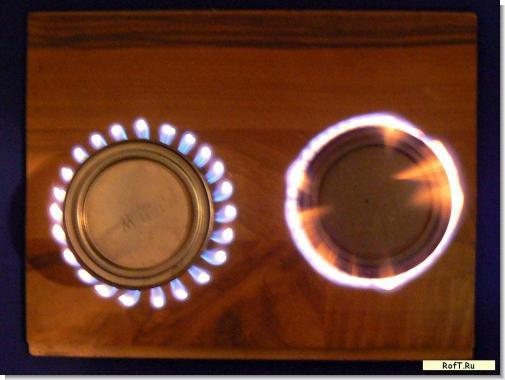
For greater heat transfer, you can put a homemade spirit lamp in a large iron container, which would heat up and give off heat. The fewer the number of holes, the harder it is to ignite, but less fuel consumption and less heat from it. A liter of water boils in less than 10 minutes. Resistant to wind, put out by covering, add as much fuel as needed, otherwise you will have to wait for burnout or pour hot alcohol back into the container, which is not safe.
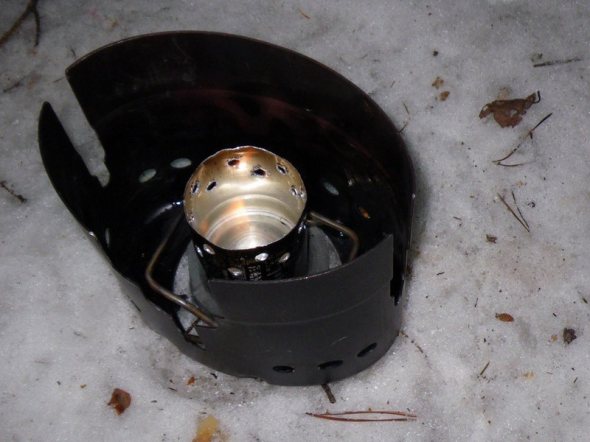
Similar options "under one mug" from a can with a filler hole, which is closed with a coin and from an aerosol can:
4. Wood Burner for Heating Food This is a more complex design of a wood-burning burner - from 2-3 cans. True, with this option, you need to remember about ventilation in a tent or room.
5. Warmers from plastic bottles Regular plastic bottles can be filled with hot water and used in place of a heating pad. You can also carry 1-2 bottles of hot water in your backpack to “warm” your back. This method will help warm up a cold bed or warm your legs while sitting at a desk. You can also carry 1-2 bottles of hot water in your backpack to “warm” your back.By the way, in the summer you can make "conditioner" from the same bottles. To do this, you need to freeze several bottles filled with water, put them on a tray or towel (they will begin to thaw gradually) in front of the turned on fan. The air temperature in the room will drop significantly.
×