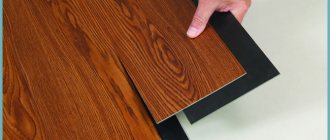
Laminate is a decorative material. Laminate flooring is often used on the balcony. This material consists of several layers:
- Base from MDF or chipboard.
- Protective polymer layer.
- Substrate.
- Decorative color layer.
This material is often used as an alternative to parquet.
Advantages and disadvantages of laminate flooring
- Cheapness. The cost of laminate flooring is on average lower than the cost of parquet or tiles.
- Prostate in styling. Laying laminate flooring on a balcony is straightforward, so no special skills are required.
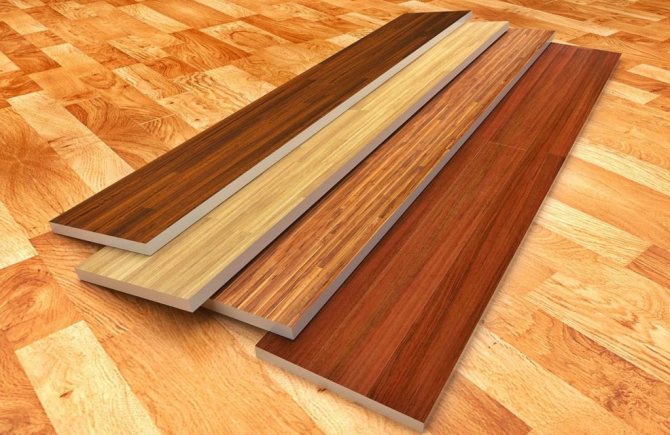
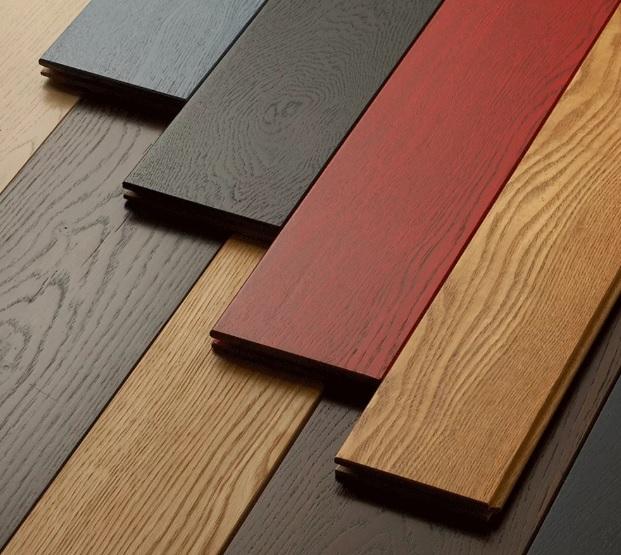
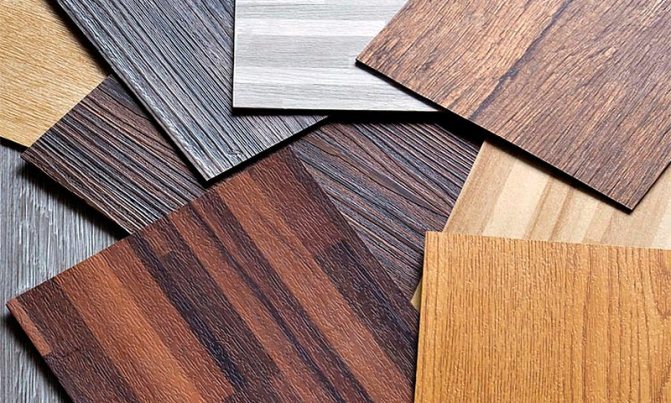
- A variety of patterns and colors.
- Possibility to purchase a laminate that is resistant to increased loads.
The main disadvantages of this material include:
- Lack of tightness in the seam area. Due to this, dust, dirt, water penetrates into the seams.
- Sensitivity to some chemicals.
- Susceptible to excess moisture, scratches, strong impacts.
It is also quite problematic to remove greasy stains, felt-tip pen marks and glue from this surface - this requires special means.
Laying laminate
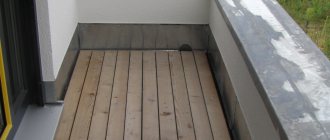
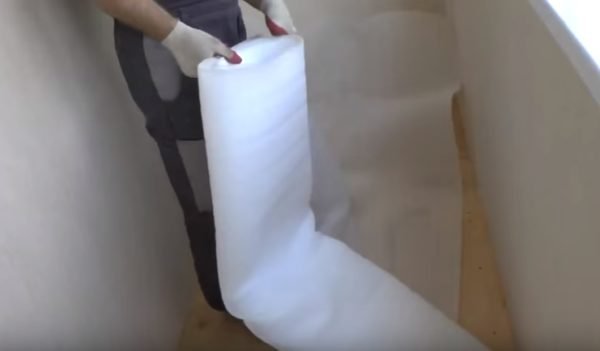
After purchasing the selected laminate and substrate, prepare the surface of the balcony floor for laying the coating. It should be flat (no more than 2 mm drops), dry and clean. Installation of the laminated board is carried out after laying on a screed or plate - a plastic film and a substrate.
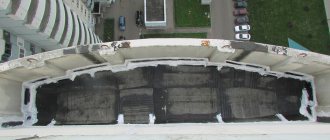
The film is needed for waterproofing the floor
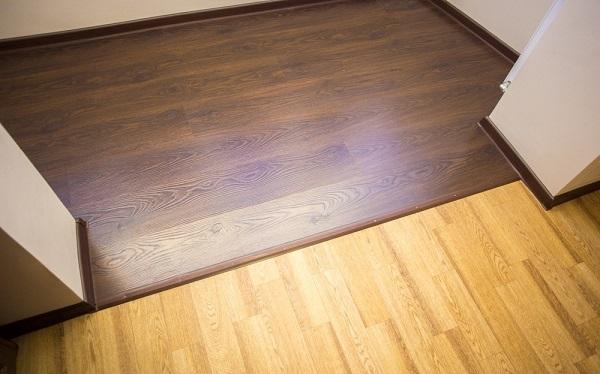
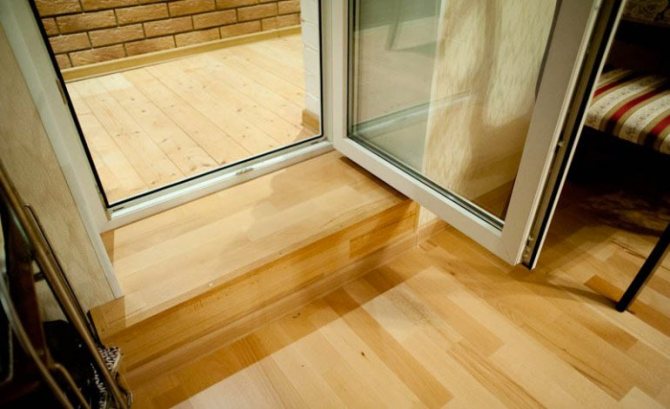
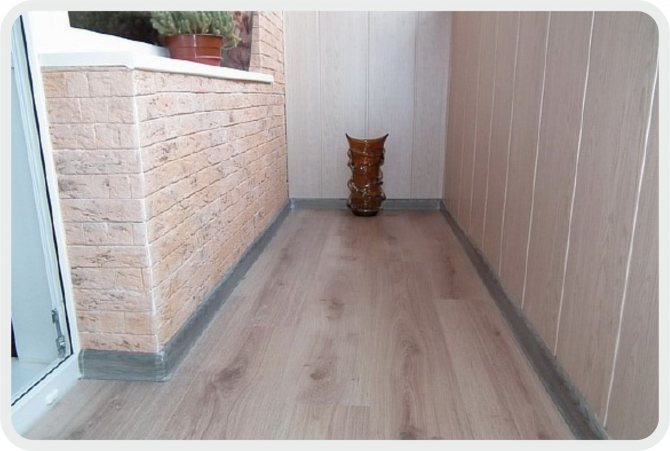
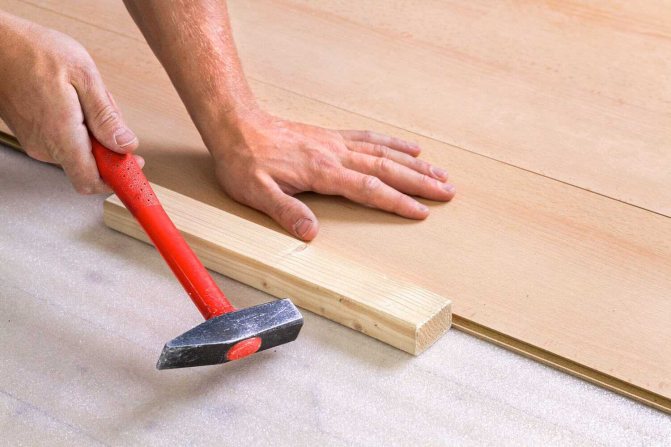
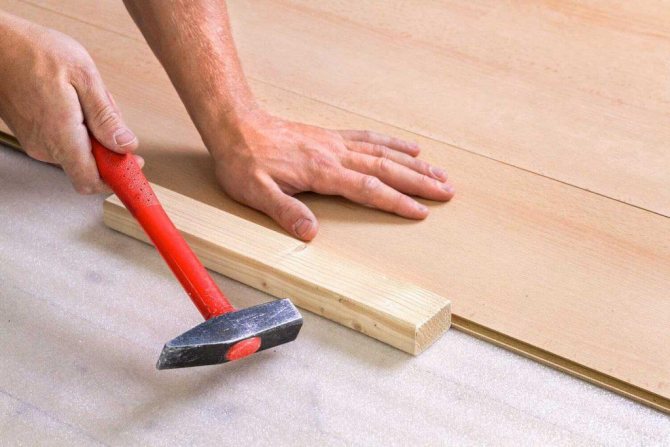
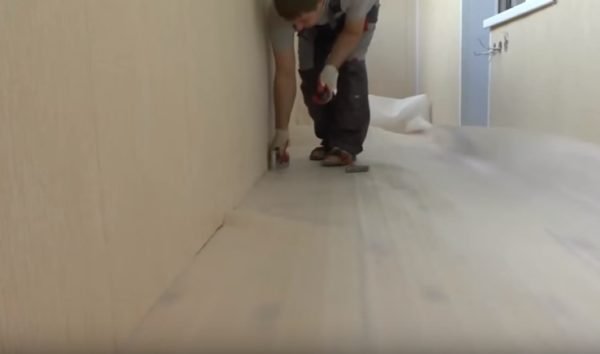
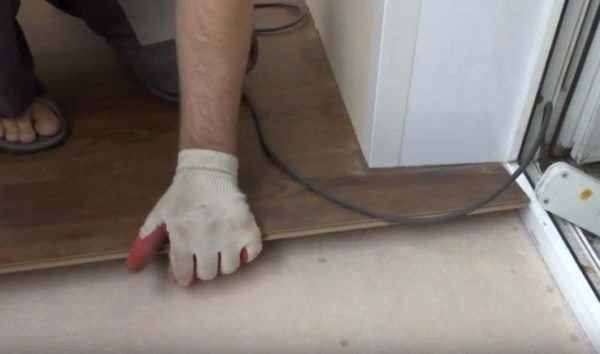
Begin laying from the wall in stripes parallel to it. Other methods are also possible - diagonally or across the balcony. To fit the size of the coating, the lamellas are easily cut with a metal hacksaw. For a secure fit of the boards and fastening them in locks - they are knocked out through a wooden block. The finished coating must have mandatory gaps (from 10 mm) from the walls and parapet to compensate for the linear expansion of the material under the influence of temperature and humidity. To do this, use plastic wedges, or pieces of the same laminate. In the future, the skirting boards and sills will hide the gaps, protect the laminate from moisture and dirt.
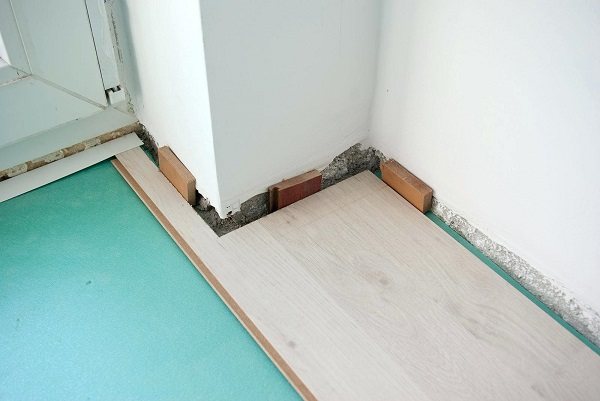
Leaving a gap from the wall
Which laminate is suitable for the balcony
Laminate is widely used for finishing balconies and loggias. However, in order to lay a laminate on a loggia or balcony, the following factors must be taken into account:
- The balcony must be carefully glazed, moreover - with warm glazing. Optimal in this case would be the use of metal-plastic structures with two-chamber double-glazed windows. All joints and cracks should be carefully sealed with polyurethane foam - moisture should not have a single chance to get inside - neither in summer nor in winter.
- When glazing, a layer of waterproofing and vapor barrier was installed. If everything is done correctly, then condensation will not accumulate on the balcony. That is why everything related to waterproofing is best left to specialists.
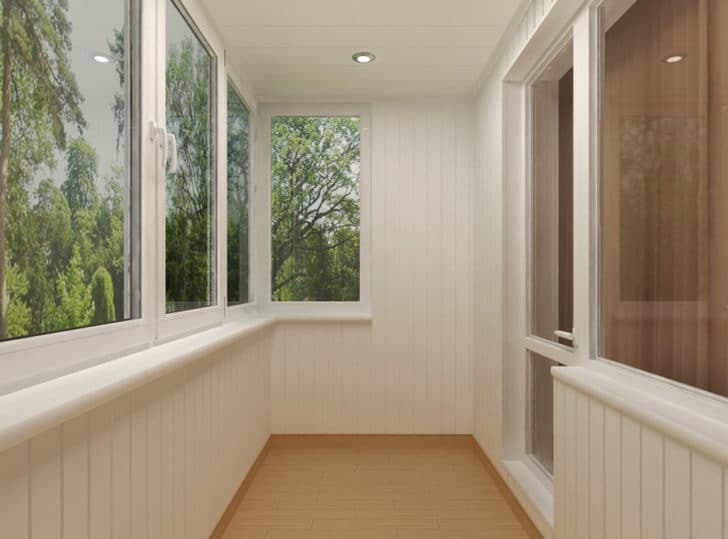
If these conditions are met, the glazing is made with high quality, then any laminate can be used for decoration. In fact, in this case, the loggia or balcony is a logical continuation of the adjoining room, so that the decoration is the same as in the rest of the house or apartment.
However, you should not completely abandon the use of laminate if the balcony or loggia is not insulated enough. It's just that in this case it will be necessary to carefully approach the choice of material. There are special types of laminate that are resistant to moisture, sudden changes in temperature and other extreme conditions. Yes, the cost of such material will be slightly higher. But, anyway, less than warm glazing.And such a finish will last long enough.
In addition, on the building materials market, you can even find not only moisture-resistant material, but also waterproof. They are used on non-insulated balconies, in the bathroom, in the shower room, pool, bathroom and other rooms with high humidity. This is achieved by using a polyvinyl chloride board instead of chipboard.
PVC is a material that is completely insensitive to moisture. Moreover, the externally waterproof laminate will be the same as the most ordinary one. In addition, this material is absolutely safe for health - all its components are environmentally friendly and do not contain toxins.

DIY finishing
There are no separate requirements for how to lay the laminate on a balcony or loggia. The technology is identical to the performance of work in other rooms. The main thing in this situation is a thorough and competent preparation of the foundation.
Leveling and surface preparation
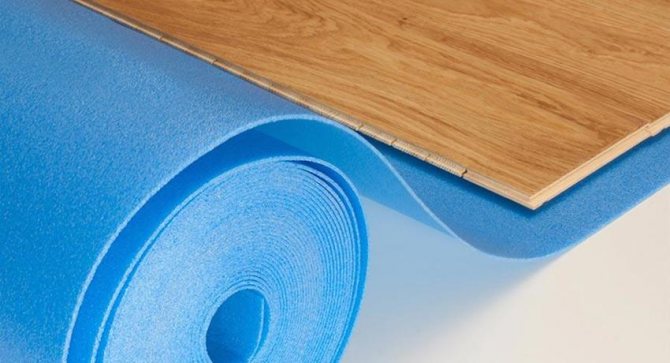
For good sound insulation, place a backing under the laminate
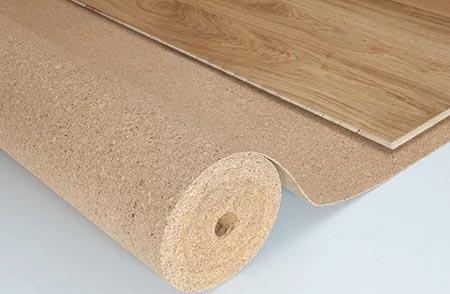
Since laminated panels have a good acoustic effect, it is advisable to put a vapor barrier film under the covering. A cork or polystyrene backing is laid on top of it.
Its main function is thermal insulation and protection of the laminate from moisture, which can get on the base due to unforeseen circumstances. The material is rolled out on the surface, this is done strictly in the perpendicular direction to the laminate to be laid. The next strip must be overlapped and connected with tape.
Finishing a balcony with a laminate using a warm floor is considered the most cardinal solution for cladding and simultaneous insulation of the room.
Laying laminate
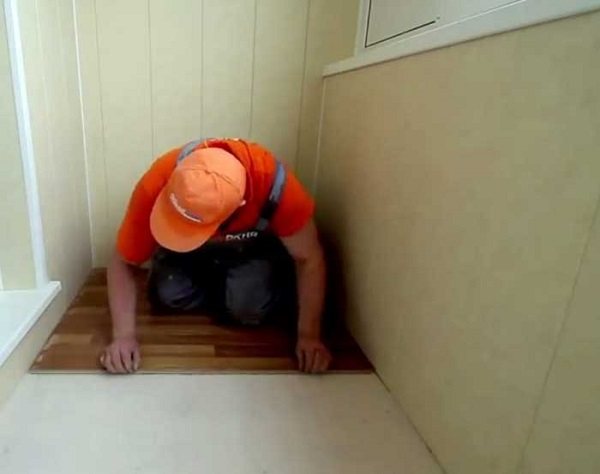
It is recommended to start finishing the balcony with laminate from the opposite side of the front door. At the same time, the panels are not attached to the base. The panels can be laid in several ways:
- Parallel to the window.
- Perpendicular to the window opening.
- Herringbone (diagonally).
In this case, the first row is laid with a gap from the wall of at least 2 cm. It is necessary for a possible shift of the surface due to the swelling of the panels. In the future, these gaps are closed by skirting boards and become invisible.
Cover panels can be installed without the use of glue
An important condition for laying modern laminate flooring is installation without the use of glue.
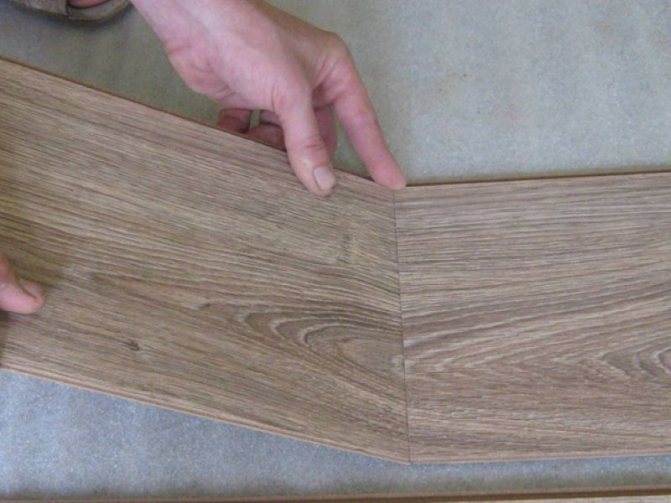
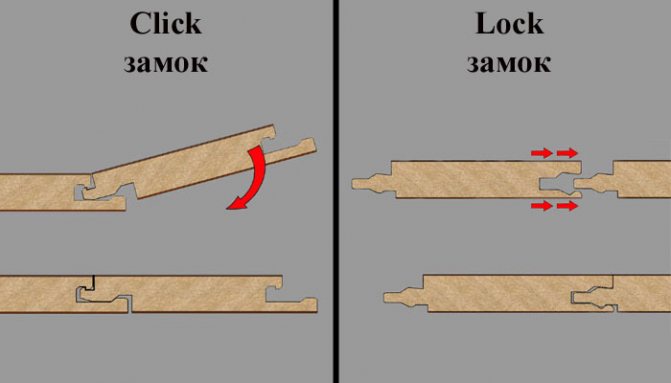
The boards are fastened together using special locking joints designed for this.
There are 3 types of such elements practiced:
- The already assembled row is lifted, and a new panel is connected to it.
- The assembled row is attached to the previous one. This option allows you to perform the installation much faster than the previously described method.
- The panels are connected using a plastic insert. She attaches the board to the base. Thus, it is possible not to lift the assembled structure, which can lead to breakage of the locking part.
Features of the choice of a substrate
In order to properly lay laminate floors on the balcony, you need to carefully consider the choice of substrate. Its main task is to level all possible irregularities and waterproofing. Also, a properly selected underlay cancels out noise from accidental knocks and footsteps. So you and your neighbors will not have to flinch from stomping if someone from your family decides to take a walk on the balcony.
Varieties of substrates
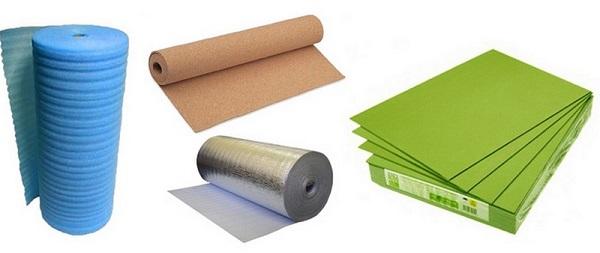
The following materials usually act as a substrate for the laminate:
- Oak cork. This natural base is very durable, but not too moisture resistant. So this is not suitable for a balcony or a bathroom.
- Izolon. It is a cheap, moisture resistant material. But it is not very durable: too strong loads wear it out quickly, render it unusable.
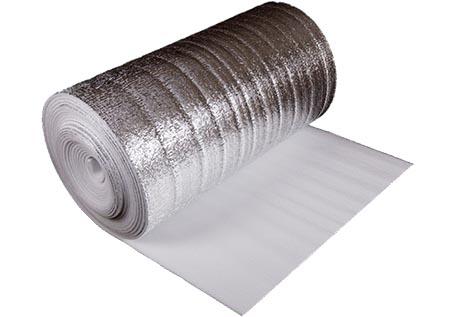
- Styrofoam and foil.The combination of these two materials gives a very good effect: it smoothes well all the unevenness of the floors, provides excellent thermal insulation, sound insulation, and is resistant to moisture. Such a substrate simplifies installation and is used for rooms with warm floors.
Do-it-yourself floor insulation on the balcony - instructions
The technology of insulating a balcony and a loggia depends on the method of insulation and the used heat-insulating material, so let's start by studying their types and characteristics.
- Passive insulation. Aimed at reducing heat loss. Improving the heat-saving properties of the balcony is achieved by using heat-insulating material.
- Active insulation. Aimed at increasing the amount of heat entering the room. It is connected with the installation of a "warm floor" heating system on the balcony.
The better to insulate the floor on the balcony and loggia
Consider the main options for thermal insulation materials that are used for passive insulation:
Penofol
Soft insulation consisting of two layers: expanded polyethylene and reflective aluminum foil. Thickness - 3-10 mm, which makes it attractive to use when it is not possible to strongly "raise" the floor level.
It is worth noting that insulation of the floor on the balcony with penofol is rarely performed, it is often used as an additional insulation.
Approximate cost (40-50 rubles / sq. M.).
Styrofoam
Rigid insulation, which has proven itself well due to the optimal combination of price and quality. It belongs to the category of non-hygroscopic materials, consists of closed pores that retain heat well. This eliminates the need for a waterproofing film.
Polyfoam has different densities of 15, 25, 35 kg / cubic meter. sheet, as well as different thicknesses from 20 to 100 mm, which makes it possible to perform high-quality insulation with minimal costs. In addition, the very technology of laying foam is more than simple and affordable. Like any rigid insulation, polystyrene can be mounted on logs or without them.
Approximate cost (2560-3200 rubles / cubic meter).
Expanded polystyrene (extruded foam or polystyrene foam)
It differs from traditional foam by a higher density (40, 100, 150 kg / cubic meter), smaller pores in diameter, and the presence of a groove-ridge system, which makes it possible to exclude the appearance of cold bridges during installation.
The thickness of the expanded polystyrene sheet varies in the range of 20-50 mm. The only drawback of foam is a higher price compared to other heaters.
The approximate cost (3500-5000 rubles / cubic meter).
Mineral wool or basalt wool
It belongs to the category of soft insulation, therefore, when installing cotton wool, it is necessary to equip a log and a subfloor. The advantage of soft insulation is that they can be laid in small cracks.
Release form - rolls or mats. Cotton wool has different density and cost. Minvata is hygroscopic and needs protection from moisture, so it can be laid only if the balcony is well glazed;
The approximate cost is mineral wool (400-500 rubles / pack = 5.76 square meters), basalt wool (650-720 rubles / pack = 5.76 square meters).
Expanded clay
Refers to bulk thermal insulation materials. However, its use on the balcony has some limitations. In particular, it is not recommended to use expanded clay for insulating the floor on the balcony and loggia, because it is distinguished by significant weight and significant floor level rise.
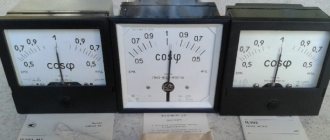
Comparative characteristics of materials for floor insulation are given in the table
Properties of heat-insulating materials for floor insulation on the balcony Characteristics of insulation materials for the floor on the balcony and loggia
When choosing insulation for a balcony, you need to take into account:
- technical condition of the balcony: condition of the floor slab, type and condition of the floor surface, dimensions, surface configuration, maximum height to which the floor can be raised;
- climate, in particular the level of humidity, which limits the use of soft insulation;
- the type of flooring that you plan to use;
- estimated estimate of insulation.
Floor insulation technology also affects the choice of thermal insulation material.
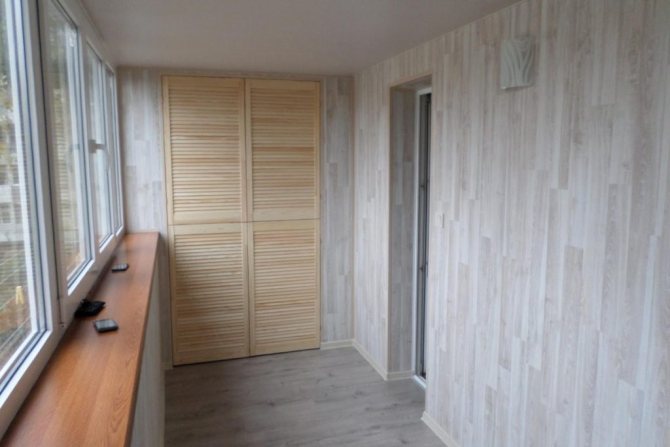
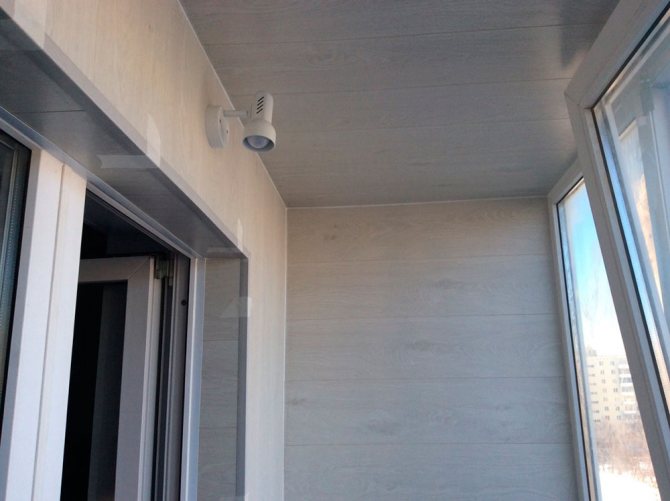
Can laminate flooring be used on walls and ceilings
Laminate is a versatile material suitable for finishing not only floors, but also walls and ceilings. It can be used without any restrictions. Moreover, you can take the same material for the floor and walls, literally from one box - this will be a very successful design decision.
Here are a few more benefits:
- Easy to install. Laying laminate flooring is easy everywhere - you can do it yourself. Even if you are completely new to the renovation business.
- Democratic prices. With good strength characteristics, these panels are much cheaper than parquet or wooden boards.
- The ability to provide good sound insulation and protection from the cold.
- Easy to clean - in order to put the laminate in order, just wipe it with a damp cloth.
- A variety of colors, patterns and textures.
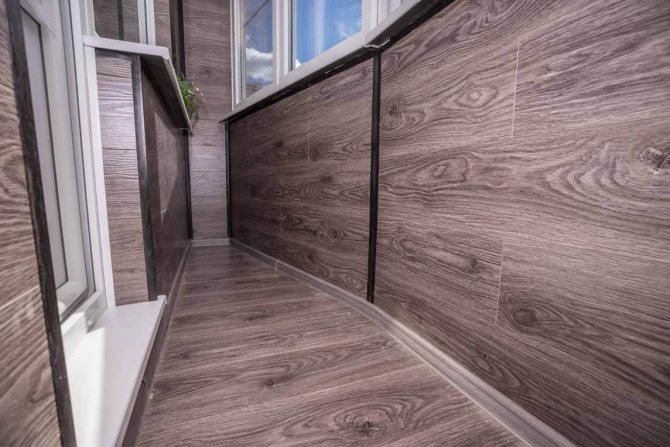
Wall decoration
Buy wall laminate for a balcony, most likely, will not work. The fact is that this material, for its intended purpose, is used only as a floor covering.
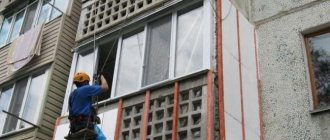
Mounting on the wall is a modern design solution aimed at giving the room a certain uniqueness, chic and color. Certainly, a wide range of color shades, imitating natural wood materials to a greater extent, guarantees wide popularity of laminated panels. For more information on the basics of laying laminate on vertical surfaces, see this video:
In this case, it is not at all necessary to take into account the properties of the boards regarding the strength of the coating; even the thinnest and weakly protected material can be installed on the wall.
Installation methods
To properly fix the panels on the wall, you can use 2 methods. The first is to adhere the laminate to the surface. To do this, carefully prepare the base: align and prime it. If this is not done, the subsequent installation will be complicated by the fact that the connecting seams may protrude, and in the whole structure it will not look aesthetically pleasing.
For uneven walls of the loggia, the optimal solution would be to prepare for the facing system - lathing. The advantage of this method is that there is no need for leveling and priming the surface, which requires additional time and money. The lathing can be made of wooden beams, which have a low cost. This allows us to speak of a low cost of work.
The walls under the laminate must be flat, otherwise the structure may "lead"
In addition, inside it, you can place not only electrical wiring, but also a heater, which will simultaneously play the role of a sound insulator.
After the sub-cladding system is assembled, and the electrical cable and insulation are fixed inside, you can proceed to fixing the laminate to the wall. This can be done using clamps used to fasten MDF panels.
Thus, you can qualitatively finish not only your balcony or loggia, but also the walls of other rooms.
In this case, it is recommended to take into account the property of the material, to absorb moisture, therefore it is not recommended to use it in rooms with high humidity: bathrooms and showers. In all other cases, the installation of laminated boards on the walls is allowed. For more information on another method of installing laminate on walls, see this video:
Self-laying laminate flooring on the balcony is not so difficult. In addition, this requires a small amount of material. But the result will not keep you waiting, after the installation of the skirting boards is completed, and the coating takes on its final appearance, you can enjoy with pleasure the interior view of the room, which has been transformed for the better.
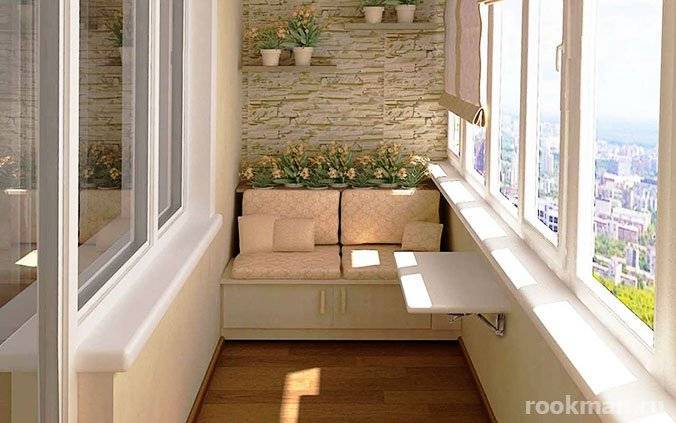
More and more owners of small apartments want to use the balcony as an additional room or storage space for various everyday utensils. However, the decoration of this room has many subtleties and nuances that not everyone knows about. For example, a laminate on a balcony can be used not only as a floor covering - it can be used to decorate walls and ceilings. If you have a glazed loggia, the laminate will be less affected by high humidity and temperature extremes than on an open balcony. Let's figure out how to properly finish the balcony with laminate.
Laying technology
The process of laying laminate flooring is divided into several main stages. Everything is preceded by preparatory work, preparation of tools and materials. The success of the entire enterprise largely depends on this. So you need to be very careful about this.
Tools and materials
Before you start laying laminate flooring, you need to prepare tools and consumables. We will need:
- Electric jigsaw.
- Pencil and ruler for marking.
- Hacksaw with fine teeth.
- Roulette.
- Building level.
- A hammer.
Many of these tools can be found in a closet or in a toolbox - no expensive professional tools are needed. As a last resort, an electric jigsaw is rented. And, of course, you have to buy the laminate itself. Better - with a margin.
Preparatory work
Now about the preparation. To prepare the floor for laying the finishing material, you need to do the following:
- Remove all old floor coverings.
- Level the floor - all unevenness will be a problem. Most often, a cement screed is produced for this.
- After the screed is dry, thoroughly clean the floor from any dirt.
- If the balcony has underfloor heating, they must be installed first.
Special attention should be paid to leveling the surface before laying - the smallest potholes and bumps will significantly reduce the durability of the finishing material. Therefore, all irregularities must be eliminated in advance. The depth of the pits should be no more than 2 mm.
There are some more rules regarding the correct installation of laminate flooring. Namely:
- First, put a backing - this will provide protection from noise and cold.
- Planks are laid parallel to the fall of natural sunlight into the premises. Boards are stacked "checkered", in a checkerboard pattern.
- It is imperative to leave a distance of about 1.5 cm between the walls and the edge of the boards.
- The length of the shortest board should not be less than 0.6 m.
Leveling the floor
After the base has been cleaned and the old coating removed, you can proceed to leveling the floors. It is a careful leveling of the floor that will help protect the coating from wear and tear. So stick to the technology strictly.
As already mentioned, the most popular way is to make a screed. This is done in several ways:
- With a concrete solution.
- With self-leveling mixtures.
Also at this stage, additional insulation is performed using expanded clay with medium and small fractions or expanded polystyrene panels.
If the base is not concrete, but wooden boards, then the alignment is performed using the floor log. Sheets of chipboard or plywood are mounted on them in a checkerboard pattern. Due to this, alignment is achieved.
Laying laminate boards
Installation of the laminate on the balcony floor must be performed in the following sequence:
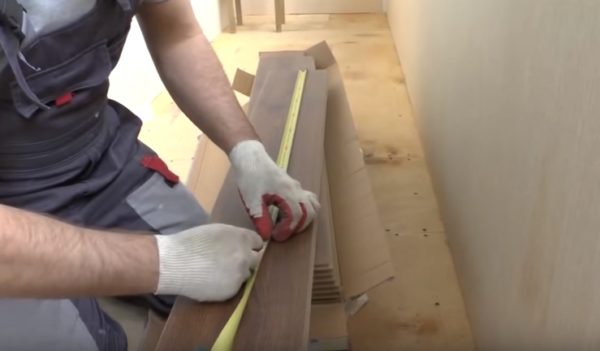
- Measure the distance between the walls in the room using a tape measure, and make marks on the laminate sheets, taking into account the data obtained. Cut the parts so that there is a small gap between the wall and the new floor covering in case the laminate board resizes when it gets wet or heated.

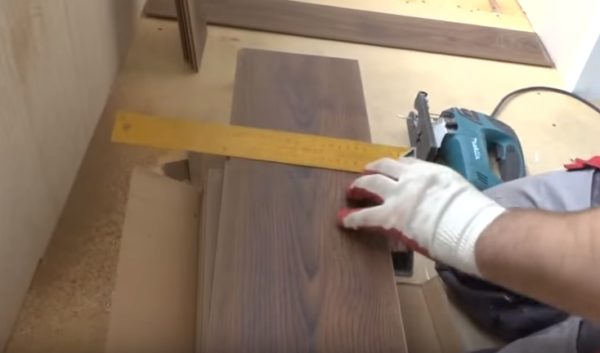
- The cut line of the laminate should be at right angles to avoid unpleasant surprises in the form of a curved coating during installation.
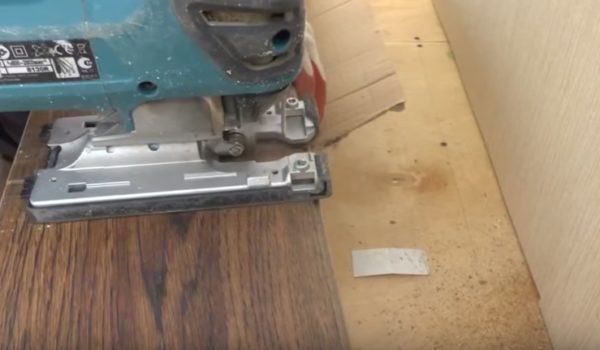
- Cut the parts to the required size with an electric jigsaw. It is recommended to make cuts at a low speed, in order to avoid nicks and chips along the edges of the plate.
- Remove excess debris, lay the substrate on a plywood surface. Since the base is strong and level, a thick backing is not necessary.
- Attach the underlay to the wooden base using double-sided tape or a construction stapler so that it does not move when laying the board.
- Then you can proceed directly to the installation of the floor covering by choosing one of the suitable methods.
- The technology of fastening one part to another depends on how the ends of the products are processed. Most often it is a lock, which, with minimal impact on the lamella, snaps into place and you can start attaching the next element.
- Installation of the last lamella is carried out after preliminary cutting along. If the cut turns out to be a curve, this section can be closed with a plinth and hide the defect.
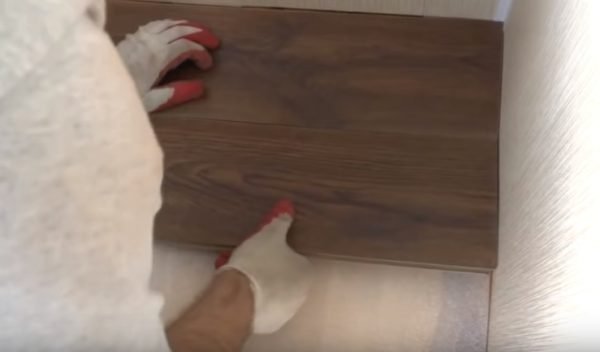
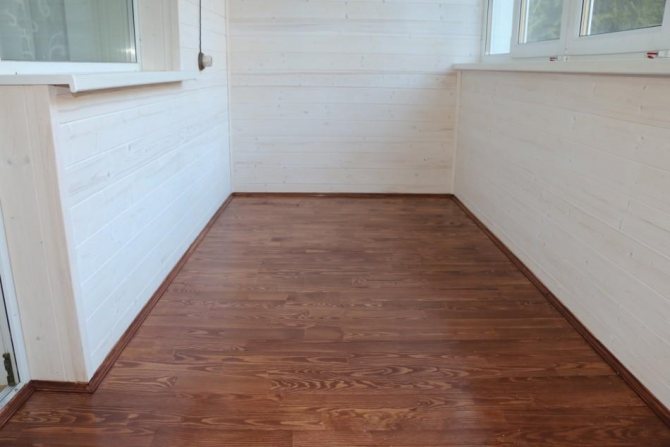
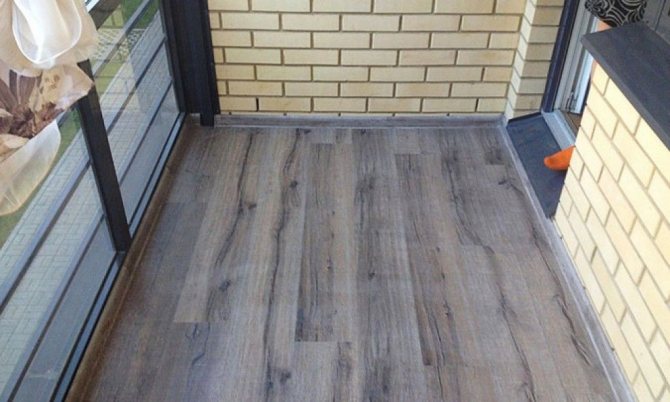
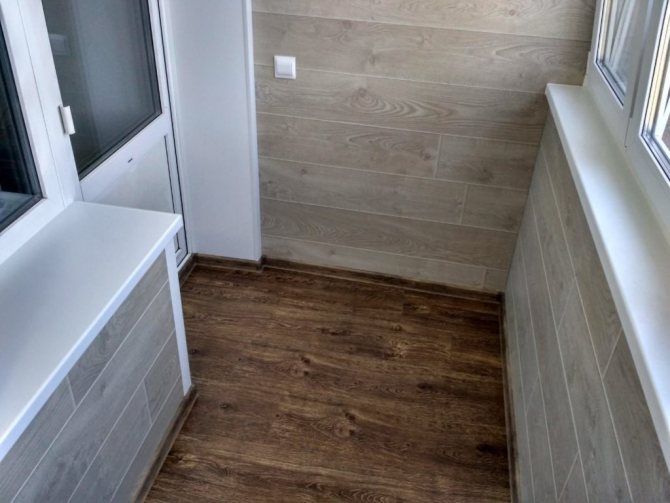
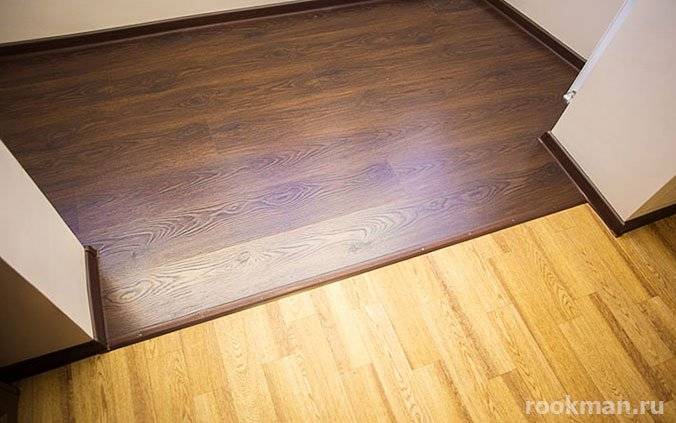
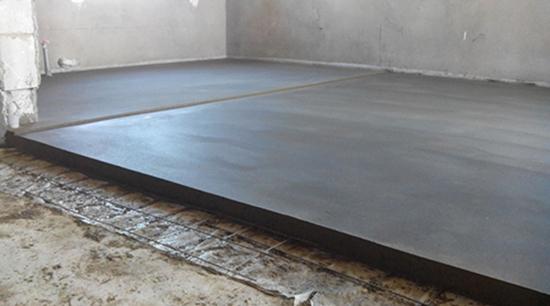
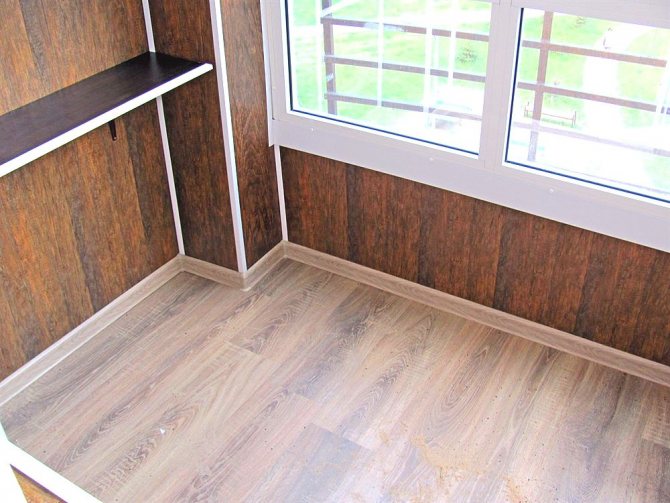
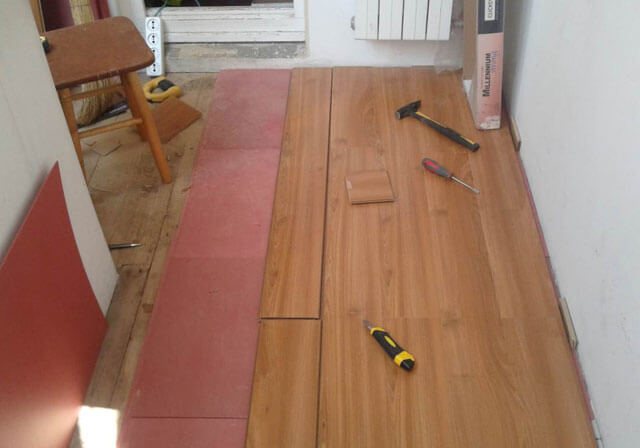
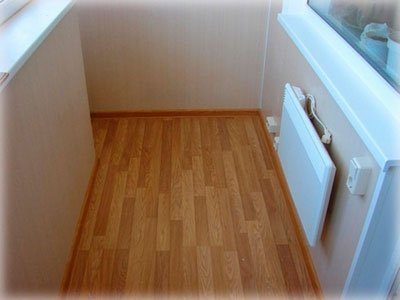
This is what the flooring looks like after finishing work.
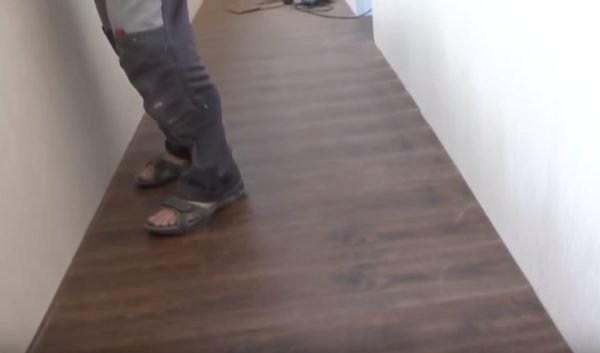
For information on how to properly lay laminate flooring, see our video:
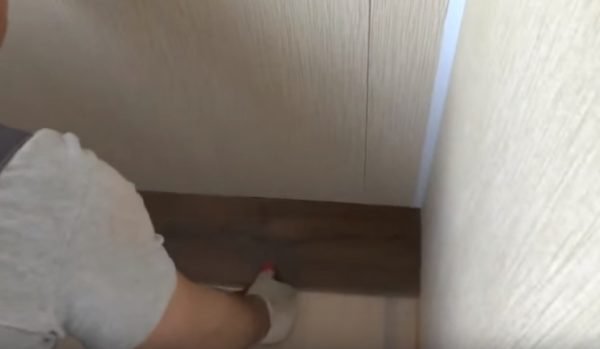
Installation of skirting boards and sills
After installation, you can start the process of installing skirting boards and sills on the balcony made of laminate, which will make the room more comfortable and attractive. For the balcony, experts recommend choosing plastic products that are of high quality and excellent technical characteristics.
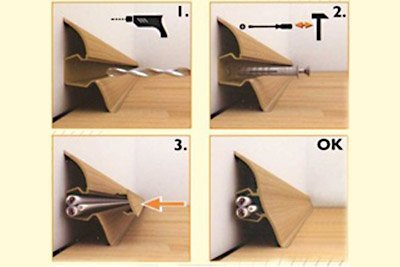
Installation of skirting boards with a conduit for wires is carried out as follows:
- The plinth is applied to the wall after first removing the plug from the plastic channel.
- In several places, a puncher makes holes in the baseboard and wall, where the part is attached.
- Dowel-nails are screwed into the holes obtained to firmly hold the part in the desired position against the wall.
- At the corners, as well as to connect the parts together, special fittings are used.
- The final stage of installing the skirting boards is to insert the plug into the cable channel.
Plastic skirting boards, thanks to their flexibility, adhere perfectly even to uneven walls after screwing in the screws. That is why this type of construction is considered the most popular.
Installation of laminate on the balcony
The first thing to do before laying laminate flooring on the balcony is to level the base. This issue is extremely important, since the laminate on an uneven surface will not be able to last long.
There are two main ways to level the floor:
- Concrete screed;
- The use of self-leveling compounds.
The choice will have to be made independently - each option has its own characteristics. For example, self-leveling mixtures are much more convenient and practical, especially if the old coating was relatively even, but they harden for a very long time, up to a month (read also: "We do the leveling of the floor on the balcony: screed options").
In any case, the matter does not end with leveling the floor, and you need to move on. What is good about laminated panels is the extremely simple installation technology, which is due to the locking connection of individual structural elements: when the grooves and protrusions are aligned with each other, the installation of laminated panels is almost complete.
Naturally, before laying, one should not forget about the need for a substrate, which allows the base layer to be insulated, improves sound insulation and levels some unevenness of the base. There is no reason for concern in this: the substrate fits without problems with your own hands, so you don't have to call specialists.
In order not to face problems in the future, it is worth considering the fact that the laminate tends to expand over time under the influence of temperature, therefore, it is imperative to leave expansion gaps between the panels and any obstacles (walls, pipes, etc.).If you do not leave these gaps, then the laminate will rest against the walls and break, and the amount of damage will be significant.
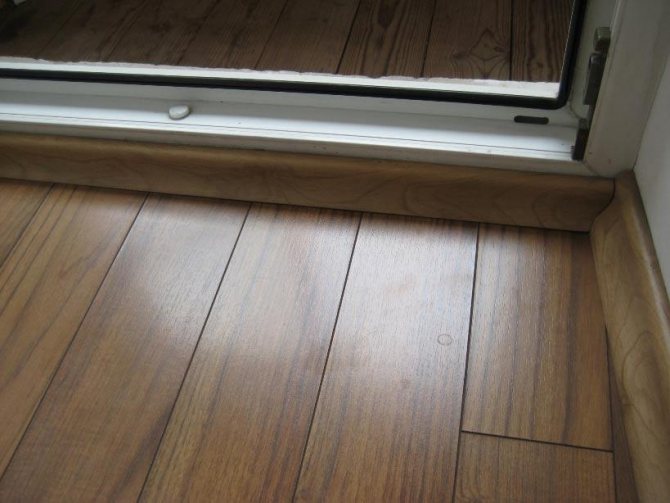
Of course, the gaps left must be masked, for which a plinth and a threshold to the balcony are made of laminate. Such a sill for laminate flooring allows you to give the room a good aesthetic appearance and is intended solely to enhance the visual qualities of the balcony. That is why the main criterion for choosing skirting boards is their compatibility with the laminate.
Rules for the careful use of laminate flooring
Laminate is a strong and reliable material in itself. However, for durability and preservation of a pleasant appearance, it is worth adhering to these simple rules:
- If you use special chemicals for cleaning, they should not be alkaline or abrasive.
- Do not clean the material with steam: moisture has a negative effect on the laminate.
- If scratches or dents appear on the boards, they are removed with a special paste. This will not worsen the appearance - the paste is chosen to match the color of the main material.
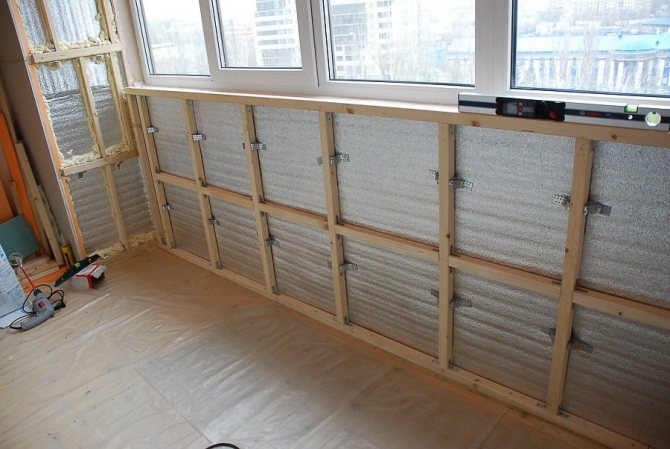
Insulation of the floor with mineral wool
I hope you have made your choice of material. Now I will tell you how I use the purchased mineral wool to insulate the floors on balconies and loggias.
Preparatory activities
All work begins with preparation. The ultimate goal of this stage is to prepare the base so that the finishing flooring with an insulating layer underneath is laid strictly horizontally.
To do this, you need to beat off the zero mark. This is done in two ways:
- Using a laser level. I fix the device to the floor and align it so that the air bubble is strictly in the specified position (in the center of the glass). After that, I turn on the device and glue sticky masking tape made of paper along the line that appears on the walls. She will serve as a guide for leveling the floor lags.

Stamping the zero mark with a laser level.
- Using a water level. I put a mark on the wall with a marker. Then I apply one end of the hydro level tube to it. And I lean the second one against the opposite wall and make sure that the air bubble is aligned with the mark. Then I put the risk on the opposite wall.
After that, I repeat the operation so that there is a distance of about a meter between the risks, after which I draw a solid line.
Then, with a tape measure, I measure the distance from the "zero" mark to the floor and determine the highest and lowest points. This is necessary in order to then put wooden wedges under the logs, leveling them.
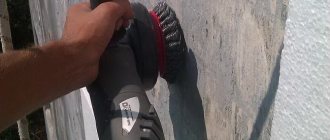
Once I'm done with the markings, I repair the concrete floor surface. I clean large cracks with a perforator, getting rid of the crumbling mortar, and then seal it with cement mortar. I cut small cracks with a grinder, and then fill them with polyurethane foam. And in fact, and in another case, you need to wait until the repair composition is completely dry.
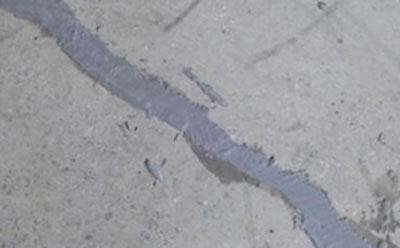
Cracks in the concrete floor are repaired with cement mortar.
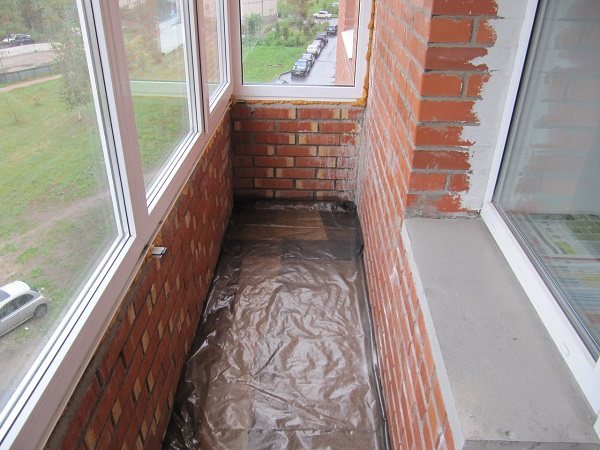
Now it is the turn of the waterproofing. To protect the insulation from moisture, I use roofing felt, which I roll out on a leveled and repaired sub-floor. As a rule, one canvas is not enough. Therefore, I place the sheets overlapping each other at a distance of 10 to 15 cm.
I do not use plastic wrap or other similar material, since when spreading and then moving along it, it often breaks due to small irregularities and pebbles present in the reinforced concrete slab.
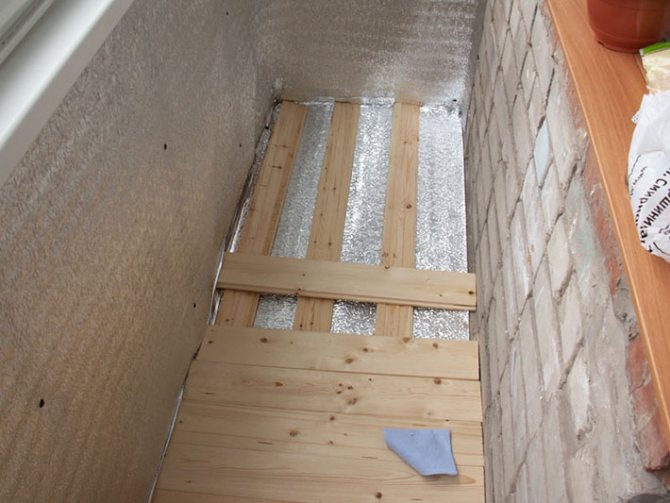
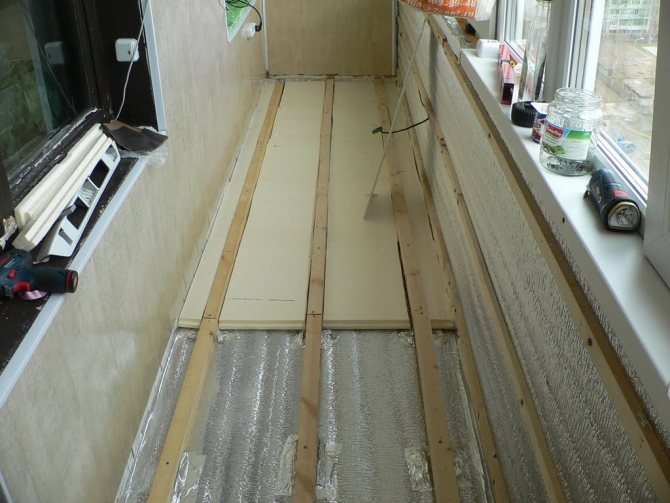
Installation of support lags
After waterproofing, you can proceed to the installation of the support lags. For them, I use dry pine timber with a section of 60 by 40 mm. The height of the lags is due to the thickness of the insulation used.
Before installing the support bars, they must be treated with an antiseptic primer, which will prevent mold, mildew and rot on wooden parts.This is very important, given that too much moisture is often formed on the balcony, which can penetrate into the insulation layer.
Antiseptic for wood processing before installation.
The lags are attached directly to the concrete through the laid roofing material with a step of 60 cm. In this case, the mineral wool will become in the crate without gaps, which can cause the formation of cold bridges.
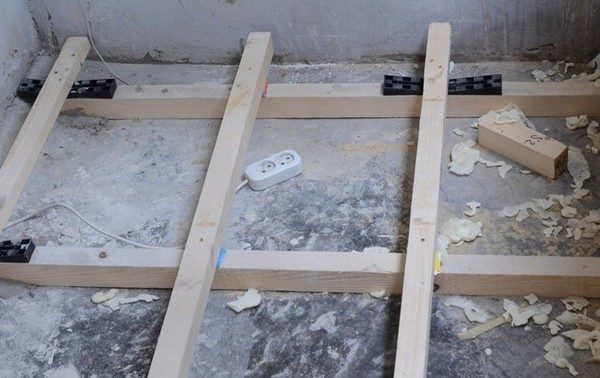
Installation of logs on the balcony for thermal insulation.
The logs are attached to the subfloor using dowels with screws. To do this, you need to drill holes in the bars of the required diameter (in my case, 10 mm) so that the dowel is immersed in the reinforced concrete slab to a depth of at least 2 cm.
Then the hole should be countersunk (deepened with a thicker drill so that after installation the screw head is completely recessed into the surface), and then insert a plastic dowel and screw the core.
The result is a structure whose top point is 20 mm lower than the level of the flooring in the cleanroom. Sometimes it is necessary to lift some sections of the sheathing. To do this, I use wooden wedges, which I then also fix with dowels screwed through the timber.
The extreme logs should be located 10-15 cm from the walls of the balcony. Their length should be such that the cut is 5 cm from the balcony wall. These gaps are needed to compensate for the possible increase in the size of the logs due to getting wet.
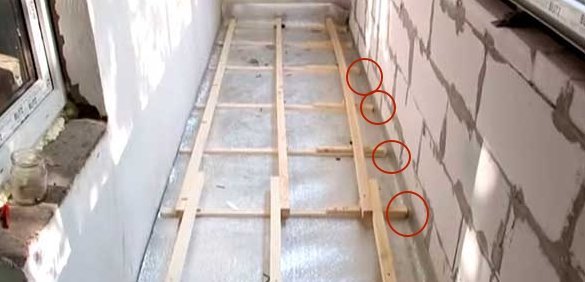
There should be a gap between the wall and the beams to compensate for expansion.
If you install the parts back to back when swelling, the floor covering may warp, which will cause the need to repair or replace the entire insulation layer.
Not only longitudinal, but also transverse parts are installed. The installation step of the short bars is about 50 cm from each other. At the joints, I recommend sawing the bars half the width, and then fastening them to each other using galvanized self-tapping screws.
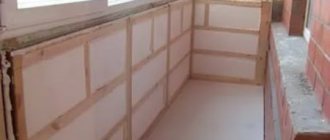
Installation of thermal insulation and flooring
Having finished with the installation of the lags, I proceed to laying the mineral mats. I always act according to the following scheme:
- I cut the insulation plates into parts of the required length and width. If you laid the logs taking into account the geometric parameters of the thermal insulation, then you will have to make the minimum number of trims. Basalt mats are cut using a locksmith's knife.
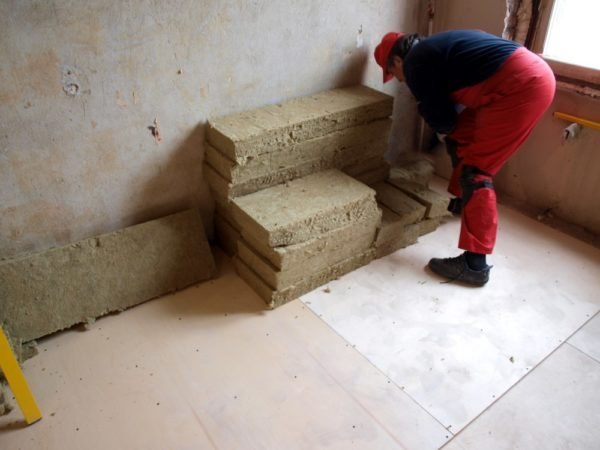
Mineral mats are easy to cut with a knife.
- I put the insulation plates in the crate. To do this, I bend them in the middle and insert them into the gap between the bars. After straightening, the thermal insulation is tightly fixed, forming a minimum number of gaps through which thermal energy can escape.

Laying insulation boards in the crate.
- I seal the seams. Particular attention should be paid to the areas where the insulation plates are joined to the walls. More foam needs to be placed there so that it glues the materials, which together form an airtight thermal insulation layer. Remember that in no case should the insulation be tamped. This shortens the distance between the fibers and reduces the amount of air inside. As a result, the thermal conductivity coefficient of the insulation decreases, and it performs the tasks assigned to it worse.
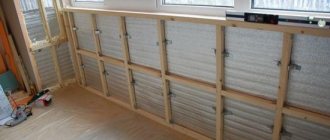
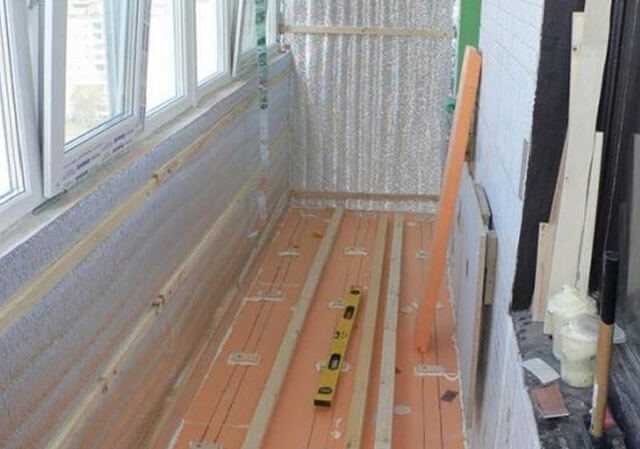
- I put waterproofing material on top of the frame with insulation. I use a vapor permeable waterproof membrane with a metallized outer layer. The latter will act as a heat shield that reflects the energy generated by heating devices inside the room. The membrane is fastened with metal brackets. Shah between them is from 15 to 20 cm.
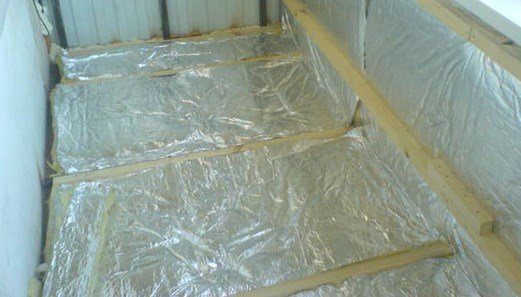
From above, the insulation is protected by a foil membrane.
- I put 10 mm thick sheets of moisture-resistant plywood on the waterproofing film and fix them on the logs with black self-tapping screws. I arrange the plywood sheets so that there are 2-3 mm gaps between them to compensate for the possible expansion of the material. You also need to leave a gap between the plywood and the walls of the balcony.
A backing, such as polyethylene foam, should be laid on the plywood.
- On the plywood, I laid the underlay for the laminate and the flooring itself. It should also be laid with gaps near the walls. Then this gap is masked with a plinth.
The last step is laying the laminate and installing the skirting boards.
At this, the insulation of the floor on the balcony can be considered complete.
The choice of material and floor construction
Do-it-yourself insulation of the loggia floor begins with the question: What kind of insulation to choose?
The most popular are the following thermal insulation materials:
- Styrofoam. The most popular material for thermal insulation, due to its low price and ease of use, they insulate 50% of all balconies and loggias in the country. Its advantages include low thermal conductivity, excellent moisture resistance and low weight, and the disadvantages are fragility.
- Penoplex. Extruded polystyrene foam, a "relative" of polystyrene, which differs from it in increased strength, durability, ease of installation and, as a result, higher cost, is presented in the next photo.
- Mineral wool. It is considered one of the best insulation materials in terms of technical and operational characteristics. It is durable, does not burn, is a vapor-permeable material. The main disadvantage is the fear of moisture, due to which the mineral wool loses its properties, therefore, when using it, high-quality steam and waterproofing is required.
- Expanded clay. Loose insulation with good thermal insulation properties and affordable cost. For high-quality insulation, a large layer is required - from 15 cm. The disadvantages include high hygroscopicity.
- Penofol (isolon). Foil-coated polyethylene foam (photo). To insulate a balcony, its thickness will not be enough, but it is successfully used as a heat reflector and vapor barrier in combination with another insulation, such as mineral wool, making the thermal insulation ideal.
There are two ways to insulate the floor on the loggia with your own hands:
- Warming along the logs. A simple and quick method of installing a floor with insulation; any of the above insulation materials can be used for its implementation. The heat-insulating material is placed in the gaps between the logs, a flooring of boards or plywood sheets is placed on top, as in the next photo.
- Laying insulation under the screed. When choosing this method, you can insulate the floor on the loggia with expanded polystyrene (polystyrene, penoplex) or kermzite. The screed is the best choice when installing a "warm floor" on the loggia, but you need to take into account that you will have to wait a long time for it to dry.
Important! Laying the heat insulator under the screed is possible when the loggia is insulated, which has a reliable overlap. In the case of a balcony, it is better to immediately choose a lagged floor structure, since the balcony slab may not withstand the weight of the screed.