
It is recommended to insulate the loggia, as this will not only get rid of drafts and dampness, but also make it possible to expand the apartment by combining the balcony with the dwelling. To properly insulate the loggia, you need to use high-quality and environmentally friendly material, such as Penoplex insulation boards. If you still decide to insulate the loggia, then when calculating the necessary materials, you need to take into account that you need to insulate not only the parapet but also the side walls, as well as the floor and ceiling. Loggia insulation technology can be different internal and external.
How to insulate the loggia yourself from the outside
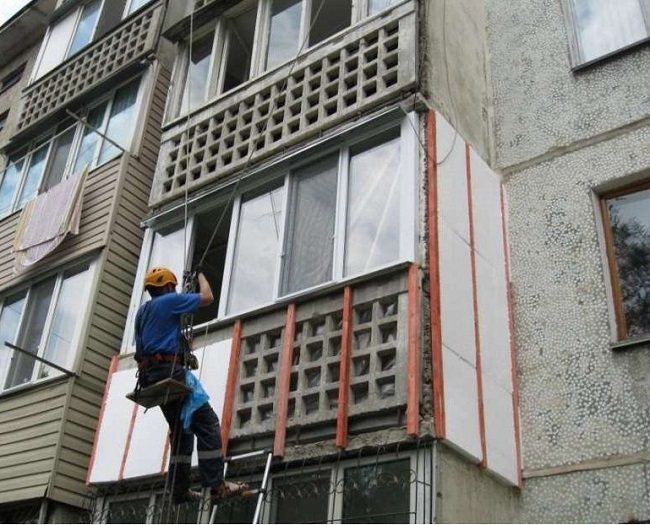
If you insulate the loggia from the outside, then the inner area will remain intact, and with the inside, it will decrease by the thickness of the insulation. However, in order to insulate the loggia from the outside, you will need to purchase climbing equipment and learn how to use it. Therefore, insulation is carried out mainly only from the inside. If you do not have glasses inserted, then first the glazing of the loggia is made, and its insulation is done after. All unnecessary items are removed from the loggia, and the old finish and floor are also dismantled. If there are cracks and chips on the surface, then they must be repaired with mortar. After that, you can think about what kind of insulation is better to buy and in what way you will fix it. The methods of insulating the loggia depend on the type of insulation you use.
Insulation fastening methods
There are two ways to fix the insulation. The first way is to attach it directly to the wall surface using dowels or glue. The second way is to install a heater in a specially mounted wooden or metal niche.
How to insulate a loggia when combined with a room
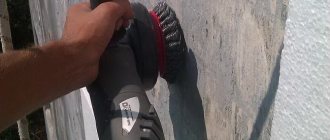
In order to attach the insulation to the surface on the dowel-fungi, it will be necessary to make a small hole in the insulation, drill a hole in the wall and drive a plastic dowel into it. Then you install the dowel-fungus in the insulation and pull it to the wall with a self-tapping screw.
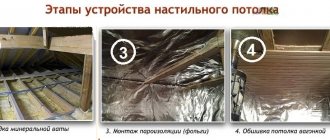
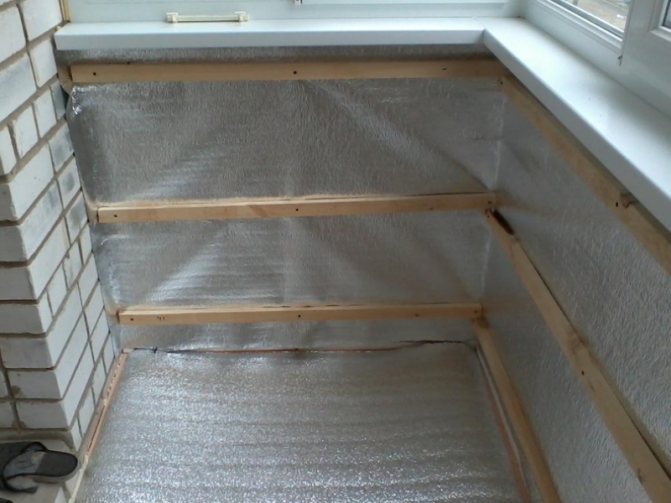
Warming the loggia from the inside with your own hands step by step instructions
To make a frame, you will need to prepare wooden bars with a thickness equal to the thickness of the insulation. The bars must be treated with a special solution against decay. These bars must be fixed throughout the entire perimeter on the floor and ceiling, as well as around the entire perimeter of the parapet. It is necessary to fix a block on the floor that will divide the floor along the balcony into two parts.
How to calculate the thickness of the insulation?
High quality insulation of a balcony or loggia
must comply with fire safety requirements and provide a standard thermal value. This indicator of SNiP is established in accordance with the climatic map of the country.
To calculate the thickness of the insulation approximately, you can use a calculator for calculating on the Internet. In practice, the resulting indicator does not take into account individual conditions, it may not correspond in reality to the normative values. The value of heat conservation is also influenced by the type of material, density, structure, heat transfer coefficient, underlying surface and its material, type of insulation, and other characteristics.
You can make an independent calculation relatively accurately by taking as a basis a standard foam block 10 cm thick.Further, the heat transfer coefficient of the insulation you use must be divided by the foam coefficient and multiplied by 10 cm.The obtained thickness result is sufficient to ensure the specified thermal value. This type of calculation is used for block products. When choosing professional insulation rolls, it is better to use professional services for insulation of a balcony or loggia.
Do you need a refurbishment?
We have already renovated more than 500 apartments, we will be happy to help you too
Find out the cost of repair
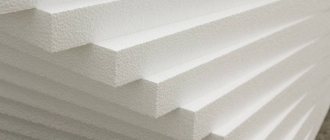
Penoplex
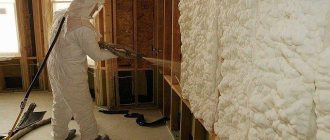
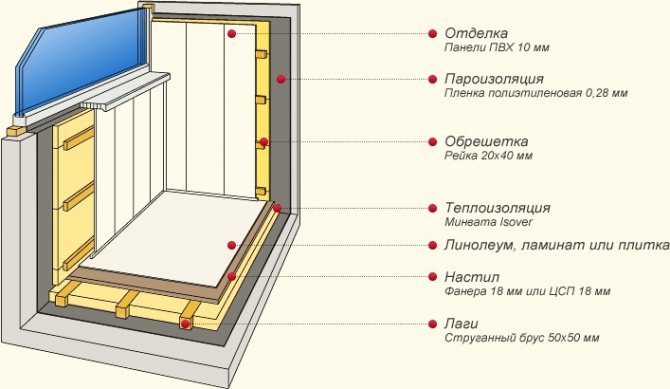
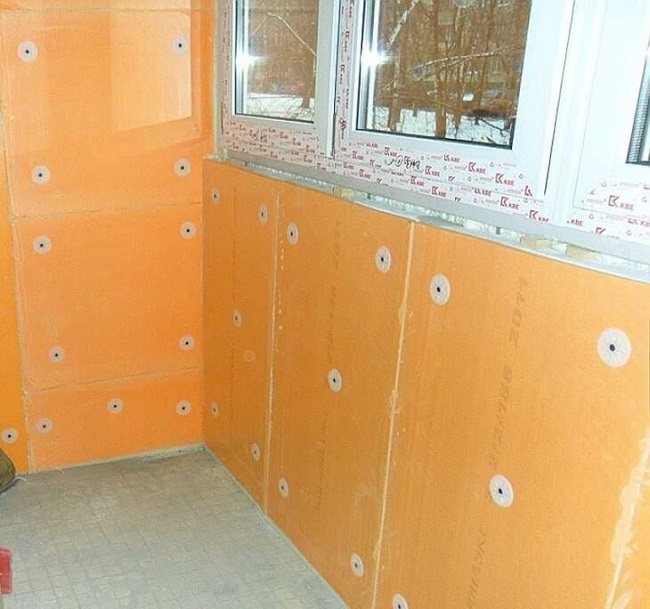
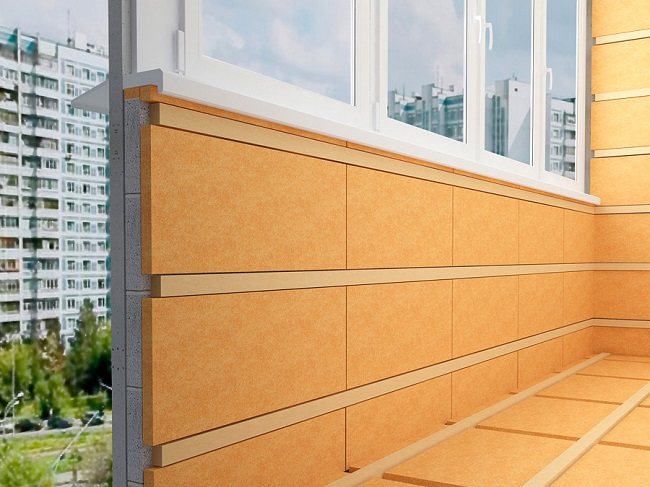
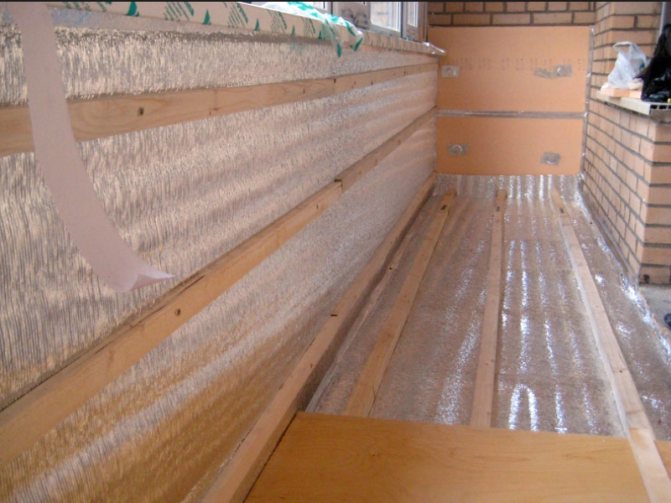
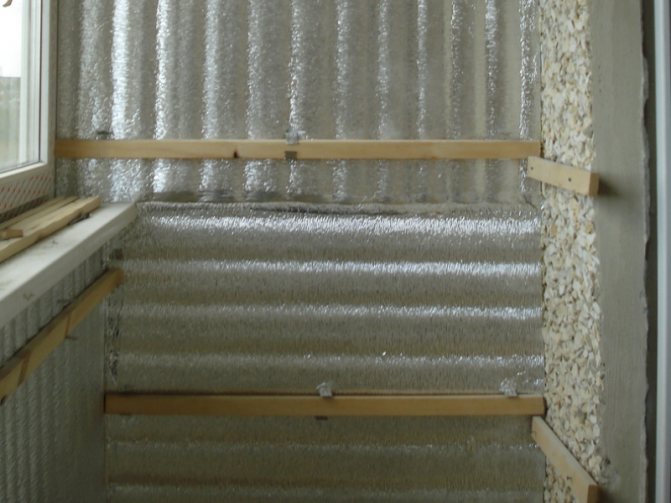
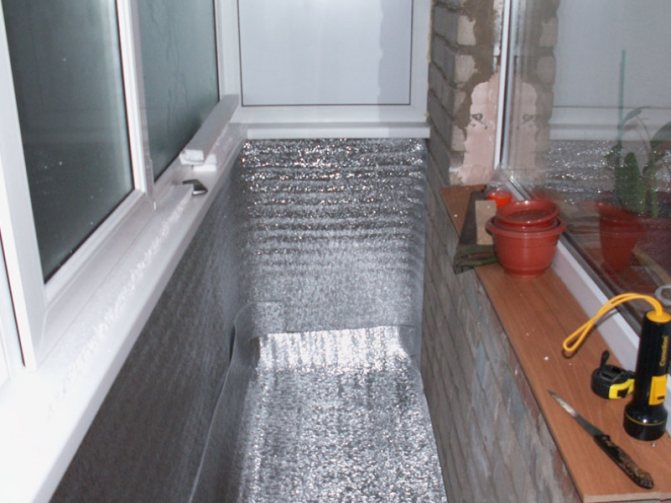
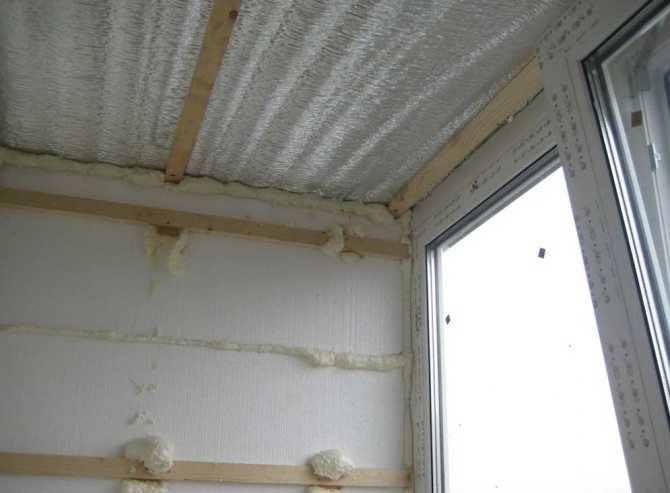
Penoplex insulation is a modern heat-insulating material that has a very low coefficient of thermal conductivity, low vapor permeability and does not absorb water. The required thickness of the foam for insulating the loggia depends on the region and can range from 40 to 60 mm. You can easily insulate the loggia with penoplex with your own hands. First of all, the floor is insulated, then the walls and parapet, and last of all the ceiling. If the new finish is applied in the form of plaster or a cement-sand mixture, then the insulation will need to be attached to the dowel-mushrooms, and if the new finish is in the form of plastic panels, waterproof gypsum board or other similar material, then in order to fix the insulation, a frame will need to be made. First, a layer of waterproofing is fixed, and then sheets of foam are laid on it. All seams between the sheets of insulation and the bars are foamed with polyurethane foam. It is recommended to cover the insulation with a layer of vapor barrier made of foil-clad polyethylene film or thin foil-clad foamed polyethylene, while the foil should look inward. After that, you can attach the finishing material to the bars. Thus, they insulate the ceiling on the loggia, as well as the walls and parapet.
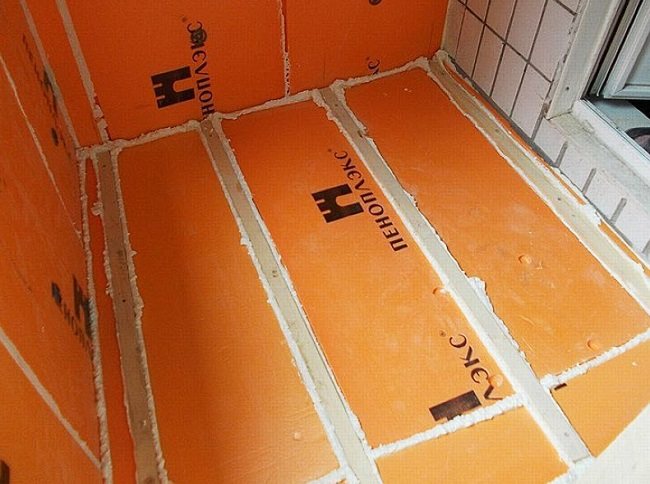
How to properly insulate the loggia from the inside with your own hands with penoplex
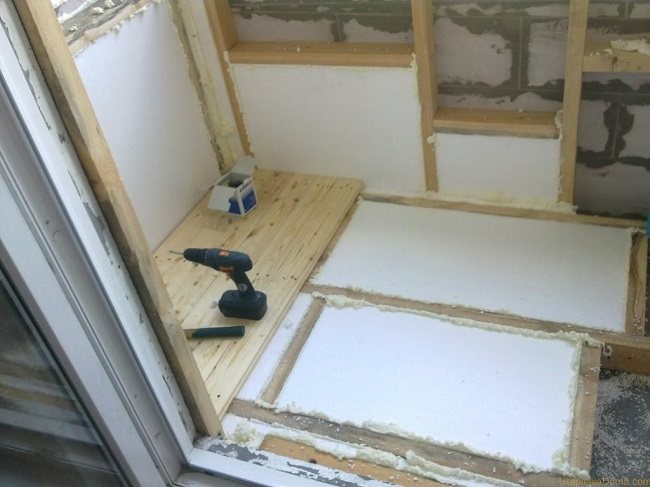
Insulation of the floor on the loggia with penoplex is done in different ways. If tiles or linoleum are laid on the floor, then a reinforced mesh is attached to the bars on top of the insulation and a mortar 4 cm thick is laid. After the screed hardens, tiles are laid on it with special tile glue or linoleum is glued. If the floor is covered with some kind of material, such as boards, chipboard, laminate or other similar material, then the insulation is placed between the beams and covered with material. In both cases, all joints between heaters must be foamed with polyurethane foam.
Materials for warming the loggia
When choosing insulation, start from the following criteria:
- Heat transfer. Estimated using the heat transfer coefficient. This is the main criterion when choosing a thermal insulator, and it affects the amount of material and the thickness of the coating. For example, with a foam plastic thermal conductivity coefficient of 0.052 W, the isolate must be laid in a 5 cm layer.
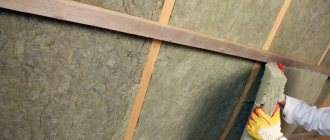
- Density. Lightweight material is easy to install, creates less stress. But at the same time it has a short service life, is not resistant to physical and mechanical stress. Dense material will require professional installation, qualifications to work with it. But at the same time, the high strength of the dense product guarantees wear resistance and a long service life. It is easier to apply an outer finishing layer on it. When designing such surfaces, you can dwell on any design and finish. Dense materials include mineral wool and penofol.
- Functionality. Some types of thermal insulation also provide high-quality sound insulation, as well as steam and water resistance. The service life of all layers of insulation is significantly increased, and the finish retains an attractive appearance throughout the service life.
- Ease of operation, ease of installation. Izolon, mineral wool, penofol, providing high quality, require professional installation, experience, qualifications of the master.
- Useful consumer properties. Traditionally, you can find thermal insulation with qualities such as antifungal character, hypoallergenicity, heat resistance and incombustibility.
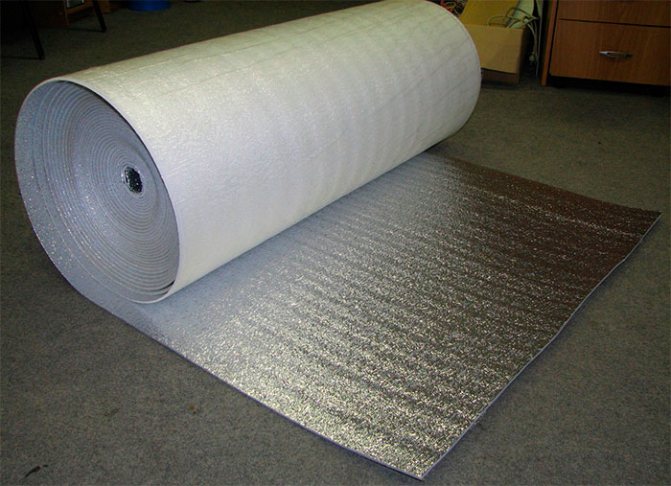
Izolon
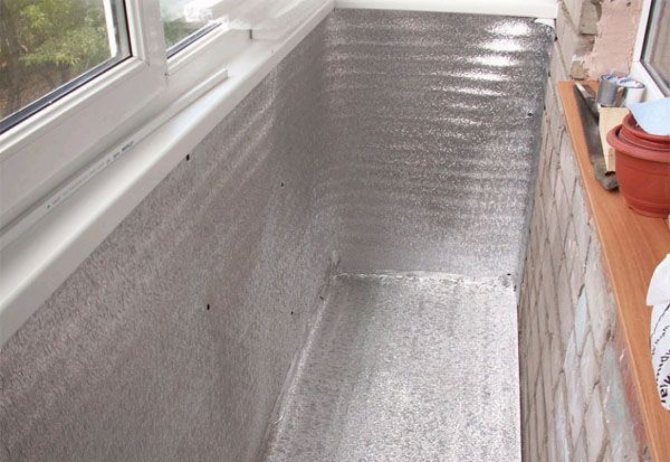
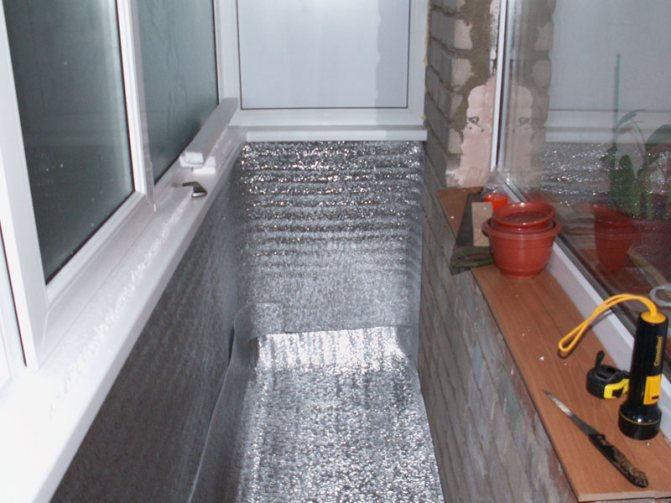
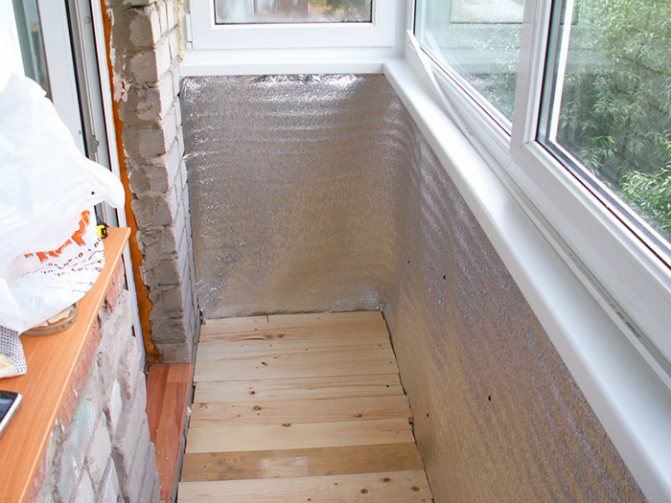
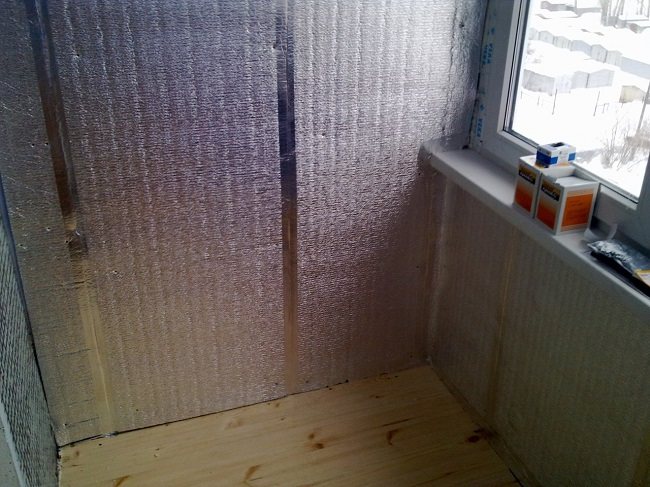
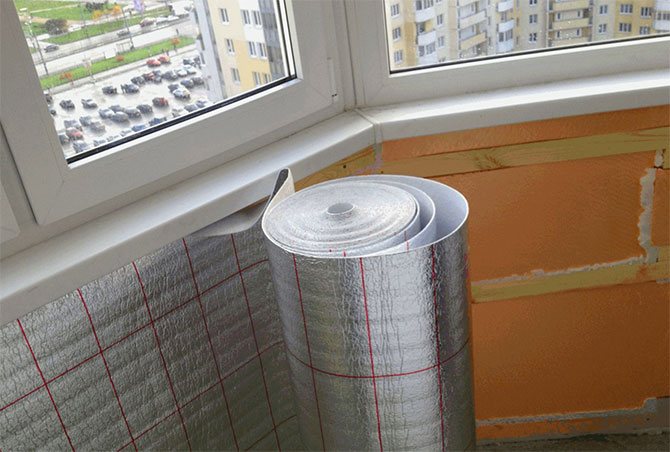
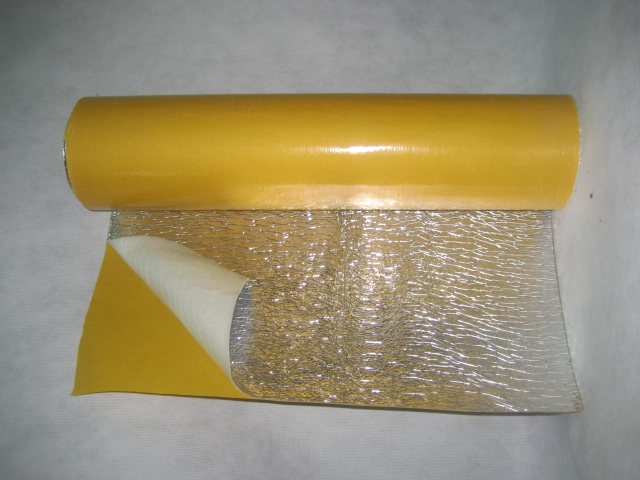
Foil isolon is of two types: cross-linked polyethylene foam in which the cellular structure is closed and uncrosslinked gas-foamed polyethylene foam in which the molecules are not chemically bonded to each other. For insulation, cross-linked polyethylene foam is used, and not cross-linked polyethylene foam is used mainly as a packaging material or as a vapor barrier. Izolon is a very lightweight and flexible material that has good sound insulation properties. Izolon is an environmentally friendly material, durable and, if properly used, can last up to 90 years. Izolon has a low level of thermal conductivity and can be operated at temperatures from -80 to +80 degrees. Izolon with foil can reflect up to 95% of heat. Isolon is produced with a thickness of 1 to 50 mm. To insulate the loggia, an isolon 10 mm thick is used.
How can you insulate a loggia with an isolon
Insulation of the loggia with isolon begins from the walls, then the floor and, last of all, the ceiling. Wooden blocks are nailed to the walls, floor and ceiling at a distance from each other in the width of an isolon. Lay the izolon with the foil side inside the loggia so that the heat is reflected from it and remains inside. All the resulting joints between the Isolon sheets must be foamed with polyurethane foam, and then glued with metallized tape. You can fix the isolon on the bars with staples. Then finishing material is attached to the bars, and boards, plywood or OSB boards on the floor.

Penofol
This material is a polyethylene foam covered with polished foil. Penofol is flexible, lightweight, waterproof and vapor-proof, has good heat-insulating and sound-insulating properties. Penofol can be foil on one side or on both sides, and some have a self-adhesive base. When insulating loggias, Penofol is used in conjunction with other insulating materials, such as foam. To insulate the loggia with foam without foam foam, you will need to use a very thick foam, and in a combined thickness of 40 mm.
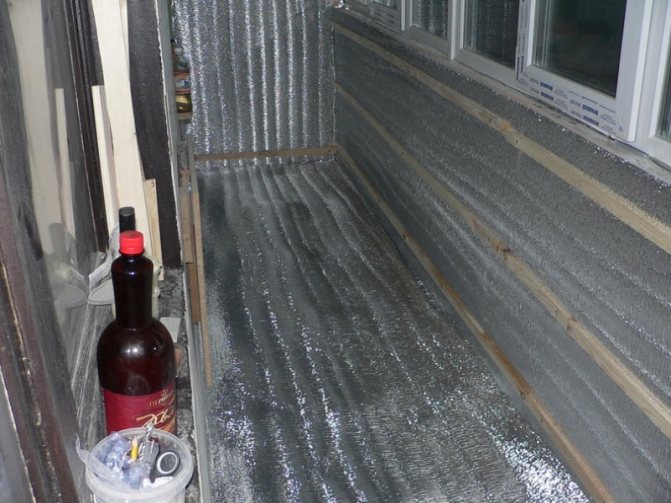
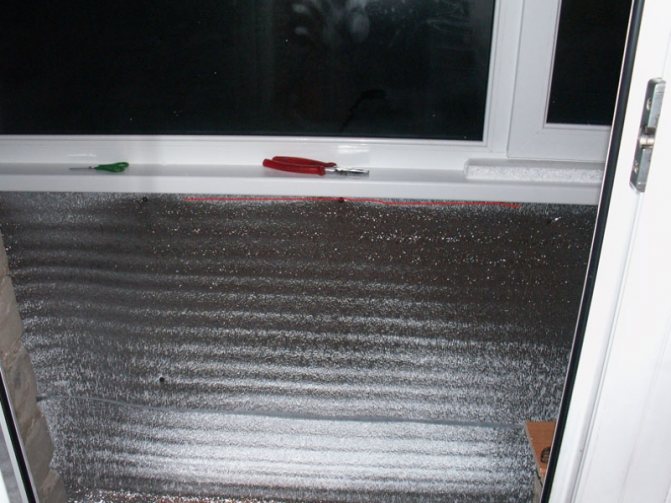
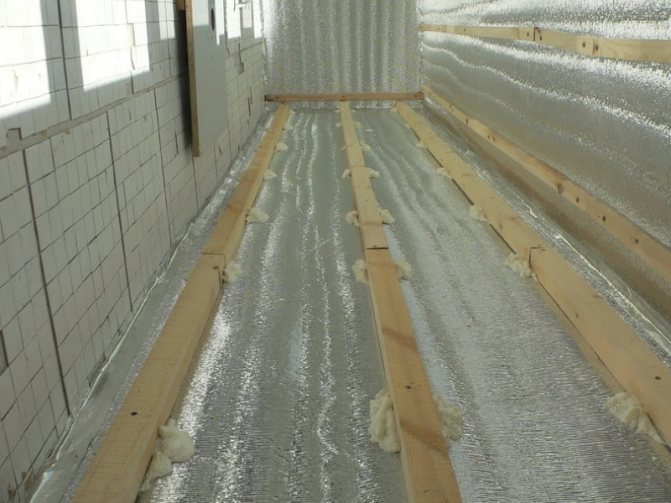
Step-by-step warming of the loggia with your own hands step-by-step photo instructions
First, the loggia is insulated with foil foil 5 mm thick with foil inside and fixed to the bars with the help of staples. Styrofoam sheets are laid on top of it. It is necessary to foam all the seams in the foam with polyurethane foam. On top of the foam, 3 mm foam foil is laid inside the room and is also fixed to the bars with the help of staples. If a joint is formed between the sheets of penofol, it is foamed and then sealed with foil tape. After that, a crate is attached to the bars, which will create an air gap between the insulation and the finishing material. The lathing can be made of wooden slats with a section of 2 by 4 cm. The laths are nailed perpendicular to the bars every 40-50 cm. When insulating the floor on the loggia with your own hands, you do not need to do the lathing. On the floor, you can lay bars with a larger section so that a gap of at least 1.5 cm is created between the insulation and the flooring. Having laid the insulation on top, it is closed with plywood or boards on which you can then lay, for example, a laminate.
How and what is the best way to insulate the loggia?
After waterproofing the base, the insulation is fixed on it with suitable fasteners, a vapor barrier is laid, securing it with a construction stapler. After that, the finishing material is laid. If the floor is poured with concrete, first of all, expanded clay is laid. The solution is distributed over it, carefully leveling the coating. Finishing materials are laid on it. Under the topcoat, you can install a warm floor in rolls. It will make the room warmer.
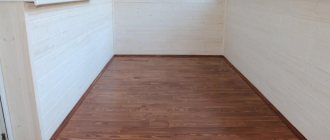
For the installation of a wooden floor, first place guide joists, then a heat insulator between them. Chipboard or a board is laid on the logs.Chipboard is chosen if it is planned to mount linoleum or laminate on it. When laying the laminate, a substrate is laid under it. Upon completion of the wall and floor decoration, plinths are installed to cover the joints of the finishing materials.
The ceilings are insulated, like the walls, the floor. In the absence of a ceiling, the roof is pre-assembled, the ceiling is equipped.
Whatever type of balcony insulation you choose, by completing it, you will make the apartment warmer and increase the usable space. On a warm loggia you can relax in any season. Different materials have similar performance properties. They differ in price and thickness. It is not worth saving on heaters. You can combine different materials, for example, cover the penoplex with an isolon with a foil surface. Follow the installation techniques exactly and choose the right heat insulator. Then you will create a comfortable microclimate on the loggia for many years.
Expanded polystyrene
This material is very similar to Styrofoam. However, this is an environmentally friendly material that has such advantages as durability, lightness, low thermal conductivity and good sound insulation. The loggia is insulated with expanded polystyrene with plates from 40 to 60 mm thick, depending on the region.
How to properly insulate a loggia with your own hands step by step photo
First, the waterproofing of the loggia is laid from the inside, that is, a waterproofing material, such as a polyethylene film, is laid on the surface of the walls, floor and ceiling. Then they begin to lay the sheets on the ceiling, then on the walls and, last of all, on the floor. Having laid all the sheets, you need to foame all the seams with polyurethane foam, which does not contain toluene, which can dissolve polystyrene foam. A vapor barrier layer must be laid on top of the expanded polystyrene; foil-clad polyethylene film is best for this. It is recommended to glue this foil directly to the expanded polystyrene with polyurethane glue. All seams on the vapor barrier must be sealed with foil tape. After that, you can start finishing.
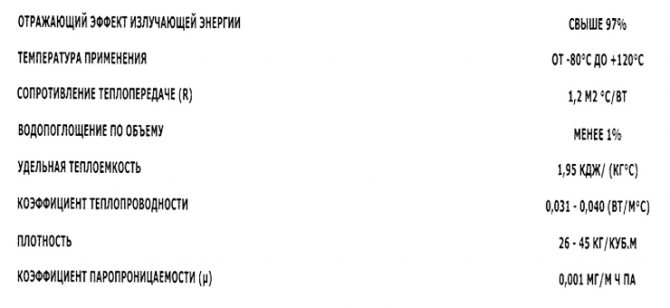
Advantages of foil insulation
The structure of foil-insulated sheets
The advantages of insulation include:
- elasticity;
- hygiene;
- ecological cleanliness;
- ease of installation and machining;
- almost complete absence of water absorption;
- high thermal insulation performance;
- light weight;
- excellent sound insulation;
- resistance to any chemicals;
- low emissivity;
- high reflective effect.
Due to all the listed properties of foil insulation, it will be possible to perform the maximum thermal insulation of the balcony area.
On a note: Using this type of insulation will also help save money, since the material itself is inexpensive, and you will not need to purchase a vapor-waterproof film.
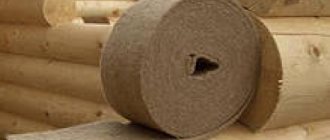
Mineral wool
This material has been used for a long time. Mineral wool is not afraid of fire, is harmless, and has good thermal insulation properties.
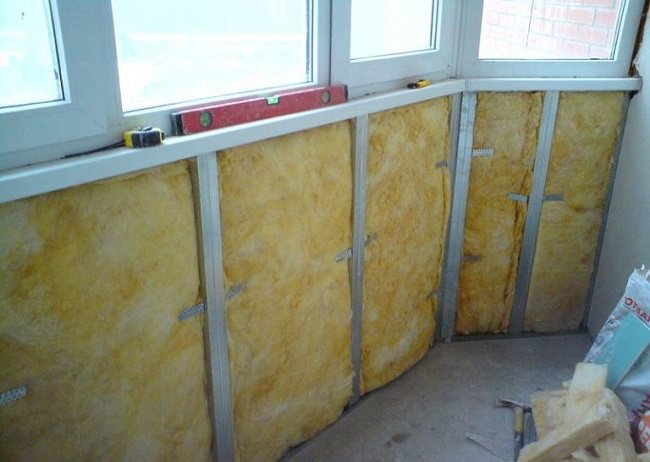
Insulation of the loggia photo
When insulating a loggia with cotton wool, it should only be laid in a pre-prepared frame made of wooden bars with a cross section of 5 by 5 cm. The loggia must be waterproofed when insulated with mineral wool. As a waterproofing, you can use a polyethylene film or roofing felt. Then mineral wool is unrolled in the frame. First, it is rolled out and attached to the walls, then laid on the floor and lastly attached to the ceiling or the space between the slab and the finishing material is filled with it. Mineral wool is best fixed to the wall using dowels. Having made the insulation of the loggia with mineral wool, it is necessary to glue all the joints between the cotton wool with tape.A vapor barrier in the form of a foil-clad polyethylene film is spread over the mineral wool. The foil should look inward. There should also be a vapor barrier on the ceiling, even if the cotton wool is not attached to the ceiling, but is simply crammed between the finish and the ceiling slab. When you finish the correct insulation of the loggia, finishing work begins.