

Material selection and glazing
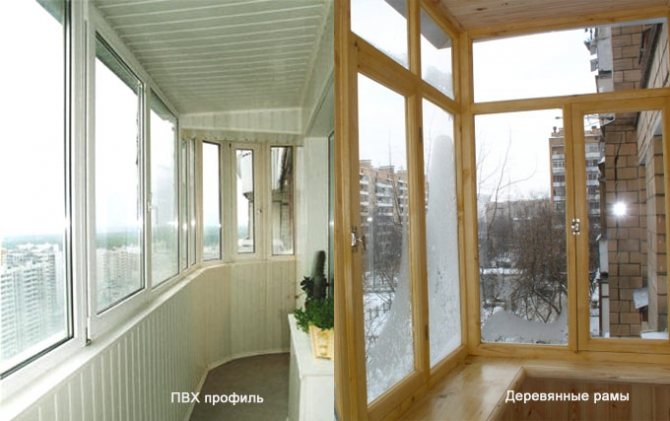
Take into account the weight of the materials: they should be extremely light. If we talk about glazing, it is better to give preference to wooden windows. If your budget is tight, order an aluminum window system: it is not only lightweight, but also relatively cheap.

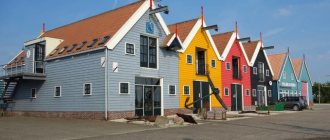
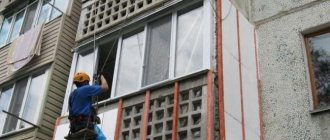
Today, outside glazing services are in great demand. It helps to increase the free space around the balcony perimeter by several tens of centimeters.
Erection of a new frame
Independent insulation and improvement of the Khrushchev balcony must be started with the process of erecting a new parapet. First of all, dismantle all the elements of the old frame. Only the concrete base of the balcony should remain intact.
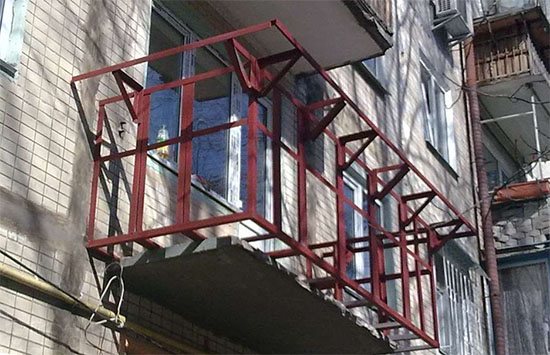
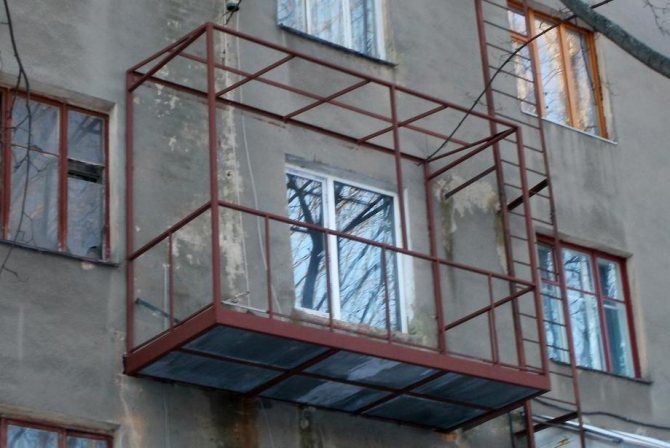
Outrigger beams
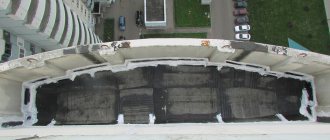
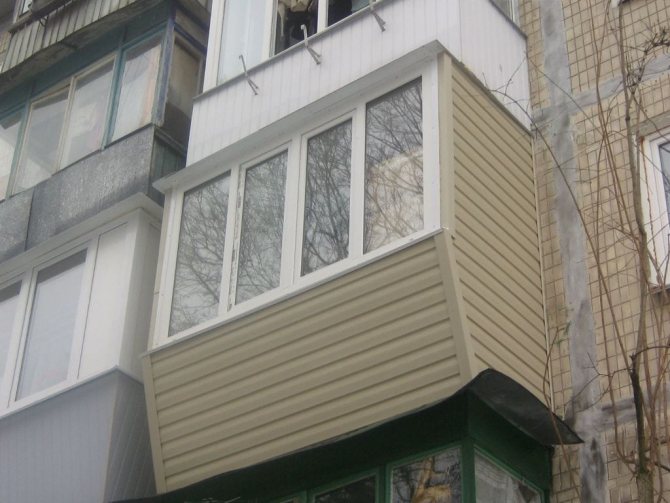
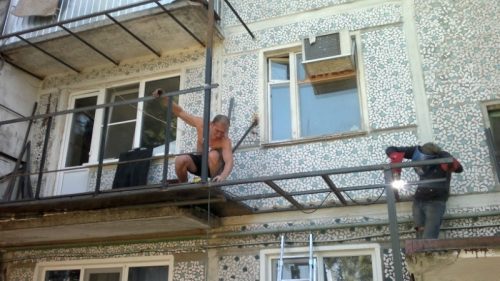
If you want to expand the balcony, then this is done using outrigger beams. As such, as a rule, ultra-strong metal channels are used. The frame is welded from metal corners and securely fastened with dowels to the base of the balcony and the wall of the building. This approach allows you to increase the perimeter of the balcony by 40 cm on each of the three protruding sides.
Balcony with outrigger beams.
However, please note that an extension exceeding 30 cm is already considered a redevelopment, which means that it will require approval from the relevant government agencies. And if you wish to move the central heating batteries along with the glazing and insulation of the balcony, you will need to obtain additional permits.
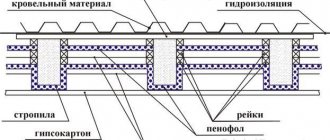
Roof
For a new frame, a new roof is also needed. It is usually erected from metal or corrugated board, which are attached to a metal frame. The frame, in turn, is mounted with reinforced dowels to the wall of the house. Raindrops falling on metal can generate a lot of noise, so make sure your roof is soundproofed.
The legality of glazing a balcony in Khrushchev
In the vastness of the Internet, the notorious bike walks about that a small balcony can be expanded by 30-40 cm without obtaining permission. It is impossible to establish who first put forward such an idea. But she wanders from one article to another with enviable consistency. The options for expanding the balconies are being discussed quite seriously, both on the balcony slab - with an increase in the area, and on the removal of the balcony glazing - an increase in volume.
Until 2006, these issues were really not regulated by law. But for more than 10 years the Housing Code has been in effect in the country, which unequivocally answers the question of the legality of glazing and describes the procedure under which a permit for glazing a balcony can be obtained.
As you know, without high-quality glazing of the balcony, it makes no sense to talk about its insulation with your own hands.
So there you go! Housing legislation, regulations of local authorities adopted on the basis of the Federal Law, requirements of state construction supervision authorities, fire and sanitary and epidemiological services unambiguously interpret balcony glazing as a redevelopment - an action subject to approval and obtaining an appropriate permit.
At the same time, there is not a single normative act in nature, which would provide for the possibility of removing the glazing structure beyond the perimeter of the parapet of a balcony or loggia.
In addition to the direct contradiction of SNiP "Balconies and Loggias", which does not provide for the possibility of violating the integrity of the structure of the loggia (balcony), they also provide for maximum loads for balcony slabs of cantilever or beam types, as well as requirements for pivot or tilt-type glazing elements (balcony windows).
It is possible to comply with them only in those houses of a new layout, in which, at the design stage, the possibility of glazing a loggia was laid (starting with the p44t series). For balconies, Khrushchev is practically unrealistic.
Glazing
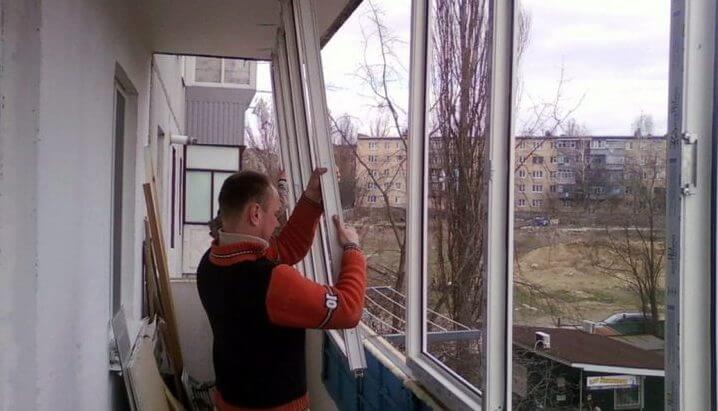
The choice of window systems plays an important role in how effective the insulation of the Khrushchev balcony will be. They can be "warm" and "cold". Before installing new windows, make sure that the top of the parapet is level and strictly in a horizontal plane. The old metal fence can be leveled by welding, and concrete or brick - with a suitable layer of mortar.
Another important point is the collapse of the walls of the building. If it does not exceed 20 mm, then the frames adjacent to the walls are deepened into the groove. If the deviation of the walls from the vertical plane is more than 20 mm, it makes sense to revise the building: perhaps it is in an emergency condition, and then it is generally dangerous to carry out any work on the balcony.
If the balcony is hanging and does not have an upper overlap, then the glazing must be reinforced with pipe supports. They will also be required when the length of the balcony exceeds 4 meters. Pay attention to the correspondence of the horizontal plane of the balcony ceiling. If there are deviations, then a corner is welded to the ceiling, taking into account the level, and the resulting wedge is sewn up with the same finishing materials that are used inside and outside.
How to create a wireframe and expand the space
Thermal insulation of the Khrushchev balcony begins with the creation of a frame. First of all, you need to dismantle all the elements, including the partitions. After that, the installation of outrigger beams is carried out, which are presented in the form of metal channels. With their help, you can significantly increase the internal space of the balcony. When performing such work, it is worth considering some legal nuances. So, according to regulatory enactments, the floor can be increased by no more than 30 cm. Otherwise, problems may arise with the relevant authorities.
For the construction of the frame, metal corners or pipes are used. They are connected together by welding or bolts. Particular attention should be paid to the places where the frame is attached to the floor and walls. This will create a solid and reliable structure that can easily withstand the weight of the finish and other loads. After the installation work, the metal elements should be coated with paint, which will protect them from corrosion.
The next stage is the installation of the roof. As a roofing material, metal or corrugated board is used. In this case, it is worth taking care of the device of the soundproofing layer. Otherwise, during rain or hail, serious noise will be created, which will cause some discomfort while staying on the balcony.
READ MORE: Thermal insulation of a panoramic balcony
Materials and tools required for work
There are several approaches to how to insulate a balcony in Khrushchev faster, more efficiently and cheaper with your own hands. Here is a set of tools and materials we propose to use:
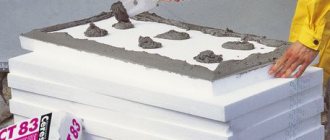
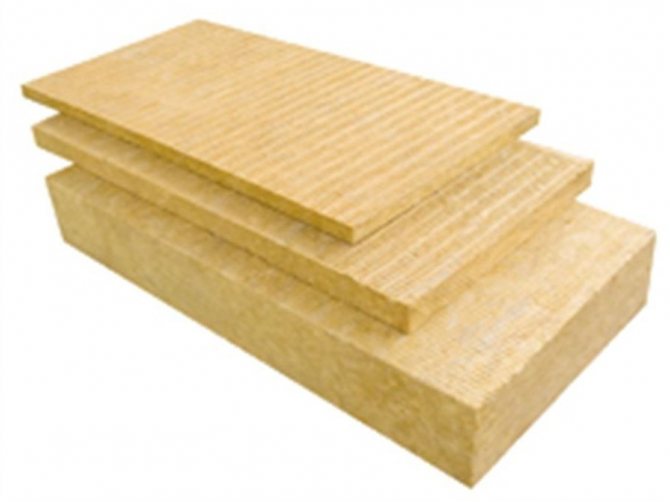
- mineral wool for floor insulation;
- penofol for finishing the ceiling;
- foam plastic with a thickness of 75-100 mm for walls;
- wooden beams or metal profiles for lathing;
- wooden logs for the floor;
- plywood with a thickness of 10 mm or more or OSB boards for arranging the subfloor;
- material for finishing walls and ceilings (of your choice);
- puncher;
- screwdriver;
- hacksaw;
- gun for applying polyurethane foam;
- foam knife;
- roulette;
- building level;
- construction stapler;
- fastening accessories.
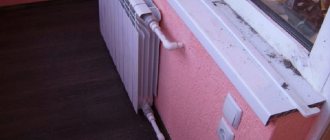
Thermal insulation
Not only the air temperature and comfort in the apartment, but also the ability to effectively use its area in the winter season, depends on how well the balcony is insulated.
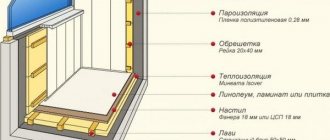
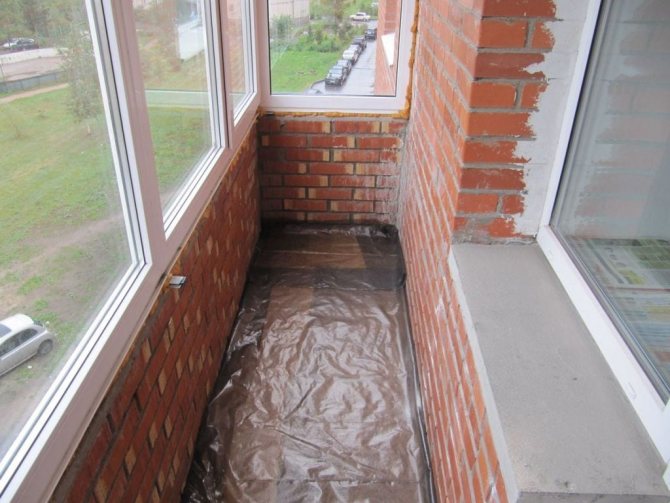
Floor
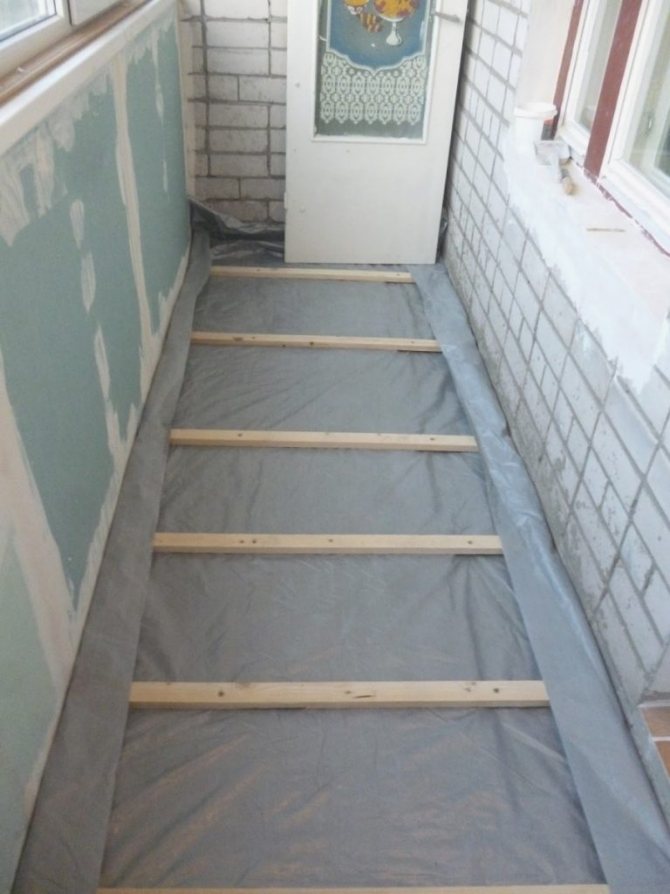
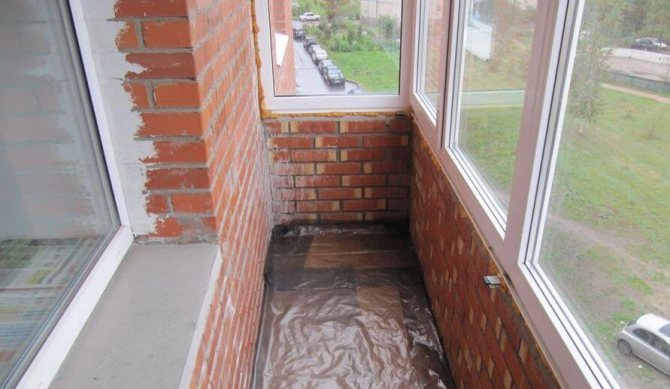
The first stage is laying a waterproofing layer on the concrete base of the balcony. If the balcony is already glazed, plastic wrap is fine.
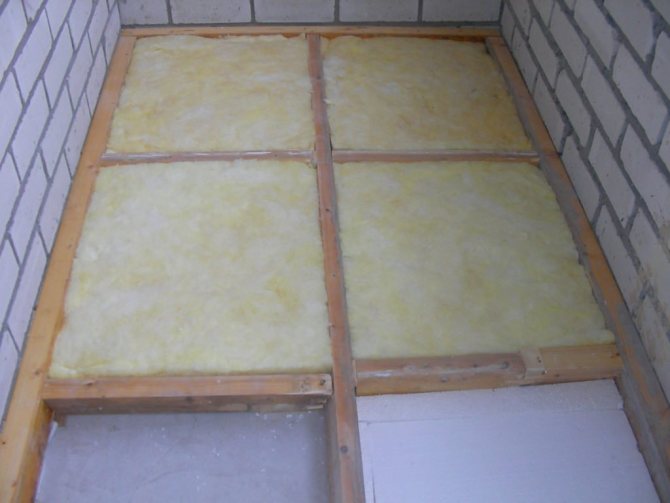
We mount the lags on top of the film. They must be leveled with support bars. Control the process with a building level. Further, insulation is laid between the lags. It should be cut in such a way that there are no gaps between the pieces of the material itself, as well as between it and the lags.
The insulation is covered with a vapor barrier membrane, and then a sub-floor is erected from OSB panels or plywood. The rough cover is attached to the logs with self-tapping screws.
Before you start laying the finishing flooring, finish all the insulation and finishing work on the walls and ceiling of the balcony, otherwise you risk severely staining or even damaging the finished floor.
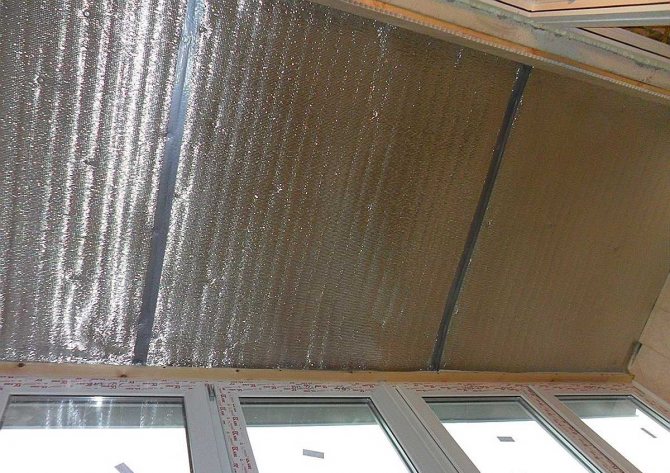
Ceiling
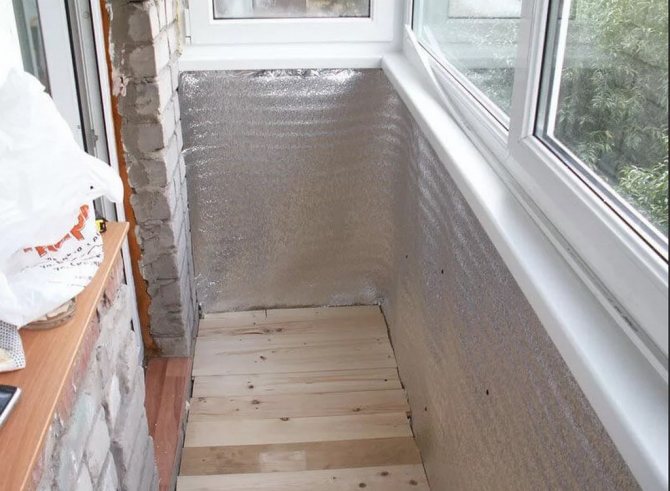
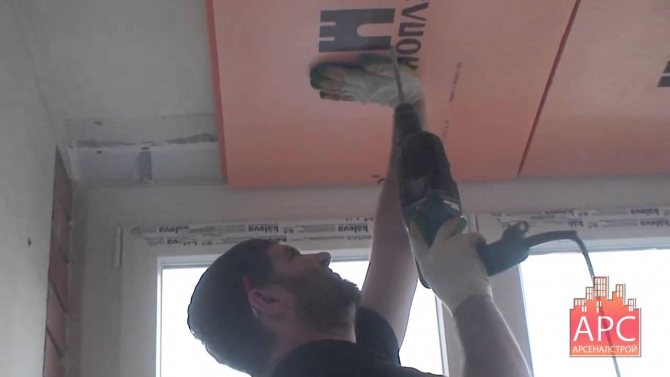
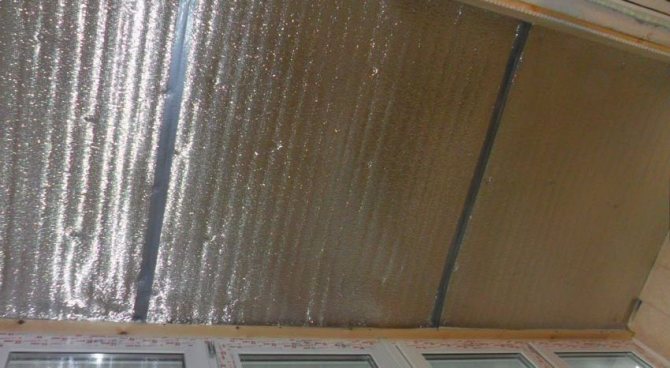
The ceiling of the balcony must be pre-cleaned of old paint, plaster and other finishing materials, primed with an antifungal agent and thoroughly dried. Only after that, you can begin to glue foil penofol on it. This is done with PVA glue or polyurethane foam. Sometimes they do without glue at all: they attach penofol to self-tapping screws with large caps.
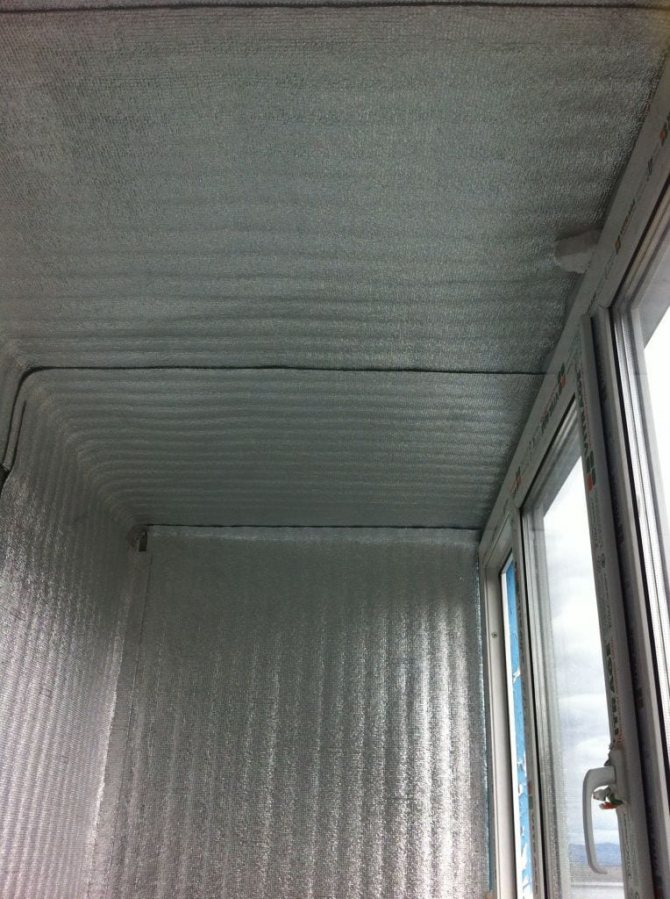
On top of the penofol, a sheathing bar is mounted. Before laying the finishing finishing material, take care of installing electrical wiring for lamps and other communications that will run along the ceiling.
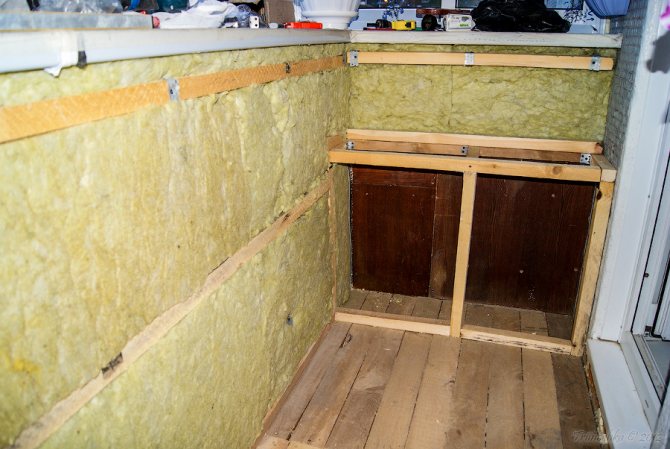
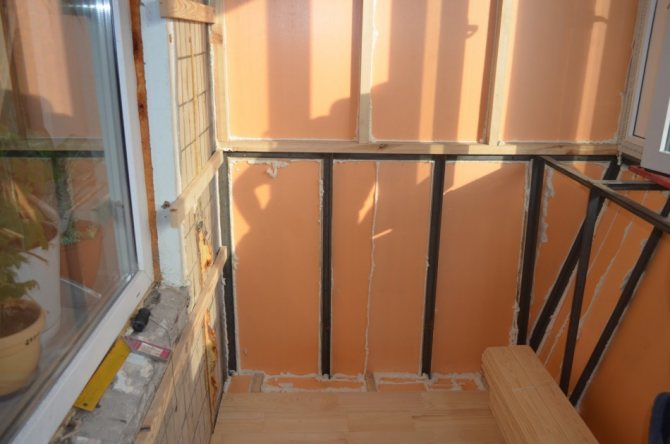
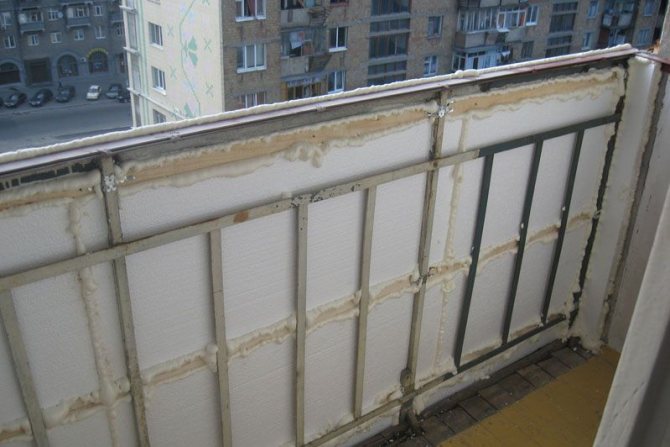
Walls
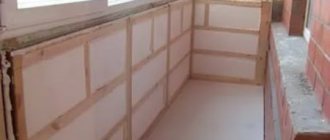
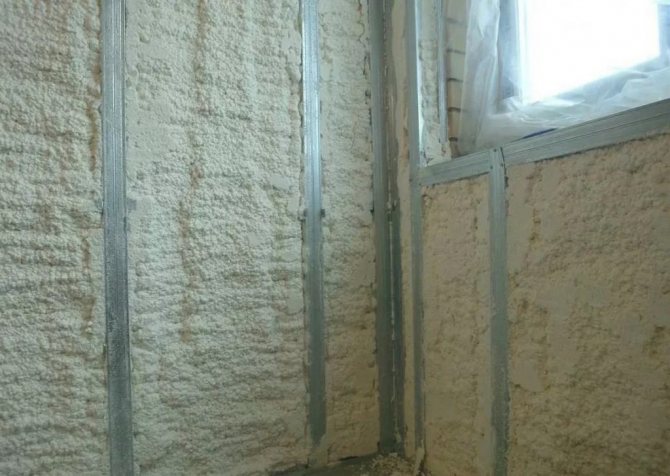
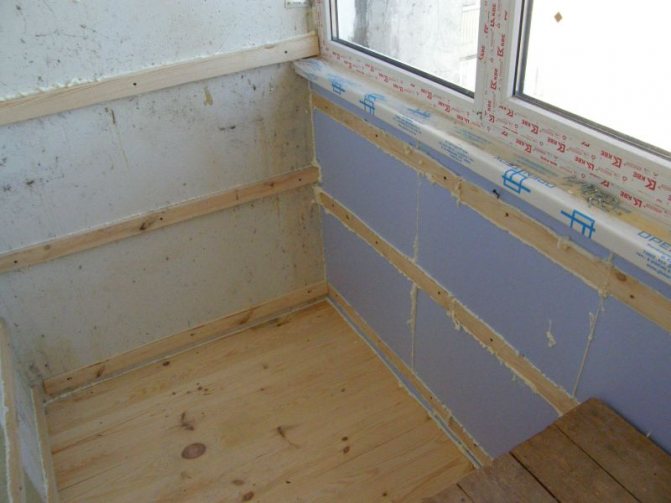
Warming the walls of the balcony is the most laborious process. First, we attach a lathing of 40x40 mm or 50x50 mm timber to the walls. If the thickness of the insulation is greater than that of the timber, installation along the crate of the support blocks is allowed. The step between the vertical elements of the crate is no more than a meter, and between the horizontal ones - about 50 cm. When choosing the level of installation of horizontal bars, you can focus on your own knee, belt and shoulder. It is at these levels, according to statistics, that the internal sheathing of the balcony is most often pushed through.
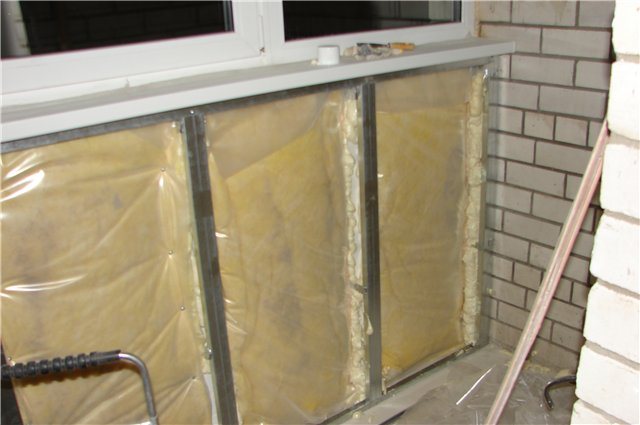
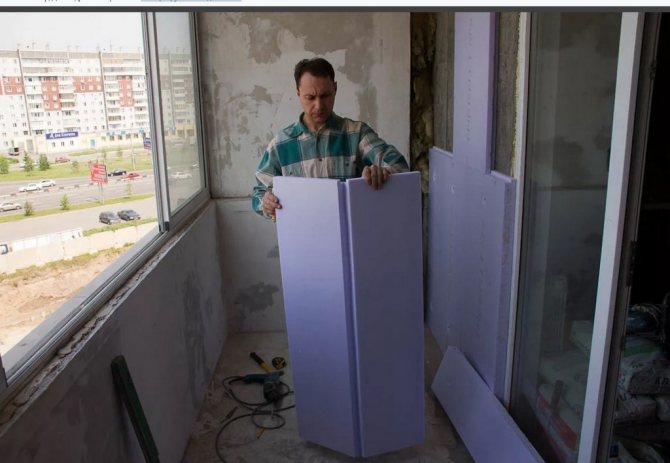
Further, in the niches of the lathing, we glue the foam plastic, tightly adjusting it to size. We use glue for expanded polystyrene or glue-foam in cans.
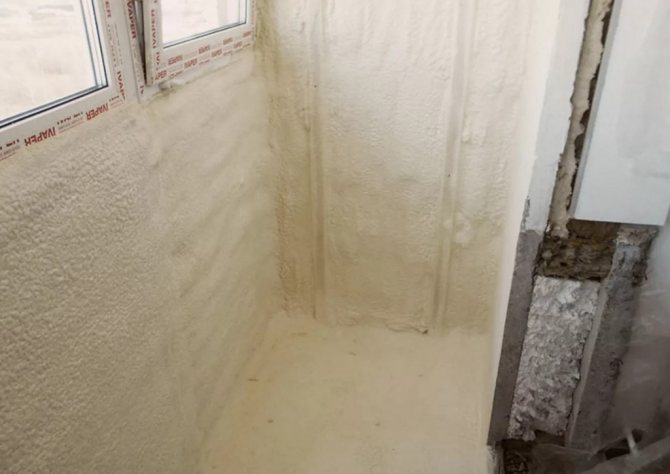
Polyfoam must be covered with a vapor barrier film, which will protect the insulation from waterlogging with condensate.

Warming process
After we have decided on the necessary materials and tools, we proceed directly to the insulation.
Floor work
First, the waterproofing material is laid directly on the concrete base; on the glazed balcony, you can limit yourself to a simple plastic wrap. This is followed by supporting wooden logs with a section of 100x60 mm. They need to be carefully aligned along the plane, for which spacers and wedges are placed under the bars.
Between the logs, insulation is laid on the balcony, but only tightly so that there are no gaps left. Next comes the turn of the vapor barrier film and the filling of the subfloor from plywood 10 mm thick, or chipboard of similar strength, which are fastened with self-tapping screws. The final floor covering is installed only after all work on the ceiling and walls has been completed.
Ceiling works
Before insulating the ceiling, it is required to thoroughly clean the surface of dust and dirt, and then treat everything with an antiseptic composition. Then penofol is glued to the ceiling - foil, roll material. It is fixed with a simple PVA wood glue, but with the obligatory rolling with a roller, which is done in order to eliminate air bubbles. Also, for fastening, you can use self-tapping screws equipped with wide caps, or polyurethane foam. On top of the penofol, a crate made of a metal profile or wooden beams is mounted. Also at this time, you can secretly conduct electrical wiring to the lamps.
Wall work
This is the most serious stage, which begins with filling the lathing, for which a wooden beam with a section of 40x40 or 50x50 mm is used. When buying a thicker insulation, you will need to put special support pads under the crate.
At the corners of the balcony, vertical racks are first installed, after which they are stuffed on the plane of the walls with a meter step. A level is used to level the racks. At the end of these works, it is necessary to fill the crossbars, through which the racks are connected. Step - 50 cm. The easiest way is to nail the crossbars at the height of the shoulders, waist and knees - this will not allow the skin to be pressed through.
Next, expanded polystyrene is glued in plates, but only close to fixation by means of glue-foam, sold in cylinders, or glue specially for expanded polystyrene. In order to keep the material from moisture, it is required to fix a layer of vapor barrier film on top.
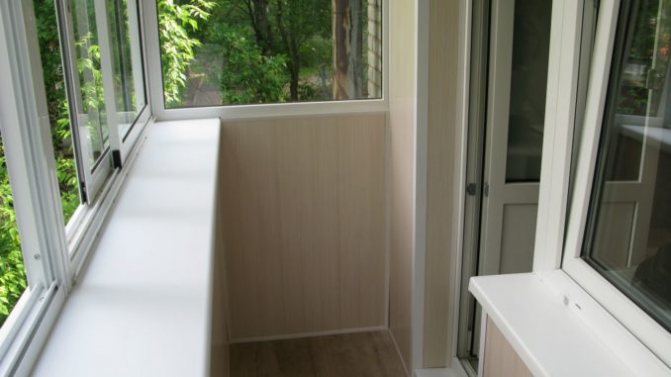
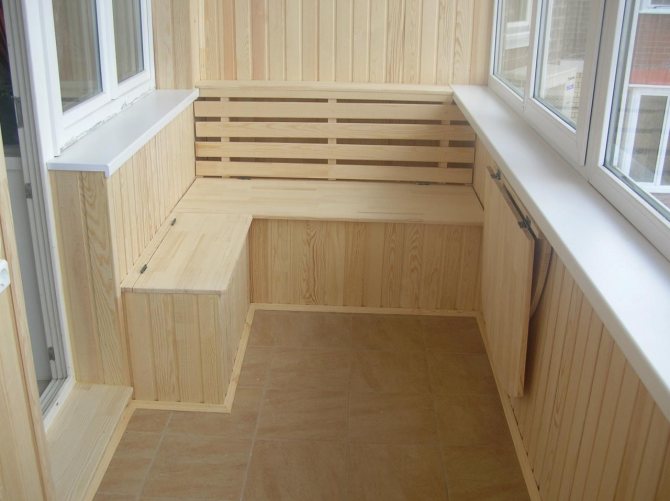
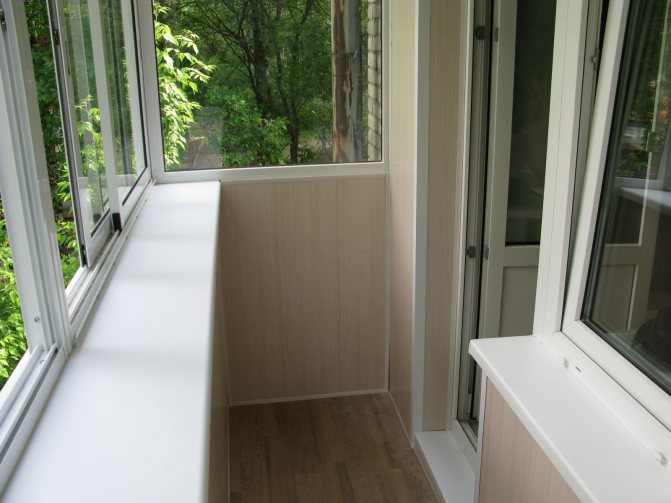
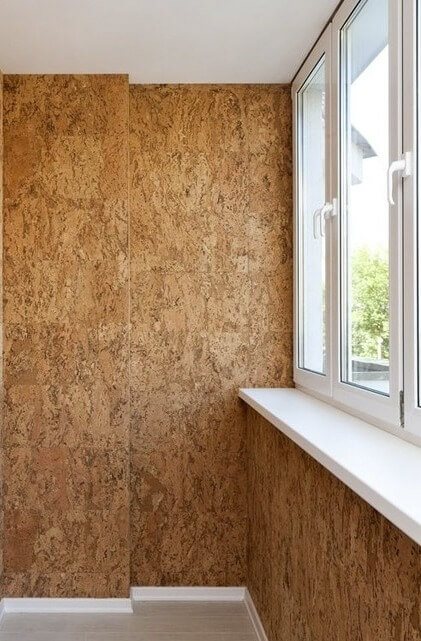
Finishing plating
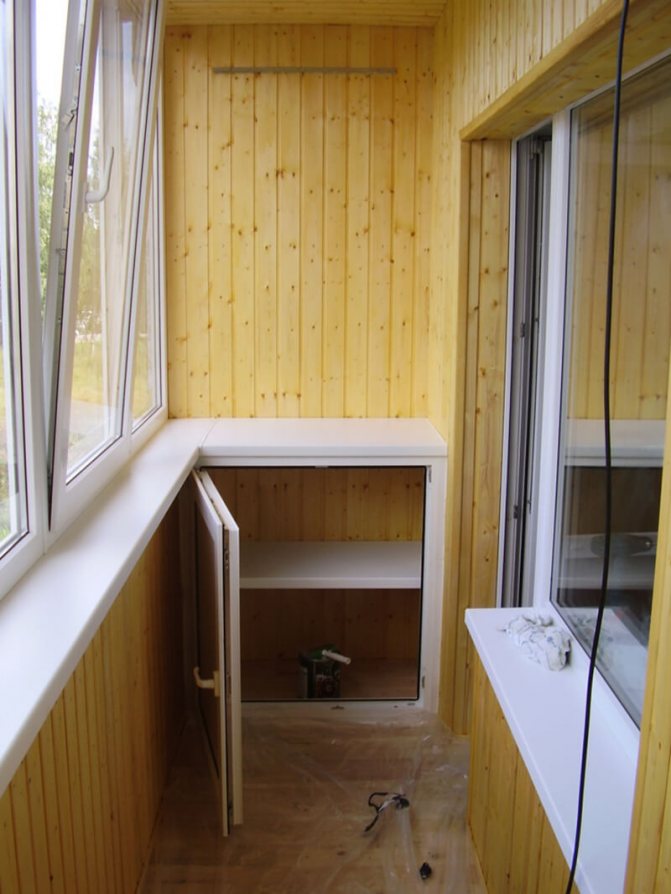
It all depends only on your imagination and, of course, financial capabilities. If you use lining, then it should be mounted on nails or with a construction stapler. If you prefer plastic panels, attach them with liquid nails. MDF panels are also a good choice, but keep in mind: they absorb moisture very much! MDF panels are mounted to the crate with the help of special clearing plates.
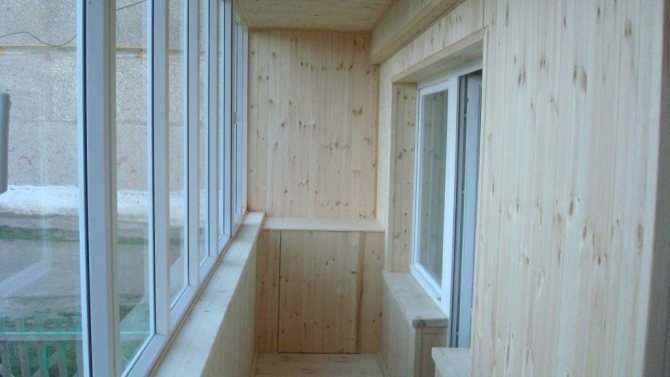
And only at the very end, the installation of window sills, platbands and other decorative elements is carried out. As a result, we get a spacious, beautiful, cozy, and most importantly, a warm balcony!
Work process
How comfortable it will be to be on the balcony during the cold season depends on this type of event. Also, if the thermal insulation is carried out correctly, the external structure can be used to expand the useful area of the apartment.
Floor
Initially, waterproofing must be placed on the concrete base so that moisture does not seep from below. Lags are placed horizontally on it. This is done using a level. Next, the insulation is laid down and covered with plywood.
Ceiling
The surface must first be cleaned of whitewash and paint, if they were there, apply a primer, on which Penofol will be glued in the future. You can fix it with glue or with self-tapping screws. Before installing the topcoat, electrical wiring will be required.
Walls
This process is the most time consuming. Initially, you need to attach the crate to the walls. The step between the bars should be no more than one meter. The correctness of the installation of the battens is checked using a level at different heights.

Further, foam or other insulation can be glued to the base. It is worthwhile to carry out waterproofing under the material so that moisture does not seep from the walls.
Finishing works
Finishing the balcony in Khrushchev should be done last. It all depends on the imagination of the owner of the apartment and his financial capabilities. When using a lining made of wood, it must be pre-treated with mixtures that will prevent rotting and prevent insects from multiplying there.
This material is environmentally friendly, and therefore it is often chosen as a topcoat. If necessary, the surface can be decorated with additional decorative elements, for example, texture. The disadvantage of solid wood lining is that it is quite expensive.