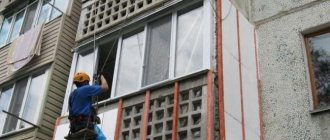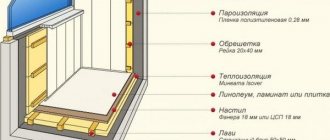
Surface preparation for installation
Penoplex panels are attached only to treated and flat surfaces.
The preparatory stage includes the following operations:
- The surface is carefully examined, after which all dirt, remnants of the old destroyed coating, delamination that will not withstand the load of the insulation are removed.
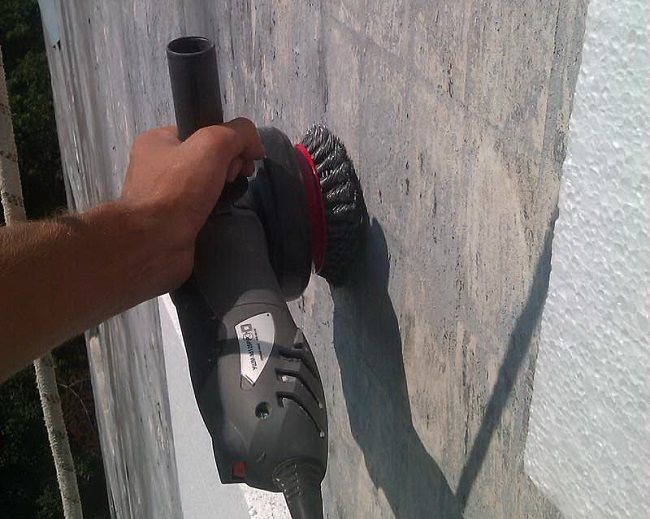
We clean the walls with a metal brush
- Particular attention is paid to surface lesions by mold and fungus. The damaged area is cleaned with a stiff brush, and then treated with a special compound, which is made at home on the basis of copper sulfate or purchased in the retail network.
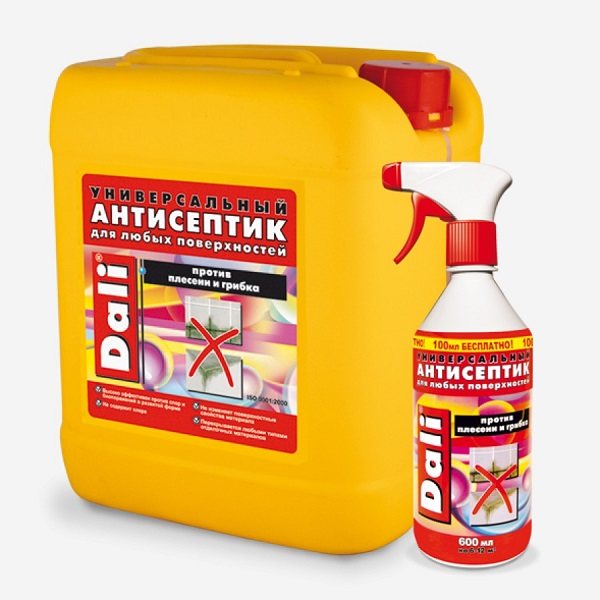
Ready-made formulations against fungus and mold
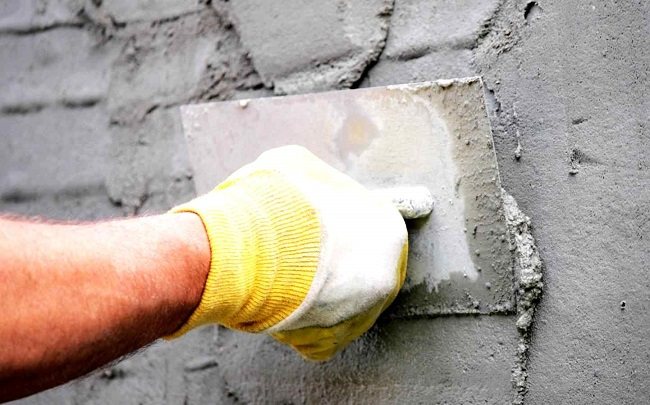
- To eliminate irregularities, a map of problem areas is drawn up. After that, alignment is performed in any of the following ways:
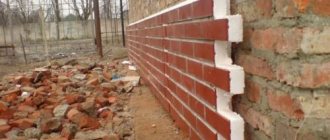
- plastering is a simple and reliable way. The solution is selected individually for the surface material. The insulation can be fixed when the plaster is dry;

- laying slabs of different thicknesses is a time consuming method that requires accurate identification of irregularities. Penoplex brand depends on its thickness. When buying, plates of different thicknesses are selected, but of the same brand;
- the use of shims is a technique that only experienced installers use. Pieces of foam or plastic are used as linings.
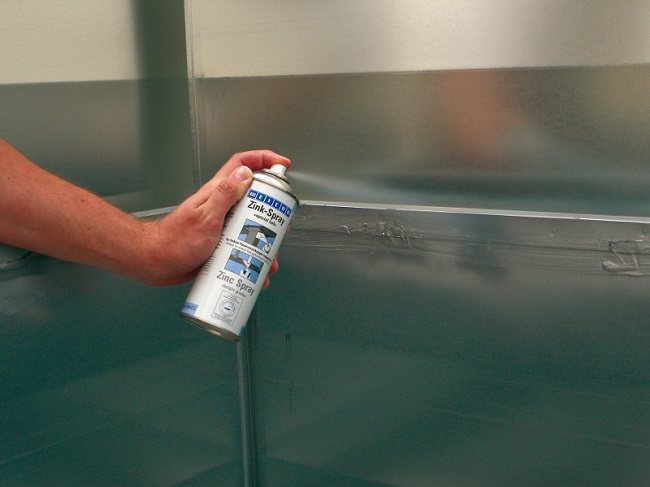
- The metal parts that are planned to be covered with plates are treated with anti-corrosion compounds.
Anti-corrosion compound WEICON Zinc Spray
- Brackets are mounted for equipment that will be hung in the future, for example, an air conditioner.
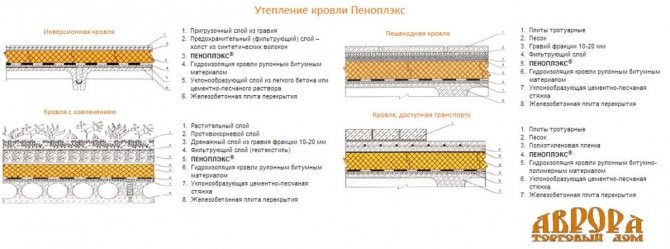
Features of thermal insulation of the attic with penoplex
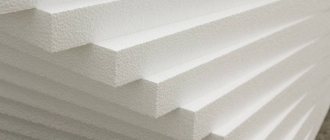
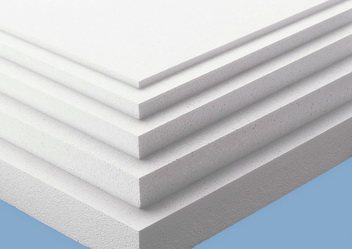
Heat losses through the roof are very high, so the insulation of the upper floor has always been taken seriously. Today, to solve the problem, penoplex is often used - a sheet of synthetic material that has the properties of plastic and foam. It differs from other heaters in good heat-insulating and moisture-repellent characteristics.
It is produced using an extruder - an apparatus through which a liquid billet is squeezed out under high pressure. Foreign products produced in a similar way are called extruded polystyrene foam. Penoplex is a Russian analogue of imported extruded polystyrene foam produced by the company of the same name. The characteristics of competitive insulation are almost the same.
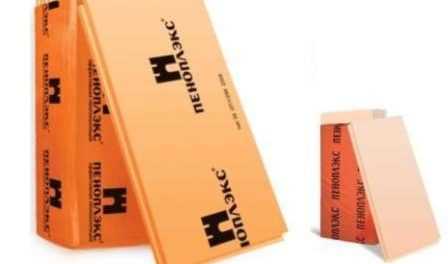
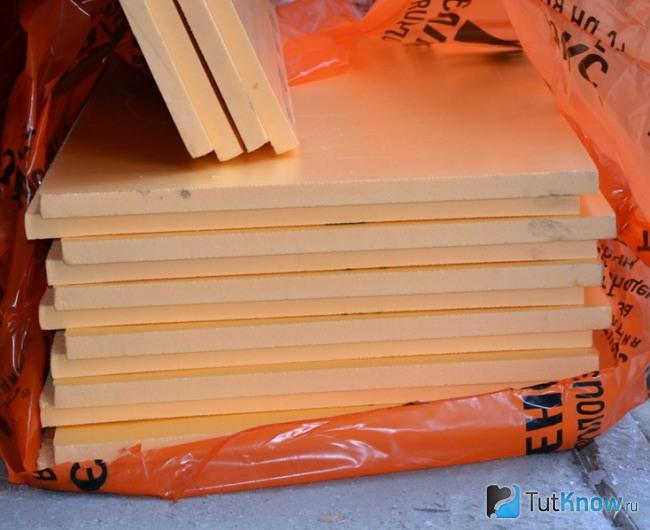
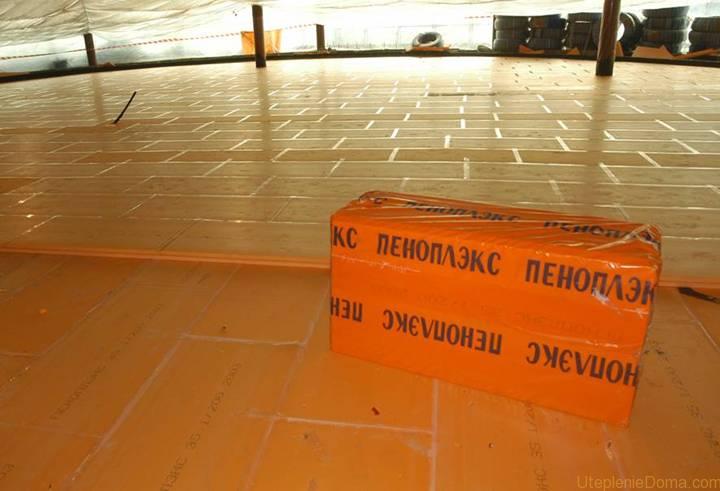
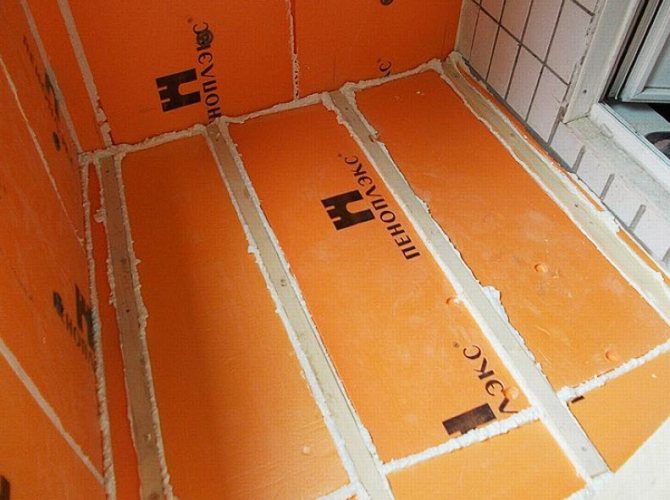
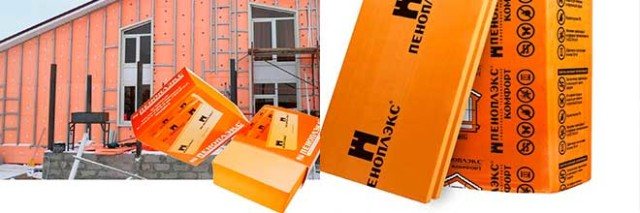
The product goes on sale in the form of panels 0.6 × 1.2 m with a thickness of 3-10 cm. There are usually 10 pieces in a package.
The material has a closed cell structure, which provides high thermal insulation characteristics. It is rigid enough to be used as a floor covering without a protective sheathing. Installation of panels is facilitated by the presence of grooves and recesses along the edges of the sheets, which allows them to be stacked very tightly together.
Warming can be done in several ways, the option is selected depending on the design of the room, temperature requirements, coating composition.
It is necessary to take into account the following points:
- In attics of residential buildings, it is recommended to use sheets of maximum thickness. Technical floors of summer cottages and other buildings can be insulated with thin products.
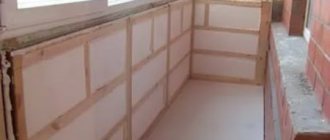
- If the roof is low, only the floor is insulated by placing panels inside timber structures or gluing on top of concrete slabs.
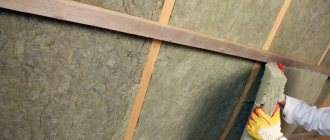
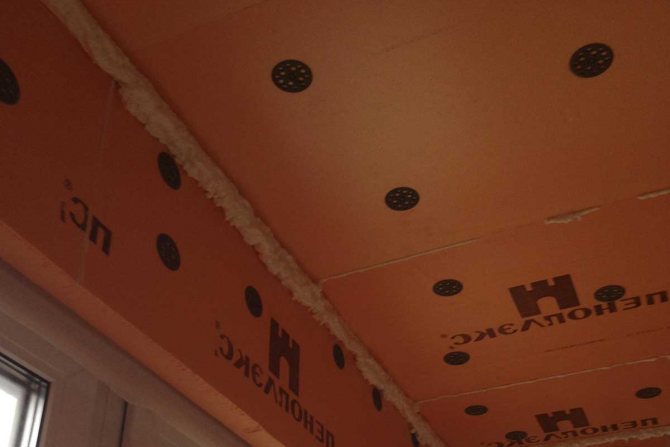
- To insulate the roof, the panels are laid between the rafters.
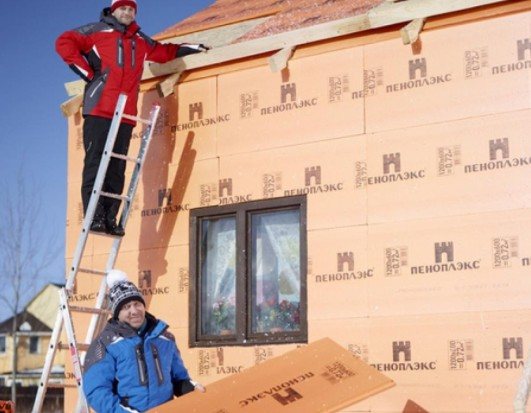
- The products are glued to the pediment, nailed with dowels or fixed with planks.
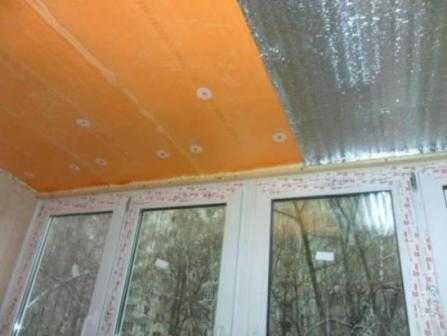
- Penoplex does not allow moisture to pass through, therefore, the contact of heated air from living quarters with a cold ceiling should not be allowed. Otherwise, condensation will first appear on the wall, and then fungus and mold. Before starting work on insulating the attic with penoplex, it is necessary to fix a vapor barrier film and a hard coating on the ceiling of the lower room. There must be a guaranteed ventilation gap between them.
- The material burns well, therefore it should not touch the chimneys. Pull the electrical wires through the metal tubes.
Insulation installation rules
In order to effectively perform thermal insulation with penoplex, it is very important to know the installation rules. They look like this.
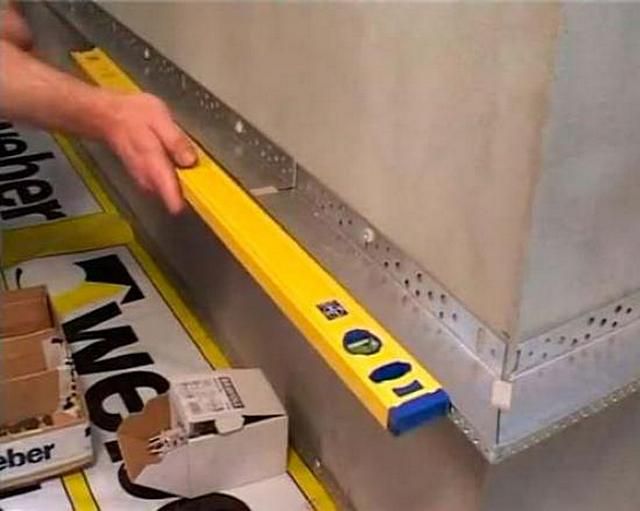
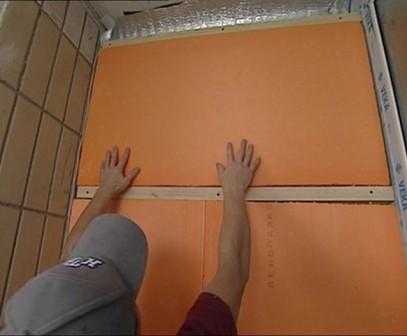
At the initial stage of work, the starting bar is set. This is a wooden lath or perforated corner. The bar is designed to keep the slabs from slipping, and also indicates the direction of laying. It is selected according to the thickness of the foam.
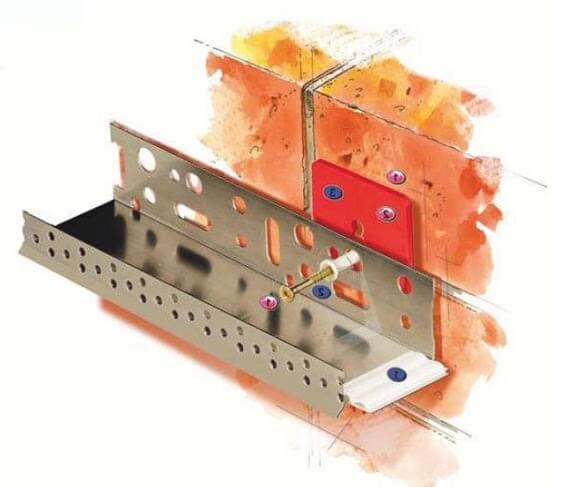
It is possible to buy a ready-made set, including strips, external and internal mounting corners for joints.
The choice of the method of fixing the plates depends, firstly, on the coating material, and secondly, on the operating conditions. Insulation is laid on concrete and brick with the following adhesives and fasteners.
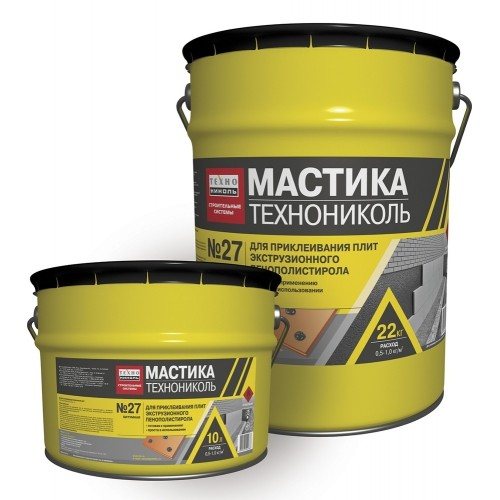
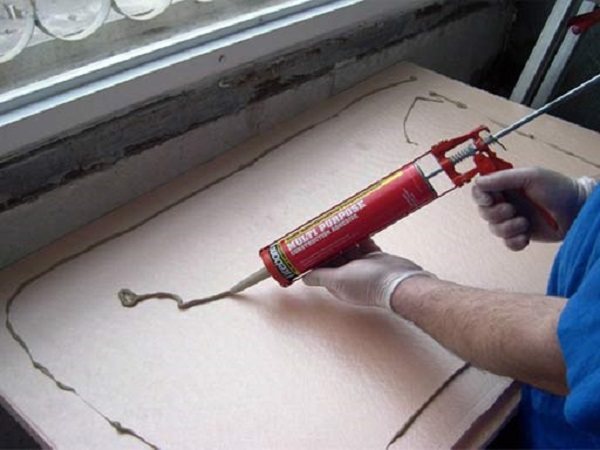
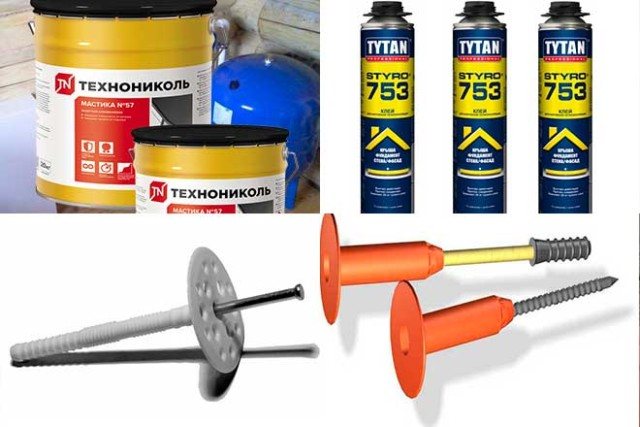
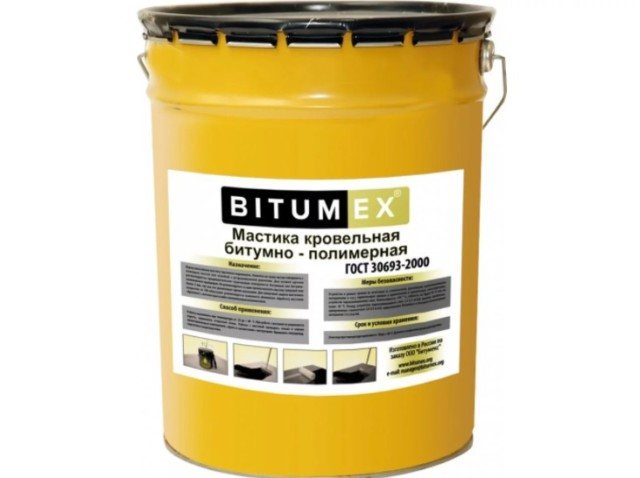
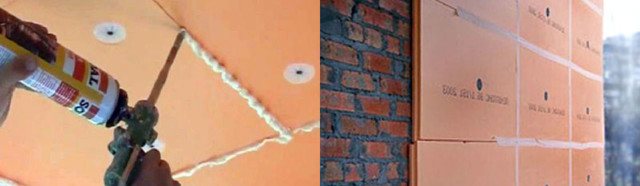
The use of a bitumen-polymer thick sticky composition is a simple and cheap way of gluing insulation. Due to its special properties, the mastic is used on buildings in special conditions.
The material is packaged in tubes. For work, you must have a special pistol.
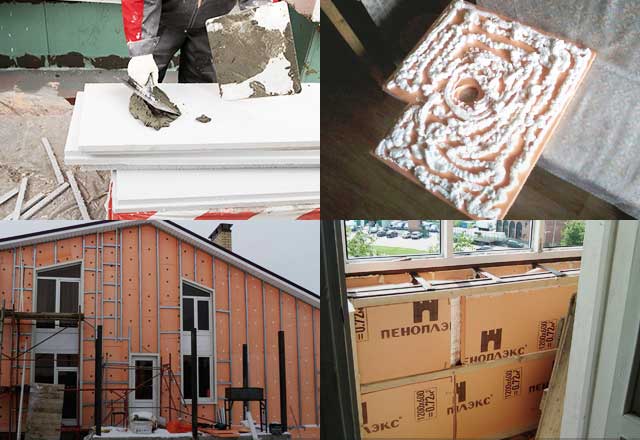
When laying, the edges and center of the slab are coated with mastic. After that, the insulation is applied to the base and held for up to an hour. If necessary, the slab can be displaced at this time.

The main binding element of dry mixtures for insulation is cement.
Before use, the adhesive solution is mixed in water according to the instructions on the package. For high-quality adhesion, after mixing, the solution is allowed to settle for two hours to obtain a homogeneous composition without water.
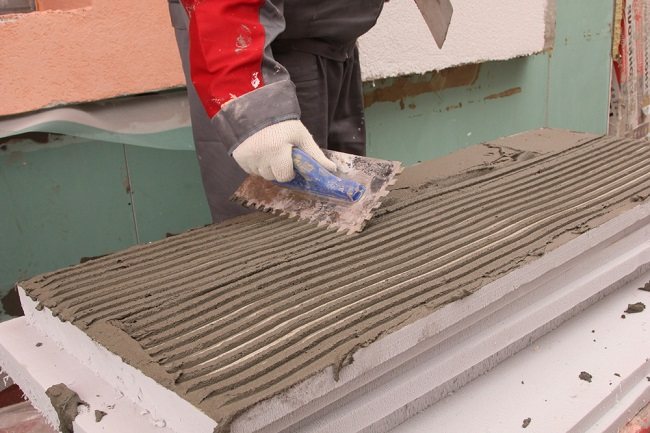
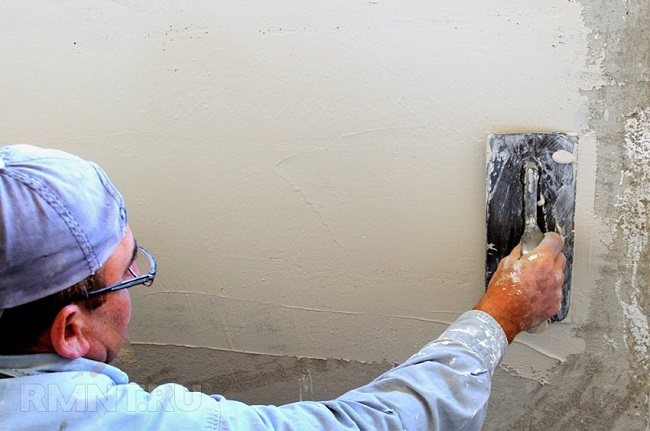
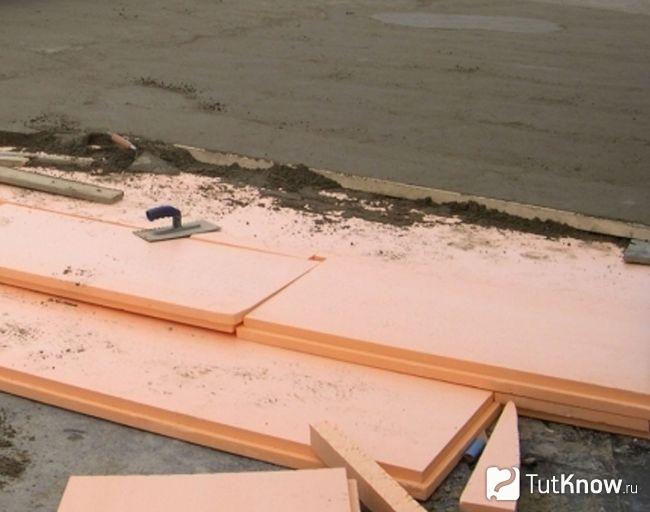
Applying glue to penoplex with a notched trowel
Before laying, the adhesive is applied to the penoplex with a notched trowel, and then the insulation is applied to the base and held for several minutes. With this fastening, additional reinforcement with dowels is not required.
- Glue.
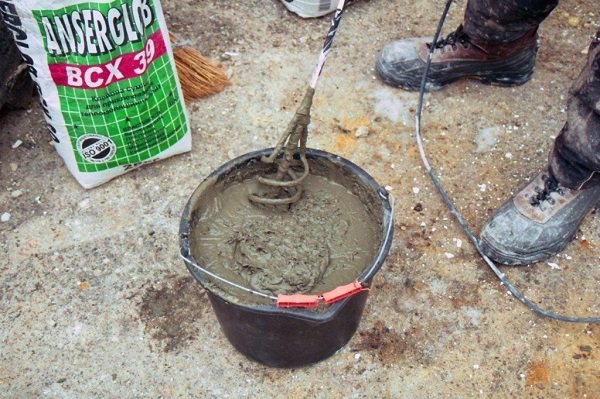
We knead the glue for the penoplex
Cement-added adhesives are very common due to their ability to level the surface. As a rule, additional fasteners are used with such glue.
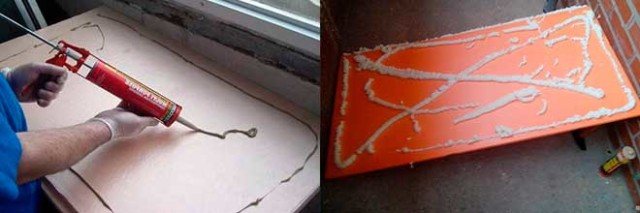
The composition is applied to the board in a continuous or dotted manner up to 200 mm wide.
Mounting technology for adhesive mixture and dowels:
Polyurethane foam has become widespread. However, it is not suitable for fixing foam boards, as it collapses over time and does not hold the load poorly.
A special material for external fastening of the insulation is glue-foam in the form of a polyurethane foam binder. It features improved adhesion and good adhesion. Penoplex slabs installed on such an adhesive composition reliably adhere to concrete and stone walls.
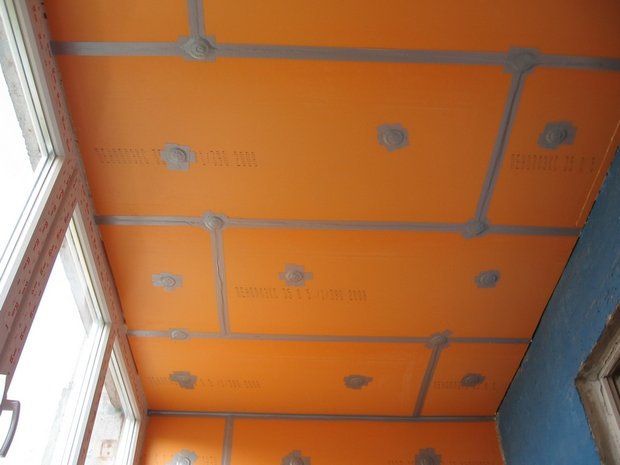
During installation, adhesive foam is applied from a gun around the perimeter of the board and in the center. Then the insulation is pressed against the base for a few seconds. After 20 minutes, the plate is firmly seized, however, further work can be performed only after two hours.
Glue-foam fixing technology:
- Liquid nails glue.
This is a well-known adhesive that is widely used in everyday life. It glues quickly and reliably. When insulating, it is used in small and hard-to-reach areas. In order to lay a large area of coverage with such glue, significant costs are required.
For glue, strict requirements are imposed on the surface condition. It should be flat and primed.
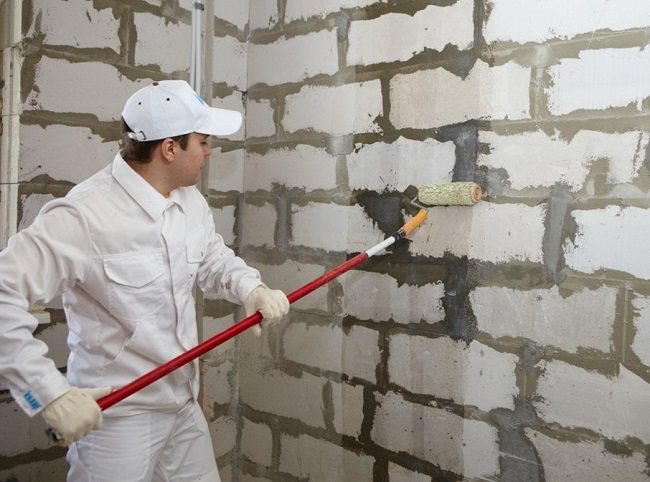
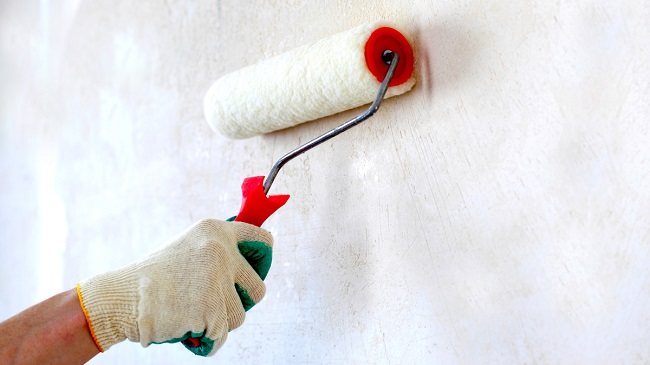
Priming the surface before gluing
"Liquid nails" are packaged in tubes, so they are applied pointwise with a special gun: in the center and along the edges of the plate. The glue dries quickly, so the insulation is applied to the base, after which it is held for about a minute.
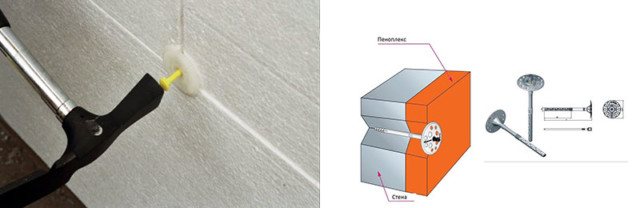
- Disc dowels.
To improve the strength, fastening the insulation with dowels is combined with gluing. Unfortunately, drilling holes for dowels breaks the tightness of the slab, which means that a passage for the cold appears.
The widely used mushroom dowel has a core, sleeve and wide head. It can be solid plastic and hollow for use with a screw or nail. The spacer zone does not allow removing the dowel from the hole, and also provides a reliable fastening.
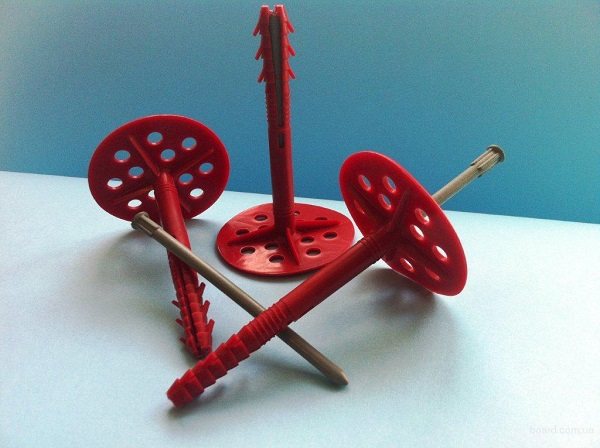
The core can be plastic or metal
Before installation, a hole is drilled in the insulation. The dowel is installed so that the cap does not protrude beyond the surface of the insulation. Then the spacer is screwed in or hammered in.
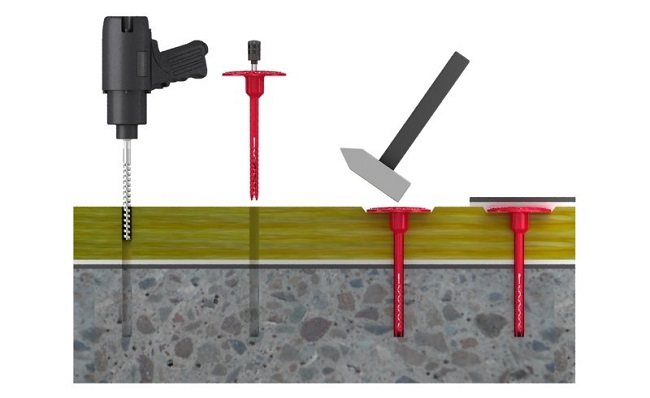
Each slab is secured with five dowels: four at the edges and one in the center. For adjacent slabs, common fasteners are located inside the seam.
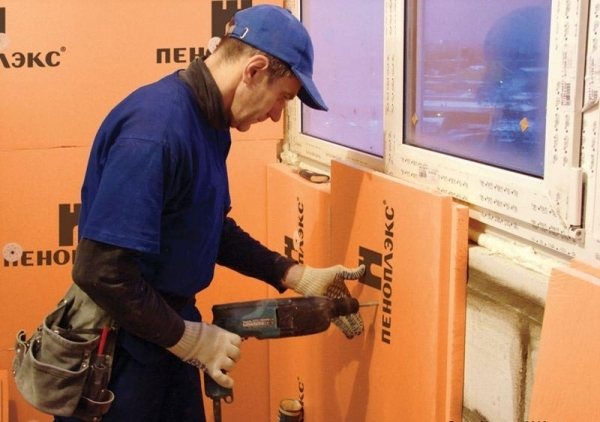
- Self-tapping screws.
Most often, with the help of self-tapping screws, the fastening of the plates, made in other ways, is strengthened. They are used when there is a lath of wood on the surface.
For fixing each slab, at least five dowels are required. For them, holes are drilled in the insulation. To prevent the self-tapping screw from pushing the plate, a washer is placed under its head.

TIP!
Penoplex boards have a smooth surface, therefore, for better adhesion, before gluing, you need to treat with a needle roller or scratch the surface with a hacksaw.
Penoplex for ceiling insulation
Penoplex is similar in properties to polystyrene, but has a denser structure. This heat-insulating material is easy to install, has a relatively low cost and good insulating properties. We offer you to find out how to properly insulate the ceiling with penoplex. Knowing the technology of installation of this material, you will be able to carry out all the work yourself.
Advantages of foam for ceiling insulation
In comparison with polystyrene and other (similar in properties) insulation materials for the ceiling, penoplex has its advantages. Penoplex does not collapse in a humid environment. The material is not exposed to the spread of fungi, mold and harmful bacteria. Indoors, the slabs are easily glued to the floor without preliminary surface finishing.
Penoplex allows you to create additional sound insulation in the room, easily tolerates temperature changes. It can be mounted on fragile bases, as it has a light weight and small thickness. The low thickness allows the ceiling height to be reduced to a minimum. Plates are fixed with simple tile adhesive. Penoplex, in addition to its advantages, has its own disadvantages. When burned, it melts and releases toxic substances. The material is quite fragile and breaks when pressure is applied to it.
We recommend reading: Technical characteristics of penoplex
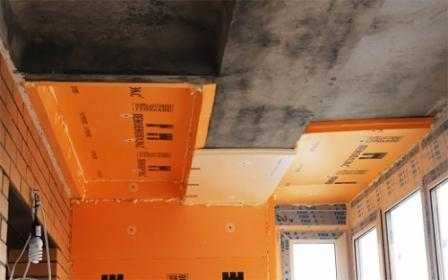
Ceiling insulation technology with penoplex
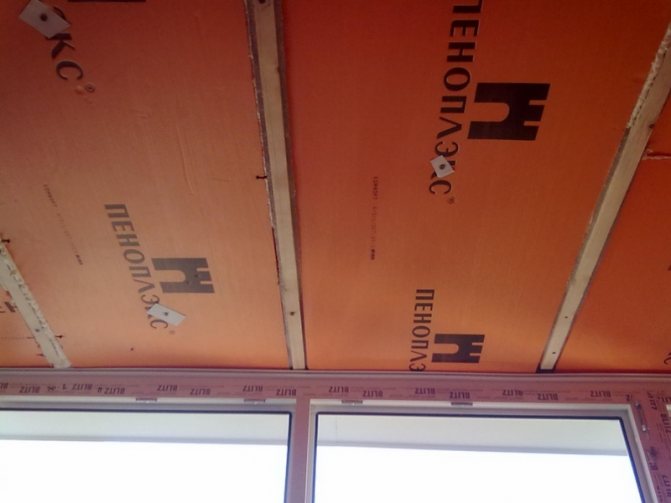
This insulation material has 2 installation methods. In the first case, the penoplex is mounted outside the room, and in the second version, the material is installed from the inside. When fastened externally, it is laid on the outside of the ceiling. Since the slabs have grooves and recesses, they are connected quite tightly and easily. For better insulation, all joints and seams are filled with construction foam.
With internal insulation, the material is glued to the floor. Seams are foamed or sealed with sealant. When fixing the foam from the outside, the material is laid on the floor.With frequent use of such a surface, logs are mounted on top and the finishing flooring is equipped. Penoplex is placed in the spaces between the lags. The gaps are sealed with sealant, foam. A floor covering is laid on top of the lag.
With internal insulation of the ceiling, one should not forget about high-quality ventilation. When insulating outside, a small gap must be left under the flooring. In the internal version, insulation occurs in a similar way. The slabs are fixed to the surface and covered with a finishing finish on top.
Watch the video: Do-it-yourself ceiling insulation
Penoplex can be glued directly to concrete. Glue is applied to the slab in a continuous strip along the perimeter, several glue blots are placed in the middle. If it is impossible to use glue, you can use special mushroom dowels. At the same time, holes are drilled in the insulation, and the dowel is screwed into the concrete, while the cap fixes the slab.
If it is necessary to apply plaster, a special reinforcing mesh is glued to the plates. In addition to plaster, drywall or any type of panel can be attached to the surface of the boards.
By its properties, Penoplex is an almost universal material. For this reason, this material is gaining more and more popularity when insulating houses. Knowing how to properly insulate the ceiling with a penplex, you can significantly save on heating and keep the heat in your house or apartment. Use modern materials to carry out repairs yourself and make sure of their effectiveness and inexpensive cost.
published on cemicvet.ru according to the materials svoimi-rukamy.com/
cemicvet.mediasole.ru
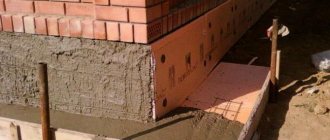
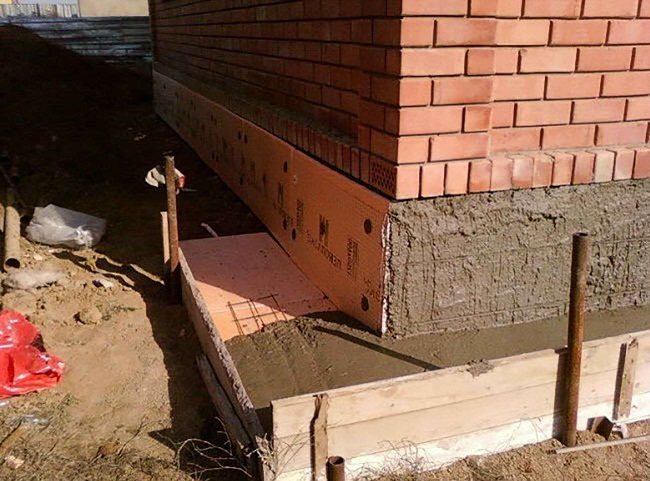
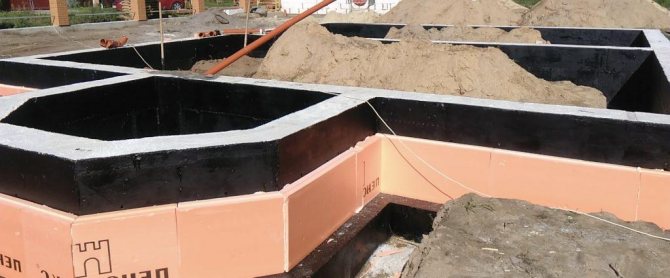
Features of installation of insulation on the foundation
As a rule, the foundation needs to be insulated in the same way as the walls. Various methods of foam insulation of the building base are used.
- Vertical way.
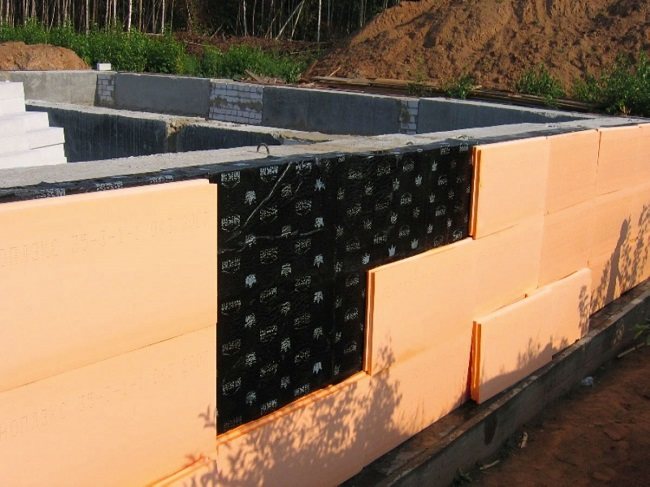
- Along the entire foundation, a lower level is marked for laying insulation.
- The slab is covered with an adhesive and pressed in the right place.
- The entire foundation is pasted over with the same method. An exception may be places that are in the ground. The slabs in this place are tightly pressed against the foundation with soil.
- Horizontal way.
In this way, the foundation from below is protected from freezing. Work is carried out at the initial stage of construction, when the foundation is just being laid.
- The slabs are tightly positioned on the concrete base of the formwork.
- Waterproofing is laid on the insulation, and then the foundation is poured and reinforced.
- After removing the formwork, the sides of the foundation are insulated.
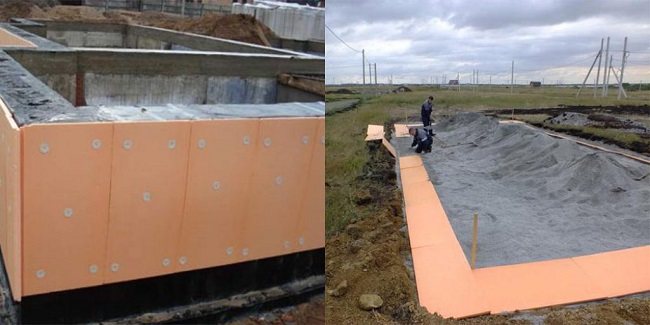
- Heat protection around the house.
In this case, the foundation and the adjacent territory are simultaneously insulated.
- First of all, the foundation is insulated in a vertical way.
- Then formwork is made around the foundations with an indent of 100 mm, and the blind area is being prepared.
- Insulation is placed on the tamped surface between the foundation and the formwork in a dense layer.
- On top of the insulation, a waterproofing film is mounted with an overlap on the foundation, after which the formwork is poured with concrete.
Protective covering
In order for the surface of the insulation to look beautiful and be durable, it must be protected. The simplest and cheapest way to protect insulation is plastering, which is carried out in stages.
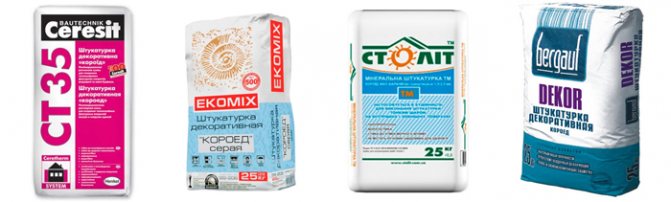
- The choice of plaster mortar.
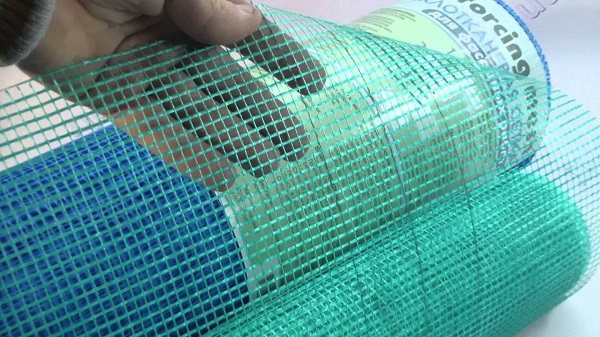
- The choice of reinforcing mesh for plaster mortar.
- Fastening of the reinforcing mesh using a specific technology.
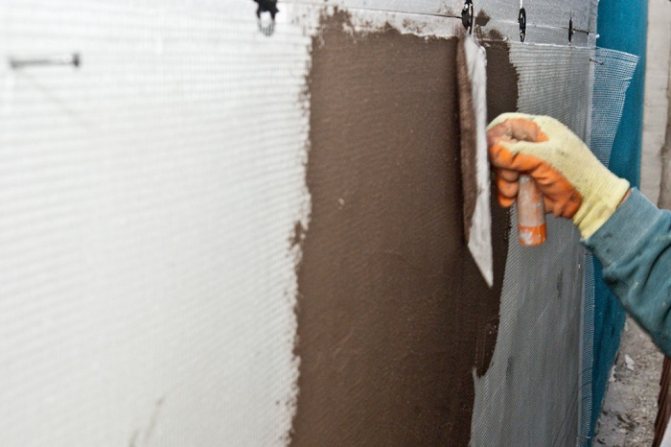
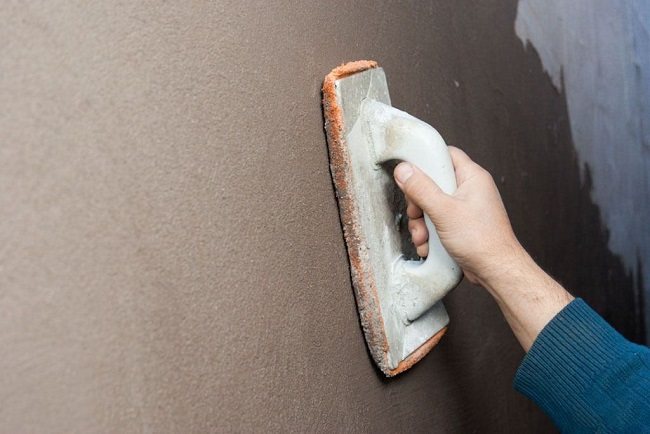
- Laying the mortar, leveling the surface, grouting with a plastic trowel.
- Priming the surface under the finishing layer.
- Finishing plaster. After drying, painting is done or a transparent protective layer is applied.
Video instruction:
In general, fixing the foam on concrete and brick walls, as well as insulating the building's foundation, is not a big deal.It is enough to follow the installation technology and carefully carry out the work so that the insulation is attractive and durable.
Styling nuances
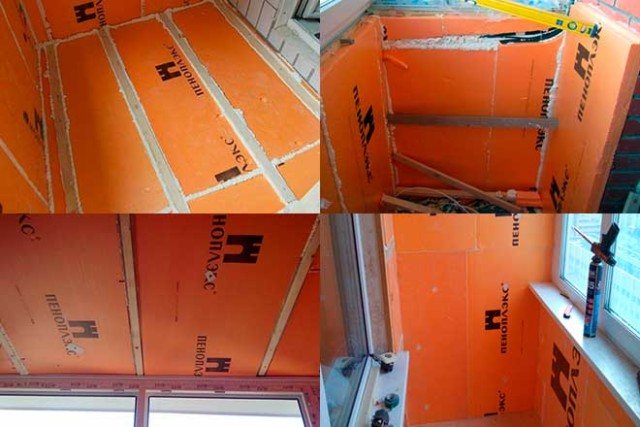
It is necessary to lay sheets of penoplex, regardless of the place, very close to each other, as tightly as possible and without gaps. This ensures thermal insulation of the surface.
If this is an attic space, the slabs simply fit into the gaps in the ceiling; it is necessary to traverse the entire surface. otherwise, the desired result will not be achieved.
Inside the rooms, after warming the ceilings with penoplex, it is also necessary to perform the subsequent finishing of the ceiling - putty, go through the finishing mixture, a primer, and then paint or other decorative finishing.
Installation methods
There are 3 ways to fix the insulation on a concrete wall:
- Adhesive composition. You need to choose the right astringent. Cement dry mixes, bituminous and polymer mastics, liquid formulations, polyurethane glue are used - it adheres well not only penoplex, but also polystyrene.
- Hardware. Dowels with wide caps are used for external thermal insulation of walls. The process is laborious, the plate is nailed in the corners and in the center.
- In a combined way. The previous methods are combined, thereby increasing the quality and reliability of fasteners. The glue insulates the surfaces from the external environment, and the hardware takes on the load from the impact on the plates.
Each of the methods has strengths and weaknesses, but the general stage for their application is to prepare the surface to be covered. The wall is cleaned of dirt, peeling, places where mold appears are eliminated with a metal brush and treated with an antiseptic - copper sulfate. Irregularities and cracks are sealed with a putty, covered with a primer.
Installation begins with fixing the horizontal starter bar with dowels as a support for the plates of the lower row. A wooden block or a perforated corner is selected according to the thickness of the foam to be laid. With any of the methods, the insulation is laid from the floor from the bottom up with the displacement of the butt joint in each row and leaving expansion gaps between the plates for temperature fluctuations.
Penoplex surfaces are smooth. To make the insulation better glued, the contact side is rolled with a needle roller or scratched on it with a hacksaw. The installation is completed by applying a protective or decorating layer to the insulation.
Materials for attaching foam to the wall
In addition to insulation, adhesives and dowels, to install the plates, you will need mounting foam to fill the joints, a reinforcing mesh, which is laid to cover the insulation, as well as foil-clad tape to insulate the seams.
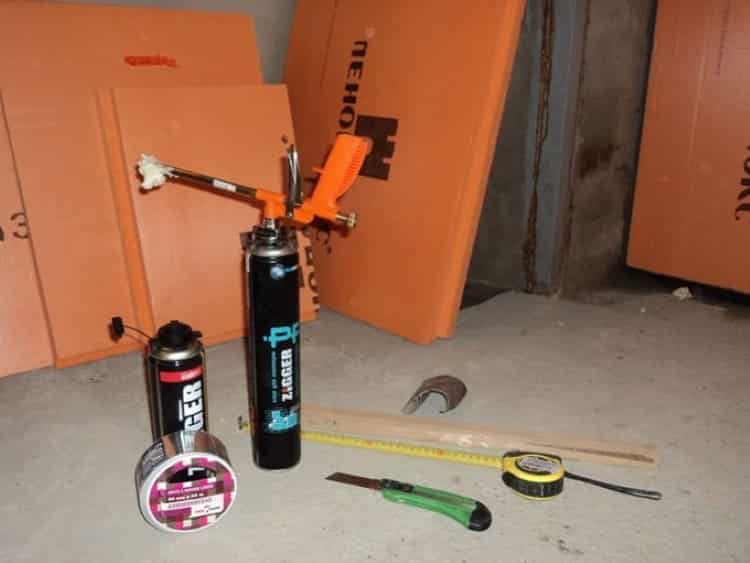
From the tool you will need a glue gun, a perforator for punching holes when mounting on dowels, a knife, a drill, containers for preparing a solution, a spatula, and a building level and a plumb line are needed to control the perpendicularity of the seams.
The list of fasteners includes commonly used adhesives and hardware.
Dry mixes on a mineral basis
The main binder is Portland cement. To improve the qualities of the future glue, plasticizers and polymers were added to the sand-cement mixture. The advantage of solutions is the ability to use on uneven surfaces.
The sequence of installation work:
- add water to the powder poured into the container, and knead the solution using a drill attachment, avoiding the formation of air bubbles;
- wait 2 hours for the liquid to be completely absorbed by the mixture, repeat stirring;
- apply the prepared mortar to the plate with a notched trowel, 2 cm away from the edges;
- install the insulation in its intended place and hold for 1-2 minutes.
Polyurethane based adhesives
They are used for fixing insulation outside and inside the building, the compositions are used in temperatures ranging from -6 ... + 30 ° C.They are set in light frosts and in conditions of high humidity in a time not exceeding 30 seconds, completely hardened in 15-30 minutes. Polyurethane adhesives are available as a ready-to-use viscous liquid.
- glue foam is applied with a construction gun in straight or wavy lines along the perimeter of the plate and along the long side in the middle of the foam;
- the insulation is pressed against the concrete base for 30-40 seconds;
- installation work continues after the slab is laid, after 2 hours: this is the installation of dowels and painting or plastering of the front side of the structure.
Professional builders use polyurethane glue to perform large volumes of building insulation. The price of the compositions is quite high. The need to use an assembly gun is another drawback. In addition, it must be remembered that the foam is toxic and burns well.
Liquid Nails
The adhesive is applied to a flat surface of a concrete wall. Its advantage is that there is no need to cover the entire area of the slab.
Produced in tubes, applied with a pistol in the following order:
- point portions are squeezed out along the perimeter of the penoplex and in the center;
- the plate is applied to the wall, then torn off and kept for 10 minutes while the glue dries;
- the insulation is finally fixed on the wall by pressing and holding for 40-60 seconds.
Bituminous mastic
The traditional application of bitumen in construction is waterproofing the underground part of foundations. On its basis, mastics are made for gluing foam to concrete walls, which have water-repellent properties.
Installation of foam sheets is carried out after the preparation of the concrete surface:
- the cleaned wall is primed;
- the mastic is applied in a thin layer to the insulation plates with a spatula; another option for the foundation is to thickly coat the wall with a brush;
- penoplex is pressed against the concrete surface for up to 1 minute.
The disadvantage of bitumen glue is flammability at high temperatures, toxicity. If the insulation is installed indoors, air exchange must be ensured and measures taken to comply with fire safety rules. Mastic is on sale in buckets, ready for use. Foundations and plinths of buildings - objects for insulation and waterproofing using bitumen.
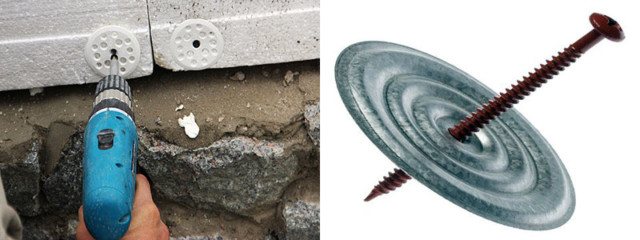
Disc dowels
In order to increase the strength of the adhesive bonding of the slabs to the concrete, the insulation is additionally fixed with dowels with a wide head - fungi or umbrellas. Hardware has a number of advantages: the use of a washer allows you to increase the radius of coverage of the surface from 30 to 50 mm, the anchor structure of the polyamide rod can withstand a pulling load of 100-150 kg, does not corrode and decay.
The procedure for strengthening the fasteners of the insulation layer on the facade of the building:
- Points for drilling holes are marked. The diameter of the drill bit for a concrete wall is 10 mm. The depth is taken from the calculation: the length of the dowel sleeve + 1-1.5 cm. For adjacent sheets, one hole drilled in the joint is enough.
- They pierce the nests for umbrellas with a perforator or a hammer drill through the penoplex in accordance with the markings. The drill cuttings are blown out with compressed air. The anchor must fit freely into the hole.
- Dowels are installed: the cap is pressed into the slab with a hammer so that it does not protrude beyond the plane of the insulation. A rod is inserted into the umbrella and hammered.
Borehole deepening in concrete - ≥45 mm. The dowel length with a 5 cm insulation thickness will be 95 mm. The glued boards must be allowed to stand for at least 3 days prior to installation. After the completion of the installation work, the surface of the wall is prepared for finishing: dents and voids are filled with an adhesive with a spatula.
Penoplex attic insulation technology
The upper floor of the house is thermally insulated in a cold or warm way.In the first case, the protective layer is formed on the floor, in the second - only under the roof; in this case, the flow of warm air from the residential part of the house will stop.
Attic insulation tools and materials
The most reliable compounds for fixing insulation are polyurethane adhesives. They go on sale in bags. To prepare the solution, mix the dry mass with water in the proportion indicated by the manufacturer. The most popular brands are Kliberit, Knauf, Ceresit. From inexpensive means, ordinary tile glue can be distinguished.
When choosing, pay attention to the following points:
- Do not use solutions containing gasoline, ethers or other substances that will dissolve the material.
- Buy mortars that have a long cure time, which allows you to adjust the position of the panels.
- Always purchase glue with a margin. The average consumption of the mixture for a flat surface is indicated in the instructions for the product, but in other cases it is higher.
- Penosil iFix Go Montage glue foam can be used to insulate the plastered gables. It is sold ready-made in cylinders. The contents of the container are squeezed out with a special device-pistol. It must be remembered that the foam cools down in just 12 minutes.
To insulate the attic, use only high-quality foam samples. It is very difficult to verify the declared characteristics, but it is still possible to identify a fake.
Simple procedures will allow you to assess the quality of the goods:
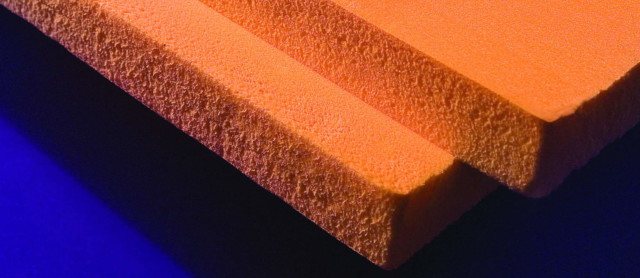
- Visually examine its structure. Penoplex consists of very small cells that are difficult to see. Well visible fragments indicate non-observance of the material manufacturing technology. These samples have large pores that allow heat to escape. Water-repellent properties are also lost.
- Break off a small piece from the sheet and press on the damaged area with your finger. The cracking of bursting cells indicates that the walls of the fragments are too thin, therefore, the sample cannot be considered of high quality.
- Press down on the panel with your finger and release. There should be no load marks.
- Penoplex with the required characteristics can be found in brand stores of well-known manufacturers.
- Buy insulation that is packed in a factory-made protective film without tears.
- Branded goods have a label with a barcode and a hologram of the manufacturing company. It contains information about the manufacturer of the product, the date of manufacture, provides the main characteristics and recommendations for use.
- The sheets have the correct geometric shape.
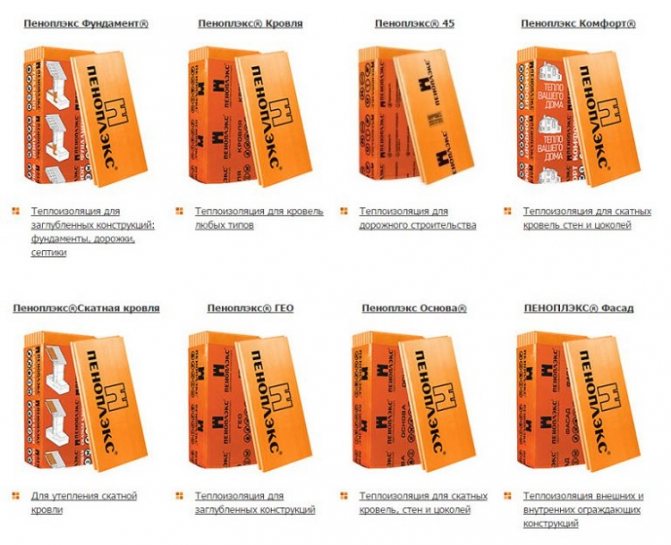
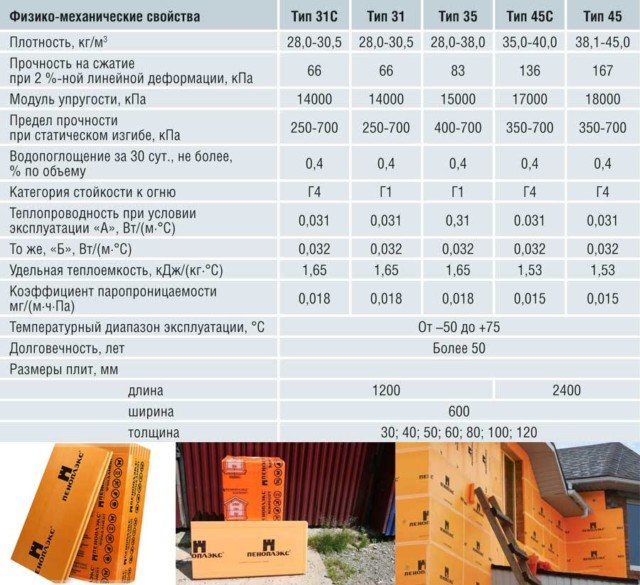
The following grades of material are suitable for use in the attic:
- Penoplex 31 is not a very rigid product that can be used to insulate roofs and other unloaded areas.
- Penoplex 31C also does not have high strength, it differs from the previous model in a high degree of flammability.
- Penoplex 35 is a versatile material that has a fairly high rigidity. Can be mounted on both rafters and floors.
- Penoplex 45 is a high-strength product that allows you to insulate floors that are subject to significant mechanical loads. It is economically unprofitable to insulate the roof with such samples.
There is another product labeling indicating performance properties:
- Penoplex "Wall" with a density of 25-32 kg / m3, fits on the rafters and on the pediment.
- Penoplex "Roof" with a density of 28-33 kg / m3, designed to cover the floor of the attic.
- Penoplex "Comfort" with a density of 25-35 kg / m3 is used on the upper floors in high humidity conditions.
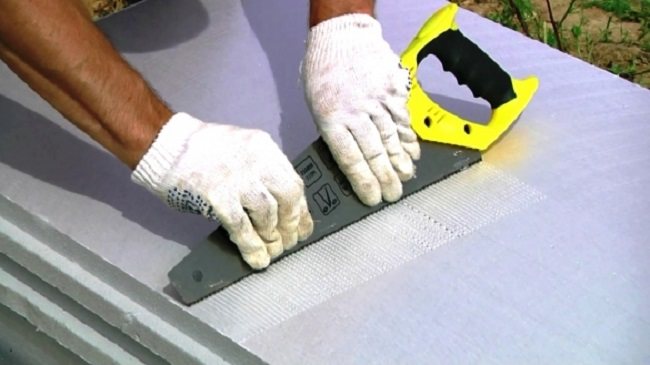
The roof and floor of the attic are complex structures, therefore, sheets of different sizes and configurations are pre-cut for insulation according to templates.
To reduce the time for processing them, you will need the following tools:
- Well-sharpened kitchen knives or special ones - wallpaper or stationery.The sharper the tool, the better the cut. It is recommended to heat the knives before use. This is the most popular processing option due to the availability of the tool.
- An electric jigsaw will quickly cut panels of any thickness, but the ends become curved.
- Heated nichrome wire is used to obtain blanks of complex geometric shapes. There are no complaints about the lateral surfaces after cutting.
Insulation of the attic floor with foam
The main method of thermal insulation of the concrete floor of the attic is by gluing foam. The mounting sheets must correspond to the operating conditions of the upper floor. The greater the load on the panels, the denser they should be.
Perform the following operations:
- Remove all items from the attic, clean and wash the concrete slabs. Seal all cracks and depressions with cement-sand mortar. If there are protrusions, cut them off. Remove greasy stains with solvent.
- Prime the floor. Check its horizontality, eliminate slopes with a self-leveling mixture. Coat the floor again with a primer from the same manufacturer as the adhesive. Wait for everything to dry.
- Inspect the foam blanks. If they are too smooth, sand them with coarse sandpaper to improve adhesion.
- Apply a layer of glue to the penoplex. The coverage depends on the condition of the concrete surface. If it is even, spread the mixture evenly with a notched trowel over the surface of the insulation. If there are concrete panels with differences in height, apply the composition to the heat insulator in fragments. Along the perimeter - a narrow strip of 3-4 cm, 20 mm high, dotted, providing free air outlet. Inside - in sections (4-5 pieces) with a diameter of 10-12 cm. Do not process the sides.
- Place the sample on the floor and press down lightly. Lay the following elements with an offset so that the joints do not line up, and press them against the adjacent ones. Remove any glue that has escaped immediately.
- After mounting several elements, check the levelness of the surface using a long straight edge and level. The position of the slabs on the floor can be adjusted within 20 minutes until the glue hardens.
- Place small pieces last. If there are empty areas, fill them with scraps of material.
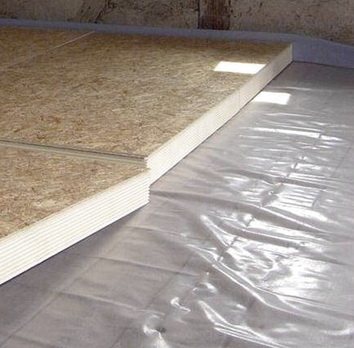
- Cover the finished coating with a vapor-permeable membrane with an overlap of 15-20 cm on the walls and on adjacent cuts.
Penoplex is quite tough and can withstand a heavy load, so it is not necessary to protect it from external influences. But in the case of intensive use, the surface for insurance is plastered. To create a protective layer, use mixtures that are designed to cover this material.
The process is as follows:
- Prepare a solution from a dry mix according to the recommendations of the product manufacturer.
- Cover the insulation with a 5 × 5 mm plaster mesh and fix with a thick mortar.
- After drying, apply a layer of 5-10 mm mortar and smooth it out.
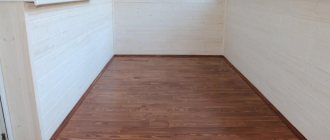
Wooden floors differ from concrete ones by the presence of power elements - lags. After insulation, it is possible to protect it with a wooden flooring supported by beams, therefore, in this case, cheaper, low density samples can be used.
They create an insulating "cake" in this way:
- If there is a finished floor, remove the top row of covering.
- Clean the inner cavity of the ceiling from dirt and dust.
- Bend any protruding nails and remove any other objects that could damage the membrane.
- Cover the floor with a waterproofing sheeting overlapping adjacent pieces and walls. Glue the joints with reinforced tape. Penoplex does not allow moisture to pass through, however, it can seep into the lower room through the gaps.
- Determine the distance between the lags and cut the necessary pieces from the blanks according to the size.
- Lay the material and press firmly against each other. Seal the gaps with waste.
- Cover the floor with steam wrap and overlap the walls and adjacent cuts. Cover the joints with adhesive tape.
- Install the top deck.
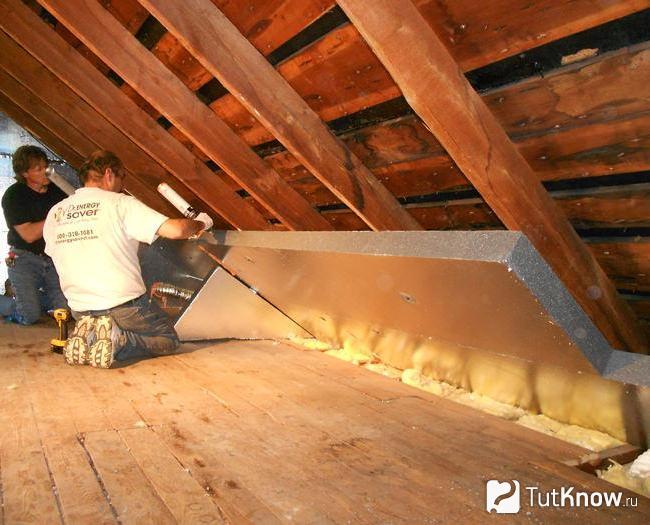
Attic roof protection with penoplex
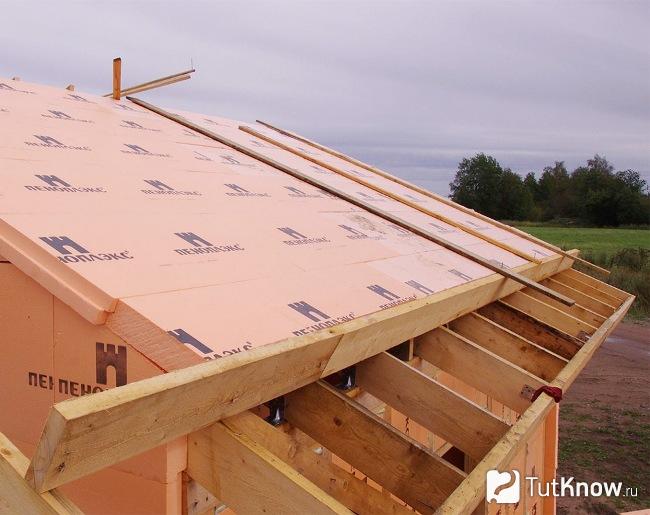
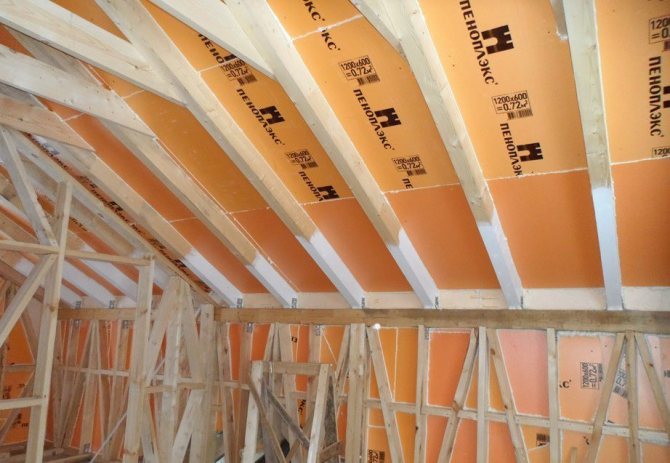
When insulating the roof, penoplex is most often placed in the gaps between the rafters. This method does not require changing the roof structure and does not make it heavier.
For insulation to be effective, it must meet the following conditions:
- The drainage system is made taking into account the slope of the slope. In this case, moisture will not get under the roof.
- It is possible to fix a vapor-proof film from the inside.
- A ventilated space will remain under the roofing material and heat insulator.
Perform the following operations:
- Treat all wooden elements with antiseptics.
- Cover the roof from the outside with a waterproofing film so that after the installation of the roofing there is a gap of 20-50 mm between it and the canvas. If the roof is completely assembled, install the film from inside the room. Lay the canvas with an overlap on adjacent elements and walls, and seal the joints in any way. Do not stretch it, leave it sagging 1 cm in the middle of the openings, fix it with a construction stapler.
- Cut the pieces of foam so that they fit snugly between the rafters.
- Install them between the beams and secure with special corners, which can be purchased at the store. Fixing with thin slats from the attic side is allowed. Check that there is a gap of 20-30 mm between the sheets and the waterproofing film. You can stack products in two rows, but the lower one should overlap the joints of the upper one.
- Fill the gaps in hard-to-reach places with scraps.
- Cover the panels from the inside of the room with a vapor barrier film with an overlap on adjacent parts and on the wall. Glue the joints with adhesive tape. Attach the canvas with a stapler without tension.
- Penoplex does not require the installation of a hard slab covering to protect it.
Insulation of the attic gable with foam
The gable insulation technology depends on the material from which it is made. The sheets are fixed to wooden structures in the same way as to the rafters, and they are glued to the brick ones. It is convenient to fix Penoplex to vertical surfaces using foam glue. For work, you need a special pistol device that allows you to dispense the substance.
Operations are performed in this way:
- Install the foam foam cylinder into a special fixture and secure.
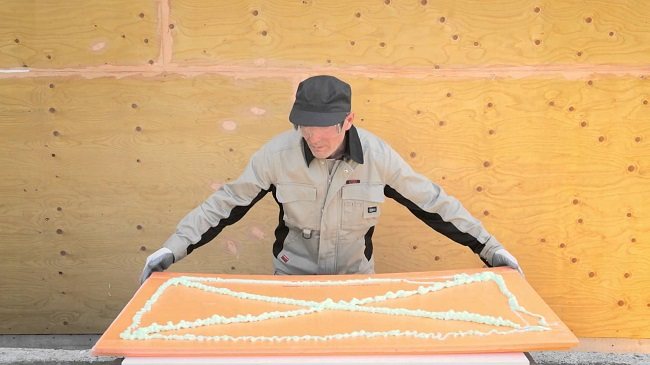
- Apply foam around the perimeter of the product and diagonally.
- Place the panel on the surface and press down.
- Repeat the procedure for the rest of the plates. Press the newly laid elements against the already glued ones.
- After hardening, the sheets can be additionally fixed with special dowels, but this is at the request of the owner of the house.
How to insulate an attic with penoplex - look at the video: The procedure for insulating an attic with penoplex is not difficult, one person can do the job. The product minimizes the heat loss through the roof and ensures the comfort of living for a long time. The main condition for obtaining the desired effect is adherence to the technology of mounting the material.
How and what to glue penoplex to concrete - methods of attaching insulation
In conditions of saving and preserving heat in the room, it is necessary to insulate the external structures of the building.
To obtain the greatest effect, you need to cover the maximum area and eliminate cold bridges, i.e. places through which cold can enter the room.
In addition to the outer walls, it is important to insulate the foundation and basement of the building, as well as the balcony, floor and roof. The strength and quality of the finishing performed will depend on how to glue the penoplex to concrete.
Methods for installing penoplex on the ceiling
Regardless of how and with what to attach the material to the surface, first it is necessary to carry out preparatory measures and select the necessary set of tools. To complete the work you will need:
- hammer drill or hammer drill;
- a set of spatulas;
- building level;
- construction knife;
- stairs or small scaffolding.
Before gluing the penoplex to the ceiling or performing installation in another way, it is necessary to thoroughly clean the surface from dust, debris and unnecessary elements. After that, it is necessary to make alignment, which involves the use of a finishing putty or plaster. After it dries, we treat the surface with an antifungal deep penetration primer. At this, the preparatory stage of the work can be considered completed.
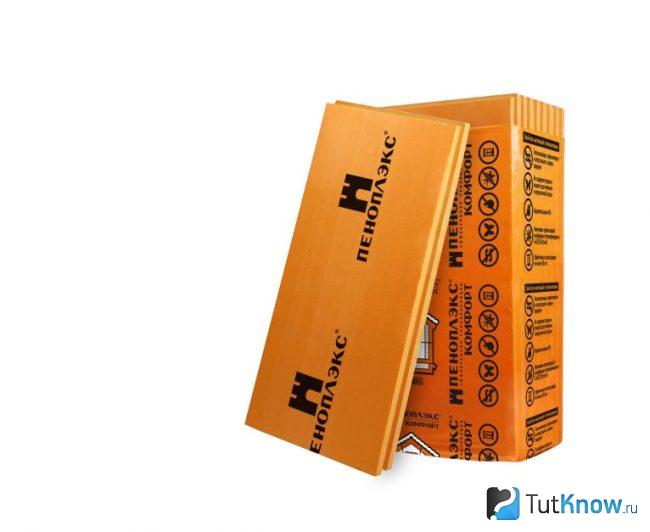
Insulation Penoplex
The concrete structures of the building are cold enough and therefore need warm protection. There are many insulation materials, but one of the most popular is Penoplex.
It has low thermal conductivity and practically does not absorb moisture, which contributes to the durability of the material.
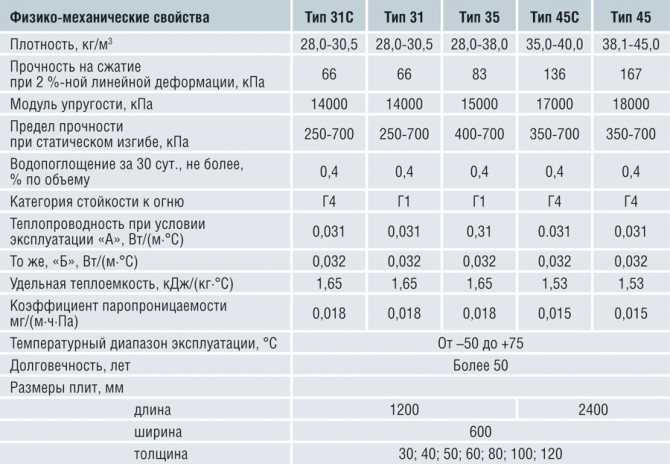
The technical characteristics of Penoplex distinguish it favorably from other heaters. It is a slab with dimensions of 1.2 X 0.6 m. Different types of Penoplex have different thicknesses, depending on the purpose of the thermal insulation board.
The analogue of penoplex is polystyrene. However, there is still a difference between these materials. A slight difference can be seen in the vapor permeability index: 0.05 mg / (m · h · Pa) - foam versus 0.013 mg / (m · h · Pa) - penoplex, as well as in the cost of each product. Although, as practice shows, everyone decides for himself what is better than penoplex or polystyrene and chooses one or another insulation according to his preferences and capabilities.
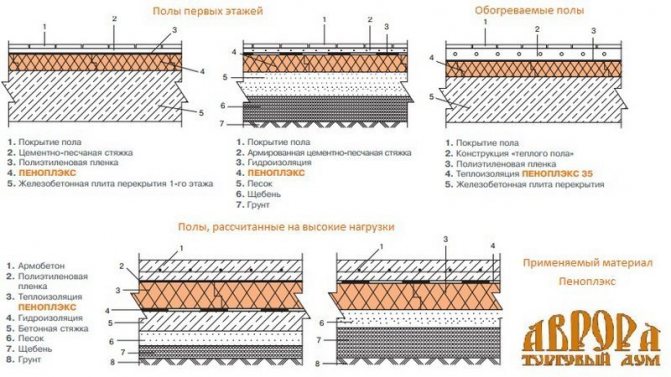
Thermal insulation scheme for building structures. For greater efficiency, in addition to the external structures of the building, it is also important to insulate the internal ceilings
Material characteristics
It is important to know what to expect from a particular construction material. Currently, penoplex is perhaps the best option for insulating a house with your own hands. Its characteristics are the most optimal and allow us to say that the advantages of using extruded polystyrene foam are most often greater than those of mineral wool or foam, which are also common in mass and individual construction.
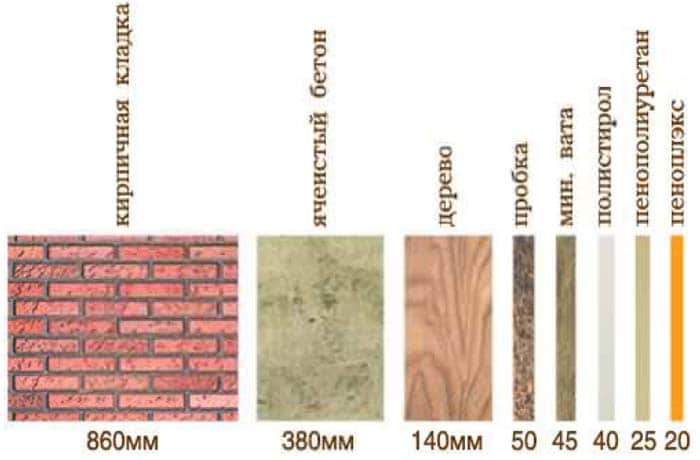
Thickness of materials giving the same thermal protection
Specifications Penoplex can be cited as follows:
- low thermal conductivity - Coefficient of thermal conductivity refers to how well a material conducts heat. The lower this coefficient, the better the building envelope prevents heat loss. For foam, it averages 0.031. For comparison, the coefficient of thermal conductivity of ceramic bricks can be from 0.36 to 0.6, and for "warm" ceramics 0.19. The thermal conductivity of wood differs depending on its type; for the most common pine, the coefficient is 0.18. All these characteristics cannot be compared with penoplex, since they differ from it by more than 6 times;
- water absorption coefficient - if water gets into the insulation, then its heat-shielding characteristics are reduced, therefore it is so important to protect the material from moisture. Materials comparable in efficiency to foam are mineral wool and polystyrene. But in terms of water resistance, they are not competitors to extruded polystyrene foam. Minvata is extremely unstable to moisture and easily absorbs it into itself. In the case of foam, manufacturers claim its low water absorption, but there is a trick here. Indeed, styrene balls do not absorb moisture, but moisture can accumulate between them. If negative temperatures are added to these conditions, the material will disintegrate and individual particles.This does not happen with penoplex, its characteristics allow it to be used in humid conditions without fear;
- strength characteristics - Penoplex is available in various densities. The values are in the range from 21 to 35 kg per square meter, which allows you to choose a suitable option for insulating any structures. The strength of extruded polystyrene foam is significantly higher than that of expanded polystyrene, so it can be used with the likelihood of increased loads and mechanical stress;
- resistance to decay, damage by mold and fungi.
The disadvantages include the fact that the material is flammable. When insulating a house, it is important to remember that when excessively heated, penoplex begins to melt, which can lead to negative consequences.
Fastening foam to concrete
Applying glue to thermal insulation material. The choice of method depends on the installation conditions and surface quality.
There are the following ways of attaching foam to concrete:
- using fasteners with dowels;
- using dry adhesive mixtures;
- polyurethane foam;
- liquid nails.
When installing the penoplex to a concrete structure, it is worth considering:
- For the correct preparation of the dry glue mixture, you must strictly follow the instructions and observe all proportions.
- At low air temperatures, the properties of the glue are significantly reduced.
- The prepared mixture is applied to the heat insulator plate over the entire area.
- Polyurethane foam is applied around the perimeter of the slab and is rarely filled with mesh or zigzag.
- The use of liquid nails provides good adhesion, but this method of installation is quite expensive.
- For high-quality performance of work, it is necessary to use a level.
- The boards must fit snugly against each other.
- Seams are sealed with sealant.
Ceiling insulation with foam and mineral wool
Ceiling insulation is usually done when building a house. But, if this was not done on time, then it does not matter - the ceiling can be insulated with your own hands at any time.
But it must be borne in mind that when the ceiling is insulated, the attic is left cold. After installing a layer with a high resistance to heat transfer, the temperature in the attic will drop, which can be significant if this room was used as a utility room, or if pipelines were laid through it.
Is it necessary to insulate the attic space?
To keep the attic (attic) warm, you need to insulate the roof, and, on the contrary, remove the thermal insulation from the ceiling, leaving only sound insulators.
But the insulation of the roof (slopes and fronts) entails about 2 times more costs compared to the insulation of the ceiling. And besides, heating the attic will always not be cheap, since the heat loss, in any case, will increase.
Therefore, in many cases, when the attic is used only for storing junk, it is more correct to make thermal insulation of the floor, leaving the attic room to frost and icy northern winds.
Below we will consider only the issue of arranging an insulation layer for the ceiling.
Create a solid layer
The ceiling is the main front in the fight to warm the whole house. As you know, the warmest air accumulates at the top. It's always hot under the ceiling. Therefore, heat leaks through the ceiling have the most significant effect on the total heat loss of the house.
It is also important at the design and construction stage to minimize the contact area and the amount of heat transferred from the walls of the house to the roof elements.
In the attic, it is necessary to insulate the corners and narrow places along the edges of the roof with high quality. The walls of the house should be covered with a heat insulator on top in the Mauerlat area and under the rafters. A continuous layer of thermal insulation must be made from the walls to the ceiling.
Layer thickness is the main issue
To reduce the heat loss through the ceiling to an acceptable minimum, it is necessary to put insulation with a thermal conductivity coefficient of 0.04 W / mK with a thickness of at least 25 - 30 centimeters for northern regions and 20 cm for a temperate climate. At the same time, the economic feasibility of these measures is achieved, according to the recommendations of the current standards. It is recommended to take the same values for foam and mineral wool.
The importance of vapor barrier
Another feature is that water vapor will condense in this layer of insulation. As you know, the warmer the air, the more water vapor can be in it. With cooling, excess steam falls out of the air in the form of dew.
In this insulation scheme, the dew point will always be inside the insulation. If water vapor passes through the insulation, then it will condense inside it, which will lead to a very rapid wetting of the layer and loss of the thermal insulation qualities of the material.
Therefore, if breathable insulation is used, it is necessary to make them vapor barrier from the air entering from below from the room.
General scheme

The general scheme of ceiling insulation is shown in the figure. There are two layers of vapor barrier and insulation between the logs. Features of the use of certain heaters are given below.
Eliminate air permeability of the foam layer
It is not expensive to insulate the ceiling with foam.
If there are lags on the overlap, then the foam is put between them with a roll. In this case, it is necessary to close this layer from below and from above with a layer that prevents the movement of air (film or dense matter) in order to prevent its convection in the cracks between the logs and insulation sheets. If this is not done, then there will be an intense heat removal from the overlap in the gaps along the edges of the logs or between the plates of the material.
For high-quality insulation of corners, contours, a very thorough work is ahead of cutting out pieces of foam and sealing up all gaps and crevices.
Laying foam in a continuous layer
If the ceiling is solid, then you can use high-density polystyrene with continuous laying, and on top of it you can simply lay a plank flooring of a large area, along which it would sometimes be possible to move around when servicing the attic.
At the same time, foam crumpling should not occur (it is necessary to use only a very rigid foam with a density of more than 30 kg / m3 (PSB-S 35 - PSB-S 50)).
You can use comb-and-groove foam sheets to create a continuous, seamless finish. But you can also use ordinary slabs of 7 centimeters thick, laying them in 2 rows with an offset of the rows relative to each other.
Mineral wool vapor barrier
Mineral wool requires a reliable vapor barrier from the ceiling to reduce the likelihood of water vapor ingress and condensation inside the insulation.
But there is no absolute vapor barrier. Therefore, on top of the insulation there should always be a free space of at least 2 centimeters to the flooring, for the movement of dry cold air, which removes excess moisture from the material layer (ventilation gap).
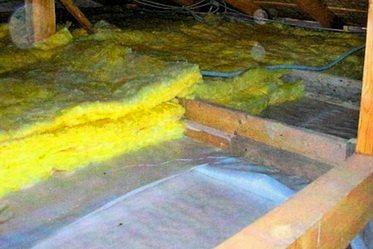
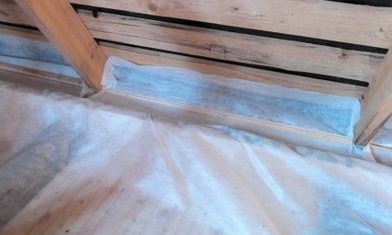
The vapor barrier film is laid in a continuous flooring with overlaps of at least 10 centimeters, glued together with construction tape. At the edges, the film is wrapped on the rafters, on the roof, or on insulation.
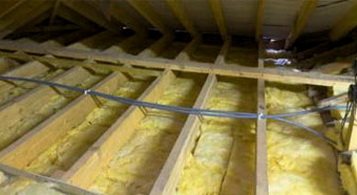
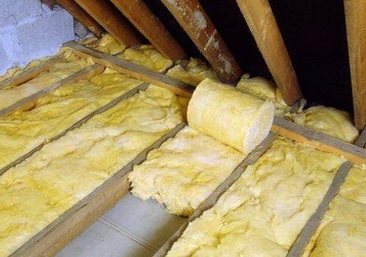
Laying mineral wool boards and lathing
Mineral wool (glass wool) of low density is placed on the vapor barrier layer only between the rafters. A vapor-permeable flooring with a ventilation gap above the mineral wool is installed on top of the rafters. If the layer of insulation turns out to be above the rafters or flush with them, then additional slats-bars or counter-lattice are stuffed onto the rafters.
Particle panels are commonly used to create the flooring. But of course, the decoration of the attic space will depend on the purpose.In this case, it is understood that the cold attic does not carry any kind of functional load, except that it serves to store not heavy old things. Accordingly, there is no special arrangement there.
The use of insulating materials together with glass wool has a double role. They protect the insulation from the accumulation of water vapor in it, and protect the house from the release of harmful micro-dust from the insulation.
Warming errors
The main mistake when insulating the ceiling is the neglect of high-quality vapor barrier along the attic floor, as a result of which water accumulates in the insulation layer and on the logs, the thermal insulation loses its qualities, and the ceiling in the house begins to get wet, while the logs are intensely destroyed.
Another common mistake is saving on the thickness of the insulation. As a result, the building remains under-insulated, and the owners continue to look for the reason for the coolness in the house and high heating costs, even after insulation. And the reason is simple - you needed 15 centimeters of insulation, and put only 5 centimeters. It became warmer, of course, but not as expected.
Effective thermal insulation solutions
For insulation of the floor, you can use, in principle, any materials that conduct heat poorly. Hay, felt, or old rugs or clothing, for example. But the best thing here is, of course, to use materials that do not accumulate moisture.
After all, it can come not only in the form of steam, but also as a result of roof leaks. Soaking will always lead to problems, and complete drying is not quick.
The vapor transparency of the layer should increase from the room to the outside. Then the effective removal of steam from the wall and insulation will be ensured.
Sometimes it is most economical to insulate an attic by combining several materials. For example, this happens when there is a surplus of material from the insulation of other objects, or it is possible to “get it on the cheap”. Typically, the following combinations of insulation on the ceiling will take place, and excellent insulation results are achieved.
What can be stowed in the attic
- A layer of hydro-vapor barrier over the entire area.
- Styrofoam and expanded polystyrene (residues) between the logs 5 centimeters thick.
- A layer of screened coal slag with expanded clay 20 centimeters thick between the logs and on top of them.
- Old felt, carpets, and clothes with a layer of 2 centimeters with lime, preventing air convection in expanded clay.
- Planks and chipboard with continuous flooring - 2 centimeters.
This example demonstrates the possibility of using and combining a wide variety of materials for ceiling insulation. It is only important to achieve a layer of insulation equivalent in thickness and its correct water protection.
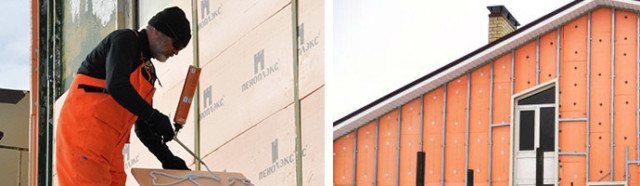
Insulation of the building facade
Insulation of walls with penoplex
Most of the heat loss occurs through the outer walls. Before starting the insulation of the facade, it is necessary to complete preparatory work, which includes:
- cleaning the wall surface from dust and other contaminants;
- leveling with plaster;
- for better adhesion on a smooth surface, you need to make notches with an ax;
- in addition, it is necessary to apply a layer of primer, for this a concrete contact primer is a good choice.
Read about how to apply primer to walls in this article.
Maybe,
Ceiling insulation with penoplex: installation technology and work procedure - House and plot
A person wants to live comfortably both in the city and in the countryside. This will help him in these unique properties of the material - the foam complex.
Ideal for insulating city balconies and loggias, as well as private houses - verandas and living rooms.
The expanded polystyrene complex is made of expanded polystyrene, extruded by extrusion.This material has remarkable chemical and physical properties that make it possible to bypass other building heating systems in terms of quality, reliability and efficiency.
Why is penoplex convenient?
Penoplex is used not only for thermal insulation of roofs, but also for floors, walls and foundations of houses. It protects your home from noisy neighbors, good sound insulation is also one of the important properties of this irreplaceable building material.
This can also include the beneficial properties of the foamed plexus:
- Ecological cleanliness. Does not contain hazardous resins, fibers, isolated during operation from some building materials. Does not harm the health of the household, made with high quality ingredients.
- Penoplex does not allow steam to pass through, does not absorb water. Accordingly, no condensation forms on its plates.
- Does not react chemically with the environment. No mold, rotting or decay on the material.
- High strength due to high density.
- It is easy to install. Even a lay developer can handle this. The foam complex can be installed very quickly, thanks to the presence of its panels with a special projection.
- Easily adheres to surface materials. This quality of insulation is achieved by a rough surface.
- Does not weigh the entire structure. Low specific gravity.
- Lasting. Thermal insulation properties are retained for almost 50 years.
- Does not require special weather conditions for installation. Neither rain, nor dirt, nor heat, nor cold affect the quality of the foamy plaster. This property was appreciated by all the owners: the residents of the city - in the insulation of the balcony, the inhabitants of the village - in the insulation of the house.
You can find out more about the types of foam and their technical properties in this article.
Please note that only ceiling insulation does not give the desired effect. In order to make the room comfortable and cozy, it is necessary to pay attention to the thermal insulation of the ceiling, floor and walls at the same time.
Good windows and doors that keep the wind out of the street increase the protection of the house from cold, frost and temperature extremes.
The foam complex is installed in four stages:
- This document is currently under preparation.
- Consumables are purchased.
- The surface is cleaned.
- The panels are glued to the ceiling or floor.
To create a foam ceiling from a loggia or balcony in city apartments or in a room of a private wooden house, you need:
- Stairs.
- Level.
- Perforator.
- The hammer.
- Knife.
Before starting work, you always need to stock up on:
- with special fastening tools - mushrooms;
- with foam for installation;
- with antifungal primer;
- dry glue.
Now you can continue installing the polyurethane foam on the ceiling.
Preparing for installation
Preparation of the base (ceiling) for installation is carried out in several stages:
- The ceiling is free of dirt and deposits.
- Aligned with plaster.
- The spatula is used to fill holes, gouges and cracks.
- After leveling the ceiling with plaster and sealing the holes, gaps and crevices with a filler, carefully remove the excess.
- Apply a primer.
- The ceiling is drying out.
Please note: Before insulating a balcony or balcony, it must be glazed. Otherwise, your thermal insulation efforts will be useless.
After completing the installation of the polyurethane foam backing, proceed with the installation. First you need to determine the type of insulation.
You can choose from two options: installation from the attic side or thermal insulation from the inside of the room.
Installation on the attic side is as follows:
- The attic floor is thoroughly and accurately cleaned of dirt and deposits and, if necessary, leveled.
- Dry glue is applied to the boards, after which they are stacked in dense rows in the attic.
- After the glue has dried and the panels are glued to the attic, the gaps between the built-in materials are sealed with foam. To ensure good drying of the resulting structure, it is removed 24 hours a day.
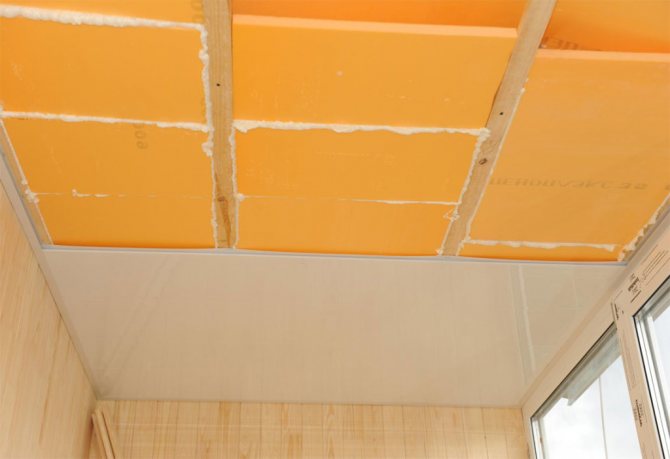
- Carefully cut off excess foam. The lower part of the boards is located on top of the foam boards.
Installation from the side of the room (loggia, balcony) is performed as follows
- The uncontaminated ceiling (leveled, with sealed gaps, potholes) is primed.
- Dry glue is applied to the expanded polystyrene tiles and then fixed to the ceiling.
- Use a drill to drill holes for the mushrooms (very carefully!).
- The holes created by the perforations are filled with mushrooms. They are necessary to ensure reliable fastening of the structure to the ceiling.
- Foam boards are filled with polystyrene at joints and gaps. After drying, the excess is carefully removed.
- The reinforcement mesh is now applied. For this, a coarse glue mixture is used.
- The surface of the ceiling is cleaned and primed.
- The finishing process is in progress.
- The final touch is decorative coating or paint.
Ceiling insulation completed.
Note: If you have an attic, it is best to insulate it. The second method of thermal insulation - using foam from the side of the room - makes sense if the neighbors live above it and do not have access to the attic.
Advantages of thermal insulation from the attic side:
- the useful area of the room is stored;
- The ceilings will not go down after installing the foam;
- Additional work on the attic floor is carried out in the same way as with floor coverings.
Penoplex is a modern solution for room insulation
Penoplex is a practical, practical material that retains its valuable properties for several decades. It is easy to install. Even an inexperienced builder can do it.
The foam insulation results are excellent, especially if the thermal insulation is performed simultaneously with the insulation of floors, walls, and replacement of windows and doors.
Try the foam complex and you will see for yourself!
How to insulate the ceiling from the attic side is described in the video materials:
Source: https://b-dom64.online/dom/uteplenie-potolka-penopleksom-tehnologija-montazha-i-porjadok-rabot.html
Insulation of the foundation
Insulation of the foundation. It can be performed both in a building under construction and in an already constructed one.
Despite the fact that the foundation is an underground part of the building and is closed from cold air, however, the soil can freeze deep enough. In addition, the cold rises to the wall (cold bridges).
This type of work includes three stages:
- Insulation of the foundation (vertical and horizontal).
- Basement insulation (vertical).
- Insulation of the blind area (horizontal).
It is important: for the maximum efficiency of the process of warming the foundation of the building, none of the above steps can be neglected.
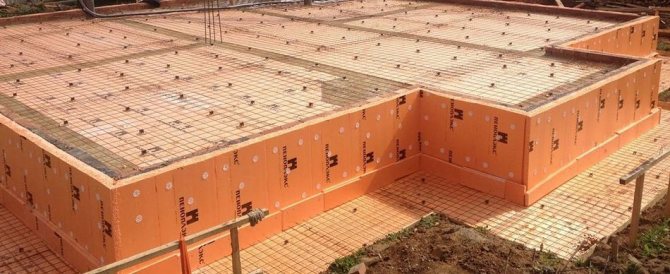
The process of warming the foundation with Penoplex slabs is as follows:
- Before installing Penoplex boards, it is necessary to apply a waterproofing layer.
- Thermal insulation boards are mounted using an adhesive mixture that is applied to the surface with a notched trowel. The device is executed starting from the bottom row.
- If necessary, using the same glue, a second layer of heat insulator is mounted.
- Insulation is carried out up to and including the base / plinth.
- Backfilling is in progress.
- In order to avoid freezing of the soil, it is necessary to perform horizontal thermal insulation under the blind area along the entire perimeter of the building.
- A fiberglass mesh is laid on the basement part and the structure is finished.
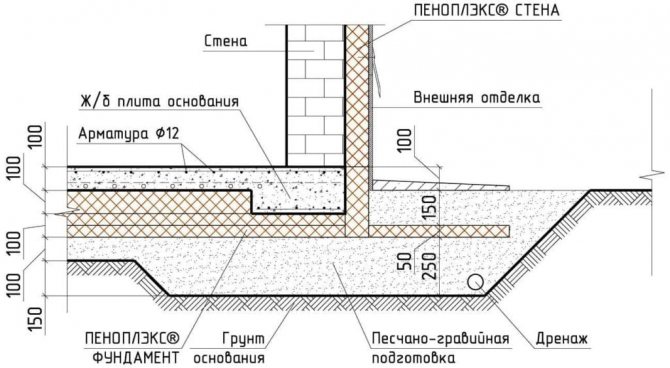
The scheme of insulation of the foundation with penoplex
Floor insulation
Bath floor. Warming is performed on a flat surface
Penoplex is great for insulating floors in a wooden house. Due to the fact that it almost does not absorb moisture, it can be effectively used in a bath. This can be done even without a screed.If installed in a steam room, it is necessary to ensure that the thermal insulation does not adjoin the stove or other heating elements.
It is easier to clad the balcony from the inside, especially if these are the upper floors, by gluing Penoplex slabs from its inside. Further, you can hide the slabs with lining, plastic or MDF. Penoplex is an excellent thermal insulation material. Due to its ease, it is convenient to mount it on any structure, especially since there are many installation methods. To the question: is Penoplex harmful to health, you can safely give a negative answer. Look video tips for wall insulation with penoplex:
Do you see inaccuracies, incomplete or incorrect information? Do you know how to make your article better?
Do you want to offer photos on a topic for publication?
Please help us make the site better! Leave a message and your contacts in the comments - we will contact you and together we will make the publication better!
How to fix penoplex to the wall: material characteristics, rules and installation methods
Timely insulation of buildings helps to effectively reduce heat loss and heating costs. The most popular insulation used in modern construction is penoplex.
To install the material, you need to figure out how to fix the penoplex to the wall in order to obtain the most insulated surface. Indeed, the effectiveness of thermal insulation depends on the correctly selected installation technology.

Technical characteristics and advantages of penoplex
Penoplex is a kind of extruded polystyrene foam. The material is a wear-resistant plate, inert to mechanical damage, decay, destruction and high humidity. It also has a long service life, frost resistance and does not require the use of waterproofing protection.
The high performance characteristics of penoplex make it possible to use it for internal and external thermal insulation of the foundation, walls, ceilings and floors. In addition, the material is widely used for interior decoration of wet rooms, insulation of balconies, loggias and verandas.
Particular attention is paid to the technology of installation of insulation "Facade" outside. In this case, it is required to create a ventilation space for laying the waterproofing layer.
For internal installation, "Comfort" penoplex is used, which provides good thermal insulation of the room, has increased strength, flexibility and reliability.
For external and internal work, it is recommended to use material of various standard sizes. For indoor installation, plates up to 4 cm thick are suitable, for outdoor ones - up to 10 cm.
Materials have the following characteristics:
- Thermal conductivity (W / mk): "Facade" and "Comfort" - 0.03.
- Flammability (MPa): "Facade" - 0.2; "Comfort" - 0.17.
- Moisture absorption (%): "Facade" - 0.6; "Comfort" - 0.41.
- Sound insulation (dB): "Facade" and "Comfort" - 42.
- Operating temperature (degrees): "Facade" and "Comfort" - from -99 to +74.
Plates for indoor and outdoor installation have standard dimensions: length - 1.2 m and width - 0.6 m.
Penoplex has a lot of advantages that make it stand out against the background of other well-known heaters (mineral wool, expanded polystyrene):
- Universal use.
- Wide operating temperature range.
- Resistant to steam and moisture.
- High thermal insulation.
- Long service life.
- Ease of processing and installation.
- Chemical resistance and safety.
Why Choose Penoplex?
Penoplex is a new generation building material. Insulation of walls and ceilings with foam from the inside has advantages over other materials (for example, foam) due to its high vapor barrier properties. Also, penoplex is superior to polystyrene in terms of:
- thermal conductivity
- moisture resistance
- compressive strength
Due to its properties to withstand maximum loads, penoplex is excellent for insulating flooring. In addition, unlike polystyrene, penoplex is thinner - this allows you to save space inside the room. In terms of price indicators, penoplex is also superior to polystyrene, however, the high price of the insulator is fully justified by its unique characteristics.
What is Penoplex?
Penoplex has a lot of advantages and is one of the most popular materials for insulation
This modern insulation consists of gas-filled extrusion foam. It is produced by extrusion from expanded polystyrene. The characteristics of penoplex include:
- environmental friendliness
- chemical inertness
- easy to cut with a knife
- does not crumble
- moisture resistance
- resistance to deformation
- noise absorption
- small thickness
- light weight
As can be seen from the list of material advantages, the insulation of the loggia with penoplex does not require the installation of a vapor barrier. The material has excellent moisture resistance properties and can be used in any premises. Disadvantages of the material:
- flammable
- toxic when burning
To avoid negative effects in the event of a possible fire, you should buy products with the addition of special flame retardant additives that increase fire resistance. Also, you should not cover open areas of the room with this material, but only lay between non-combustible building materials as an interlayer.
Pay attention to the technical specifications of the foam. It acts as an alternative to penoplex, but at a lower cost.
Read about the device of a warm floor on the balcony and loggia in this material. How to choose and install yourself.
Rules and recommendations for installing penoplex
Effective thermal insulation with penoplex is possible only if the technology of its installation is observed. Sheets are installed on a flat surface. The first to be fixed is the starting strip, made of a wooden beam or perforated metal. The width of the plank should correspond to the width of the insulation. Ready-made kits are on sale, consisting of a strip, external and internal corners for mounting at joints.
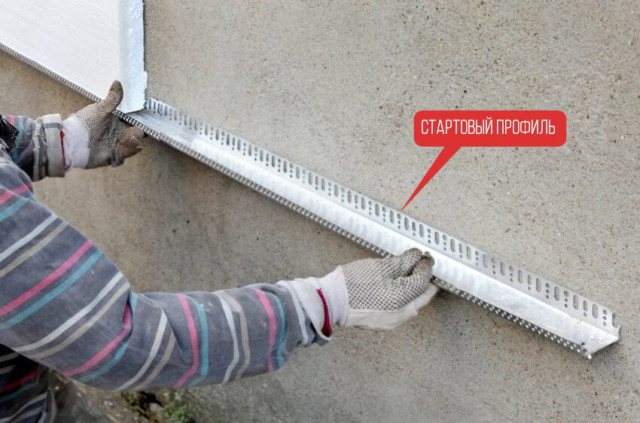
Installation of the starting plate is carried out in the following order:
- A horizontal guide is marked along the perimeter of the building using a level or chokline.
- First, the required level is set, then beacons are installed with a thread.
- The strip is mounted on the dowels along the intended guide.
The starter bar will ensure the correct fixing of the foam in compliance with the geometry of the installation.
The staggered arrangement of sheets from the starting bar up is the best way to install insulation. The adhesive is applied to the inner side of the insulation, and to fill the resulting voids, polyurethane foam is used, which does not include hazardous components.
After the installation of the penoplex is completed, a decorative surface finish is performed.
Installation of penoplex on glue or mastic
To implement installation in this way, it is necessary to ensure good ventilation of the room. The selected adhesive is prepared for work in accordance with the manufacturer's current recommendations. The composition is applied with a spatula, in stripes along the perimeter of the plate or in separate strokes, in the amount of 5-8 pcs. on one sheet.
The thickness of the adhesive or mastic application most often varies within 1-2 cm, depending on the ceiling surface. The adhesive coverage of each board should be close to 50% of the surface. After installing several sheets, isolate the joints by sealing them with the applied mastic.
Penoplex fixation methods
The choice of a suitable method of installing insulation is determined by the quality and type of surface, as well as the level of load that is created by the material.
Fastening the penoplex to the wall is performed:
- Mastics.
- Dry mixes.
- We glue.
- Dowels.
- Liquid nails.
- Self-tapping screws.
- Polyurethane foam.
Regardless of the method chosen, the installation of the insulation is carried out from the bottom up.
Polymer and bituminous mastics
Mastics are widely used for thermal insulation of plinths, foundations, exterior walls and balcony screens. They provide easy and safe wall mounting in the presence of adverse external factors.
Mastics are special viscous mixtures in tubes, ready to use. The tubes are installed in a construction gun, after which the mastic is evenly applied to the prepared insulation. Next, installation is carried out and the material is pressed to the surface for a minute.
Modern mastics contain a small amount of petroleum products, so all installation work is carried out in compliance with safety rules and in well-ventilated areas.
Dry mixes
Laying foam with dry cement-based mixtures is the most affordable option. Most often it is used to fix insulation to a concrete wall. The dry mixture is diluted according to the instructions to obtain a viscous solution. To simplify mixing, a special attachment for an electric drill is used.
The ready-made solution is applied to the surface of the insulation with a notched trowel to evenly fill the existing grooves. Next, the installation of insulation is carried out in the same way as in the previous method.
Adhesives
Penoplex can be glued to each other with the help of special adhesives, presented in the form of foam. The adhesive is used in the same way as the polyurethane foam. High adhesion of the material allows you to fix penoplex on smooth concrete and stone surfaces.
The composition is applied along the perimeter of the insulation with a construction gun for sealant or polyurethane foam. Then he is pressed against the treated surface for 40 seconds. It will take at least half an hour for the material to fully set.
Two hours later, the surface finishing works are carried out.
Dowel-shaped dowels
Fastener with a wide head, which is used for large areas of thermal insulation and for uneven surfaces, such as a brick wall.
For work, plastic or metal fasteners can be used, capable of withstanding heavy finishing materials and resistant to damage.
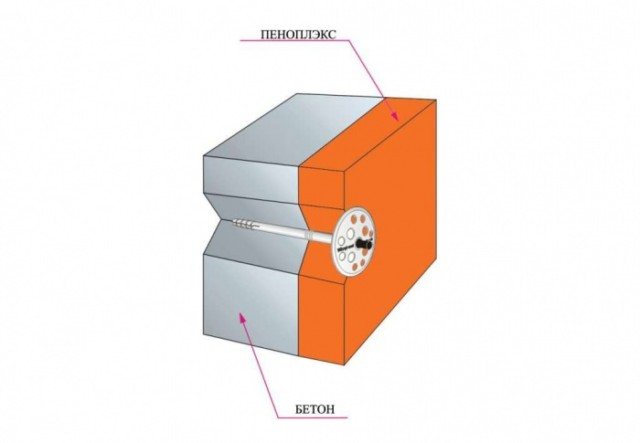
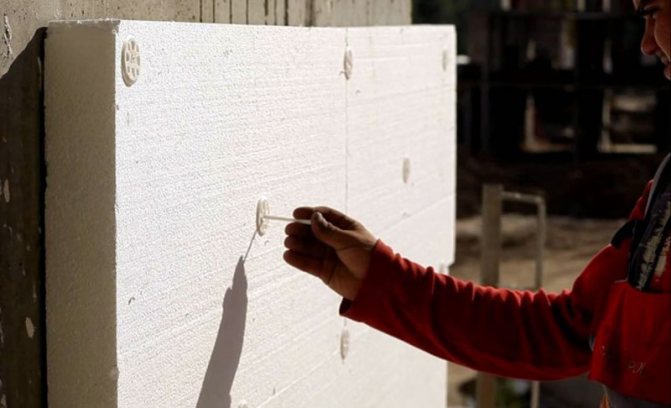
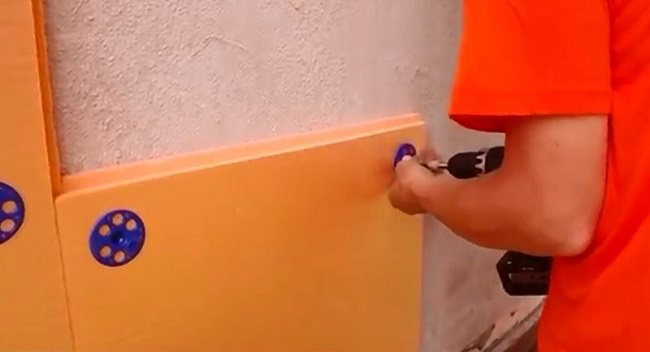
The disc dowels are attached as follows: a puncher makes holes up to 6 cm deep, which are filled with foam. Next, a dowel is inserted so that the cap does not rise above the surface of the insulation. Up to 5 dowels are used for one sheet of insulation. Adjacent sheets are connected to each other with a single dowel, which is inserted into the connecting seam.
Liquid Nails
You can glue the insulation on a leveled and primed base using liquid nails. The adhesive is applied with a gun in the center and along the perimeter of the foam board. Fixation is carried out by quickly pressing the material against the surface to be treated.
Liquid nails are a versatile, expensive compound that is suitable for wood and metal surfaces. Due to the high cost of the material, such insulation technology is advisable for small areas.
Self-tapping screws
The simplest and cheapest option for thermal insulation of surfaces is using self-tapping screws and a screwdriver. Suitable for fixing foam to a wooden wall on a pre-installed lathing.
Despite the simplicity and availability, this method of installing insulation has significant drawbacks. Unlike dowels, self-tapping screws have small caps, so their consumption is higher - up to 8 pieces per plate. Accordingly, this becomes the reason for the appearance of cold bridges and a decrease in the thermal insulation characteristics of the surface.
Mounting foam
The method of fixing the insulation using polyurethane foam is of an auxiliary nature if the main fastening is performed on dowels or self-tapping screws. In this case, the surface is glued with foam to increase the adhesion of the material to the surface. This method is used for cladding plastic and plaster surfaces.
The foam is applied with a gun in the center and perimeter of the foam sheet. Next, the insulation is applied to the surface and held for some time for quick setting.
How to insulate the ceiling with penoplex
Penoplex is equally effective for both external and internal thermal insulation, and it is suitable for any surface - ceiling, walls, floor. Ceiling insulation can be done in two ways, and both of them are quite simple.
Installation of thermal insulation with hangers
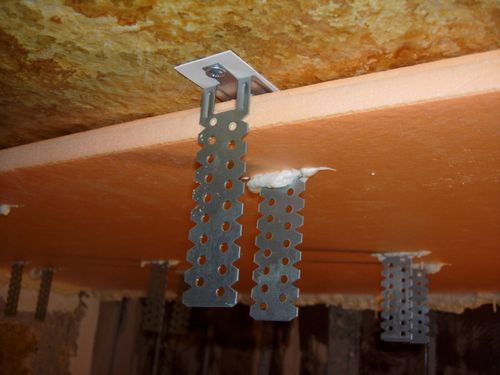
How to insulate the ceiling with penoplex
For work you will need:
- foam sheets 20 mm thick;
- sharp knife;
- roulette;
- metal suspensions;
Straight hanger for metal profiles - plastic dowels and screws;
- polyurethane foam;
- primer.
This method is suitable for flat ceilings. If the ceiling is made of concrete slabs, and there are gaps or chips at the joints, they are sealed with putty before insulation. Then the working area is checked using a level to ensure that there are no differences in height. After that, you can proceed to the thermal insulation of the surface.
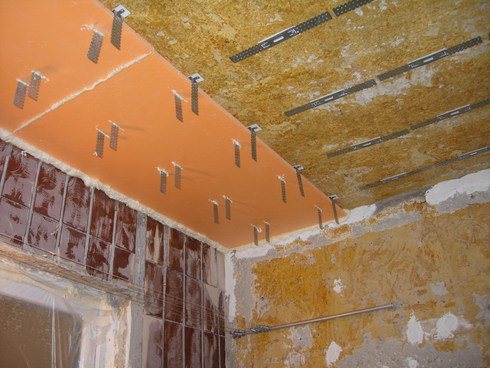
Installation of thermal insulation with hangers
The ceiling is primed and dried, the suspensions are prepared. In one of the corners, stepping back from the walls about 15 cm, a direct suspension is applied to the ceiling and fixed with dowels with screws. Further, another 15-20 cm retreat from the first suspension parallel to the wall, and the next one is attached. After completing this stage, the suspensions should be placed on the ceiling in even parallel rows with an interval of 2-3 cm.
Now the ends of the suspensions of the first row are bent downward and the attachment points are marked with a pencil on a sheet of penoplex. With a sharp knife, cut holes along the width of the suspension and apply the material to the ceiling, carefully threading the ends of the fasteners through the insulation. After laying the first sheet, proceed to the second, tightly joining the plates together. All fastening holes, seams between plates and joints with walls are sealed with polyurethane foam.
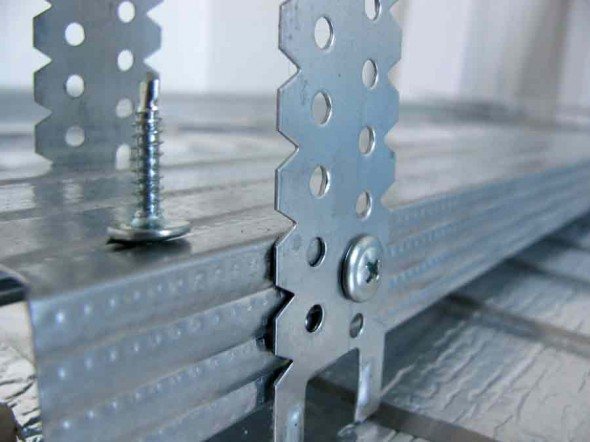
Instead of suspensions, many use special disc dowels or self-tapping screws. The principle of fastening and installing insulation remains the same. It is not recommended to use ordinary self-tapping screws for these purposes. The insulation layer is covered with plasterboard, wood, plastic panels.
Fastening to the lathing
Fastening to the lathing
The second method is used in cases where the ceiling has large differences in height or individual beams. For the lathing, choose a bar or an aluminum profile that matches the thickness of the insulation. In order to adjust the foam sheets less under the lathing cells, you should immediately fix the beams at a distance less than 1-2 cm from the width of the sheet.When the frame made of beams is ready, you can fix the thermal insulation.
The slabs are cut to length, glue is applied from the back side and tightly inserted into the lathing cells. All gaps and gaps between the insulation and the timber are blown out with foam, cut off the excess. A fiberglass reinforcing mesh is glued on top of the penoplex, and then the ceiling is finished.
All gaps and gaps between the insulation and the timber are blown out with foam, cut off the excess
Insulated ceiling sheathing
How to make double insulation
Often, this technology is used to insulate a balcony, loggia and veranda in order to create the most comfortable conditions for staying indoors.
It provides for laying the thermal insulation material in a double layer on the surface that cannot be glazed - the load-bearing wall and the parapet. Side walls, floor and ceiling are faced with one layer of insulation.
For double insulation, it is recommended to use penofol and penoplex, which provide reliable thermal insulation and reduce heat loss.
First, penoplex is installed using one of the methods presented above, on top of which penofol is mounted on metal staples or an adhesive composition.
The high performance characteristics of polystyrene foam as a heater allow it to be widely used for internal and external thermal insulation of buildings. The availability of material processing and the choice of the most suitable installation method allows you to effectively insulate various types of surfaces with your own hands, without attracting expensive specialists.
Main part
We will need:
- penoplex sheets
- construction knife
- polyurethane foam
- fastening tool (self-tapping screws)
Tools:
- hammer drill with attachment
- drill for mixing glue
- putty knife
- scalloped graters
- sandpaper for grouting plaster
- other decorative finishing tools
Work progress: wall and ceiling insulation
Fastening the insulation to the walls and ceiling can be of two options:
- on the crate
- directly on the wall
If you are going to mount penoplex on a wall, the perfect evenness and smoothness of the treated wall will allow the material to be securely fixed to the surface. When installing insulation in the crate, the evenness of the wall does not matter much.
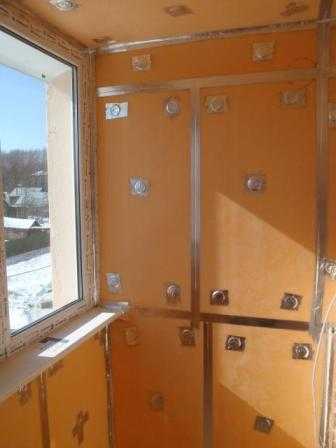
We carry out the installation of foam on the walls using the crate
- We fix the foam sheets to the surface of the ceiling and walls using disc-type dowels (with plastic cores). If you are going to put putty on the walls, the foam sheets should be additionally glued.
- Close the joints between the sheets polyurethane foam without toluene (it dissolves polystyrene). After drying, the foam is trimmed with a knife.
- If desired, we mount the heat-insulating layer with foil-clad polyethylene film, placing it with foil inside the room using polyurethane glue, creating the effect of a thermos, sealing the joints with metal tape.
- We make final finishing.
Do-it-yourself insulation of the loggia with penoplex from the corner. If you need to cut a groove in the panel, this can be done with a construction knife.
Work progress: floor insulation
Floor insulation with penoplex
Work on insulating the floor of the loggia with penoplex can be carried out using different methods:
- laying on logs
- screed laying
For laying the foam between wooden logs, sheets 5 - 10 cm thick are suitable. The logs are pre-treated with an antiseptic. The gaps between the lags and the sheets are filled with polyurethane foam.
Heat insulation under the screed is executed in the following sequence:
- penoplex
- polyethylene film
- finishing screed
Do not rush to lay the decorative coating on the concrete screed - let it harden and dry well. The hardening time of concrete depends on the climate in your area. Apply a layer of screed at least 5 cm.
After insulation, you will need to think about the appearance of the insulated room. Combining a room and a loggia can be an interesting design solution.
You will learn about other ways of insulating a loggia from our article. We will tell you about the current methods of thermal insulation using mineral wool and foam.
On the types of balcony flower boxes and their correct choice: https://balkonsami.ru/interer/ozelenenie/kak-pravilno-vyibrat-balkonnyie-yashhiki-dlya-tsvetov.html
Floor finishing
After installing the insulation on the floor, any decorative material is placed on the screed - wood flooring, laminate, linoleum or ceramic tiles. If desired, underfloor heating is mounted on top (infrared or based on heating mats).
If the floor was insulated using a log, sheets of plywood or OSB boards are laid on top of the logs, on which the final finish is then placed.
Ceiling and wall decoration
For the installation of the finishing, a wooden frame-frame is applied to the walls with the ceiling (if it was not installed earlier, when laying the insulation), to which the finishing material is attached. The frame is erected from narrow boards, treated with an antiseptic composition and installed on top of the foam. Such fastening makes the whole structure more reliable and durable.
For decoration of the ceiling and walls, plastic panels, drywall or wooden lining are most often used. By the way, the lining will additionally keep the heat in the room. It is important to pay attention to the fact that for plasterboard ceilings, a crate made of metal profiles is used.
After completing the installation of the finishing material, we lay the skirting boards for the floor and ceiling, as well as arrange the corners between the walls.
Advice: Installation is best done in warm weather. If you want to insulate the loggia with penoplex in the cold season, warm the room with a heater. It is not recommended to mount penoplex at temperatures above +25 degrees, since water from adhesive and cement compositions evaporates quickly.