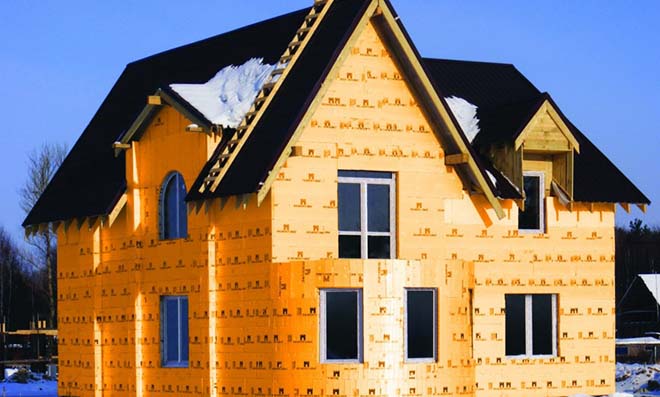
Do-it-yourself insulation of a wooden house outside with penoplex will help you keep warm even in winter.
Wood was the first material for the construction of human habitation. It has not lost its significance for modern construction. But if you think a timber house is warm by definition, then you are wrong. Even a tree house outside must be insulated.

We will tell you how to insulate a wooden house further.
About heat insulator
The material is popular both in private construction and on an industrial scale. All thanks to a number of advantages that Penoplex has:
- The minimum indicators of heat conductivity. Thanks to this, it retains all the warm air inside the house.
- Moisture repellent properties. The material does not absorb moisture at all, which means that it is not afraid of mold or fungus, which like to settle in a warm and humid environment.
- More durable than Styrofoam.
- Long service life.
- It can be used for insulating buildings made of gas and foam concrete, as well as silicate bricks.
- The presence of soundproofing properties.
- Ease of handling and installation. There is no need to acquire specific tools if the developer will do all the work with his own hands.
Apparently, Penoplex really deserves popularity, since there are a lot of positive characteristics.
Manufacturing technology
Insulation is a close relative of polystyrene, since it is also made from polystyrene balls. But there are some differences in the technological process that allow you to create a material with improved characteristics.
- bunker - polystyrene, fire retardants (reduce the flammability of the material) and other additives are loaded. Everything is mixed here;
- Extruder - in this machine, the components are fused and mixed several more times. In addition, another component is attached - a blowing agent, which creates a large number of cells filled with air;
- forming sheets using rollers or plates.
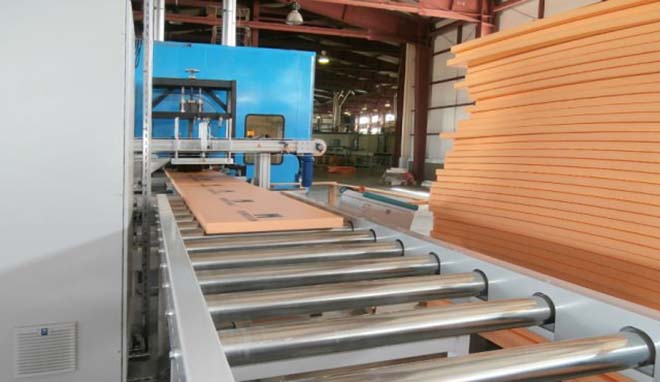
Thanks to this production, penoplex is obtained, suitable for insulating almost all buildings and important communications.
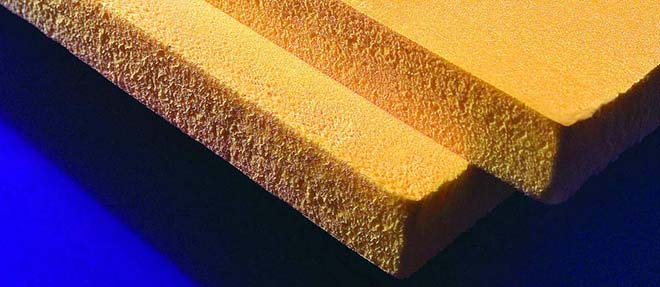
Design features
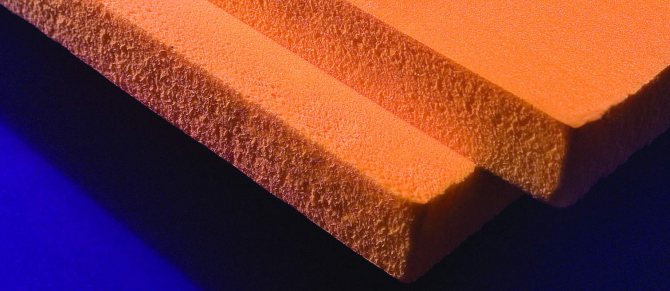
As mentioned above, it consists of a large number of cells filled with air. About 98% of the foam volume is air, and only 2% is polystyrene itself. At the same time, it is clearly seen on the cut that the structure is homogeneous, and the bubbles are evenly distributed throughout the entire layer of insulation.
It is known from physics lessons that air does not conduct heat well, that is, it heats up and cools down for a long time. Thanks to this, the material has thermal insulation properties.
Scope, is it possible to do the work yourself, with your own hands
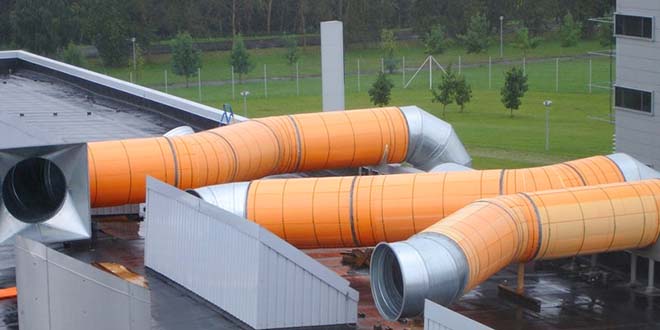
Since penoplex has a large number of positive characteristics as a heat-insulating material, it is used for insulation:
- Facades in private construction.
- Plinths and foundations.
- Loggias and balconies.
- External walls of industrial facilities and public buildings.
- Various pipelines.
- Required tools
When insulating a house outside with penoplex with your own hands under siding, you do not have to buy any special tools. The usual set that any responsible owner has is quite enough. The following tools are required:
- pencil or stamp for marking;
- tape measure;
- building level and plumb line to determine the horizontal and vertical;
- hammer or screwdriver;
- puncher for making holes for brackets;
- a stationery knife or an ordinary sharpened knife, a hacksaw for cutting foam sheets.
What exactly needs to be purchased at a hardware store is fasteners, that is, umbrella dowels.
Material features
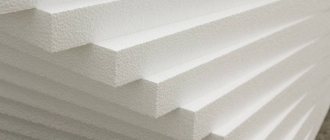
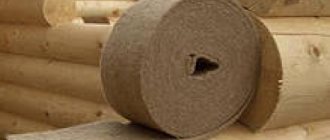
Penoplex is an extruded polystyrene foam. It is widely used to insulate walls, floors and foundations of various structures.
It can also be used to insulate wooden houses, summer cottages and other structures.
The material has a similar structure to foam, but they are produced using different technologies. Penoplex is manufactured using high temperatures and pressures.
Therefore, it turns out to be extremely light, but at the same time very durable. And the excellent thermal insulation characteristics are explained by the presence of air microgranules in the structure of the material.
Preparatory work
To carry out any work, it is necessary to carefully prepare the bases. You should not skip this stage, even if the house is completely new, and even more so for old buildings. The presence of fungal deposits under the penoplex will contribute to the rapid destruction of the main structure. After all, mold and mildew thrive in a warm and humid environment.
If cracks remain on the wall, they will become cold bridges. This means that there will be no effective insulation. In this case, the owner will lay down all responsibility on the team that performed the work or on the material. Different reasons require a special approach at the preparatory stage, therefore we will consider two options:
- wooden structure;
- brick house.
Wooden base
Wood is rightfully considered an environmentally friendly material. In such a house you feel light and comfortable. But at the same time, the material is short-lived. Quickly enough absorbs moisture from the environment and at the same time loses its attractiveness, and even thermal insulation properties. Therefore, when preparing a wooden base for penoplex, they are attentive to:
- Presence of mold, mildew or insects on the substrate. Everything is carefully cleaned and treated with a special antiseptic composition, as well as a moisture-repellent agent.
- Differences on the wall. If there are strongly protruding places, it is better to cut them or remove them in another way.
- Cracks. If the house is built of rounded logs, then it is necessary to caulk the inter-crown space with natural material and only after that proceed to the sheathing with penoplex.
- If there are rotten parts, they are replaced and reinforced.
- The new home is given time to shrink naturally.
In addition, do not forget to remove all hinged structures that can create inconvenience in the process of decorating the house. And all metal parts that cannot be removed are coated with a special compound that protects against corrosion.
Brick base
A brick base also requires careful preparation. The main stages practically do not differ from a wooden house:
- freeing walls from curtain structures;
- sealing cracks and depressions - cement mortar is used for this;
- cleaning the base from dust, stains and mildew. Here you need to choose the right means suitable for processing bricks;
- a new structure takes time to shrink.
If you do everything yourself, but correctly, then the premises will become warm and reliable, and the siding finish will cover both the insulation and the main structures from the negative effects of the environment.
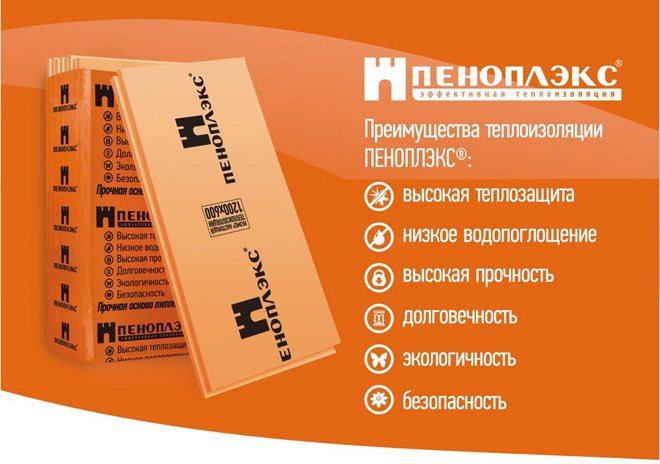
Penoplex characteristics
This name has extruded polystyrene foam. It is the most productive heat insulator due to its qualities:

- low moisture absorption, its cellular structure practically does not absorb water;
- high thermal efficiency allows using a smaller thickness of the insulating layer;
- fire safety, polystyrene foam does not burn and does not emit toxic substances;
- ease of installation;
- good strength and resistance to mechanical stress;
- resistance to the formation of fungi and mold.
Types of extruded polystyrene foam
Penoplex can have different density, its value is in the range of 25.0–45.0 kg / m³. Depending on this indicator, the material has a different purpose and is divided into five types:
- the first - for the roof (28.0–33.0 kg / m³);
- the second - for the foundation (29 kg / m³);
- the third is for walls (25 kg / m³);
- the fourth is universal (25.0–35.0 kg / m³);
- the fifth is industrial (45.0 kg / m³).
Each of them has its own purpose depending on the name. The universal version has collected all the best indicators, therefore it can be applied to any part of a wooden building.
Industrial penoplex has the highest strength. It is used for road construction and insulation of industrial pipelines.
Frame fabrication and vapor barrier
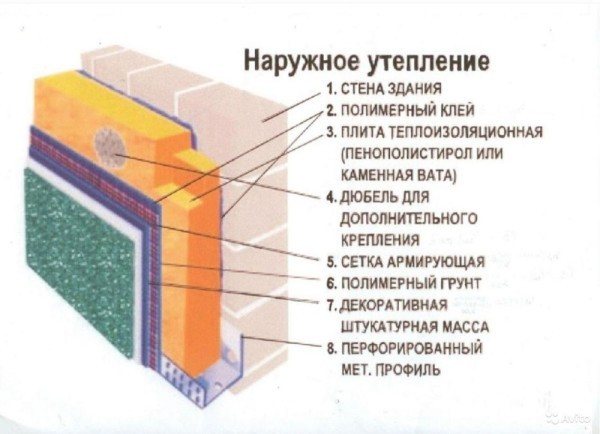
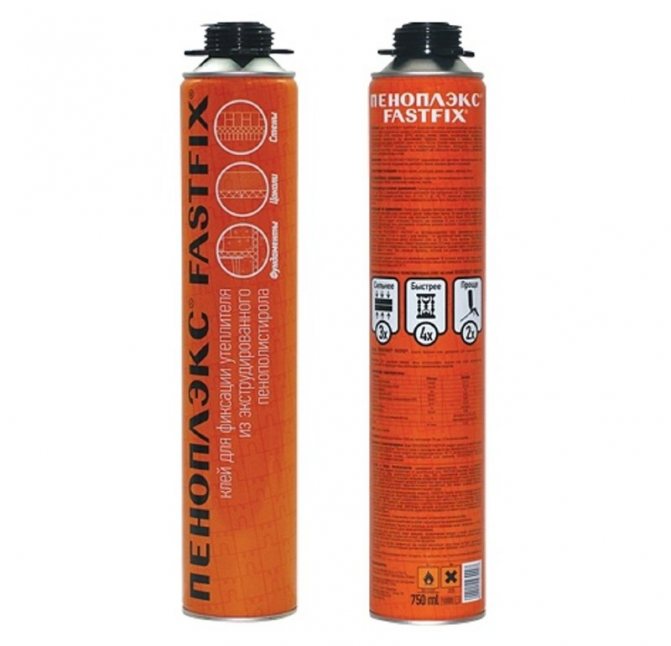
In order to attach the penoplex to the wall, there is no need to install an additional frame. The material is securely fixed with glue and mechanical fasteners to the base. But to fix the siding on the penoplex, a crate is needed. It can be made from:
- Wooden beams.
- Metal profile.
But before starting the insulation process, the walls should be covered with waterproofing. To do this, use a vapor barrier membrane or bitumen mastic. If it is a film, then they begin to lay it from the bottom of the wall, so that the next layer covers the previous one by 10-15 cm.
The joints are glued with tape, the membrane is fixed with a construction stapler. The entire surface is treated with mastic, without missing a single detail. It is imperative to completely dry the layer.
Wooden frame
Wood lathing is capable of withstanding vinyl panels, but metal siding will require something sturdier. Wooden parts are coated with a protective compound that will help extend the service life.
A wooden frame is installed already on top of the foam, you just need to wait until the adhesive composition, on which the heat insulator was attached, has completely dried. To fix the battens, front dowels are chosen, the length of which is equal to the thickness of the insulation multiplied by 2.
Such a frame will not only serve as a supporting structure for siding, but also create a ventilation gap. For foam insulation, it is simply necessary to leave such a gap for the natural removal of excess steam.
Metal crate
If a metal profile is chosen for the installation of the siding, then the brackets will have to be fixed even before the insulation is attached. Therefore, they adhere to the following plan:
- laying waterproofing;
- markings for brackets;
- installation of brackets;
- fixing the penoplex;
- fastening guides.
In order for the insulation to be conveniently placed in those places where the brackets are, holes are made in the penoplex and put on the parts. Be sure to glue the heat-insulating material, and then additionally fix it with dowels.
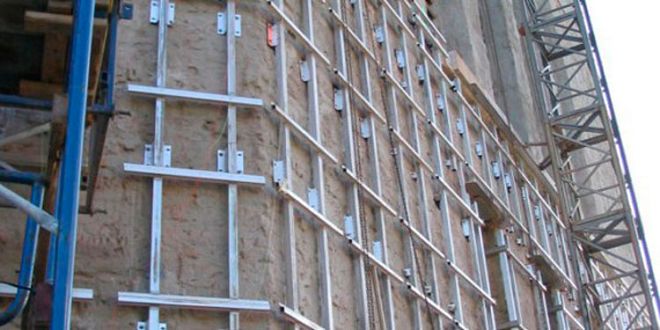
After the outer walls are sheathed with insulation, the guides are fixed to fix the siding. This will create a ventilation gap.
Wall insulation technology
To create a warm and comfortable indoor climate, you can insulate a wooden house with penoplex.
Before insulation, you should prepare the work surface. First of all, it is leveled in such a way that there are no fronts larger than 20 mm.
A large knife should be used to cut the material into pieces of the desired size. It should be sharp enough so that the material does not crumble.
The resulting slabs can be laid end-to-end or overshoot. In the second option, gaps are formed between the plates, which should be filled with foam.
Before installing thermal insulation, a vapor barrier film should be installed, this is especially important when insulating a house from a bar.
If you do not put the film, then the wall will turn out to be breathable, but under the influence of moisture, the material will quickly become unusable.
Instructions for thermal insulation of the house outside
The technology of wall decoration with this insulation is quite simple. A beginner can do the job on his own. The only thing you have to do carefully is to study the theoretical foundations of the process. If you follow the instructions, then there should be no problems.
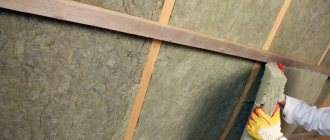
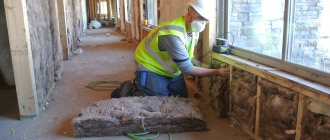
Thermal insulation of walls with mineral wool
To attach mineral wool under the siding to the base, you will need to make an additional crate, which will be an additional support for the insulation. The scheme of actions is approximately as follows:
- Laying waterproofing.
- Installation of a frame for mineral wool.
- Installation of mineral wool mats.
- Laying another layer of waterproofing.
- Fixing insulation and membranes with dowels with wide caps. For a secure fit, there are 5 mechanical fasteners per mat.
- Installation of a frame for siding.
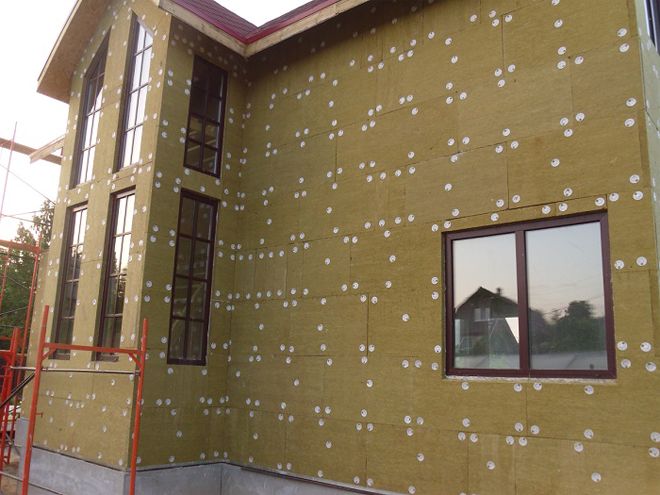
In this case, the entire structure will be as reliable as possible and the insulation will not settle over time.
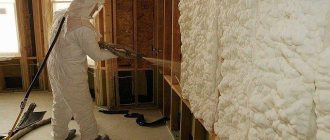
Heat insulator installation
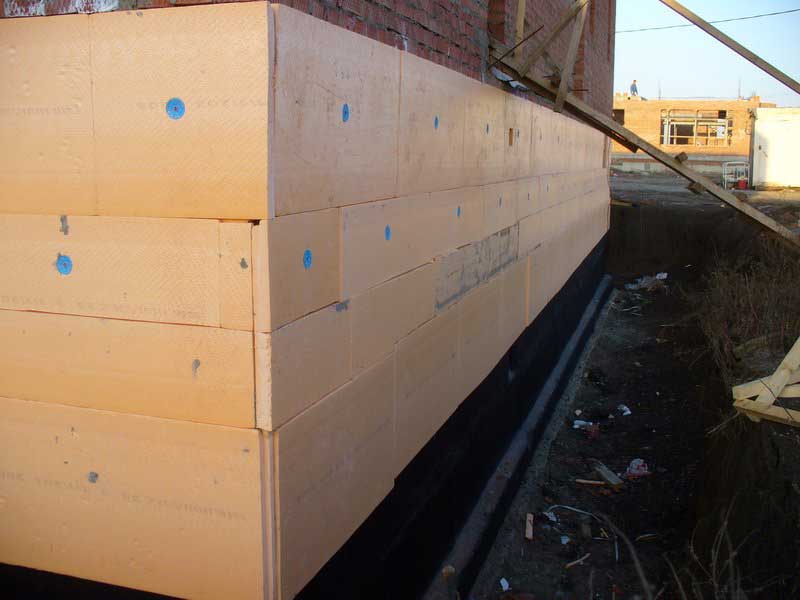
As for the penoplex, there is no need to mount an additional frame for insulation here. This significantly reduces the time required to complete the work. In order for the insulation to be fixed securely, they adhere to the following plan:
- a starting profile is installed above the foundation or plinth;
- finishing starts from the bottom corner of the house;
- an adhesive solution is applied to a sheet of penoplex around the perimeter, and several blunders are made in the center;
- the lower edge of the element is laid in the starting profile and pressed tightly against the base;
- the next sheet is covered with glue and tightly applied to the first sheet;
- this is how the first row is finished;
- in the next row, the sheets are shifted to the side, half the length. This method of fastening will help to avoid the coincidence of the seams, which means that the structure will be stronger;
- sheathe the entire wall.
When the glue dries, they begin to mechanically fix the foam. Holes are made using a puncher. Dowels are installed in them, after which the core is screwed in.
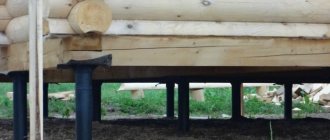
Insulation of the foundation
With the help of penoplex, you can also perform thermal insulation of the foundation of a wooden house. In this case, the plates should be installed from the inside to prevent the formation of condensation on the inner surface of the wall.
Thermal insulation of the foundation also allows you to create an optimal basement microclimate. In addition, the room will become much warmer, and heating costs will be reduced.
Video to help:
Additionally, you can make the floor insulation in a wooden house.
Fastening guide elements
Under the siding, you need to correctly set the guides. If the panels are installed horizontally, the profiles are aligned vertically. The elements are spaced evenly, and the distance between them matches the distance between the holes in the perforated edge.
For panels that are installed vertically, a horizontal crate is suitable. In this case, too, all parts are evenly spaced. Do not secure the guides too close to each other. The optimal distance will be 40-50 cm. During fixing, be sure to control how smoothly both the profiles and the siding panels are attached.
Is it worth it to insulate a wooden house with Penoplex
Last time we talked about the characteristics of different manufacturers of extruded polystyrene foam, one of which is Penoplex. Today we will help you figure out why the insulation of a wooden house with Penoplex can be harmful. The basis for everything is the low vapor permeability of this material, which disrupts the natural circulation of air through the wood. EPPS is suitable for foundations, plinths or blind areas, in other cases it is not used.Although in some cases it is theoretically possible.
Is it possible to insulate a wooden house with EPS
Wall insulation with Penoplex is allowed only in frame houses.
Insulation of a wooden house with Penoplex is not always possible. First of all, you need to look at the construction of the house itself. For example, if it is a frame, then polymeric materials can be used to insulate any structural elements. If we are talking about structures made of a log or a bar, then the insulation of a wooden house from the inside with Penoplex can still be allowed, but external wall insulation in this case is simply excluded.
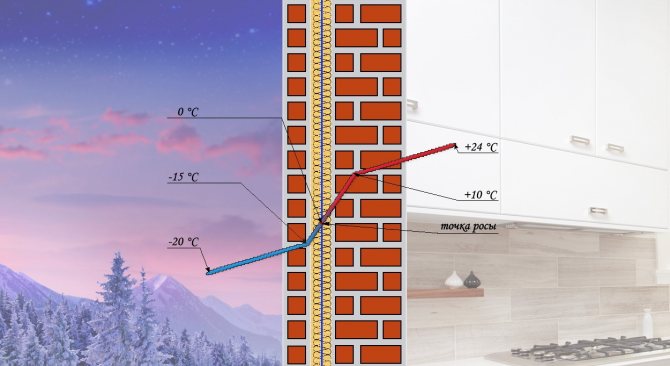
Such limitations are associated with the characteristics of the extruded polystyrene foam. It practically does not pass steam, the coefficient is only 0.013 mg / m * h * Pa. For ordinary foam, this value is five times higher, not to mention natural wood, which allows steam to pass in a volume of 0.32 mg / m * h * Pa.
The use of extruded polystyrene foam will disrupt the natural circulation of air, the house will stop breathing.
As a result:
- moisture accumulates in the structure of the wood;
- harmful microflora is actively developing;
- the fibers of the tree are destroyed, the material decays.
Insulation of a wooden house from the inside with Penoplex is the installation of thermal insulation into the floor and attic floor, on the roof, but not on the walls. It should be understood that we are talking about the theoretical possibility of using extruded polystyrene foam. The material is very expensive and therefore basically it is used only for insulation of the foundation or basement. This type of work can be attributed to the insulation of a wooden house outside with Penoplex, since the foundation and basement are also structural elements of housing.
Roof insulation with Penoplex
Penoplex can be used to insulate the attic, but it is expensive.
Roof insulation with Penoplex, again in theory, is quite possible, everything depends only on the cost of thermal insulation. Working with extruded foam is as easy as working with regular foam, the techniques are the same. By definition, in any house made of wood, the roof consists of a rafter system. Depending on its configuration, another living space can be equipped in the attic, which is called the attic. Insulation of the attic with Penoplex, layers from the inside:
- interior decoration;
- a layer of extruded polystyrene foam, which is held between the rafters on polyurethane foam, and all joints are filled with it;
- diffusion membrane - although extruded polystyrene foam is not afraid of moisture, it does not place additional waterproofing, at least to protect the rafters;
- ventilated gap of 15 mm or more;
- roof finishing.
Roof insulation with Penoplex is a rare occurrence due to the inexpediency of using such an expensive material. After all, you can replace it with ordinary foam, while getting the same result, that is, there is no technical need for the use of EPS.
Wooden cabins, insulated for summer cottages, can be operated even in winter, but only with additional heating.
Insulation of the ceiling and floor with Penoplex
You can easily carry out insulation of the ceiling with Penoplex, as well as the floor, but it is too expensive. Apart from the obvious insulation, there are no other advantages. At the same time, not only extruded polystyrene foam will cope with the task of insulating, many materials are suitable for this:
Professional advice
To insulate a house of penoplexes, it is completely unnecessary to select special weather conditions. It is enough that it does not rain or snow. The duration of drying of the adhesive solution will depend on the ambient temperature, but the quality of adhesion is not affected.
Before buying material and doing everything with your own hands, still consult with professionals. Maybe for a specific building it is better to choose another insulation or finishing material.In addition, a master who knows his business will help you accurately calculate the amount of materials and the thickness of the insulation.
Installation of thermal insulation
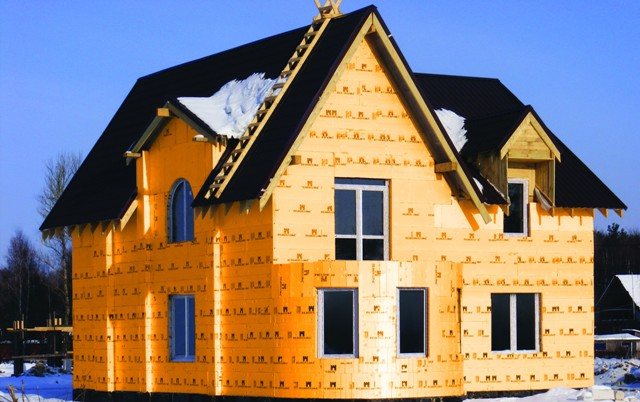
How to insulate a house with penoplex? To insulate a wooden house with penoplex from the outside, you should act in a comprehensive manner, preventing the occurrence of cold tunnels throughout the entire area of the walls. At the same time, if you insulate a wooden house from the outside with high quality, you can significantly save on the internal insulation of the house. Numerous reviews of experienced builders indicate that insulation of the house with foam outside is quite enough to achieve the thermal balance of the room.
Thermal insulation scheme for the outer walls of the building
If the budget of your project allows, you can insulate a wooden house in a complex way:
- Paste the walls outside with polystyrene.
- Dug and foam the wooden house from the inside.
- Insulate the floor.
- It is not worth insulating the floor with penoplex.
Everyone can insulate a wooden house with polystyrene outside.
Is penoplex suitable for insulating a wooden house?
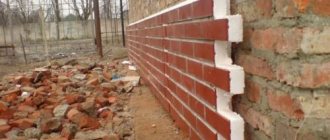
Since ancient times, in order to insulate a wooden building, it was lined with bricks. Such structures can often be found in villages and summer cottages. However, the old methods are being replaced by new technologies that make it possible to quickly carry out thermal insulation, to lay the foundation for effective heat preservation. Today, more and more often they practice insulation of a wooden house with penoplex, which, however, in no way interferes with giving it a "traditional" look afterwards, using already facing bricks. What other options are there in the use of such material as penoplex for a wooden house? In a wooden house, the facade and walls from the inside, the ceiling and the floor can be insulated with penoplex. You can read more about how to insulate the floor of a frame house with extruded polystyrene foam here. The rest will be discussed in more detail below.
Thermal insulation of a wooden house outside
Insulation of the walls of a wooden house outside with penoplex is carried out in compliance with some rules. The structure itself is built on the principle of a ventilated facade. In addition, it is possible to use extruded polystyrene foam for stone cladding. This means that there must be a gap between the foam and the wooden wall of the house, which ensures the flow of air. If this is not done and the wooden house is insulated with penoplex directly along the walls, moisture condensation and, as a result, the "start" of the decay process is unlikely to be avoided.
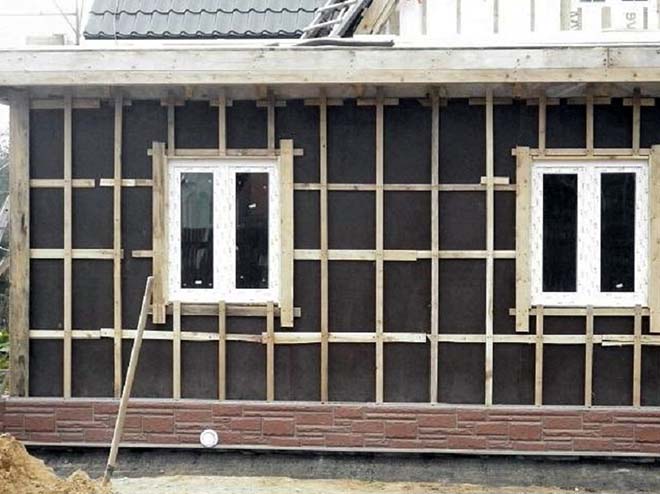
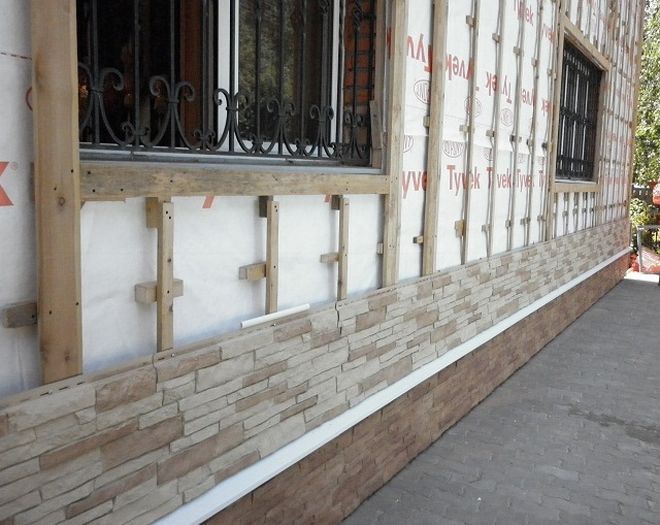
- Thermal insulation of a wooden house outside with penoplex begins with the installation of a batten made of 50x50 mm wooden bars.
- Insulation plates are placed in the crate. If the house is made of logs, then their unevenness will create conditions for ventilation. If this is a flat bar, then slats should be laid between it and the penoplex to create the necessary gap.
- Exterior decoration of a wooden house with penoplex is completed with cladding - siding, blockhouse, or all familiar bricks.
Especially worth mentioning about frame houses. Along with the widespread use of mineral wool, penoplex is also widespread for insulating a wooden frame house. At the same time, it can be mounted both outside and inside. Finishing a wooden house with penoplex from the outside is carried out according to the already described technology, from the inside, the insulation layer is usually covered with plasterboard, fiberboard or other materials for interior decoration.
Thermal insulation of a wooden house from the inside
If for some reason it is impossible to insulate the facade of a wooden house with penoplex from the outside, then it costs nothing to transfer this process inside. The mounting methods are the same here. As already mentioned, the internal insulation of the walls of a wooden house with penoplex is completed with a layer of plasterboard, lining, decorative panels. The ventilation gap between the insulation and the wall is also important.
A good move, allowing you to save heat, will be not only the floor with extruded polystyrene foam, but also the ceiling and walls.In a wooden house, this material is quite acceptable for a wide variety of structures, as they say, from floor to ceiling. Its benefits are as follows:
- Small thickness saves space. For example, insulation of the ceiling with sawdust requires a layer of at least 20 cm, while the thickness of extruded polystyrene foam requires much less.
- In cases where work can only be carried out from below, insulation of the ceiling in a wooden house with penoplex can be a way out of the situation.
- Simple installation on the lathing does not require a lot of effort.
Thermal insulation of the walls of a wooden house with penoplex is quite effective. True, many people use foam and mineral wool for these purposes - the difference in price affects. Extruded polystyrene foam is preferred by those who, firstly, cannot afford to lose extra centimeters of space (foam sheets are thinner than foam with the same thermal conductivity, and even more so mineral wool), and secondly, they pay a fair tribute to other properties of this wonderful material (low vapor permeability, long service life). Insulation of the walls of a wooden house, including a frame one, with penoplex is possible outside and inside, it can also be used for thermal insulation of the foundation, floor, ceiling, roof. An important condition is the arrangement of ventilation gaps between the foam and the insulated wooden surface of the wall, floor. This must be borne in mind during installation.
"Wet" facade
There are many rumors around the "wet" façade. This type of exterior cladding is often used to decorate the walls of apartments from the outside. With this method of installation, polystyrene foam is not additionally covered with a decorative layer.
Important! Wet façades are not suitable for wooden houses.
To create a "wet" facade, you will need to purchase the necessary list of materials in advance:
- specialized glue for fixing foam boards;
- glue for applying plaster;
- reinforced fiberglass sect for outdoor use;
- perforated corners;
- decorative plaster and paint for facades;
- high adhesion primer;
- high permeability primer.
Important! In order to insulate the house from the outside with penoplex, sheets with a thickness of at least 5 cm are required.
After purchasing these materials, you can start preparing the walls for applying a thermal insulation layer.
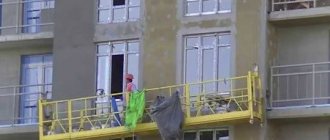
Facade preparation
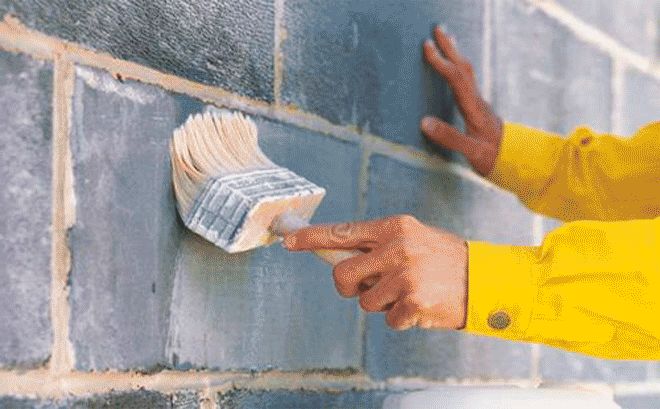
It is possible to properly insulate the facade, provided that the walls of the building were prepared for the installation of foam. At the initial stage, it is necessary to remove from them all elements that interfere with the work. This applies equally to peeling plaster. The base on which the expanded polystyrene will be mounted must be strong and reliable.
At the end of the first stage, you need to clean the wall from fine dirt. To do this, wipe the facade with a wet cloth.
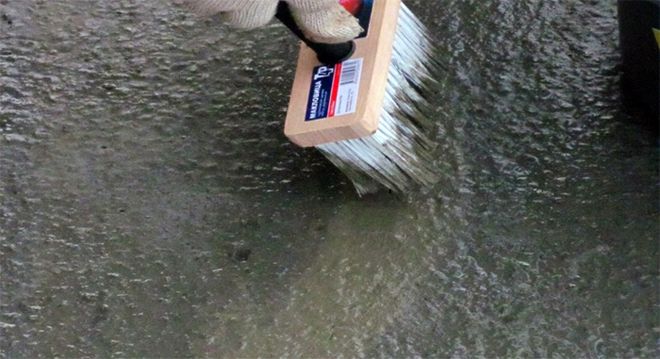
Next, a high permeability primer is applied to the facade. For wall treatment, it is more convenient to use a roller or brush. The primer must be applied in a thin layer. After the wall dries, the procedure is repeated.
Installation of thermal insulation
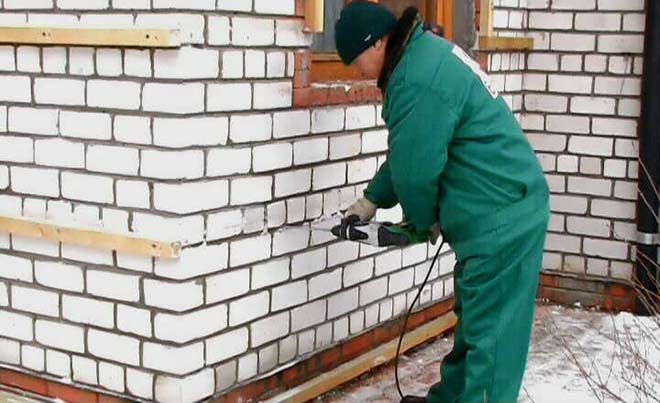
To align the first (bottom) layer of insulation, you need to install a profile along the wall. It is attached to bricks with dowels, to wood with self-tapping screws. During the installation of the profile, the building level should be used.
Foam adhesive used to fix the foam to the facades of buildings is applied along the perimeter of the sheet and its center. The first slab is installed in the lower corner of the wall. Penoplex is placed on the guide profile and slightly pressed down so that the glue securely fixes the insulation. Further, the position of the insulation is checked by means of the building level.
By a similar principle, the first row of foam is laid. It is important that the sheets are mounted as close to each other as possible. Subsequent rows are staggered.
When the work on the walls is completed, you need to go to the sheathing of the slopes. To do this, it is necessary to cut the foam plates in accordance with the dimensions of the window and door openings.
At the end, the expanded polystyrene sheets are additionally fixed with special dowels. For them, it is necessary to drill holes in the wall directly through the sheets of insulation. Its length should exceed the same parameter of the dowel by 10-15 mm.
Advice! Dowels are recommended to be placed at the joints of the insulation sheets. So their caps will be able to fix several plates at once.
When working with slopes, dowels are not used.
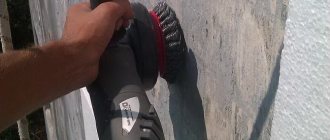
Preparation of insulation for decoration
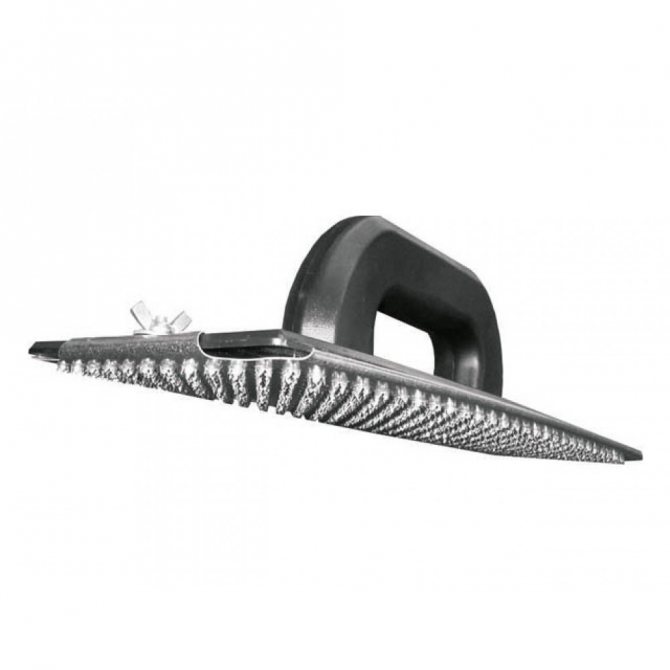
Before applying the finishing material to expanded polystyrene, its surface must be roughened. The problem can be solved by processing the penoplex with a metal brush, sandpaper or a special float designed for such work.
After completing this stage, an adhesive primer is applied to the surface of the foam. The gaps between the sheets are filled with the same glue that was used to fix the material to the wall.
Next, perforated corners are fixed at all outer corners (including slopes). To fix them, Ceresit CT 83 glue is used. When installing the corners, you must use a level.
Before finishing the foam, its surface is covered with a reinforced mesh. The material is first laid on the slopes. The mesh should be cut so that it fits into the corners. Further, the slopes are processed with Ceresit CT 83 glue (a layer with a thickness of 4-5 mm should be obtained), after which it is necessary to walk over the surface with a notched trowel.
At the end of the work, a mesh is applied to the slope and embedded in the glue. A notched trowel is used to level the reinforcement.
Attention! After the surface has dried, it is reapplied with glue.
Facades are reinforced in a similar way.
Styrofoam finishing
Before finishing, polystyrene sheets are pre-treated with a primer. The plaster is applied according to the instructions attached to it.
After about 5-7 minutes, the finishing material is additionally rubbed with a bevel. After the plaster has completely set, it can be painted over. It is recommended to use a roller for this. The paint is applied in 2 layers, while avoiding drips.