One popular modern development in the field of construction is a self-leveling underfloor heating. It allows you to make the life of the inhabitants of the house more comfortable. This is especially true in autumn, when it is already cold outside the window, and the centralized heating system is not yet functioning. In this case, the use of such a floor covering will return comfort to the apartment.
You don't have to hire a builder to get this floor. All the necessary work can be done on your own. In our article we will tell you more about this product and about its installation.
Self-leveling heated coating
Features of self-leveling underfloor heating
Bulk mixes are universal, they are used both in apartments and in private houses due to the advantages among other types of flooring. Let's take a closer look:
- a screed with a bulk mixture will create an ideal surface without seams, joints and drops, while standard screeds require additional leveling;
- the mixture does not contain toxic elements that, when heated, would emit corrosive vapors that are harmful to health;
- there are no cavities / pores on the finished coating that accumulate dust and dirt, which prevents the occurrence of an allergic reaction in sensitive people;
- any color / pattern / 3D pattern is applied to the self-leveling floor, thanks to which the house can acquire absolutely any design;
- the coating is resistant to heavy loads of household appliances and furniture, as well as to falling heavy objects;
- resistance to damage. The screed is endowed with plasticity and shrinks easily after hardening;
- chemical resistance to any floor cleaning products. The floor does not deform when cleaning with various chemically active compounds;
- increased fire resistance. Thanks to this, the floor is installed both in public buildings and in residential premises;
- moisture resistance;
These factors significantly push the self-leveling floor forward, leaving competitors behind. But this type of screed must be combined with a warm floor, in order to avoid unpleasant consequences.

Types of underfloor heating under a self-leveling coating
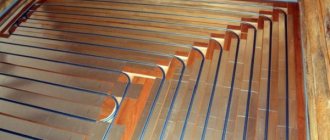
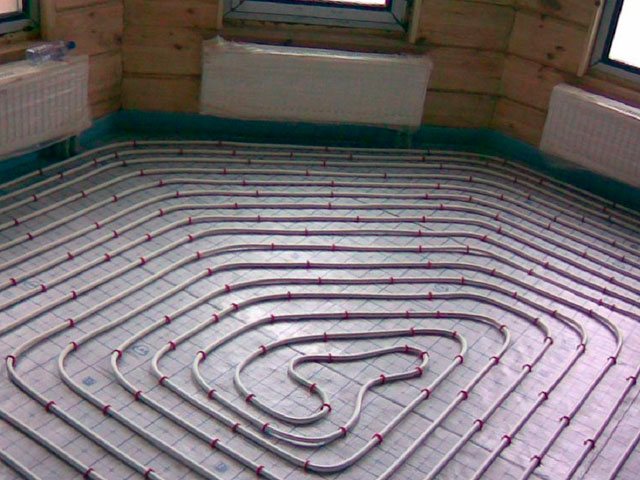
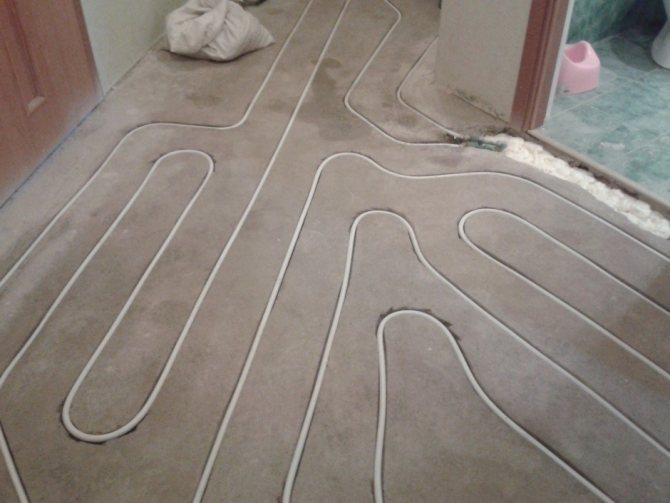
- Water heated floor. This type of underfloor heating is used mainly in private houses, due to the peculiarities of the installation. Consists of a system of pipes through which the coolant (water) moves. Depending on the room, it fits according to two main schemes - "snake" or "snail", sometimes the schemes are combined with each other. This type is difficult to install, requires a thick layer of filling, if one element breaks down, the entire structure fails, but at the same time it is a rather profitable option in financial terms;
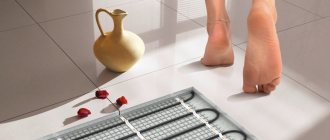
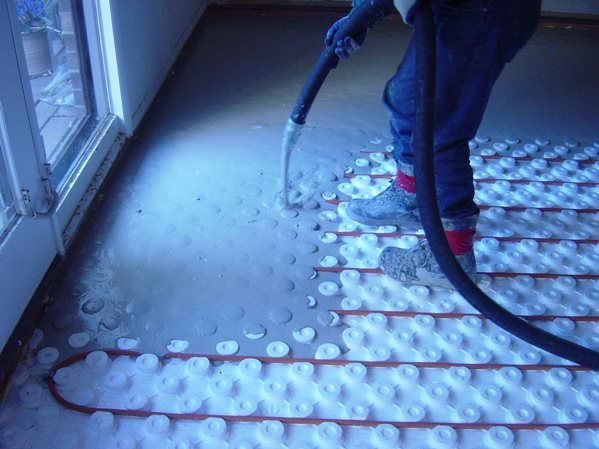
- Electrical cable system. It is based on heating wires, which are laid depending on the chosen scheme. The cable is available with one and two conductors. The cable is mounted on the base in the form of a mesh. A ready-to-install type of heating is also available in the form of warm mats, which must be laid on a prepared base and secured with a mortar tie;
- Infrared thermal film. This type is a modern type of electric underfloor heating. The film is easy to install, does not require additional elements. The film is laid on a prepared base, glued with adhesive tape, connected to the network, a hydro- and heat-insulating coating is laid on top, after which the system is pulled together with a special mixture. This option is ideal for combining with self-leveling floors, but taking into account that the layer should be minimal, in order to avoid damage to the heating elements.
We recommend: Instructions for installing underfloor heating
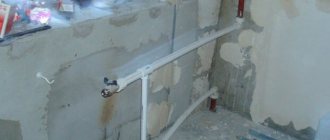
Basic rules for chipping an old screed
There are several basic rules when chasing in any of the ways, especially with regard to the old screed. The fact is that wiring is laid in the old screed, often it is aluminum and without corrugation (without any protection). Therefore, you first need to check the screed for wiring. If your wiring has changed or is changing at the moment, then this is not necessary if it is not energized. Although usually the cable is not laid in a screed, but under it, in a layer of insulation - sand. If you have a layer of sand under the screed, then most likely the cables are located exactly there and when cutting the screed material to a depth of 1-2 cm, nothing terrible will happen, but it is better to play it safe and check.
Recommend: Professional and not very professional rotary hammers or why Bosch tools come in two colors
Check for the presence of a cable in the screed
There are several ways to check the presence of a cable in the screed. They are similar to checking walls, but with a slight nuance - the cable can be positioned in any order, not at 90 degrees.
The easiest way to check if there is any wiring in the screed is with an electrical tester with a non-contact test function. The wiring must be live.
Types of self-leveling floor and prices for it in Moscow
The classification of the self-leveling floor depends on the elements included in the composition. Thus, there are 2 main types:
- polymer concrete. The mixture is made on the basis of sand, plasticizers and cement. The mixture is laid on a ready-made base using beacons to facilitate installation. Reinforced mesh reinforces the structure. Such floors freeze after two days;
- polymer. This variety has 3 subspecies;
- epoxy. The combination with an infrared system will bring the greatest effect, due to the need for a fill thickness of 2-3 mm. Endowed with protection against the effects of chemically active compounds, have many color variations. However, there are also disadvantages: loose fit to the base due to increased density and low elasticity, the heating temperature should not exceed 24-25 ° C;
- polyurethane. Durable, flexible, fits snugly with any base. After hardening, the floor becomes resilient and resistant to vibration. It is pleasant to move on the finished surface. The self-leveling floor of this subspecies is combined with all heating systems;
- methyl methacrylate. Environmentally friendly subspecies of the floor, resistant to chemicals, heating temperature range from -65 to + 140 ° C. The poured solution hardens in 2-3 hours, it is combined with all types of heating.
In online stores in Moscow, you can order various types of self-leveling floors. Consider popular brands:
- Volma Level Comfort. Suitable for use in bathrooms. Cures quickly, self-distributing. The average cost is from 300-350 rubles per bag;
- KnaufTribon. It cures quickly so that the flooring can be installed after one day. Price from 350-400 rubles for 1 piece;
- Bolars Optim SV-210. Used in industrial plants. Fast hardening, withstands increased loads. Prices start from 360-400 rubles for 1 piece;
- VetonitFastLevel. Used for large rooms, it can be combined with any finish. Cost from 400 rubles per bag of 20 kg;
- VetonitFinishLevel. An economical option if you need to fill a large space with a thin layer. Price from 550 rubles.
We recommend: What are the advantages of Heat plus underfloor heating?
Self-leveling floors vary in price and quality. Choose coverage based on your preferences and financial implications.
Installation of underfloor heating under the self-leveling
The warm floor under the self-leveling floor is laid in three options:
- film warm floor. The system is mounted with eyelets, the wires are connected, the sensor mounted in the substrate is connected to the regulator, and then the system is checked for serviceability. You can check the system by hand.If any of the film sheets does not exude heat, you must disconnect from the network and fix the problems;
- electrical cable system. Installation is similar to laying a film underfloor heating. However, the cables should not be stacked on top of each other, but if you are using self-regulating wire, then there is no need to worry about this. The function is checked only after pouring and completely drying the surface. The temperature measurement sensor is not poured with the mixture, dips and air formations in the poured mixture are also excluded, they must be neutralized when laying;
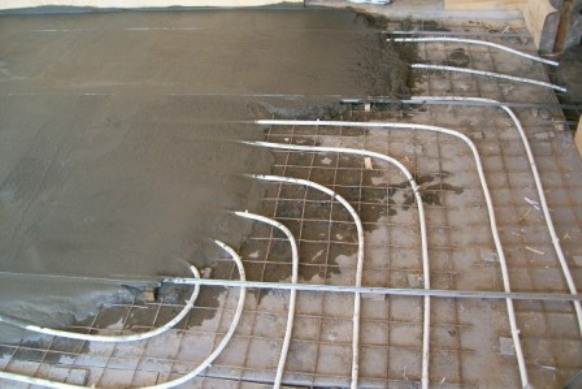
- water heat-insulated floor. The pipe contour is laid on the finished base, the manifold cabinet is installed, the outlet and supply pipes are drawn to the manifold, after which the system is poured with the ready-made mixture.
Cheap options for pipes made of polypropylene have the right to be installed, however, it is better to give preference to copper and metal-plastic pipes, they will serve without failures for decades.
Laying the water system
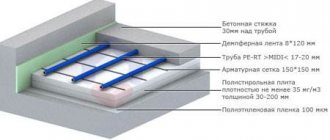
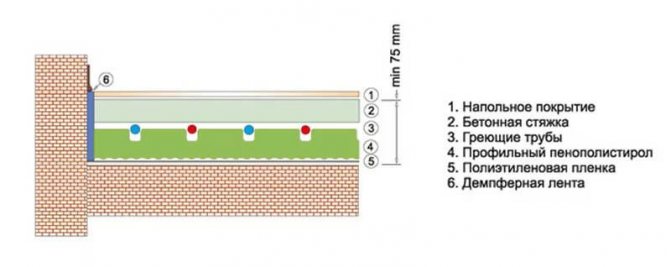
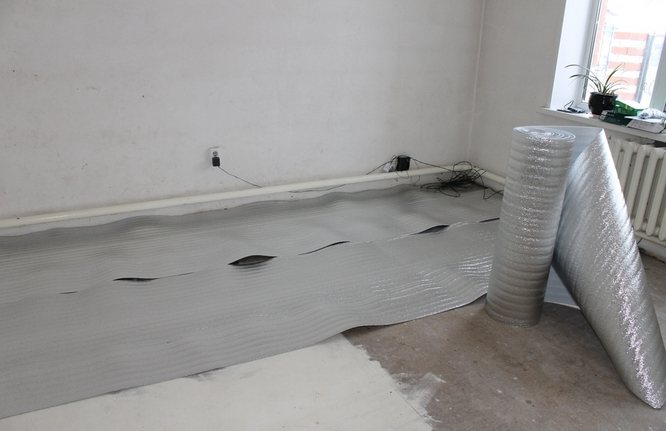
Warm water floors under the self-leveling floor are mounted on a layer of thermal insulation. When the project for the layout of the system and the base of the room are prepared, you need to cover the insulation layer. It can be expanded polystyrene or rolled foil insulation. The thickness of the latter should not be less than 7 mm along the perimeter of the room, a damper tape is installed. It will compensate for the thermal expansion of the self-leveling floor during heating and cooling.
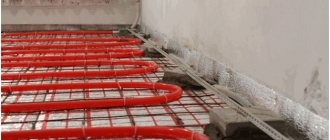
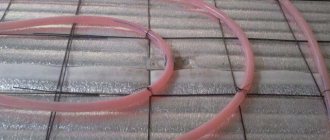
Roll insulation is fastened with adhesive tape. Next, a reinforcing mesh is laid on it. Pipes are laid on it. Special communications are suitable for heating. They are usually colored red. Fixation is carried out using special guides or staples, which are fixed with dowel-nails.
The pipes are laid out according to the "snail" or "snake" scheme. The choice depends on the configuration of the room. The distance between the pipes should not be less than 10 cm and more than 20 cm. After that, a layer of screed is poured onto the system. It should be at least 8 cm. The screed dries for 3-4 weeks. It will be possible to walk on it in 5-7 days.
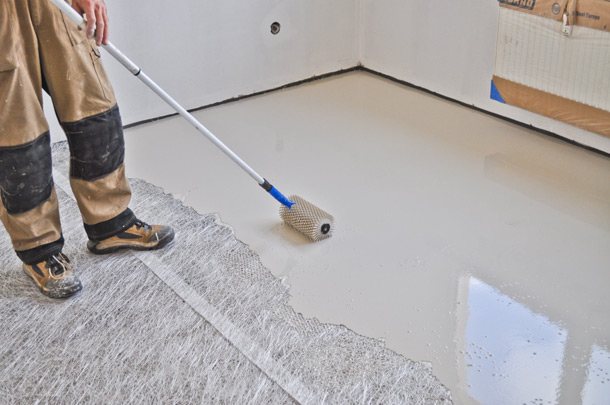
Installation of self-leveling coating
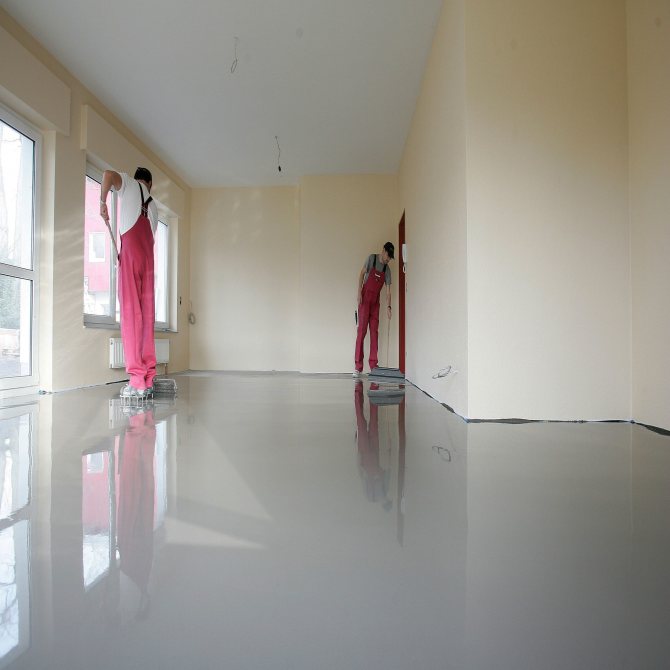
After laying the heating system, start pouring the self-leveling floor. A solution is prepared with the addition of water, mixed with a drill with a special nozzle. Filling is done as follows:
- the prepared mixture is poured onto a previously prepared heating structure;
- align with a needle roller to remove air accumulations;
- wait for the structure to dry;
- apply a protective layer of colorless varnish.
We recommend: What are the myths about the dangers of underfloor heating?
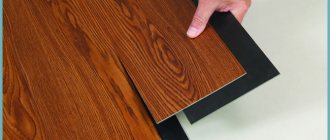
After these actions, the floor is put into operation and, if desired, a finishing coating is laid on it.
Installation of a self-leveling underfloor heating is an affordable and easy-to-install option, it is combined with any type of underfloor heating, it can be poured on your own without significant monetary contributions, which creates undeniable competition in the building materials market.
- Similar posts
- What is the layout of the underfloor heating mixing unit?
- How are PEX pipes for underfloor heating connected?
- What are the advantages of Heat plus underfloor heating?
- How to install a water-heated floor with your own hands?
- How does the underfloor heating work from a battery?
- What are the types of underfloor heating mats?
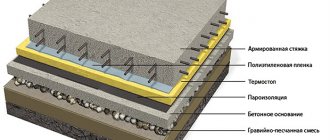
Self-leveling floor technology
- The first step is to remove the old flooring and vacuum the floors.
- Using the mixture, we close up all the irregularities and prime the surface.
- After the screed has completely dried, we lay our reflector insulation on the floor. This is foil-lined foam of roll execution, 2–5 mm thick.
- We glue the joints with tape.
- After the reflector has been laid, we begin to install the heating mats or water floor. We fix the elements to the floor with a special mounting strip.
- And, in fact, fill in the screed. It does not dry for long, from three to five days.
- After the screed is completely dry, we prime the floor and you can proceed to the next phase - pouring self-leveling floors.
Important! We make a kind of controller - we cover a small piece of screed with ordinary film, fasten it to the floor with tape and wait. If after a day moisture (condensation) has not formed under the film, then the screed is completely dry.
We remember furniture all the time. Under it, and we have a sketch of the arrangement, heating mats are not placed. Do-it-yourself filling is quite simple - it is important to follow the advice and not improvise.
For pouring, we dilute the mixture to the state of liquid "sour cream". Use a wide spatula to help the mixture spread evenly and neatly over the surface. With a needle roller, we roll the floor that has not yet hardened, in order to remove air from the mixture. The polymerization of such floors is fast enough and after about 7-8 hours our surface is ready for use.