Clay is a natural material from which our ancestors made a lot of useful household items. Later, jewelry for women began to be made from this material. Her color scheme can be very diverse: red, brown, gray, white, blue, yellow and combined combinations. It depends on its mineral composition. Now, in order to extract clay, it is not necessary to go in search of it in places of its accumulation. It is enough to contact any specialized store or creative laboratory. It is important to note that not any clay can be suitable for its creative embodiment into an object of art or everyday life.
How can clay be useful?
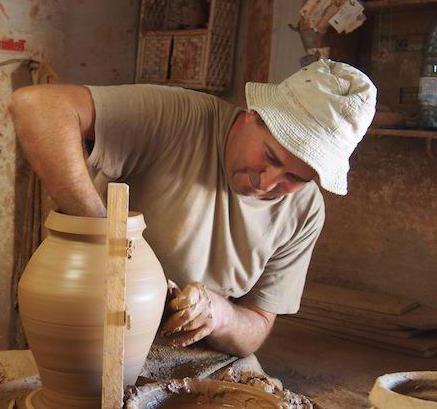
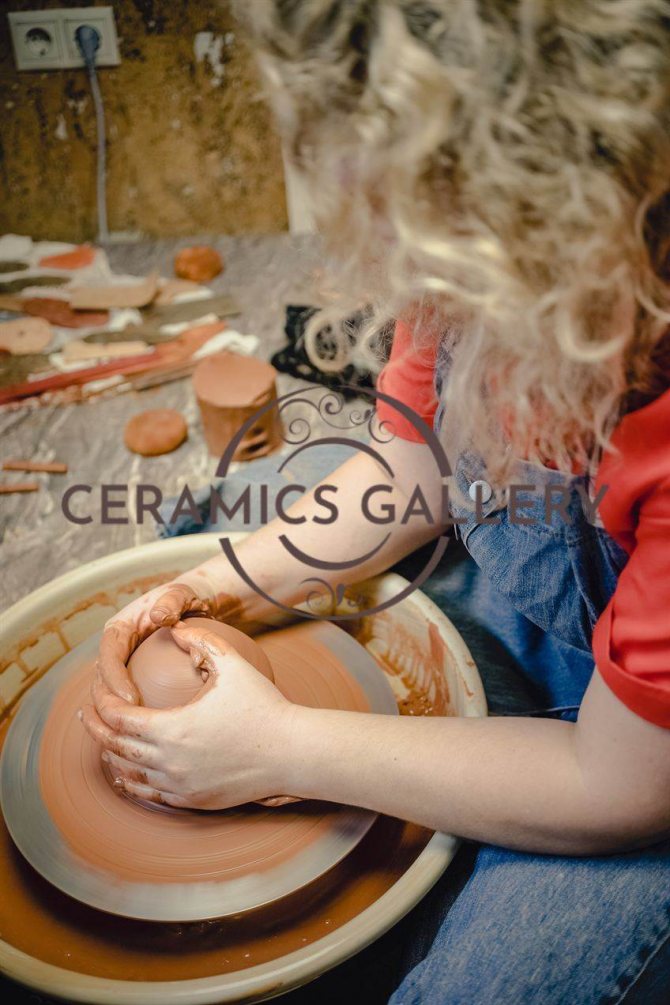
Any activity involving the combined interaction of manual labor and imagination not only captivates the mind of the master, but also helps the young body to develop fine motor skills of the fingers. And this means that thinking, imagination, a sense of color, geometry of an object and much more - will give the child the opportunity to develop his creativity. In addition, it is well known that modeling has a calming effect and makes it possible to focus on a specific subject - "here and now." And a gift made with your own hands and from a pure heart will not leave anyone indifferent.
Firing clay at home
If you want to give your handicraft a long life, then firing is a must. So that during this process the product does not lose its shape and does not crack, it is very important to observe the clay firing technology in accordance with its standards. Due to the effect of high temperature on the clay, the product gains strength, it “turns to stone”. And if, after all the required manipulations, cover with glaze, then your object of creativity can be used in everyday life.
Nowadays, the practice of firing clay at home is very popular. There is nothing difficult here, except that you should adhere to safety precautions and have the necessary space, sufficient power for firing.
Basic recommendations for firing
To begin with, the product must be left in a dark place (or without direct exposure to sunlight) in order to dry it. Temperature changes and drafts will adversely affect the quality of clay firing - this should be taken into account. The smaller the wall thickness of the product, the faster it dries and the less time it takes to get rid of unnecessary moisture, and vice versa. This also applies to the firing time, the larger and thicker the object, the longer it takes to bake, the range varies from 4 to 12 hours. On average, it happens about 6 hours, but this is all individual.
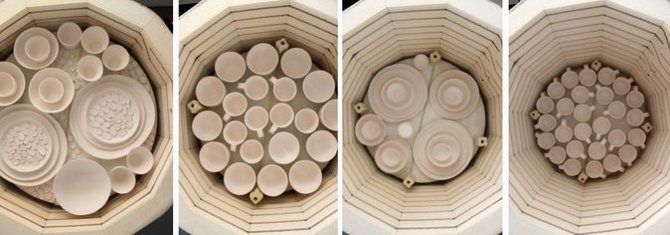
When laying your work, you should observe their arrangement according to the "pyramid" scheme: the objects should be the largest in size at the bottom, then higher with a gradual decrease. Weight is also important: the heaviest items should be on the bottom. At this stage, you can not be afraid that they can stick to each other - feel free to lay them on top of each other. We close the oven.
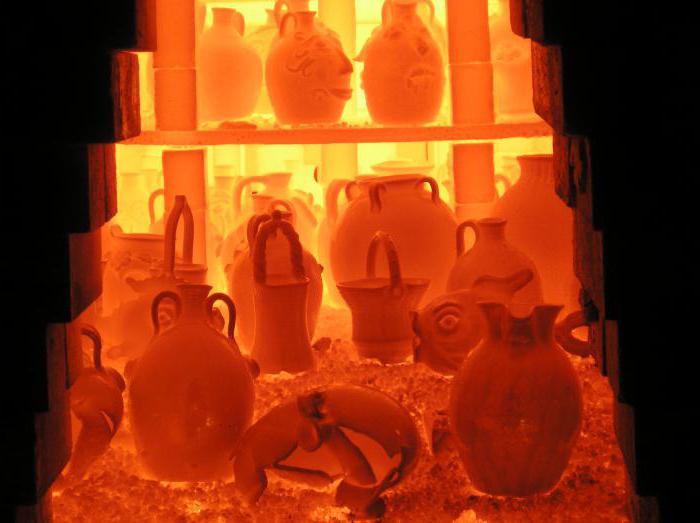
Clay firing temperature reaches 900 degrees at its maximum. But warming up should go with a gradual increase. If you have a professional oven with temperature control, then the first heating should be set to 150-200 degrees. This temperature will be kept for no more than 2 hours. Then we add another 200 degrees and the remaining 2 hours we keep the clay objects in the oven. And so we repeat until we reach a value of 900 degrees, and hold on for some time.
Diy ceramic muffle kiln
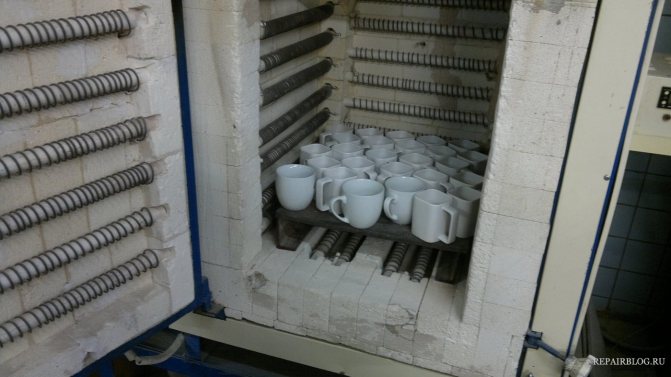
The term "muffle furnace" itself does not mean anything for most people. No, this is not another type of heating device that allows you to save on fuel. This is a device designed for firing ceramics, smelting metals, cupelling, creating single crystals, etc. In medicine, they are used to disinfect instruments.
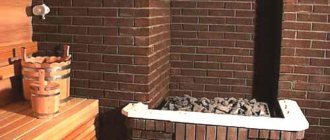
Photo 1 Muffle kiln for firing
Despite its compact size, a household unit will cost 35-48 thousand rubles, which is quite expensive for making hand-made and ceramics. Therefore, many are looking for how to make a muffle furnace with their own hands. We propose to arm yourself with a number of tools, recall the school physics course in thermodynamics and start manufacturing.
Varieties of muffle furnaces
By design features, the devices are divided into:
- tubular or cylindrical;
- horizontal or vertical.
By the type of heat treatment composition:
- air;
- vacuum;
- based on inert gas.
Only an air muffle furnace can be made at home, therefore it is about it that will be discussed in the article.
By the features of the thermoelectric heater:
Of course, a gas stove will bypass in operation 3-4 times cheaper than an electric one, due to fuel economy, but such a stove, firstly, is prohibited by law to manufacture and use, and secondly, it is technically extremely difficult to make a muffle stove with your own hands using gas.
Due to simple materials, the stove can be made in any convenient form, including one that ideally suits the interior of the room.
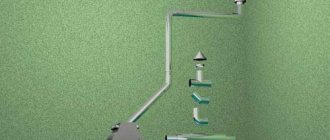
Photo 2 Scheme of an industrial muffle furnace
Manufacturing the device
In this case, we will tell you how to make a vertical muffle furnace for firing ceramics with your own hands.
To do this, you need the following tools:
- angle grinder (grinder) and 1-2 circles;
- electric arc welding and electrodes;
- locksmith tools, including wire cutters;
- 2mm nichrome wire.
and materials:
- 2.5 mm steel sheet or used oven body;
- corner;
- fittings;
- basalt wool;
- refractory fireclay bricks;
- refractory mortar;
- silicone sealant.
Housing
Ideally, the body of an electric oven or miracle oven is suitable as the basis for a homemade muffle furnace for fusing or cupelling, since it already has all the necessary insulation. All you need to do is remove or remove all plastic elements.
Photo 3 Old oven in the form of a muffle furnace body
If it was not possible to find such an oven, the body can be welded from a sheet previously cut into blanks. Weld all the sidewalls, clean the seams with a metal brush or grinder and cover with a primer.
Making a case from sheets, although a little more complicated, allows you to make the design that fits in size for a particular room.
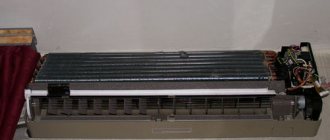
A heating element
A key component of the device, since it is on it that the temperature in the oven and the heating rate depend.
You will also need to make a thermostat for a muffle furnace with your own hands, or purchase a ready-made one.
A nichrome wire will act as a heating element, the diameter of which is selected depending on the maximum temperature. The minimum and most consumable diameter is 1.5-2 mm.
Nichrome on a standard spiral can withstand 1100 degrees, but it is necessary to exclude the ingress of air, otherwise it will burn out. Fechral is best suited for a muffle furnace - its working temperature is 1300 degrees, and it is “friendly” with air.
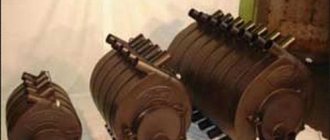
Photo 4 Heating element
Any electric muffle furnace, even the smallest one, made by hand, when heated to 1000 degrees, spends about 4 kW. Check all wiring and set the auto-stabilizer to 25A before use.
Thermal insulation
The most important aspect of work, which is responsible for the integrity and efficiency of the entire structure. Inside the muffle furnace, fireclay bricks are installed on fire-resistant glue. To the size of the oven, it is cut off with a grinder. Basalt wool is used on top.
Photo 5 Fire-resistant glue Terracotta
Some forums for the manufacture of muffle furnaces recommend using asbestos for masonry. This is really a fire-resistant material, but already at a temperature of 650 degrees + it begins to release carcinogens.
Making a homemade muffle furnace
The first point can be skipped for those who use an old oven as a body.
How to make a case
Cut out a rectangle of the required size from the sheet, bent into a cylinder and weld a seam. Next, cut out a circle of the corresponding diameter from the same sheet and weld it to the cylinder. You get the semblance of a metal barrel, the sides and bottom of which should be reinforced with fittings and corners.
The volume of the barrel is calculated in such a way that there is enough space for both insulation (cotton wool and bricks) and for the materials to be fired.
Photo 6 Oven body from a barrel
The body can also be rectangular - the shape does not in any way affect the quality of the furnace and the efficiency of heating. In the video, you will see how to make a rectangular muffle furnace with your own hands from similar materials.
1 DIY muffle furnace with a description
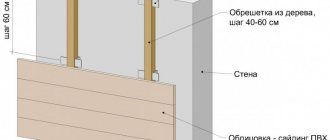
Thermal insulation of the oven
- Basalt (stone) wool is laid out along the perimeter of the structure.
Photo 7 High-temperature mats
Why is this type of mineral wool chosen? For several reasons:
- incombustibility - it is even used as a barrier to open fire. Cotton wool can withstand temperatures up to 1114 degrees, after which it begins to melt, but does not burn;
- natural components - basalt, from which cotton wool is made, an absolutely natural material, therefore, even when heated, it does not emit any harmful substances, unlike, for example, cotton wool made from slags;
- minimum thermal conductivity, which is only 0.032-0.048 W / m / K, which is even less than that of expanded polystyrene.
Cotton wool is attached to the body with special ceramic buttons
Photo 8 We attach cotton wool to the furnace body
- This is followed by thermal insulation with fireclay bricks. This material is required, since it consists of 75% refractory clay and will not burst during the operation of the furnace.
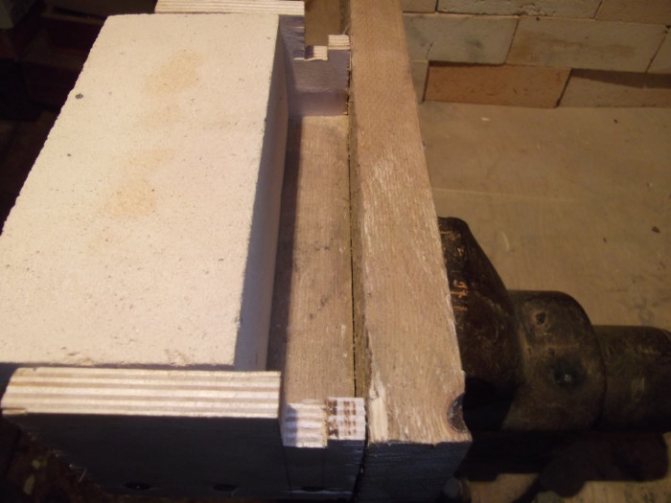
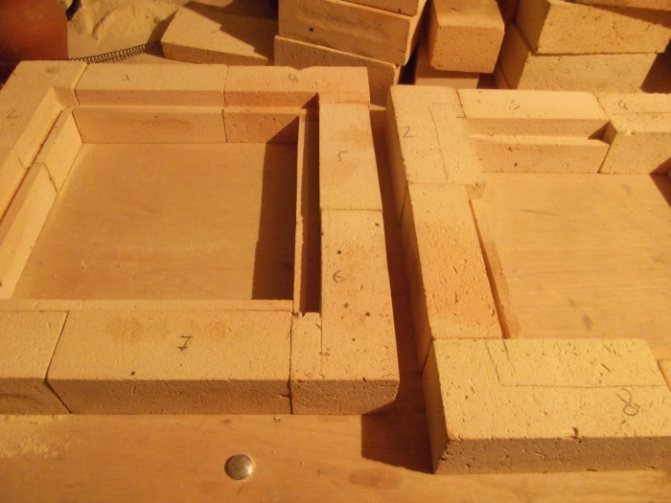
Take 7 bricks, number them for convenience, make up like a pipe. Next, cut the ends with a grinder so that the pipe is as round as possible.
Photo 9 Marking the refractory of the muffle furnace
When the bricks are cut and assembled, wire them together and check how symmetrical the structure is.
- You make a 6 mm spiral from nichrome wire, for which you wind it on any round object of a suitable diameter, you can even use a pencil.
Please note that the oven can only be operated if the temperature is continuously monitored. Otherwise, it's just an expensive but very dangerous toy. The only real option for a sensor of such high temperatures (over 1000 degrees) is a thermocouple. You do not need to look for platinum for this, this option is quite suitable:
- iron-constantan, 53 mV / deg, thermo EMF;
- nickel-iron, 34 mV / deg., thermo EMF.
Photo 10 Laying the heating coil
- Unscrew the bricks and cut furrows for a spiral on the inside at a slight angle with a grinder. Check their evenness with a level and position them so that the turns go from the very bottom to the top. It is strictly forbidden to allow contact of the turns - there will be a circuit closure. After cutting the grooves, insert the spiral and reassemble the entire structure.
Photo 11 MP made by hand
- Remove the ends of the spiral and connect them to a 25 A machine.
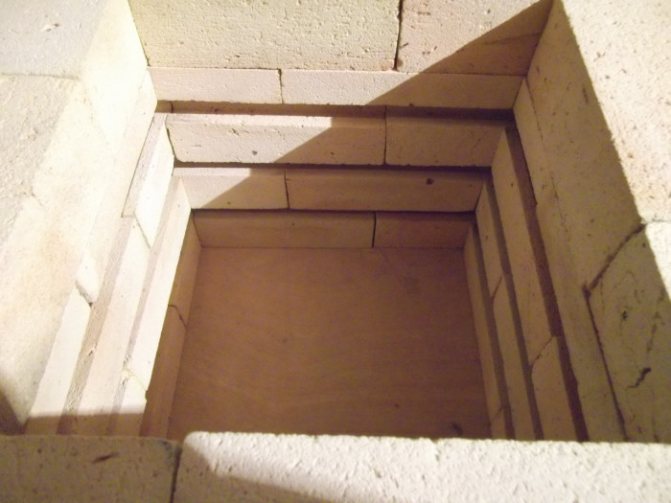
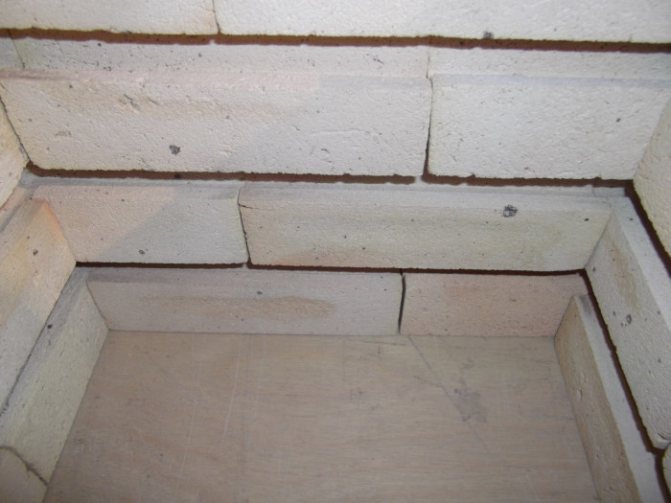
- Now take the previously prepared steel cylinder, put fireclay bricks on the bottom of it, cut so as to completely cover the entire bottom, fill them with refractory glue. Next, place the assembled thermal structure and also fill the space between the barrel and the structure with a refractory compound.
Photo 12 The finished structure is placed in a steel case
You can turn it on only when the whole structure is completely dry. 3-5 days after production, turn on the device at full power, but do not close the lid - if evaporation starts somewhere, turn it off and leave it for another day.
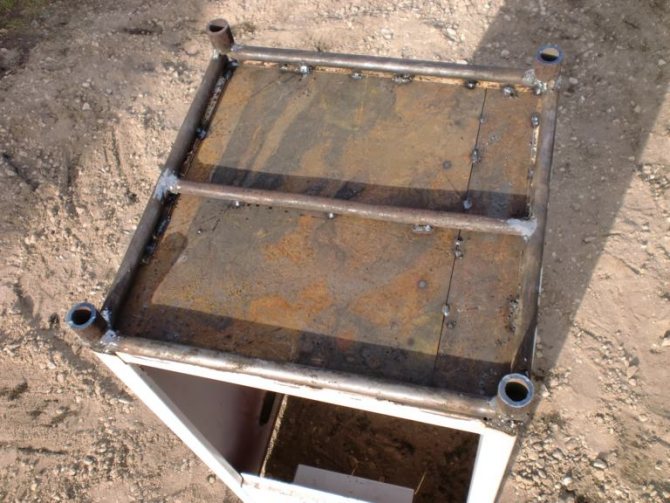
Cover making
- Cut a circle out of steel that is identical in diameter to the already fully assembled structure.
- On top of the glue "plant" fireclay brick - it will provide sufficient sealing.
- Weld on the sides of the handles so that it is convenient to lift and remove the lid and latch for closing.
- Cover the edge with fireproof silicone, before that the surface must be degreased (even White Spirit will do).
As a reminder, when the oven is running, it must be closed. Excessive air ingress will lead to rapid wear of the nichrome.
The simplest muffle furnace for ceramics
To make such a simple device, you only need an ordinary electric stove, a clay pot and a piece of fireclay brick.
- Place a piece of brick on the stove so that the ceramic to be fired does not touch the spiral on the tile and cover it with a pot. Adjust the power with a thermostat.
- Now you watch the pot - as soon as a red light starts to shine through its walls, you time the firing time. As a rule, it is 10-12 hours.
Pot muffle furnace
Safety engineering
- You can work with the stove only if there is grounding.
- It is forbidden to start work if there are chips or cracks on the body.
- It is forbidden to touch the device during operation.
- It is strictly forbidden to touch a working spiral.
- The oven requires constant supervision during operation.
Despite the relative ease of manufacture, such a device is not very common among home craftsmen. This is due to the high costs of electricity.
Someone thinks that it is possible to make a muffle stove on wood too - well, if you can find a log with a calorific value of 14,000 kcal / kg, then yes, it will.
Although it is still better to use a forge for such "firewood" - it was in such conditions that the first such stove in history was invented.
If you still have questions on how to make a muffle furnace with your own hands, watch the video instruction.
2 DIY muffle furnace
Source: https://presstile.ru/stroitelstvo/pechi/myfelnaia-pech-dlia-objiga-keramiki-svoimi-rykami.html
How to burn clay
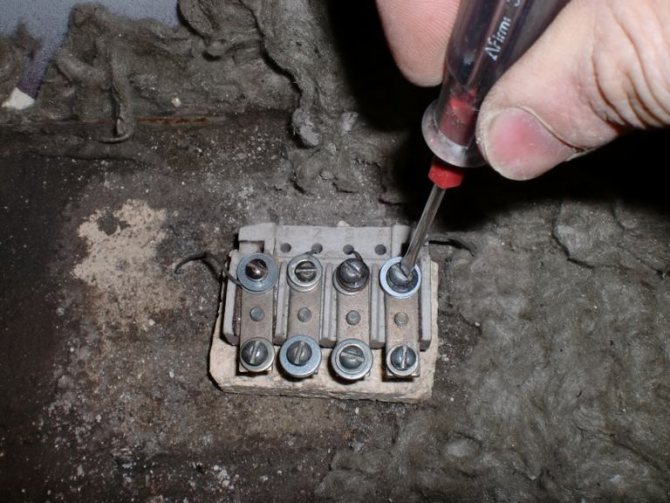
As a rule, clay is fired at home in a homemade oven. In this case, the temperature regime must be monitored on an ongoing basis. It will look like this:
- We start from the first position of the switch, hold it for 5 minutes and turn it off.
- After 5 minutes, turn it on, leave the clay to bake for 10 minutes and turn it off.
- After 15 minutes, turn it on, hold it again for 10 minutes and turn it off.
- At this stage, we turn on the oven, and we maintain the clay firing until the products turn red.
- Here we turn on the switch to the second position and according to the same scheme: 5-5 minutes, 10-10 minutes, hold for 15-10 minutes. And here you do not need to turn off the oven, but only go down from position 2 to 1 and back.
- Position 3 applies if the oven capacity is insufficient.
On average, up to 6 hours is spent on the entire clay firing process. You can determine "readiness" by the glow of the walls inside the oven. As soon as the glow turns light yellow, turn off the oven.
Do not open the door immediately, leave the products to cool in the oven for a long time, for example, overnight. This will allow it to cool down evenly after firing.Then you can glaze them and let them dry, so your creation will last you much longer.

DIY muffle furnace
People interested in pottery sooner or later come to the question of buying their own muffle kiln for firing ceramics.
Having studied the market, we are faced with unreasonably high prices for muffle furnaces. Our company is engaged in the manufacture and sale of muffle furnaces for firing ceramics at affordable prices.
In this article, we will outline the main aspects of the manufacture of muffle furnaces.
Calculation of the overall and electrical parameters of the furnace
This stage is fundamental, since it determines the main parameters of a muffle furnace for firing ceramics.
The starting parameter is the internal volume of the muffle furnace. With a large volume of fired products, furnaces with a large volume are selected, with a small volume of fired products (amateur potters), accordingly, furnaces with a smaller volume.
As our practice in the manufacture of ceramics kilns shows, the GRIFON-60 kiln with a capacity of 60 liters is most often ordered. Since it combines the optimal volume and price!
In parallel with the theoretical calculations, a 33-liter ceramic kiln will be calculated.
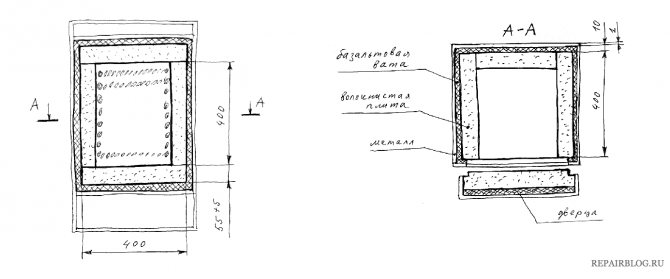
Calculation of the volume of the muffle furnace
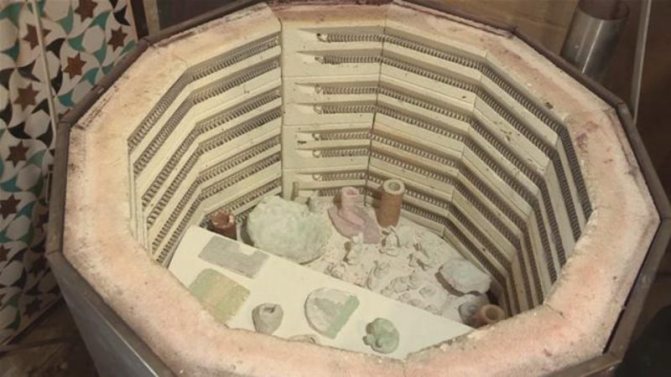
The figure below shows the muffle of a ceramic kiln, i.e. working layer of the furnace or otherwise the inner insulating layer. Basically, it has a dense structure, since it is most often used to fasten heating elements (spirals), as well as to give the working layer mechanical strength.
Since the perimeter of our muffle furnace is an octagon, its volume (V) is calculated as follows:
furnace muffle
V = S * H (dm3 = liters),
Where S = 2 * K * (F) 2 - the area of the muffle bottom; K= 2.41 - coefficient; F- the length of the inner face of the muffle (dm) (see Figure 1); H- the height of the inner part of the muffle (dm) (see Figure 1).
Since the volume of the furnace is usually expressed in liters, then all values should be expressed in decimeters.
V= 13.76 * 2.39 = 32.8 ≈ 33 (dm3) = 33 (liters), where
S= 2 * 2.41 * (1.69) 2 = 13.76 (dm2); K=2,41; F= 169 (mm) = 16.9 (cm) = 1.69 (dm); H= 239 (mm) = 23.9 (cm) = 2.39 (dm);
Materials for the manufacture of muffle and furnace lid
We use the most modern materials for the manufacture of ovens. For the working layer of the lining (muffle and furnace lid), we use lightweight refractory bricks, which we bring from Germany.
This brick has excellent thermal characteristics, namely, it has low thermal conductivity, high thermal and heat resistance. The classification temperature for this brick is 1430 ° C. With all this, the brick is quite lightweight due to its low density and is well processed mechanically.
This allows you to mill grooves in bricks for the installation of heating elements. Milling ensures the highest precision of the spiral grooves.
Lightweight refractory brick Lightweight refractory brick Lightweight refractory brick
Oven cover
The furnace cover is made of two layers of refractory bricks. In this case, the second layer overlaps the seams of the first layer, which increases the strength of the lid. Most stoves of Western and Russian production have only one layer of bricks.
Also, the bricks are chamfered, which prevents the bricks from chipping when the material expands (heats up).
In the outer layers of the muffle and the furnace lid, we use additional insulating refractory layers, which have an even lower thermal conductivity with a significantly lower weight.
Refractory mats made of ceramic fiber, mullite-silica cardboard (MKRKG), etc. can be used as such materials.
Thus, the lower the thermal conductivity of the materials, the better the thermal performance of the furnace.
| Material | Maximum application temperature, ° C | Thermal conductivity, W / m * K | Density of material, kg / m3 |
| Lightweight brick | 1430 | 0.28 at 600 ° C | 770 |
| Ceramic fiber | 1260 | 0.27 at 1000 ° C | 128 |
| MKRKG-400 cardboard | 1150 | 0.11 at 600 ° C | 400 |
The complex application of these materials significantly saves energy resources, as well as saves time for heating and cooling furnaces. Unfortunately, many modern, both Western and Russian manufacturers make kilns for firing from ceramics only with the use of refractory bricks, making the kilns less efficient.
Calculation of the power of the ceramic kiln
This stage is no less important and at it we will determine the power of the furnace. Depending on the volume of the designed kiln for firing, the power (P) can be calculated using the following formula:
P = J * V (W), where
V- internal volume of the furnace (l) (see the section on calculating the volume);
J-specific power, which is determined based on the volume of the furnace:
- J= 70 ÷ 100 (W / l) with a furnace volume of up to 60 liters;
- J= 50 ÷ 70 (W / l) with a furnace volume over 60 liters;
P= 81.81 * 33 = 2700 (W) = 2.7 (kW)
Calculation of the current strength of the kiln for firing
In this section, we will calculate the current strength, i.e. the current that flows through the heating element (coil):
I = P / U (And where
P- the power of the kiln for firing (see the section on power calculation)
U- supply voltage (V)
It is advisable to select the supply voltage depending on the power of the firing furnace:
- U= 220 (V), with a furnace power up to 5 ÷ 7 (kW);
- U= 380 (V), with a furnace power over 7 (kW);
I= 2700/220 = 12.27 (A)
For your own safety, we recommend laying a separate line of conductors from the flap of the apartment (house) to the stove. The line must be equipped with its own circuit breakers with the required rating. The cross-section of the conductors is selected based on the power of the furnace. Choose a larger conductor cross-section.
Table 1. The choice of wire cross-section depending on the current strength or power.
| Supply voltage U = 220 (V) | ||
| Wire cross-section, (mm2) | Current, (A) | Power, kWt) |
| 1,5 | 19 | 4,1 |
| 2,5 | 27 | 5,9 |
| 4 | 38 | 8,3 |
| 6 | 46 | 10,1 |
| 10 | 70 | 15,4 |
| 16 | 85 | 18,7 |
Calculation of the resistance of the heating element
Knowing the amperage I and supply voltage U according to Ohm's law, it will not be difficult to calculate the resistance R:
R = U / I (Ohm) = 220 / 12.27 = 17.92 (Ohm)
Figure 2 shows the spiral of a muffle furnace with the calculated current-voltage characteristics:
Fig. 2 Calculation of the electrical parameters of the spiral of the muffle furnace
Calculation of the diameter, length and specific surface power of the heating element wire
At this stage, selection of heating element material... I would like to stipulate that for these purposes, nichrome and fehrali are most often used.
We use the GS SY superfechral in our GRIFON ceramic kilns for a number of good reasons:
- it is a cheaper alloy in comparison with nichrome, since it does not contain nickel;
- superfechral has better heat resistance than nichrome (the highest operating temperature is 1450 ° C);
- this brand of fehrali has increased plasticity, which facilitates the winding of spirals.
After material selection the diameter of the heating element wire is selected.
The diameter of the spiral is selected depending on the required specific electrical resistance (resistance in 1 meter of wire, see Table 2). More beats. e-mail resistance corresponds to a smaller conductor diameter, less beats. e-mail resistance, correspondingly larger diameter.
Table 2. Selection of the wire diameter depending on the required diameter and length of the heating element
| Wire diameter d, mm | Physical properties of superfechral GS SY | |
| Specific electrical resistance in 1 m of wire ρ, (Ohm / m) | Number of meters in 1 kg | |
| 0,18 | 54,7 | 5480 |
| 0,2 | 44,3 | 4512 |
| 0,3 | 19,7 | 2000 |
| 0,5 | 7,09 | 717 |
| 0,8 | 2,76 | 280 |
| 1 | 1,77 | 179,5 |
| 1,2 | 1,23 | 124,5 |
| 1,6 | 0,692 | 70,1 |
| 2 | 0,452 | 44,8 |
| 3 | 0,197 | 19,9 |
| 6 | 0,0491 | 4,98 |
| 8 | 0,0276 | 2,8 |
| 11 | 0,0159 | 1,45 |
The length of the wire of the heating element also depends on the diameter of the conductor. I would also like to note that the larger the diameter of the wire of the heating element, the longer the heating element will last.
Thus, by combining the above parameters, a spiral is selected in the furnace muffle.
Knowing the required resistance R (see previous section) and electrical resistivity ρ the wire length L is calculated:
L = R / ρ , (m)
Since in this oven we use the wire diameter
d = 2 (mm), then ρ = 0.452 (Ohm / m). Then L = 17.92 / 0.452 = 39.64 (m) = 3964 (cm).
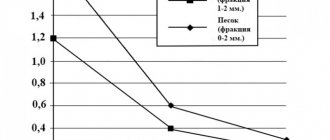
The most important calculation in this section is the calculation of the surface power of the wire ψ, those. the power that is allocated per unit area of the wire.
In furnaces with high temperatures, surface power ψ Fechrali should not exceed 1.4 W / cm2 for wire up to 4 mm in diameter. If this value is significantly exceeded, then the heating element will not withstand the temperature.
ψ = P / S , (W / cm2), where
P- furnace power, (W);
S = 3.14 * L * d - wire surface area, (cm2), where
L- wire length, (cm);
d- wire diameter, (cm)
ψ= 2700 / 2489.4 = 1.08 (W / cm2), where S= 3.14 * 3964 * 0.2 = 2489.4 (cm2). Thus ψ=1,08
Source: https://grifon62.ru/mufelnaya-pech-svoimi-rukami
Clay crafting
If you want to use clay without firing, then you need to choose it with polymer additives.
Before you start modeling polymer clay, you need to thoroughly knead it with your hands, knock with your palms. From these manipulations, excess air will come out of the material. This is necessary if you still decide to fire (but not necessarily). It is more convenient to shape the product by working with two hands, starting with the largest objects and ending with the smallest ones. A stack will come to your aid, this is a sculpting tool. When the work is completed, wipe the product with a damp sponge or brush.
How to sculpt correctly
Clay, although a plastic material, is more durable than plasticine. Therefore, there are several important recommendations for handling it during sculpting:
- The clay should always be wet, do not let it dry.
- If cracks appear, immediately smooth them out with water or a water-clay mass.
- Modeling work begins with large objects, smoothly moving to smaller ones.
- It is not worth rolling foreign products into the clay; it is better to make separate indentations in the product for this.
When everything is done, you need to leave your figurine to dry for a couple of days. Although non-fired clay looks great, you can additionally bake it in the oven or microwave, but that's up to you. At the final stage, PVA glue can serve as a glaze for the product.
We make a furnace for firing ceramics with our own hands - School for home insulation
Do-it-yourself stoves for firing ceramics
In order for clay crafts to be durable and strong, they must be heat treated.
You should not burn clay in an ordinary oven or gas-powered stove - this is not only ineffective, but sometimes even dangerous (during processing, poisonous substances can be released).
For such a procedure, you will need a special sealed oven that can warm up to the required temperature. You can buy such a device in a store, but if you wish, and if you have good instructions, you can make a clay kiln with your own hands.
Pottery kiln manufacturing technology
"Factory" furnaces, especially for professional purposes, are very expensive (over 35,000 rubles), but craftsmen have learned how to make devices for firing with their own hands. It is worth noting that, according to the type of fuel used, such furnaces can be:
- electric;
- gas;
- on the wood.
We will only consider the first two, since it will be quite difficult to achieve the required temperature by burning wood. Let's start with electrical equipment. According to the arrangement method, these kilns for firing can be:
- muffle (in them the heating elements are located around a sealed vessel (muffle) made of fireclay material; with the help of such furnaces, Russian schools are often heated);
- chamber (the heating device is located inside).
The second option is more suitable for home-made, since it is quite difficult to build a large muffle on your own, and the heat loss in the muffle structure is high.Let's consider how you can make a chamber furnace.
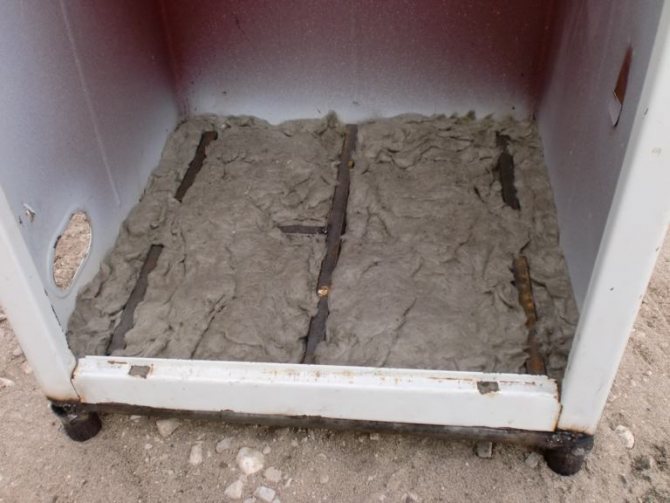
Method one. Making a chamber stove from a refrigerator or washing machine
For such a design, only three main elements are required:
- metal case (a washing machine or refrigerator is suitable);
- heating coils;
- chamber made of fireclay material.
When everything necessary for work is ready, we proceed directly to the manufacturing process.
- First, it strengthens the bottom of the metal case. We use a steel corner for this purpose (as an option, it can be replaced with an ordinary pipe with a diameter of 1.5 centimeters). We weld pieces of corners / pipes at the corners of the bottom - they will serve as support legs.
- In addition, we need to similarly strengthen the upper part of the box, the doors and at least one of the sides (the one to which the door hinges will be welded later).
- We put a 1-cm layer of basalt wool on the bottom of the case (a similar layer must be laid on the inner walls). In order to avoid deformation of the insulation under the mass of the chamber, we lay several pieces of a metal corner or rectangular pipe. At the end of these procedures, we cover the insulation with a sheet of metal.
- After that, we decide on the refractory material that we will use in the manufacture of the camera. Ideally, these should be fibrous fireclay boards, which can be either cut on site after purchase, or ordered in the required sizes. Our DIY clay kiln requires six of these plates.
- We connect the bricks with a mortar that corresponds to the marking of the material. There is also a cheaper option - ordinary fireclay clay or fireclay masonry mixture.
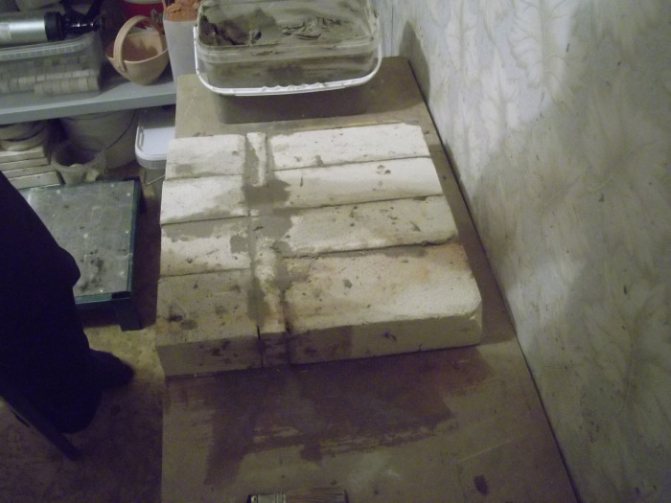
- Now we start laying directly. We adjust the bricks as tightly as possible relative to each other, we make the seams between them no larger than 0.5 centimeters. If necessary, we saw off individual bricks to the required dimensions.
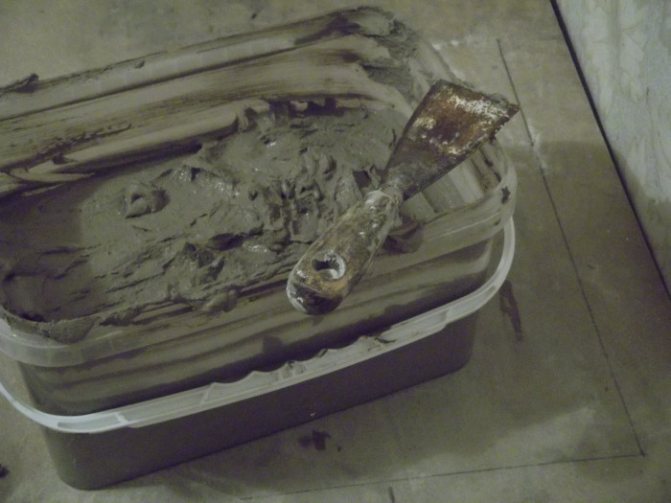
- We start laying from the bottom of the box. Dissolve the mixture with water and mix thoroughly. Before installing each brick, we moisten it with water, otherwise the mixture will dry too intensively.
- We begin to raise the walls. We put sheet metal and insulation in the gap between the body and the brick layer. If the brick is laid flat, then the insulation can not be used.
- The upper part will take longer: the bricks at the edges need to be laid with a slight upward slope, and trapezoidal blocks should be laid between them.
- We weld on the hinges, adjust the door. We must ensure that the gap between the brick layer of the case and the door is minimal.
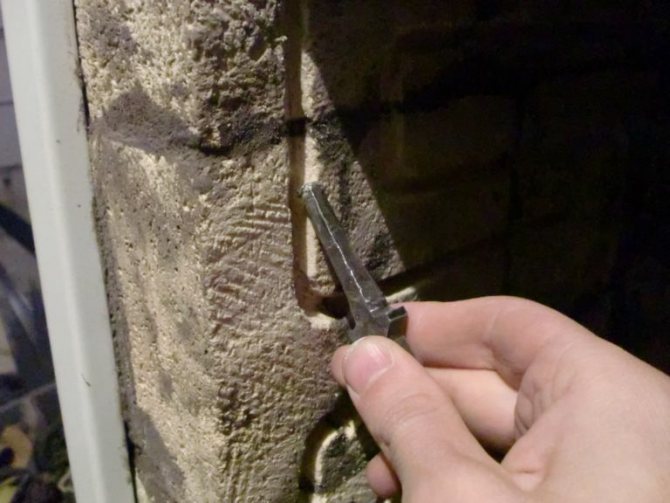
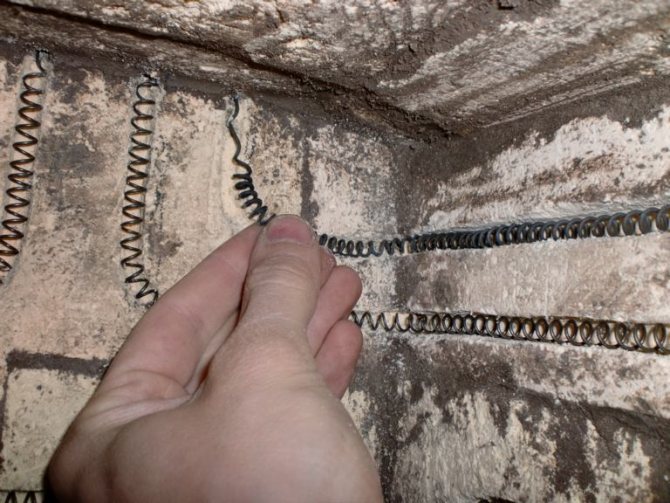
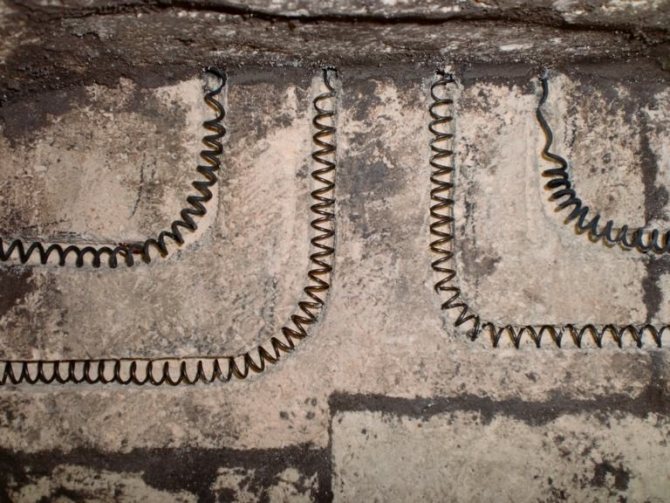
- After the masonry has dried, we begin the next stage of work. On the surface of the bricks, we must make grooves in which the heating coil will be laid. We use a spiral of nichrome wire 0.1 cm in diameter; the diameter of the loop will be about 0.5-0.7 centimeters. The grooves must be of the same depth / thickness.
- When heated, the wire can expand, and the spirals, in turn, "come out" of the grooves. Therefore, they should be fixed. The image below shows the main ways to install spirals:
There is another way - to build a chamber of heat-resistant bricks, since this material is sold everywhere and is used for laying stoves and fireplaces. For the chamber of such a furnace, it is recommended to use a lightweight brick marked "ШЛ" (for example, "ШЛ-0.5").
This mixture is sold in the same place as bricks or fireplaces. To fix the brick on a metal surface, add a little cement to the mixture (about 30 percent of the total).
The door is also lined with fireclay bricks. We make a quarter around the perimeter in such a way that, as a result, a ledge appears (we will lead it into the oven window).
- using small pieces of wire;
- by means of a groove located at an angle;
- by means of a groove having a protrusion;
- using a MKP tube.
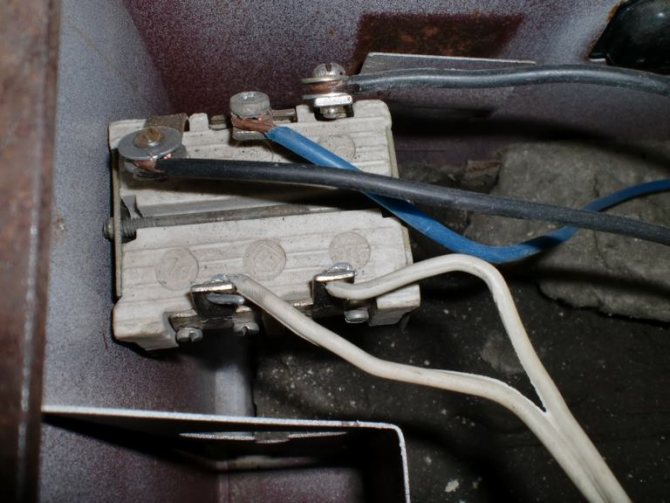
- We make 2 circuits from the spirals so that the temperature regime can be adjusted by means of a switch (just like in an electric stove).
- On top we mount a ceramic plate (for example, from a burner) and fix the ends of the spiral with bolts.
- We will equip our do-it-yourself clay kiln with the switch below, in which there will be three contacts on one side and two on the other.
- We mount the switch in such a way that its pin goes out, that is, to the front panel. We connect all the wires, from the side where there are only two contacts, we connect zero and phase.
- We connect the cables leading from the plate to the other three contacts. Typically, one of the cables should close a pair of contacts on the edge of the plate.
- As a result, we should get the following: at the first "speed" the spiral circuits will be connected in a certain sequence, since in this case the temperature will be the lowest.
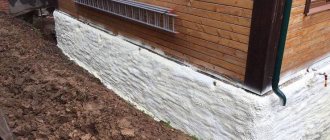
- This, in principle, ends the furnace manufacturing process. At the end, we need to thoroughly dry the structure, for which we place it in open sunlight or next to a heating radiator for at least 1-2 months. After this period has elapsed, we need to perform final drying by running the device for 3-4 hours at the minimum "speed". When there is no more steam from the structure, the device can be turned off - it is completely dry. We can proceed directly to the firing!
We start the ends of the spirals up.
If the "speed" is the second, then only 1 circuit will be connected due to the fact that the temperature will be higher. It is characteristic that this should be the circuit that runs from below, so that the elements located in the lower part are also heated.
Finally, at the third "speed", the circuits are connected at the same time - here the temperature will be maximum.
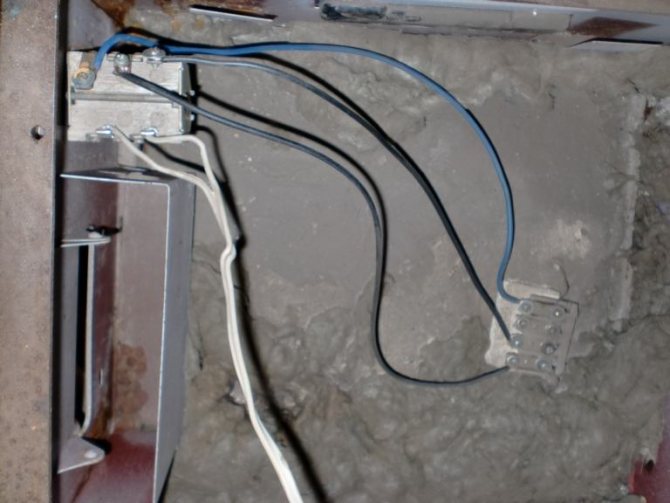
A few words about how to connect this oven for firing clay with your own hands. For this purpose, it is recommended to use a reinforced socket - the one to which the electric stove is connected. As an option, we draw a large cable from the shield.
And remember: when using such a structure - with open spirals - you should be especially careful! Every, even the smallest, mistake can lead to the most unpleasant consequences. If you are not particularly versed in electricity, then hire a professional. Never touch live heating coils.
Method two. We make a stove without having a metal case at hand
The manufacturing process in this case is not much different from that described above, but there are definitely some nuances here.
To begin with, the working volume of the design below will be about 13 liters.
The spiral, as mentioned above, will be able to warm up to a thousand degrees in just 1.5 hours, while the temperature of the outer walls of the device will not exceed 100 degrees. The algorithm of actions should be as follows.
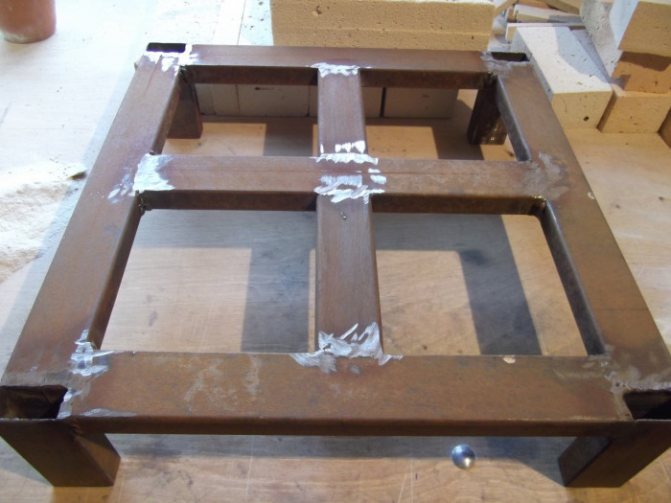
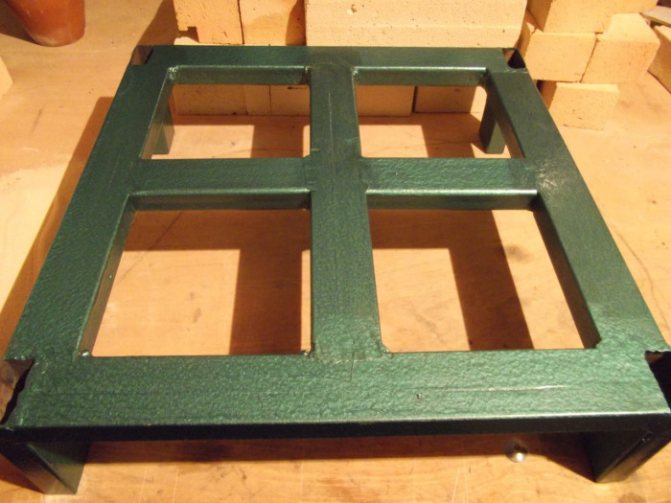
Step 1. First, using a profile pipe 4x2 centimeters (with a square section), we construct a stand for the device. After that we paint the finished stand with enamel.
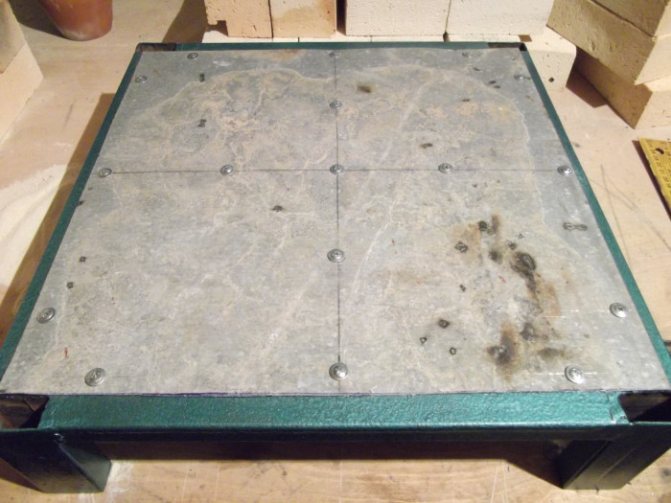
Step 2. On top of the stand, we fasten a sheet of galvanized steel (its thickness should be approximately 0.1 centimeters), using self-tapping screws for this purpose.
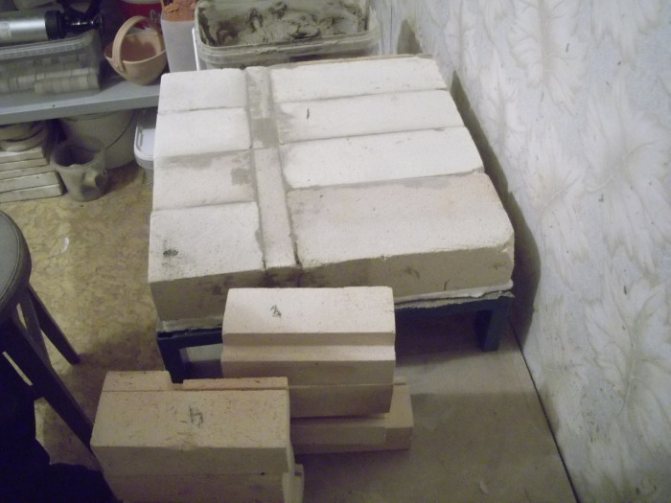
Step 3. We make the walls from fireclay bricks and a special fireplace composition (everything is the same as in the previous version). After the solution has solidified, we make grooves for the spiral.
Step 4. We assemble the bottom of the brick separately, use the same mortar for fastening. Before continuing to work, we wait until the structure is completely dry. Do not forget to wet each brick just before laying.
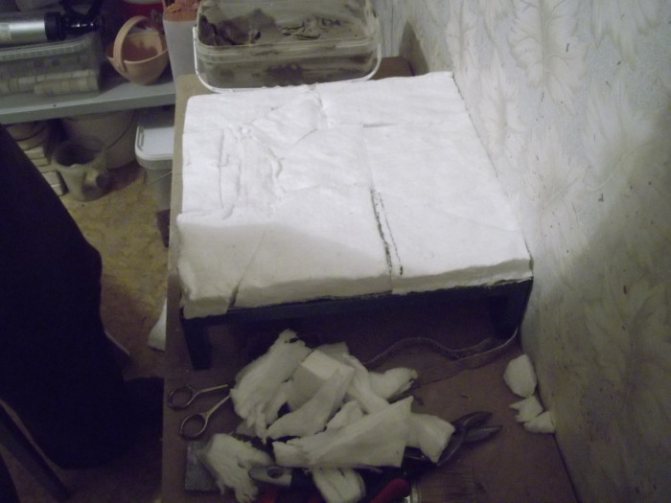
Step 5. On top of the metal base, we lay a thermal insulating layer (we can use the same basalt wool for this).In order to maximize the compaction of this layer, it must be moistened before fixing the brick bottom.
Step 6. We continue the traditional laying of the stove, but try to fill all the voids and seams thoroughly.
Step 7. The cover for the camera is traditionally made of fireclay bricks, but at the same time we fasten them together with a metal tie.
Step 8. We put the spiral in the prepared grooves, insulate the structure from the outside with thermal insulation material. Next, we cover all with sheets of galvanized steel, which are cut in accordance with the dimensions of the resulting chamber.
As you can see, this requires knowledge not only in the furnace business, but also in the field of electricity. You can familiarize yourself with another possible manufacturing method from the video below.
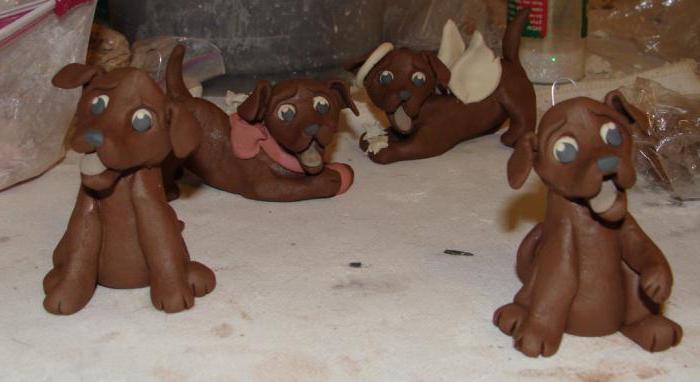
Polymer clay as a source of inspiration
When using polymer clay, firing is not necessary, but it creates a stunning effect of realism on the subject. It looks very impressive.

Firing polymer clay can be carried out in an oven with a thermostat and on a homemade oven. But the most convenient way is the airfryer. When creating flowers, the airfryer will not work, as they will become thin. They need a temperature in the range of 110 to 130 degrees.
This means that none of the proposed methods work. Therefore, firing clay for flowers is best done in glassware.
We bake flowers from polymer clay
We place the flower buds on toothpicks, which are stuck into any soft object, for example, in foil. We put all this in a glass dish with a lid, and send it to a well-preheated oven. On average, it will take about 2-2.5 minutes for the product to be ready. But pay attention so that their color does not change and the petals do not become thin. If this happens, you have overexposed the product. You can determine the exact holding time of the firing experimentally, depending on the operating mode of your oven and the volume of the product.

When firing polymer clay in the oven, it is important to take into account the temperature of the glassware - it should not be cold, it can be heated directly in the oven while it is heating.
Furnace types
Furnaces have a variety depending on the fuel used:
- Wood burning.
- Gas.
- Electrical.
The first version of the stoves is more often used in home workshops and is installed mainly outdoors if the workshop is small. Gas ovens can operate on both propane and natural gas. Basically, potters use electric kilns, which have many advantages: they heat up quickly, they can be installed even in small workshops and it is quite simple to make an electric kiln for firing ceramics with your own hands.
Electric ovens are also divided into two types:
- Muffle furnaces are furnaces in which a heating element is placed around a one-piece container made of refractory material (muffle).
- Chamber furnaces are ovens in which the heating element is located inside.
Any kind of kiln for firing clay can be made by hand and its cost will cost several times lower than buying a ready-made one.