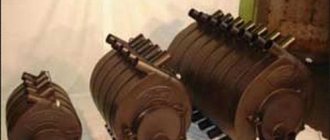
Some Internet users are interested in what a tile is. It seems that this word has long been heard, and everyone knows that this is one of the varieties of ceramics. However, not everyone knows how this type of finish differs from ordinary tiles.
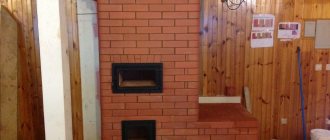
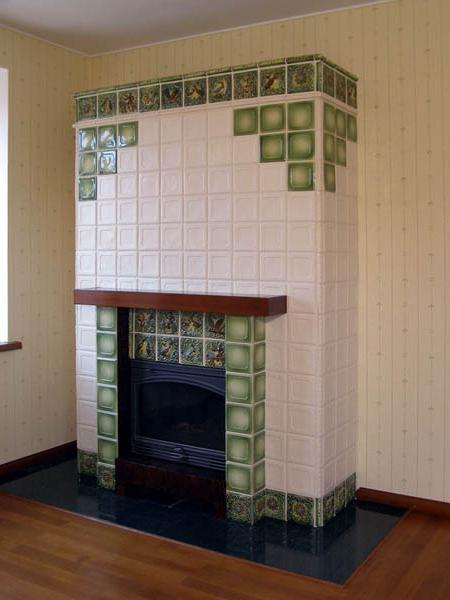
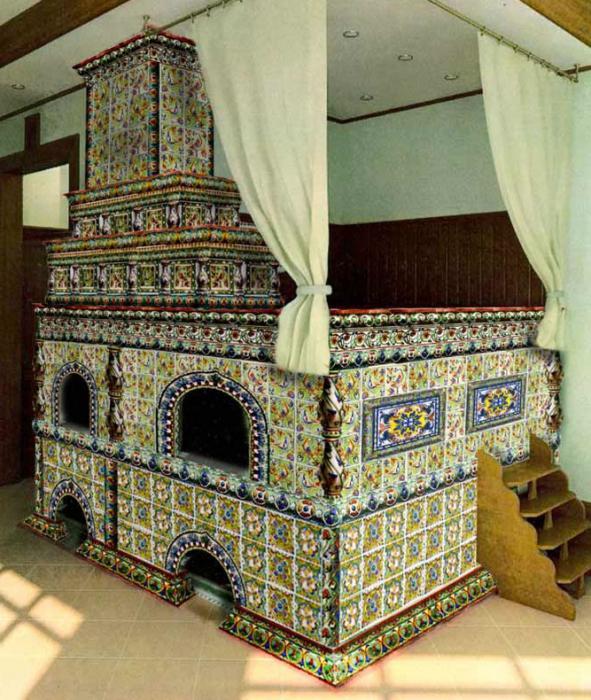
So, a tile is called a clay tile burnt at high temperatures, intended for decoration of walls, facades of buildings, as well as stoves. It differs from ordinary ceramic in that it has a so-called rump on the seamy side - a side around the entire perimeter, forming a box. This design makes the tile very easy to install when finishing surfaces. Today, when decorating exteriors, and more often interiors, such type of decoration as tiles is also used. A fireplace, walls in the kitchen, in the hallway or even in the living room - this is the main field of application of this wonderful material. Glazed fired tiles are able to tolerate high humidity, significant temperature changes, various mechanical influences without harm, they do not rot, do not tarnish and look more than attractive.
Types of tiles
Stove tiles can vary in appearance. In this regard, tiles are classified into:
- plain smooth;
- plain embossed;
- painted smooth;
- painted relief;
- stucco.
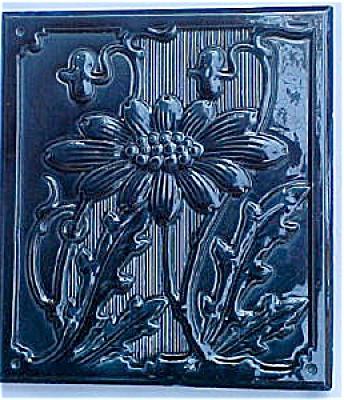
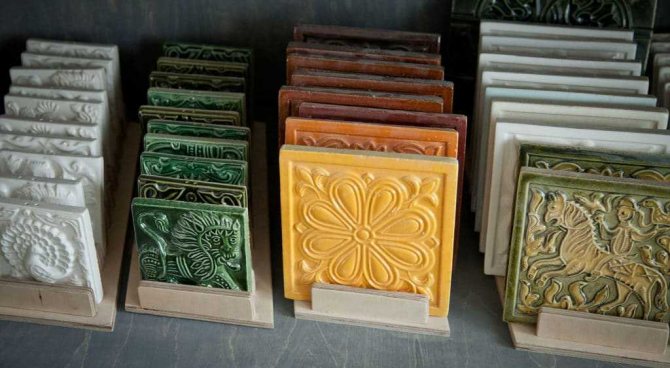
All of these varieties are very beautiful and are considered almost the highest quality type of ceramics. All sorts of patterns and whole pictures with a well-defined storyline - this is how stoves and walls can be decorated using a material such as tiles. You can see a photo of the structures finished with it on the page. Nowadays, interest in this type of decoration has increased greatly. And therefore, workshops began to be created, specializing in the manufacture of just such a cladding for stoves and walls. Most often they sell standard types of such tiles. However, if you wish, you can also order an exclusive kit designed for a given specific stove or interior.

The meaning of the word "tile"
The exact meaning of this name for this type of pottery is not known. However, it is assumed that it came from the word "cut". The fact is that in the manufacture of such cladding, wooden forms were once used. At the same time, the beauty of the tiles directly depended on the skill of the woodcarver. The more skillful the master was, the more original and attractive the finished material turned out.
Perhaps the meaning of the word "tile" has somewhat different roots. Some researchers draw a parallel between it and the word "sample". The fact is that the latter was very common in Russia precisely during the heyday of tile art.
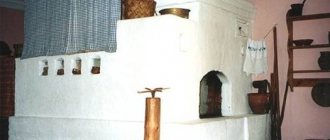
Facing the sauna stove with tiles
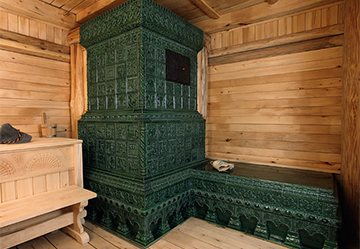
The peculiarity of stoves-heaters is that they overheat more than others.
Moreover, they are constantly in contact with water and are located in a room with high air humidity.
That is why tiles, lined with brickwork, are the best suited for such extreme conditions.
But even if there is a metal stove in the bath, it can be refined by building a brick casing around it in a half-brick (holes are made on the sides for free air circulation). This casing can be finished as you like.
If the rod (crutch) is small in diameter and is too loose in the hole in the tiller, it must be fixed with a solution that will fill the inside of the product. Try to "fill" the hole with a solution so that the rod fits snugly.
Features of the design and installation of tiles
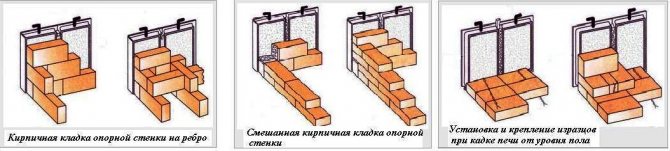
So, what is a tile, we found out.This is the name of a facing material made of clay. Next, let's see what are the features of the installation of this type of finish. Facing with this material is done in a completely different way from tiles. Most often, tiles are used to decorate stoves. If you just put them on a solution or glue, due to the effect of high temperatures during the fire, they will soon disappear. The concrete mix is not used for the same reason, even when laying the stoves. It is replaced with a clay solution.
The installation of tiles is performed not on the finished stove, but immediately - already in the process of laying it. During the manufacture of tiles, holes are drilled in the segments of the rump opposite in height, into which a metal rod is inserted. Further, the box from the seamy side is filled with clay mortar, into which small brick rubble is pressed. When laying the stove in this solution, a hole is selected to the metal rod. Further, a wire is overlapped around it, the ends of which are laid between the bricks during the laying process. Traditionally, no seams are left between the tiles. The result is a beautiful yet highly durable finish.
How to install tiles on the stove?
In the old days, the tiles were laid during the construction of the stove. For this, two specially trained people - a stove-maker and a lining-maker - worked together. Technologies have changed, and you can decorate an already finished oven with such tiles.
Surface and material preparation
You should adhere to the following work scheme
The first part concerns the preparation of the furnace itself and the parts that will be attached to it:
- Facing the stove with tiles begins with getting rid of old plaster or other decorative elements. If the oven is just laid out, remove the remnants of the mortar mixture.
- It is recommended to deepen the joints in the masonry by about 10 mm. This will promote better adhesion to the mortar.
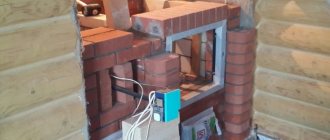
- The oven must be covered with a construction mesh. This will increase the rigidity of the structure and help longer service life.
- Self-tapping screws are mounted in the oven masonry. The future cladding will be attached to them.
Then you can start fitting all the details:
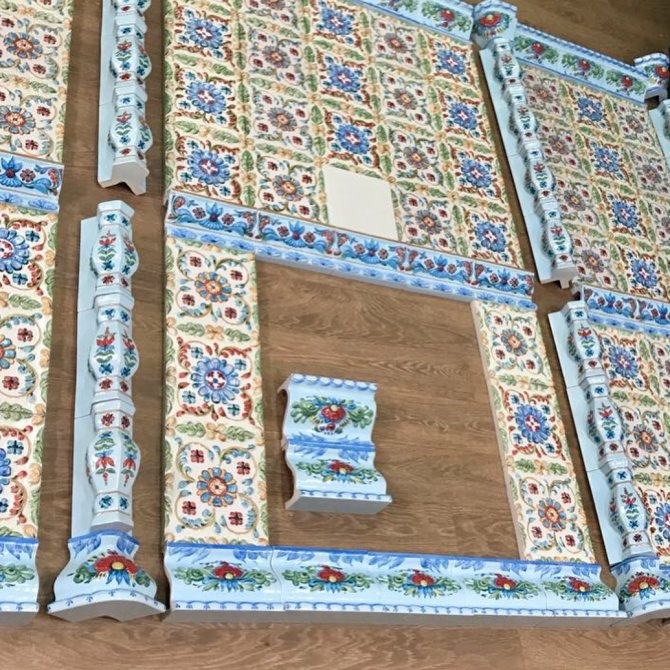
- Since these tiles may differ in size, it is recommended to make them as uniform as possible. This can be done using a grinder or grinding.
- When all the details are as identical as possible, you can sort them by shade. It is important to remember that all dark tiles are placed closer to the base of the stove. The further from the floor, the lighter the pattern.
- For greater convenience, you can lay out a rough sketch on the floor near the stove, and then take each detail one by one.

Fastening technique
Facing the stove with tiles is not an easy and time-consuming task. But if you take into account the basic rules, even a novice master can do this.
- All tiles are soaked in water before work. This procedure will increase the thermal stability of the material.
- Fastening tiles to the stove starts from the bottom corner (row). Clay or cement mortar is filled in the tiller of the part, then they are attached to the surface. All tiles must be level. If you allow the blockage of the structure at the first stage, then you will have to redo all the work. The following are the methods for laying tiles on the first row:
- If the tile is heavy, you can add broken brick or rubble.
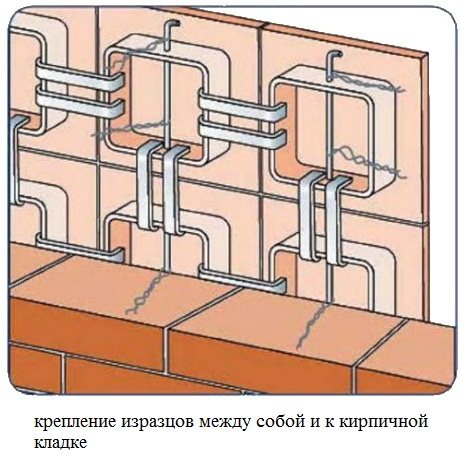
- Metal pins are inserted and bent into the grooves of the rump. A wire is attached to them, which, together with the previously fixed self-tapping screws, holds the tile. The wire connects the tiles with the next ones in the row.
- The rest of the rows are laid in the same way. It is necessary to remember about the gap on the seam. For the aesthetics of the product, it must be the same.
- After fastening, the seams are rubbed. You can buy grout at the store. It is important that it does not get out of the general composition. Therefore, you should choose the color of the tiles.
The history of tiles in Russia
Thus, you now know what a tile is and what are the features of its installation. Now let's make a small excursion into the past and see when exactly this type of decoration appeared in Russia. The history of the manufacture of this type of facing material is inextricably linked with the history of the development of the art of laying stoves. Once upon a time in Russia, huts were heated "in black" with the help of the simplest designs - heaters. However, later, more modern stoves began to appear - with a chimney. Of course, the Russian love of decorating household items also touched this important element of the hut. Clay tiles, intended for finishing floors and buildings, began to be produced in Russia as early as the 10-11th century. Then she was mainly decorated with churches and temples.
The stove tile itself appeared a little later - in the 16th century. At that time, it was an ordinary clay tile with a relief pattern. The plots of the drawing on such a finish could be very different. Glazed tiles (analogous to modern glaze) began to be processed in the 17th century. In any case, the oldest of all found tiles dates from this century. Its second half can be safely called the golden age of tile art. It was precisely from the 17th century. and until the 19th, decorating stoves with this type of cladding becomes traditional. The plots of Israeli paintings, as well as the motives of the patterns, are becoming more and more complicated. The colors become unusually bright and colorful. Stoves of large churches, houses of wealthy citizens, palaces are decorated with tiles.
Until the 18th century, it was customary to cover with such tiles, including the facades of buildings from the outside. However, by the end of this century, this fashion faded. Tiles began to be used only for interior decoration.
The use of this type of cladding in the USSR
Unfortunately, after the revolution, the art of making tiles in our country practically fell into decay. However, it was not completely forgotten. They continued to decorate the stoves with tiles. In particular, this type of finish was popular in Ukraine. Such cladding was even used to decorate one of the Moscow metro stations - Borovitskaya. Tiles were also delivered to other countries of the socialist camp - Czechoslovakia, the GDR, etc.
Preparing clay for tiles
Technologically, making a tile for a stove on your own is actually not as difficult as it might seem at first glance. However, this work takes a lot of time and includes several stages:
- First you need to dig up good red clay without impurities.
- Then it is placed in a wooden box, thoroughly crushed and sifted through a fine sieve.
- Next, the resulting dust is diluted with water and left to settle.
- After a while, the lightened light water is drained off, and the liquid clay is scooped out in such a way that the lowest dense layer remains at the bottom.
- It is left to dry a little. After it acquires the consistency and flexibility of plasticine, you can start making the tile itself.
How to make tiles yourself
Tiles manufacturing technology is rather laborious and complicated. However, you can try to reproduce it at home. The resulting products will be quite suitable for creating tiled stoves and fireplaces.
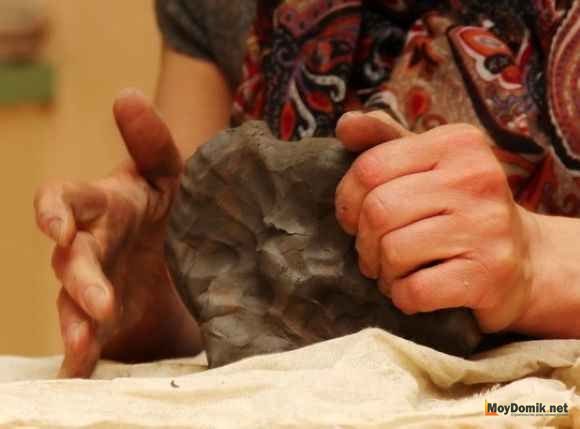
Cooking clay
We start by making clay. If you are planning to harvest the material independently, it is better to carry it out in the summer or at the very beginning of autumn. Clay, broken into small lumps, must be thoroughly dried in the sun. Then we break up the clods with a special rammer and sift the clay to remove all impurities. Fill the resulting material with water and stir well. We drain the small debris that has surfaced. We repeat this several times. It is very convenient to use a specially prepared container.
Holes are made in it at different heights from the bottom, initially closed with plugs.As the holes are rinsed, the holes open, the water is drained and only liquid clay remains. The liquid material is scooped out and poured into a wide container. Then we put the clay in the sun so that the excess water gradually evaporates. We constantly mix the mass. Later, when the clay looks like a thick dough, knead it well with your hands to give the mass plasticity. The material is ready to go.
We make a plaster mold
Do-it-yourself stove tiles come in a variety of sizes and shapes. Having chosen the necessary one, we sculpt a clay blank, with the help of which we will subsequently make a plaster mold. We take a piece of clay and form a flat cake out of it. With a sharp knife, cut out the desired shape. Take the rule and carefully align the edges of the model. We begin to sculpt a relief drawing. Take a stack and apply a sketch of the pattern to the workpiece. We sculpt rollers from clay and lay them along the outlined contours and along the perimeter of the part.
Pouring out the tiles
Next, they begin to manufacture the tiles themselves. The tile for the stove is made as follows:
- The finished form is filled with clay solution.
- Notches are made along the edges of the workpiece.
- Four long rectangular blocks are molded from clay.
- The sticks are glued along the edges of the workpiece. In this case, it turns out something like a box.
- In the two extreme segments of the frame, holes are made in the middle for the fastening pin.
After the clay has dried, the tiles are removed from the mold.
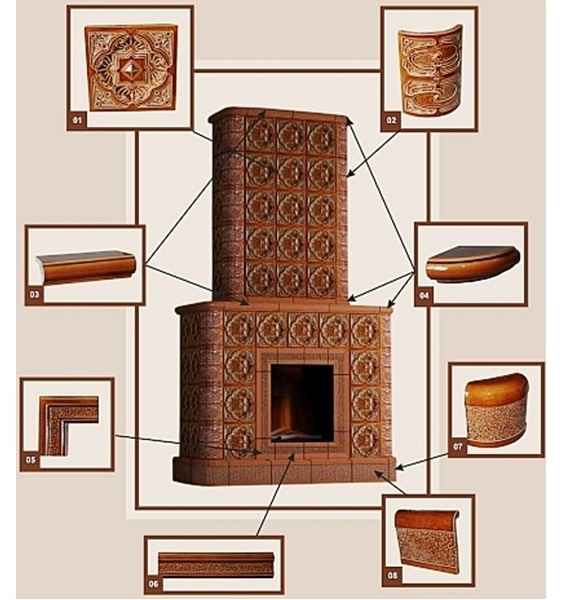
What are tiles?
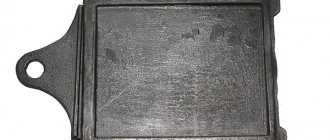
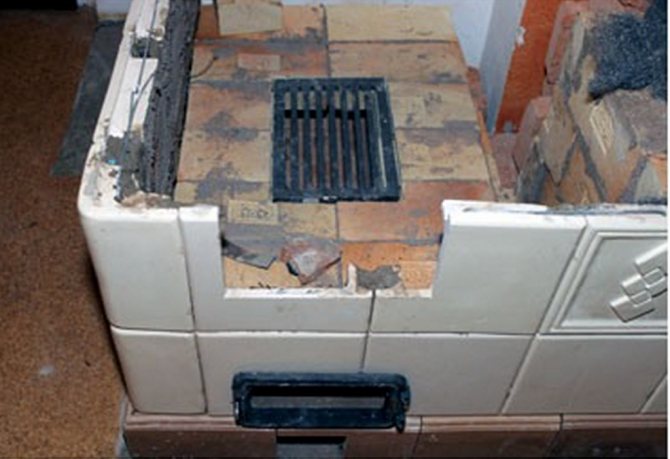
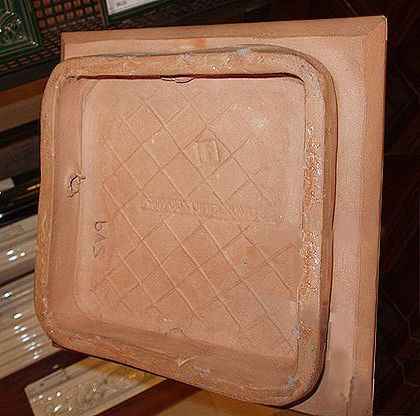
Tiles are a special box-shaped ceramic tile, a close relative of tile. Thanks to the reverse side (trompe) in the form of an open box, these products are securely attached to the surface.
Ceramic tiles
Previously, the fastening elements of the tiles were prepared during the laying of the fireplace, this is an ideal option, but the bad thing is that it is impossible to remove the cladding with such a fastening without dismantling the heater itself. Modern craftsmen were able to solve this problem using a special mesh on which the tiles are securely attached.
Advantages of tiles over tiles
The main difference from other ceramics is its unusual shape. Tiles on the back have a special rump protrusion - an open box, smaller than the dimensions of the tile. When facing, it is filled with mortar, there are also holes for fasteners.
Important! Hollowness allows you to increase the amount of masonry mortar used, which significantly increases the heat transfer of the walls.
The air remaining in the voids and clay can be heated up to 100 degrees, after which they gradually give off heat. This material is not only beautiful, but also has several important advantages over conventional tiles:
- Hygiene. They do not need additional care, the glossy surface allows you to wipe away soot and dust in almost one motion,
- Heat capacity. The thickness of the decorative material itself and a thick layer of clay mortar significantly increase the amount of heat absorbed by the fireplace,
- Heat transfer. The heat accumulated by the tile lasts a long time after the end of the firebox, and the fireplace gradually gives it away. The generated heat is enough to maintain a normal temperature in the room for 12-20 hours (depending on the size of the tiller).
- Heat resistance. Tiles are not damaged at any temperature,
- Ecological cleanliness. In the manufacture of the material, pure clay is used, it does not fade, and does not emit toxic substances,
- Fuel economy. Due to the ability to accumulate heat, the duration of heating the room after the fire is significantly increased and, as a result, the total fuel consumption is reduced,
- Security. The risk of burns due to accidental contact with the fireplace is excluded. Inner chamber, does not allow the outer surface to get very hot,
- Long service life.Quality tiles can last for decades.
The decorative qualities of tiles for finishing heating devices have no competition. Thanks to their variety, fireplaces with tiles in the interior look natural. There are even cases of using the charm of this decor, in a laconic high-tech style.
disadvantages
Among the many advantages, you can find the disadvantages of tiles:
- A large mass of material - only massive structures can be trimmed with tiles,
- The material and subsequent decoration of the fireplace with tiles, require large financial costs,
- High-quality installation, due to the complexity of the work, can only be done by an experienced master.
What is a rump for?
Rump, increases the heat capacity of the entire fireplace and increases the strength of the material. In size, it is slightly smaller than the area of the product.
Additional advantages that the rump gives:
- The rigidity, which increases the tiller - the tile becomes almost 2 times thicker than the usual tile,
- Additional resistance to sudden temperature changes, which is important for heating devices. In addition, the clay-filled rump makes it possible to fire the fireplace much less frequently,
- Rump significantly increases the service life of the tile.
Firing and painting
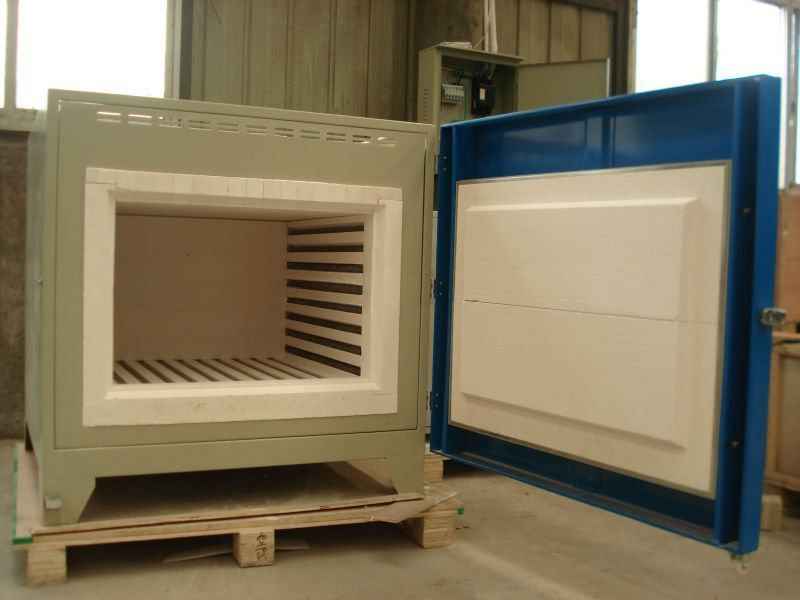
The workpieces obtained in this way are placed in a muffle furnace. The tile should be "cooked" in it for four hours at temperatures up to 950 grams. Next, the oven is turned off, wait for it to cool down and take out the tiles. After they have cooled down, you can start painting. The tiles are painted with either oil paints or engobes. The latter type is represented by clays of different compositions, which take on different shades at high temperatures. After the drawing is applied, the tile is covered with a special glaze. After waiting for the latter to dry, the tiles are again placed in the oven and fired again.
We make a tile from clay
Wooden formwork is made around the plaster mold. All edges should be flat and about two centimeters above the plaster. Then clay is applied. Rules for filling the mold with clay:
Holes in the wire tiller.
- the mixture is pressed with effort in thin layers - it is imperative to fill all the cavities of the drawing;
- you need to start from the center and move to the edges;
- after complete filling, the surface is leveled to the level of the formwork.
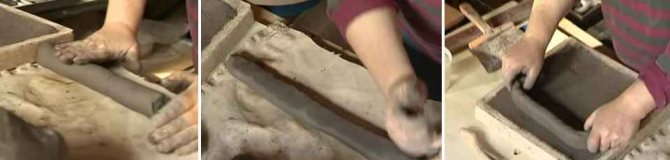
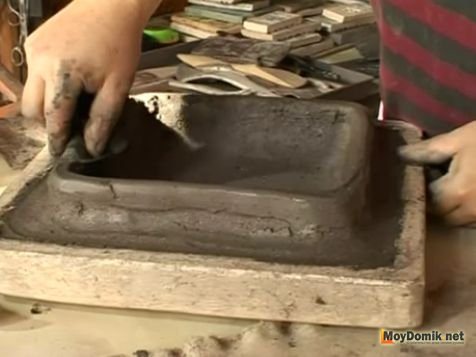
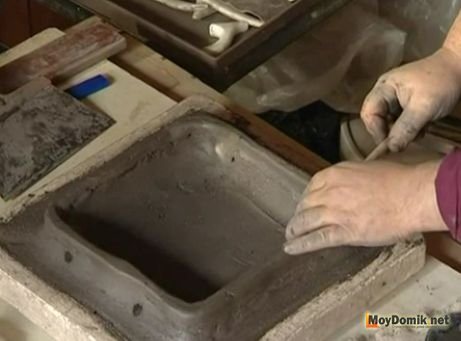
A very important stage in the manufacture of tiles for the stove with your own hands is the formation of a rump. This is such a side around the perimeter of the tile. It is needed for fixing tiles. Thanks to the tiller, an air gap remains between the oven wall and the finish. The height of the tiller should be about 2.5 cm, and the total thickness of the tile should be 45-50 mm. To make this side, you need to roll a sausage out of clay and fix it around the perimeter with an indent from the edge of 15-20 mm.
It is extremely important that the height of the headstock is the same at all points, otherwise it will be impossible to achieve a flat surface when laying the tiles.
There should be two holes on each edge of the tiller. Wire will be passed through them. It fixes the tiles to each other and to the brickwork. Then you need to let the clay dry a little, after which it will slightly decrease in size. Thanks to this, the tile can be pulled out of the mold. Then you need to check the dimensions again and, if necessary, slightly correct the product. In addition, you may have to smooth out some imperfections in the drawing.
Firing and decorating tiles
The firing procedure for tiles is carried out in two stages. First, the products are hardened in a special oven at a temperature of 900 degrees for 4 hours. Then the oven turns off, but the tile must not be removed until it has completely cooled down. The bottom line is to let the tiles cool down slowly. After that, the tile becomes hard, but has not yet reached its peak strength. After the initial firing, the product is decorated with:
- painting with oil paints;
- engobing - dipping in liquid clay of different shades with the addition of engobe.An engobe is needed if the tile is not covered with glaze.
One of the best options is to insulate a frame house with mineral wool. Moreover, it is also the most profitable.
You can also use mineral wool for pipelines, chimneys, roofs and more.
Glaze can be used to cover both painted tiles and tiles that are not decorated at all immediately after the initial firing. To do this, the product is completely dipped in the glaze. Glazing is an optional step that you can skip. After decorating, the tiles undergo a secondary firing at a lower temperature for 3 days. Facing stoves with such tiles will give your interior an unusual flavor.
Second way
You can make a tile with your own hands in another way. This is a simple technology that does not require firing equipment. However, tiles made by this method can only be used for wall cladding. She cannot finish the stoves. In this case, instead of clay, an ordinary putty mixture is taken, which can be purchased at any building materials store. It is diluted with water, guided by the instructions on the package. However, you need to add a little more of it. The finished mixture should have a consistency of 15% sour cream. It is thoroughly mixed until all lumps disappear and left to stand for a while.
You can take silicone molds for tiles, designed for baking cookies. The putty mixture is poured into them in such a way that no voids remain. Next, a rectangle of a size comparable to the shape is cut out of the painting reinforcing mesh. It must be gently pressed into the mixture. Tiles reinforced in this way will be stronger. Next, the top layer of the mixture is removed with a straightener, carefully aligning the seamy part of the workpiece. After the mixture has set, the tiles can be removed from the mold. Sometimes, ugly sagging remains on the workpieces obtained in this way. You can remove them with ordinary coarse sandpaper.
Workshop on making tiles
02/23/2016 3925 Pechnik (Moscow) Decorating different types of hearths (stoves and fireplaces) is considered an old tradition that is gaining a new round of popularity. The modern market offers not only domestic products, but also tiles from Ukraine, Belarus, as well as countries of Foreign Europe, etc. Old traditions are revived, improved and presented in their new form to their customers.
But, be that as it may, and today, in the age of automation and machine labor, the manufacture of tiles is a laborious procedure and requires manual work. Of course, the result is real works of art, which, of course, are not so cheap. But believe that stove or fireplace tiled
, worth ten heating structures.
The content of the article:
1. Do-it-yourself tiles 2. The first stage - drawing up a plan 3. The second stage - preparing the clay for the tiles 4. Preparing the clay for modeling the tiles 5. The third stage - making a template for the tiles 6. The fourth stage - making the mold for the tiles 7. Preparing the gypsum solution 8. Making a tile with a smooth surface without a shape - video 9. The fourth stage - making tiles at home 10. The fifth stage - solid (primary) firing 11. The sixth stage - adjusting the sinking 12. The seventh stage - drawing a picture (painting tiles, engobing) 12.1. Cold painting 12.2 Engobing 13 Stage 8 - glazing 14 Stage 9 - final firing of tiles
DIY tiles
Specialized Internet sites are replete with a variety of articles, including almost only general information, allowing only to get a general idea of what these unusual ceramic tiles are.Today we will try to make the facing material on our own, for which we will hold a master class on execution. Let us warn you right away that this work is not so boring, on the contrary, it is interesting and exciting.
In preparation for the procedure, purchase a plaster putty that will be used to make the mold, as well as special clay. The tools are stacks, knives and a muffle kiln. It is more expedient to write all the stages on a separate sheet of paper, this will be step-by-step instructions, which will subsequently need to be carefully followed.
The first step is making a plan
At the first stage, we draw up a detailed action plan. This includes sketching, counting the number of tiles, and measuring the hearth to be decorated. Among other things, you should decide on the type of form and the volume of the material used for the manufacture.
The shape of the tile should be thought out very carefully, since if a deviation from the norm, all the material can be spoiled. It is important to take into account the drawing that will be laid out later, the configuration of the template itself will depend on this.
The second stage is the preparation of clay for tiles
The second stage is the preparation of the clay, which must stand. While the clay is being prepared, you need to make a mold for the tiles.
Preparing clay for modeling tiles
Step by step:
1.for the manufacture of tiles used
special pottery clay
which has high ductility. Such raw materials are characterized by the ability to form, and the subsequent high strength, therefore, pottery clay, like no other, is suitable for modeling,
2.then we form small balls
, so that the clay dries as best as possible. Dry the balls in a warm, well-ventilated room,
3.Dry balls should be grind
, what remains after grinding, sift through a fine sieve with fine meshes,
4.At this stage, elutriation of clay
... To do this, the powder should be poured with water and mixed well, after which the mixture should be allowed to settle. Clay washing is carried out in a large volume of water, the proportion is one to ten (clay - water, respectively). After the clay has been washed, the water is drained very carefully so that the bottom layer of the clay remains intact. Thus, you can clean the material from unnecessary impurities. The presence of excess inclusions in clay for tiles can subsequently adversely affect their quality. We explain that when heated, the material expands, and the impurities can have a slightly different expansion, which will lead to cracking of the tile array. Professionals advise cleaning the clay in a special container, in which several holes will be pre-drilled, it is better to do this vertically, and arrange the holes in a row. The holes are filled with wooden chops, which are removed as the clay lightens. This method is very simple and convenient. 5. in the future, the clay is laid out in the sun and
dried
with constant stirring, so that it does not crack. To improve the refractory properties of the clay, you can add a small amount of kaolin, chamotte or spar to it.
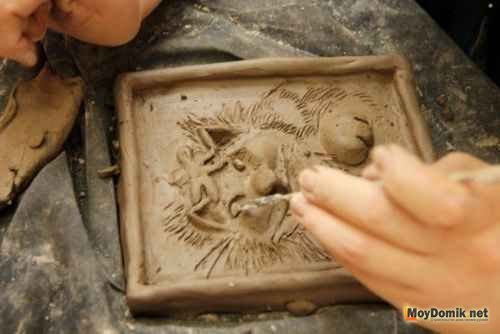
The third stage is making a template for a tile
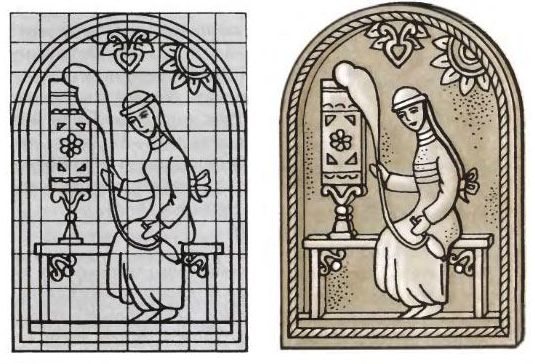
To obtain a plaster cast, a template is prepared in advance. Making a template consists in applying a pattern that you plan to see on the surface of your stove or fireplace with a two or three centimeter layer of clay. According to the type of surface, two types of tiles are distinguished: embossed and smooth. Smooth tiles are supplied with a pattern, and relief tiles can then be painted. When forming a template, it is important to take this circumstance into account. In the image, you can see how the square template is being prepared.
Advice!
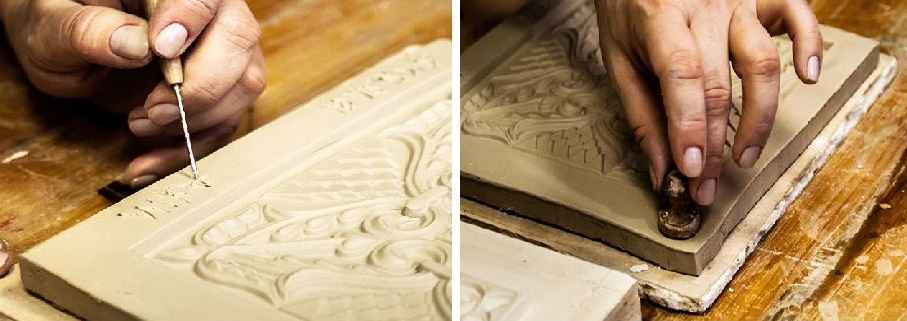
The configuration and parameters of the tile are selected based on the ease of installation and dimensions of the furnace for firing the material.Provided that the drawing is uncomplicated, you can simply sculpt it with your fingers. Of course, with a more complex pattern, it is more expedient to use special tools - stacks.
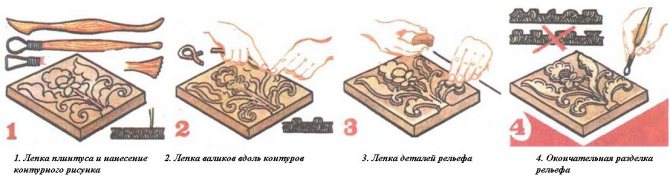
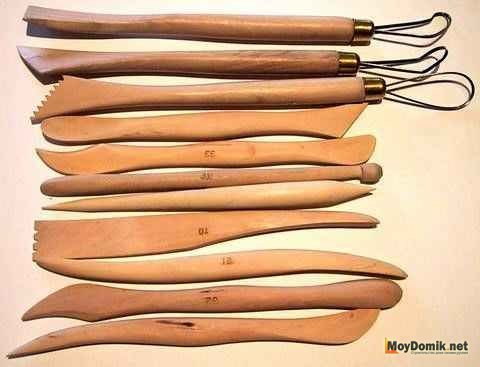
Stack is a kind of wooden knife impregnated with linseed oil and used to work with clay. Stacks are used to apply patterns, stripes, grooves, and remove excess clay. Devices can be bought in specialized stores, or you can do it yourself. Stack loops are made of leather, wire or springs from an alarm clock.
The rollers are organized by laying out the side along the edges of the tile blank.
Attention! During the formation of a pattern from clay, do not forget that an already completed product should simply be separated from the workpiece, therefore, it is better to exclude too small details, as well as right angles. In the image you can see the recommended profiles. The indentations during the extraction of clay and during the molding of the ornament should be made in such a way that an open cone is subsequently formed in the section. In the picture you can see a baby bead made in exactly the same way.
The final preparation of the template is to remove excess clay or add it. In the latter case, clay is usually added with an accidental cut, which can affect the integrity of the pattern and the required smoothness, for which a wet rag is used.
Experts form templates for each individual tile, when laid they form a spectacular pattern. As you already understood, due to the complexity of the tile, it is a rather expensive material for facing stoves and fireplaces.
The fourth stage - making a mold for a tile
After the template has dried, it is installed in the formwork and moistened with water from a spray bottle until a slight sheen appears on the surface.
Preparation of gypsum mortar
Preparing a gypsum solution. To do this, we prepare ordinary gypsum, water and knead them in a ratio of seven to ten. Note that the gypsum will need to be poured into the water, and not vice versa. It is very convenient to prepare a gypsum solution in a half of a rubber ball, so the solution will not lose the required viscosity for a long time and it will be easier to mix the components.
If this is the first time you are preparing a solution, then it is better to replace it with a putty, which retains its fluidity longer. The gypsum is ready, pour it into the mold with a thin layer. The procedure should be carried out very carefully, so that the plaster fills all the voids, as this will later be the tile.
At the next stage, pour out all the gypsum until the mold is completely filled.
The seamy side of the tiles is made by hand. The fact is that it will be easier to perform its subsequent coupling. The setting of the gypsum takes place within seven to ten minutes, and after twenty minutes the gypsum is almost completely solidified. Next, the formwork will need to be removed, and the mold, along with the template, will need to be dried. Drying is carried out at room temperature. Of course, the drying time will decrease slightly, but the quality of the tile will be guaranteed to you, since there will be no damage to the template itself.
The matter is small - we separate the form from the template. The workpiece is simply removed from the template, since the clay tends to shrink during drying. However, just in case, it is best to check if there are any crumbs on the bottom of the mold, for this it is dried and washed. If the form is made conscientiously, then with its help you can make up to two hundred copies of tiles. In order to increase productivity, you can make several forms at once, with the help of which you can make tiles several times larger.
Of course, such a procedure for making a facing material may seem complicated to some, do not worry, there is a possibility of manufacturing without using a template form.
Making a tile with a smooth surface without a shape - video
You can reduce the time for making a tile using a kitchen plastic container. It is convenient to put clay into it, to give the tile the necessary rigidity. True, it is more difficult to pull tiles out of it, so the plastic mold can be replaced with a silicone one. When everything is ready, we start making the tiles themselves.
The fourth stage - making tiles at home
According to the drawing, we can trace the stages of making the tiles.
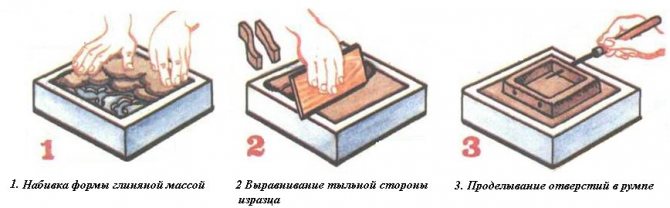
We offer separately step by step instructions
:
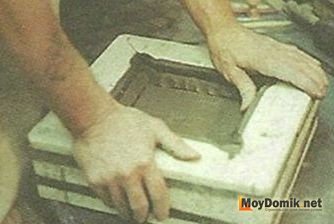
1.first follows prepare the form
, since particles of clay or commonplace dust could remain in it, it must be washed and dried. The inner surface of the mold must be perfectly clean, since even a small foreign object negatively affects the quality of the tile,
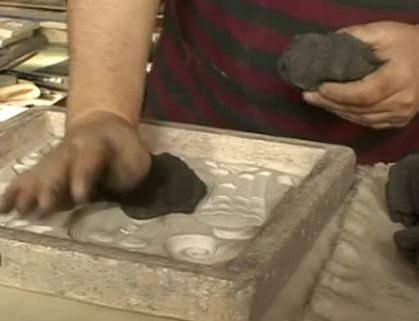
2.further shape tightly stuffed with clay
, do it not immediately, but gradually, in small parts. Clay starts from the middle of the mold. First, the clay is spread in a thin layer over the entire mold, tamping strongly with your fingers. This will help fill in all the gaps and create a high-quality drawing. If you are making stove tiles for the first time, it is better to give preference to smooth elements, since later they will only need to be painted. Moreover, even unpainted, they look great on the surface of the heating device,
3.the back of the tile carefully align
, this will allow you to remove excess clay and organize a platform for the future head. A rump is a small square-shaped protrusion on the back of a tile. The rump itself should be done separately, while rolling up two or four bars of the same size. After that, the block is pressed down a little and placed on the back of the tile.
The side must be strongly pressed to the base, using for this stack
.

Let's note one more nuance regarding the rump. The top of the element must have the same height and must be aligned flat. Then later it will be much easier to lay the material, it will not have unnecessary protrusions.
Plane alignment is carried out using a stack, after which the tiller is pressed down with plywood.
Advice!
Professionals do not recommend making a rump by combining two molds that are filled with clay, as you can see in the photo. As a rule, this will speed up the work, give the rump a tedious shape, but make the mount too unreliable and fragile.
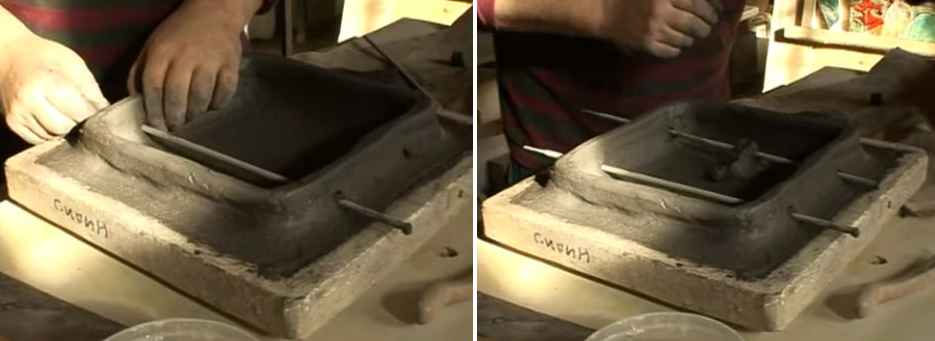
Ceramic tiles are characterized by the peculiarity of their fastening. They are tied with a special baked wire from the back of the structure. Thus, the tiles should be laid out first, and after that the hearth should be built. from here, presumably at the stage of organizing the rump, plan the holes for fastening the cladding elements.
Provided that the tile is molded using a box mold, the holes should be drilled only after drying.
Due to the fact that the plasticity of natural material can adversely affect the strength of the structure, a rigid frame is installed, for which either thick wire or small sticks are used, subsequently fixed with clay.
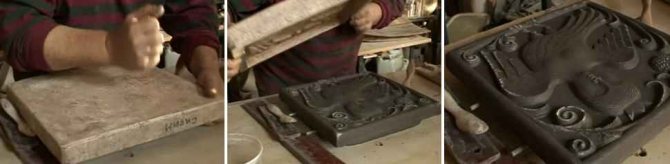
After all these procedures, the tile is taken out of the mold and sent to drying
.
Antique cladding elements almost always have an imprint of the author or signature on the surface.
Note that the author's manual work is recorded by his signature from the seamy surface of the tile, and the use of the form - the signature is on the front surface.
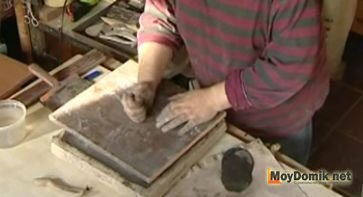
After that, the product should be removed from the mold. You need to get the tile after the clay has dried, but not completely dried, otherwise it will be difficult to get it. Professionals call this condition dried up.
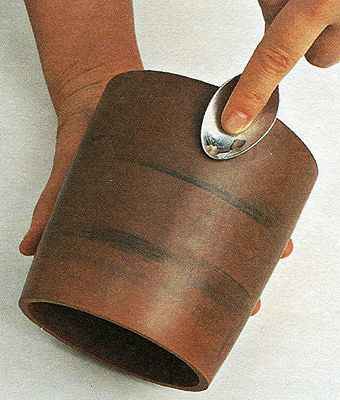
For the processing of the front surface, polishing is used. Glazing is the polishing of a tile with any smooth and hard object.Usually a spoon, vial or pebble is used for this. After processing, the surface of the product acquires a beautiful shine. When polishing relief tiles, glazing is performed only on those surfaces on which there are no protruding surfaces. After polishing, the element is dried.
Important! Since during the facing of the hearth, damage to individual elements may occur, it is more expedient to prepare a repair kit for the tiles. Thus, the repair kit usually includes all the tiles, at least one piece at a time.
Fifth stage - solid (primary) firing
Tiles are dried in a special mode, and the temperature should be such that the clay is dried, and not baked to the state of a stone. It is important to choose a suitable oven for drying tiles, as the heating must be carried out as evenly as possible, that is, from all sides. The recommended air temperature will be nine hundred to nine hundred and fifty degrees Celsius, and the time is three to four hours. The finished product should not be immediately removed from the hearth, it is left in the oven until it cools completely.
Since the dried product cannot yet be called a finished tile, it has its own name - "utel".
The sixth stage - the fit of the sink
Proceeding from the fact that during drying, the clay decreases somewhat in size, it is possible to obtain blanks with different parameters at the exit. This cannot be avoided, which is why during cladding you will have to adjust the elements to each other. Do not be upset, since this is considered a normal phenomenon in the oven business, which is explained by several factors, such as clay shrinkage, non-uniformity of filling the mold, etc. Among other things, the color of the blanks may also differ, but the tiles will subsequently be painted, so the difference in color is not so terrible.
Factory-made tiles have the same size and slight color difference. Size regulation GOST 3742-47. and the deviation will be only half or one millimeter.
If the ceramics are made independently by the owner of the hearth, the procedure for fitting the sink may be required, it is also called "retification". Retification consists of removing the top layer of the tiller to adjust the height and combing the side edges.
Advice! We do not recommend striving for a perfect fit of closely spaced elements of the stove decor, since the presence of gaps directly affects the thermal expansion of the material and its movement during the fire. Among other things, the final sorting of the tiles is carried out only after all the material has been painted. Decorative corner and front tiles are especially precisely adjusted, because they are made in a single copy.
Seventh stage - drawing (painting tiles, engobing)
There are several methods for scheduling tiles.
Cold painting
Traditional oil paints are used for drawing. Before covering the element with them, the surface is painted with linseed oil and left for two days to dry. Only after that they start painting.
In order for the tile to turn out as effective as possible, its surface after drying can be coated with oil varnish. This method of decoration is convenient already because it does not need to be additionally fired.
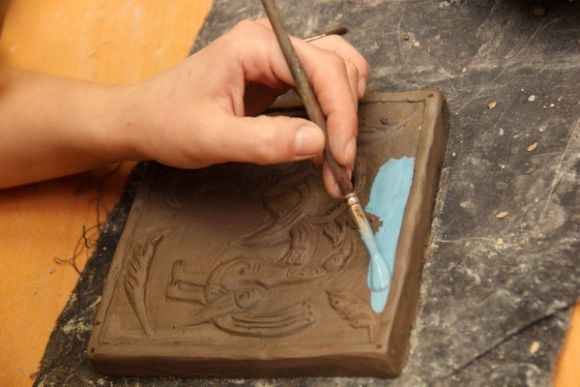
If this is your first time painting tiles, then this method is for you! It is simple, does not require a lot of time expenditure, and when laid out, an excellent pattern is obtained on almost the entire surface of the hearth.
Engobing
An engobe is a decorative coating made of liquid clay. This coating is used to equip ceramic and pottery products before firing. The result is a beautiful, smooth surface. Alternatively, engobeing to give the product the desired tone.
In the production of izrazov, engobe is obtained by several methods.In the first case, this is a method of selecting different shades of clay, and in the second - coloring white clay with coloring pigments. The method of drawing a picture, in turn, is divided into two more types:
- applying clay, the consistency of which is the thickness of thick sour cream,
- immersing the tile in water, and then in white agnob. After drying (but not strong), a pattern is applied to the surface of the product.
Separately, we will say that, provided that later you do not plan to glaze the cladding elements, then ten to twenty percent of the flux should be added to the agnob. The flux is a silicate glass that gives the paints a shine.
You can prepare the flux on your own, just crush the glass in the container. for your own safety, it is better to work with gloves, and put the container in a plastic bag. After you crush the glass, you need to sift it through a sieve. The most reliable way to separate large particles from small ones is simple, for this you need to take a nylon stocking, pull it over the embroidery hoop and sift crushed glass.
The drawing looks spectacular both on smooth and embossed tiles. The theme can be the most unusual motives of different countries.
To fix the pattern, the tile should be fired in the oven again.
Eighth stage - glaze
The tile used for cladding stoves and fireplaces is characterized by a beautiful smooth surface, which helps to transform the stove so stylishly from a heating device into an effective interior element. This can be achieved by glazing the tiles. For this, the tile is immersed or covered with glaze. The procedure is simple, the element is held by the tiller or placed on a small wire support. Glazing can be applied to finished material and tiles after primary firing (firing). The recommended glaze thickness is one to one and a half millimeters. After the layer has dried, the tiles are fired again in the lower chamber of the muffle furnace for two to three days.
Experts advise that when watering the tile surface, perform the procedure immediately, in one step, if you do it in two steps, stains may remain.
In order to prepare the glaze, a starch paste is prepared in advance, to which crushed glass is added, which is called "flux". Under the influence of high temperatures, starch is sintered and penetrated into the pores of the material surface. As a result, a thin film forms on the tile surface, which plays a decorative role.
Ninth stage - final firing of tiles
The final firing of the tiles is carried out only after glazing, and if the tile is not glazed, then only after the drawing is applied.
It is good to know that the product is taken out of the oven only after it has completely cooled down. If this requirement is not taken into account, then a mesh may appear on the surface. Only after all the actions performed will the tile sparkle with bright colors. Ultimately, all elements are sorted and assembled according to the size of the heating device itself.
Painting putty tiles
Paints for drawing on tiles made in this way are selected based on the purpose of the tile. If, for example, it will be installed behind a kitchen stove, it is better to choose a heat-resistant one. In all other cases, acrylic dye can be used. Then the tiles can subsequently be washed and cleaned.
We hope we have fully disclosed the topic of the article and answered the question of what a tile is. You now also know how to make such a finish with your own hands. That's all. We wish you good luck in this interesting endeavor!
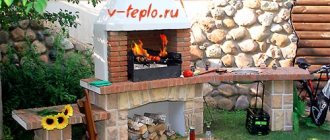
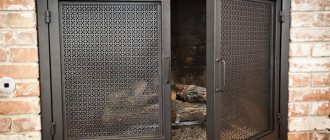
Fireplace tiles
The peculiarity of the fireplace is that most of its surfaces are not heated enough to test the strength of finishing materials. Therefore, fireplaces are much easier than tile stoves after the heater is finished.
You can fix tiles without a trowel on special oven compounds, adhesives and even cement mortar.
The cement mortar shrinks quickly to make it more elastic, you can add a pinch of ordinary washing powder to the batch.
The fireplace is most often regarded as an object of aesthetics and decor of the room, so its appearance should be appropriate. Do-it-yourself fireplace cladding is a step-by-step surface finishing technique, read on.
You can find a diagram of the ordering of the Swedish stove with your own hands here.
Stove heating with a water circuit is required when the room is large and a simple stove is not enough to heat the whole house. Here https://microklimat.pro/sistemy-otopleniya/montazh-sistem-otopleniya/pechnoe-otoplenie-s-vodyanym-konturom.html you will learn how this system works, what are its advantages and disadvantages.