Advantages and disadvantages
When choosing, you need to study the design of the system, since all existing options have individual characteristics. If you plan to lay tiles on a water-heated floor, take into account the positive qualities of such a combination:
- It is possible to operate the structure as a main and auxiliary heat source.
- Uniform heating of the entire floor surface.
- Homeowners can save money by eliminating the need to pay electricity bills, such as when installing an electrical heating system for warm flooring.
- Versatility.
- Hot water used as a heating medium does not heat the tile surface as intensely as in the case of similar systems. Thanks to this, the finishing material on the floor is less exposed to thermal effects, which means it does not lose its properties and does not deform.
- The system is characterized by high thermal conductivity.
- There is an opportunity to equip warm water floors under the tiles with your own hands, since the most difficult work is considered to be the installation of plastic pipes. The rest of the steps are done effortlessly.
The floor-standing water system also has disadvantages. These include the need to obtain permission to carry out such work. In apartment buildings, such actions are considered illegal, since an increase and any change in the heating circuit entails a decrease in water pressure, and at the same time, a decrease in the temperature of the coolant and a loss of its heating capacity are noted.
The disadvantages include the increased complexity of installation and the need for large financial investments.
Operating costs are low, however, during installation, you will have to spend a significant amount on materials and equipment, especially if you need to equip an underfloor heating system in a large room.
You should take into account the additional costs of performing the installation in cases where you do not plan to carry out the installation yourself.
The disadvantages include the slow heating of the tile surface. If effective thermal insulation is installed, this measure will increase the rate of floor heating. In addition, the complexity of the repair is considered a disadvantage. If for any reason a violation of the integrity of the communications occurs, the leak cannot be removed without dismantling the floor covering and the subfloor (screed). Another disadvantage is the lack of the possibility of local regulation of the hot water temperature. You can only reduce the intensity of heating the coolant in all circuits.
Do-it-yourself warm water floor under the tiles
- What is this heating system?
- System design
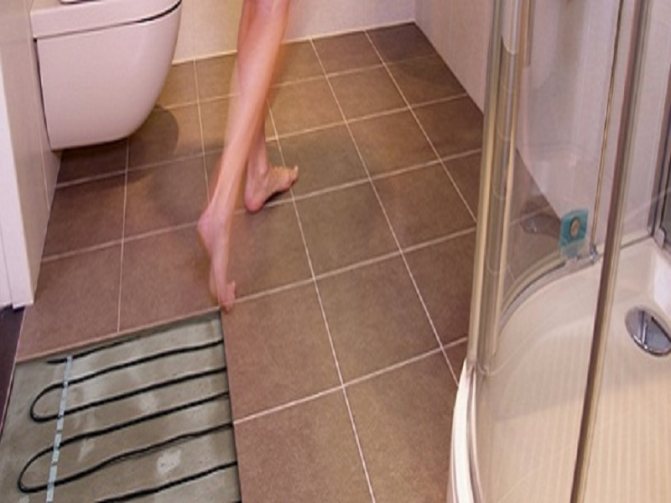
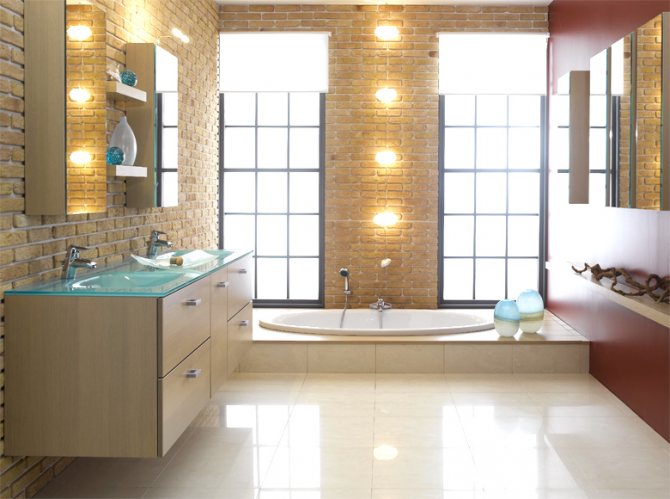
- Design features of the warm floor in the bathroom under the tiles
- Design features of the underfloor heating system for tiles
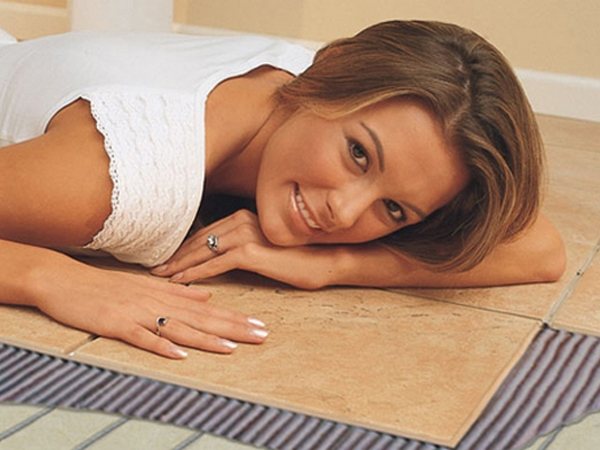
Warm, cozy, comfortable in all respects, the atmosphere in the house largely depends on the availability of a modern heating system. This can be a traditional option for heating a room with an even distribution of heat through the pipes. However, this heating option is not the only one. For example, today many have already appreciated the heating scheme, for example, in the bathroom, by installing warm water floors under the tiles.
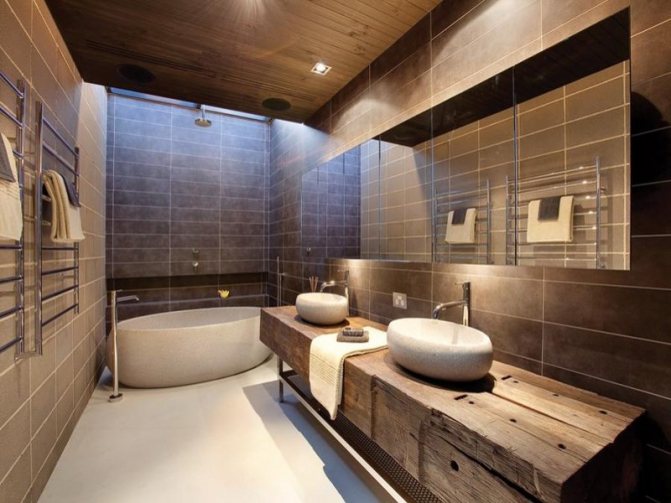
What is this heating system?
System design
Modern warm floors are incredible comfort and safety. This is a worthy alternative to all traditional types of heating in the house, allowing you to achieve constant and even heating of the room. The correct heat distribution scheme in the house is a guarantee of the health of the household. There will be no cold zones in such a house. You can also do the installation of the system yourself, especially if you already have experience in repair work of such a plan. The finished system works flawlessly, provides a fairly economical energy consumption and allows you to control the temperature in the house.

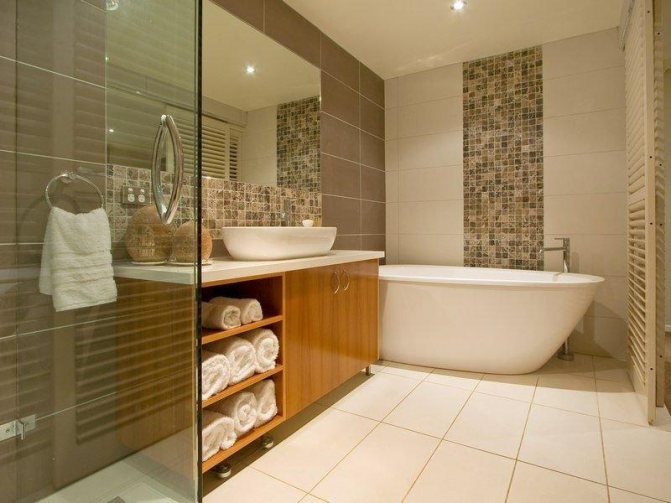
Design features of the warm floor in the bathroom under the tiles
A real warm floor consists of several layers:
1. A layer of gyro-insulating underlay to create warm floors. Waterproofing materials may vary depending on the installation method. The material can be laid on the ground, on top of which the screed will be carried out. In this case, roofing felt or dense polyethylene can be used. You can do without a screed, but then you will need to install a waterproofing membrane.
2. A layer of insulation. The insulating effect is provided by a special dense layer of expanded polystyrene. Sometimes basalt wool is used as an insulating layer. But this material is used last, as it is hygroscopic and can get very wet in case of leaks. Such insulation quickly loses its original heat-insulating properties.
3. Next, you need a reflective foil layer. It can also be metal plates with special channels.
4. The presence of pipes.
5. The quality of underfloor heating is influenced by the presence of a solid base. If you do not make a screed under the system, then for a solid base you need to lay several moisture-resistant plywood sheets. For example, it can be drywall, OSB.

It is important to take into account that both wood and gypsum boards with good thermal insulation qualities can be used as a basis for installing the system.
Ready-made warm water floor can have different thicknesses. Much will depend on the type of installation. You also need to take into account the presence of pipes, the thickness of the insulating material, the screed (if any), the laying of plywood sheets on the subfloor. The thickness of the screed at the base of the floors is no more than 3 cm. The thickness of the insulation may vary depending on the material used and the place of installation (over the ground, over the floor). Plasterboard sheets or mats are laid no more than 8 cm thick. For pipes in mats (or sheets), special channels are provided, the depth of which depends on the thickness of the pipes. In this case, the thickness of the pipes themselves can be ignored.
Design features of the underfloor heating system for tiles
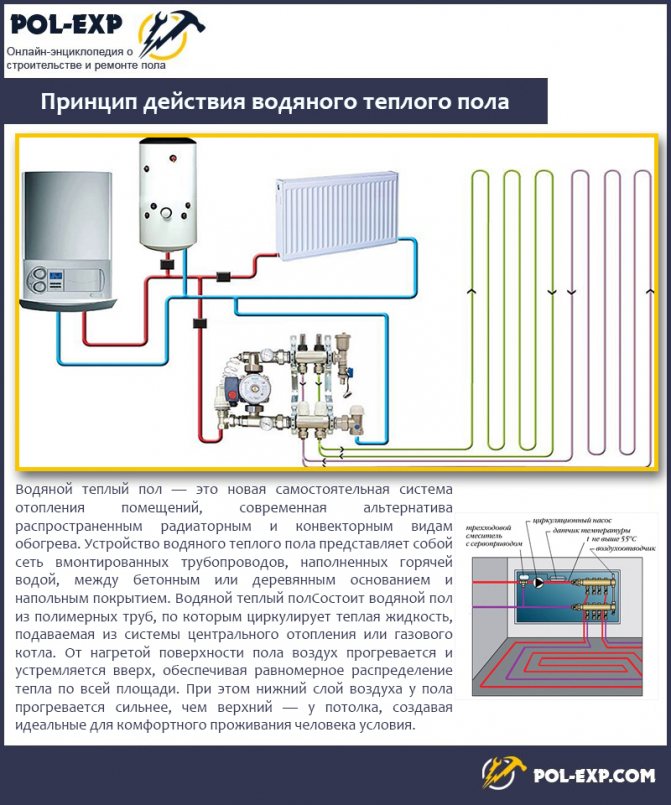
The under floor heating system is designed as follows:
- The boiler is being installed. Today, different types of boilers are installed in homes. For example, electric, as the most affordable equipment option. Although most homes have gas boilers, this is the most common bathroom heating system and the most economical. When choosing a gas boiler, you need to pay attention to models with a closed firebox, which protects the room from combustion products.
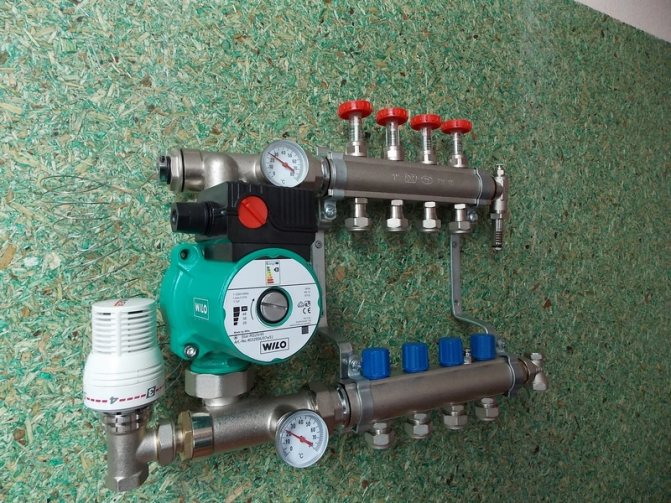
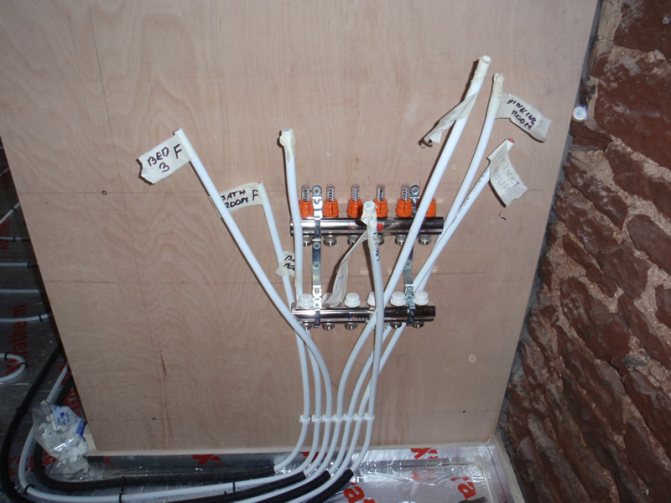
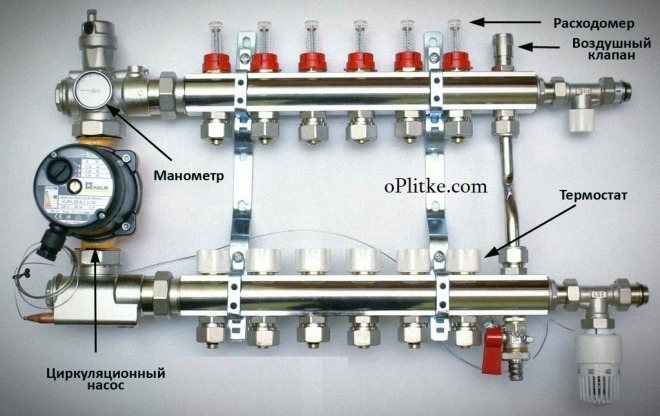
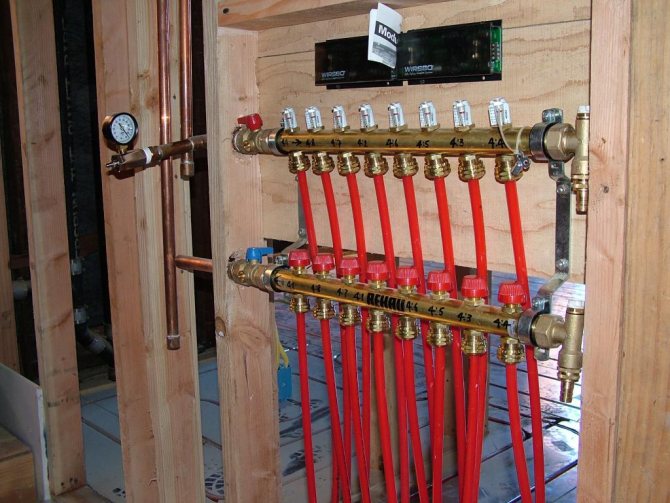
- The presence of a collector in the system. It is needed if the warm floor is the only source of heating in the house. That is, there are no other pipes and batteries in the room anymore. In this case, the heating area is taken into account. So, one floor contour (40 m) will require 100 m of pipes. The circuits are connected to the manifold. In this way, each circuit in the heating system is regulated. And in each circuit, two combs are installed, consisting of supply and return pipes, as well as air valves and control valves. For this whole structure with contours, a special niche or manifold cabinet is allocated.
- The presence of a pump. For the installation of underfloor heating, a pump is required to circulate heat from the boiler to the collectors. The pump is just between them and is equipped with a water purification filter.
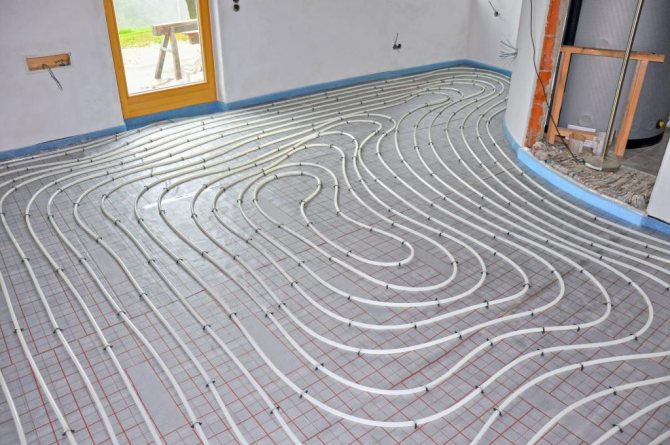
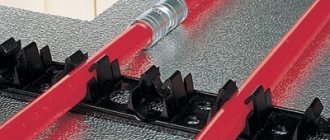
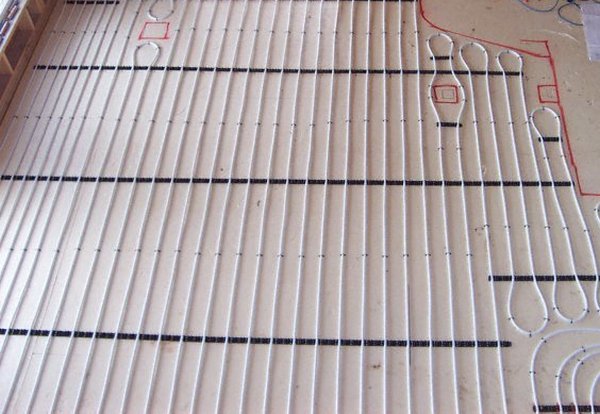
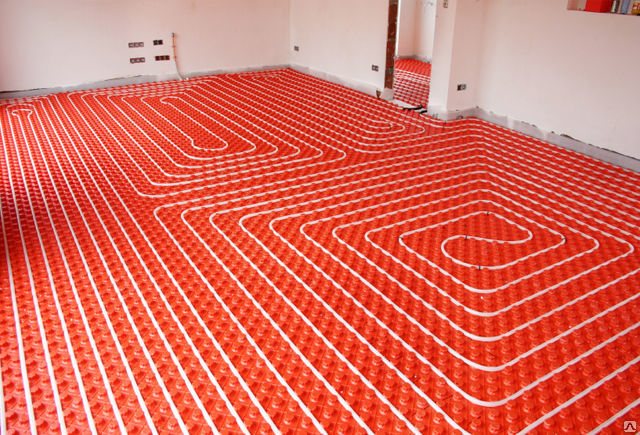
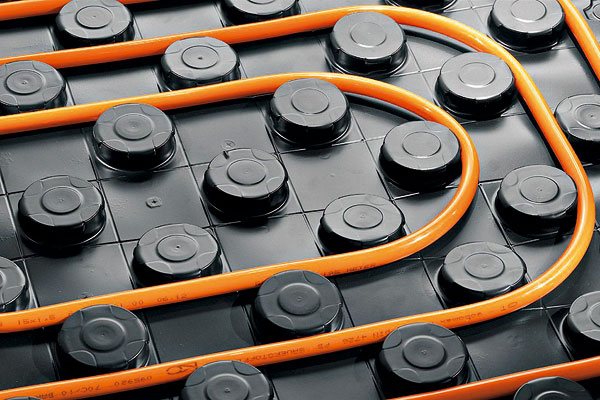
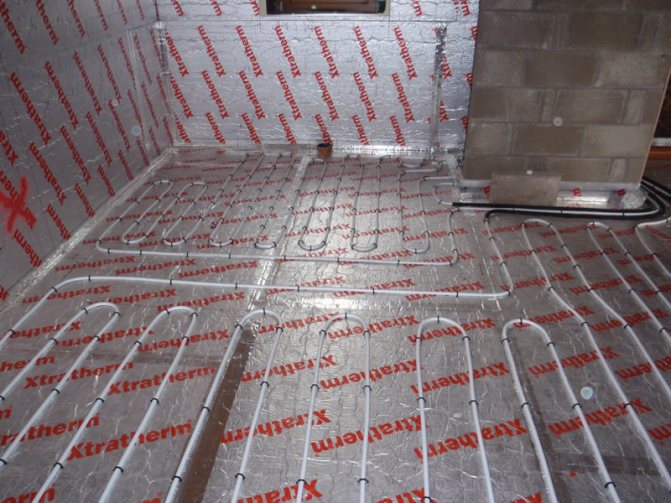
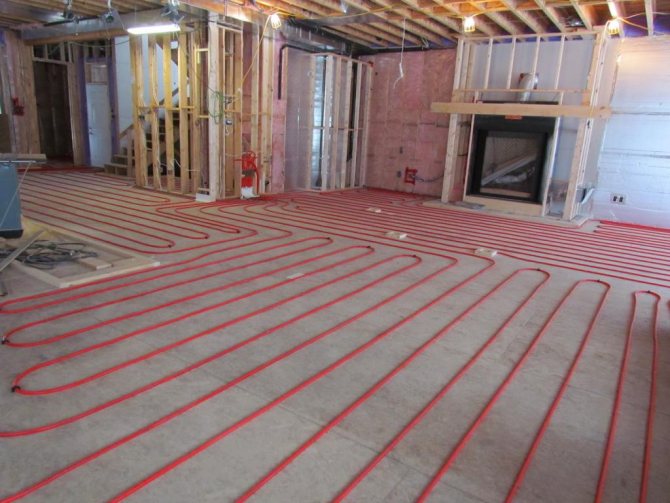
- Underfloor heating installation. The structure consists of pipes (metal-plastic or polypropylene) with a cross-section of 1.6 cm to 2 cm. The pipes are laid in spirals along the perimeter of the room. In the center of the room, the turns are turned and the return line begins to be laid.
- This is one of the options for space heating, which provides a wide area coverage with relatively low energy consumption compared to a radiator system for heating.
- The water floor allows you to abandon all other heating methods and can replace other heating devices in the house.
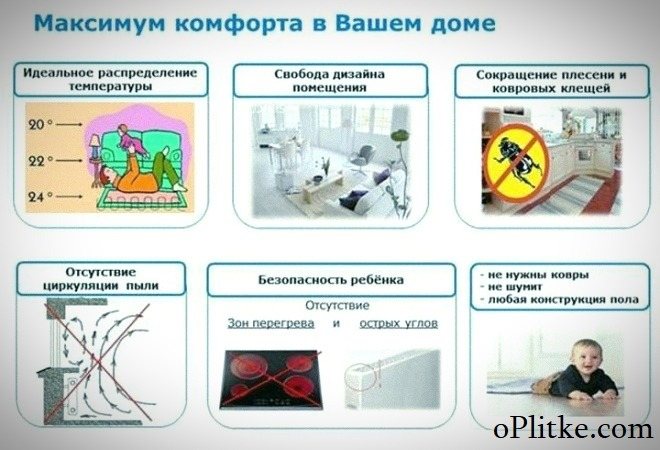
- Underfloor heating, when properly installed, provides an even distribution of heat in the room.
- The underfloor heating system is designed for long-term operation. Heating system warranty - 50 years.
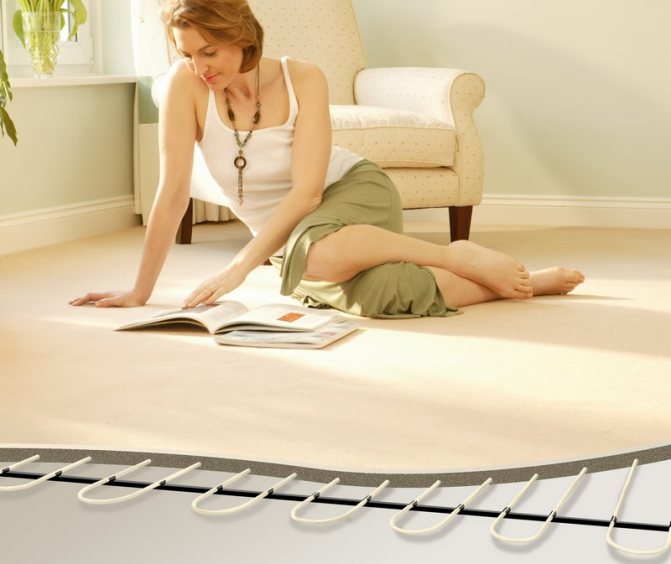
- Warm floors make it easy to create a warm atmosphere in your home at a comfortable temperature and normal humidity.
- In addition, thanks to the underfloor heating system, there is no need to install non-aesthetic structures in the house for additional heating. This expands the boundaries of space and makes the room more comfortable, not limited in layout.
- At the same time, warm floors do not restrict the owners of the house in the choice of additional heating systems, if necessary.
- The underfloor heating system makes it easy to regulate the temperature in the house.
- Constant warmth and uniform heating of the room leave no chances for fungus and mold to develop.
- Floor maintenance is effortless. It is enough to do a quick wet cleaning.
- The warm water floor guarantees safety, provided that the installation work is carried out correctly.
Advantages and disadvantages
The heating system in the house in the form of water-heated floors affects the comfortable living of all households. But, as with any technology, water floors can have their own advantages and disadvantages.
What are the advantages of a heating system with underfloor heating?
And yet, despite the many advantages of underfloor heating, one should not forget about the possible disadvantages of the system.
What are the disadvantages of heating with underfloor heating?
There are not so many of them:
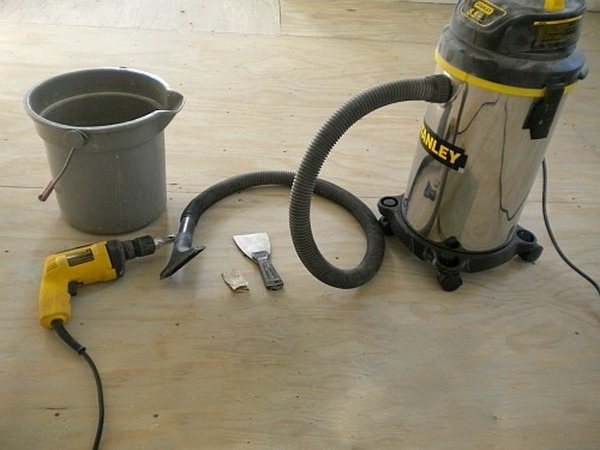
Preparation for styling
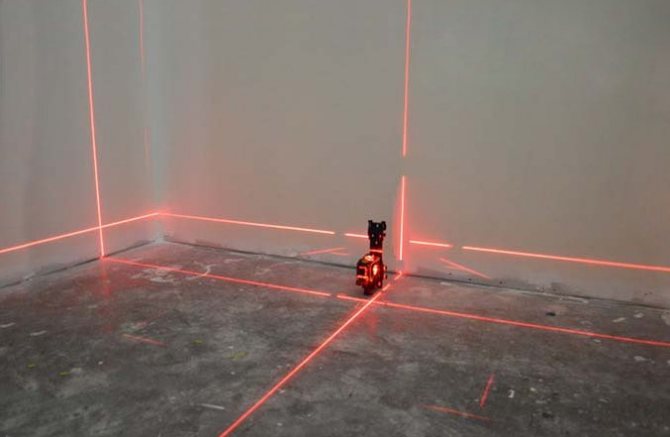
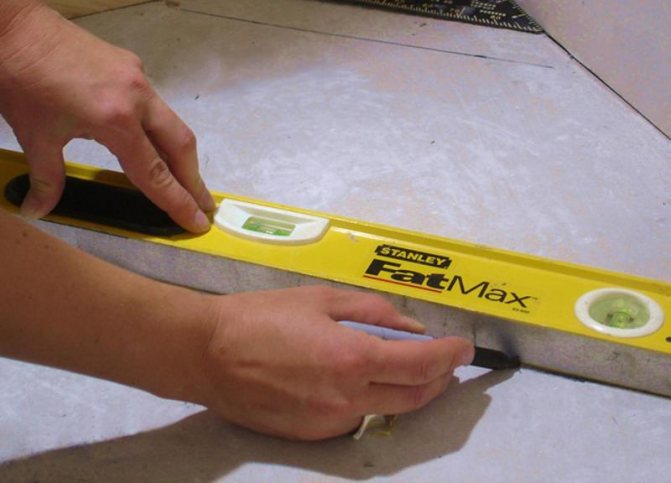
In order to ensure the smooth operation of the underfloor heating system, it is important to prepare the base before laying the pipes. Preparatory work at the initial stage ensures the quality of the system as a whole. Therefore, it is important to clean the base for laying from dirt and debris, to eliminate all kinds of potholes, chips, irregularities and protruding areas throughout the area. Without this, the floors will have height differences, which will lead to an uneven distribution of heat in the room. Levels are used to adjust the height of the floors.
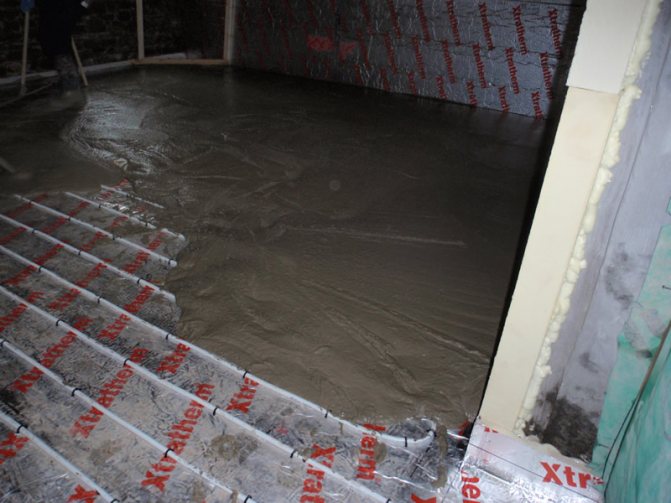
At the next stage of preliminary work on the preparation of the base for laying, a screed is performed. It should be perfectly even, of the same thickness around the entire perimeter of the base. This can ensure a high-quality and uniform heat distribution. Next, you can proceed to work on laying the thermal insulation layer. This material is necessary to minimize possible heat loss. The waterproofing film is laid along the entire perimeter of the room.For this purpose, a special tape with a width of about 10 cm is also used.

After that, you can carry out full-fledged thermal insulation. The thickness of the insulating material largely depends on the design features of the floors, on the location of the room. In some cases, the thickness of the insulation will have to be increased to maintain heat retention. Thermal insulation can be carried out using various materials, for example, strong and dense foam can be laid.
Technology and installation
Installation of a warm water floor is carried out in two ways:
- pipe laying is carried out on a concrete base;
- the pipes are laid on a polystyrene base.
The principle of operation for each method of laying the system is almost identical.
The water floor is installed in the following sequence:
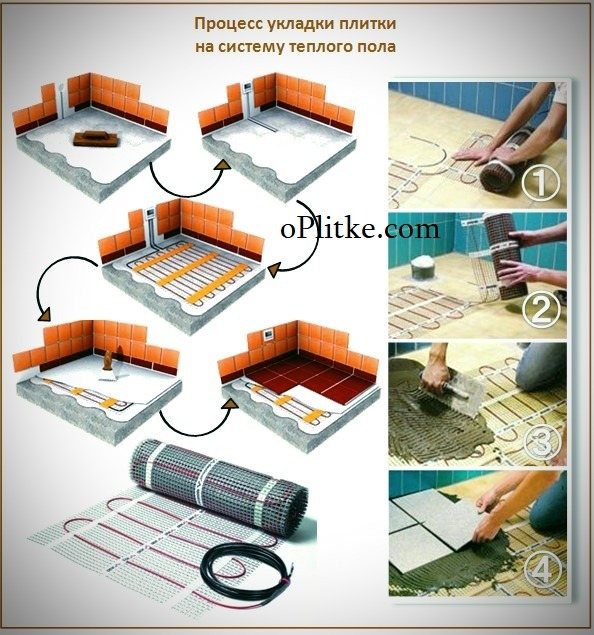
Laying tiles
When installing underfloor heating systems, traditional materials are usually used:
- ceramic tiles,
- a rock,
- porcelain stoneware.
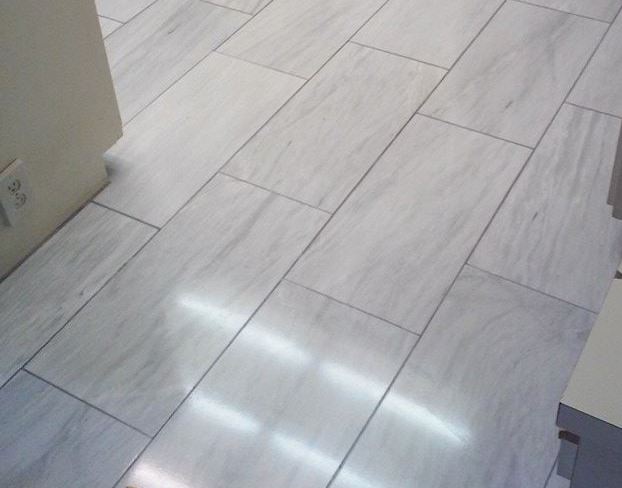
Underfloor heating allows for smooth tiling, which ensures the least heat loss. When laying such a tile, it is important to ensure that no voids remain under the material, otherwise this will lead to temperature deformations in the future - the tile will simply begin to crack.
Tiles can be laid after pressure testing and testing of the system has been carried out, when the concrete screed has completely dried out. To speed up this process, you can use a heat generator. This will also allow for this time to ensure a stable temperature in the room.
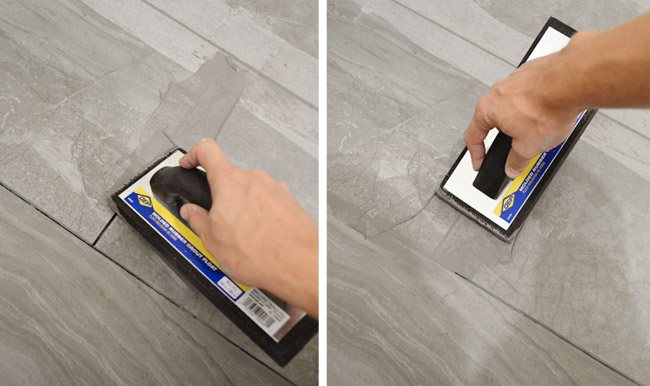
The tiles are laid on the base of the floors according to preliminary markings. According to another scheme, the tiles are laid from the center of the room or from the corner. The tile on the seamy side is processed with a special glue using a notched trowel. The tile must be immediately pressed to the base and so hold for the first few seconds until it fully sets. For this, ordinary tile glue is used, and the joints are rubbed with a special compound.
After laying the tiles, the seams need to be processed. It is necessary to achieve their evenness and the same thickness (1-3 mm). To do this, you need to use plastic crosses that are placed in the corners of the tiles.
When laying tiles, it is important to achieve a flaw-free result. Therefore, it is best to use special flexible mixtures in the work, ensuring the quality of the laying.
Now that the main work on laying the tiles is done, you need to wait until it is completely dry.If necessary, grout the joints again.
Manufacturers rating
Modern manufacturers of underfloor heating offer potential buyers proven systems with a high quality guarantee and increased service life. And yet, when choosing a heating system, one should proceed from the rating of manufacturers.
The most popular of them today are the following brands:
- German brand Rehau
- Italian manufacturer Valtec
- Finnish Uponor brand
- Another German manufacturer Oventrop
It is important to take into account that all tile laying work is performed only with the heating system turned off.
You can see the process of installing a water floor with your own hands in the following video.
- Do-it-yourself water-heated floor under the tiles Features and installation of the water-based floor heating system under the tiles The floor, tiled with ceramic tiles, has many ...
- Replacing the socket with your own hands Replacing the socket is necessary in cases where the old one ceases to perform its functions or simply breaks down. ...
- Installation of a split system with your own hands instructions Stages of installation of a split system with your own hands Outdoor air conditioner unit
- Do-it-yourself electric warm floor under the laminate A comfortable and energy-efficient home is, to a certain extent, the right combination of modern technologies and materials. ...
Equipment types
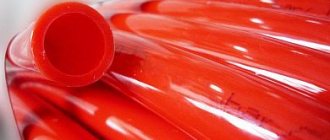
The main element of the system is communications. The recommended diameter is 20 mm. This is enough for normal circulation of the coolant in a private house. In addition, due to the small size of the pipes, the total thickness of the screed over the underfloor heating system will be minimal. It is recommended to use polyethylene (sewn material) or reinforced multilayer communications.
The second important element of the warm flooring system is the collector. This is a universal unit that performs the function of a distributor, and additionally with its help, the heating of the system circuits is regulated. The manifold often contains thermostats, pumps, and pressure stabilizers. In order for this node to function efficiently and without interruption, it is recommended that you determine a suitable location for its installation.
The manifold is often offered assembled, all units are combined in a cabinet. It is recommended to choose this option when arranging a warm floor covering if you plan to do the work yourself. It is advisable to install the most economical boiler, since the costs of operating the heating circuits will increase. It is allowed to use gas, electric, solid fuel and diesel boiler equipment.
Screed option
To carry out construction work in this way, you will need:
- Special metal-plastic pipe of the corresponding diameter.
- Fasteners.
- Circulation pump for bleeding the system.
- Collectors of various modifications.
- Various valves, adapters, fittings of different types and types.
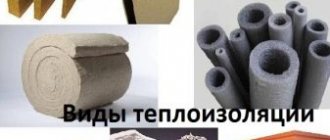
The choice of thermal insulation
Considering that it is advisable to mount such a structure in a private house, you need to protect it from moisture, and also help reduce heat loss through the rough base. For this purpose, thermal insulation is used as a way to contain the outflow of heat from the room. The most reliable types of coatings that are less susceptible to mechanical stress:
- Styrofoam;
- expanded polystyrene;
- foil-coated roll insulation (penofol).
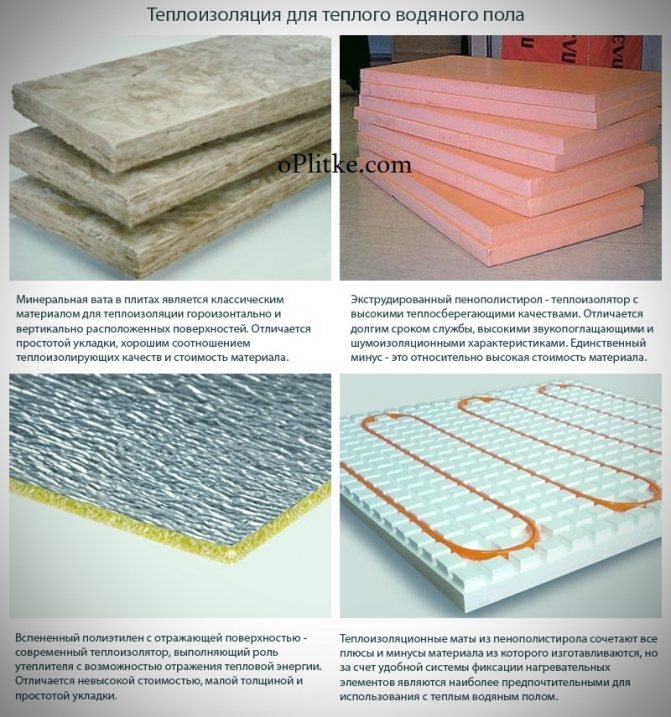
The latter of the options is recommended for use in the case when the installation of water-heated floors under the tiles is performed as an auxiliary heating source. At the same time, it is not necessary to lay a layer of thermal insulation of a large thickness, since heat loss will be minimal due to the connection of communications to the heating system.When there is a basement or ground under the subfloor, it is recommended to choose expanded clay or expanded polystyrene as insulation for a warm floor covering, while the layer thickness varies within 50-100 mm.
Insulation materials should be of increased rigidity, since the structure is covered with a concrete screed. If a soft material is used, the cement layer deforms under the influence of increased loads. In addition, the overall thickness of the "cake" of the warm floor covering should not be too large, so as not to visually reduce the height of the ceilings. The same applies to the thickness of the screed for a water-heated floor and the dimensions of the thermal insulation.
Screed method
The base should be perfect, there should be no roughness, bulges or depressions. It is imperative to level the surface. If there is at least some bias, then this will lead to uneven heat transfer.
Now the installation of a special distribution cabinet. It will house various pumps for circulation and pressure boosting, as well as a unit for distributing heat energy along the circuits, valves, a control system, hot water input, and so on. If there is a constructive opportunity, then you can mount the cabinet in a wall niche, but this is not at all necessary. The dimensions of the cabinet should allow working with the contours of a warm water floor.
If you purchased all the components yourself, then you can make the comb (distribution) for the system yourself. Such work requires pipes and various plastic connections. If you make the comb yourself, then you will save a significant amount of money, because the factory brass assembly is very, very decent.
Laying tiles
After 28 days, you can proceed to the next stage. The principle of laying tiles on a warm floor and a rough base without heating is the same: ceramic products are laid on the finished surface, starting from the center (in the case of working with small-sized tiles) or the corner of the most visible part of the room (laying large products). When the adhesive dries up, proceed to grouting.
Waterproofing, insulation, reinforcing mesh
Then you can move on to waterproofing the base of the floor, to save money, you can take the usual film that we use in the construction of greenhouses and greenhouses. The film is laid in strips, overlapping each other, the overlap of the polyethylene film strips must be at least 25 cm. In addition, make the film runs on the walls (at least 15 cm). All joints of polyethylene film strips are glued with construction tape.
Next, we move on to insulation. To prevent heat energy from being lost, it is necessary to lay a layer of thermal protection. The substrate for a warm water floor can be of different materials:
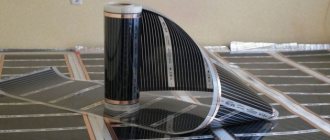
- Penofol. This modern material is used if your system is an addition to the main heating system.
- Extruded polystyrene foam (slabs 5 cm thick), this insulation is used if the floor system is the main source of heat in the house.
It is important to know that buildings standing on a slab foundation or on a cold basement require additional insulation of the ground floor basement. This option requires double insulation with extruded polystyrene foam, that is, the thickness should be at least 10 cm.
When you are done with the insulation, you will need to glue the edging tape to all walls. It is glued at the level of the future screed. We need such a tape for thermal expansion of the screed, which will arise according to the laws of physics in the process of floor work.
Next, you need to cover the mesh (reinforcement). The mesh significantly and many times increases the physical strength of the screed, protects it from cracking. The pipes of the system are fixed to the mesh. To save money, you can fasten pipes to the reinforcing mesh using so-called plastic ties, which is cheaper than clips or special strips for such purposes.
Functional check
A test run of the warm flooring system is carried out after installing the heating elements. If you do this at the last stages of work, when the structure has already been filled with a screed, it will be difficult to detect errors in the installation of communications, which means that the leak will remain invisible. To avoid flooding the premises, it is recommended to carry out a test run. To do this, the warm flooring system is turned on and the condition of the pipes is monitored for several hours, gradually increasing the heating temperature and pressure.
Division into contours
In the case when the area of your room is significant, then you need to somehow visually divide the floor in it into certain sectors. One sector will have its own independent contour. One sector according to the rules is less than forty square meters. This indicator is important for the normal thermal expansion of the screed during the operation of the floor. In principle, we have completely figured out the construction of a heated water floor under a tile, now we proceed directly to laying the tubular system.