
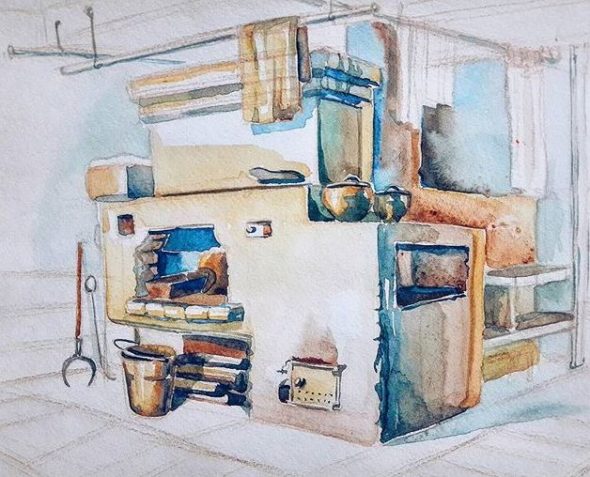
The oven is a source of warmth and comfort, a means for cooking food, drying fruits and mushrooms. It was used to bake bread. The Russian stove was also a place to sleep. She was able to heal a patient with colds. The device ventilated and dried the dwelling, creating a favorable atmosphere. This unit was even used for purification purposes: they steamed in it with brooms.
As a rule, it was massive heating devices that were built in Russia, because at that time people were subsistence farming. Their height was up to 2 m, length - more than 2 m, and width - about 1.5 m. The main task of such a structure is to keep warm as long as possible. For this, during construction, the cooking chamber was located deep in the furnace, and a damper was installed between this structure and the mouth.
How and how to heat a Russian stove
Coal or wood was usually used as fuel. Logs were selected from pine, fruit or birch species. They are distinguished by a longer burnout and preservation of heat, which is required for the oven to perform its functions.
To get good coal, firewood for heating was selected of the same size, getting rid of knots as much as possible. Then they were folded in a well, and chips were placed on top for faster ignition. In order to obtain a uniform coal, it was important to be able to melt it so that the heat was maintained for a long time. For this, the device was heated with a large batch of firewood.

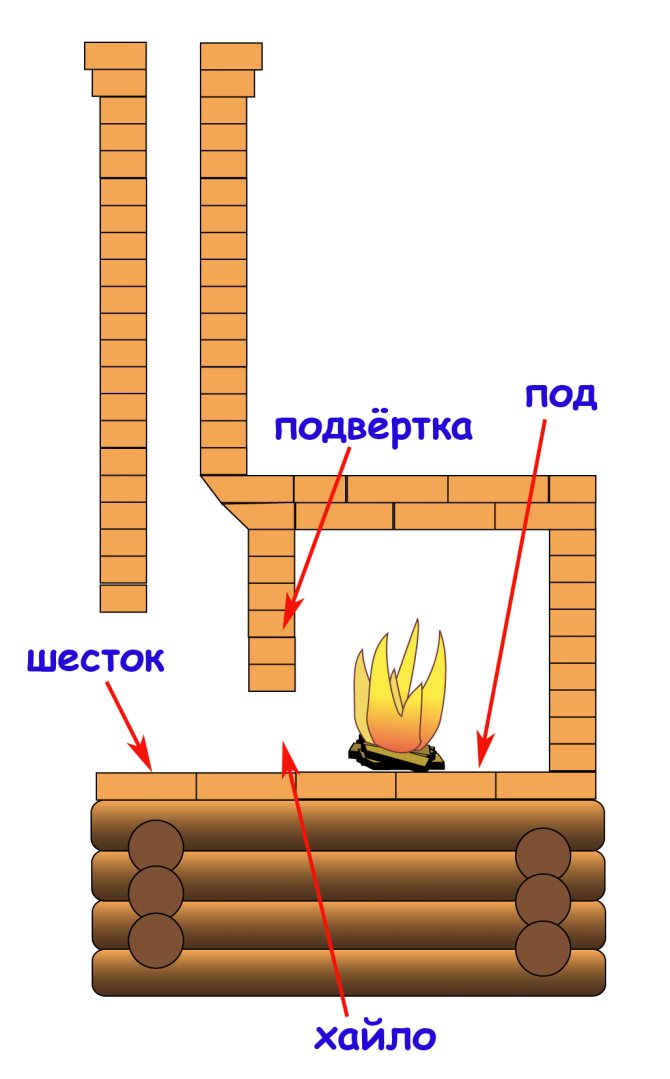
The structure of the Russian stove
The main components of the unit:
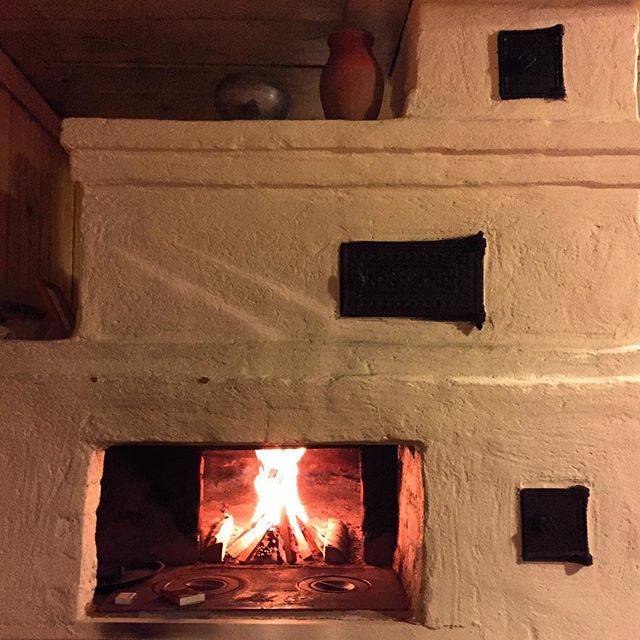
- a crucible or firebox is the basis of any heating structure used for cooking;
- vault - a part located at the top of the furnace, on which an array is laid, capable of retaining heat;
- under - the lower element of the firebox, designed to increase the strength of the combustion chamber;
- cheek - front wall of the furnace;
- mouth - a hole in front of the crucible through which fuel is put in and dishes are loaded; this is the part connecting the firebox with the room and the chimney;
- six - the area on which the household utensils are located before being placed in the firebox or after being removed from it;
- sub-six - an unheated compartment under the six, designed for storing dishes or other things;
- baking - the area under the hearth of the unit, where firewood is placed for heating;
- hailo - a device for blowing smoke into a chimney;
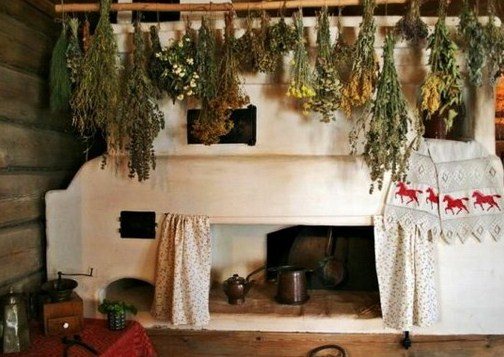
- stoves - niches for increasing the heating area and improving heat transfer; they were used to dry herbs, berries, mushrooms and to store dishes or shoes;
- sill - part of the mouth up to the roof, designed to increase efficiency by keeping flue gases under an arched ceiling;
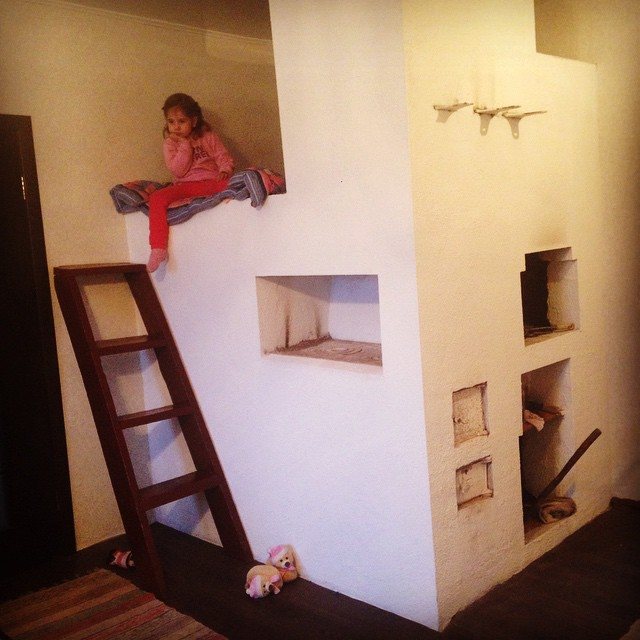
- overlap - the upper part on which the stove bench was installed.
About other modifications of the "Swedish"
Swedes and their variants
The described cooking and heating oven is one of the simplest design options. If desired, such an oven can be upgraded with glass doors - this will not only improve the appearance, but also additionally protect the room from food odors.
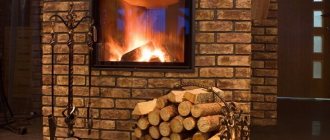
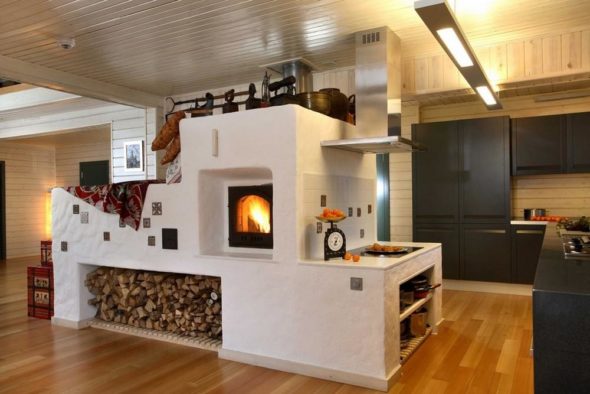
Swedish woman with fireplace
Another variation of the "Swede" can be considered a construction with a fireplace, installed between the living room and the kitchen. In this case, the kitchen will have a full-fledged stove with an oven, a dryer and a hob, and in the living room there will be an original fireplace, which will not only heat the room, but also serve as an additional decorative element of the interior.For this, one common chimney is used, for this reason additional costs will not be required.
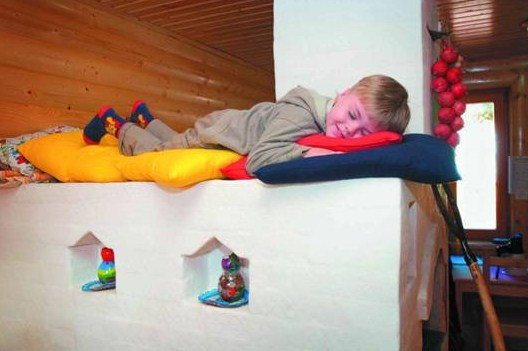
Important information! One of the main advantages of the "Swedish" is the ability to effectively treat colds and flu. You just need to sleep on heated (but not hot) bricks, after which the disease will go away very soon.
Stove with stove bench
In the same way, you can heal joints and get rid of lower back pain. To do this, you need to equip the stove with a stove bench. For the first time, such a structure was developed by Henry Reznik and it consisted of a furnace with dimensions of 3x4.5 bricks and a stove bench - 2.5x7 bricks, respectively. This oven can operate in two modes - winter and summer - and heat a room up to 40 m².
Video - Stove with a stove bench
Characteristics of ovens "in white"
Over time, the “black” devices were replaced by “gray” units. Chilled smoke escaped either through a hole in the ceiling or through a wooden pipe. Hot smoke and sparks came out of the firebox through the channel, capable of causing a fire on the roof, especially in the summer season, since the roofs at that time were lined with combustible material - straw. Therefore, the long-term use of stoves "in black" did not mean the presence of difficulties in the manufacture of a pipe for smoke outlet, but rather this was how our ancestors took care of the heat in their home and its safety.
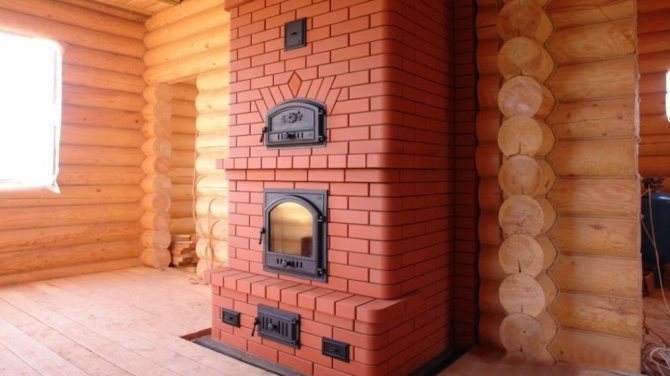
However, the Russian people understood the need for an urgent alternative to such unreliable furnaces, and it was found in the form of new, fireproof, simple, economical and multifunctional structures - “white” stoves.
They were no longer built of clay, but of pre-fired bricks. At that time, people learned the skill of burning bars, realized their importance in the construction of furnaces and began to build brick structures.
The material for the roof has also changed. The roofs were lined with shingles or boards, which excluded the likelihood of a fire.
Soon the problem of fire risk returned. The new chimney increased draft, but at the same time increased the amount of hot air emitted with sparks.
In order to increase efficiency and eliminate the risk of fire, the chimney began to be bent and turned into a casing in turns. Thus, the hot smoke, moving in zigzags along the stove, gave off heat to the bricks, while the sparks also extinguished. At the end of its path, the combustion products passed through a special horizontal section of the pipe, from which they fell outside, already cooled.
Another difference between "white" stoves and "black" ones is the foundation. The first type of device weighs 2-3 times more than its predecessor, so a strong foundation was built so that the floor would withstand and not fall through.
Although the "white" ovens were perfect, they were used for a long time only in the homes of boyars, princes and wealthy gentlemen. The reason for this was the high cost of bricks: ordinary villagers could not afford the luxury of purchasing this material and continued to use old-style stoves. Some found an alternative in the construction of such a unit from adobe brick - raw, and the fired one was used on the hearth and roof of the furnace.
Types of Russian stoves
Such a unit can be converted or built to suit any customer's wishes.
Main types:
- Classic (read more) - a standard version of a heating device with a stove bench.

- Russian stove with stove (read more) - a more perfect and convenient model of the unit: in summer it performs the function of cooking, and in winter - heating.
- Russian mini oven (read more). Another name for this design without a bed is "housekeeper". The device is designed for cooking.
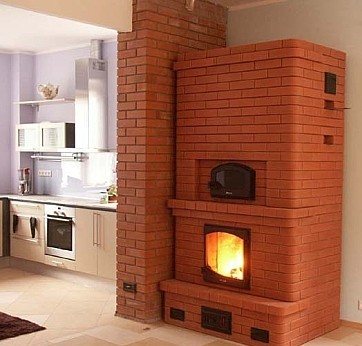
- Russian heating unit with fireplacem (read more). The combination of a modern open hearth and the capabilities of a stove is both beautiful and comfortable.
How to make a Russian stove with a stove with your own hands: step by step instructions
For the laying of the furnace part, they use refractory bricks, which are made of fireclay clay. Further, the structure is laid out from a simple ceramic brick.
Absolutely every stove has cast iron parts - dampers and doors. They also need to be prepared in the required amount.
Required tools and materials
- Doors: blower 250x140 - 2 pieces, furnace 250x205 mm - 1 piece, cleaning 130x140 - 2 pieces, as well as ventilation of any size.
- The grate is 380x250 mm.
- Gate valves: 140x140, 180x140 and 260x260 mm.
- Crucible damper with dimensions of 450x380 mm.
- The view has a diameter of 230 mm.
- Hot water box size 500x120x280 mm.
- Cast iron stove with 2 burners measuring 400x700.
- Two steel strips: 1430x25x2 and 1000x50x12mm.
For the laying of vaults and arches, easily demountable templates made of plywood and wood will be needed.
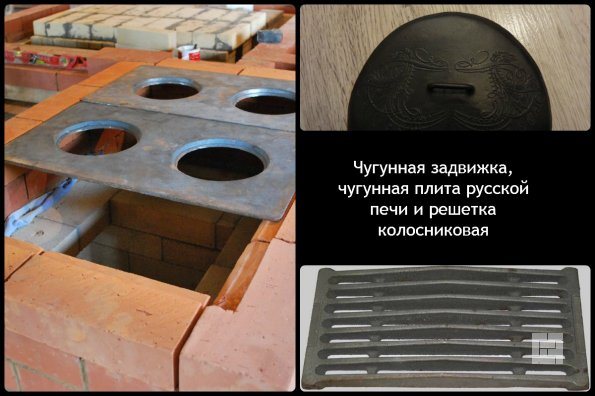
It is better to make the stove from high-quality cast iron.
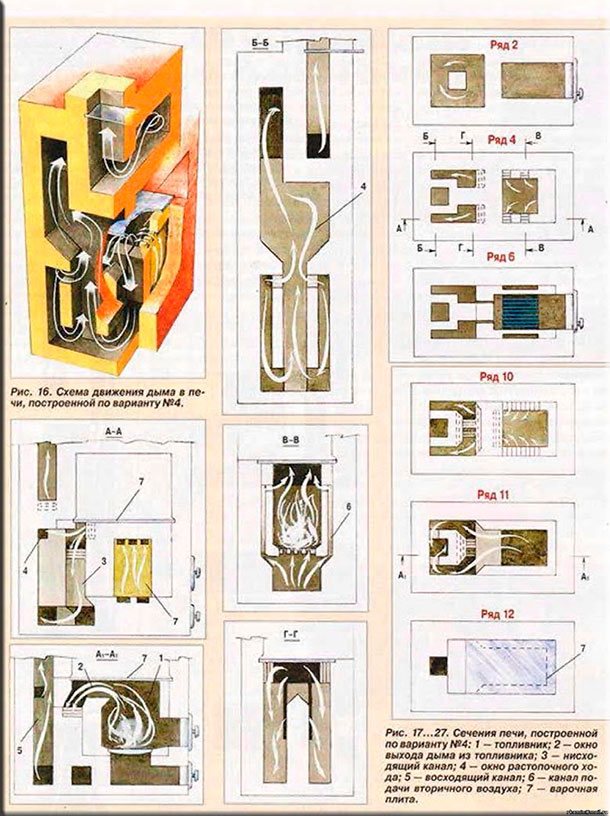
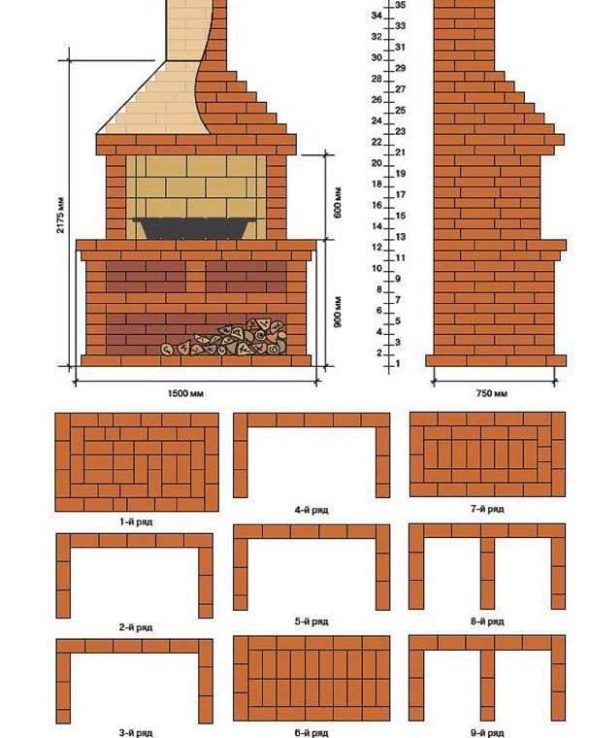
Photo gallery: diagrams and dimensional drawings
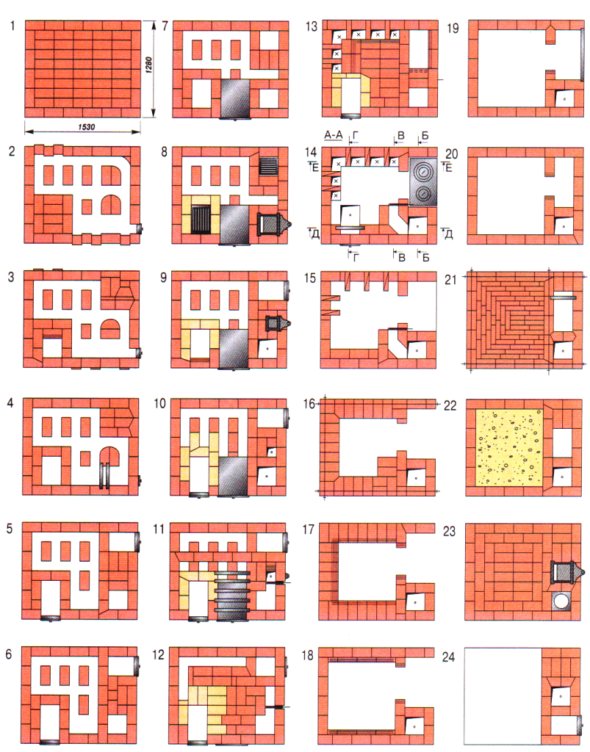
Option for laying a Russian stove with a stove
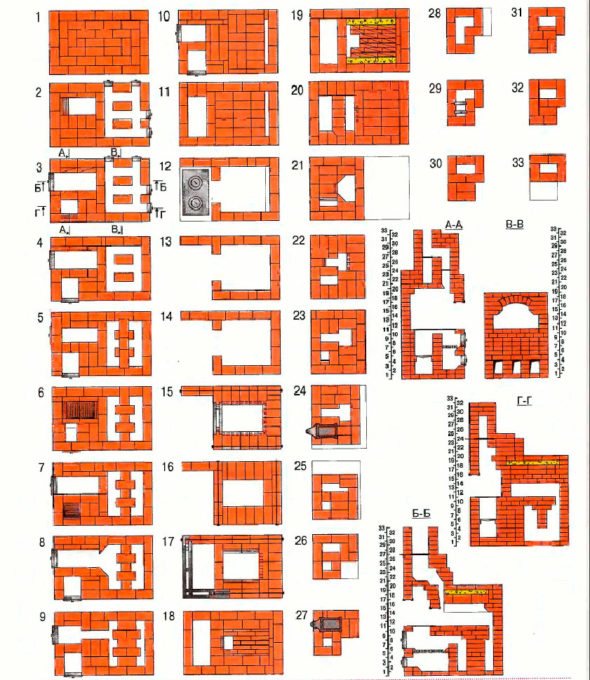
Masonry of the Russian stove
Furnace masonry option
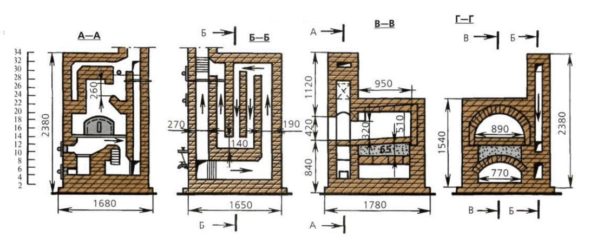
Scheme and dimensions of the Russian stove
Features of the preparation of masonry mortar
For each type of brick, a solution is made with its own composition and proportions.
- If the masonry is made with bricks of grade M150 and higher, then they use a clay-sand mortar in a ratio of sand and clay of about 1: 2. The same solution is used for facing with ceramic tiles.
- If the masonry is made with refractory bricks, then they use a solution based on refractory clay with the addition of sand.
- If the masonry is made with fireclay bricks, then they use a solution of refractory clay and the so-called fireclay powder in a ratio of 1: 3 or 1: 4.
- When laying brick pipes in the attic, a mortar of cement and sand is used.
Clay is a very soft rock, from which sculptures, dishes are molded, tiles are made and much more. In nature, clay can be of different types, and it is "oily", normal "and lean. It is considered the skill of a good stove-maker to optimally select the ratio of sand and clay in order to get a good solution.
A solution is prepared for each type of brick.
There are many ways to check the quality of the mud. The most common of them is clay dough is made, then a thin flagellum is rolled and then you just need to bend it. The smaller the bending radius (at which the flagellum begins to crack), the better the solution.
How to make clay mortar
In order to make the masonry, you need about 3.5 cubic meters. m of clay solution. Accordingly, the required amount of ingredients is taken in proportion to each other. For example: 1.1 cubic meters. m of clay need 0.27 cubic meters. m of water and 2.2 cubic meters. m of sand.
An iron barrel or a tin-lined box is used as a container, the clay is soaked for 2 days. Then sand is added and the solution is mixed with your feet (you need to have boots with high tops) until it becomes homogeneous.
The quality of the mortar and brick will determine how long the oven will last.
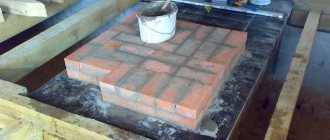
How to build a foundation
Since the stove is a heavy and massive structure, it needs a separate foundation. That is why it will be very problematic to start laying in an already finished house - you need to think about this in advance.
The most ideal and reliable option is a reinforced concrete slab monolithic foundation. The stove foundation is not associated with the main foundation of the house and is considered an independent structure.
Brick masonry stove
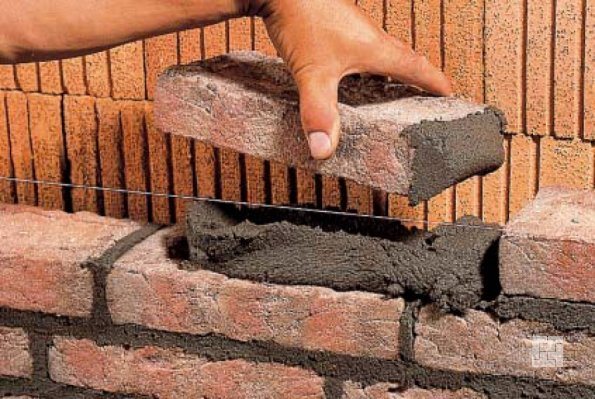
The main requirement for masonry is tightness. That is why only solid bricks are selected for the furnace without any cracks, and the seams are made thin - no more than 5 mm.In no case, it is not recommended to achieve airtightness due to the coating of the walls with clay from the inside - this greatly reduces the thermal conductivity, and also increases the deposits of soot and soot. In addition, clay has properties to clog channels inside the structure and flake off, it will be very problematic to clean them. Masonry methods are applied:
- "Into a brick" - this is if the wall thickness coincides with the length of the brick;
- "In half a brick" - this is when the brick lies flat along the wall;
- "In a quarter" - this brick is placed on the edge.
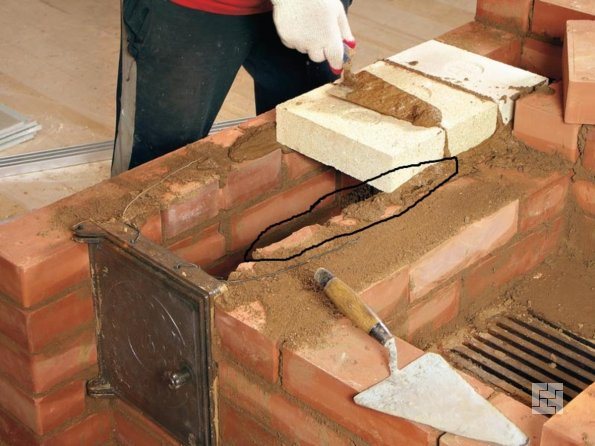
When laying, it is necessary to remove excess mixture, especially from the inner wall of the oven. Outside - the walls are laid "in brick", internal - "in half a brick".
There are several types of masonry
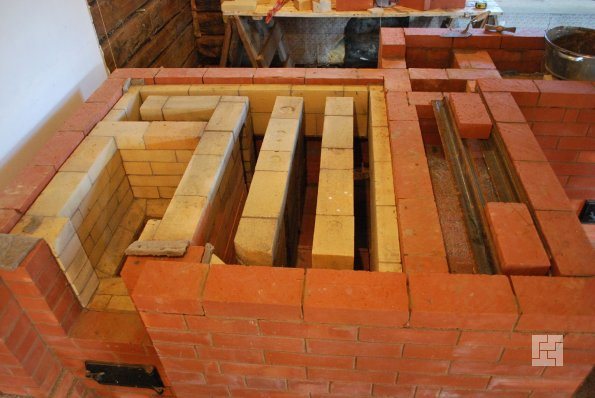
How to make orders with flooding
Orderings are the so-called step-by-step instructions for correct laying, which indicate the order of actions in each next row. Thanks to them, any person can master the process of laying a Russian stove.
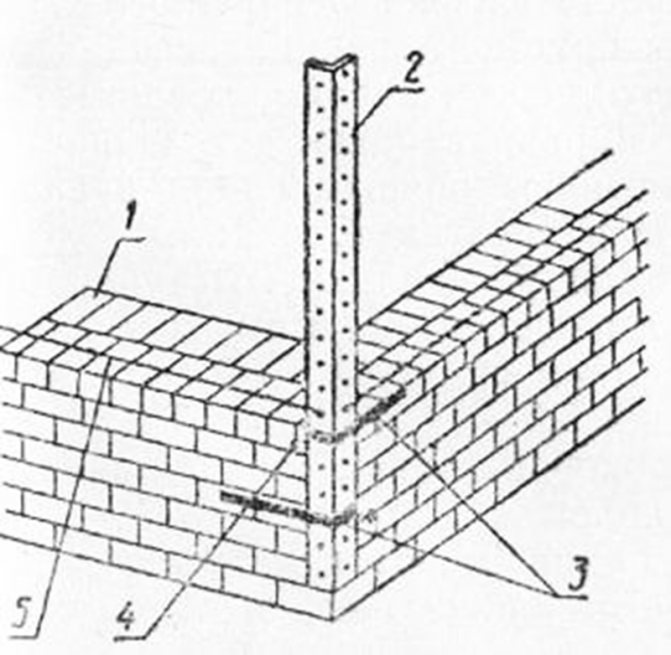
- 1st row: it is laid from the so-called burnt brick, which absorbs moisture minimally. The corners of this row are made of bricks that are cut to ¾ of the length. For the best contact, the inner corners of one of them and the adjacent one are filed. For this, a diamond saw, a grinder and other similar tools are used. Such masonry is needed to correctly tie the corners in the following rows.
- 2nd row: it is with him that the laying of the walls begins, special cleanings are laid in the front and on the left side. An ash pan is created on the right side of the front of the furnace.
- 3rd row: cleanings on the left side are laid with bricks without the use of mortar. Doors for cleaning and blowing are placed in front. The doors are installed with hardened steel wire, which is placed in the cuts in the bricks and fixed with mortar.
- 4th row: the hearth channels are blocked.
- 5th row: the grate is placed for the smallest firebox. In order to lay the inside of the firebox, refractory bricks are used, which lays down without the use of mortar.
- 6th row: a water-heating tank is placed on the left side of the stove and the laying of a firebox from refractory bricks continues.
- 7th row: the grate of the stove firebox is placed and then the laying of the walls of the stove and the first firebox continues. The right wall is reinforced with a steel strip, which is placed in the seam and tightened with special end caps.
- 8th and 9th rows: the laying of internal channels and walls continues. The doors of the stove and the small firebox are installed, fastened, as described above, with the help of a hardened wire.
- 10th row: the vaults of the first two fireboxes are connected. The bottom of the crucible is overlapped. All flue gas ducts are still fully open.
- In the 11th row, a special steel corner 30x30 mm is placed on the front edge, a plate is placed on top. The right firebox is overlapped with a removable grate.
- 12th row: laying the front walls of the furnace (refractory bricks are used for this), as well as the side walls of the slab. The furnace shutter is installed. From the left side of the stove, the formation of the bottom of the chimney begins. A small hole remains between the chimney and the furnace, which is closed with a special summer valve. Next, you need to make an arch template from plywood and wood.
- 13th and 16th row: then the formation of the walls continues. The furnace mouth is overlapped.
- 17th row: the narrowing of the furnace vault begins and the gradual expansion of the chimney. The back wall is reinforced with a steel tie.
- 18th row: the arch of the furnace is completely overlapped and the front wall is placed, which forms an overtube.
- For laying the arch of the crucible, you will need to make a template again - the formwork. It is made of 2 rectangular frames, parts made of plywood with a semicircular top rest on them - it was circled.To make this structure easily disassembled from the outside, the circles are attached to removable pins, and so that it does not fold inward ahead of time, several spacers are placed between the frames. Above the circles, a flexible flooring is made, which is assembled from thin boards with the help of belts or ropes.
- 19th row: the front wall of the furnace is strengthened with a screed, the walls are being built above the furnace, while creating a free space for backfilling.
- 20th row: the arch of the furnace is covered with sand and compacted. This is done to increase the heat capacity as well as ensure quality baked goods and other food items.
- 21st row: the stove is overlapping, the overtube narrows towards the chimney.
- 22nd and 23rd rows: narrowing of the overtube and laying of the chimney.
- 24th row: the overtube is closed with a special ventilation flap.
- 25th and 26th row: the free space above the overtube gradually connects to the chimney and narrows.
Further, the laying is done depending on the height of the house: from the outside, the chimney begins to taper with a step in front of the ceiling, after which a pipe begins to form, which passes through the ceilings and the roof. In the free space between the roof and the ceiling, as well as above it, the masonry is made with a cement-sand mortar.
That's all, the stove is done. It remains only to lay out the pipe above the surface of the house and you can heat it.
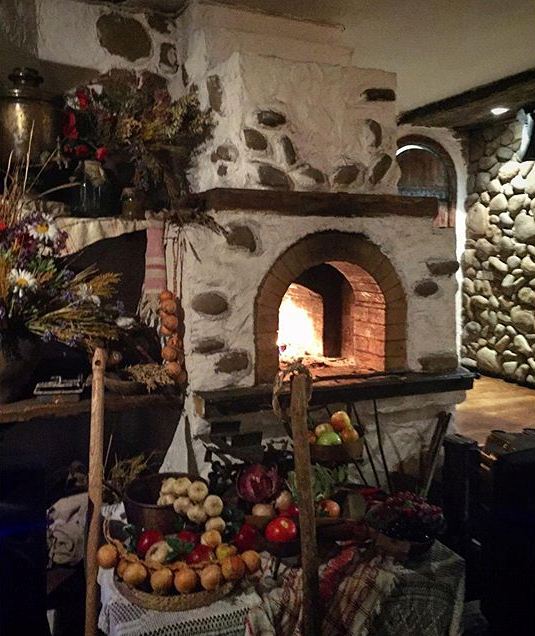
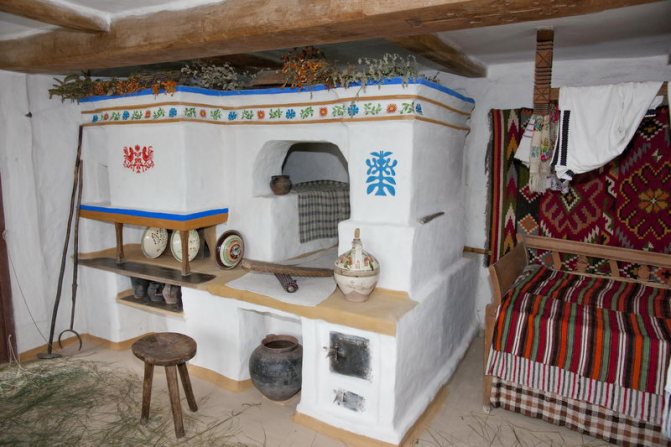
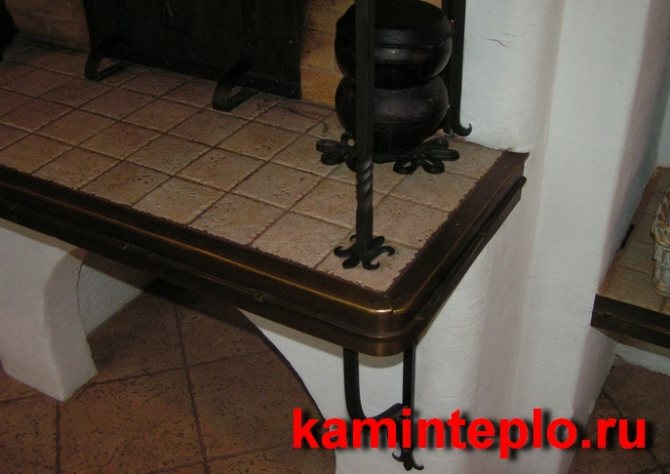
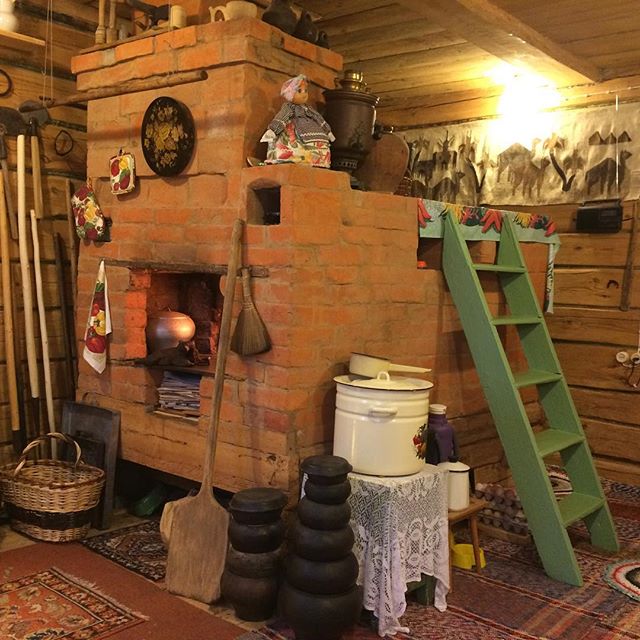
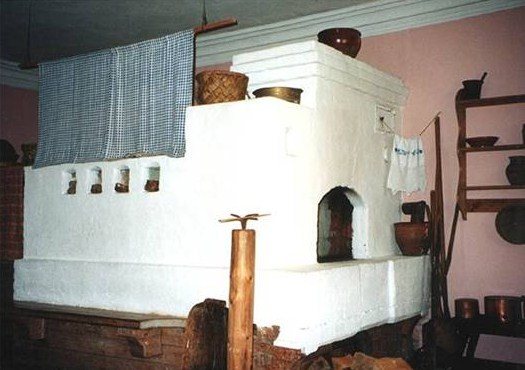
Russian stoves in pictures and photos
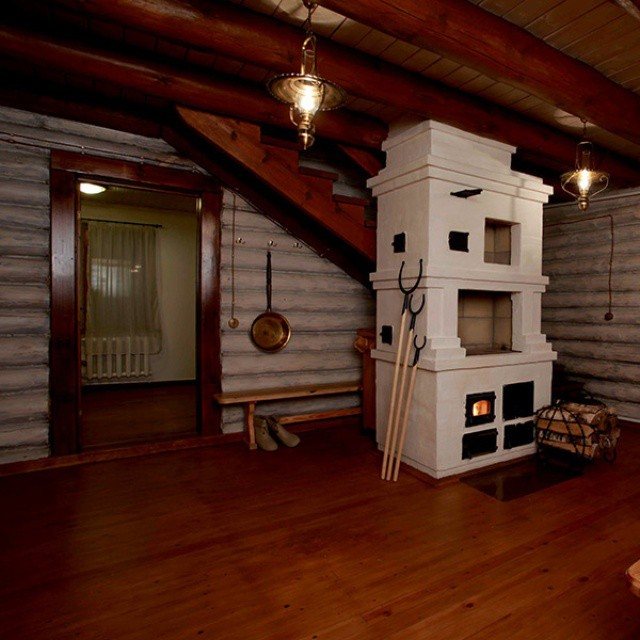
Large Russian stove with a stove, a stove bench and a place for firewood
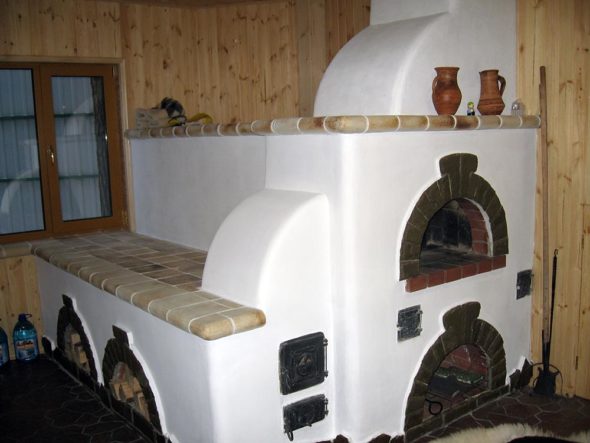
Option of a large Russian stove with a deck chair and stove
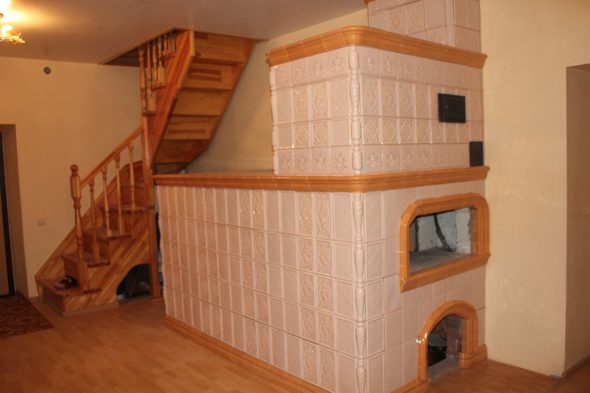
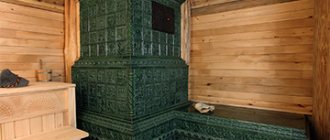
Tiled stove
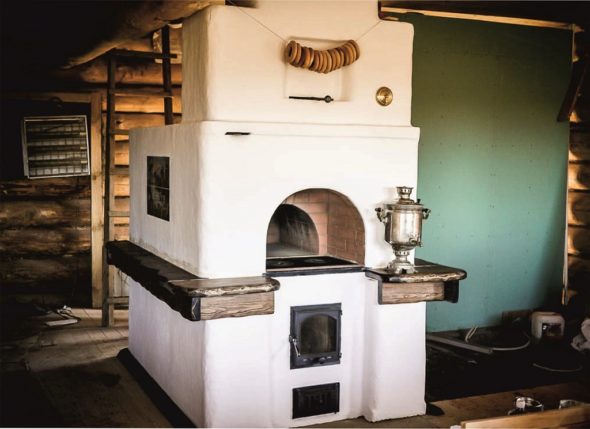
Option of the Russian stove with a stove bench and stove
Russian stove with stove and stove bench
Advantages and disadvantages
Disadvantages of using such equipment:
- high consumption of firewood;
- heating the upper and middle parts of the structure;
- may not fit into the interior.
Advantages of a modern heating unit:
- long-term maintenance of heat;
- service life - more than 30 years;
- safety and reliability;
- health-improving effect on the entire body;
- the possibility of heating a large area;
- high heat transfer;
- cooking food;
- drying of things, as well as herbs, mushrooms, berries.
They got rid of colds on the stove, warmed up a chilled back. They were treated not only with heat, but also with stove ash mixed with salt.
Advantages and disadvantages
The Russian stove has a lot of positive qualities, but at the same time, it cannot be called an ideal device.
It is worth noting the positive aspects of using:
- Available materials execution.
- Profitability.
- Any kind can be used solid fuel for heating.
- Multifunctionality. It can be used not only for heating the room, but also for cooking and recreation.
- It's easy to use, it is only necessary to heat the stove once a day so that the house is warm all day.
- Security. The firebox is located deep inside, which does not allow fire, sparks, coals to get outside of it. With qualified use, its service life is long.
Disadvantages include:
- Using only solid fuel that burns for a long time. Under no circumstances should gas burners and oil nozzles be installed inside.
- Solid waste remains. But ash can be used as fertilizer.
- Can be used only in one-story houses, since it gives a large load on the floors. Requires the creation of a high-quality capital foundation.
- Bulkiness, takes up a lot of usable area and space.
- The chimney can provide a smoke outlet from only one structure, as a result of which it cannot be used in apartment buildings.
- It takes a long time to warm up. Especially after a long downtime.
- Automation of its work is completely excluded, it requires human participation in its work.
How to buy a Russian stove
A similar unit can be made to order or built on your own.
There are special organizations that manufacture heating devices, taking into account the wishes of the customer. The price of a Russian stove varies depending on the size, appearance, heated area, the planned volume of food to be cooked, and the material used.
If you nevertheless decide to build a Russian stove on your own, this can be done using the step-by-step instructions described in other articles on our site. Choose the type of Russian stove by function and appearance, study the stages of masonry, stock up on the necessary materials, tools for work and get down to business.
Such a heating unit is popular not only in Russia, Ukraine and Belarus, but also abroad. Thanks to their convenience, usefulness and attractive appearance, these structures are increasingly becoming a luxury and pride for wealthy people abroad. For example, in the dining room at the house of Bill Gates, there is a working Russian oven in which pies are baked for the richest man in the world.
Key features
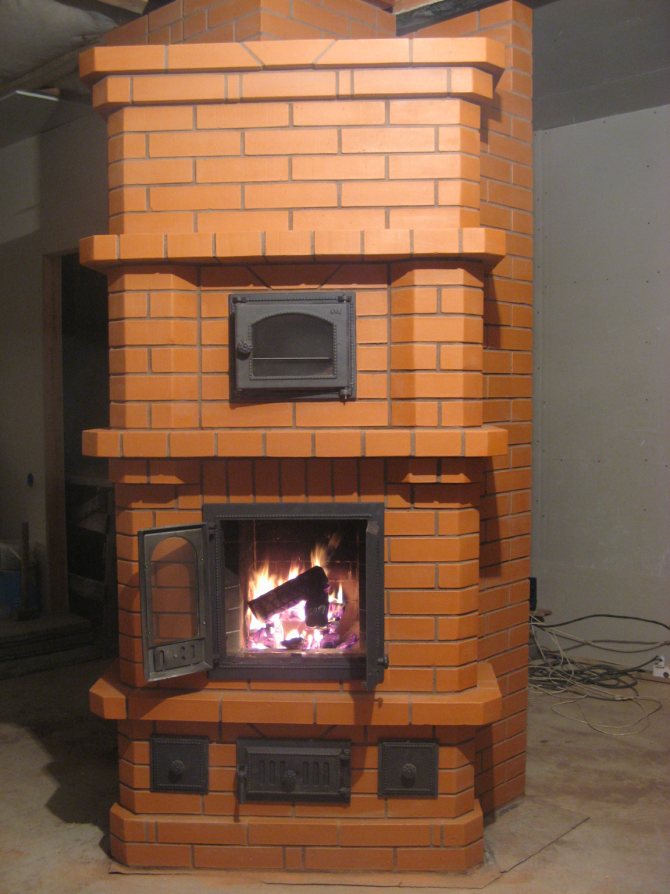
Such a stove is popularly called "Swedish". If everything is done correctly, the oven will not only perform the above functions - it will even be possible to bake bread with it.
Swedish oven
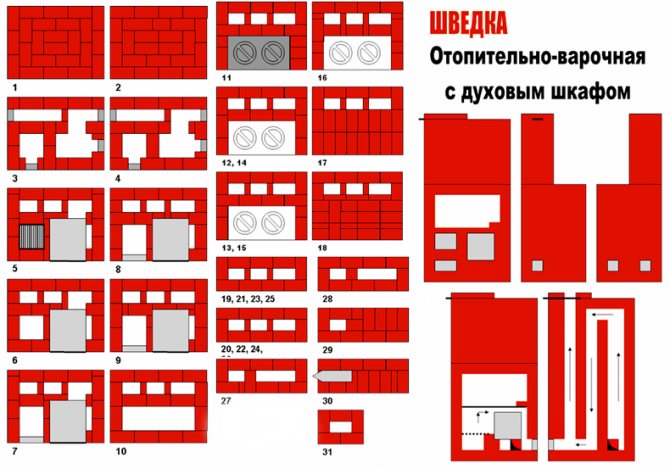
This is the option that will be considered in today's article. Below is the drawing and the order of the "Swede".
Knowledgeable people will immediately notice that this order is in many ways similar to the Russian stove, but it also has elements of a fireplace. There is nothing surprising here, because in spite of the foreign name, "Swedes" in the domestic interpretation are intended primarily for use in our homes.
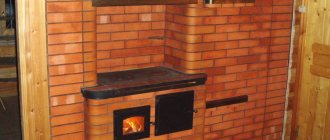
Stove Shvedka