Siding principles
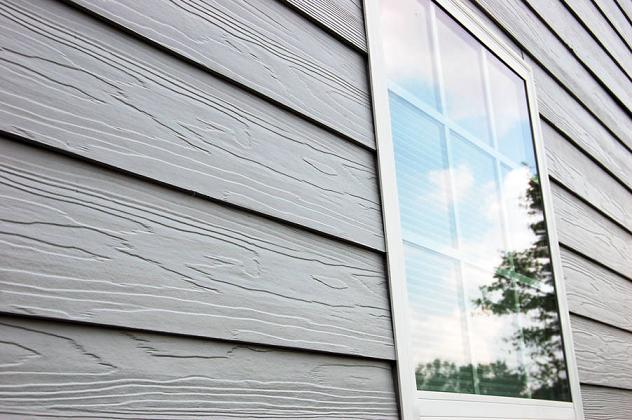
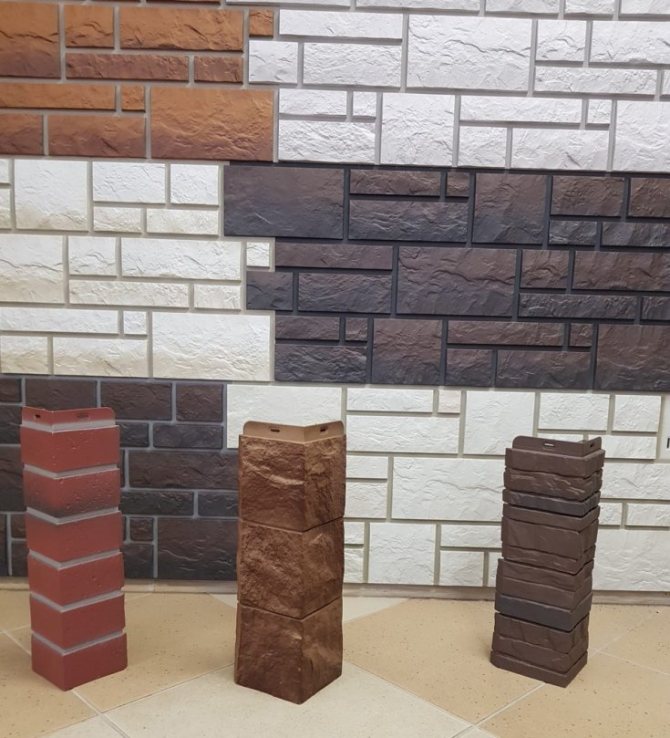
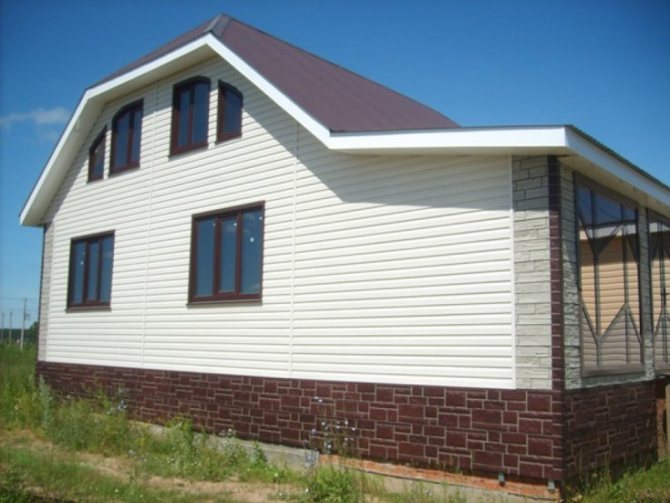
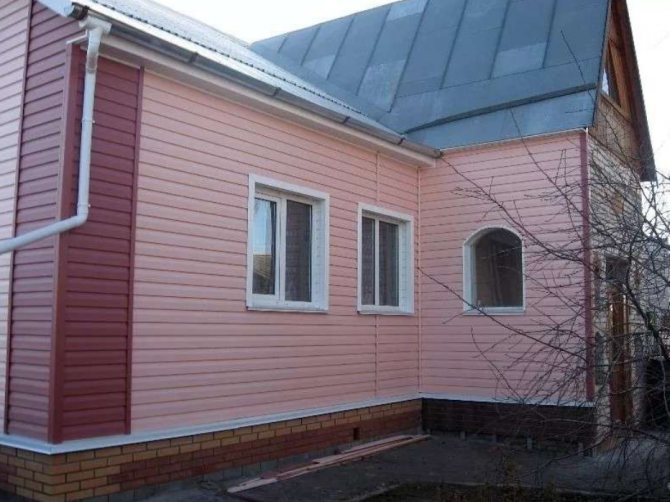
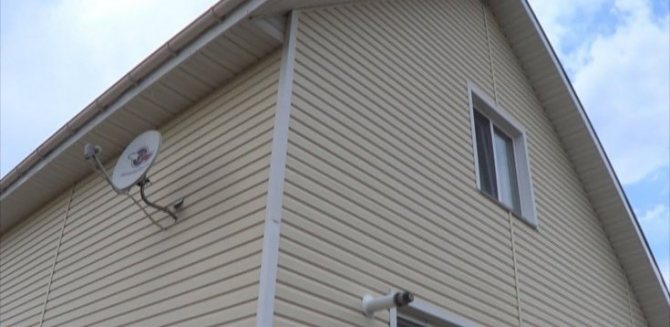
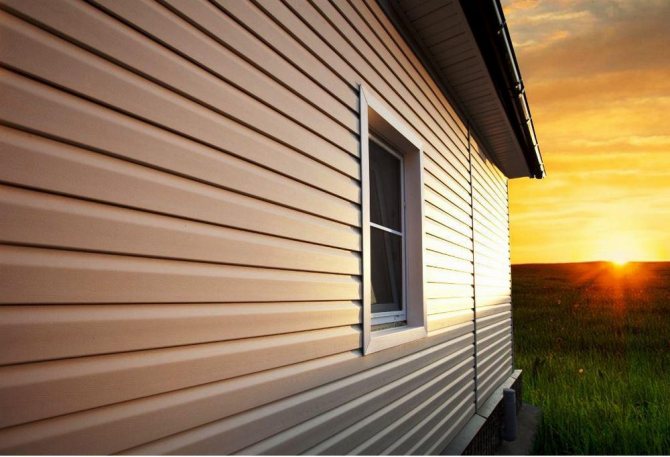
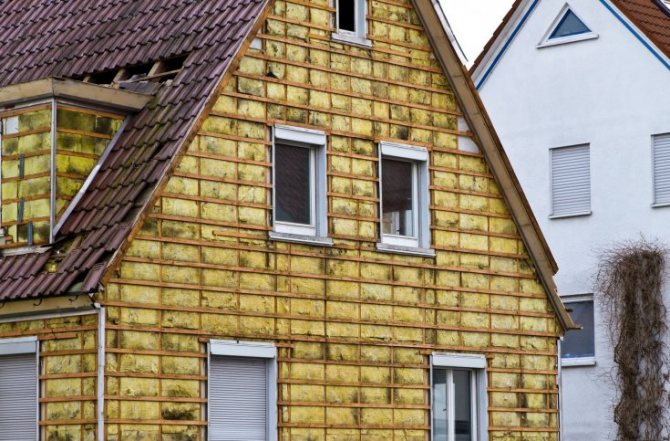
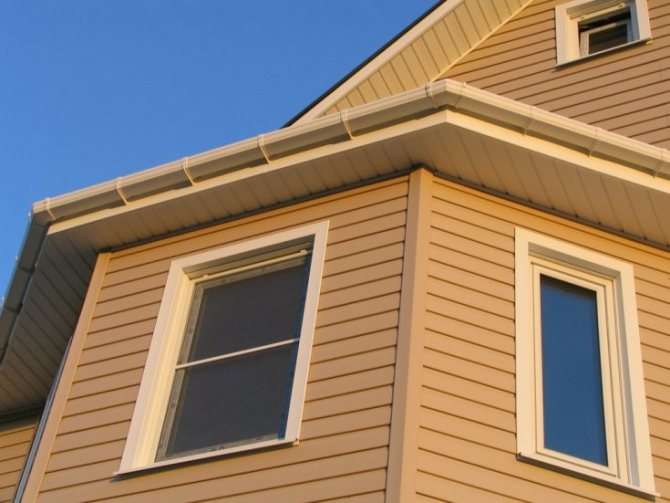
Siding is widely used for exterior cladding in construction. To transform the facades of houses, basement siding material is used. The shape and color of the panels changes in accordance with fashion trends.
The composition of the upholstery is also varied. It can be made from wood, PVC, vinyl, metal. Some types are cement based.
Do-it-yourself installation of basement siding involves studying some information.
Preparatory and installation work
Preliminary calculations.
The number of siding panels that will be required for cladding the facade and installing the component parts of the frame is determined from the initial measurements:
- The total area of the walls.
- Sizes of window and door openings.
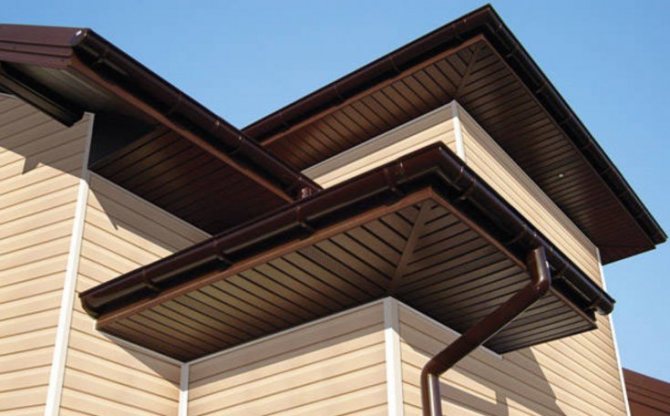
- Roof cornice areas (if the cornice is sheathed with siding).
- Basement areas (if sheathed with siding panels).
Attention! The exact calculation of the amount of materials is made according to this formula - the total area of all wall openings is subtracted from the total area of the walls of the building. The resulting difference is divided by the total area of one standard siding panel. After that, the value obtained from the division must be multiplied by the number 1.10. Thus, the total area of the entire coverage is obtained, plus 10% of the waste margin.
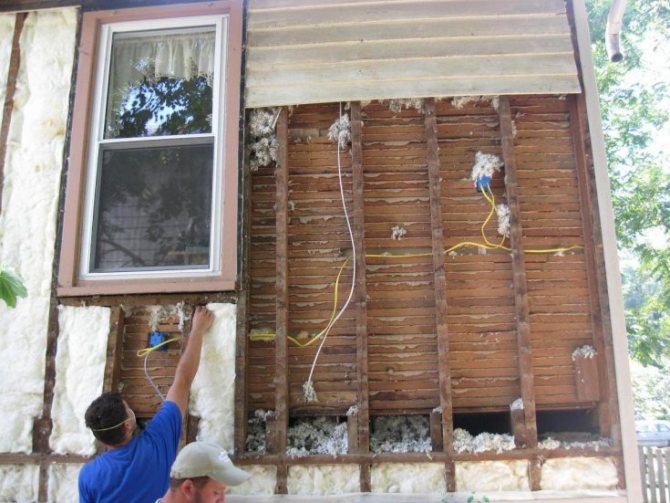
Preparing walls for cladding: instruction
Before sheathing your house with siding, you should remove from the walls all unnecessary elements previously mounted on the facade - these are window shutters, downpipes, cornices, ebb and flow and other elements... Remove peeling paint and plaster, rot, mold with your own hands, and seal all cracks with cement mortar.
After that, treat the walls with a primer, preferably with deep penetration. If the walls are wooden, cover them with an antiseptic.
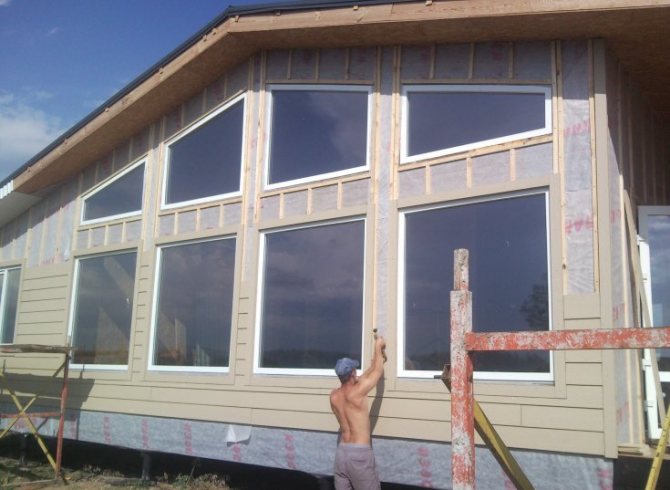
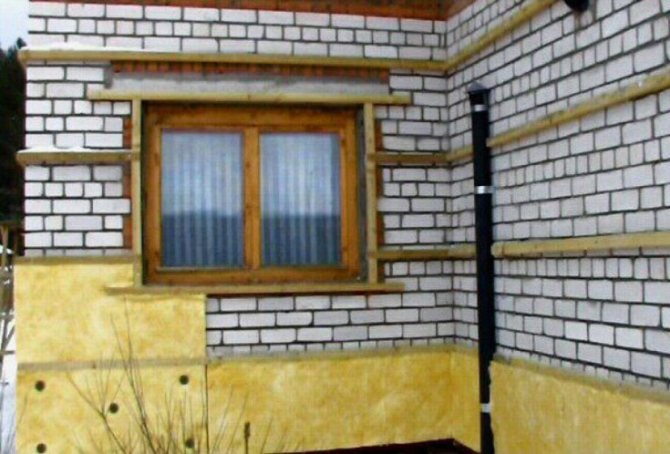
Frame installation
After preparing the walls, you can start marking and installing the frame for the siding panels.
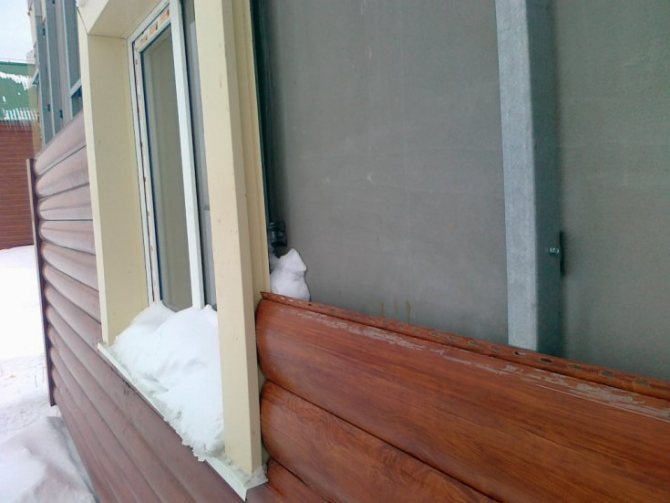
If the walls of the house are assembled from a bar, while additional insulation is not planned, you can only fasten the outer corners and connecting H-shaped profiles without an intermediate lathing. In this case, the panels can be mounted directly to the wall.
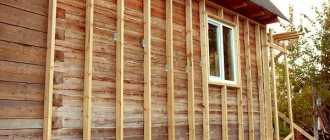
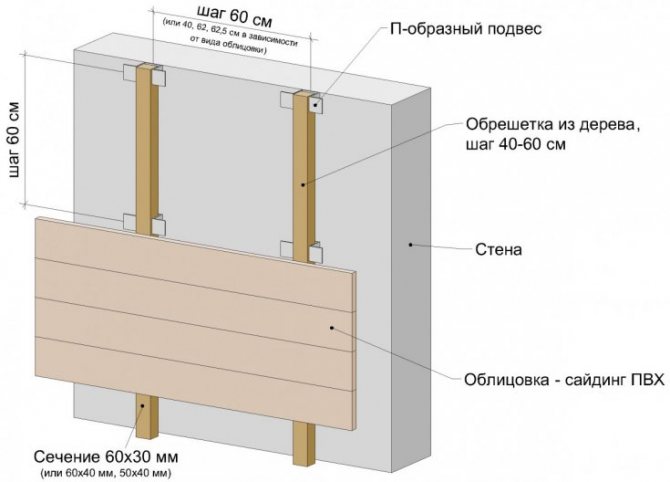
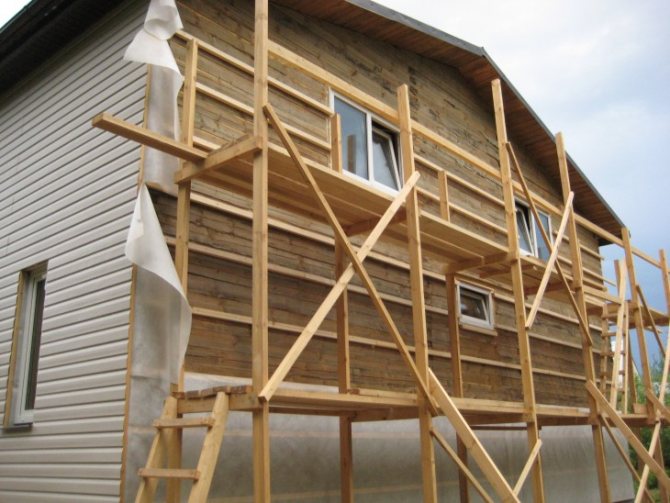
If the lathing is made of wood, timber 50x50 mm or slats 50x80 mm can be used, which are attached to a wooden wall with nails or self-tapping screws.
For walls made of other materials, it is recommended to assemble a frame from a metal profile that is used for drywall. Such a crate is distinguished by its durability, strength and fire safety.
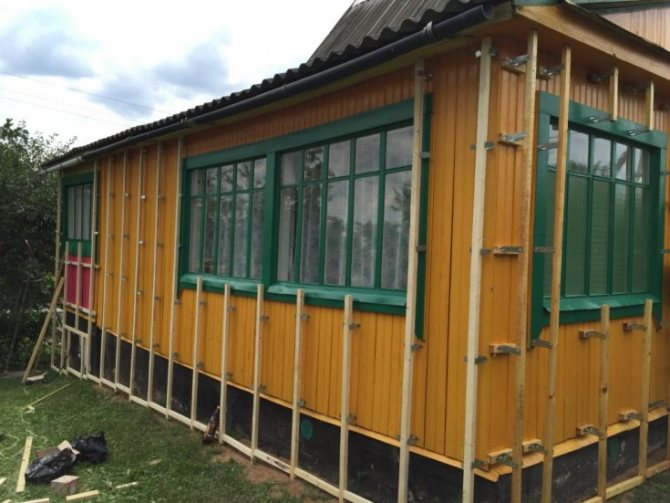
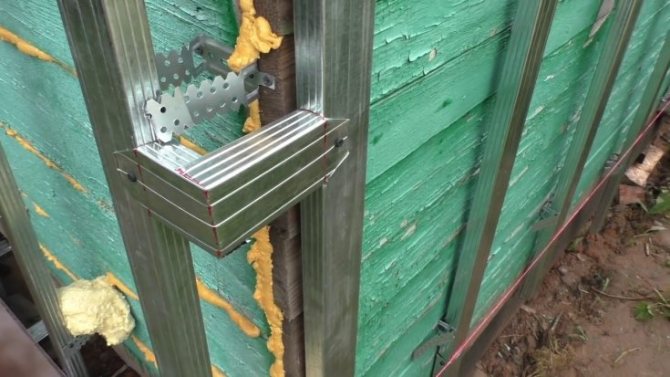
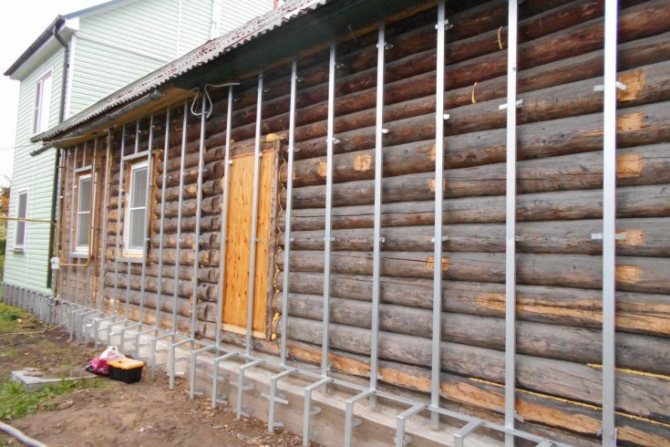
Installation of lathing
The lathing is a set of strips that are fixed to the walls at a certain distance perpendicular to the length of the siding panels and act as a support for them.
On the walls, lathing for a set of siding panels, mounted vertically, mounted horizontally on the plinth.
The first elements of the crate are installed near the very corners of the house. Their vertical position controlled by the building level (spirit level)... The details are fixed on wooden walls with a galvanized coating or self-tapping screws. Dowels are used for concrete, brick and other materials. Vertical rails are installed in 400 mm increments for metal panels and 300 mm for plastic ones.
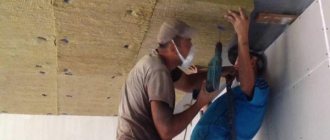
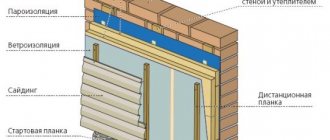
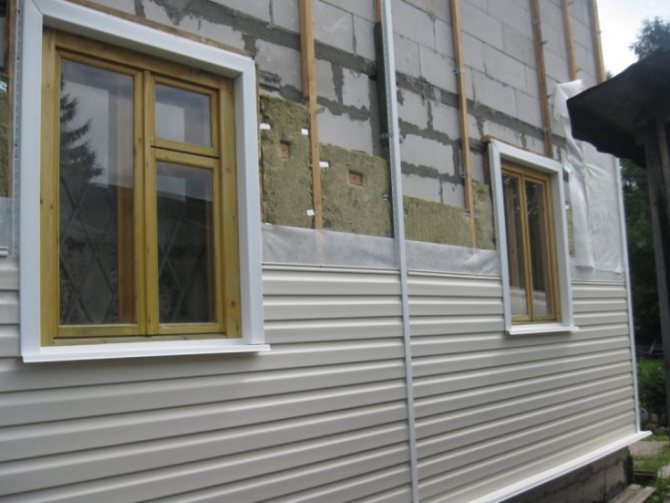
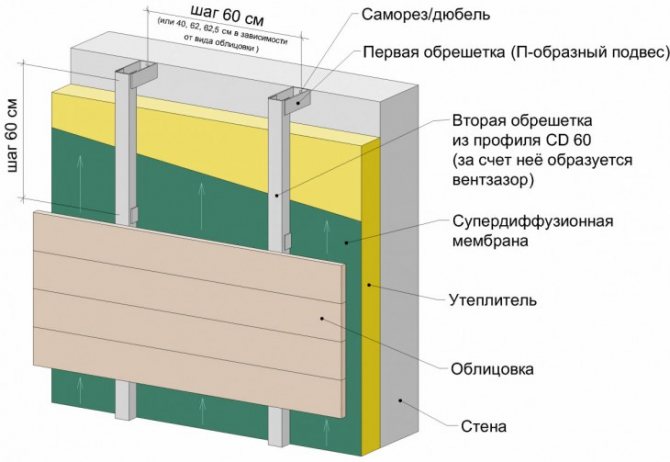
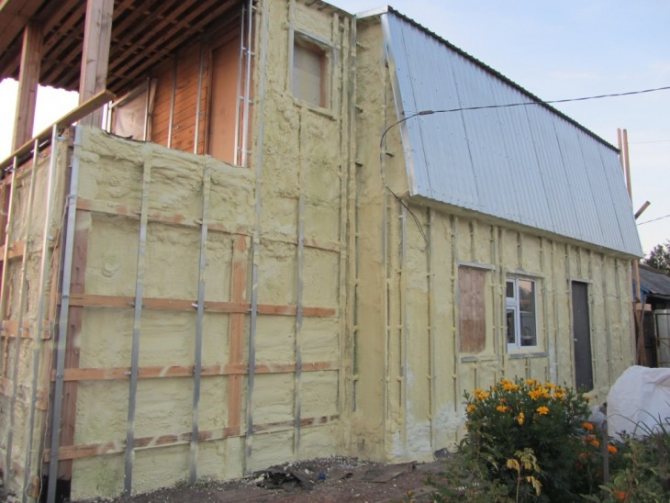
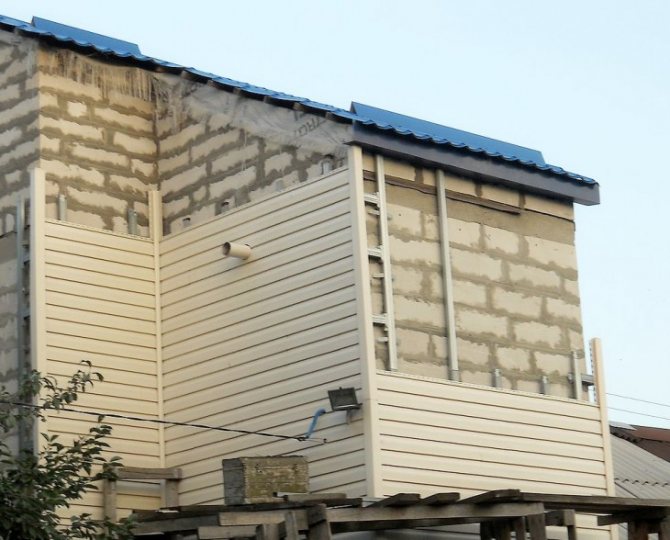
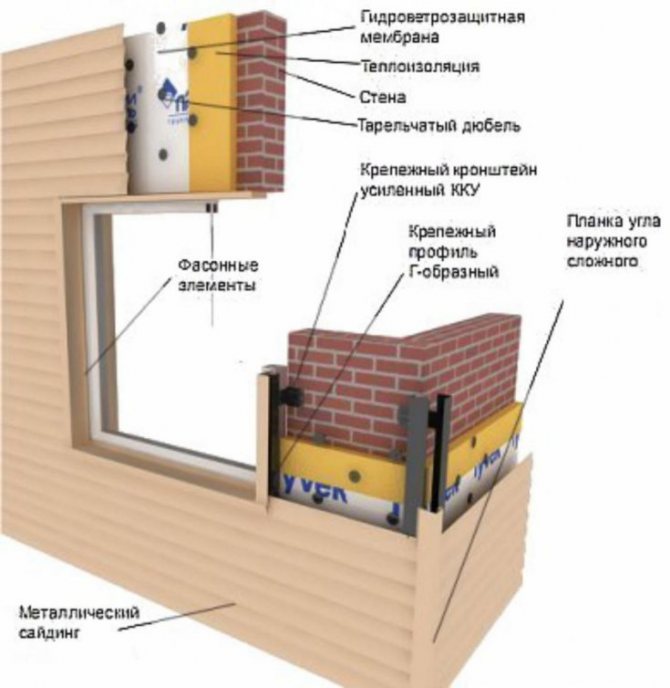
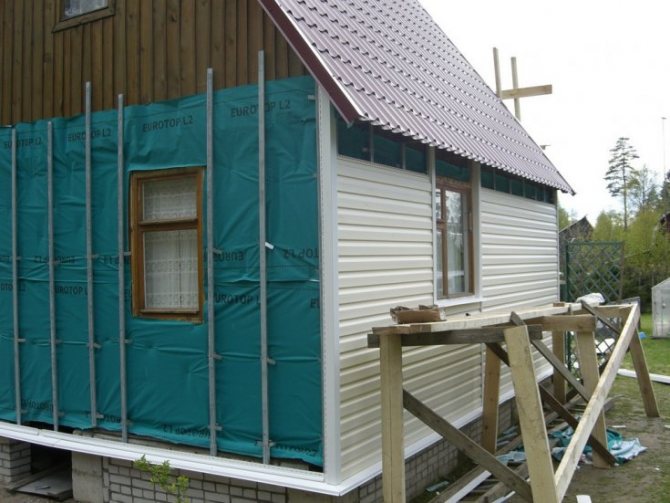
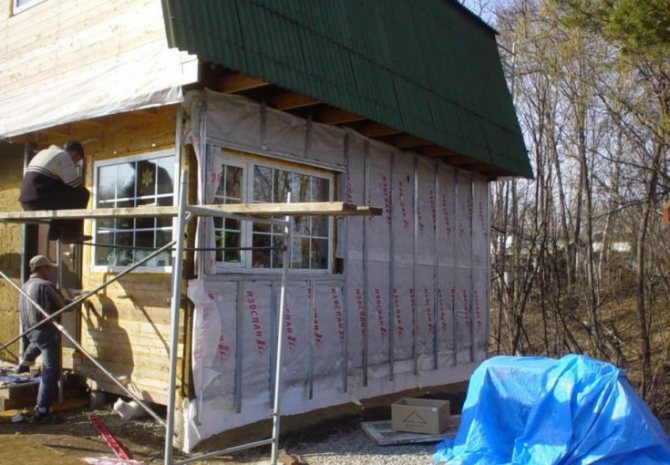
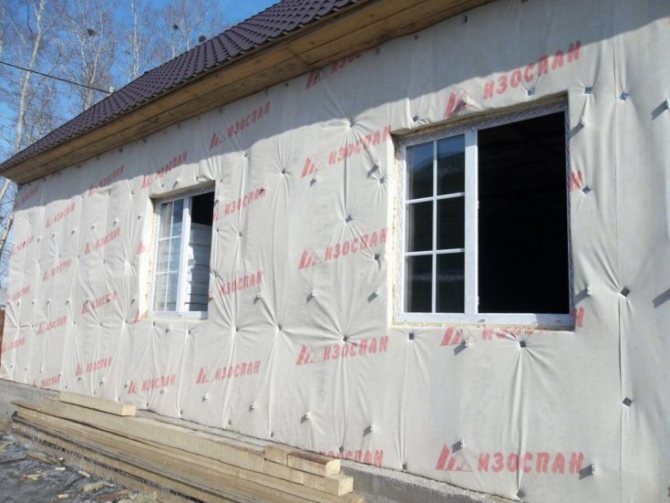
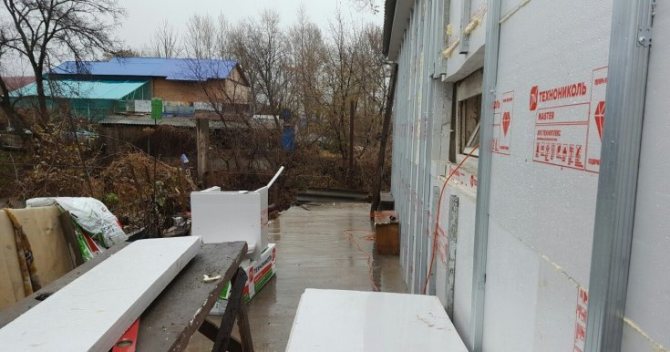
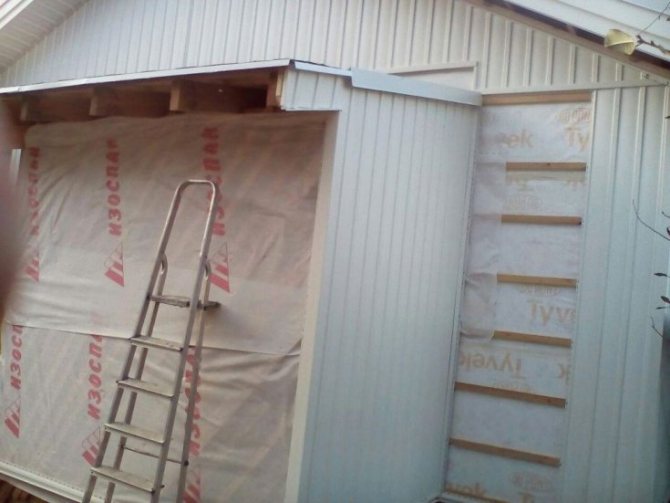
If the facade is to be insulated, then the distance of the lathing to be mounted must be at a distance from the wall equal to the thickness of the insulation. The material for the heat insulator can be made of fiberglass, mineral or basalt wool, foam, foam and other insulation.After laying the insulation, it is covered with a waterproofing film.
Insulation is laid on the walls between the vertical profiles of the sheathing, but at the same time a small gap must be left between it and the siding panels within 10-30 mm. If it is impossible to leave a gap, counter-rails are additionally attached to the profile on top.
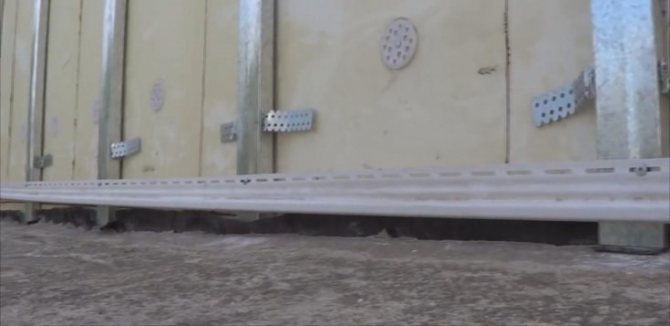
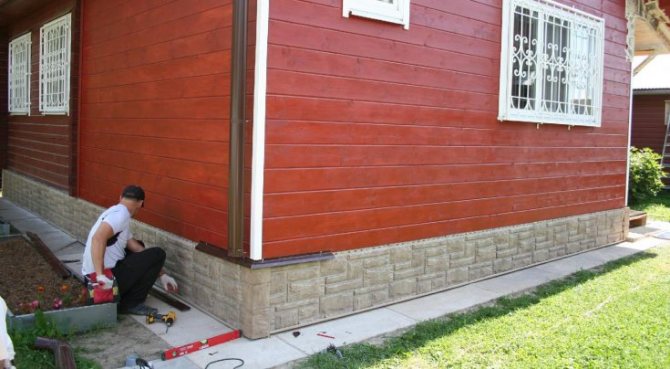
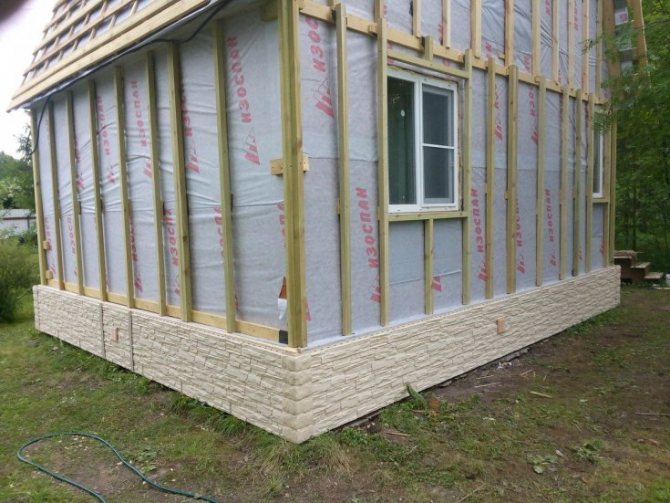
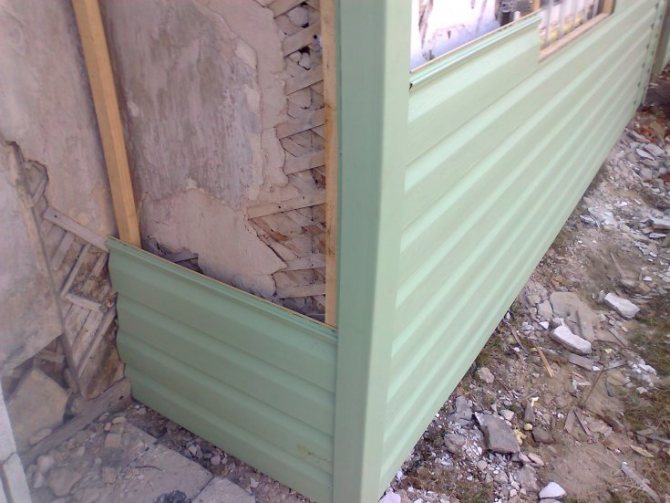
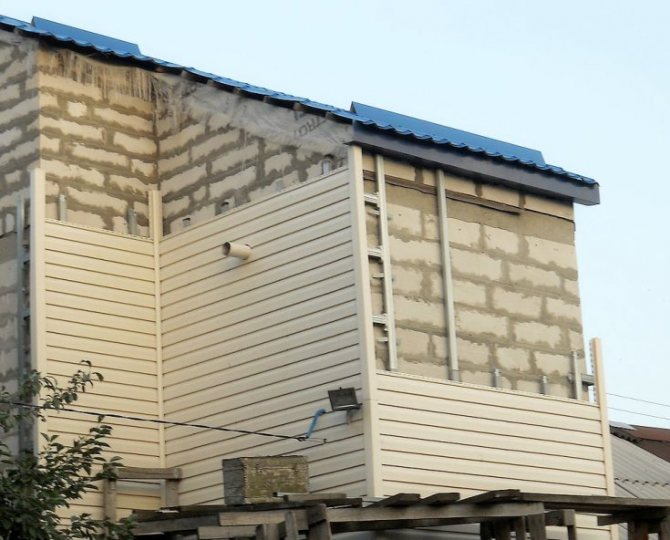
Installation of siding on a plinth
Installation of the frame for finishing the basement with siding panels is almost the same as on the walls, but only here the profiles for the lathing are mounted horizontally.
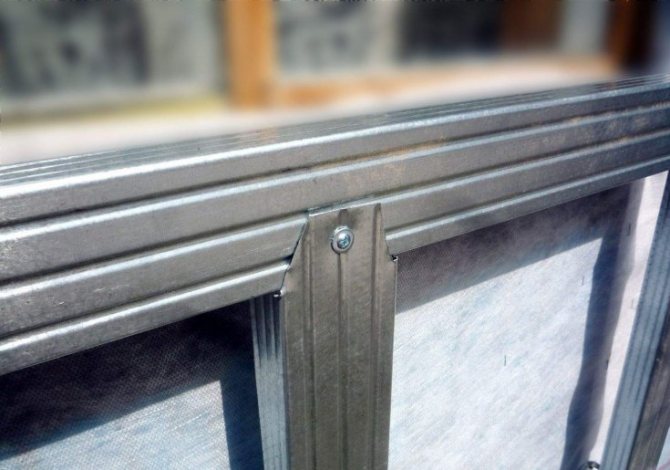
Before you start sheathing the frame for metal siding, you need to measure the height of the basement along the entire perimeter of the building. If no difference in height is found, the start strip can be set to the very bottom. If there is a difference, you will have to trim the bottom panels. In the case when there is no blind area around the perimeter of the house, the lower profile of the crate is installed from the ground at a distance of about 100-150 mm.
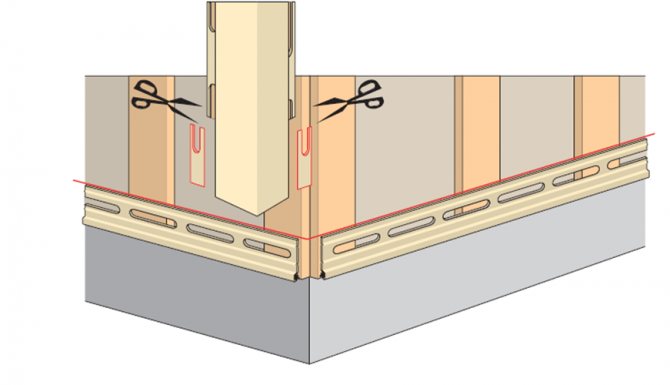
The extreme panels protruding beyond the basement are trimmed and inserted into the outer corner, fixed to the corner of the house, but at the same time its width should be at least 150-200 mm. The last is the starting strip, which is mounted around the entire perimeter of the building to protect the inside of the entire structure from water ingress.
Siding installation
The technology of cladding a house with siding with your own hands, regardless of whether it is metal siding or plastic, is almost the same. The only difference is in the weight of the material.
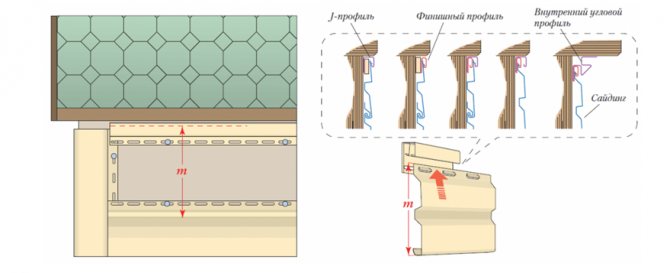
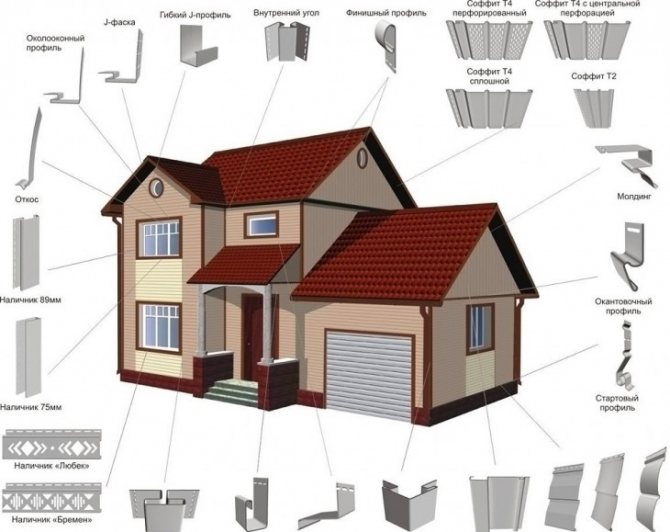
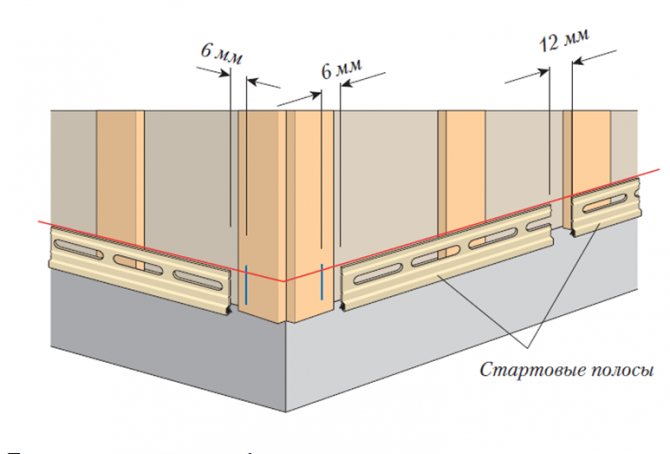
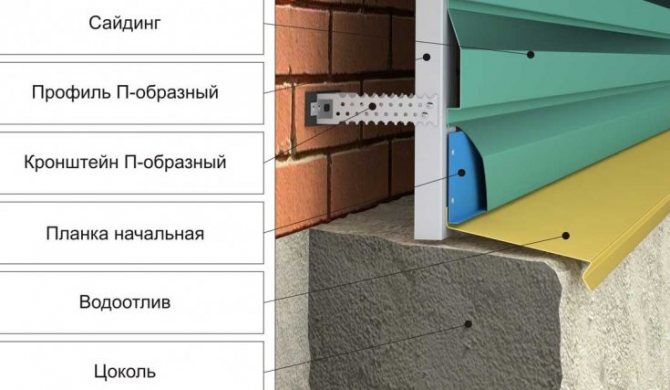
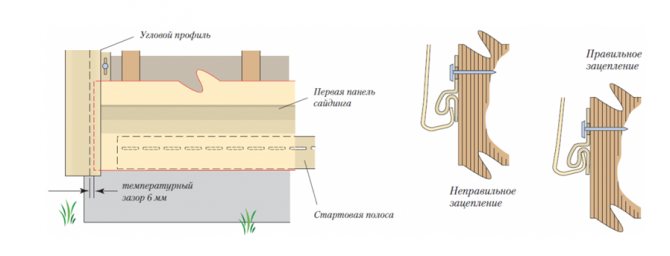
Installation of starting J-profiles.
The starting J-profile is installed under the bottom row of siding panels. It is mounted strictly along the horizon of the entire perimeter of the house, but should be 40 mm higher than the lower edge of the siding, and is fixed to the crate with self-tapping screws. There should be a deformation-temperature gap of about 6 mm between the starting strips.
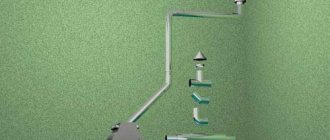
Installation of outer corners.
Installation of external corner profiles is carried out on the lathing in the corners of the house and the external corners of all wall openings. The profile is attached to the crate next to the starting profile, after which the siding is inserted into it.
But instead of a profile corner, you can use an ordinary simple corner. In this case, two panels are mounted first on the corner of the house, after which their joint is overlapped with an ordinary corner.
This option is the simplest and most preferable for craftsmen who are installing siding for the first time with their own hands.
Setting internal corners.
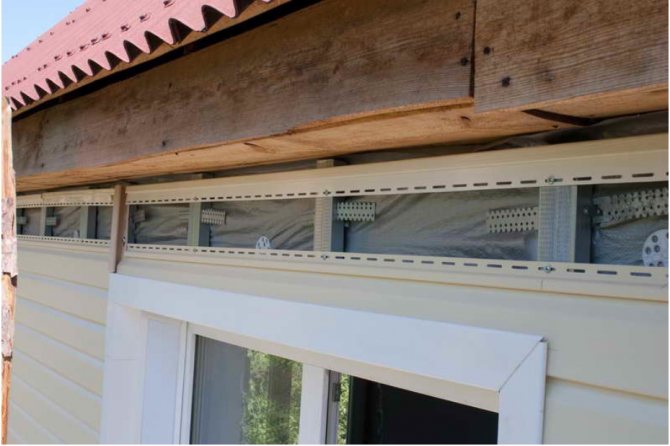
This type of profile is installed at the inner corners of wall openings and for abutting wall panels with a roof cornice, if it is also sheathed with siding.
The inner corner is fastened with nails to the batten immediately after mounting the starter strip 6 mm below it. In the case when the starting strip interferes with fixing the corner at the required distance, it is possible to cut the fastening strip on it to the width of the starting strip, taking into account the temperature gap.
If necessary, instead of one inner corner, you can use a J-profile, which, naturally, in a financial matter, will cost much less. In this case, the J-profile should be tightly fixed with the outer edge to one of the panels installed earlier. The siding panels of the other adjoining side are then inserted into it.
Installation of H-profiles... These profiles are mounted on the crate at the same time as the corners, immediately after installing the starter planks. They are installed in a vertical position, and the rules for their fastening practically do not differ from the installation of profile external and internal corners. Also, if necessary, the fastening strips are trimmed and the expansion gaps of 6 mm are observed.
Thanks to these profiles, it is possible to make the longitudinal joining of siding panels the most aesthetic, while after installing them, panels of the required length and required quantity can be prepared in advance.
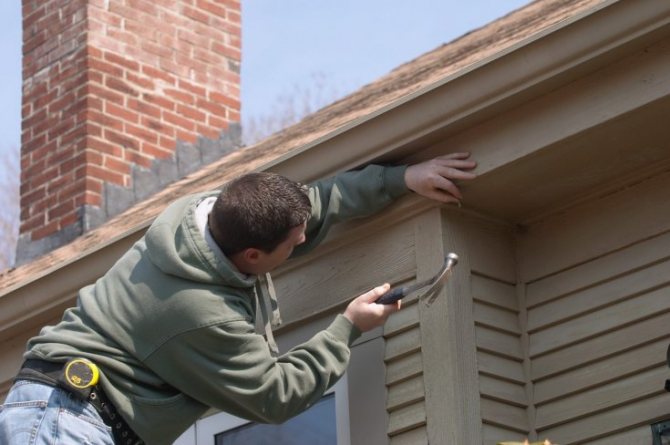
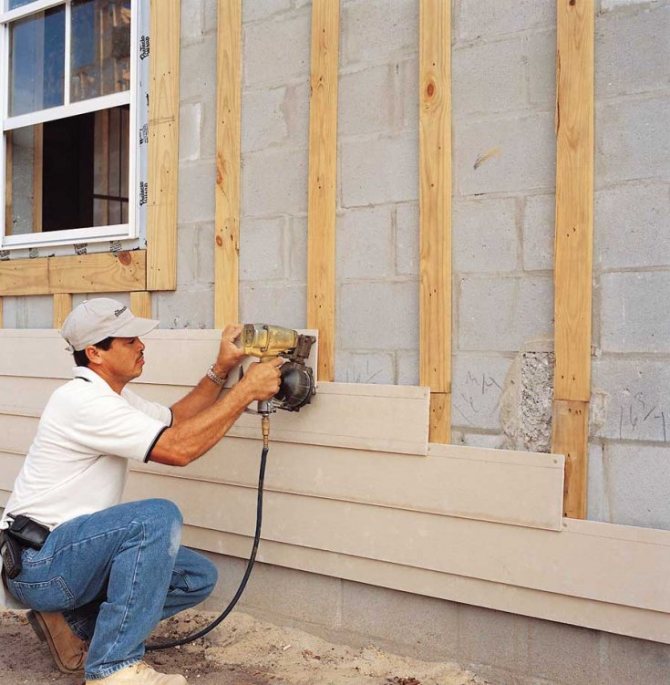
How to attach siding
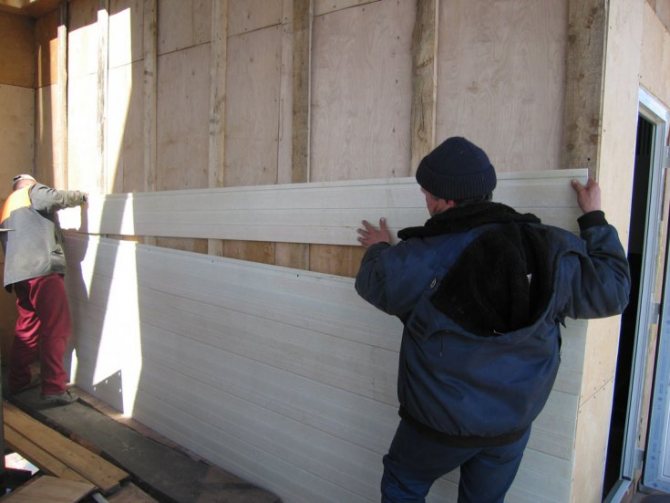
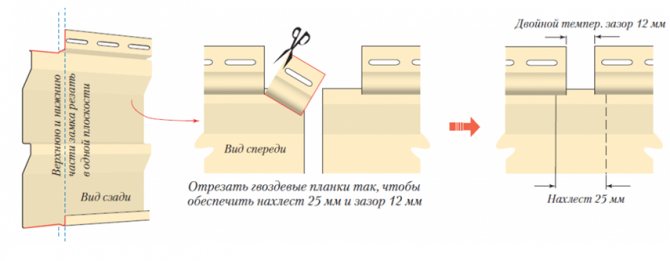
As soon as the starting strips, all corner and H-profiles are fixed on the crate, you can immediately sheathe the house with siding with your own hands. It is recommended to immediately cut the panels to size, but one should not forget that for a high-quality deformation gap, they should be 12 mm shorter than the actual size.
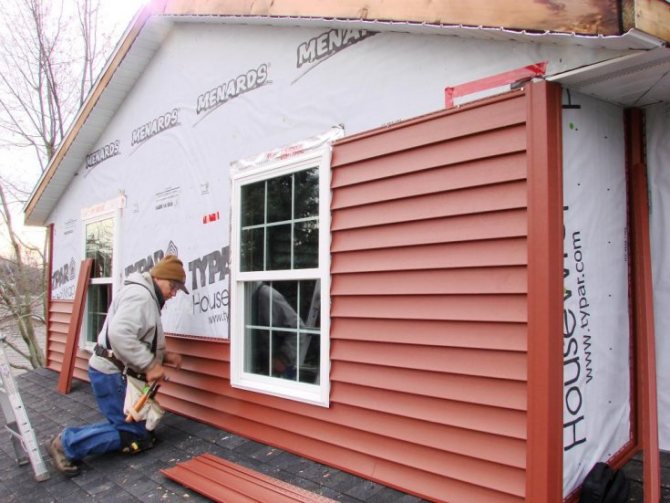
Installation is carried out according to the bottom-up principle. The start strip has a lock similar to the panel. The first panel is connected to the strip using this lock, and its ends are inserted into corner or H-shaped profiles. After the locks snap into place and the panel falls into place, its top is fixed to the crate with nails or self-tapping screws.
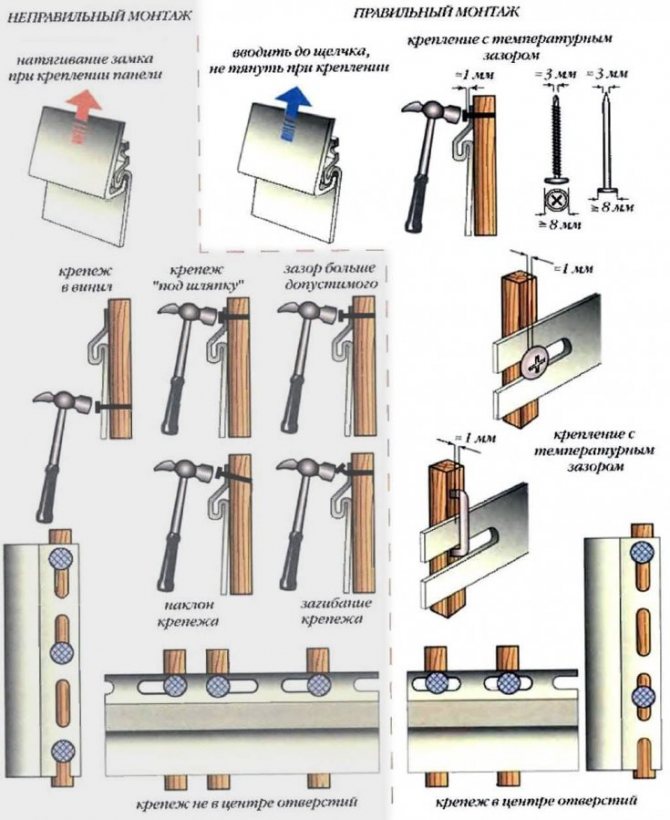
At the same time, it should be remembered that the panel has free play during thermal expansion, nails or self-tapping screws should press the siding loosely to the crate and be located in the center of the oblong hole. The next siding panel is mounted in exactly the same way.
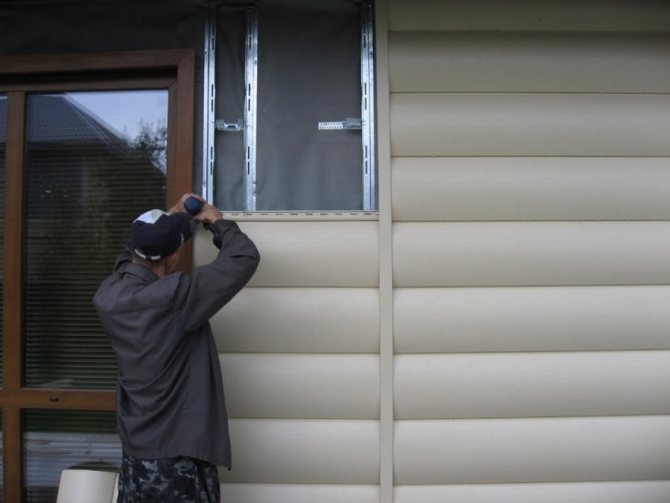
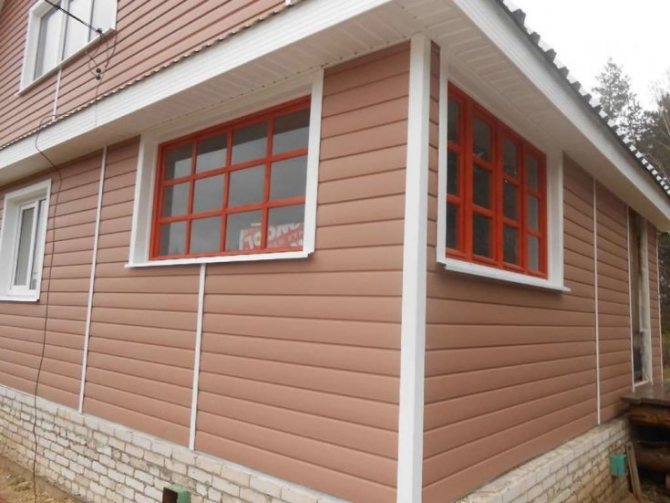
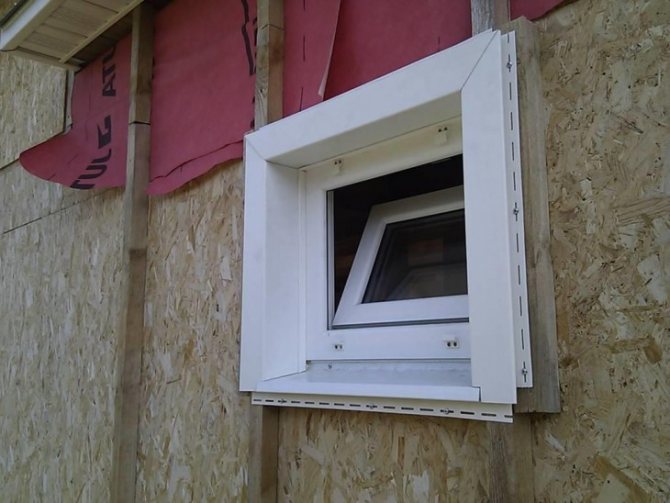
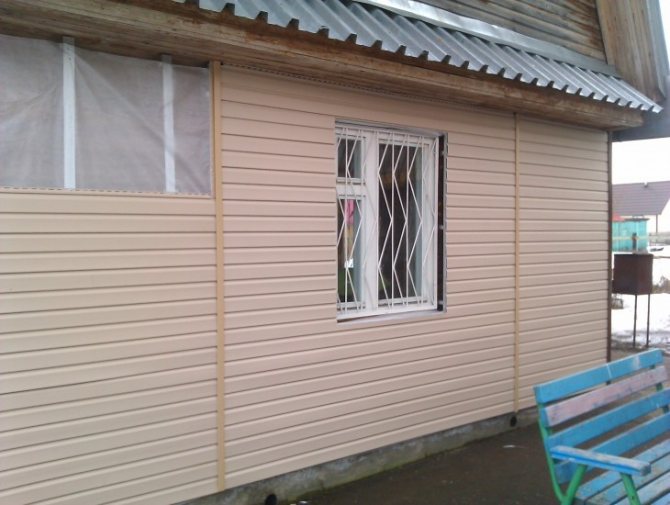
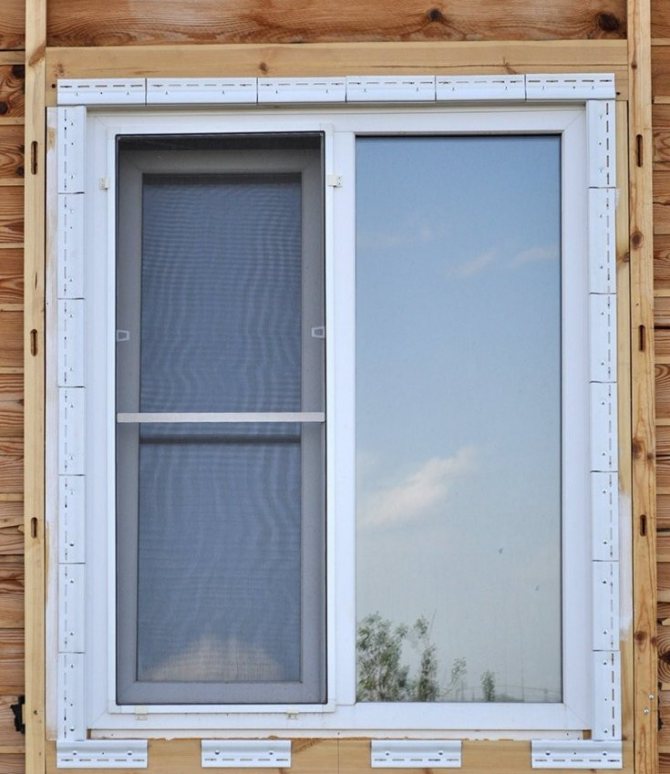
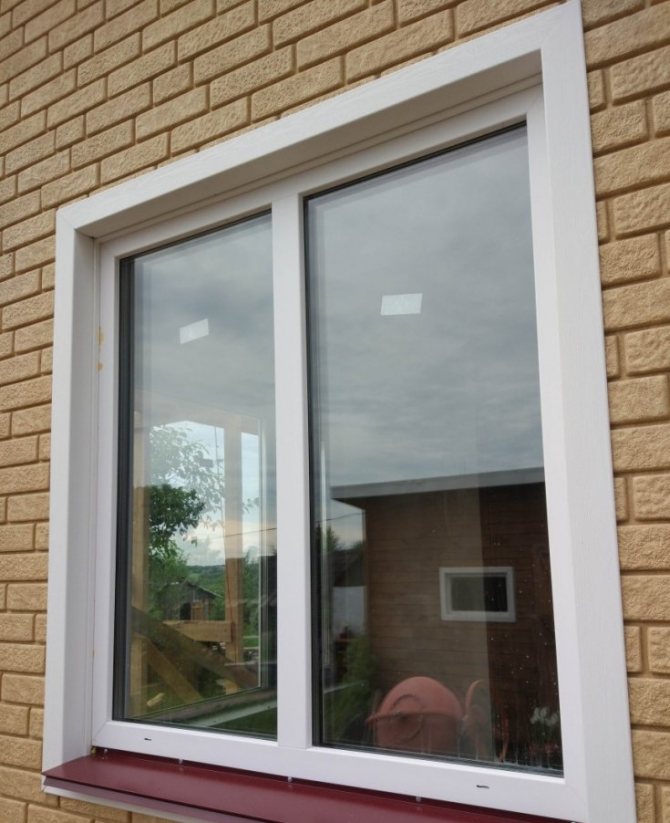
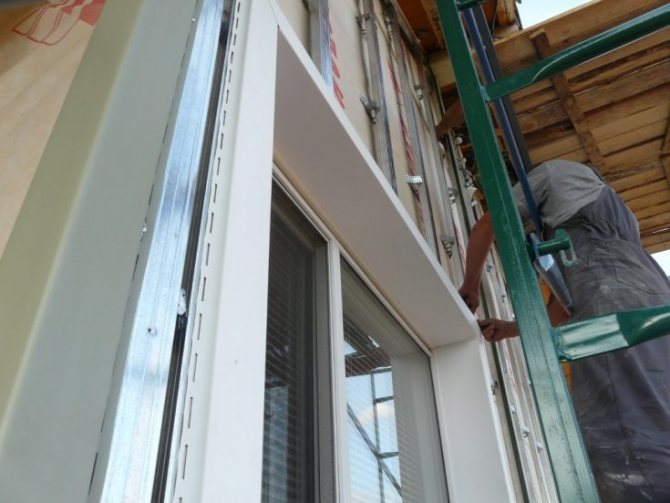
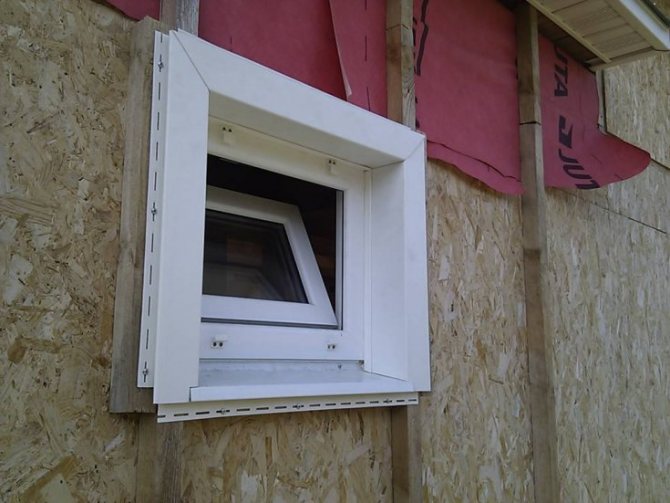
Installation of siding in wall openings
All existing openings intended for door blocks and windows are practically designed according to the same scheme, the only difference is in the metal ebb tides, which are installed in the window openings.
Strapping methods may depend on the depth of wall openings and niches... For example, window blocks and doors, which have practically the same plane with the walls, are sheathed with special platbands with grooves into which the ends of the siding panels are inserted.
If the wall openings are more than 200 mm deep, in addition to the inner corners, a starting J-shaped strip is used, which is installed on the window frame from above and on both sides. Panels can be assembled without lathing.
If the openings on the walls are of great depth, a crate can be mounted in them, and the installation of siding with your own hands is done, as on ordinary walls.
Installation of metal siding, plastic or wood siding is practically uncomplicated. In order to fully understand the process of its installation, you can take a closer look at the photo, and watch the video instruction, which describes in detail and shows the installation of the video siding with your own hands.
Siding is dependent on temperature changes
At high degrees, the pores of the upholstery expand. Low values contribute to its compression. This point is important to consider. When carrying out construction work, the material should not be tightly applied to each other.
At room temperature, it is correct to leave a 2 mm distance between the panels. If installation is carried out in winter, the gap is increased to a centimeter. In the heat, nine millimeters is enough.


Siding panels are mounted in the middle. Round self-tapping screws or roofing nails are used as fastening elements.

The unevenness of the walls can be easily hidden by lathing made of metal or treated wood. The method is also suitable for a flat surface. This air cushion will insulate the structure.
Siding classification
There are some types of panels designed for finishing individual buildings. This is the following siding:
- Wooden. In appearance, it looks more like a traditional lining. It is called that - "glued lining".
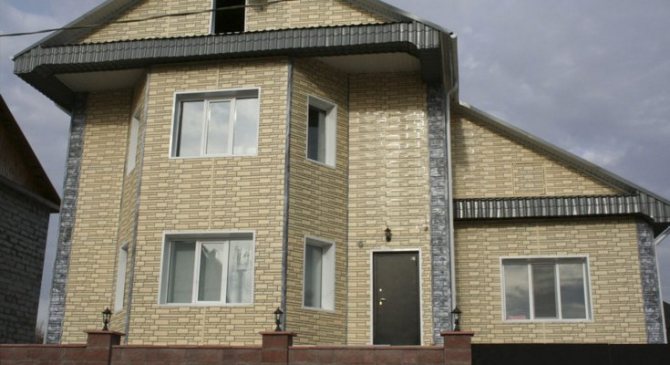
- Vinyl. This siding is the most popular among the owners of individual houses and at the same time the cheapest. It is made from polyvinyl chloride or acrylic. Such panels imitate brick, wood or natural stone. Those who decide to change the appearance of their home should keep in mind that vinyl panels are easily damaged at very low temperatures.How to install this type of siding? The peculiarity of finishing with vinyl panels is that work with them is possible only in sufficiently warm weather. In addition, due to the fact that vinyl siding does not reduce heat loss, the protected surface will require insulation.
- Aluminum. Such siding is characterized by low weight, as well as increased resistance to the negative effects of liquid media. It is perfect for facing large areas. In this regard, it can be used for high-rise buildings.
- Metal. This siding is the so-called galvanized. The protective layer for it is polyester, pural or powder coating.
- Cement. This building material contains cement mixed with cellulose. For its installation, a sufficiently strong structure will be required, since such a siding is heavy.
- Ceramic. This is one of the new types of panels designed for cladding buildings. Experts consider ceramic siding to be the best option among similar building materials in the middle price range.
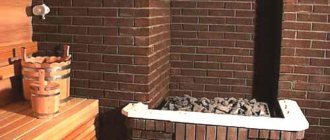
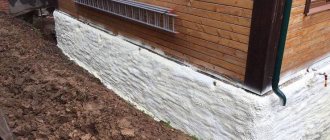
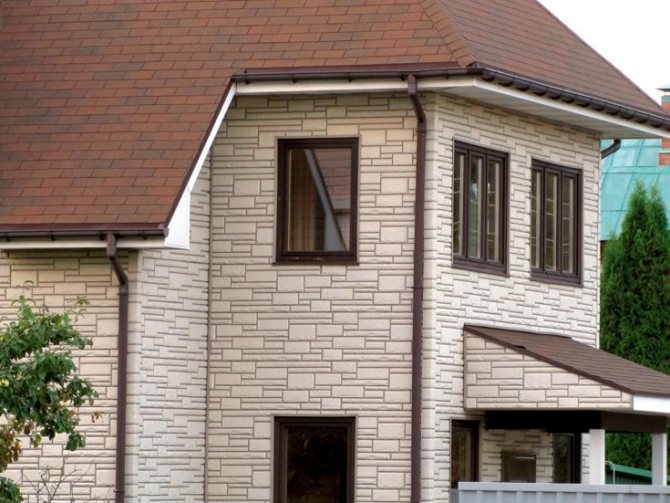
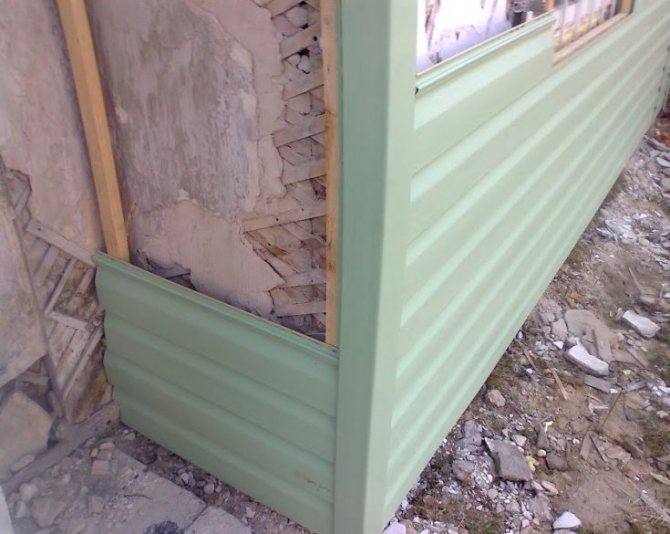
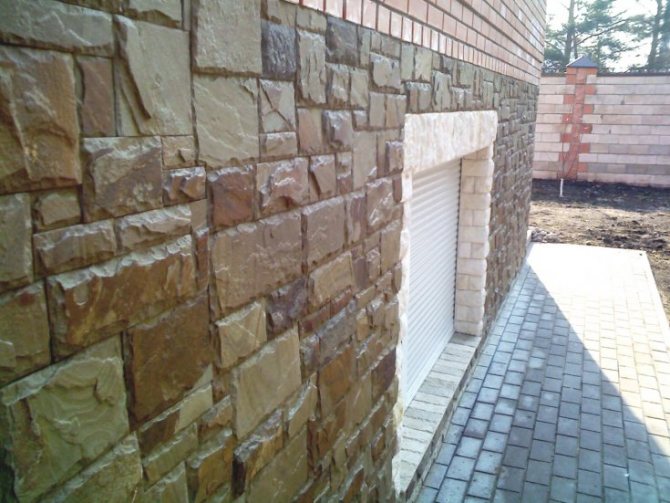
- Basement. This type of panel is used to decorate the lower part of the building. Such products are quite durable. After all, it is the basement of the house that is most susceptible to temperature changes, when in summer it heats up from the blind area, and in winter it cools from soil and snow.
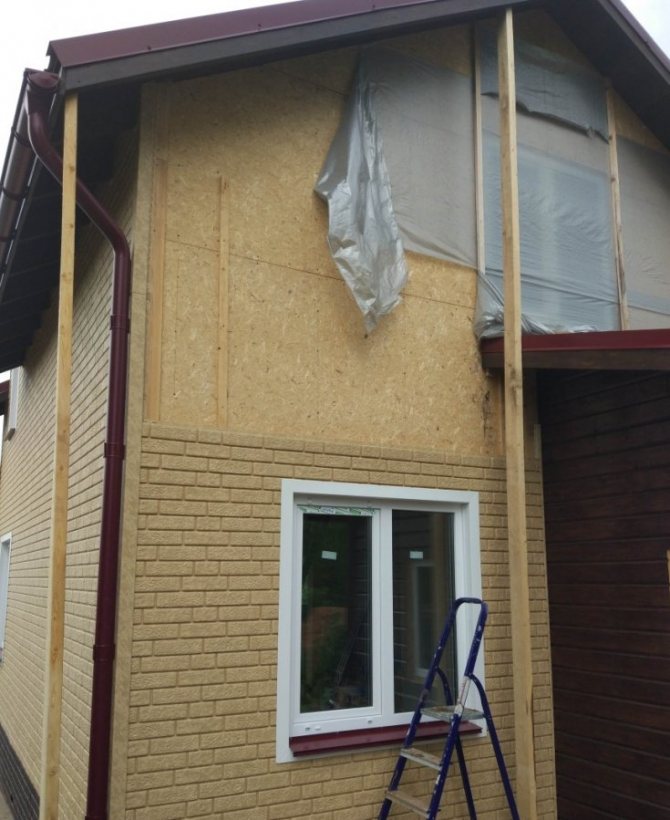
Surface preparation
Before carrying out the main work, you need to foam or cement all cracks, remove protruding elements.
Check it out here!
- DIY illuminated ceiling: 85 photos of the best options! Types of illumination: spots and peculiarities of their connection, LED illumination, diode illumination, "starry sky"

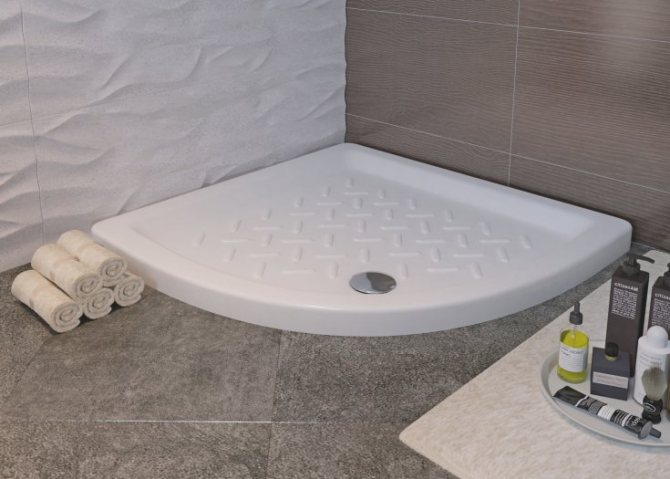
Do-it-yourself shower cabin assembly: pallet assembly, preparation and installation of walls, installation of a portal. All stages of assembly with a photo
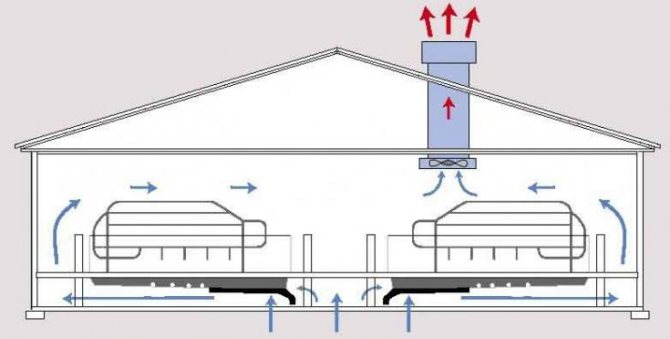
How to make ventilation with your own hands - we provide freshness in the house, we create comfort on our own (photo + video)
The walls are thoroughly cleaned of dirt. When facing with siding, the surface of a wooden house is treated with an antiseptic, and foam blocks are carefully primed.

Installing the guides
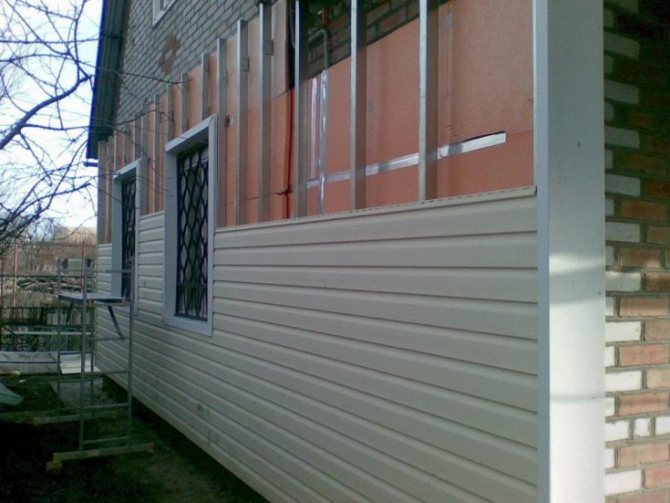
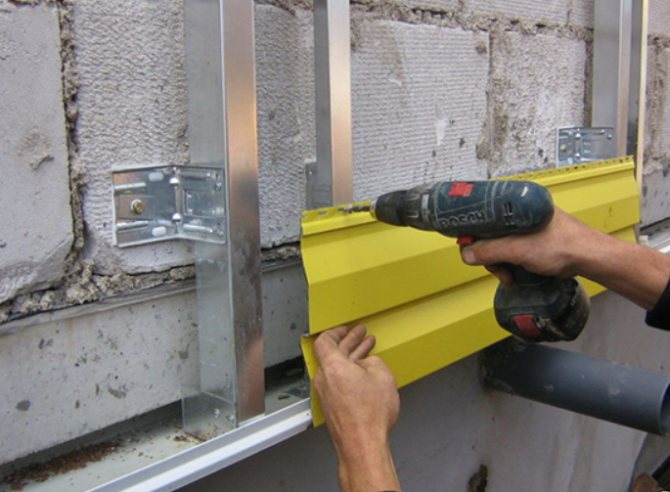
The most common method of attaching siding is horizontal. This means that the crate will need to be fastened vertically.
If the guides are mounted to a wooden house, then nails or self-tapping screws are used, if the wall is made of a concrete block or brick, then you need to use dowels, the holes for which must be pre-drilled in the wall.
Fastening the lathing
For the basis of the lathing, wooden slats or a metal frame are used. Concrete and brick surfaces are galvanized with a profile.
First, the walls are marked out in a straight line using a level, then they begin to fasten the vertical elements.
The distance between the two slats is about 40 centimeters. Places of corners and window blocks require additional guides.
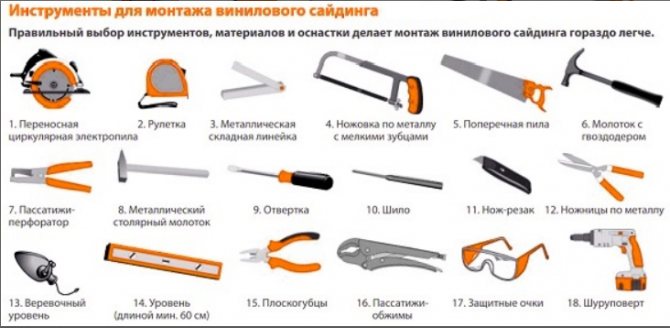
Tools
As a rule, everyone has a basic set of tools, especially if you have built a house yourself. Nothing new is required, it is enough to prepare:
- Level - to determine the location of the panels.
- Roulette - for marking.
- A hacksaw - for sawing off wooden slats for the frame.
- Metal scissors - for preparing the guides.
- Building corner - for aligning corners when fixing panels and constructing a frame.
- Screwdriver for self-tapping screws - necessary for the construction of the frame.
- Rope plumb line - to determine the level of fastening of the guides.
- Marker or chalk - for making markings.
After preparing the tools and materials, you can start the main process - decorating the house. Conventionally, it is divided into several stages, each of which must be considered separately.
Protection against temperature extremes
Upholstery work involves preliminary insulation and protection of walls from moisture penetration. The need for thermal insulation is considered individually, while waterproofing is a prerequisite for installation.
Check it out here!
- How to make a drywall arch: we make an interior arch according to the photo instructions. 120 photos of arches in the interior
How to make a balcony with your own hands - tips on how to make a beautiful balcony in an apartment. Step-by-step guide to the use of modern building materials + 70 photos of the best design options
Do-it-yourself coupe door installation - step-by-step instructions for installing sliding doors and advice on choosing accessories (110 photos + video)
Fastening starter J-profiles
The final result of the finishing depends on the fastening of the starting profiles, therefore, maximum attention should be paid to this stage.
The fastening of the profiles is performed according to the following instructions:
- For the first stage, you need a building level, with which you need to make a mark on the lathing strip, stepping back 5 cm from the bottom point. To mark this place, screw in the self-tapping screw shallowly.
- Moving consistently around the entire perimeter of the house, make similar marks at all corners of the structure.
- Attach a cord to the screwed-in self-tapping screws to determine the level of fastening of the profiles.
- Mark the location of the corner profiles on the frame gratings.

- Step back 6 mm from the border of the corner lathing and attach the first profile, strictly horizontally.
- It is necessary to leave a technical distance between the profiles, of the order of 10-12 mm, in order to prevent their contact during temperature changes.
If for some reason you forgot to leave a 6 mm indent, then the situation can be corrected by cutting the nail strips so that during temperature fluctuations it does not rest against the starting profile.
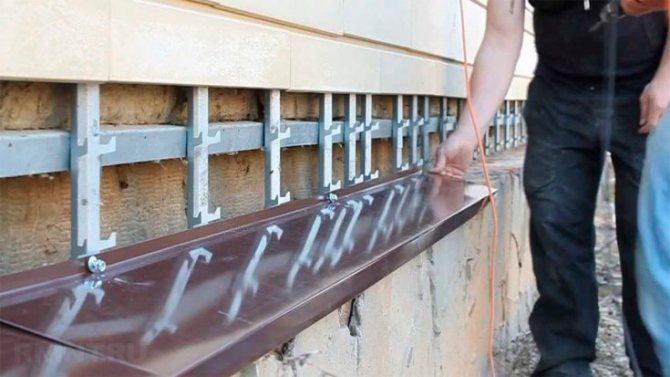
Fastening the guide parts
Installation of elements begins with the drainage area. The profiles are fixed at the corners with self-tapping screws, after which the main guide element is attached.
In the area of the window opening, the slats and profile are fixed in such a way that the lower edge on the outside is slightly lower than the inside. The door is framed around the perimeter with a profile marked J.

Siding panels are fixed so that there is a small gap at the bottom, half a centimeter is enough. Above, all the shortcomings will be hidden by the closing bar.
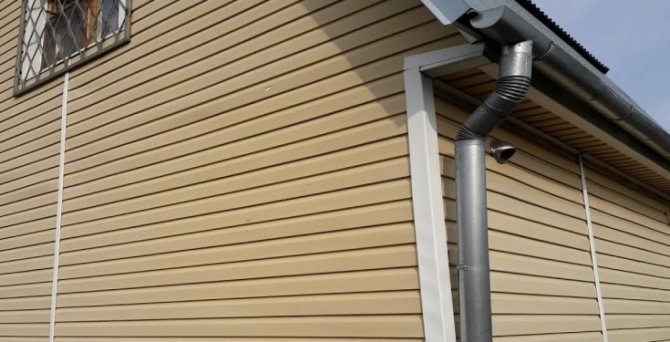
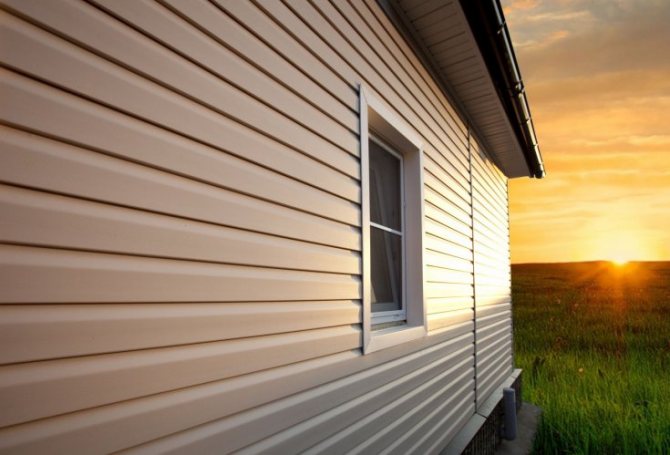
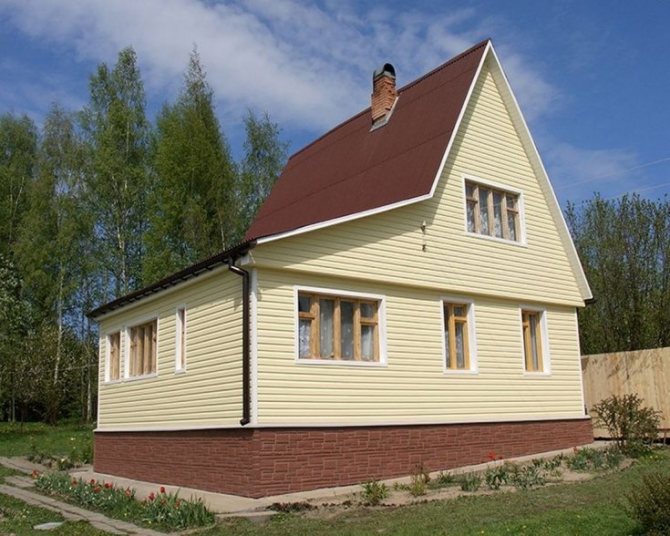
Pros of siding on the facade of the house
The popularity of siding panels in home decoration is due to several factors:
- Resistant to any weather whims, chemical compounds, ultraviolet rays.
- Light weight of the panels, which allows finishing without additional reinforcement of the walls. A small frame for fastening the material is enough for the finish to meet all the requirements.
- No need for careful alignment of the walls of the house. Since the frame will be attached to the walls, then a layer of thermal insulation is laid and the final stage will be the installation of siding.
- Easy to care for.
- A high level of resistance to mechanical stress and fire safety.
- A wide range of colors.
- Elementary finishing technology.
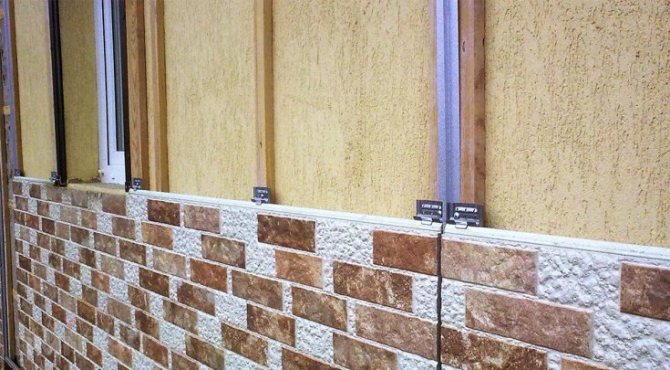
Installation of panels
After installing the guiding elements, you can start attaching the siding. The basic installation is started by fixing it to the main starting plate. The rest of the panels are fixed in the same way.
The distance between the elements must be respected, they must not overlap. If the panels are long and require trimming, use a color-matched H-rail alignment.
Check it out here!
Do-it-yourself countertop installation: selection, installation and fastening of the countertop. 155 photos of the best ideas and tips for their applicationDo-it-yourself canopy - beautiful ideas, best projects and tips on how to build a canopy with your own hands (90 photos and videos)
Do-it-yourself pool - 115 photos of the best ideas for building a vacation spot and an overview of current projects
Do-it-yourself installation of metal siding is carried out from the bottom up. The same principle of fastening and vinyl material.
Armed with theoretical knowledge and having watched several videos of do-it-yourself siding installation on the Internet, you can try.
Types of siding
Siding is divided into several types for various factors. Depending on the material of manufacture, it can be:
- wooden;
- from chipboard;
- vinyl;
- metal;
- cement.
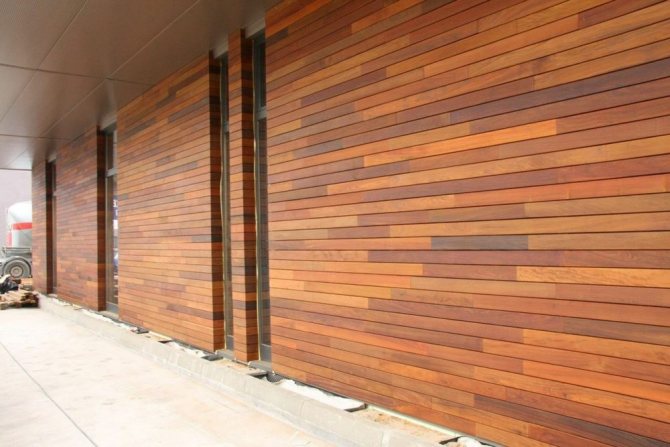
Wooden is a board made of solid wood. There are 2 technologies for the production of such boards. The first involves drying them at normal temperature. The second - in the oven, at a temperature of up to 200 o C. Boards made by the first method are more expensive, but more durable. For production, conifers are most often used - pine, larch. They serve for a long time and are resistant to moisture.
Chipboard siding made from pressed wood fibers with the addition of polymeric materials. Epoxy resin or expanded polystyrene can act in their role. In terms of strength and durability, this option is inferior to the wooden one, but it costs less.
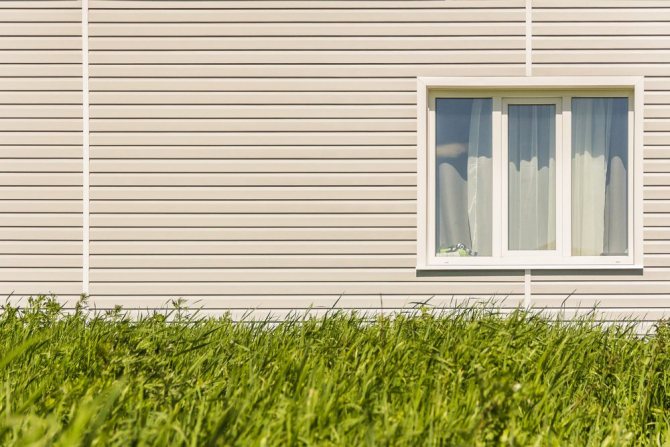
Vinyl the cladding is made by pressing heated vinyl through a narrow long hole. The result is a plastic board. Vinyl siding is inexpensive, but very durable - it lasts several times longer than wood.
Metal siding made of thin sheet steel. This is the most durable and durable option. In the presence of a high-quality anti-corrosion coating, it will last for more than a dozen years. However, such a cladding is not cheap. There is one more drawback. Steel cladding has a rather large mass, so it is not suitable for finishing every home.
Cement siding made from a mixture of cement and cellulose fiber. It is durable, inexpensive, fire resistant. But this finish, like steel, is too heavy. This is her main drawback.
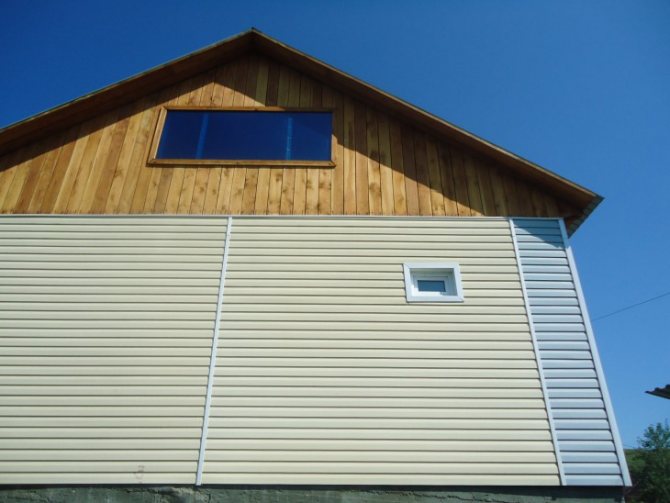
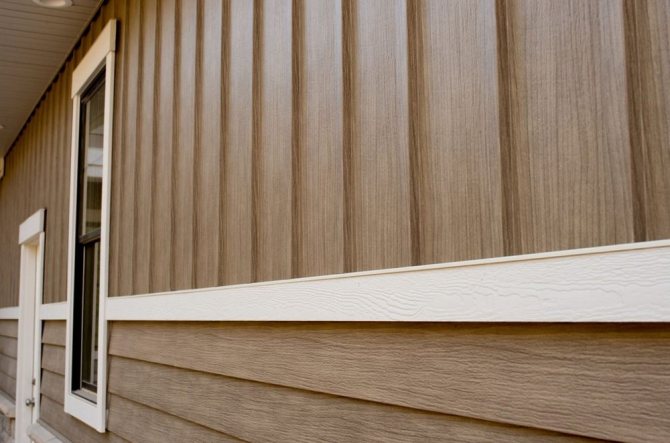
Depending on the position in space, siding is divided into:
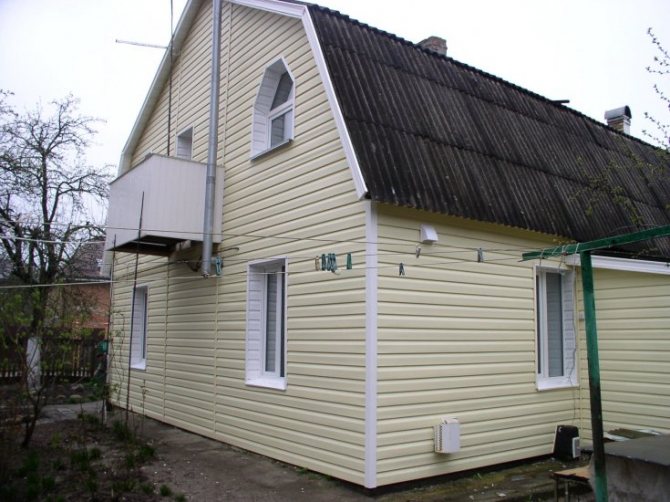
- horizontal - mounted in the horizontal plane of the wall;
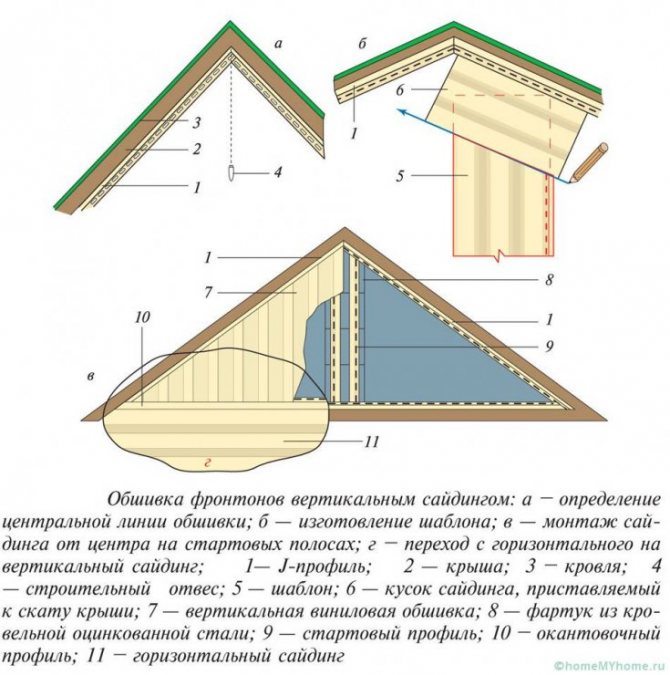
- vertical - installed vertically.
Siding has a wide variety of forms. The most common 3 are:
- "Herringbone" - is an overlapping board that, when viewed from the side, resembles the silhouette of a coniferous tree;
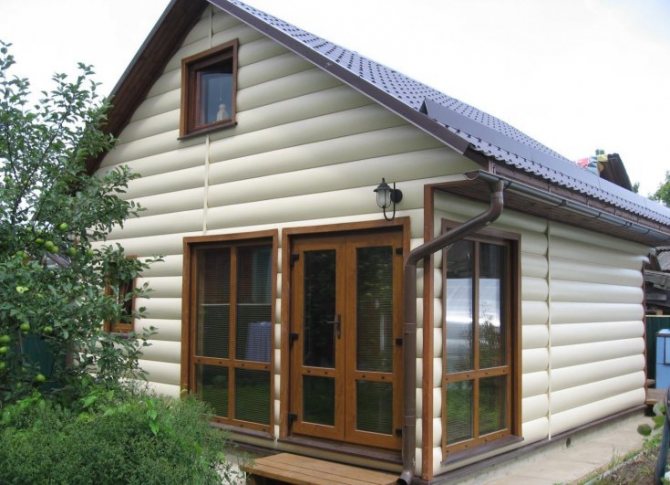
- under a log - imitates a log house;
- under a stone or brick - creates the illusion of real masonry.
Photo of the process of installing siding with your own hands


Read here - DIY ceiling repair: subtleties of restoration, repair options and construction features (130 photos and videos)
Installing the first row
After fixing the main profiles, you can proceed directly to the wall cladding. The quality of the finish of the entire wall depends on the correctly laid first row, therefore, after installing the first plank, check it for horizontalness several times.
In addition, beginners are advised to start from the back of the house, in which case you will have the opportunity to adjust and get your hands on it.
The installation process for the first panel looks like this:
- Cut the required plank size from the main profile.
- Insert the workpiece into the lock of the starter and corner profile. At this stage, it is necessary to leave a technological gap of 6 mm on the corner profile to the bottom of the mount.
- After completing these steps, you must attach the bar to the battens of the battens.
Please note that adherence to technological clearances is necessary in case of an increase or decrease in the size of the strips, which can occur at low and high temperatures. But you should not overestimate the recommended distance so that the strips that have returned to their size do not jump out of the mounts.
There is a strict rule on this score:
When installing siding in the warm season, the technological gap should be no more than 6 mm, in winter - no more than 9 mm.
Extension of planks
In the case when the length of the profile is not enough, it needs to be joined. It can be done in two ways:
- Using the H-profile.
- Overlap.
If the overlapping method is chosen as the joining, it is necessary to do similar actions with those that were considered when building up the corner profiles.
The H-profile is installed according to the same principle as the outer corner strips. In the upper part, an indentation is made from the roof of 3 mm, and the lower part of the plank overlaps the starting profile by 6 mm.
Installing siding strips under the roof
After installing all the profiles, you need to take care of the correct fastening of the last strip. To install it, you need to attach the finishing profile, as shown in the figure below.
The next steps for attaching the siding look like this:
- Measure the distance between the lock of the last installed plank and the locking edge of the finishing profile along the entire plank.
- From the obtained value, it is necessary to subtract 1-2 mm allocated for the technological gap.
- Prepare a siding strip of the desired length and cut the top mounting panel on it.
- Form the hooks on the top of the plank with a punch, and bend them towards you.
- Place the trimmed strip in the last installed siding panel, and by slightly pushing the panel and lifting it slightly upwards, snap it into the finishing profile.