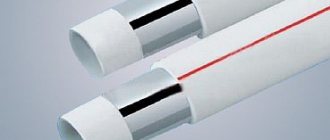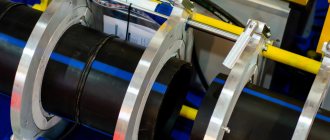
Positive characteristics of PP pipes
Pipe products made from polypropylene have a number of advantages:
- long service life, which is at least 25 years;
- resistance to aggressive environmental influences;
- a wide range of connecting fittings and other accessories;
- absence of condensate and various deposits on the inner and outer surfaces;
- insignificant weight of products;
- resistance to corrosive processes;
- ease of installation work;
- sufficient strength;
- low noise level.
The maximum permissible operating temperature of a liquid moving through polypropylene pipelines is considered to be 90ᵒC (the limitation applies to products of brands 20 and 21). In the case of arranging a line for supplying cold liquid, the temperature of which most often does not exceed 20 degrees, pipes of grades 11 to 16 are laid.
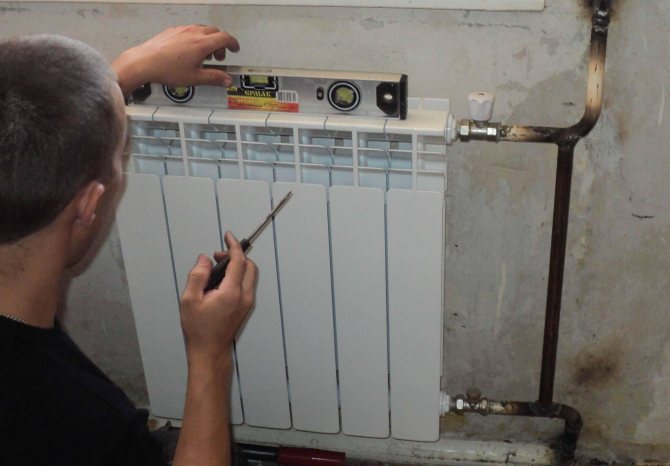
How to order the installation of heating pipes
Measures for the installation of plastic pipelines are a responsible complex of actions that requires thoughtfulness and attention to detail. You need to be extremely careful when choosing products, to their characteristics, since during further operation, some materials will be absolutely inaccessible for repair (for example, underfloor heating).
With proper assembly, pipelines can last for years and years. Almost all pipe manufacturers guarantee their reliable operation for more than 30 years.
Despite the seeming simplicity of installation, our company advises contacting professionals in the installation of heating pipes and offers all types of pipelines and accessories for them of high quality and at affordable prices. Contact us - we will assemble pipelines from any material!
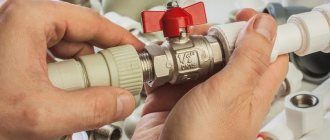
The main features of installation work
Polypropylene pipes are laid using fittings, both threaded and non-threaded. Products with thread are:
- detachable;
- one-piece.
The choice of the method of installation work is primarily influenced by the conditions in which the pipeline will be operated. All components made of polypropylene must be protected from fire.
When it is necessary to embed a water meter or a storage tank into the system, split-type threaded products are used. In addition, the one-piece connection is used only when working with flexible hoses. It is forbidden to use dirty or deformed elements. It is also not allowed to self-thread.
If you have to connect flat sections or equip the transition of a pipeline segment to a diameter of a different size, use couplings. Special elbows are used for turns, and tees are used to create branches in the system. Bending of pipes is not allowed.
After all the necessary information has been studied, they proceed to the installation of polypropylene pipes, which is carried out in several stages (in more detail: "Types, properties, installation of propylene pipes with your own hands").
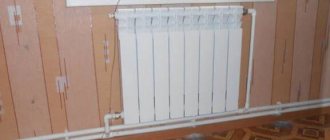
Types of heating installation systems
Installation of heating from polypropylene pipes can be done in several ways. Systems are available with two spills - upper and lower.
- The basis of the top spill system works on the principle of gravity circulated water. In this case, the circulation pump is not introduced into the system. Water moves along the perimeter of the pipes on its own.
- This installation method is used in those rooms where there is no regular access to electricity and water, as this makes the use of the pump impracticable.
- Bottom dispensing heating is equipped with a pump and is radially wired. The pump supplies water to the system with a high pressure, which makes it possible to install pipes with a small diameter.
- Systems with one or two pipes are also used, which are connected to bottom or side radiators.
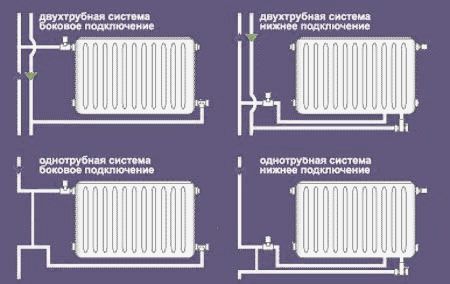
Diagram of connecting tubes to radiators
Mainline project development
Always before starting the installation, a project of the future system is drawn up. Ergonomics is considered the main criterion - for this reason, it is necessary that the number of turns of pipelines and connecting elements in the line be minimized.
If you plan to arrange a heat supply system, it is important to correctly draw up a project in which the location of the following elements should be accurately indicated:
- heating equipment;
- fasteners;
- various adapters and couplings;
- corners.
The heat supply line is connected to the batteries from the side or bottom in one of two ways - one-pipe or two-pipe.
When developing a project, it is necessary to take into account the likelihood of thermal expansion of the pipe material, which in this case is polypropylene.

If necessary, the laying of water distribution, the pipeline is connected to centralized communications. When designing a water supply, it is taken into account that such plumbing fixtures as toilets, heating units, sinks, etc. are to be connected.
In practice, one of two ways of arranging the wiring is used:
- Open option... Pipes installed horizontally are placed above the level of the floor covering, and vertical products - only in the corners. Thanks to this installation, it is possible to make the pipeline less visible.
- Closed option... This installation method is difficult to implement, since it will require preliminary accurate calculations. Pipes embedded in walls must be solid, and each joint must be freely accessible.
The distribution of the water supply network is of three types:
- consistent. This budget approach is easy to implement;
- collector - water supply is organized using special equipment - collector;
- with pass-through sockets - it is rarely used.
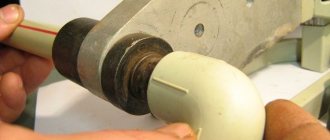
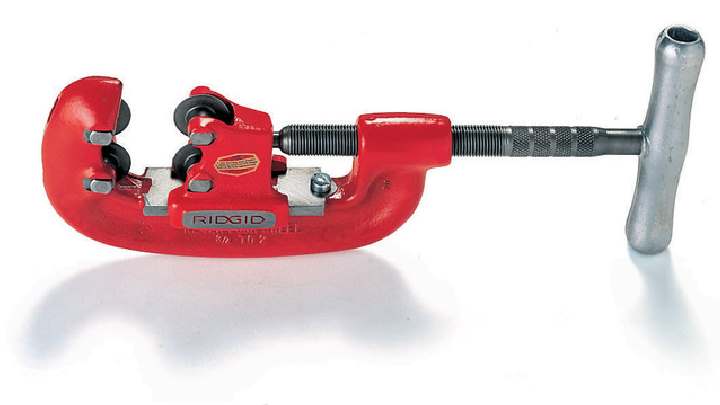
Welding PP pipes
To start this stage, you must have at your disposal an electric jigsaw for cutting polyethylene and equipment designed for welding.
Before starting work on the device, you need to put on nozzles (sleeves) of a certain diameter. Then, using the thermostat, set the desired temperature, which should be about 260 - 265 degrees and wait until the device warms up. There is a step-by-step instruction from the manufacturer of welding equipment that describes in detail all the nuances, including the warm-up time.
How to make a welding machine yourself
Since a good welding device is not cheap, it would be better to rent it or make it yourself.
When the choice is made in favor of the second option, then you need to prepare in advance:
- electric drill;
- nozzle (sleeve) of the required diameter;
- outdated iron;
- washer and bolt for him;
- thermal paste for computers.

The sequence of actions will be as follows:
- To increase the degree of heat transfer, the sole of the old iron is treated with paste, after which you need to fix the Teflon sleeve. Its position is determined in advance - they have a wide part towards the bottom or towards the top.
- Cut the nose off the iron so that it is more convenient to work with it in the immediate vicinity of the walls.
- Heat the ironing unit until it switches off again.
- The presence of a thermal sensor at the iron allows you to more accurately determine to what temperature the unit has heated up. There is also an easier method to find out the degree of heating of the device using lead.The fact is that this metal begins to melt at 230 degrees, which almost coincides with the temperature required to perform welding.
The subsequent steps for soldering are similar to the assembly described above.
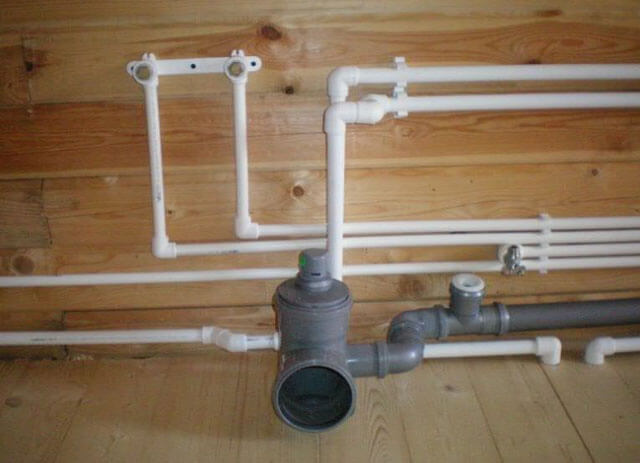
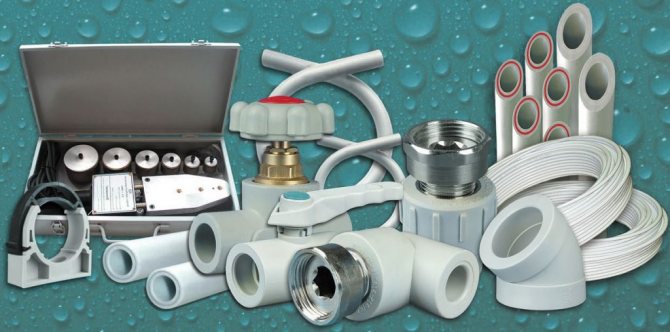
Installation of a polypropylene pipeline
To create a highway, you will need:
- PP pipes;
- plastic clamps;
- threaded fittings;
- couplings and tees;
- detachable connecting elements;
- bends and adapters;
- ball valves; stubs.
First, the main elements of the system are installed, which include plumbing fixtures, radiators, heating units, etc. On the basis of the project, the locations of the highway are marked. Installation of polypropylene pipes is carried out using couplings. If necessary, collect hard-to-reach sections of the highway - this is done separately.
When laying communications for the construction of heat supply or hot water supply, the coefficient of thermal expansion is taken into account. In order to compensate for it, it is recommended to use movable type fittings.
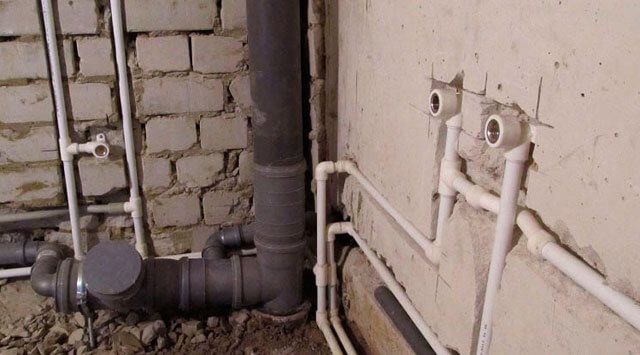
When the installation of PP pipes for laying a closed pipeline is carried out, the walls are first grooved, for which a groove is made in certain places, the width of which is equal to two pipe diameters. It is possible to fill the line with liquid only one hour after the completion of installation work, and hydraulic tests are carried out after a day.

Design and installation of pipelines for heating systems using metal-polymer pipes
Office and warehouse on st. Obrucheva operates Mon-Fri from 09:00 to 19:00. Office and warehouse on Simferopol Boulevard - Mon-Sat from 09:00 to 19:00. The Balashikha office is closed.
Despite the working hours, all managers of the company work remotely on a daily basis and are available via email and mobile communications. Contacts of each manager are listed in the Contacts section.
Technical information
| Table of contents | Forward >> |
SP 41-102-98 Group Zh24
System of regulatory documents in construction
Code of practice for design and construction
Design and installation of pipelines for heating systems using metalpolimeric pipes
OKS 91.140.10 OKSTU 49 3000
5. Installation of heating systems from metal-polymer pipes
General instructions
5.1 Installation of metal-polymer pipes should be carried out according to the installation project at an ambient temperature of at least 10 ° С.
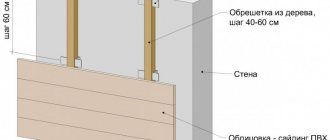
5.2 Before laying metal-polymer pipes in the room, it is necessary to complete all electric and gas welding work, install fastening elements, and, with an open laying, finish finishing work.
In case of hidden laying of pipelines at the locations of dismountable joints and fittings, hatches or removable shields that do not have sharp protrusions should be provided.
It is advisable to place the uprights in channels, niches, grooves, behind decorative panels, or, as an exception, to embed them in walls and partitions.
Horizontal pipelines and connections to heating devices may be placed on ceilings and behind skirting boards (Figure 14). Open areas can be covered with decorative elements.
a - in heated rooms on the floors between apartments; b - in heated rooms on ceilings above unheated rooms or in the basement; 1 - floor covering; 2 - a layer of concrete; 3 - waterproofing layer; 4 - a layer of sound insulation; 5 - thermal insulation layer; 6 - pipeline; 7 - backfill; 8 - overlap; 9 - pipe thermal insulation
Figure 14 - Hidden laying of distribution pipelines from metal-polymer pipes in the floor
Open laying of metal-polymer pipes is allowed in places that exclude their mechanical and thermal damage and direct exposure to ultraviolet radiation.
5.3 It is not allowed to flatten and break the pipeline during installation.
If the pipe breaks, straighten and shape it into a cylindrical shape with a wooden or rubber hammer. Such an operation is allowed to be carried out only once in a given area.
5.4 Coils of metal-polymer pipes, stored or transported to the assembly (blank section) at a temperature below 0 ° C, must be kept for 24 hours at a temperature of at least 10 ° C before rolling.
In the process of unwinding the coil and installing the pipeline, it is necessary to ensure that the pipe does not twist.
Pipe laying should be carried out, avoiding tensile stresses, the free ends should be closed with plugs to prevent dirt and debris from entering the pipe.
5.5 The bend radius must be at least five outer diameters of the pipe. When bending less than 5dн
a coil spring should be used. Pipes are bent smoothly without heating, in a cold state.
5.6 When installing underfloor heating systems, the following conditions must be met:
- heating pipes for one room should be made from a whole piece of pipe;
- the covering layer of thermal insulation and waterproofing should not have cracks;
- the pipes must not pass under the expansion joints of the concrete pour, otherwise they must have a protective shell with a length of at least 1 m;
- pipes to the thermal insulation should be fixed using special V-shaped "anchor" brackets. It is allowed to attach the pipe to the metal mesh with a wire with a soft gasket;
- the underfloor heating pipeline must be filled with concrete or covered with a coating only after hydraulic tightness tests. When pouring, the pipe must be under a pressure of 0.3 MPa;
- the heated area of one coil should not exceed 30 m2 with a maximum length of one side of 8 m. Expansion joints with a width of 0.5 cm should be made between homogeneous areas of the concrete pavement, which should be filled with elastic material. The mortar layer must be carefully leveled;
- when concreting, it is necessary to avoid displacement, vertical bending, squeezing or damage to pipes;
- the minimum filling height above the pipe surface must be at least 3 cm. The cement-sand mixture must be at least grade 400 with a plasticizer.
5.7 For the passage of pipes through building structures, sleeves must be provided. The inner diameter of the sleeve should be 5-10 mm larger than the outer diameter of the pipe to be laid (Figure 15). The gap between the pipe and the sleeve must be sealed with a soft non-combustible material that allows the pipe to move along the longitudinal axis.
Figure 15 - Installing a sleeve for laying pipes in walls and ceilings
5.8 The clear distance between the building structure and the metal-polymer pipeline running along it must be at least 20 mm.
5.9 Metal-polymer pipes for heating and hot water supply pipelines should be laid at a distance of at least 50 mm above other pipelines.
5.10 The connection of metal-polymer pipes with steel pipelines, shut-off and control valves and heating devices is carried out on the thread using special fittings (appendix,).
Incoming inspection of pipes and components
5.11 Prior to installation work, metal-polymer pipes, fittings, fittings and fasteners must be subjected to an incoming inspection.
Pipes, fittings, and fasteners must have an accompanying document confirming their compliance with regulatory requirements.
5.12 Pipes should be marked with pipe diameter, allowable temperature and pressure. There should be no mechanical damage or fractures on the pipe surface. The pipes must not be twisted or flattened.
5.13 On fittings and union nuts of connecting parts, the thread must be cut in accordance with GOST 6357, strength class B. Mating parts must not have dents, burrs, scratches. Rubber gaskets must have the correct geometric shape.
5.14 The means of fastening metal-polymer pipes must have a surface that excludes the possibility of mechanical damage to the pipes. Fasteners must be free of sharp edges and burrs.
The dimensions of clamps, clamps, brackets must strictly correspond to the diameters of the pipes. Metal fasteners should have soft gaskets and anti-corrosion coatings.
Preparatory work technology
5.15 Before starting the installation of pipelines, the following preparatory operations must be performed:
select pipes and fittings that have passed the incoming inspection;
mark the pipe in accordance with the project or locally, taking into account the allowance for subsequent processing with the maximum use of the pipe material. Pipe marking can be carried out with standard measuring tools: a measuring ruler, folding rule, tape measure, as well as a specially made template and marking device. Cutting risks on the pipe are applied with a pencil or marker.
Scratching or notching the pipe surface is not allowed.
5.16 Cutting of pipes should be made according to the marking with scissors, at an angle of 90 ° to the pipe axis, avoiding crushing of the pipe and the formation of burrs. The deviation of the cutting plane should not exceed 5 °.
To eliminate errors in pipe ends, it is necessary to calibrate the pipe ends using a reamer. Out-of-roundness of pipe ends should be no more than 1%.
Connection of pipes and connection to fittings
5.17 The crimp nut connection option consists of the following operations:
- for bending a pipe with r
dн (outer diameter) it is necessary to use a spring;
- using a spring, straighten excess pipe bends (approximately 150-160 mm);
- cut the pipe with special scissors at an angle of 90 ° to the pipe axis;
- process the pipe surface with a calibrated reamer (first with side 1 to the depth of the marks on the outer surface of the reamer, then with side 2 to remove the inner chamfer);
- put a brass crimping nut on the pipe;
- manually press in the connecting element to the stop to the depth for pipes with an outer diameter, mm: 16 - 8 mm; 20 - 10 mm, 25 - 12 mm.
The pipe is connected to fittings with an external thread along the mating surfaces of the parts without sealing the threaded nut.
To connect pipes to parts with an internal thread, it is necessary to use a nipple with a threaded part seal.
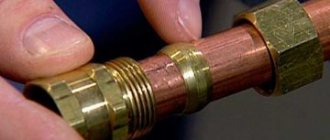
5.18 For connection to devices with an internal thread, it is possible to use a connection with a compression nut and a compression ring with a sealing of the threaded part (Figure 16).
1 - metal-polymer pipe; 2 - crimp nut; 3 - split crimp elastic ring; 4 - connecting insert with external thread
Figure 16 - Compression nut and ferrule connection
5.19 Sealing of threaded connections with steel pipelines and fittings can be carried out with linen strand, FUM tape or any other sealing material.
5.20 Installation of a connecting piece with a crimp sleeve (Appendix D) is performed as follows:
- to remove a chamfer at an angle of 45 ° along the inner surface of the pipe end;
- put the crimping sleeve on the pipe;
- put the union nut and the O-ring on the fitting of the connecting piece;
- install the fitting into the pipe using the tool;
- pull the sleeve over the pipe with the union;
- remove the pipe from the device;
- crimp the bushing onto the pipe using a rolling-in device, remove the pipe from the device.
Fastening of pipelines
5.21 Arrangement of fasteners of metal-polymer pipelines is carried out in such a way as to exclude the maximum permissible stresses in the pipe material from linear temperature extensions of the pipeline.
5.22 The distance between the fasteners should be taken according to table 6.
Table 6
In millimeters
| Outer pipe diameter | Distance between sliding mounts | |
| when laying horizontally | with vertical laying | |
| Up to 16 | 500 1000* | 1000 2000* |
| 20 | 500 1000* | 1000 2000* |
| 25 | 750 1000* | 1200 2000* |
| 32 | 1000* | 2400* |
| 40 | 1000* | 2400* |
| 50 | 1000* | 3000 |
| * For pipes "METAPOL" | ||
It is necessary to provide for fastening at bends and branches of pipelines.
5.23 Distribution manifolds and shut-off and control valves should be secured with independent fixed fasteners to eliminate the transfer of forces to the pipeline during operation.
5.24 For fastening pipes, it is recommended to use products according to the catalogs of pipe manufacturers or other supports used for plastic pipes. Possible fastening methods are shown in Figures 17, 18.
1 - pipe; 2 - retainer; 3 - clamp; 4 - screw (dowel)
Figure 17 - Fastening pipes to walls and partitions
1 - clamp; 2 - pipe; 3 - soft pad; 4 - thermal insulation; 5 - bolt; 6 - nut; 7 - suspension; 8 - bracket
Figure 18 - Fastening of pipelines
Heating system test
5.25 After performing the installation work, the system should be tested for leaks at a pressure 1.5 times the operating pressure, but not less than 0.6 MPa, at a constant water temperature.
5.26 During the preparatory work before the hydraulic test of the system, it is necessary:
- turn off (temporarily remove) safety valves, control valves, sensors, etc., if the permissible pressure of the specified fittings is less than the test pressure according to 5.25;
- replace the disconnected elements with plugs or shut-off valves, the allowable pressure for which is greater than the test pressure;
- connect a pressure gauge with a measurement accuracy of 0.01 MPa to the system.
5.27 The system should be filled with water slowly with open air vents to avoid air pockets.
5.28 Hydraulic tests must be carried out at constant temperature in two stages:
1st stage - within 30 minutes, raise the pressure twice to the calculated value every 10 minutes. In the next 30 minutes, the pressure drop in the system should not exceed 0.06 MPa;
2nd stage - in the next 2 hours, the pressure drop (from the pressure reached at the 1st stage) should not be more than 0.02 MPa.
5.29 A hydraulic test of the underfloor heating system must be carried out before the pipelines are poured with concrete (mortar).
5.30 Thermal testing of floor heating systems made of metal-polymer pipes should be carried out after the concrete has finally hardened, i.e. after 20-28 days Tests should begin with a coolant temperature of 25 ° C with a daily temperature increase of 5 ° C until it meets the design value.
Renovation work
5.31 Plumbers, making repairs, should be familiar with the properties of metal-polymer pipes and their processing technology.
5.32 When replacing pipes during repairs, it is not allowed to install pipes with a smaller diameter than the pipes being replaced.
5.33 In case of damage to a section of the pipeline, it is advisable to cut out the damaged section. Replacement is carried out using a piece of pipe of the required length, connected to the pipeline with special fittings. The damaged section of the pipe is mounted using 2 union nut connections through a nipple with a threaded part seal or two-way connections with a compression nut and a compression ring without a threaded part seal.
5.34 When carrying out welding or other hot work in places of possible thermal or mechanical damage to pipes, it is necessary to install fences.
5.35 To clean the outer surface of the pipes, a material should be used that excludes mechanical damage.
5.36 When the system freezes, the presence of plugs in the pipe can be determined by a local increase in the diameter (expansion) of the pipe or by a layer of frost and ice on the surface. The pipe should be heated with warm air or hot water up to 90 ° C. It is strictly forbidden to use an open flame or tap the pipes with a hammer. The damaged pipe section should be replaced as soon as possible.
5.37 When loosening the seal between the pipe and the sleeve passing through the building structure, it is necessary to seal it with a sealant made of non-combustible materials.
| Table of contents | Forward >> |
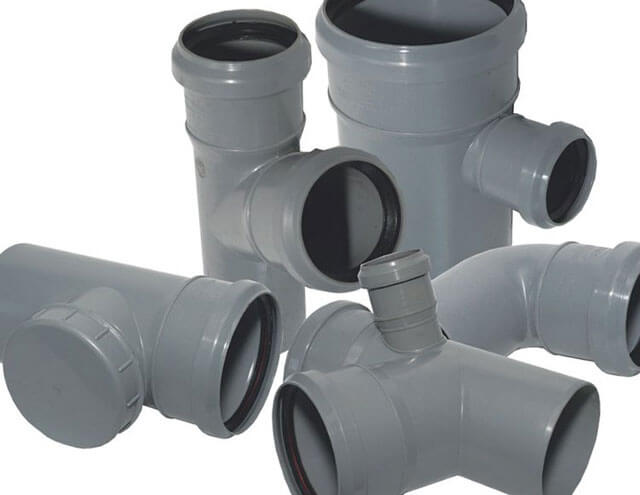
Arrangement of a sewerage system made of polypropylene pipes
When creating a sewage system, sewer PP pipes are often used. The process of laying them has features that should be considered.
A careful study of the rules and instructions for installing polypropylene pipes will help to equip a sewer system in your own home with your own hands:
- The pipeline is laid under a slight, approximately 3 cm, slope towards the location of the drain.
- When the pipes are in a cold room, they should be additionally insulated with mineral wool.
- It is not allowed to make sharp turns of communications, or rather, at right angles. Instead of them, half-taps are used.
- An obligatory element of the sewage system is a fan ventilation structure, which prevents the penetration of unpleasant odors into the premises.
- The toilet must be connected after installing the sink, otherwise the breakdown of the water seal cannot be avoided.
The external sewage line is laid in a certain sequence, taking into account some of the nuances:
- The diameter of PP pipes is determined, which depends on the number of people who live in the household.
- From the sewer runoff, they dig a trench in the direction of a septic tank or a cesspool, observing a slope, the size of which depends on the depth of soil freezing, or the pipeline is insulated.
- A sandy "pillow" is laid on the bottom, its minimum thickness should be 20 centimeters.
- A pipeline is laid, preventing sagging of its sections - otherwise, the joints will soon collapse.
During the installation of the system, the seams do not need to be sealed, since there are rubber seals in the polypropylene pipes for outdoor installation.
Self-installation of the sewer line will help you save a lot, but only on condition that it is correctly executed.
Types of wiring
After choosing the pipe material, it is necessary to think over the wiring diagram of the heating system. Depending on the area of the heated premises, the layout of the building, the type of coolant and the energy source, the engineer must select one or another pipe layout. Experts distinguish between several ways to install pipes in the house.
We recommend that you familiarize yourself with: How to make a bed frame from a profile pipe with your own hands
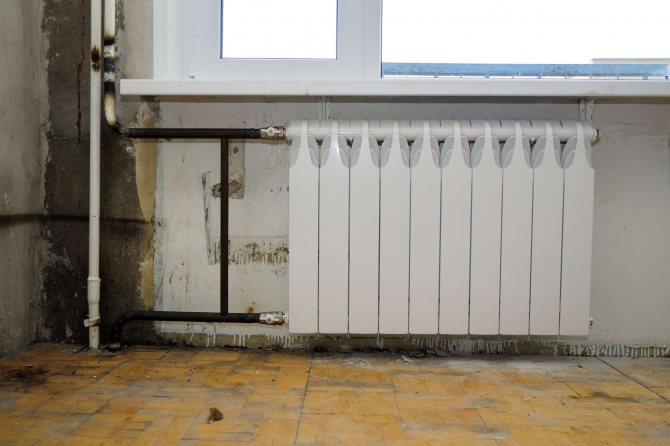
Top water filling system (gravity)
In such a system, the heating boiler is located at the lowest point of the object, and the circulation of water is based on natural physical laws (expansion during heating, contraction during cooling). As it heats up, the water increases in volume and flows from the boiler through the pipes upward, filling the risers and heating radiators. Circulating in a closed loop, the cooled liquid returns to the boiler, where it heats up again.
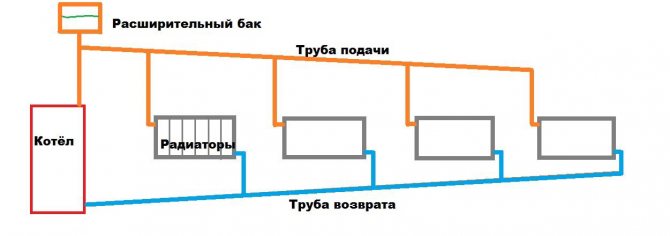
The top water filling system is the simplest and most economical in terms of installation and operation. The advantages of this layout include:
- independence from electricity;
- no need to install a circulation pump.
Overhead water distribution system is suitable for a relatively small area of heated premises. The disadvantages of the gravity system include low efficiency and the need to increase the power of boiler equipment. In top filling systems, abnormal situations often occur - airing, boiling water - which further reduces the efficiency of heating. When operating the system in rooms farther from the boiler, the temperature of the riser and radiators is usually lower than in other areas.
Bottom water filling system (forced)
In such systems, the circulation of the coolant is carried out due to the operation of a special pump, which is installed at the outlet of the collector connected to the boiler. Thanks to the circulation pump, the performance of the system is significantly higher compared to gravity heating. Other advantages of this type of wiring are the ability to use thinner plastic pipes and install the pipeline under the floor.
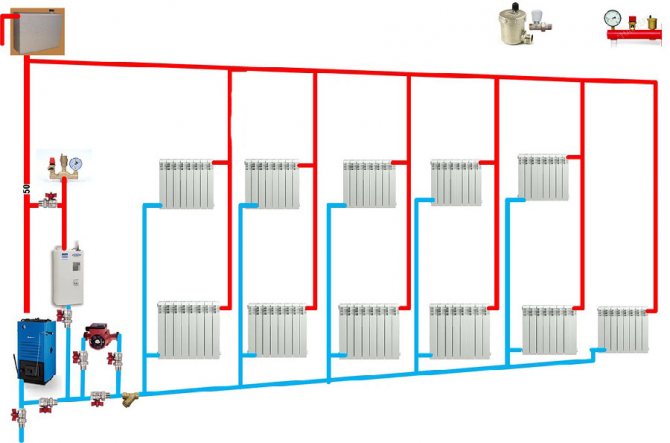
The only downside to bottom wiring is the dependence on electricity. In the event of an unscheduled power outage in the house, the circulation pump stops and the system stops functioning.
There is another classification of heating system wiring:
- one-pipe - the installation of the riser is carried out on the basis of one pipe, which leaves the boiler and is connected to one radiator, and from it to the next, and so on;
- tee - several radiators are connected to a common riser;
- collector - based on the supply and return pipelines, which are connected to the collectors, and radiators are connected to them using separate pipes.
Important! One-pipe wiring is suitable for small (up to 150 m2) residential buildings. Collector wiring is most often installed in residential buildings and cottages on two or more floors with several rooms, a kitchen, a bathroom, and technical rooms.
Before planning the installation of heating pipes, you must also take care of the purchase of small engineering equipment. It includes all kinds of valves and plugs, steam traps, control and metering devices (manometers, thermometers).
We recommend that you familiarize yourself with: How to make a warm floor from polypropylene pipes with your own hands