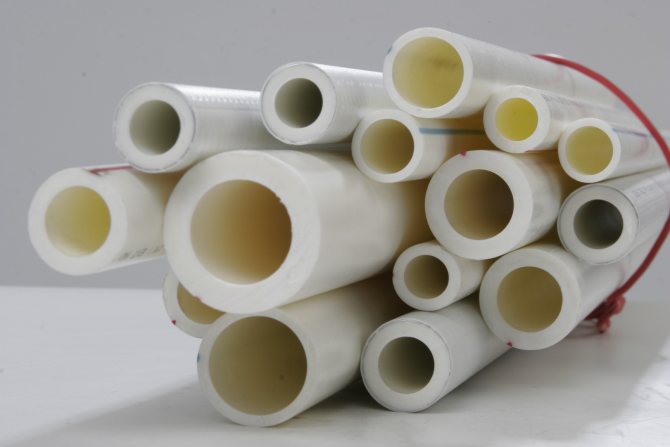
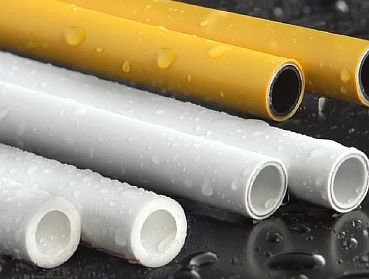
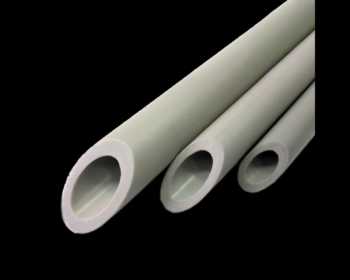
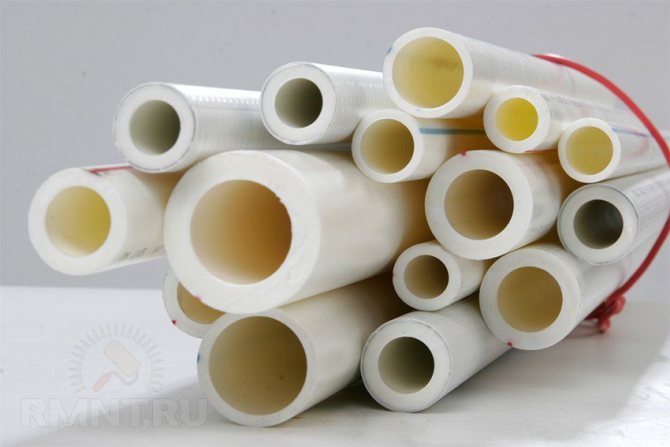
Varieties and characteristics of polypropylene pipes
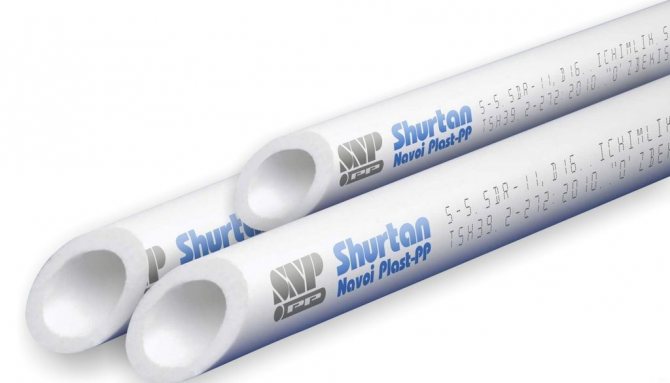
Polypropylene pipes are widely used in the construction industry, as they are not expensive and strong enough.
They are available in two types: single-layer and multi-layer. Each type with its positive and negative sides. Let's take a look at them.
Single layer
Single-layer polypropylene circuits come in several varieties:
- PPH - made of homopropylene. They are not intended for underfloor heating, but they are widely used in water supply, sewerage and ventilation systems.
- PPB - made from polypropylene block copolymer. Products of this type are durable and resistant.
- PPR - used in the manufacture of random copolymer polypropylene. The contour from it evenly distributes the load along its walls.
- PPs is a flame retardant product. The pipes are able to work effectively even when heated to +95 degrees.
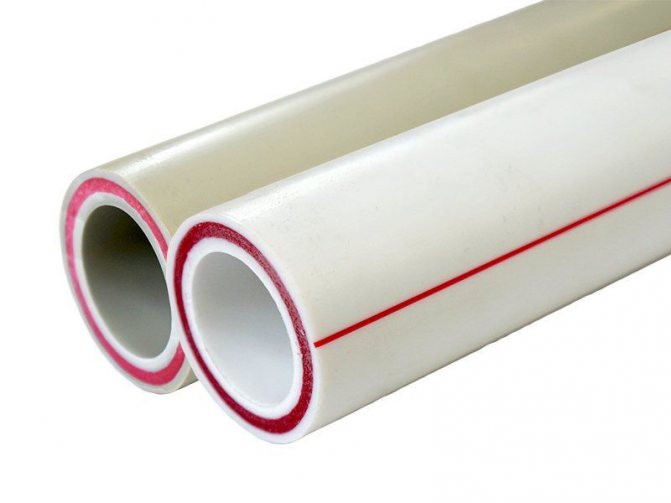
Multilayer
Multilayer polypropylene pipes are also available in several types, and have the following technical characteristics:
- Aluminum - the pipeline has a thin reinforcing layer on the outside. In the process of joining such elements, the aluminum layer is cut by 1 mm. There are products where the reinforcement is between the walls. Polypropylene pipes with a reinforcing layer function effectively even at + 95 degrees.
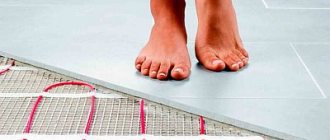
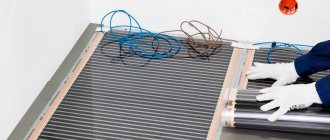
- Fiberglass - the reinforcement is located between the polypropylene sheets. This type works great in the construction of underfloor heating.
- Composite - between two layers of polypropylene there is an interlayer that combines fiberglass and aluminum fibers.

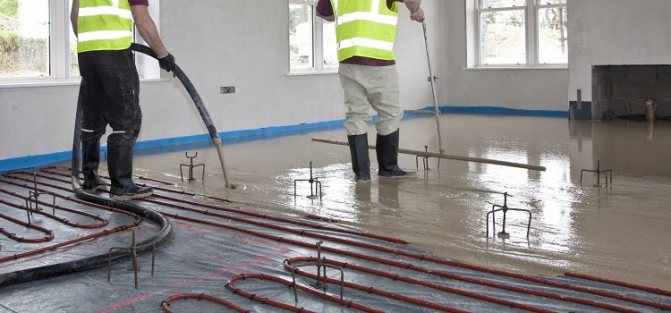
Can polypropylene pipes be poured with concrete? What conditions are necessary for this
Overhaul in residential premises of multi-apartment or private houses provides for the replacement (modernization) of elements of the heating system. The need is associated with a reduction in the cost of paying for energy resources during further operation and giving an aesthetic appearance to rooms.
Sometimes the owners decide to hide the heating pipes under the floor covering or in the walls of the room. In this regard, they are interested in the possibility of using plastic pipes for these purposes and the question is, can a polypropylene pipe be poured with concrete? How long is the service life of the communications located under the screed?
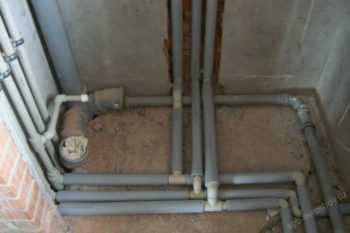
Concealed pipe placement
Characteristics and application of polypropylene pipes
To determine the possibility of installing polypropylene pipelines under the screed, it is worth referring to their characteristics. Note that polypropylene is one of the polymer variants, the components of which are combined with derivatives of ethylene gas. The material is stable when interacting with an aggressive environment and alkaline solutions, while the operating conditions declared by the manufacturer allow a difference in operating temperatures from -10 to +110 degrees.
The advantages of polypropylene:
- the term of use with heat loads without changing the quality and external is at least fifty years, and when organizing cold water supply, it is twice as long;
- the working pressure in the water supply or heating system can reach 20 bar;
- constant contact with the water mass of the inside does not provoke the formation of scale;
- the noise of flowing water is absorbed by the walls of the products;
- propylene has properties of low thermal conductivity, which prevents the formation of condensation on the outer walls;
- the product is lightweight and involves installation even by one person;
- when using a special tool, the products are connected and assembled in regular places in a short time;
- elasticity helps to give the turns the given bends;
- after installation of products, additional maintenance is not required;
- affordable price of the product and fastening elements.
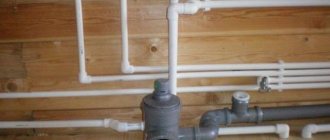
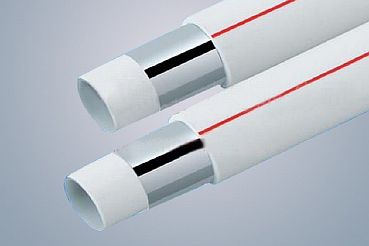
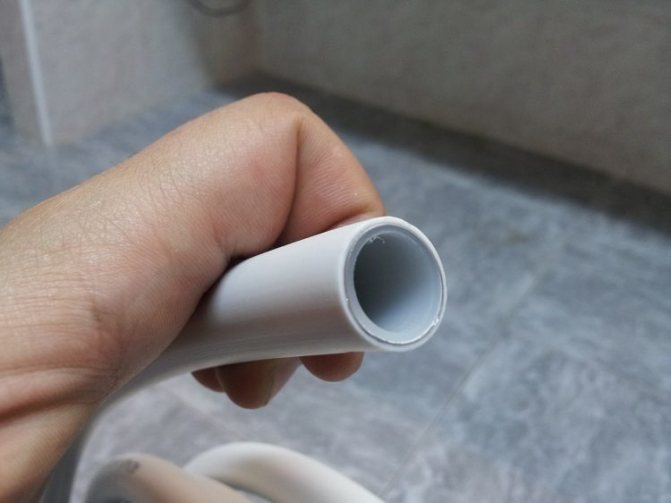
Hot water pipes
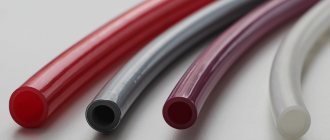
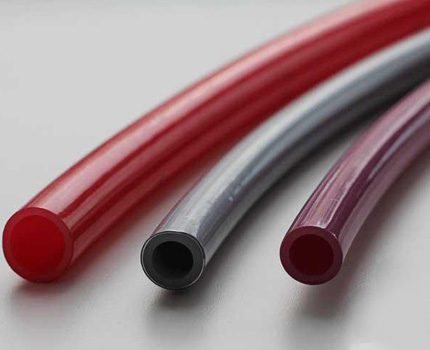
On the construction market there are polypropylene pipes of different colors. This fact does not determine the properties of the material from which they are made, with the exception of black, which helps to protect against UV radiation. The properties of the product are determined by the markings applied to the surface:
- РРВ. The defining characteristic is the increased mechanical strength due to the reinforcement technology during manufacture. The application is recommended for heating and water supply systems, including under a concrete screed.
- RRH. Marking is applied to products of significant diameters, the size of which allows them to be used in ventilation, sewage, cold water supply systems.
- RRK. The most used brand of polypropylene products. It can be used in cold and hot water supply systems, heating.
It easily transfers thermal and mechanical stress.
Cold water pipes
Important! The price of polypropylene pipes and fittings differs in each region of the country. In this regard, before purchasing, it is recommended that you familiarize yourself with the characteristics of the products presented in stores and choose copies that are optimal in price and quality.
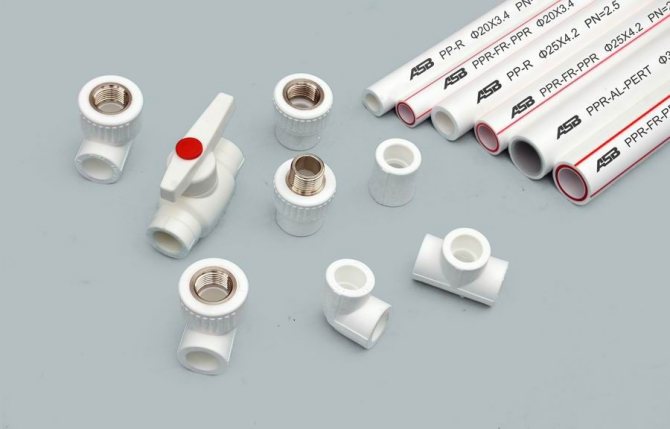
Application features
The technology for manufacturing polypropylene pipes does not exclude the linear expansion of the product when exposed to high temperatures. Correct selection of a pipe with the required properties and installation of supports with the organization of expansion joints will make it possible to compensate for this disadvantage. Any system includes branches from the central pipeline, direct connection and the creation of turns at different angles, while differences in pipe diameters are not excluded. The use of fittings, which are divided into the following types, simplifies the solution of these problems:
- flange type;
- crimping device;
- using a threaded connection;
- welded structure.
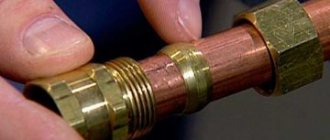
Polypropylene fittings are used to connect pipes made of the same and other materials. This effect is achieved by placing chromium-containing or brass inserts in the inner part, which determine the technical possibility of connecting to plumbing devices and creating transitions.
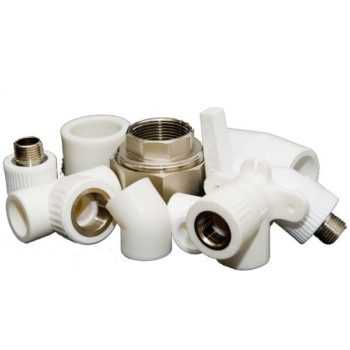
Fitting
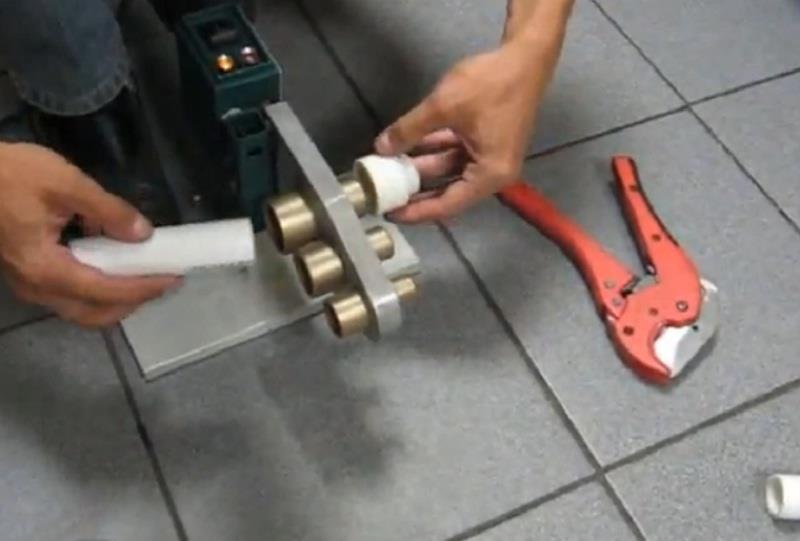
Practice shows that the main reasons for the occurrence of ruptures of heating pipes under the screed are a gross violation of the installation technology and poor-quality soldering of fittings at the joints of products.
The soldering process is not difficult for DIYers. The device for connecting pipes is represented by a soldering iron with marked nozzles of various diameters. Before industrial brazing, it is recommended to carry out a trial thermal connection of materials on small pipe pieces and unused fittings. Using combined fittings, it is possible at the design stage to ensure the optimal pressure in all parts of the heating structure, while preventing unnecessary costs for using pipes of a larger than necessary diameter.

Soldering polypropylene pipes
Important! The connection of polypropylene pipes with the external location of the aluminum amplifier requires its removal for the immersion length into the abutting element. Otherwise, all soldered elements must be dust-free. Degreasing is recommended.
Installation technology
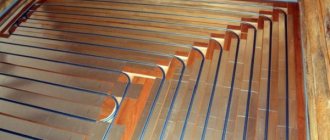
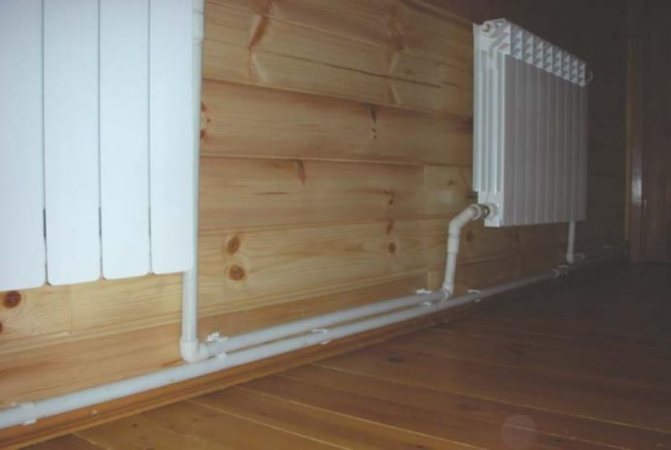
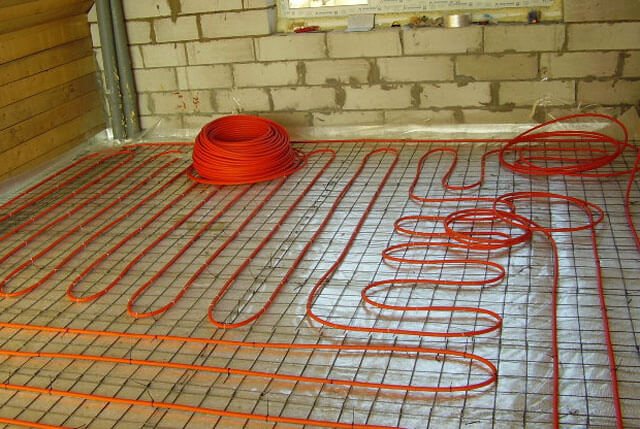
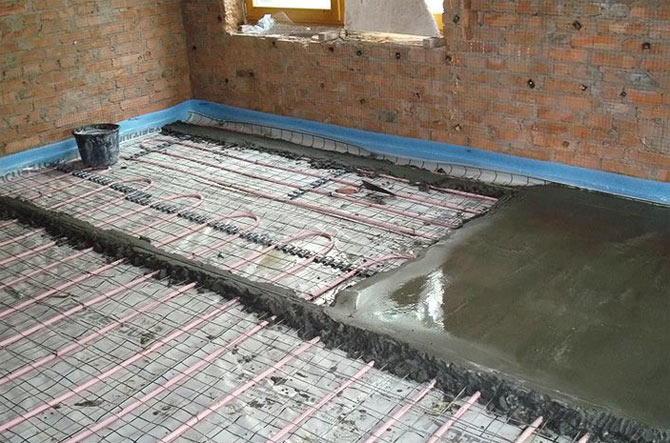
In a separate category, polypropylene pipes are distinguished for organizing a warm floor.Their characteristics allow laying in a concrete screed without fear that the system will rupture. The basis for such a statement is the pipe-laying technology, in which the joints are above the floor surface, and only whole sections of the pipeline are silted up with a mixture.
The installation procedure for laying a water-heated floor is represented by the following measures:
- It is advisable to carry out a full calculation of the required material and accessories and draw up a scheme for laying polypropylene pipes. When calculating the number of products, the form of laying (serpentine, spiral and other optimal for a given room) is taken into account.
- The surface of the rough screed is cleaned of construction debris.
- The waterproofing layer is laid sequentially, then the heat-insulating material is mounted.
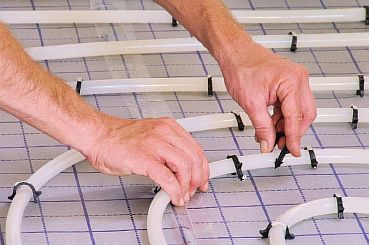
- A metal mesh is laid as a base over the entire area of the room covered by the heating circuit. Products are directly attached to it using plastic clamps or iron wire.
- All heating circuits are connected to a pre-formed manifold. The system is tested with parameters higher than the operating parameters. The temperature to the operating temperature is raised gradually.
- After checking, fill in with a final screed and lay the floor covering.
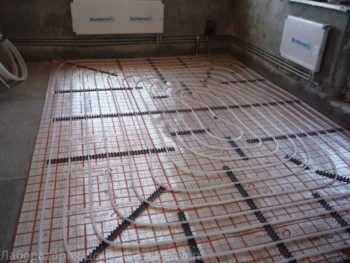
Underfloor heating under the screed
Important! If there are signs of pipe breakage under the screed, it is necessary to highlight the local area of the floor surface where the pipe was damaged, using the installation scheme, open the surface.
Dry the affected area and carry out repairs.
The above information indicates that the use of polypropylene products in the installation of individual heating systems is a reasonable and correct decision. Compliance with the installation rules and high-quality soldering at the joints of the connecting elements ensures a long period of trouble-free operation. The technical characteristics of polypropylene elements, which determine their reliability, allow placing communications in the cavity of the walls and under the concrete screed.
One of the options for laying polypropylene pipes is presented in the video below.
Video 1. Installation of plastic heating pipes.
https://www.youtube.com/watch?v=wn1Tq7-p4Vw
Average score of ratings over 0
laminatepol.com
Advantages and disadvantages of polypropylene
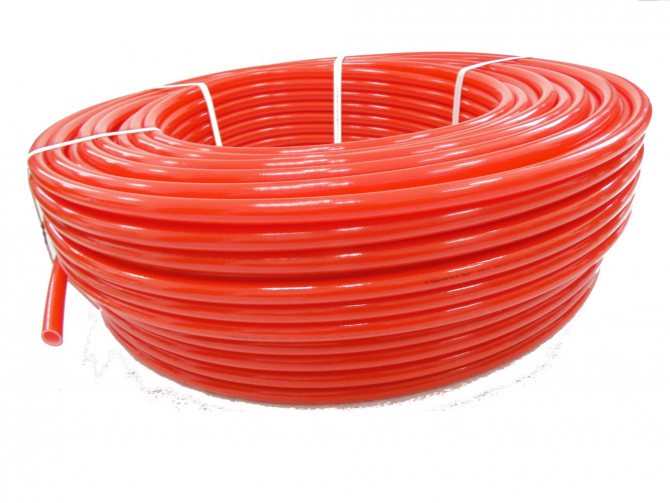
The main reason for the popularity of PPR pipes in the construction of underfloor heating is cost-effectiveness. Their cost is affordable, and this is especially important when installing a pipeline over a large area.
In addition, polypropylene circuits:
- have increased mechanical strength and elasticity;
- have an excellent level of tightness - this is ensured by the method of special soldering, the product is monolithic, almost seamless, which allows placing pipes under the screed;
- durable - subject to the rules of installation, they will last several decades without an accident;
- are lightweight - this makes the installation process simple;
- inert - do not lend themselves to aggressive substances;
- are not subject to corrosion - thus, deposits do not accumulate inside the pipe;
- have good sound insulation;
- environmentally friendly - no harmful substances are emitted when heated.
For your information! Polypropylene is highly resistant to low temperatures, which protects the coolant from freezing.
But even in cases of its freezing, the walls of the pipes do not collapse, since the polymer is able to expand, and when heated, it returns to its original form. Therefore, polypropylene pipes are ideal for laying in country cottages, where the owners do not live permanently, and the floor works from time to time.
However, this type of pipe-rolling materials has its drawbacks. Polypropylene is highly flammable and must not be installed in rooms with a high level of fire hazard (wood).In addition, the optimal operating temperature limit is + 75 degrees. It should be said that the PP has poor flexibility, and it will not work to make turns under a small radius.
In addition, ordinary PVC pipes are intended for use in the water supply and sewerage system, but they cannot be placed in warm floors, since they will not withstand thermal and hydraulic stress. Therefore, it is necessary to lay a reinforced contour in heated floors.

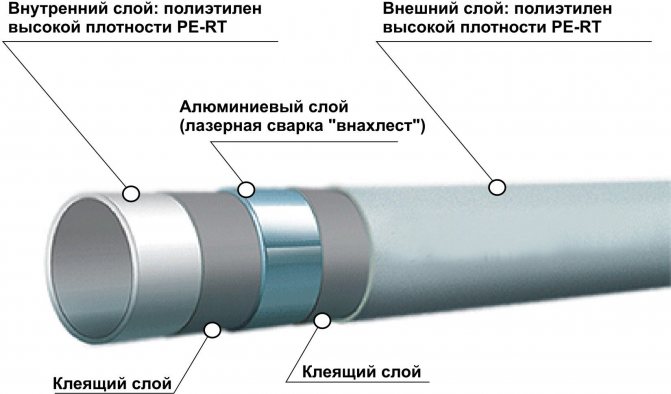


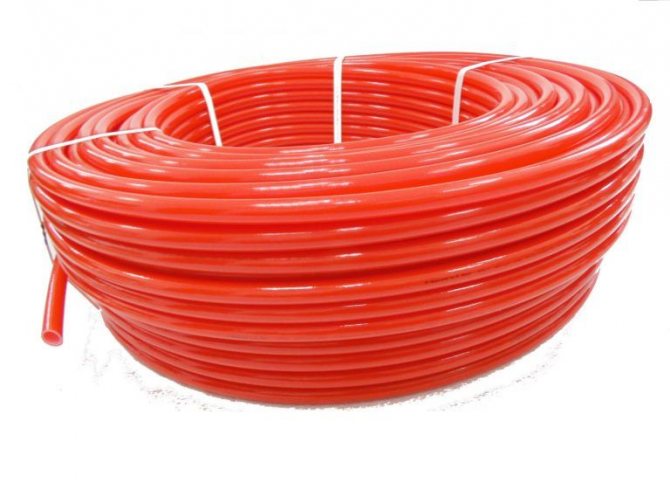
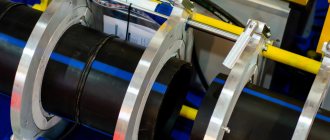
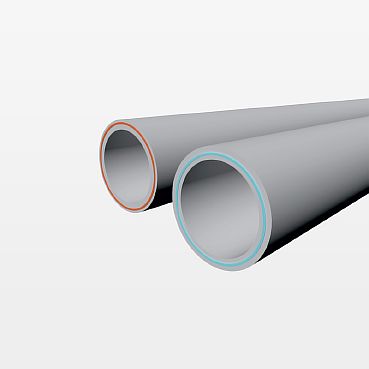
Reinforced-plastic pipes
They are leaders in the construction market.
Reinforced-plastic pipes do not corrode, have high strength characteristics, and are protected from scale deposits inside the pipes.
Reinforced-plastic pipes are manufactured in multi-layer. The outer polymer layer of this pipe protects the middle layer from mechanical stress. The middle layer is made of aluminum, which helps to maintain the shape of the pipe and withstand the high temperature of the coolant. The inner layer is made of polymer material to protect the pipe from corrosion and scale deposits. The ideally smooth inner surface of the pipe does not impede the transportation of the coolant. All three layers are held together with a special adhesive. The quality of the adhesive affects the service life of the entire pipeline. When this composition dries out, the pipe delaminates and ceases to hold the coolant.
The disadvantages of using metal-plastic pipes when installing a warm floor with your own hands is the difficulty of fastening the pipeline sections together. When installing fittings, it is important to correctly calculate the force. If the force is insufficient, a leak may appear in the assembly. And excessive force during assembly can damage the pipe, then it will need to be cut off and a new fitting applied. Ultrasonic welding is an alternative to fitting connections.
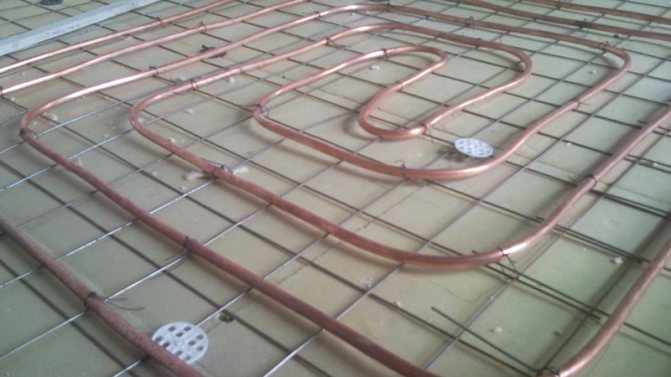
The ideal solution for the installation of underfloor heating pipes is the use of copper pipes.
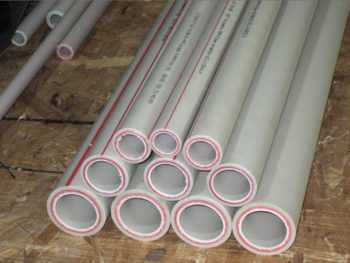
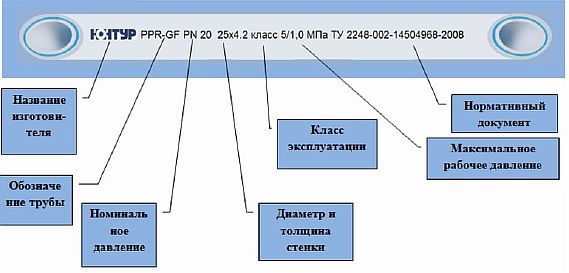
Polypropylene pipe marking
Currently, there is a wide variety of products in this segment on the market, which have the following markings:
- PN 10 - is placed on ordinary polypropylene pipes with a homogeneous structure. They are recommended for use in water supply systems with water temperatures up to 20 degrees and pressures up to 10 atm. Pipes with this marking usually have a diameter of 20 to 110 mm.
- PN 16 - denotes a single-layer product that is suitable for installation in warm water floors. Let the heating agent heat up to 80 degrees and the pressure up to 10 atm. The diameter of the contours is the same as PN 10, but the thickness of the walls is much greater.
- PN 20 - marking of homogeneous pipes, they have a permitted heating level of the circulating heat carrier up to + 95 degrees. The working pressure in this case is not more than 6 atm, and the diameter is from 20 to 110 mm.
- PN20 AL (PN20 GF) - installed on polymers with an aluminum reinforcing layer or fiberglass. The rest of the indicators coincide with PN 20. This type differs from other consumables in the coefficient of thermal expansion - it is less.
It is very important to take this marking into account when choosing a product for certain operating conditions, the effectiveness of the warm floor depends on it.
Polyethylene pipes
For the installation of underfloor heating, it is worth choosing pipes made of cross-linked polyethylene. The advantages of this type of pipe when laying in a screed are reliability, strength and resistance to high temperatures.
Cross-linked polyethylene is obtained in the process of polymerization, as a result of which the ethylene molecules seem to be cross-linked together, providing the material with the maximum density (for more details: "Advantages of cross-linked polyethylene pipes for underfloor heating, installation rules"). 4 methods of polyethylene crosslinking have been developed, differing from each other in the percentage of crosslinking. The higher the percentage, the higher the density of the polyethylene, and hence the mechanical strength.
Advantages of XLPE pipes:
- Corrosion resistance. Resistant to acids, alkalis, organic solvents;
- Elasticity. Pipes do not lose strength when the temperature drops to -50⁰С, as well as in cases of water freezing in them;
- Resistant to high temperatures. They can be operated in systems with a constant coolant temperature up to 90⁰С. Withstand temperature surges up to 120⁰С.
The disadvantage of using these pipes in the underfloor heating system is the need to use a large amount of fasteners, since they poorly hold the given configuration of the circuit. When installing XLPE pipes in a screed, you need to be careful, as they are easily damaged.
Creating a diagram and calculating the number of pipes
Before starting work on the installation of a water-heated floor made of polypropylene, you need to prepare a project and calculate everything.
The drawing is done on graph paper, it reflects the scheme and the laying step.
Project preparation
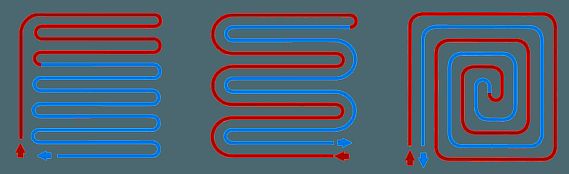
The water underfloor heating pipeline can be laid according to the following schemes:
- "Snake" is a simple option, but it has a drawback - the coolant cools down when passing through the pipe, and at the end it will be colder.
- "Spiral" - with this method the heating is uniform, therefore it is more popular.
- "Double snake" - in this case, the heat is distributed evenly over the floor surface.
When choosing a scheme, the degree of heat transfer of the structure is taken into account, since the efficiency of the floor will depend on this. To do this, you need to know: the area of the room, the material from which the walls, ceilings and thermal insulation are made, the type of flooring, the diameter of the contour and its material, the temperature of the coolant.
After choosing a laying scheme, it must be applied to paper. It is recommended to make the step between the pipes from 10 to 30 cm, and the loop length is not more than 80 meters. From the walls, the contour is laid at a distance of 20 cm. On the drawing, the place of installation of the manifold cabinet should be noted.
For your information! If warm water floors are used as the main heating, then the pipeline should be laid in increments of 12-15 cm.
Calculating the size of the pipeline
To determine the footage of polypropylene pipes for underfloor heating, two methods are used. One is to measure the size of the pipeline on the drawing with a ruler, and then multiply this indicator by the appropriate scale. A margin of 10% for trimming is added to the result.
The second way is with a thread. A thread is placed on the floor, according to the contour laying pattern. Then, it just needs to be measured - this will be the size of the pipeline. Just as in the first case, you need to add 10% of the stock.
Important! For each room, the length of the pipes must be calculated separately.
Underfloor heating design and execution
This system saves usable floor space as it sits under any floor covering or cement screed. Do-it-yourself warm floor made of polypropylene pipes can be arranged by pouring them with concrete or other plasticizer. At the same time, a coolant circulates through them and evenly distributes heat, starting from the bottom, throughout the room.
The appearance of the underfloor heating system
In this case, the heat source can be a boiler or other types of heating. Temperature sensors ensure timely shutdown of the system immediately after the set temperature is reached, which saves energy.
Do-it-yourself installation of a warm floor is performed in several stages:
- project preparation;
- laying and connecting pipes;
- checking and monitoring system performance;
- arrangement of screed;
- finishing coating.
Let's take a closer look at all the stages.
You cannot make a warm floor without preparing a project, which is needed to calculate the need for materials, the heated area, the temperature that can ensure the operation of the system, the location of the boiler and other nuances, including the diameter and length of the pipes. For the efficient functioning of heating, all calculations will be more correctly entrusted to professionals.
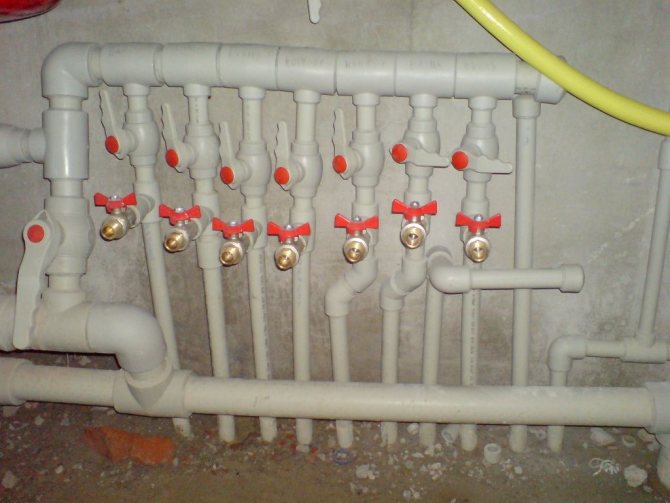
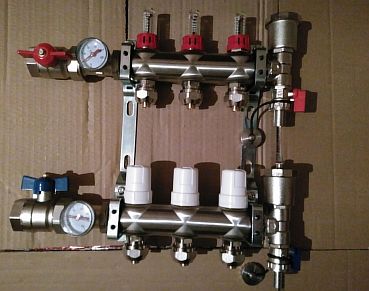
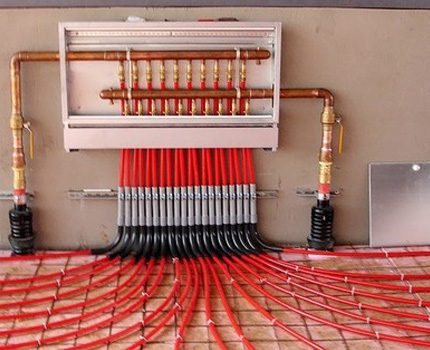
The installation of the system begins with the installation of a manifold cabinet, which is necessary to connect the circuits to the base line, with the help of which warm water is supplied and cooled water is taken.
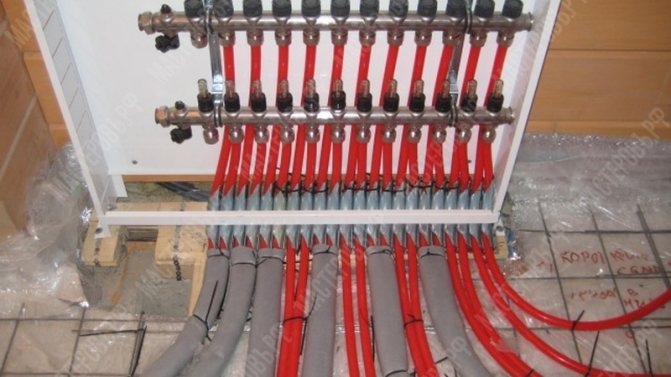
Distribution manifold cabinet
The cabinet is installed above the floor level so that the pipes go down, while ensuring air exhaust and the normal functioning of the system.
One of the key points when installing a heated floor is waterproofing, which can protect the room from water leaks. For this purpose, film materials such as polyethylene are often used.
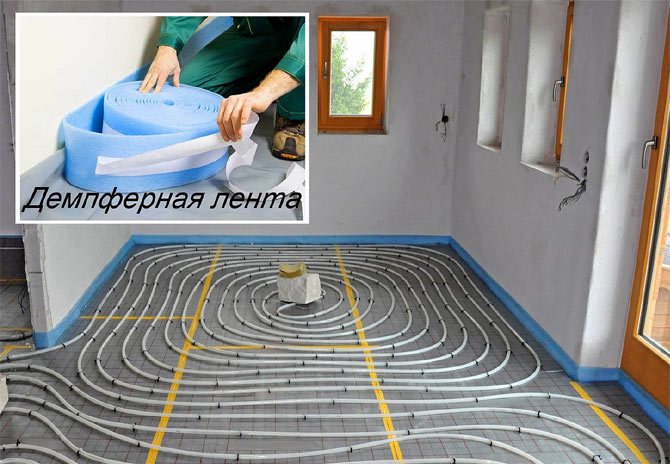
To prevent cracking of the screed during thermal expansion, experts recommend using a damper tape, which is glued around the perimeter of the room.
In order to reduce heat losses, thermal insulation is installed that can cope with heavy loads and has a high thermal resistance. For this purpose, a foil coating is used, which has excellent mechanical strength, a low compression ratio and evenly distributes heat over the floor surface. Reinforcing metal mesh is used to fasten the pipes and fix the screed.
Preparatory work before installing the system
For the correct installation of the "pie" of a warm water floor made of polypropylene pipes, preparatory work should be carried out. Step by step, the actions look like this:
- The old flooring is removed and the screed is dismantled.
- An assessment of the base is carried out, if cracks are found, they must be repaired. But first, you should clean the surface of concrete chips and make a primer. If the subfloor cannot be renovated, a thin layer of leveling screed must be poured.
- The collector cabinet is installed, on the wall or in a specially equipped niche, at a distance of 1 meter from the floor. This must be done before laying the "pie" of the floor, as the installation process is rather messy.
- A waterproofing layer is laid, thick polyethylene is suitable, it is able to retain moisture. The film needs to be laid with an approach to the walls - 10 cm. If the area of the room is large, and several strips of film are put, then they overlap, and you can connect them together with adhesive tape.
- A damper tape is glued around the perimeter so that the concrete screed does not crack when heated.
- Thermal insulation is being installed. It is possible to lay a different material - roll or sheet. When choosing expanded polystyrene extruded boards, there should be no gaps between them, therefore, the material should be laid in two layers. For greater tightness, the joints can be stitched with polyurethane foam.

- A foil substrate is laid, it is necessary to reflect heat rays. The heat is directed upward, thereby heating the floor and the air in the room. The connection of the material is carried out using adhesive tape. If the thermal insulating material is with a foil layer, then this substrate is not needed.
- A reinforcing mesh is placed to give strength to the structure, and a pipeline can also be attached to it.
Strict adherence to all the rules for carrying out these works contributes to the efficient operation of the system.
Installation of pipes in a concrete floor
When installing in concrete floors, polypropylene pipes are often used. You can install a warm floor made of polypropylene pipes into a concrete screed with your own hands, thereby saving money.
When planning the installation of the heating system, keep in mind that it will take you at least a month from the start of work until the screed is completely dry. In the installation room, the operating temperature should be kept above 5 ° C.
When installing in an apartment, it is worthwhile to conduct an examination and obtain permission from utilities. Concrete floors should not be placed in fully wooden houses.
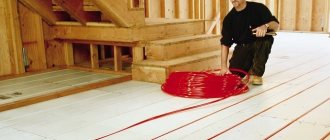
Laying polypropylene pipes
Installation is a crucial stage in the construction of a water heating floor. It is necessary to lay the pipeline in accordance with the developed scheme - "snake" or "snail". You need to start from the collector, the second end of the pipe after laying, must also return to it.
Important! When working with polypropylene pipes, the room temperature must be maintained at +5 degrees.
The pipes are fastened in several ways:
- To the reinforcement mesh using plastic clamps or wire is a reliable option. You cannot fix the contour tightly, this can damage it.
- To a heat-insulating product with dowels.
- Using thermal insulation mats with lugs. The pipeline is laid between them in the grooves, thereby firmly fixing.
For your information! Fasteners should be installed every 80 cm.
Surface preparation. Features of warming the base under the warm floor
The old screed is completely dismantled down to the base. Unlike the process of forming a conventional screed, when installing a warm floor, you should level the floor horizontally at the initial stage if there are differences of more than 10 mm.
Next, a layer is laid on the cleaned surface. A damper tape is fixed around the entire perimeter. It will compensate for the thermal expansion of the floor when heated.
Important: When using a water underfloor heating, in the device of which there are several circuits, the damper tape is also laid along the line between the circuits. ... In order for the heat not to go down, it is necessary to insulate the base of the floor.
Depending on the location of the room and the type of floor, as well as the target orientation of the heating system, the appropriate insulation is selected:
In order for the heat not to go down, it is necessary to insulate the base of the floor. Depending on the location of the room and the type of floor, as well as the target orientation of the heating system, the appropriate insulation is selected:
- If the warm floor is an addition to the main heating system, then it is enough to use polyethylene foam with a reflective foil coating as a substrate for the warm floor (penofol).
- For apartments with heated rooms on the floor below, it is enough to use sheets of expanded polystyrene or extruded polystyrene foam with a thickness of 20 to 50 mm or other durable insulation of a suitable thickness.
- For apartments on the first floor with an unheated basement or houses in which the floor is located on the ground, more serious insulation should be used in the form of a mound of expanded clay and expanded polystyrene sheets 50-100 mm thick.
Tip: You can use specialized heaters for warm floors. On the one hand, such materials are already equipped with special channels for laying pipes for underfloor heating systems.
A reinforcing mesh is laid on top of the insulation. It is necessary to secure the screed layer, which will cover the entire underfloor heating system. Among other things, it is possible to fix the underfloor heating pipe to the mesh later, instead of using special fastening strips and clips. In this case, ordinary plastic ties are used.
Scheme of the device of the surface of the warm floor
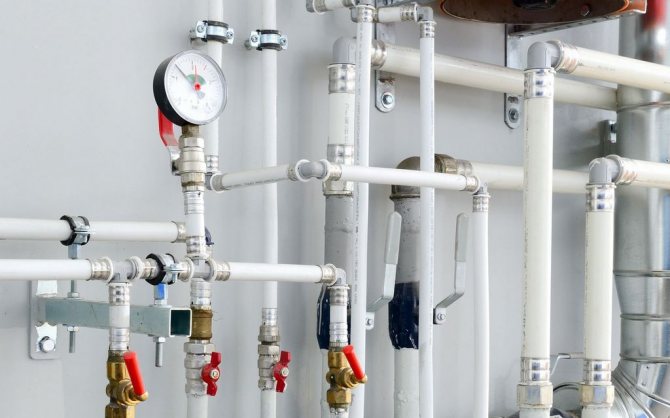
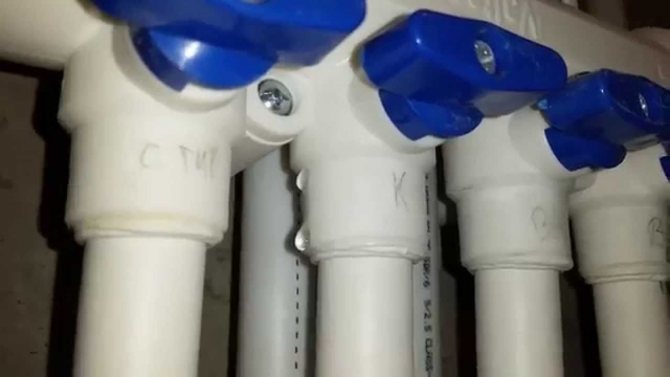
Floor connection
The first step is to assemble a device, which consists of a pressure gauge, an air valve, an adjustment and drain cock, and a mixer.
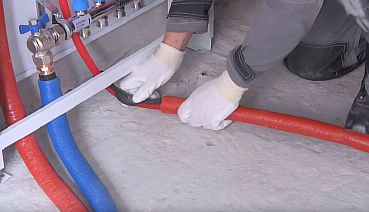
It is possible to mount a ready-made collector, with the required number of taps, into the installed cabinet. Pipes are connected to it for supplying a heated coolant with a nut and a sleeve, as well as a return hose.
After that, floor contours are connected to the collector group. One end of the pipe to the supply tap, and the other to the return.
Screed device rules
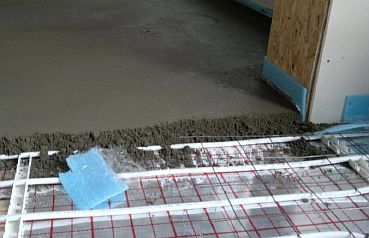
If the hydraulic tests have ended successfully, the pipes have not been depressurized, and the system is completely filled with the coolant, then the pipe installation stage is completed. Now you can proceed with the screed device and finishing.
For the screed device, it is necessary to use a purchased or self-prepared mortar based on M300 cement. The minimum height of the screed to protect polyethylene pipes is 3 cm above the laid pipe. This thickness will be optimal for uniform heat distribution.
In most cases, the screed is made solid without expansion joints. Thermal seams are necessary when:
- the room has an area of more than 33 m2;
- the length of the room is more than 10 m;
- the room has a complex configuration.
A damper tape is used to create the seams. Thermo seams are treated with a sealant.
Do I need to do reinforcement before pouring the screed? There is no definite answer to this question. Experience shows that the system functions perfectly without reinforcement, but at the same time the reinforcement layer gives the screed additional strength. For reinforcement, you can use a 100x100 mm mesh made of metal or plastic.
Also, reinforcement will be useful only if the reinforcing mesh will not just lie on top of the pipe system, but "drown" in the solution, while solidifying while being inside the screed.
The correct reinforcement device complicates the installation of the screed, therefore, when there is no experience or confidence that everything will be done correctly, this stage can be skipped. After pouring the screed, the system can be started up no earlier than 25-30 days.

Any floor covering can be used as a finishing - the top layer of the "cake"
System testing
Before filling the pipeline with a concrete screed, it is imperative to test the device, since in cases of malfunctions or leaks, it will be difficult to eliminate them under the concrete.
To check the system, each circuit is individually filled with water, and all control valves are opened, which helps to remove air from the pipes. At the same time, the pressure is set 1.5 times higher than the working pressure, but not less than 6 bar.
After 3 - 4 hours, the pressure drops, and it needs to be raised again. This must be done three times. After that, the floor is left for a day, and if during this time the pressure has dropped by no more than 2 bar, then the system is installed correctly.
For your information! If a leak or malfunction is found, then they need to be eliminated, the leaks must be soldered, and then the floor testing must be repeated again.
Installation
Heating system installation takes place in several stages.
Lining
For effective heating, the floor must be prepared prior to installation.
If there is no base as such, first make a rough screed from a sand-cement mortar. If concrete slabs act as the base, they are leveled, covering up all the cracks and ensuring that there is no level difference above 1 cm.
The rough screed is cleaned of dirt and dust, after which a layer of waterproofing is laid. The material for this is usually a thick film. Experts recommend placing the film on the walls at a distance of 10–20 centimeters. In a room with high humidity, in country houses, this is a must. The film is laid with an overlap of 10–20 centimeters and glued with mounting tape at the joints.
A damper tape is glued around the perimeter of the room. Its edges should be about 20 mm higher than the future screed. After the screed dries, the edges of the tape are usually cut off.
Then, thermal insulation is laid so that the warm floors heat the room most efficiently. There are various heat-insulating materials, both rolled and in the form of plates; the choice of coating depends on personal preference, price, thickness. All gaps between them should be sealed with polyurethane foam to exclude the possibility of heat leakage. The thickness of the thermal insulation when installed on a cold floor or ground should be at least 5 centimeters, otherwise 3 centimeters are sufficient.
If the insulating material is not foiled, a foil film is placed on top of it. At the joints, it should be glued with aluminum tape.
We recommend that you familiarize yourself with: How to choose and correctly use polypropylene adhesive?
Upon completion, the floor is ready for laying the heating circuit.
Pipe laying
When working with polypropylene indoors, the operating temperature must be kept above 5 ° C.
The pipe can be fastened in two ways: using dowels through thermal insulation and fastening to a reinforced mesh. The preferred option is to attach to the mesh as more reliable. Plus, the mesh allows you to strengthen the screed layer, which will cover the heating system.
The mesh for fastening is placed on a heat-insulating substrate. Then pipes for a warm water floor are laid along it according to a previously selected scheme and fixed with plastic clamps or wire. The fastening must not be tightened too tightly - this can lead to deformation of the pipes during operation and reduce their service life. At the junction point, they are fastened together using a special welding machine. It comes in several flavors and is easy to operate.
Laying begins with a collector. First, one end is attached to it, and after laying the pipes throughout the room, the second is connected.
Testing
After laying and fixing the pipes, they are connected to the manifold and tested. For testing the heating equipment, water is supplied, while at the same time etching out the air. In this case, the water pressure should be higher than the operating pressure, but not more than 6 bar.
After a day, check the pressure, and if it has dropped by no more than 2 bar, then you can start coating. If the pressure is less, then an error has occurred in the gasket.
The final stage
After successful testing, the concrete screed is laid. If the room is small, you can additionally use another reinforcing mesh, which is placed on top.
For a concrete screed, a special mixture is prepared with a plasticizer; in the absence of an additional reinforcing mesh, it is also recommended to add polypropylene fiber. The screed is laid at temperatures from 5C. It is worth remembering that the screed needs 28 days to dry completely.
The inclusion is carried out after the screed has hardened. Before the first start-up, de-air the pipes.
After the screed has dried, you can start laying the flooring. The choice of flooring is carried out among materials with special markings. Tiles are considered the ideal material for underfloor heating.
Filling the screed
For pouring the screed, a cement-concrete mortar with plasticizers is used, which can be made independently or bought ready-made.
To give more strength to the structure, you can lay another reinforcing mesh over the pipeline. If additional reinforcement does not fit, then fiber from polypropylene fibers should be added to the solution.
The room temperature when laying the screed should be + 5 degrees. First, you need to install a beacon profile, which will make the surface even.
You need to start filling from the far corner of the room, in stripes, and finish at the exit. Leveling the mortar is carried out using a rule.
Depending on the pipe diameter, the screed thickness ranges from 30 to 70 mm.
It will take 28 days for the solution to dry completely. Only after the screed has hardened can the topcoat be laid. The best type is ceramic tiles, especially for a bathroom or toilet, although installation of flooring from a different material is permissible.
Important! Until the concrete mixture dries well, it is forbidden to turn on the warm water floor. Before the first start-up, bleed all the air.
As you can see, the installation of a water floor with heating from polypropylene pipes is not difficult. The material is convenient to work with, so everyone can make a warm floor made of polypropylene in a private house or apartment with their own hands.
Step-by-step installation of XLPE underfloor heating
The technology of the device consists in the step-by-step creation of layers that are stacked in a strict sequence. The total thickness of the system will be 10-20 cm, depending on the characteristics of the screed, the insulation and reinforcement used.
Preparatory work before construction
It should be borne in mind that the average load created by a “warm floor cake” on a concrete base is 300-350 kg / m2. Therefore, the floors must be designed for this weight.
When installing a heated floor using pipes made of cross-linked polyethylene, the following work steps are required:
- Selection of pipes. Calculation of the length of the contour. Drawing up a laying scheme.
- Preparation of the base. Laying waterproofing and insulation.
- Installation of pipe contours. Hydraulic tests.
- Pouring the screed and finishing the selected floor covering.
- Putting the system into operation.
When buying collectors, it is better to give preference to devices with balancing valves and flow meters, which in the future will simplify system setup, and in the event of a malfunction, they will help to quickly identify the problem circuit.
To build a heated water floor, you will need the following:
- water heating boiler for heating the coolant;
- expansion tank;
- circulation pump for forced movement of the coolant;
- plumbing fittings: fittings, ball valves;
- XLPE pipe reel;
- fasteners for insulation boards and PE pipes;
- distribution manifold assembly;
- damper tape;
- insulation and reinforcing mesh;
- screed mortar or dry screed mixture.
All materials should be prepared in advance so that in the process of arranging a warm floor, you will not be distracted by going shopping and buying missing components.
It is better to entrust the choice of a distribution manifold to professionals or calculate it yourself using special calculator programs.
Selecting and creating a pipe laying scheme
For living quarters, three layouts are used: "snake", "shell" or "snail" and "double helix". The spiral "snail" is the simplest option, providing a uniform distribution of heat energy. According to this scheme, water-heated floors are most often built, because all angles in it are 90º.
Laying according to the “snake” pattern is somewhat more difficult, because it involves 180º turns. But it is great for the construction of a cross-linked polyethylene system, because pipes made of this material bend freely, the throughput is practically not reduced in the loops.
The choice of the installation scheme depends entirely on the characteristics of the room. If we are talking about the arrangement of large-sized areas, the installation is carried out according to the "double spiral" scheme. It is also used if the allocation of zones according to the intensity of heating is planned, for example, in the hall, in front of the entrance group or in front of the large terrace.
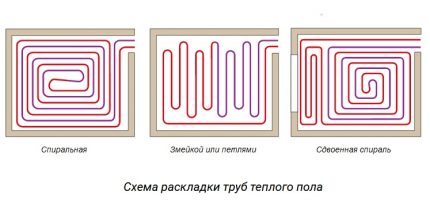
"Snail" guarantees uniform heating of the floor, "Snake" - the maximum temperature at the edge points of the room
For simple spiral and serpentine circuits, the optimal length of the circuit will be 60-80 m. For rooms where the length is much greater than the width, the length of the circuit is 100-120 m, but provided that pipes of a larger diameter are used.
The distance between the pipes (pitch) is 10-35 cm. The wider the step, the less heat will come from the floor.
At the peak points, where the maximum heat loss is observed, the step width should be minimal, for example, near the front door it should be 10-15 cm, increasing when approaching the center of the room. The distance of the pipes from the walls along the perimeter is 30-45 cm.
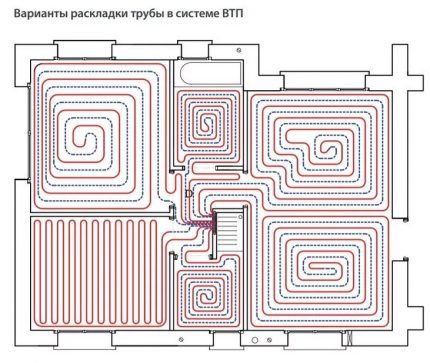
The collector unit for underfloor heating is, if possible, located in the center of the apartment (floor of a private house). So all points of the heating floor system will be supplied with a heat carrier of approximately the same temperature. In areas of increased heat loss, near window and door openings, the step between the pipes is reduced to increase heat transfer.
Selection and calculation of the number of pipes
When choosing pipes made of cross-linked PE, it is necessary to decide what diameter of the product is better to purchase.As practice shows, the best option for installing a warm floor in your own house or apartment located on the ground floor will be a 16 mm pipe.
For rooms whose length is several times the width, 20 or 25 mm pipes can be used. The standard wall thickness is suitable - 2 mm.
To calculate the required number of polyethylene pipes, you can apply the formula:
D = S / M x k
Where:
- D is the estimated length of the pipe;
- S is the area of the heated floor;
- M is the middle step chosen according to the scheme;
- k - safety factor (for rooms up to 30 m2 it is 1.1, more than 30 m2 - 1.4).
It should be remembered that the maximum length of a XLPE pipe depends on the diameter - the larger the diameter, the longer the heat transfer pipe can be. For products with a diameter of 16 mm - up to 90 m, 20 mm - 120 m, 25 mm - 150 m.
Too long pipes with a small diameter increase the risk of problems with the circulation of the coolant
Preparation of the base for pipes
When the calculations of the required number of pipes are completed, you can proceed to preparing the base for the water floor heating circuit.
This phase includes the following workflows:
- removal of old flooring and old screed;
- laying an insulating layer;
- installation of insulation;
- laying a reinforcing mesh;
- damper tape sticker.
First, you need to level the base so that the drops are no more than 5 degrees (check with the building level). For leveling, you can use a sand mixture followed by tamping or self-leveling compounds. The leveled base is removed from dust and debris.
Then the waterproofing layer will be laid. The simplest type is plastic wrap.
If financial resources are available, it is better to use high-quality Russian or European waterproofing in the form of a polymer membrane. It not only reliably protects the floor from moisture, but also allows the underfloor heating system to "breathe".

To increase the parameters for heat preservation, the vapor barrier can be laid on a foil insulation-heat reflector
Behind the waterproofing comes the turn of a heat-insulating substrate, which can be used as extruded polystyrene foam. This is the cheapest and most effective way to reduce heat loss.
Of the new heaters, a cork heat insulator is considered the most environmentally friendly, but its cost is ten times higher than that of the most expensive polystyrene foam. Insulation plates 5 cm thick are attached to wooden guide rails using dowel nails. The plates are held together with glue and special staples.
As for the reinforcing mesh, when using expanded polystyrene plates, there is no need to lay it - the pipeline is laid directly on the insulation. The use of a mesh is justified if another layer of waterproofing is laid on top of the insulation.
If you do not want to overpay for insulation, then you need to keep in mind that there are special insulation blocks for the installation of a warm floor on sale, in which channels for pipes are provided. Such blocks significantly increase the cost of creating a warm floor, but they are very convenient to use.
After the mesh layer, it is time to stick on the compensating damper tape. This is done simply - a foam tape is glued around the perimeter of the room, which compensates for the expansion of the future concrete screed. Instead of a damper tape, you can use straight pieces of polystyrene foam.
After preparing the base, the heating boiler and manifold distribution unit are mounted. The boiler is connected to the water supply and power supply system (gas or electricity).
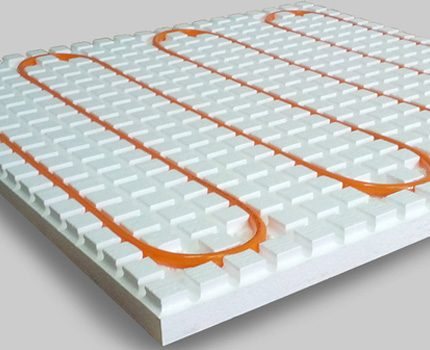
Special insulation for underfloor heating has gaps for pipes and markings for their correct laying
Installation of polyethylene pipes
Underfloor heating is laid with contours according to a pre-selected scheme. A loop is a closed pipe ring, which, upon returning to the collector, is connected to it using a fitting.
For small rooms, 1-3 circuits are arranged. To simplify installation, it is recommended to apply approximate markings on the expanded polystyrene plates. With the markings, it will be easier for you to lay polyethylene pipes and check the step size.
Before starting the installation of the underfloor heating pipeline, it is also necessary to decide how the pipes will be connected and how the polyethylene pipes will be attached to the insulation.
The fact is that pipe joints can be carried out:
- welding;
- crimp fittings;
- press fittings.
The latter is the easiest and most reliable option. To connect the pipes, it is necessary to install a movable coupling, and then carefully increase the inner diameter of the pipe to the required size with an expander.
Fasten the union all the way and push the sleeve over the pipe over it. The molded joint can withstand prolonged exposure to high temperatures and pressures up to 10 MPa.
As for the method of attaching polyethylene pipes to the insulation, this is relevant if ordinary polystyrene foam is used.
There are several mounting options:
- tightening clamps made of polyethylene;
- steel wire;
- clamps fixed with a stapler;
- fixing tracks.
The easiest and most economical way of fastening is with clamps. Consumption is 2 pcs per 1-1.5 m.

On straight sections, fastening clamps are installed every 30-50 cm, and bends - 10-20 cm
There are 10 rules for installing cross-linked polyethylene for underfloor heating:
- When laying bends, sharp bends of the material are not allowed.
- Installation work is carried out at a temperature not lower than +18 C.
- After bringing the pipe from the cold, you must wait until it warms up to room temperature.
- The maximum turning radius for pipes with a diameter of 16 mm should be 10-12 cm.
- During the installation process, it is not advisable to change the selected layout of the coolant.
- Excess lengths must be trimmed just before they are connected to the manifold.
- Do not step on, put heavy things, put tools on pipes.
- For movement along the laid pipes (if necessary) it is recommended to use large sheets of plywood to reduce the load on the coolant.
- To increase the heat preservation index, pipes emerging from under the floor at the point of connection to the collector unit can be reinforced with thermal insulation.
- The pipes must lie flat, without twisting or excessive tension.
After the circuit has been laid, the pipe returns to the manifold and is connected using a sized fitting. After that, a system test is carried out, the purpose of which is to detect defects before the system is hidden under the screed.
For testing, you need a household compressor, which can give a pressure of 4-6 bar. The coolant is fed into the pipes with the help of a compressor and left for 6-12 hours. When shooting the fastening clamps, they must be reapplied 5 cm below the previous attachment point.

It is recommended to equip the collector against a wall near the floor to reduce heat loss during transportation
Frequent errors and problems during installation
Under no circumstances should you re-crimp when installing press fittings, therefore, when clamping the press handles, you must apply sufficient force to crimp.
Be sure to remove burrs from the ends - they can clog the system.