Before starting the installation of a warm water floor in the bathroom, it is necessary to remember that such a floor cannot be done along a separate heating circuit in multi-apartment residential buildings with central heating. This is strictly prohibited by the current legislation of the Russian Federation. If you equip a water heated floor in these apartments according to such a scheme, then this will require lengthy and most importantly monetary approvals of design and estimate documentation in order to obtain permission from government agencies. But if we are talking about private housing construction or commercial real estate with autonomous water heating, then underfloor heating along a separate circuit, for a bathroom with an area of no more than 20 sq. m. is an ideal solution.
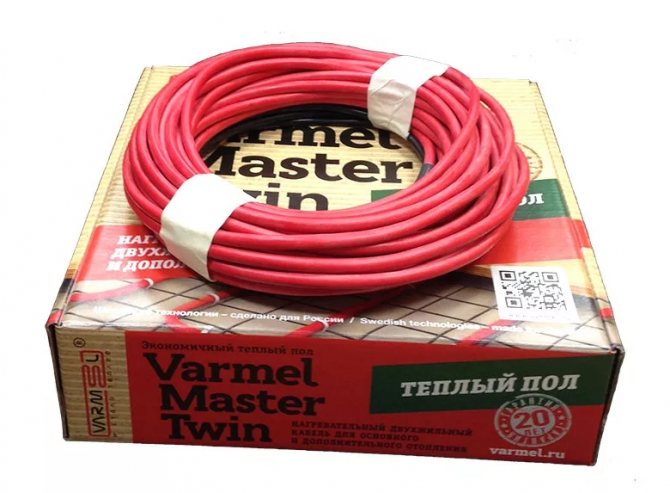
Maybe an electric heated bathroom floor is better?
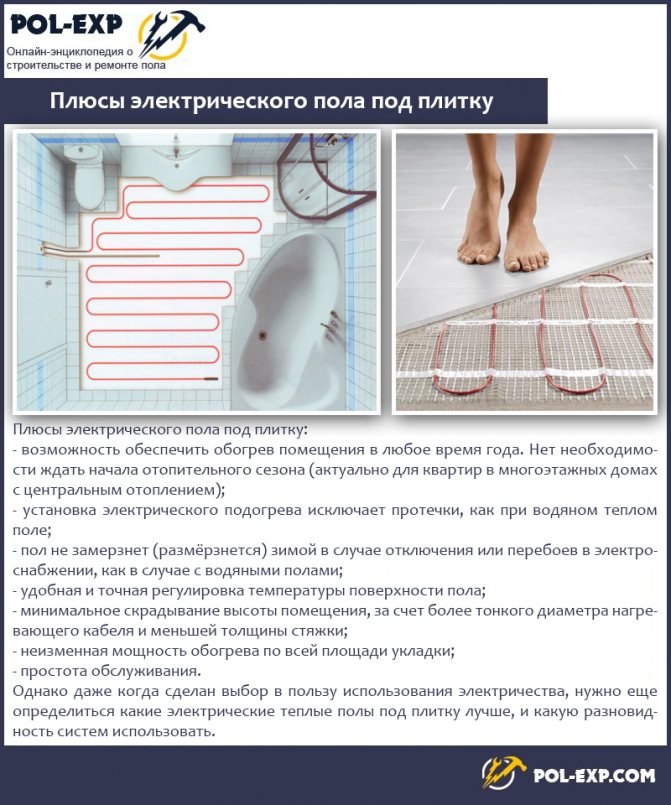
The advantages of underfloor heating with a water heat carrier over electric or infrared floors are obvious:
- There is no need to lay expensive electrical cables, the price of pipes, fittings and equipment used is much lower than the price of materials for electric floors;
- The costs incurred for the purchase of materials quickly pay off on energy savings;
- More even heating of the floor and the room, which allows you to create a comfortable temperature for a person's leg;
- Electrical fire safety. (no fire due to overheating and electric shock);
- Possibility to install under large and heavy objects or furniture.
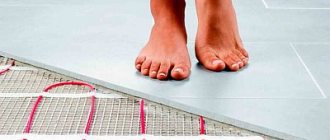
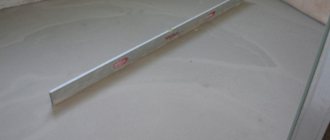
With all its advantages, a water heated floor in the bathroom and not only requires a good preparation of the building surface. This is necessary in order to get the perfect underfloor heating. It must be mounted on a surface with irregularities with a height difference of no more than 30 mm.
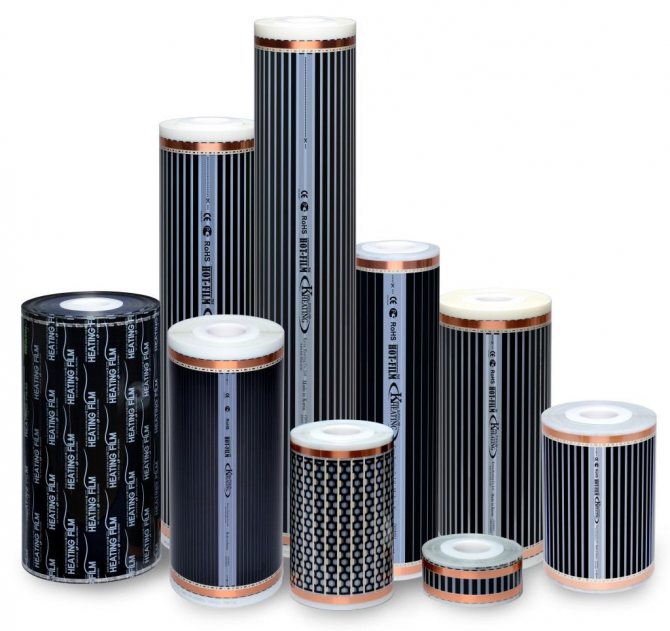
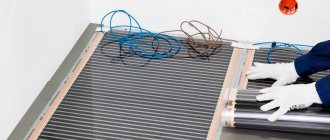
Infrared floor installation
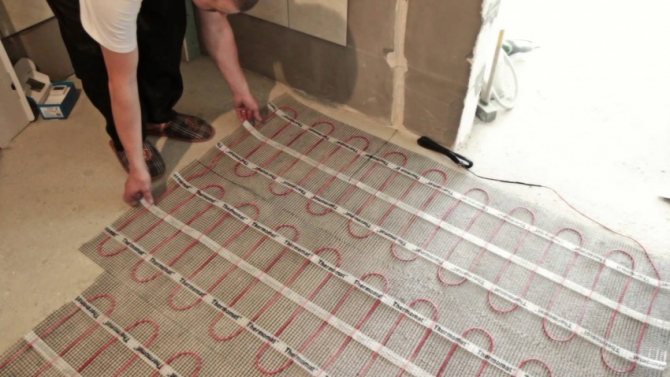
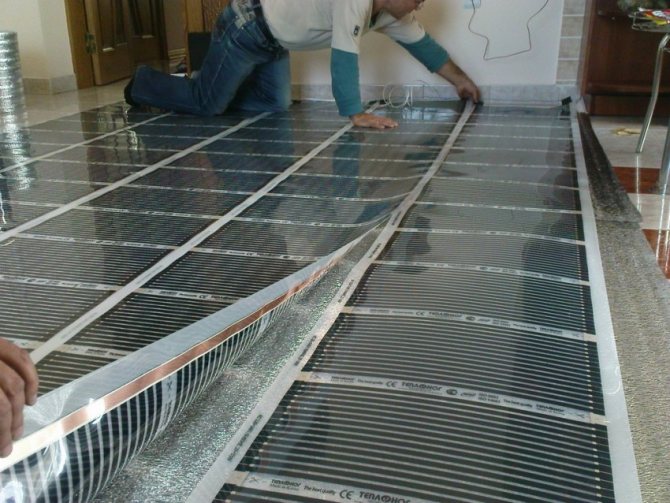
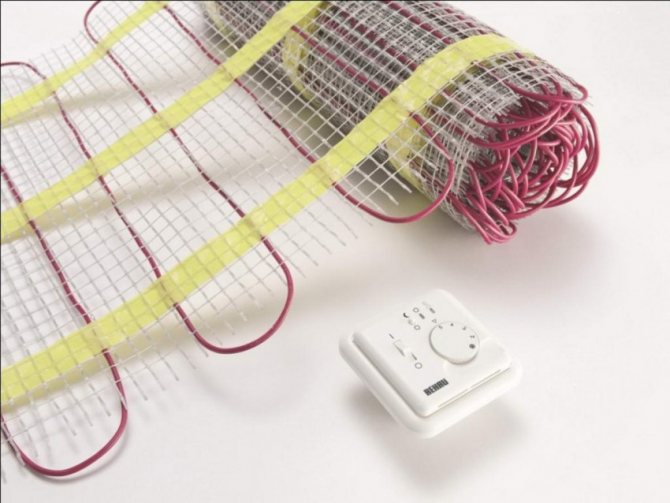
Infrared floor heating in the bathroom is a kind of electric floor. Heat loss with this type of heating is insignificant, it works silently. Installation of an infrared underfloor heating under a tile is similar to an electric floor, but there are a number of features:
- A 2 mm thick substrate with a heat-reflecting effect is used. It is needed so that not the neighbor's ceiling, but your flooring, warms up warmly.
- If such a floor is to be installed under a tile, then it is recommended to lay an assembly fiberglass mesh. Then you need to choose a material for thermal insulation that lies under the tile.
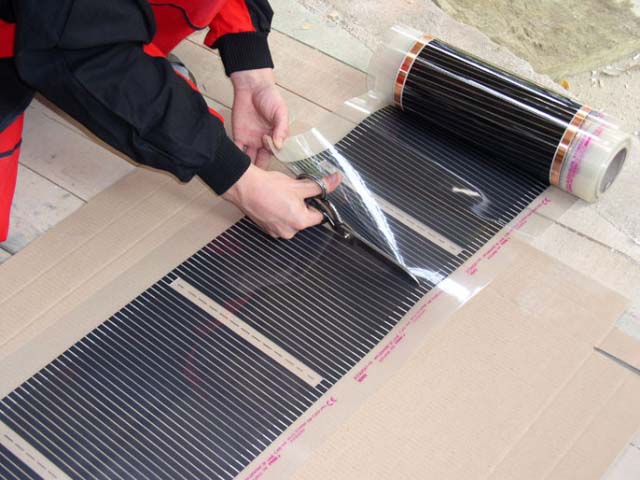
- The thermal film is adjusted to the required size along the cut line. These pieces of infrared thermal film are connected to each other, and then to the thermostat.
- The finished infrared floor is fixed with double-sided tape.
- The process of connecting to a thermostat is exactly the same as for electric floors.
The height of the underfloor heating using infrared film will be 7-8 cm.
Important! With the correct installation of the infrared floor, it is necessary to use a fiberglass reinforcing mesh. It must be nailed to the floor under the tiles. The thickness of the glue used to fix the tiles should be 1.5-2 cm, not less.
Heat exchanger for water floor. Is it necessary?

Still, some 20 years ago, during the installation and operation of such a floor, there was a problem of regulating the temperature of a separate circuit. underfloor heating in the bathroom... The problem was that when connecting a parallel water heated floor of a bathroom to a house heating system, consisting of a hot water boiler, a mixing device and a collector, it became necessary to reduce the temperature of the water in the pipes of the underfloor heating.The reason is that the boiler of the home heating system heats the water to a temperature of about 100 degrees, and to lower it to the 40-45 degrees necessary for the operation of the underfloor heating, it is necessary to install a heat exchanger. A heat exchanger is a rather bulky and expensive unit that requires highly qualified installers of thermal equipment to install it. In addition, it needs to be monitored more frequently in operation and its operation, unlike hot water boilers, is difficult and expensive to automate.


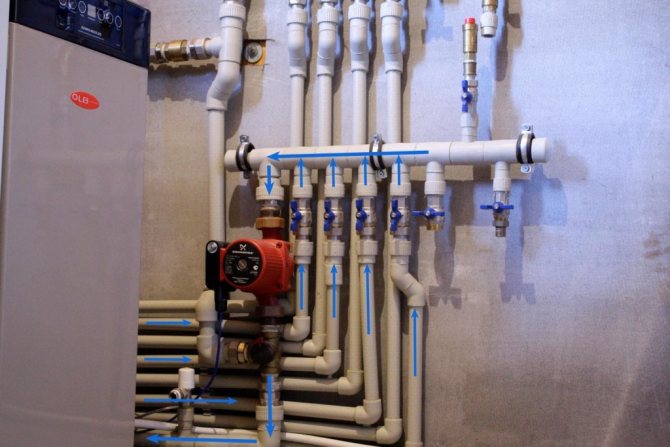
Connection diagram
One of the most difficult stages. The thing is that for a warm floor there is no need to heat the coolant to high temperatures. Here, 40-50 ° C is enough. But how do you get the temperature down? Everything is very simple - we use a collector, because it is for these purposes that it is intended.
If the underfloor heating is connected directly from the heating, then everything is easier than ever. It is important here to correctly connect the ends of the pipe structure to the nozzles of the mixing unit. It has a coolant supply comb, there is a return comb. Connect them to the ends of the pipes and carry out a test run of the system. Usually after a couple of minutes it becomes clear whether it is working correctly.

Floor filling location
Attention! It is very important to fine-tune the operation of the mixing circuit. If you purchased a factory product (manifold), then most often it is already configured. True, it is often necessary to correct the temperature regime by opening or closing the shut-off valve. If the collector is homemade, then devote a few hours to setting it up. Get the most effective results.
There is one point in this whole case that I would like to consider in more detail. The conversation is about a heated towel rail. This plumbing fixture is an integral part of the bathroom today. It's very convenient with him. So, in this article, we are interested in the question, is it possible to connect this device to the underfloor heating system. After all, there is no need for him to maintain a high temperature, and + 50 ° C is a normal indicator.
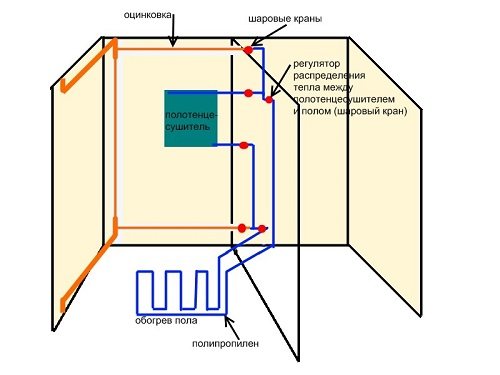
Heated towel rail in the underfloor heating system
Nothing is impossible, however, it is necessary to very clearly think over the connection diagram of the heated towel rail to the warm floor. In this case, you will have to take into account several very important points.
- An air vent must be installed in the upper branch pipe of the heated towel rail (Mayevsky's tap will do).
- This plumbing fixture necessarily cuts into the supply circuit of the underfloor heating. Its tie-in is made between the collector and the pipe floor wiring itself. That is why it is so important to install the mixing unit and heated towel rail as close to each other as possible.
- You will have to discharge air from the system at two points at once: in the collector group and through the Mayevsky tap on the heated towel rail.
Connecting underfloor heating in the bathroom using a thermostatic kit
To solve this problem in modern conditions for rooms no more than 20 sq. M., It is possible to connect the pipes of the water heated floor in the bathroom to the heating system using a thermostatic kit. For example, Thermo-floor R508M Giacomini (Italy). This kit allows you to perform the whole range of work on the installation of a warm floor in the bathroom. With its help, you can parallelly connect a water heated floor in the bathroom to the heating system. The advantage of a parallel connection, in contrast to a serial one, is that there is no need to take out of operation the entire heating system of the house, in case of any accidents or malfunctions in the bathroom floor.
The use of the kit in the conditions of the Russian winter becomes especially relevant. Indeed, in the baths, usually for better heating of the room, heating radiators are also installed, as a rule.The capabilities of the kit allow you to connect the pipes of the water heated floor in the bathroom directly to the heating radiator, but even if there is no radiator in the bathroom, you can connect the heated floor to the heated towel rail. With this connection, you can turn on or off the water heated floor at any time, regardless of the heating in other rooms. And what is important, it takes a little labor to connect the warm floor using the kit to the heating system. Anyone who has ever worked with modern fittings and metal-plastic pipes or XLPE pipes with a diameter of 16 inches can install underfloor heating equipment in the bathroom.
Warm water floor under the tiles with your own hands in the bathroom
Do-it-yourself heated floor in the bathroom under the tiles, heated by water, will be the best choice for detached cottages or apartments with individual heating.
In suburban buildings in which permanent residence is not planned, in order to protect the water-heated floor system in the bathroom from freezing from heating, it is necessary to use polyethylene pipes to which water with antifreeze is added.
Do-it-yourself installation of water-heated floors in the bathroom: sequence
Laying a warm floor in a bathroom with a water circuit from heating is a rather laborious process that requires engineering skills and strict adherence to the instructions:
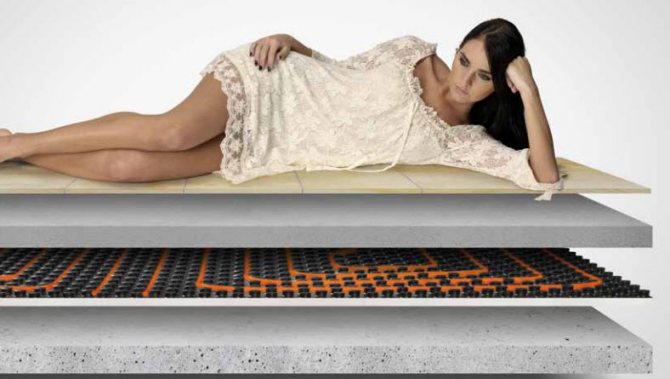
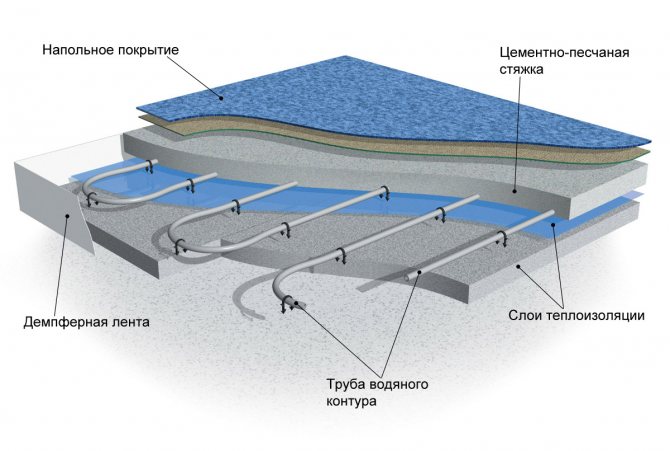
- Preparatory stage. Old floors are removed, the base is prepared (cleaning and smoothing).
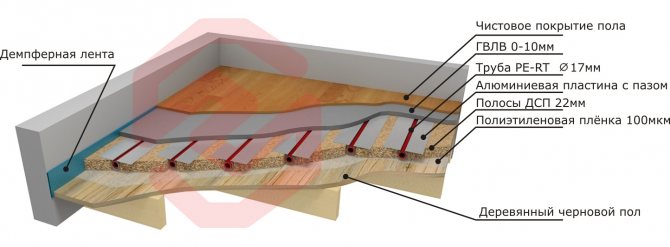
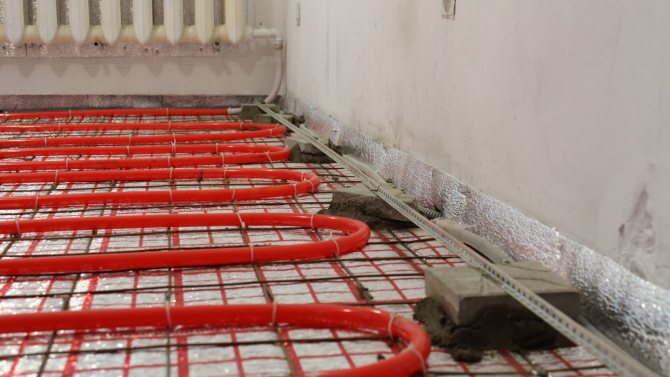
- Waterproofing is laid on the surface. The outer edges are laid on the walls, and the inner ones are overlapped and fastened with mounting tape.
- The installation technology provides for the laying of a damper tape, which will "extinguish" thermal expansion, movement of the building structure and protect the flooring from deformation.
- Foam or polystyrene mats are placed on the waterproofing.
The waterproofing process is an important part of installing a heated floor in a bathroom under a tile. It serves a dual purpose. First, it protects the insulation by preventing the formation of condensation. Moisture significantly increases the thermal conductivity of the material, especially when using mineral wool-based heaters, and to maintain a certain temperature in the room, you will need to increase the power of the underfloor heating system in the bathroom with your own hands.
Secondly, in the event of a leak, the liquid will remain on the film, which will significantly reduce the cost of future repairs. A heat-reflecting foil shield is laid on top, which will prevent overheating of the lower part of the floors.
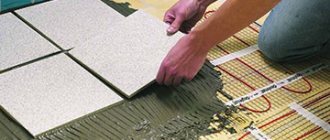
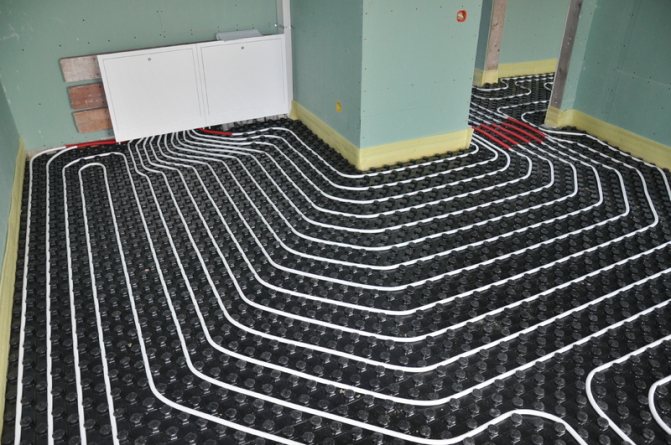
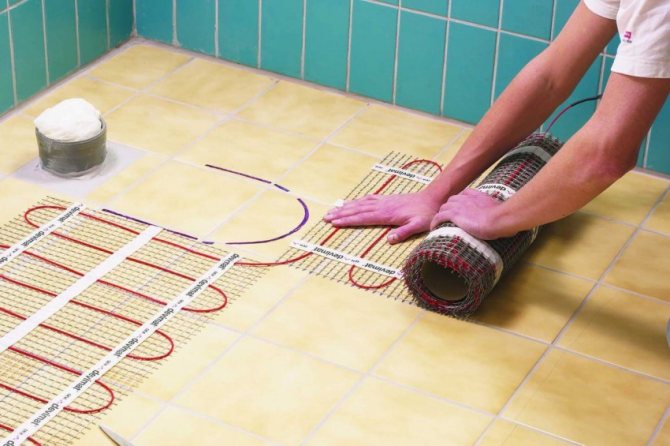
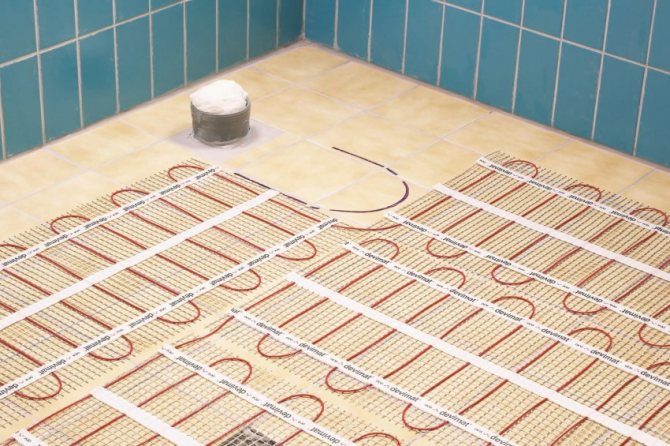
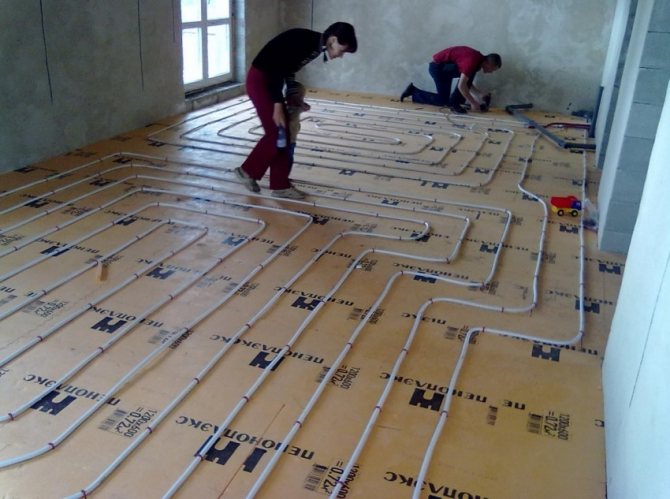
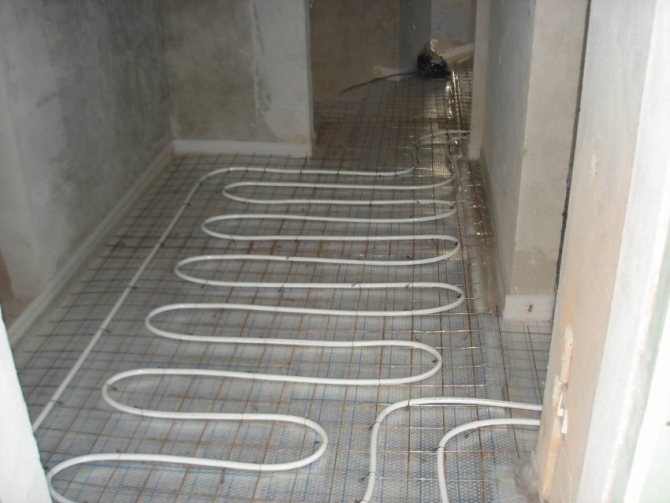
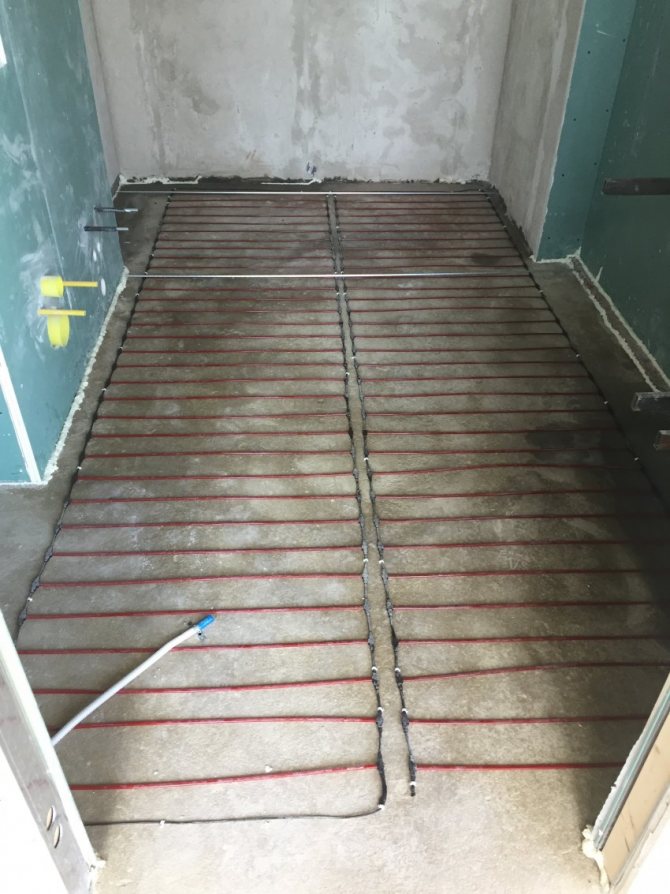
Heat-distributing plates are placed over the entire surface of the insulation, which are attached to the channels. It is in them that pipes are laid. The choice of a specific scheme (snail or snake) depends on a combination of a number of factors, which include the geometry of the heated room, the material and thickness of the walls (which determines the heat loss), the diameter of the pipes used and similar factors.
The next large unit of the underfloor heating in the bathroom under the bathtub is the collector. It is mounted in the same room, in a special cabinet located in a convenient place, so that the owner always has the opportunity to shut off the water supply or adjust the temperature.
After arranging such a "pie", it is necessary to carry out a "run" to make sure there are no leaks. For this, air is injected into the system at a pressure of about four atmospheres. If the check did not find microcracks, the pipes are filled with water under a pressure of 0.6 MPa, which is held for half an hour. After that, the pressure rises to 1 MPa and is maintained for two hours. In the absence of moisture outside the heating circuit, the floor of the room is filled with concrete and covered with tiles.
Thermostatic kit advantages
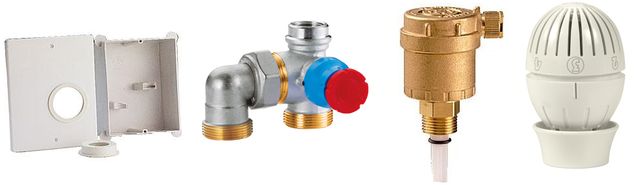
The kit allows using a head with a thermostat and a valve to regulate the water temperature from +8 to 32 degrees. This does not require electricity. The air is released from the system using a special automatic valve. All components of the kit are mounted in a junction box, which is fixed at a height of at least 40 cm. Connection to the underfloor heating water supply network is carried out using fittings for metal-plastic or polypropylene pipes. The junction box is mounted on the wall using special fasteners. The design of the junction box allows it to be installed both in cement plaster and behind walls made of plasterboard or other building materials. After installing the floor with this system, no protruding parts remain. Turning on the floor heating or adjusting its heating temperature is done by simply turning the thermostatic head protruding slightly above the wall.