Tiles and underfloor heating seem to be made for each other!
They perfectly complement each other's positive properties: the tile does not get wet, does not "wear out", it is easy to wash it, but it is always cold.
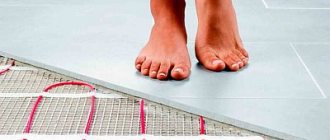
It is much more pleasant to step on ceramics that are heated from below. And besides, the tile perfectly transfers heat, letting it pass to the surface with minimal losses. Underfloor heating electric under the tiles, it is much easier than the water version.
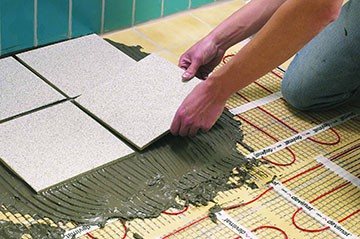
Laying tiles on a warm floor
The warm floor under the tiles, undoubtedly, brings comfort and coziness to the room. The installation of a warm floor is most often carried out in the kitchen, as well as in the bathroom, and the advantages of its use are that it is absolutely not susceptible to moisture and all kinds of pollution. With all its tangible advantages, ceramic tiles also have disadvantages, the main one being that they are cold to the touch. It is generally not recommended to lay warm carpets with warm pile in bathrooms and kitchens. What to do in such a situation? Obviously, stepping barefoot on a cold floor is uncomfortable. In this case, both you and your child can get sick. The emergence of such questions led to the fact that heated floors were invented.
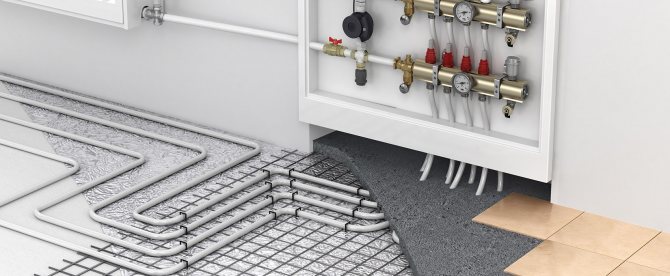
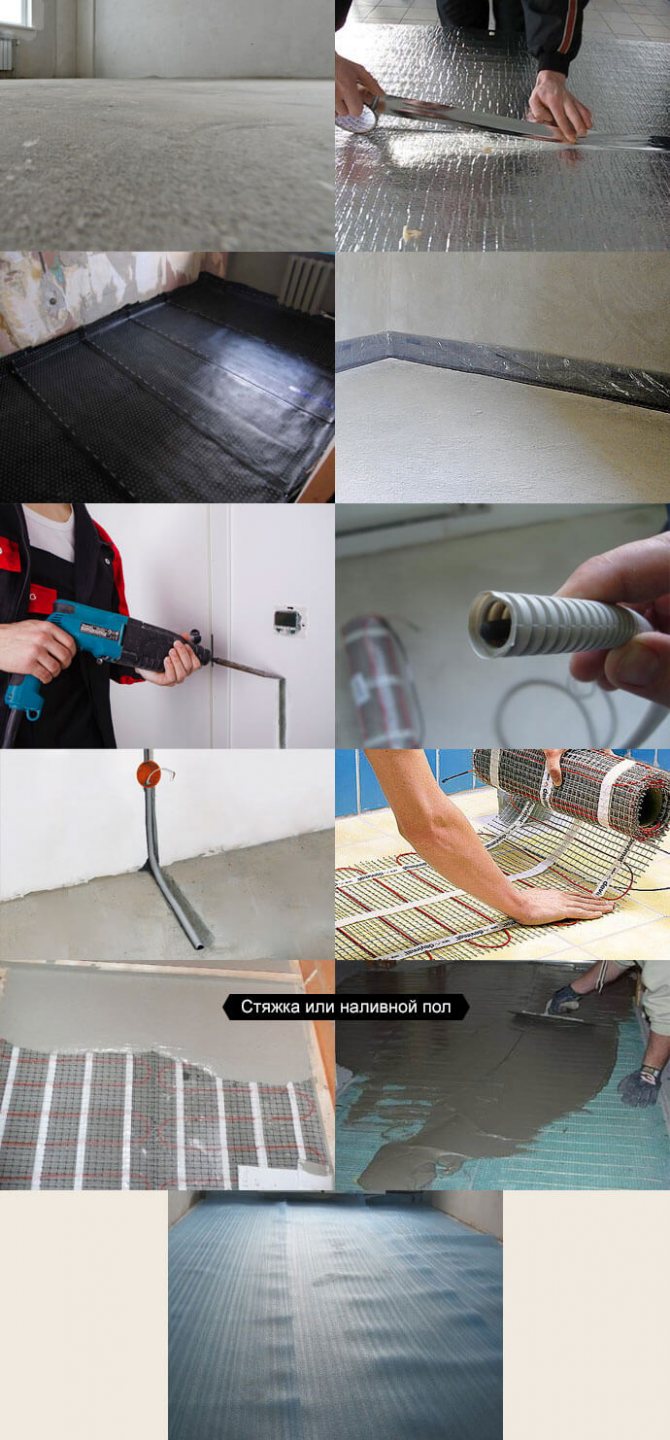
To date, they have come up with a lot of options for warm floors: • Water; • Film; • Electric. Before installing each of them, be sure to cover with a special heat-insulating material. After that, a sand-cement screed is carried out, and already on top, on the mortar, the necessary flooring is laid - ceramic tiles, wooden boards, linoleum or any other. Heat sources in these cases can be water, infrared floor film, or an electric cable.
Drafting a project
Even if you decide to make a warm floor under the tiles with your own hands, then without a project (elementary calculation), you can be left not with a warm, but a cold floor. Or even gold. The project reflects:
- room layout with real dimensions;
- layout of future furniture (very important for cable systems);
- wiring diagram of a cable or laying thermomat;
- places of connections, their number;
- place of installation of the thermostat and temperature sensors;
- calculation of the required number of heating elements based on the real area of the room;
- specification of the equipment and materials used.
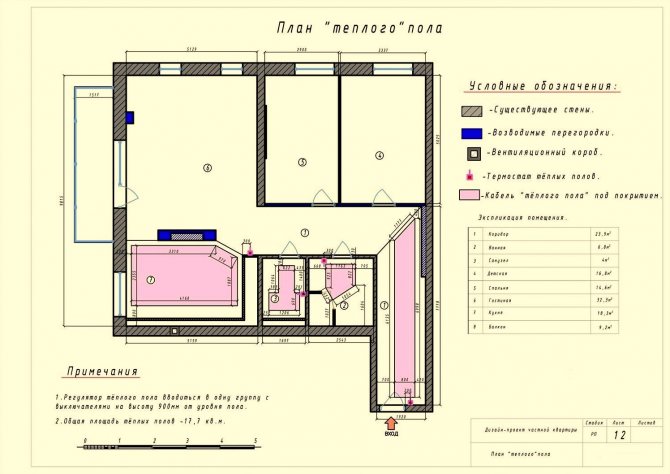
Warm floor plan
When calculating cable systems, it must be remembered that the cable is not laid in the places where furniture is installed. When installing systems, a distance from the wall of at least 15 cm is required. The distance between the turns in cable systems is at least 10 cm. The recommended installation height of the thermostat is 80–100 cm from the floor. It is strictly forbidden to cross the heating cable, even if it is conceived at different levels of the screed.
Choosing a floor type
When choosing the type of system, the following factors are taken into account:
- Floor covering material (wood parquet, laminate, porcelain stoneware tiles).
- The main function that the system will perform: heating the room or heating only the floor covering.
Depending on the area of the room, the flooring used and the main functionality, we carry out the installation of a warm floor of the required power.
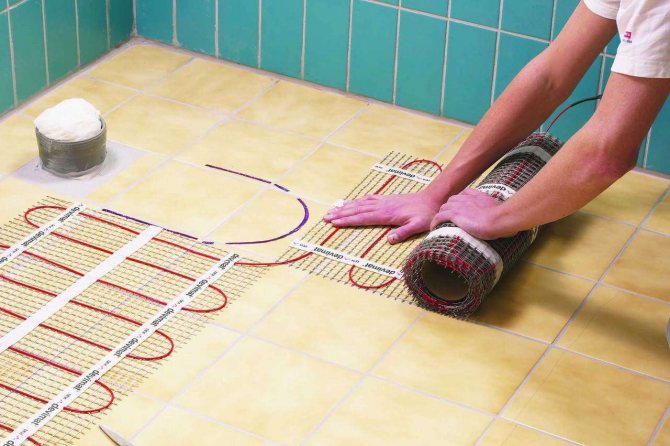
Laying underfloor heating mats
Scheme and preparation of materials
To obtain high-quality floor heating, it is necessary to occupy about 75% of its area.The required cable length is easy to calculate using a simple formula:
Lк = S × Ps / Psp, where:
- Lк - cable length;
- S is the area of the room;
- Ps is the demand for heat energy per unit area (measured in W / m2);
- Pud is the specific thermal power of the cable indicated in the passport for the purchased material.
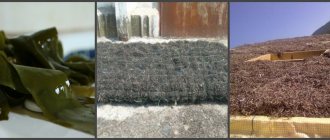
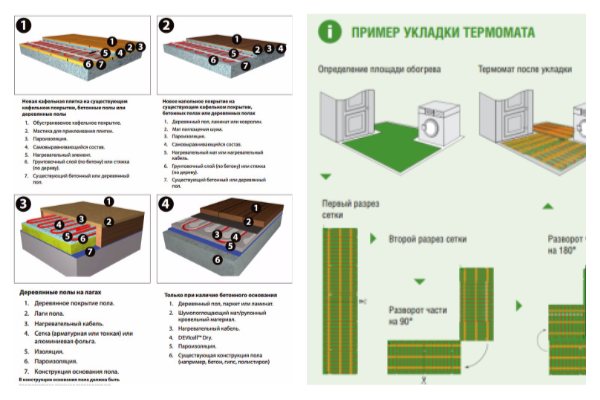
Depending on the place of installation, it may be necessary to lay insulation material, especially if this place is located above the basement of a wooden house or you decide to heat the floor on a balcony or loggia.
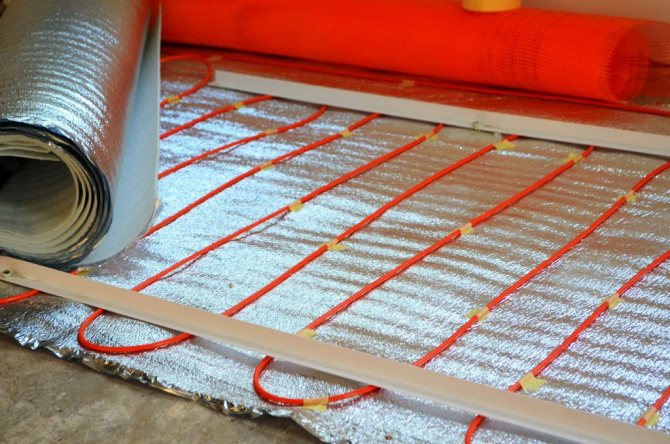
Heat insulation for underfloor heating
The thicker the insulation, the greater the distance from the wall. Usually, for this, foam or expanded polystyrene, or foil-clad penofol is used.
The temperature sensor is installed at a distance of no more than 300 mm from the wall between the cable coils, which makes it possible to evenly measure the temperature in the system. The thermostat can be installed in the same row with electrical outlets and switches in the room, which will avoid additional wall chasing and unnecessary wiring.
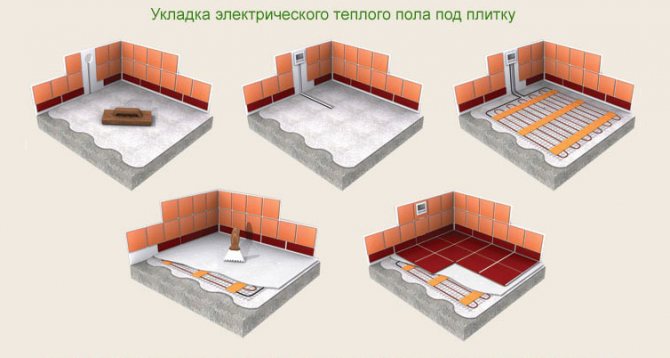
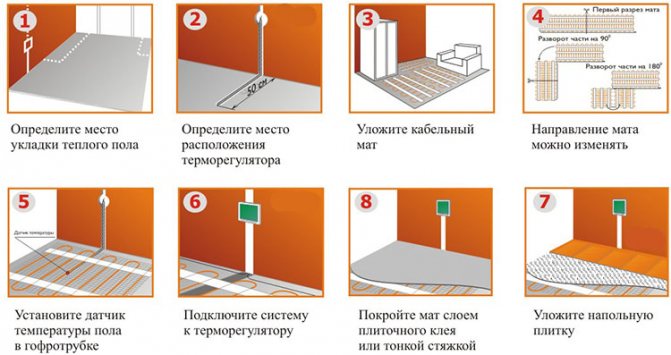
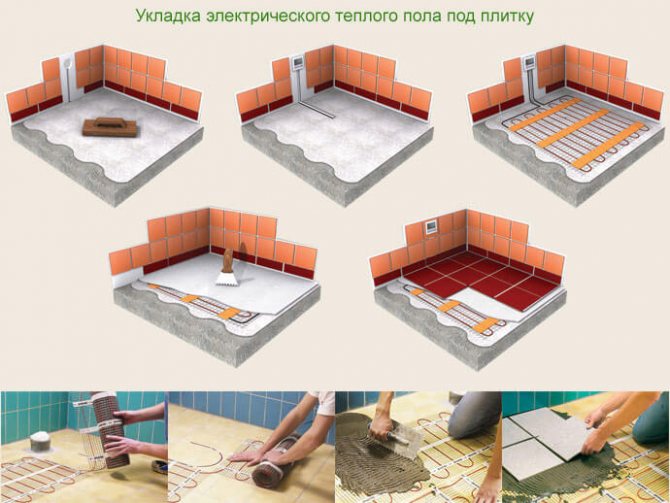
How to properly install a warm floor
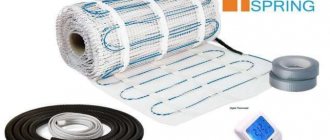
If you plan to cover the floor with ceramic tiles, electric heating mats will be the best option for underfloor heating. Structurally, it is a fiberglass mesh, to which shielded heating sections are attached. These heating sections are distinguished by increased reliability, due to the fact that they are produced according to special technologies - they are connected by a clutchless method, by connecting cold and hot parts. Underfloor heating is installed, as a rule, in several stages: 1. At the first stage, it is necessary to draw up a diagram in which the heating mats should be correctly positioned. When doing this, it is worth considering the fact that it is unacceptable to place electric heating elements in the places where furniture is located. 2. At the second stage, it is necessary to prepare the floor surface - remove foreign objects from it, debris, if the surface is uneven, it should be leveled. 3. At the third stage, you have to lay the heat-insulating material, this will lead to a decrease in heat losses. 4. At the fourth stage, a cement screed is installed, which is the basis for a ceramic tile covering; 5. After that, at the fifth stage, it is necessary to lay the heating mats, according to the scheme that you created earlier. You will need to install the thermostat and connect it to the mains. In general, a warm floor consists of the following electrical elements - a heating mat, a thermostat, a temperature sensor, an RCD - a residual current device. It happens that in the process of work a new task arises - the cut of the fiberglass mesh. This work must be done very carefully, without touching the heating electric cable. 6. To test the system for operation, the electrical wires are connected to the network. If you see any malfunctions or inappropriate results, then this is the best time to fix something. In the event that you complete all the work, improving or replacing something will be certain difficulties. To make adjustments, the entire floor will have to be dismantled. 7. At the seventh, finishing stage, you will have to install the mats using ordinary tile adhesive. When doing this, make sure that the layer does not exceed seven millimeters. An interesting feature that you should know is that you should turn on the installed underfloor heating no earlier than after 20 days, since you must wait until the glue is completely dry. When using underfloor heating, we advise you to carefully monitor the temperature control, and also make sure that your floor covering is practically in its original state and is not damaged.
Installation of a water floor is carried out in a specific sequence, just like an electric floor.However, the principle of operation of these two floors will be very different, since it lends itself to completely different laws of physics. Here's one of the differences - an electric cable has the same temperature throughout its entire area, while a water cable heats up a little differently. The highest temperature will be observed in the place where the water flows from the chamber to the floor heating system. When water is circulated, its heat is lost and when it is returned to the boiler, it is already in a practically cooled state. [/ Vc_column_text] [/ vc_column] [/ vc_row]
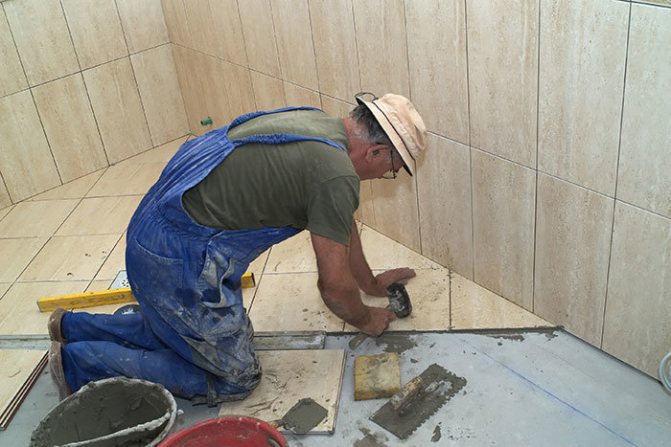
photo tile stacker
The maximum temperature will be at the point where water from the boiler heating chamber enters the floor heating system. Circulating, the water loses its heat, and it returns to the boiler, already cooled. Hence, it turns out that the temperature of the coolant differs at the outlet and inlet. If you install the water floor incorrectly, this will significantly reduce the overall efficiency of the heating system. It turns out that the independent installation of such a floor must necessarily be carried out only after careful acquaintance with its technological schemes, it is also advisable to study the video and instructions.
Before you decide to install a water floor, know that there are two possible ways to install it: • An installation system that involves the use of concrete: • An installation system that is a flooring (it is also called a polystyrene foam or wood system). The installation system, which is the use of concrete, is more economical. For this reason, it is especially popular among consumers who prefer budget repair options. The sequence and principle of its installation is absolutely similar to the installation of a warm floor, which uses heating mats. Compared to the electric cable of the pipe, the water floor is absolutely immune to overheating. However, it must be mounted in accordance with the specified scheme, without losing the sequence, in addition, it must be completely free of fractures and bends. In this case, special fittings with a mesh size of about 15 cm, as well as a wire diameter of five mm, are quite suitable for you. Why are these dimensions the minimum? Because smaller fittings can simply not withstand the high load in the form of a warm water floor. During installation, there is such a parameter as the laying step, it should not exceed 30-40 centimeters, in general, the water pipes practically do not overheat. If you make the distance between the pipes even slightly smaller, the efficiency of the entire heating system will significantly decrease. In addition, the likelihood that various low-temperature areas of the warm floor will appear over time is not excluded. To secure the pipes, you need fasteners such as clamps and dowels. In order to lay the piping of the water system, you can use various methods: • Spiral; • Spiral way, in which the center is shifted; • Parallel, or as it is also called the "snake" method; • Meander, or double snake method. When choosing any of the methods, consider facts such as the size of the room, the heat loss that occurs in the rooms, what floor you are on, the number of window openings and exterior walls, the number of doors, and so on. You should also know that pipes with the hottest heat carrier are laid exactly in those places where the greatest heat losses occur. There is also an unacceptable pipe length, any length over 100 meters! If you make the pipe significantly or even slightly larger, the effect of using the underfloor heating will significantly worsen. To calculate the required number of pipes, you need to arm yourself with the following building standard: for each square meter, you need 6-7 meters of pipe.The return and supply ends of the pipe are led out into a manifold cabinet, which is mounted in a specific niche in the wall. You can make this cabinet open, or as it is also called invoice. Which method you use in this case depends entirely on your preferences. The pipes must be routed to a manifold cabinet, and the main heating circuit must also be connected to the pipes. After that, valves are mounted, which are necessary to shut off the coolant, as well as temperature regulators. You can use a special electronic valve to regulate the temperature. Its advantage is that it reacts to signals from a temperature sensor and controls the room temperature autonomously. Before the screed is poured, a check is made for the quality of the system as a whole, to prevent possible leakage of the coolant. Using a floor mounting system, you can completely eliminate the creation of a screed based on cement and sand. Thus, you will be able to significantly speed up the process of putting the warm floor into operation, as well as reduce the load on the supporting structures of the building.
ceramic tile stacker
Do-it-yourself electric underfloor heating under tiles
If electricity is used, the family's monthly expenses increase, but there are much fewer problems with such floors. They can be used in apartments, it is much easier to lay them than the water version, and the thickness of such a "pie" is not at all great.
There are three types of electric floors:
- Cable.
- Filmy.
- Matte.
They differ in their cost and characteristics.
The main thing you need to know about the types of electric floors in order to make a choice:
Cable it costs the cheapest of all, but the difficulties in laying with it are the most. Firstly, the cable, like the water pipe, is poured into a concrete screed (it is not so thick, but the repair will still be long, dirty and difficult). The cable must be laid and fixed by yourself. This is only good if you need to feed a non-standard surface.
Heating based films no less effective, it is the thinnest coating. But you can take on its self-styling only if you have construction skills and confidence in your abilities, because the film does not forgive mistakes. Here you will need to do everything right the first time.
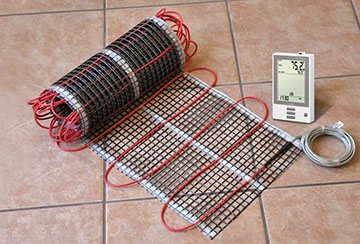
Mats represent a nylon mesh of a certain width with a cable. We can say that for non-professionals this is the best choice.
If you want to install a warm floor under the tiles, you need to choose the most suitable option correctly, since in the bathroom water often falls on the floor, and therefore good insulation is needed. Warm floor under the tiles: which is better? See options overview.
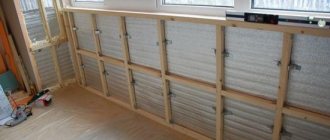
We will consider the main characteristics and features of laying polystyrene foam for a warm floor here.
It is not so easy to independently mount a warm floor in a bathroom, so you need to know all the intricacies of installation, installation and connection. At this link https://microklimat.pro/sistemy-otopleniya/montazh-sistem-otopleniya/teplyj-pol-v-vannoj-komnate-svoimi-rukami.html you will find detailed instructions for installing the system.
Drawing up a diagram
The peculiarity of the electric version is that it is not recommended to hoist heavy household appliances, furniture or plumbing on it. Even if the furniture is on legs, with a low bottom, it will create an obstacle for uniform heat transfer. Therefore, the location of bulky objects is thought out in advance and marked on the plan of the rooms.
On the one hand, this is a minus, since it excludes the possibility of making a rearrangement in the future. On the other hand, because only empty areas of the room need to be filled, the cost of IR foil or mats is reduced.
Laying scheme for electric underfloor heating under tiles
Having found out on which sections the cable will be laid, you need to distribute it over all areas and calculate the step between the turns. To do this, the area must be divided by the cable length. The step should not be less than 7 cm!
If heating mats are used, you will not have to calculate the step, but it is important to know the size of the mats before buying - you will not be able to shorten or narrow the canvas during installation.
At the stage of drawing up the diagram, you need to decide where the thermostat will be located, and how the wiring will be connected to it.
Always keep a plan for the location of underfloor heating and joints. This can come in handy in case of renovation work.
Preparatory stage
Before proceeding with the installation of electric mats, you need to prepare the floor surface well.
It should be flat and clean:
- The old coating must be removed completely, down to the concrete base.
- All protuberances must be "chipped" and sanded. Cracks and pits are closed.
- According to the diagram, grooves for the thermostat are grooved (usually at a height of about 30 cm from the floor) and channels for wiring.
- A channel for laying the temperature sensor is cut in the floor. It must fall between the turns of the future cable.
- Thorough cleaning is done.
After all of the above, the concrete is impregnated with an antiseptic.
Installation of electric underfloor heating
The stage of sequential laying of the screed layers begins.
- Waterproofing. Whether it is needed under an electric floor is a moot point, left to the discretion of the owner. If it is decided to do it, then you will need to cover the floor with a film with an overlap of 10 cm on the walls.
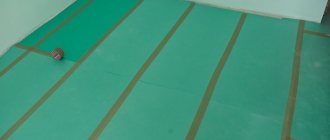
- But thermal insulation is necessary, otherwise the lion's share of the heat will be lost somewhere in the ceilings. Foil insulation - penofol is perfect. With a shiny layer, of course, upwards (only in the case of infrared films, it is not recommended to use materials with aluminum foil). The joints are glued with construction tape.
- Damper tape. This is a tape of soft material, it will slightly "spring" and compensate for the expansion of materials from temperature changes. The tape is fixed around the perimeter at the bottom of all walls.
- A thermal sensor and a thermal relay are installed. The wires that connect them are placed in a corrugation, and fit into the stamped grooves. It is important to ensure that in the place where the corrugation turns from the wall to the floor, there is no crease, but a smooth transition is obtained.
Now the most crucial moment is the laying of mats (cable or film).
To lay the cable, you will need special fixing strips, which are attached to the base with dowels. After that, you will need to pour the screed (it is advisable to add a plasticizer to the concrete). The thickness of the resulting screed should be about 2.5-3.5 cm.
The infrared film is rolled out over the insulation (there are 10 cm indents from the walls) and fixed according to the instructions: either with tape or with special ears on the tapes. Contacts should go in the direction where the thermostat will be. The wires are mounted on terminals and crimped with pliers (here everything should be without errors), and the joints are insulated.
Stages of installing an electric floor
The mats are unfolded, if it is necessary to bypass any obstacle, the mesh can be cut and spread apart (but the cable cannot be cut). For fixing, the mats are equipped with special adhesive inserts, which are located on the bottom side.
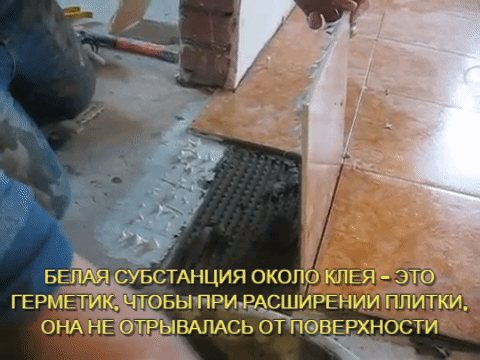
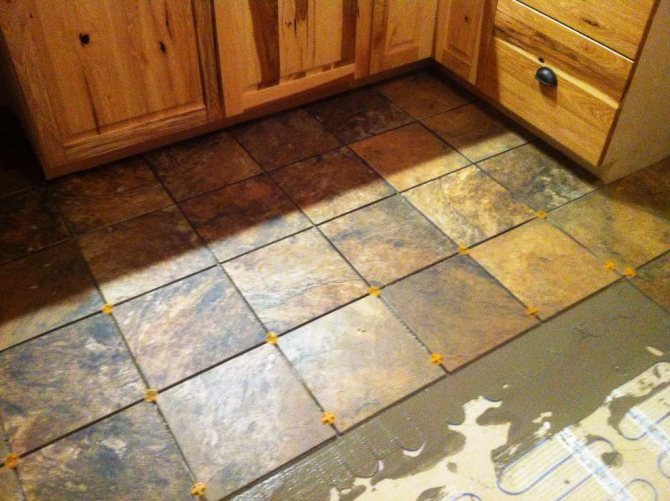
Tiles are laid. Tile glue is prepared according to the instructions. It is applied directly to the heating mats. Care must be taken not to damage or dislodge the mat. The tiles must be laid so that their surface is strictly horizontal.
After laying the tiles, the floor is left alone until the glue is completely dry. If you break the rule and turn on the heating ahead of time, this can lead to a short circuit or swelling of the tile (due to the fact that moisture evaporates unevenly over the glue area).
In order for the warm floor to be more efficient, it is important to choose the right mounting mats. Mats for a warm water floor - how to choose the right one? See a detailed overview.
How to make a screed for a water-heated floor, see this page.
Connection
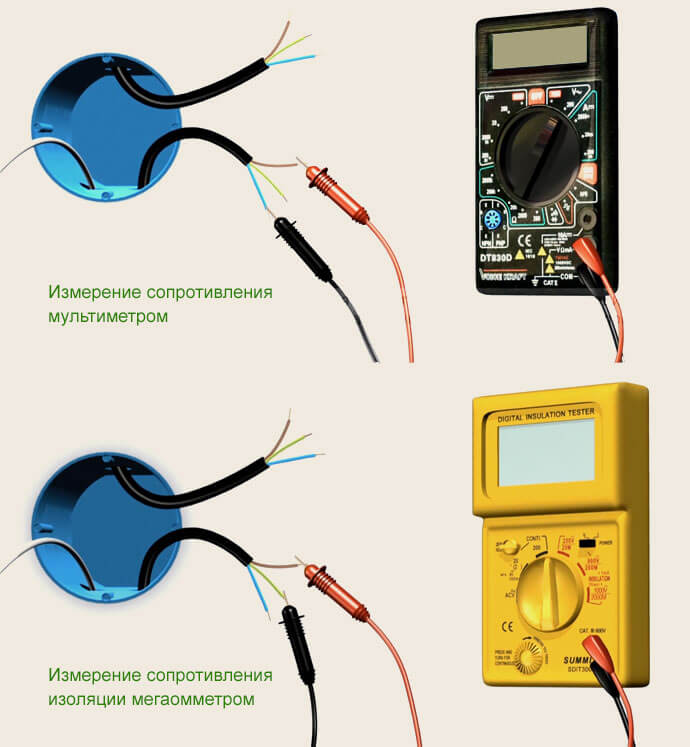
Before powering the system from the network, you need to ring it by checking the resistance with an ohmmeter (or multimeter).
This will help you find out if the chain was damaged during installation. The deviation from the specified passport value can be no more than 5-10%.
Now you need to find out if the insulation of the film or mats breaks through to the ground. She is also checked with an ohmmeter. If there is no short circuit, the resistance tends to infinity.
Then the whole apartment is de-energized, and work begins on connecting the floor.
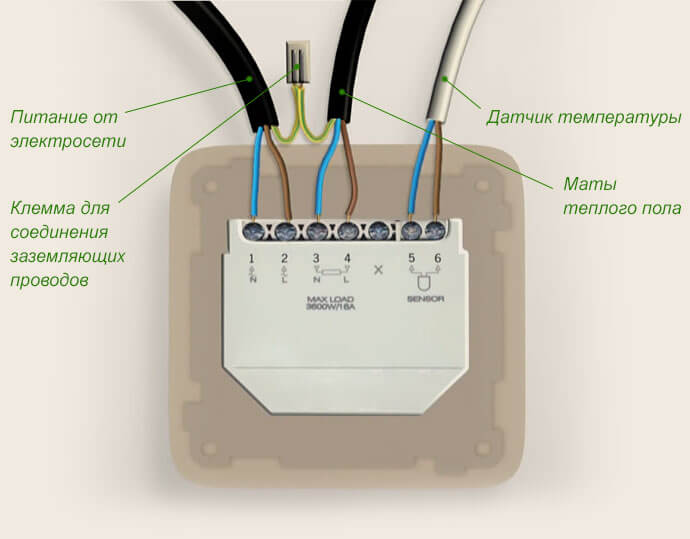
Do not connect electric floors directly to the socket! And only through an RCD and a thermal relay.
If there is high humidity in the room (sauna, bathroom), there is always a risk that the floor will penetrate people. To prevent this, in humid rooms, grounding is required - either the thermostat or a reinforcing mesh.
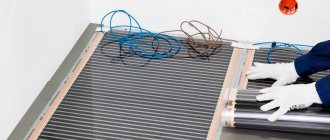
What is Infrared Tiled Floor
Infrared radiation is responsible for floor heating. Its main advantages are that by radiating heat, it is absolutely harmless to health. In addition, the infrared type of floor is characterized by high efficiency, as well as radiant heating. For this reason, this floor is much more economical than traditional floors, by about 15-20 percent. To lay this type of warm floor under the tiles, you will need: • Perforated film; • Insulating tape; • Tools; • Two types of adhesive tape: bituminous and painting; • Wires; • The foil substrate, that is, the film that covers the foil, is not electrically conductive. The installation of the floor is divided into the following stages: At the first stage, the surface is prepared: debris is removed, it is necessary to mark the area planned for laying the film, and everything must be carefully primed. The foil backing is laid in such a way that the location of the foil is on top. According to the correct technology, the substrate is placed in stripes, which must necessarily coincide, in width. Craftsmen recommend doing so that the length of the stripes is the same as the length of the room. The cut should be in a place where there is no graphite layer.
Advantages and disadvantages
Before installing a warm floor under the tiles, you need to understand what will be the source of heat. And second, which system of underfloor heating is more suitable for your home. Basically, there are two options for floor heating - water and electricity. If you have a private house and no one lives on the first floor (basement), or even better if the house is at the finishing stage, you can consider the option of a warm floor with water heating.
Water heated floor
The main difficulty will lie in the correct and reliable installation of water pipes, laying a decent layer of concrete screed. All these works must be performed by a highly qualified specialist. If such a system is installed in an apartment building, then there are several more difficulties. Firstly, in order to check the operation of the system, it will be necessary to wait for the heating season, and secondly, it may be necessary to coordinate with the administrative authorities the connection to the pipe of the central source of hot water supply at home.
In our opinion, underfloor heating with electric heating for any type of flooring and for any type of tile is the most effective and not too expensive solution in terms of money and time. Underfloor heating with electric heating has a number of advantages:
- Any tile can be chosen.
- Ease and simplicity in installation, especially ready-made kits.
- Uniform heating of the entire floor area.
- The ability to adjust the temperature in the parameters you need.
- A small layer of screed, which means a real reduction in the cost of your project.
- Sufficiently low power consumption of the system.
Laying tiles on an electric underfloor heating
There is no risk of causing damage to neighbors and your own property, since there is no problem of water leakage. The highest energy consumption occurs at the initial stage of heating the tile floor, and then using the system controls, the required temperature is maintained.
How to stack cut film
With the correct technology of work, you should make sure that the copper contacts are located at the bottom, while the matte surface should be on top. The contacts must be turned to the wall, in the place where the thermostat is planned to be placed. In the next step, you have to cut circles in the foil backing that coincide with the holes in the film. These works are carried out very carefully in order not to damage the ferrite layer. Having done and checked all this, you will need to attach the copper clamps to the film. For these purposes, you will need pliers, or a hammer, while the copper clamps must be tightly clamped on the conductors. After that, it is necessary to carefully check the reliability of the contact. In order to qualitatively fix the connection points of the wire, bitumen tape is used, so that the contacts do not get into a humid environment, and also so that the metal does not appear.
You may be interested in an article about porcelain stoneware steps. It is quite complete and interesting.
How to install the film correctly
It is possible to place the film only in some, far from all, areas. When placing it, make sure that it is not in the places where the furniture is installed. In order for a warm, comfortable temperature to prevail in the room, you can install the film on an area of seventy percent of the entire room, and this will be quite enough. After the film is laid, you will need to attach it to the foil backing. For these purposes, you can use molar or thin double tape. After that, in order to make the installation of thermal sensors, next to the place where the thermal regulator is located, a small piece is cut in the foil substrate and a groove is made. This sensor is installed under the film. The distance between the sensors must be at least one cm in order to be able to install the sensors. After that, using foil tape, no matter where on the substrate, you need to install a ground wire. For fixing the backing sheets, ordinary foil tape is also used. Next, you must make a wire connection to the grounding pin, which is located in the outlet.
Installation of film underfloor heating
Then you can proceed directly to the cable laying and thermal insulation equipment.
In addition to the electric underfloor heating, there is a water one, which also has a number of advantages. You can get acquainted with this type of underfloor heating in detail and study the instructions on how to make it on our website in the article do-it-yourself water floor.
Thermal insulation is provided by a new generation material - penophenol... It is thin and lightweight, but at the same time has a high coefficient of thermal conductivity. It consists of foamed polyethylene, covered with a thin layer of foil on one side, and self-adhesive paper on the other. Penophenol should be laid with foil upwards, gluing the joints with assembly tape. Further, a mounting mesh is laid on top of the penophenol, which prevents the cable from heating when it comes into contact with the thermal insulation, and also increases the strength of the cement mortar.
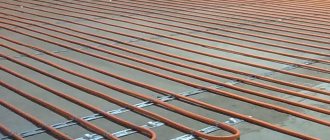
The cable for the electric underfloor heating is laid on top with a snake at distances of 20-25 cm. It is important to ensure that there are no kinks.... It is attached to the floor with mounting tape.There are also heating cables that are already glued to mounting tape and are sold in rolls. It is very important not to lay the cable in those places where furniture will be placed in the future.
Next, you need to install a special thermal sensor... This must be done so that, if necessary, it can be easily replaced. Usually it is placed in a tube and poured with concrete along with the cable. The temperature sensor will signal the thermostat when it heats up to the required temperature that it is time to turn off the system, and vice versa, turn it on when everything cools down.
Next, you need to make sure that the underfloor heating is installed correctly and, if necessary, eliminate errors. The serviceability of the system can be checked by connecting it to the network and a special tester, through which the cable resistance is measured. Detailed information on measurements is contained in the product passport from the manufacturer. After completing the check, you can start pouring the cement screed. The solution should be filled with an even layer of 3-4 cm. The formation of voids in the solution should not be allowed, this can lead to overheating of the cable in the future.
Do-it-yourself electric underfloor heating under tiles
Connecting the underfloor heating power supply
After the mortar is completely dry (after about 5 days), you can lay the floor covering. Before proceeding to this stage of work, you should study in detail the instructions with photos and videos on how to lay tiles on the floor yourself.
Underfloor heating electrical installation
A control check of the installed underfloor heating should be carried out after 30-35 days. It is not recommended to turn on the system before this period. First, moisture may still be present in the solution. Secondly, the increase in temperature promotes the expansion of the materials. As a consequence, there is a risk that the cement screed will dry unevenly, creating cracks and voids. This could damage the system. In the event of a malfunction, warm floors are problematic to dismantle and costly.
Laying underfloor heating under tiles
Correctly performed work in accordance with all the rules and regulations will allow you to enjoy cozy warm floors for many years.
How to install a thermostat
As a rule, experienced craftsmen advise placing the temperature controller near the electrical wiring. In order to make the correct connection of the temperature controller, carefully study the instructions. Connecting the sensor to the timer is as follows: • The temperature control sensor (red wire) is connected to the sensor connector; • Emergency shutdown sensor (black) - connected to the sensor 2. In the next step, you will have to connect the temperature controller to the mains. This must be done in order to check the correct operation of the system as a whole. If you did everything absolutely correctly, after one minute, you should already feel the heat coming from the film, and each of the installed modules should be warming up!
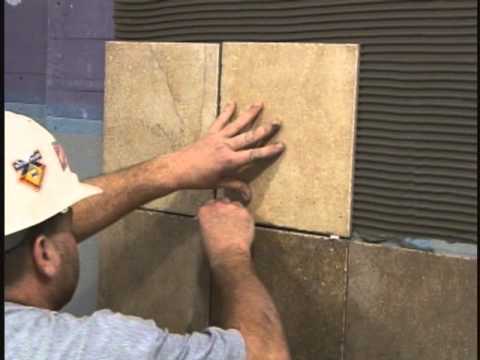
How to install floor tiles on a warm floor
Take a regular mounting mesh, which has medium-sized cells, and secure it to the floor in different places using masking tape. After that, you can start laying the tiles. When your glue starts to set, never turn on the heating film. Next, lay the tiles using standard technology, you can read about how to do it correctly on the pages of our website. We wish you an interesting reading. Hopefully laying tiles on a warm floor will take place with your participation without incident! Happy repairs!
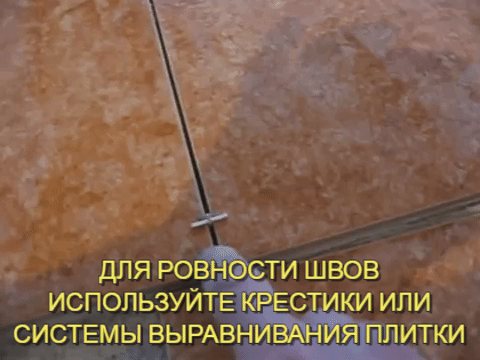
Our online store is pleased to offer you a wide range of tile leveling systems. We implement these tools in three flavors - DLS, SVP and Litolevel.All of them have excellent factory quality, are manufactured in modern factories, on innovative equipment, using the latest technologies in this area. Their main positive characteristic is high strength - they do not bend and break only in special places, as required by the technology. Another product sold by our company is 3D crosses, which help to make perfectly straight seams. If we compare them with systems, then they are functionally weaker, since leveling systemsadditionally help to ensure a perfectly flat surface during installation. The positive thing about the systems is that they are relevant for both professional bricklayers and ordinary beginners. Professional bricklayers prefer to use leveling systems , since these tools significantly accelerate the speed of work, two to four times, thus, in one working day, they make a double or even triple rate and, accordingly, earn more. Beginners use tile leveling systems, as they help to lay the tiles with high quality, while not requiring any specific skills.
Choosing a warm floor
There are several types of electric underfloor heating that are suitable for different rooms and installation methods. So, a warm floor can be:
- film infrared. Very thin, only 0.8 cm, ideal for dry installation under linoleum or laminate flooring. Can be used under a tile, but if all precautions are followed exactly;
- cable. Just a wire that is laid at a certain pitch. This promotes more heat. To achieve normal heating, it is necessary to use a wire with a power of at least 15 W per 1 lm, and the step during laying should not exceed 10 cm.According to the technology, it is mounted in a screed, the thickness of which is from 4 to 5 cm. 200 W per 1m2;
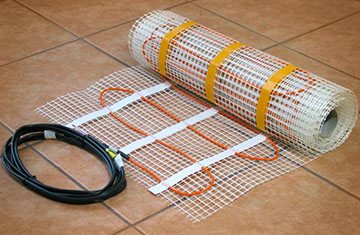
- in the form of mats. This is a mesh with a ready-made cable attached to it. The most popular version of such a floor has a power of 120 or 160 W / m2. There is an option with a very low power - 100 W / m2 and the most powerful - Thermo, with a power of 180 W / m2:
- pivotal. This is also an infrared heater, ideal for wet installation, ie. in tile adhesive.
If you need installation in tile adhesive, then it is better to stay on heating mats or a rod version of a warm floor. Let's talk about heating mats in more detail, because this heating method is distinguished not only by its ease of installation, but also by its reliability and durability.
Theoretically, all powers are equally applicable, but in practice, if you choose a system with a power less than 150W / m2, then it will not heat well. With this power, the temperature will rise to a comfortable state, but this will take some time. Mats with a power of 180W / m2 have the ability to quickly heat any floor surface, but for this they must be laid in the top layer of the screed.
The surface heats up in about 30 minutes or more, and the cooling process lasts only a few minutes. Some manufacturers stipulate the heating time to the required temperature within 24 hours. In fact, heating is not used very often. Often it is turned on either for the purpose of showing off to guests, or during the off-season, when there is no heating.
Benefits of working with tile leveling systems
The tile does not sag, even after the glue dries; Even a beginner who is faced with this type of work for the first time is able to lay the tiles well; The workflow is significantly accelerated, it becomes two to four times faster than the traditional method; One of the parts is reusable, so you significantly save on subsequent installation - in all rooms, starting from the second; Application tile leveling systems makes it possible to make perfect, geometrically correct seams, as well as create a flat surface; And much more. In addition, using these tools, you will be able to avoid the formation of a crooked floor, and these are: • Stumbling and falling, which can lead to injury. Take care of yourself and your loved ones - do not allow low-quality styling; • Formation of chips and cracks, in places where tiles are laid crookedly, as a result of the impact of heavy objects, such as furniture; • Abundant formation of dirt in the joints between the tiles, in places where the tiles are not laid in a level. This spoils all the aesthetics of the room. As you already understood, in all these cases, the ideal option would be to use tile leveling systemsto avoid such situations.
The technological process of working with our tools is extremely simple.
Two alignment systems - DLS and SVP, structurally consist of two types of parts. One part is a leg and is responsible for creating a perfect even seam, a second part is attached to it, which ties the tile and base - leveling the surface. Thus, the need to do leveling work is removed from the stacker, and this is the most dreary and not favorite job. After you have laid the entire wall or floor, you need to let the glue dry for about one day. After that, you have to dismantle the tile leveling systems, use a rubber mallet for these purposes, just knock them down at the right angle so as not to damage the glazed tile surface. After that, the upper knocked down parts should not be disposed of, collect them in a bag or in a box from the kit, and leave them for laying tiles in subsequent rooms. Some part of the legs will remain in the seams between the tiles, but after they are sealed with a fugue, they will not be visible. Here, in general, is all you need to know regarding the process of working with tile leveling systems.