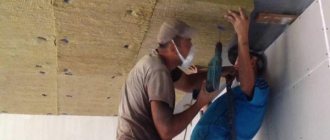
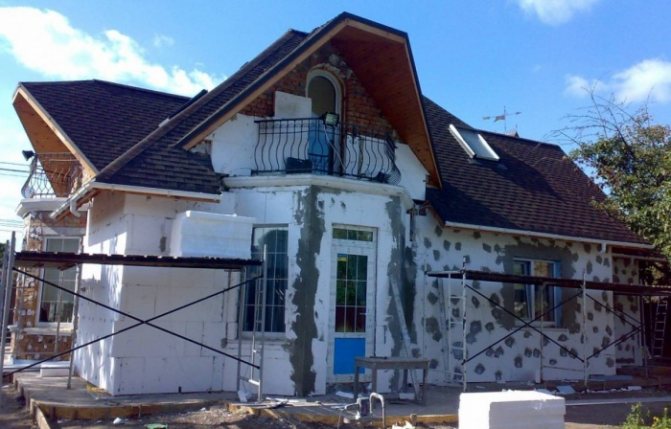


Thermal insulation of walls with foam outside the house Thermal insulation of the walls of the house from the outside is one of the important stages of construction work. Because most of the heat loss of any building, as a rule, occurs precisely through the walls of the building. Roughly, the numbers vary, ranging from 60-80%. As practice shows, excessive heat losses mean large expenditures on heating costs. Payment for heat, sometimes reaches 40% of the total amount of utility bills. Therefore, in order to somehow reduce the expense of the family budget, it is necessary to insulate the building. The most affordable and less expensive way is to insulate the walls of the house with foam outside with your own hands.
Thermal insulation of walls with foam outside - Advantages and disadvantages of the material
In order to determine whether it is possible to insulate a house with polystyrene foam, you need to thoroughly study the features of the material and this method. Polyfoam has, like other building materials, its own advantages and disadvantages. When deciding on the use, be sure to take this into account.
Cons of Styrofoam
Decorating the walls outside the house with polystyrene foam suggests the following disadvantages:
- Polyfoam is poorly air-permeable. The material prevents the removal of wet steam from the room. This property, as a rule, leads to a violation of the proper microclimate in the room. An effective solution to the problem is a forced, exhaust ventilation device.
- A facade, waterproofing finish is required. Thermal insulation of walls with foam outside, without the use of facade decoration, is at least not practical. Of course, the styrene balls themselves do not absorb moisture. Their water permeability is very low. But between them, water is easily stored. In winter, during severe frosts, this moisture expands and leads to the complete destruction of the material. Facade waterproofing, however, will help to effectively solve the problem and avoid such incidents.
- Rather low mechanical strength. Using this building material in the construction of the walls of a capital structure, such a quality of the product is not critical. For example, while laying the floor in a pie. But all the same, you need to take into account such a minus. If, for finishing the facade of the building, plaster is used, then it is recommended to strengthen the surface with a reinforcing mesh. If, however, it is planned to use foam for siding, then the material will come in handy, only as a component of a ventilated facade.
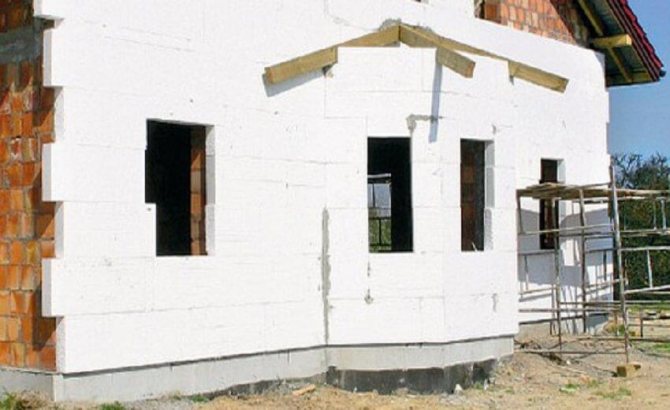
Insulation of walls with foam outside
Pros of Styrofoam
There are also quite a few significant advantages of this material. When constructing, insulation of the walls of a building with foam plastic with your own hands, it is important to know and use correctly, all the advantages of the product. Based on the positive qualities of polystyrene, it is possible to correctly determine whether to use the method in question for insulating external walls in private buildings.
Polyfoam has a number of positive advantages - these are:
- Relatively low cost;
- quite easy to install;
- relatively low weight of the product;
- small transportation costs;
- fairly high thermal insulation qualities;
- relatively high safety.
It is important to understand that foam is not resistant to fire. Therefore, when purchasing a product, you should pay special attention to its labeling. As a rule, a heat material has several degrees of fire resistance: from G1 to G4. The lower the number in the marking, the more fireproof. For complete confidence, when choosing a product, you can always consult the seller.
The use of polystyrene foam for insulating a wooden building is not recommended.Such a ban is caused due to fire safety considerations, and of course, due to the characteristics of the material. Wood breathes well, therefore, many homeowners prefer this building material for the walls of the building. Wall decoration with foam, for a capital structure made of wood, at the slightest violation of technology, can cause mold and mildew. This means that it will contribute to the progression of decay of the building as a whole.
For wooden buildings, it is wiser to use mineral wool as insulation. Warm product, vapor permeable enough. It will not be an obstacle for the ventilation of the building.

Advantages of the material
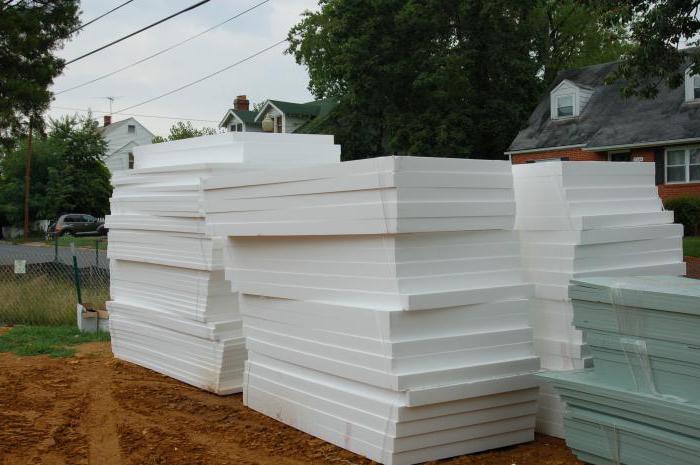
Despite its low cost, foam is a high quality and safe material. Toxicity information is just a myth. The main property due to which it is actively used in the cladding of houses is its high thermal insulation qualities.
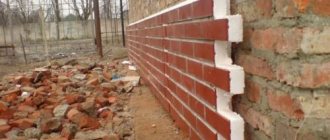
A sheet of polystyrene, having a thickness of 10 cm, protects the dwelling from heat loss in the same way as a concrete wall, 60 cm thick. And 5 cm thick as a brickwork in 2 layers.
Also, the material has many more advantages:
- High noise insulation properties.
- Light weight, which reduces the load on the foundation and walls.
- Water resistant material and does not deform in high humidity.
- Does not ignite.
- It is durable and does not lose its properties for about 50 years.
- Prevalence and availability. You can buy polystyrene at any hardware store.
But all these advantages apply only to high-quality material and with proper installation. How to properly sheathe a house with Styrofoam?
Thermal insulation of walls with foam outside - Preparation of materials
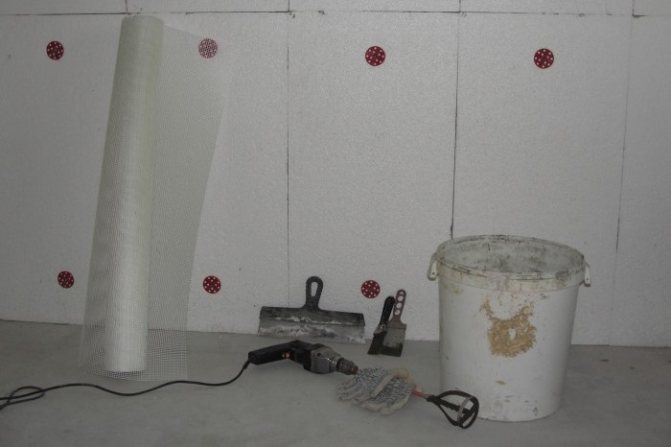
High-quality insulation of walls outside with foam, it is recommended to start with the preparation of construction tools and consumables. For construction actions, regardless of the finish (siding or plaster), the following should be prepared:
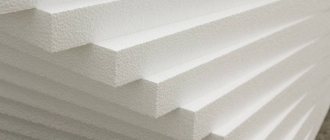
- Styrofoam - sheets or plates;
- to create a support, starting (bottom) heat-insulating profile;
- construction glue for fixing the material;
- disc or umbrella dowels.
Glue, for proper fixation of the foam, must be selected carefully. If you choose the wrong one, then defects will quickly appear on the surface of the product, which will significantly reduce the thermal characteristics of the material. The insulation needs to be attached to glue, which does not contain any solvent additives at all. Usually, on the packaging of the adhesive, there are explanations that say that the glue is well suited for such a warm product.
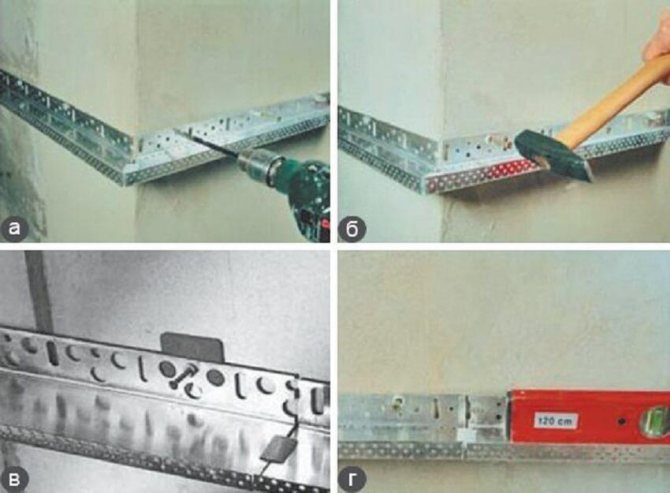
Installation of the starter profile
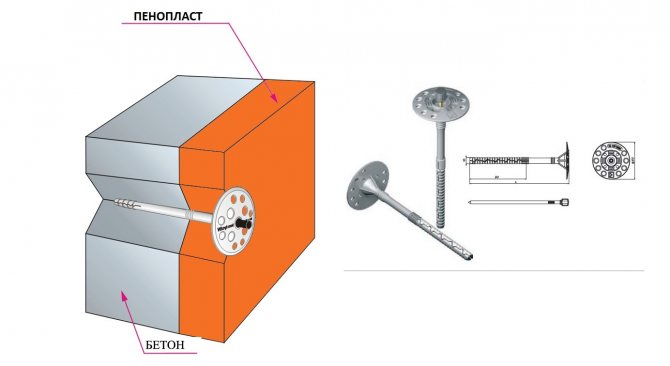
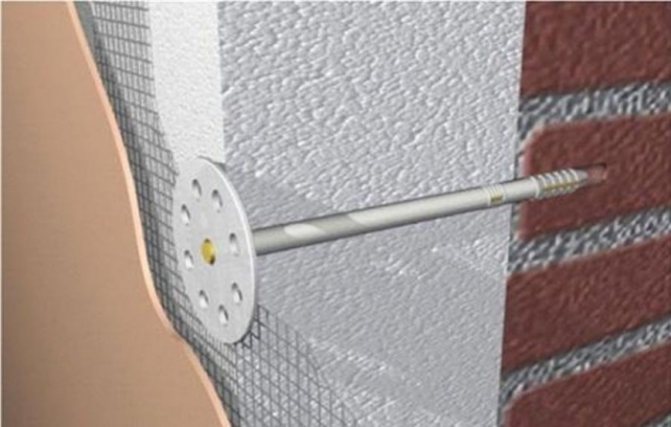
The length of the fasteners is selected based on the thickness of the heat product and the material of the walls. As a rule, the fixing of the dowel should be at least 50 mm. If, concrete base, then a minimum value of 40 mm is permissible. For brick walls, dowel fixings are recommended, 70 mm more than the thickness of the foam layer.
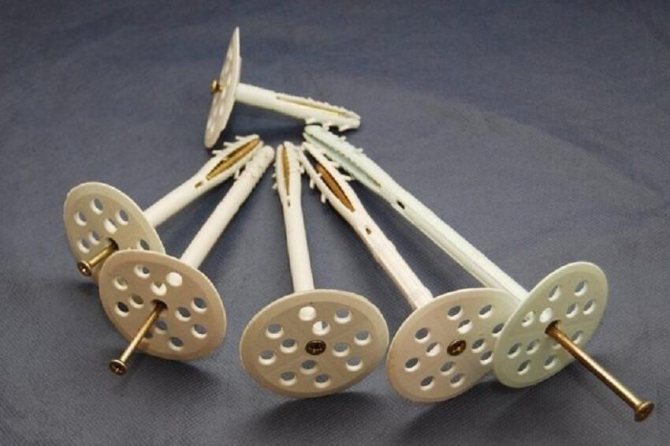
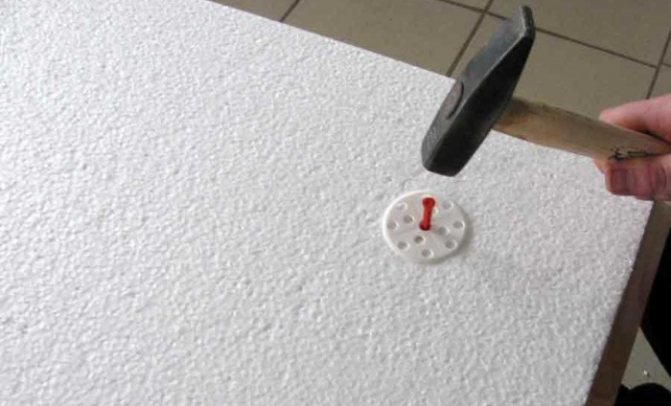
Fungus dowel, for fixing foam
Self-tapping screws and similar elements for finishing with foam plastic for siding or plaster are not advisable to use. Such latches provide a rather low grip reliability. In addition, they can cause serious damage to walls, capital structures.


Why is the heat insulator placed outside
The technology of wall insulation with foam plastic from the outside, from the point of view of construction heat engineering, is considered correct. The number and order of layers, as a rule, does not depend on the type of finish (siding, plaster or panel). Thermal insulation from the street side is the most correct and practical solution. This is due to at least three reasons:
- The useful area of the building remains unchanged;
- Such thermal insulation protects not only the inner space of the house, but also the surface of the outer walls;
- Condensation (dew point) does not get inside the wall, but remains in the insulation.
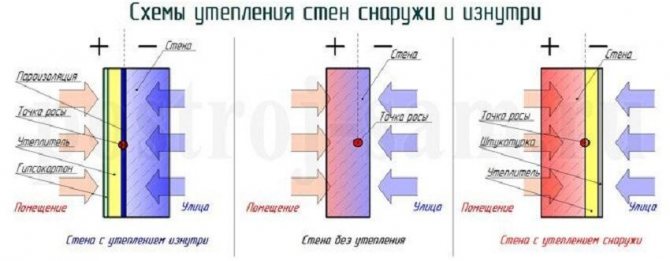
Foam insulation outside and inside
The reasons for the insulation of the building from the inside can only be quite good reasons. For example, these can be:
- High building height. A similar problem implies, for outdoor work, to attract industrial climbers. And this, as you know, is a rather expensive pleasure.
- Desire to preserve the existing facade of the building. The reasons are different, but the main, relatively common, are two. The first is if the exterior finish is recent. And the second, if the thermal insulation work is carried out only in one apartment, and there is no possibility or desire, to do heat repair, in the entire multi-storey residential building.
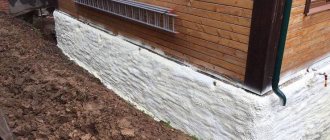
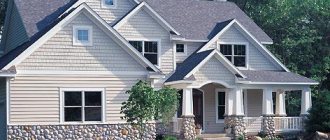
How to insulate walls outside the house with polystyrene - Plaster, as a facade finish
You can independently insulate the walls of the house from the outside with foam, using the technology that is known to many as the "wet facade". Top-beige, plaster, as a finishing of the facade of the building. It is worth noting immediately that with proper installation work, such a design option will become an acceptable protection from cold air, for any building and will serve in good faith for more than a decade.
Plaster, as a finishing of the facade of a building, is a fairly well-known and effective solution, which allows not only to minimize the costs for the improvement of the appearance of a capital structure, but also helps to qualitatively hide the external insulation of the walls from the negative effects of the environment. It is applied, as a rule, directly to the heat insulator itself. At the same time, construction work is carried out in the following order:
Cleaning the walls of the building, from dirt and dust
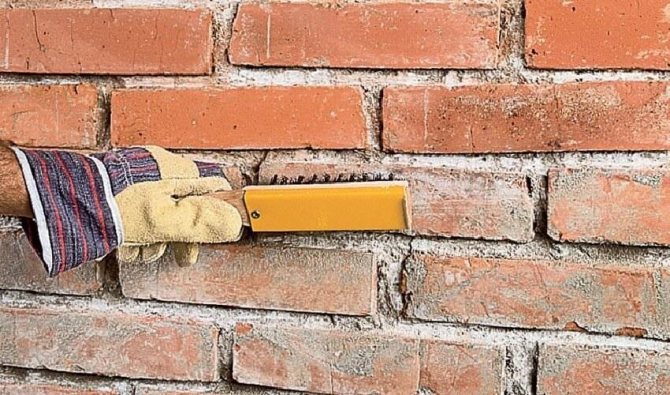
Cleaning the wall from debris
High-quality cleaning of the walls of the building, from various dirt and dust, although not difficult, but very responsible occupation. It is required to thoroughly, thoroughly remove, various debris deposits. Since then, putty will be applied. From the quality of fixation, this building material, no matter how trite it may seem, depends on the durability of the entire heat-insulating structure.
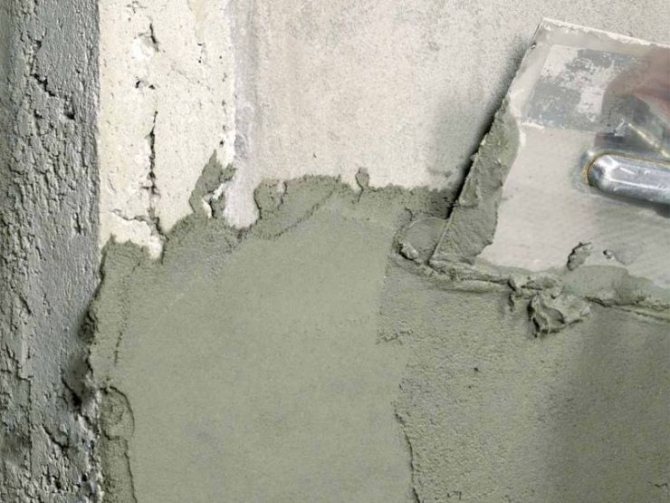
Puttying the surface
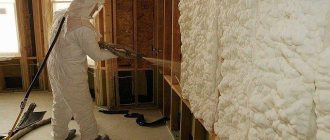
One of the equally important measures, which will further affect the durability of the thermal insulation structure, is surface filling. Or, in simple terms, the proper leveling of the surface. It must be understood that the fewer defects in the base, the lower the likelihood of rapid destruction of the heat-insulating layer. The work, I must say, although not very difficult, is quite laborious. The whole process of actions is shown in the picture below. It will not be superfluous, after the completion of the work, to check the evenness of the walls. The most affordable option, to correctly assess the plane of the walls of the building, is to use the building level.
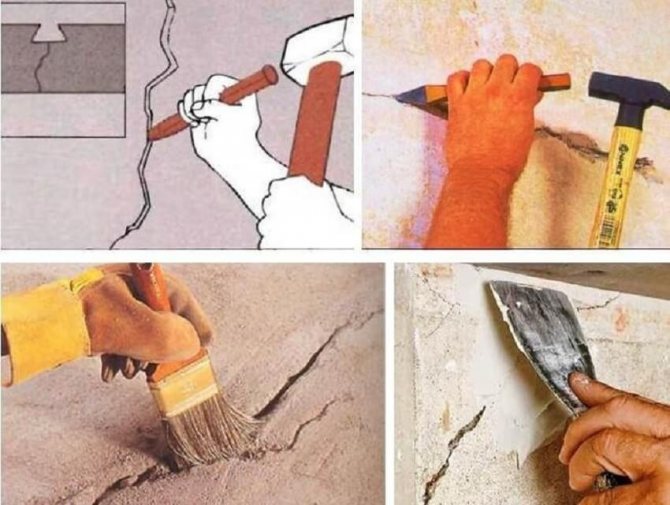
Putty and crack filling
Surface priming
To ensure reliable, high-quality adhesion of building materials, it is required to prime the surface. In addition, the priming provides the coating with good antiseptic properties. To-bezh, provides proper protection to building materials from mold, fungus and other, no less harmful, microorganisms. Therefore, when choosing a primer, you need to pay special attention to the composition and antiseptic properties of the product.
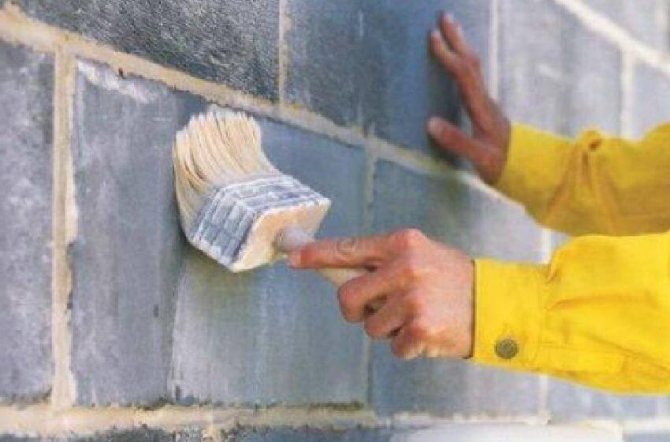
Wall priming
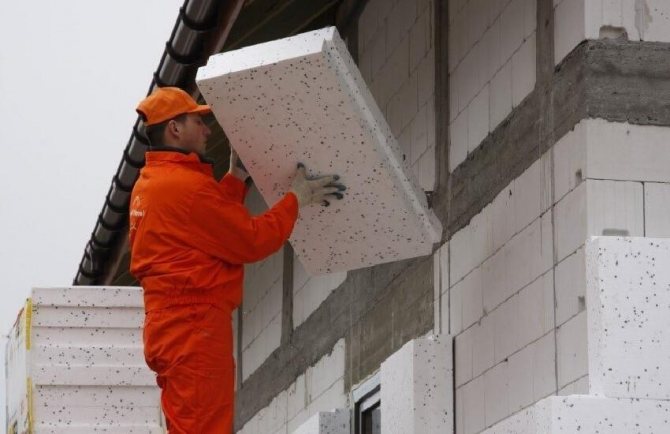
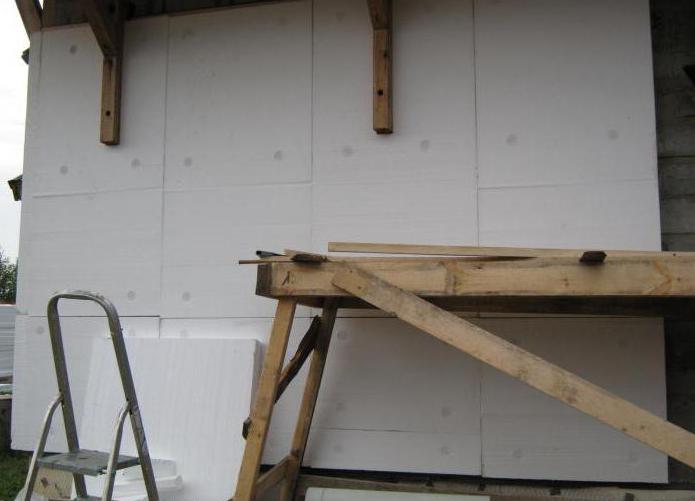
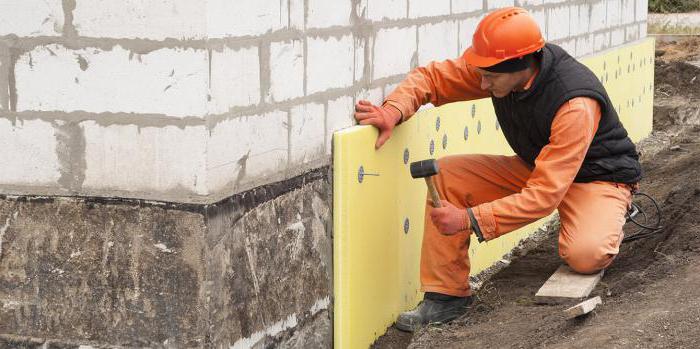
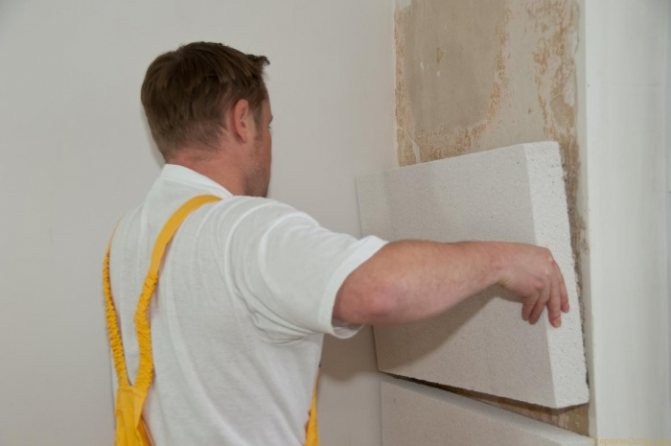
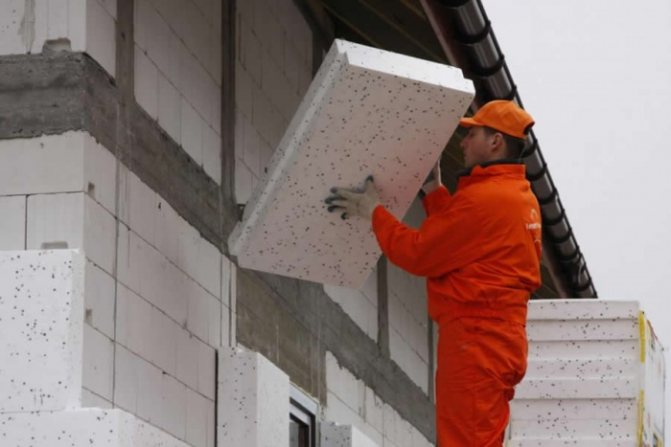
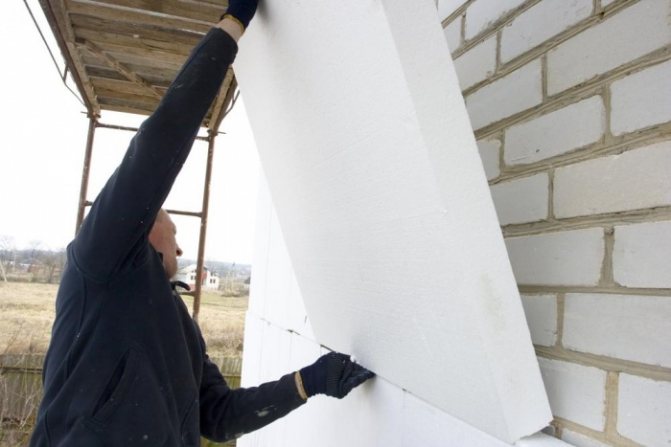
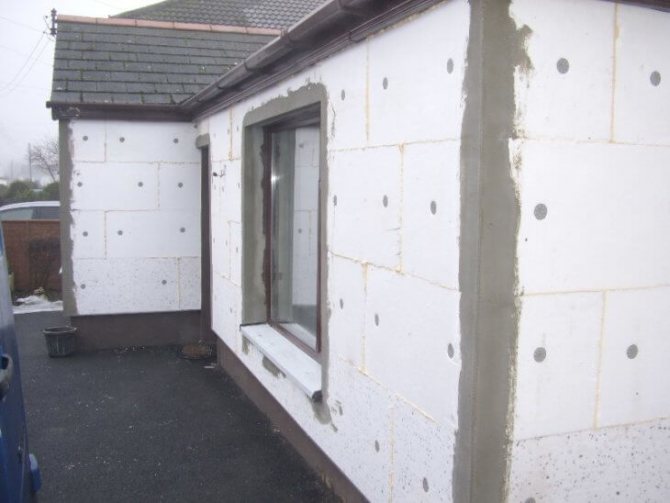
Fastening the foam
When used for exterior wall decoration, plaster, polystyrene sheets, it is necessary to fasten with a continuous layer, without a frame, having previously greased with glue. At the same time, vertical joints of the seams are recommended to be staggered. To-beige, each subsequent row, relative to the previous one, needs to be shifted by about half the width of the product sheet.
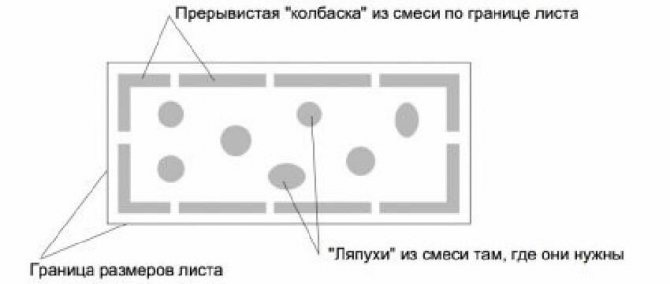
Glue application scheme
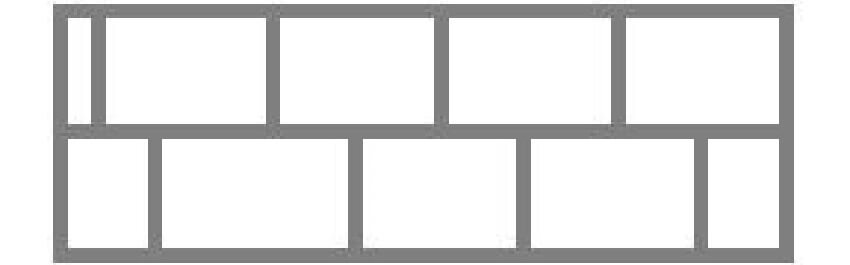
Styrofoam sheet stacking scheme
After completing the installation steps, the adhesive must be allowed to dry.The wait can last, depending on weather conditions, 2-3 days.
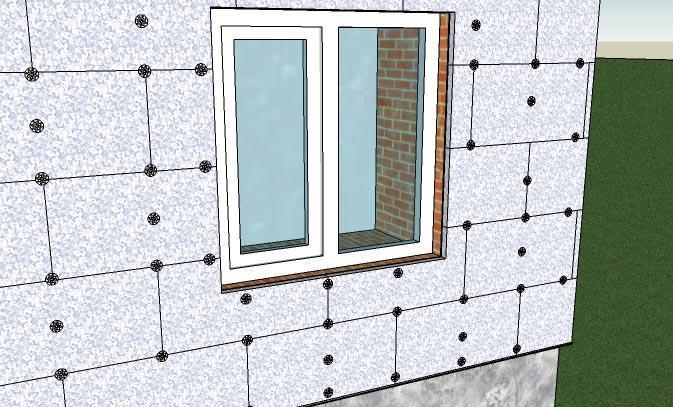
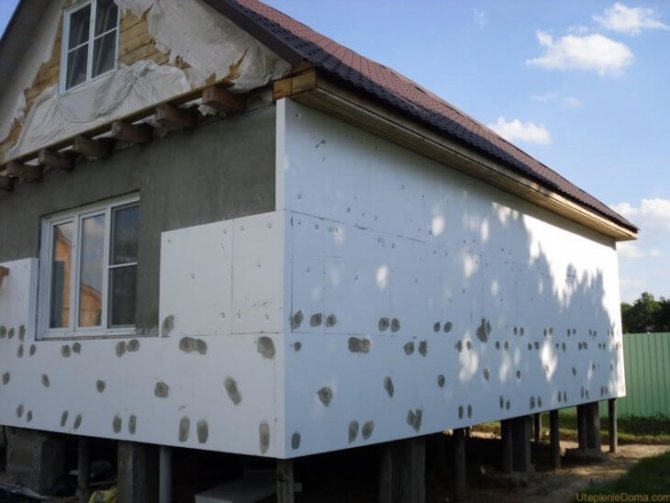
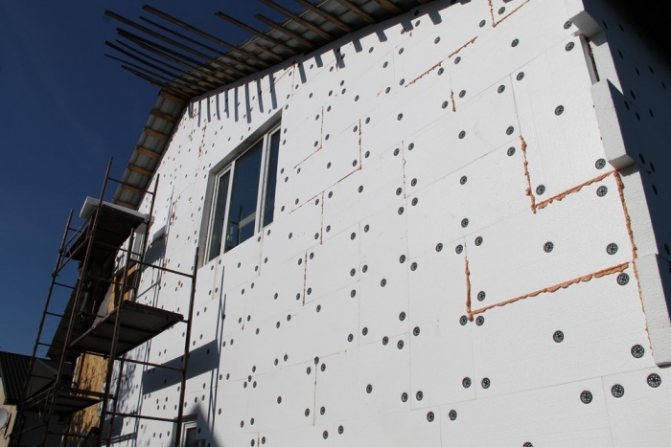
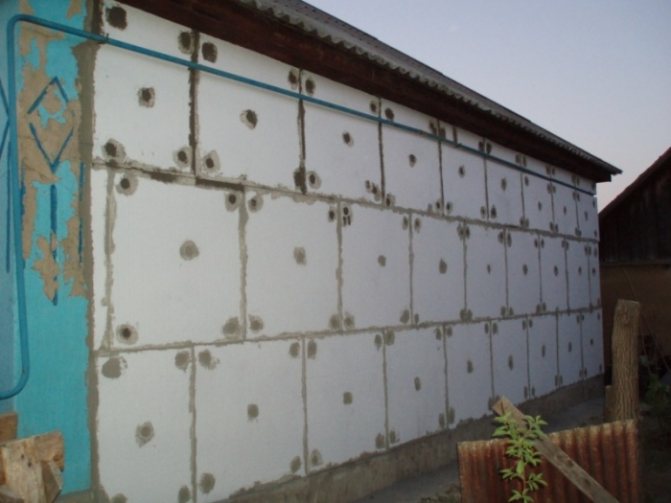
Fixing foam with dowels
After the adhesive has gained the proper strength, it is additionally carried out, fixing the foam with dowels. The process of fixing the insulation with dowels is well shown in the figure below.
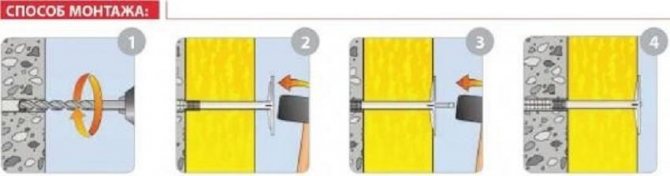
Fastening the foam with dowels to the wall
Sealing joints with polyurethane foam
And at the end of the thermal insulation work, the joints are sealed with polyurethane foam. After the foam has hardened, the excess material is carefully cut off and cleaned with a float.

Foaming gaps between sheets
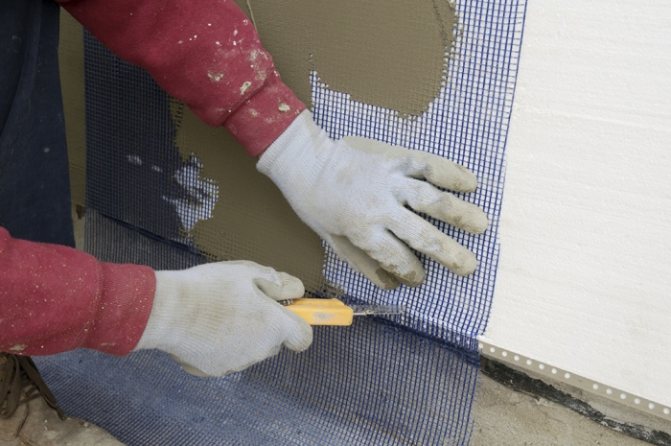
Plastering works
After the surface has been properly processed and prepared, plastering works are performed in compliance with the technology and using a reinforcing mesh. The action, I must say, is not an easy one, rather painstaking and laborious. Certain professional skills are required. Otherwise, the quality of plastering work will be poor.

Layer diagram of the correct insulation


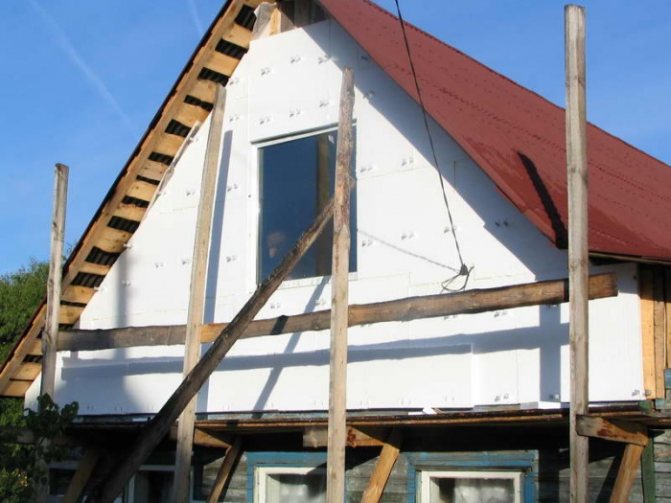
Warming step by step
The owners of summer cottages often undertake to insulate the house outside with penoplex with their own hands. The technology for mounting plates is simple, the order of work is as follows:
- Prepare the walls: remove the plaster and paint, then treat the surface with an antiseptic. If there are places with fungus and mold, a bactericidal composition should be applied.
- Align the walls by filling in irregularities. Thanks to this procedure, it will be possible to prevent the breakage of the plates during installation.
- Apply plaster. For processing the boards, you need to use a needle roller designed for drywall. An alternative is a metal brush.
You can even out uneven places with plaster yourself
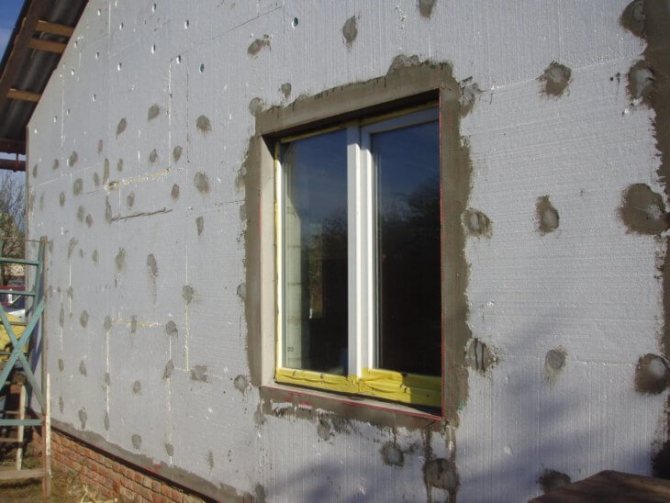
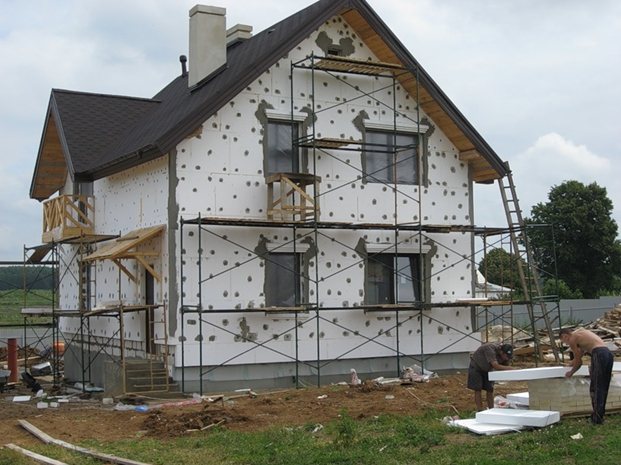
If the sheets are too large, you need to correct them using a saw with small teeth. If it is not available, you can cut the slabs with a knife. For finishing window openings, use whole sheets. At the final stage, you will need to fix them. The glue will dry after 4 days. After this time, you should start securing the sheets. While the lower part is drying, you will need to insulate the house from above using a scaffold.
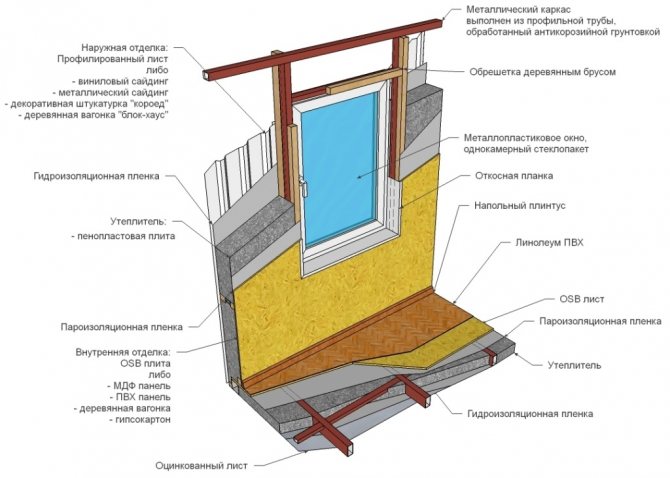
How to insulate the outside with foam plastic walls for siding - Step by step
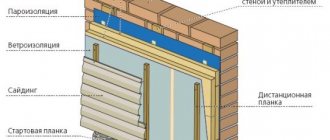
If you plan to use siding as a finishing material, it is not very difficult to insulate the outside with foam plastic. In many ways, construction work is the same as the previous version. However, there are significant differences - it is required to provide a base for attaching the siding. In contrast to the same mineral wool, the insulation of the walls of the house with foam outside does not require the obligatory arrangement of the ventilation layer. Nevertheless, it is more expedient all the same, to equip a ventilation layer. This approach will significantly and significantly increase the service life of the heat insulator.
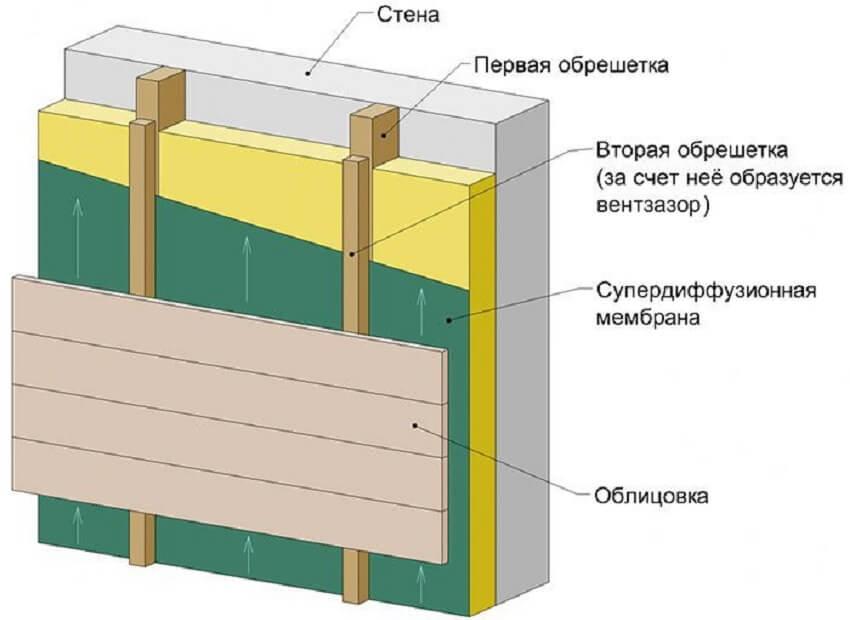
Fastening siding through a wooden lathing

Fastening siding through a metal frame
To know and understand how to properly insulate a house with foam for siding, you need to study and perform the following order of construction work:
- High-quality surface cleaning;
- Proper alignment of the walls;
- High-quality application of the primer;
- Fastening brackets, for arranging frame racks, for siding;
- Foam bonding;
- Fixing with dowels;
- Laying a layer of waterproofing;
- Installation of frame racks;
- Fastening the siding.
Fixing with dowels, as in the previous case, is performed after 3 days of drying. In the general case, the fixing technique does not differ from the previously considered case.
Wall insulation thickness
The proper thickness of the wall insulation is determined by the heat engineering calculation. For a private building, you can choose the thickness approximately. As a rule, it is equal to 100 mm. Determining the exact value depends on:
- Climatic features of the construction site;
- building material walls;
- the thickness of the wall structure;
- the purpose of the building is residential, economic or industrial, for each, special, its own requirements.
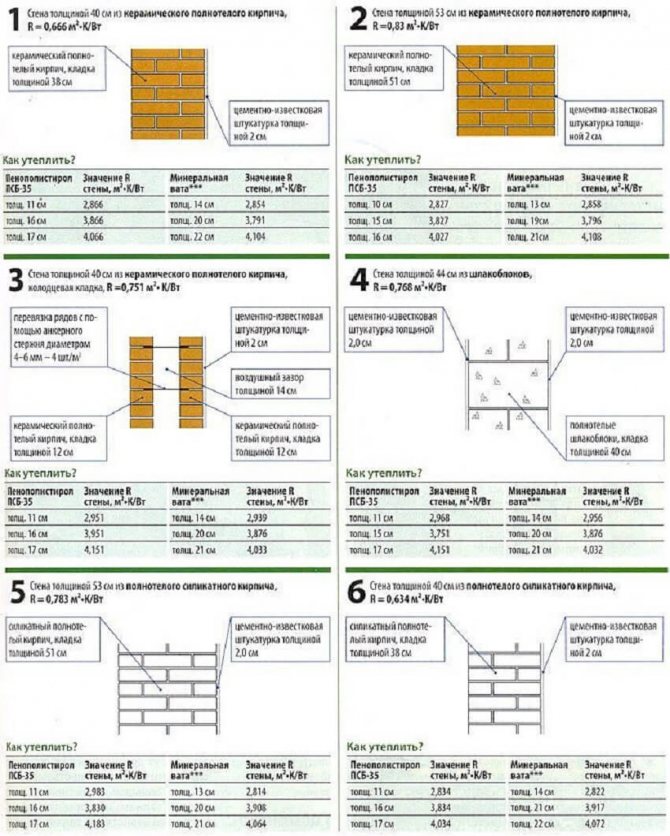
Foam thickness - table
For more accurate calculations, you can apply the Teremok program. It is not difficult and in Runet, freely available. For proper calculation, you will need to determine the composition of the wall. Its thickness and thermal conductivity of the building material. After the results are obtained, the specified value is rounded up.
P.S. Before you professionally insulate a house with foam with your own hands, you need to choose the right building material and carefully study, fully master, all the technology for performing construction work. It doesn't matter what is used for exterior decoration, siding or "wet facade", you just need to strictly observe the order of all layers, and most importantly, fix them reliably and with high quality. With proper thermal insulation, buildings, walls and decoration, and the structure as a whole, will last for many decades. And with proper, timely care, and several centuries.
SHARE ON SOCIAL NETWORKS
Do-it-yourself home insulation with penoplex
1... Leveling the facade walls, sealing cracks, priming; 2... Gluing foam on glue, followed by fixing with dowels; 3... Gluing of reinforced mesh, preparation for finishing; 5... Finish with facade plaster.
If you will be finishing the facade with siding or pvc panels, then you should install vertical guides on the facade. Additionally, the penoplex should not be covered with a vapor barrier, all material will be reliably protected under vinyl siding. Rodents and insects are not afraid of extruded polystyrene foam.
It is quite possible to do all the work on warming the house alone. Like any heat-insulating material, penoplex has good insulation noise qualities - insulation is also a great opportunity to get rid of street noise. For more information on how to insulate a house with penoplex, see the sections: insulating a brick house and insulating a wooden house.