Important points of thermal insulation
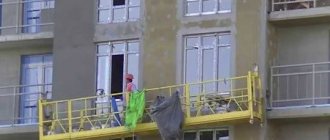
Basement outdoor insulation
First of all, when building a house, you need to decide whether the house will have a basement or not. In the case of a house with a basement, which will be used as a living space, it becomes necessary to insulate it to prevent heat from escaping through its walls.
In this case, the total heat loss can reach up to 15% of the heat loss of the entire building. To reduce the cost of insulation work and to avoid errors associated with the installation of insulation, it is necessary to solve many factors at the design stage.
Pay attention to:
- the functional purpose of the basement;
- the original building materials used for the construction of the walls;
- climatic zone of residence.
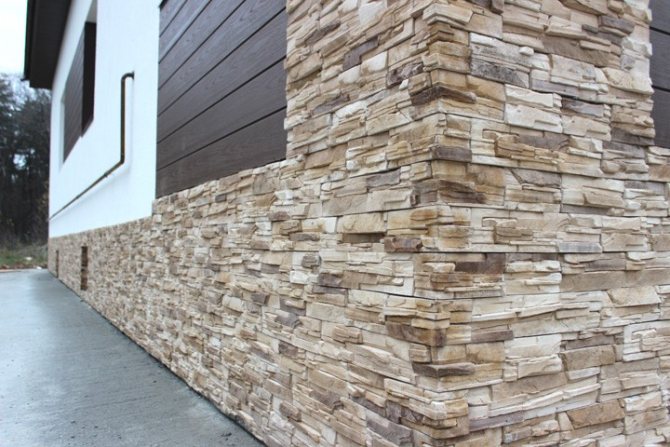
Facing the basement with insulation. Plinth thermal panels: pros and cons
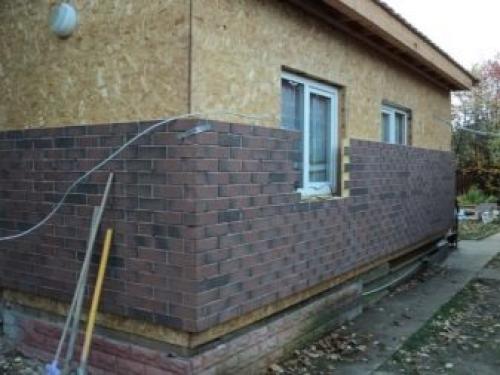
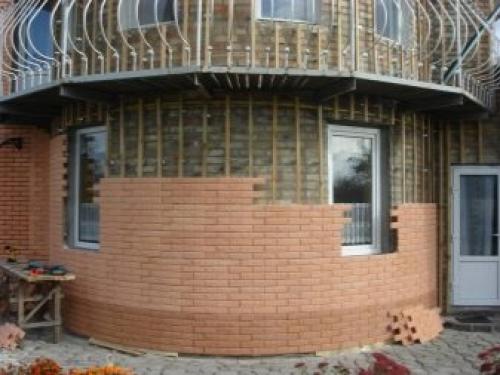
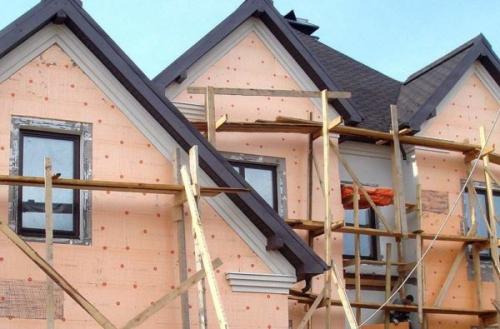
Most of the owners of country houses want to make additional cladding for the basement of the facade. Such a finish is required not only for decorative purposes, but also for insulation and giving greater strength to the outer walls. The modern construction market offers a huge number of materials for strengthening the basement, made using the latest technologies, thanks to which the materials have optimal characteristics and simplify the installation process.
One of these are basement thermal panels with clinker tiles. In the article, we will consider the pros and cons of the products, the method of their installation and customer reviews.
What it is?
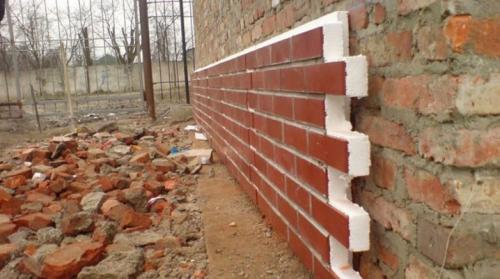
The products are insulated panels with clinker tiles, which, in addition to the thermal function, also have a decorative one. The basis of the material is a heat insulator made of polystyrene foam, polyurethane foam or expanded polystyrene. Each of the above types is intended for a specific surface. The cladding part is a clinker, which is known for its strength and long service life. Similar characteristics are inherent in this tile, since the clay from which it is produced undergoes a special heat treatment.
Many experts put clinker on a par with materials such as granite or marble due to its increased strength, however, unlike them, the tiles do not have a radiation background.
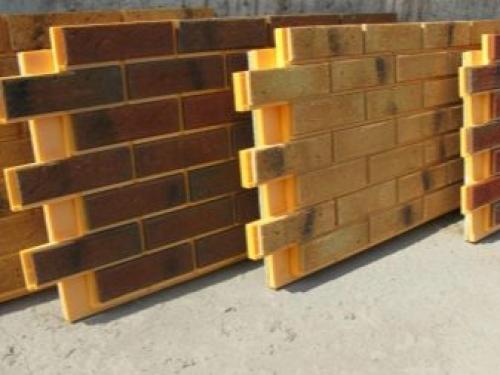
For finishing the basement of the house, panels with a thickness of 6-10 centimeters are used; the level of insulation of the foundation will also depend on the chosen model. The choice of the width of the product should be made based on the type of base on which the installation will be carried out. Manufacturing brands promise customers that their panels will last 50-100 years depending on external conditions. And the companies that produce clinker tiles give a forty-year guarantee of the color preservation of the facing material.
Features and Benefits
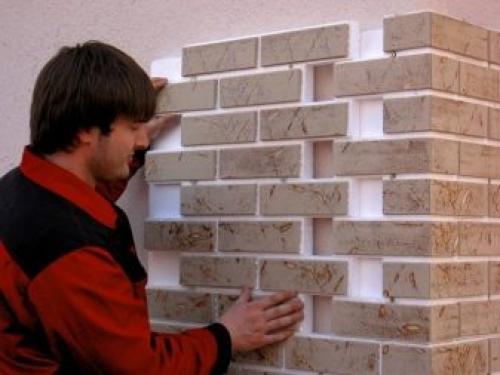
Thermal panels for cladding the basement floor have a large number of advantages that distinguish them from other facade finishing materials with insulation. The products are highly reliable due to a special manufacturing technology, which provides a tight connection of the tile with the expanded polystyrene base at a certain temperature in a locking manner.
This means that there is no adhesive between the two materials, which could disintegrate within a certain time and thereby reduce the service life of the panels. Due to the location of the dew point inside the material itself, moisture does not condense on the wall, which guarantees even greater safety of the products.
The advantage of such thermal panels is the special manufacture of each part, which ensures the perfect connection of the tongue-and-groove parts. Upon completion of the installation process, they merge into a single whole and contribute to the creation of not only a uniform coating, but also a high-quality thermal insulation system. This plus is a guarantor of complete waterproofing of the cladding even in case of slanting rain.
The moisture resistance of the material is an advantage, because thanks to this, the installation of the panels is much easier. And since the products do not absorb water, the walls of the building themselves are protected from moisture. Thermally insulated panels are mounted using plastic profiles, which prevents the occurrence of internal stresses that adversely affect the inner layer. The fire safety of thermal panels is due to the fact that the raw material for the manufacture of the insulation base belongs to the "G1" category, which indicates that the product is non-combustible. The low thermal conductivity of panels with a width of 6-10 centimeters contributes to heat-saving properties, similar to concrete, whose thickness is at least 1 m.
Warming methods
Internal insulation of the base
To date, there are many options for warming the basement. First of all, the foundation should be divided into 2 parts, one of which (underground) is in constant contact with a humid environment (rain, melt water, dampness).
So that moisture does not damage the insulation and it, in turn, does not lose its thermal characteristics, it is necessary to use a moisture-resistant insulation, for example, penoplex.
An analogue of penoplex - polystyrene - also has a high moisture resistance (a comparative analysis of heaters is given in this article).
When insulating the basement, two methods are used:
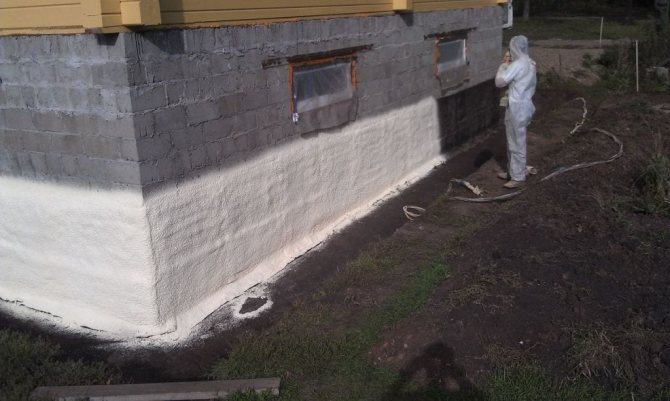
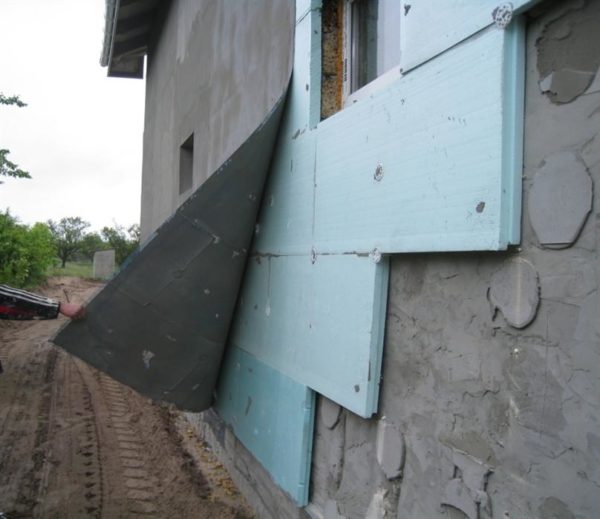
- External insulation. With this type of insulation, it is preferable to use a material that has zero water absorption. Penoplex has similar properties. This work can be done by hand without the help of specialists. Additionally, you will need to make a good waterproofing of the foundation, for example, from roofing material, or treat the surface with bitumen mastic.
- Internal insulation. The procedure for warming is similar to the actions in the first method. The only difference is that the plinth is cladding on the outside. The advantage of interior design is that:
- there is protection from groundwater;
the microclimate is improving.
Note: a great advantage of external insulation is to extend the life of materials by protecting it from atmospheric influences.
However, there is also a drawback: the appearance of condensation between the insulation and the wall.
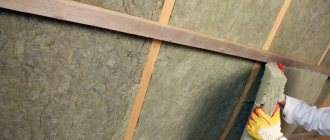
You may also be interested in an article about wall insulation with ecowool. And in the next article there is information about the types and characteristics of mineral wool.
Penoplex features
To further understand the subtleties and nuances of finishing the penoplex, first let's get acquainted with the features of this material. First of all, I note that its correct name is extruded polystyrene foam. Penoplex is popularly called this insulation in honor, which, as it is not difficult to guess, is engaged in its production.
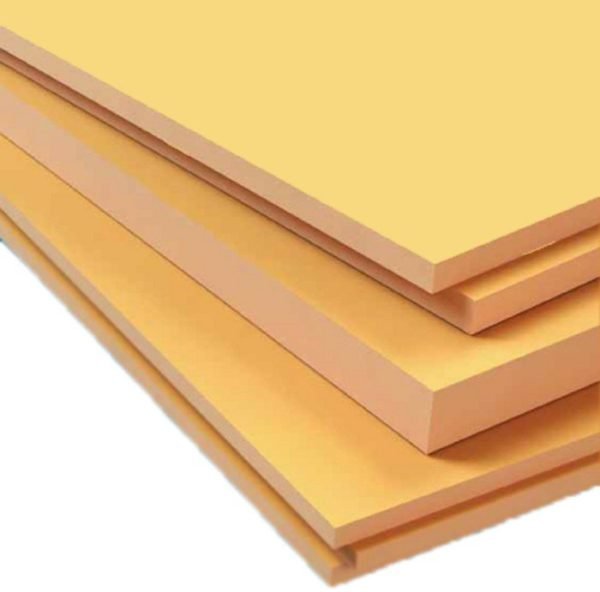
Penoplex is based on ordinary polystyrene foam (polystyrene), which undergoes special processing under the influence of high temperatures. Thanks to this, he acquires the following qualities:
- higher strength;
- homogeneous smooth structure;
- zero moisture absorption;
- vapor permeability;
- lower thermal conductivity than conventional foam.
Often, manufacturers add fire retardant additives to the penoplex, as a result of which the material acquires the G1 flammability class. True, only the most expensive brands of extruded polystyrene foam from well-known manufacturers have this quality.
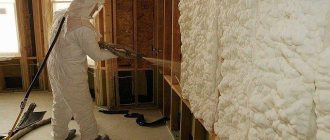
On the one hand, due to these properties, extruded polystyrene foam is a more attractive insulation. But on the other hand, due to zero moisture absorption and smooth homogeneous structure, this material has very poor adhesion. Therefore, initially it was not intended at all for use in “wet facade” insulation systems.
The result of improper finishing technology of extruded polystyrene foam
A big mistake for beginners is that they try to finish the foam in the same way as regular foam. This leads to the fact that the reinforcing mesh lags behind it along with the plaster (glue), immediately after hardening..
However, this does not mean that the use of penoplex for arranging a "wet facade" must be abandoned. There is a proven finishing technology that I want to share with you.
The price of penoplex is several times higher than the cost of ordinary foam. Therefore, it makes sense to use this material only where its qualities, such as strength, are really important. For example, it can be used to decorate basements.
Preparatory work
Having examined the advantages and disadvantages, we will consider the stages of preparatory work for external insulation:
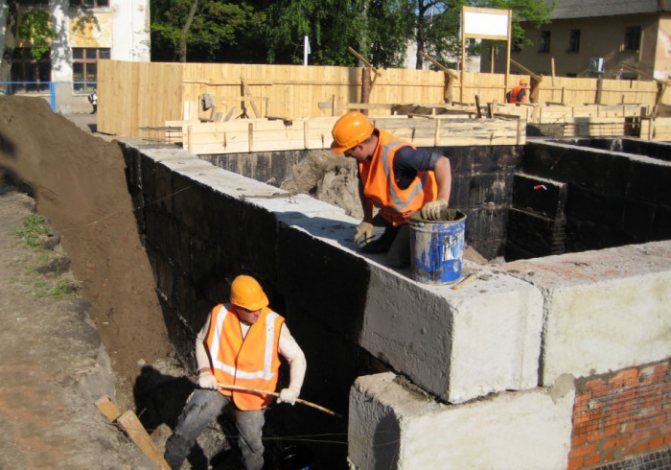
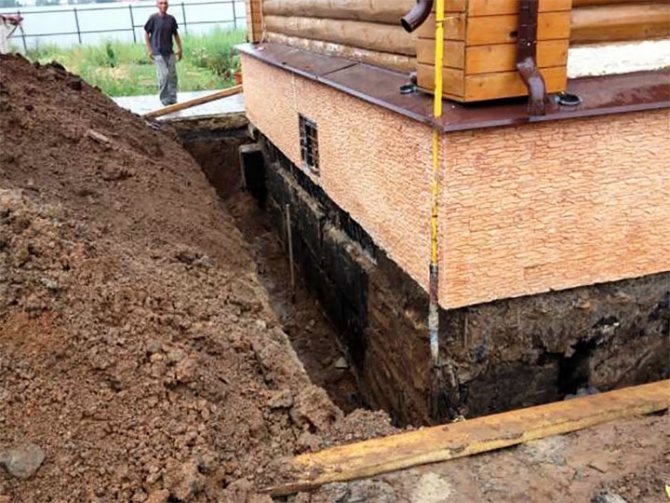
- Around the house, soil is selected, the depth of which should be equal to the depth of the foundation. Further, for ease of installation, a trench about a meter wide is pulled out.

- The base is cleaned from dust and dirt.
- If necessary, the surface of the base is leveled using a cement mixture.
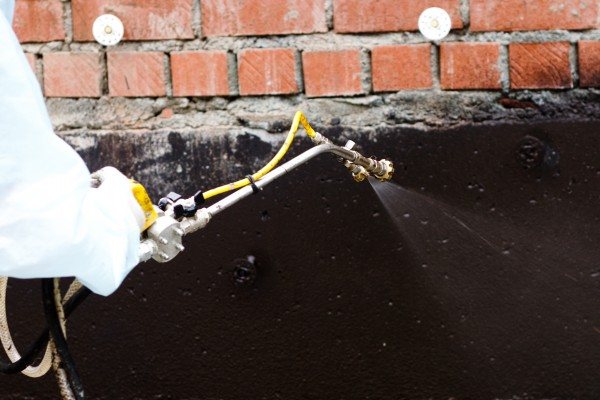
- Next, waterproofing with roofing material is performed. However, you can get by in a less costly way, namely, priming with bituminous mastic. The mastic is applied in 2 layers, and the second layer is applied only after the first has completely solidified.
Keep in mind: a more reliable option would be to use a deep penetration waterproofing, such as a penetron.
How to finish penoplex. Foam finishing technology
The process of finishing the penoplex can be conditionally divided into several stages.
Next, let's get acquainted with the nuances of technology on each of them.
Extruded polystyrene foam can also be used in the arrangement of hinged (ventilated facades). In this case, the work is carried out in the same way as in the case of using other thermal insulation materials, such as foam.
Instrument preparation
So, before finishing the penoplex, you need to prepare a certain set of materials:
- an adhesive primer such as Ceresit CT19;
- Ceresit CT83 glue or its analogue;
- fiberglass mesh for outdoor use;
- perforated corners;
- universal facade primer;
- decorative facade plaster;
- facade paint.
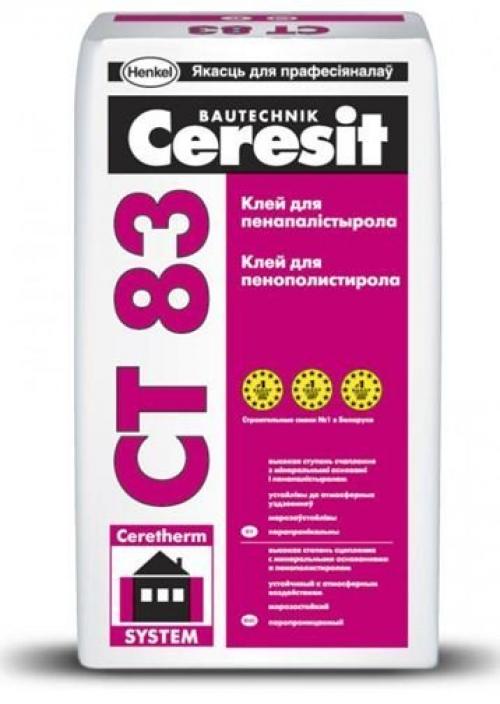
Ceresit CT83 glue
In addition, you should prepare the following inventory:
- needle roller or metal brush;
- a set of spatulas;
- plaster bevel;
- building level;
- construction mixer or drill with a special attachment;
- paint roller and pallet;
- paint brush;
- assembly knife.
Now you can get to work.
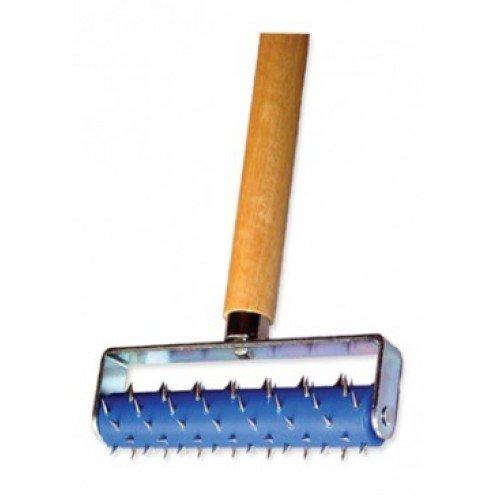
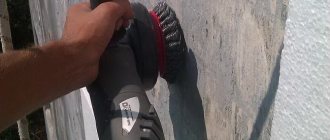
Needle roller for processing foam
Preparation for reinforcement
Preparation for reinforcement is the most critical stage of the work, since it depends on it, the adhesion of finishing materials to the foam, respectively, and the durability of the entire finish. Instructions for performing preparatory work looks like this:
- first of all, the surface of the extruded polystyrene foam must be roughened. To do this, treat the insulation with a needle roller or metal brush. You can also use ordinary sandpaper stretched over a jointer for these purposes;
The surface of the foam must be rough
- then the surface should be additionally treated with an external adhesive primer. To do this, pour the liquid into the roller tray and dip the roller itself into it.During application, make sure that the primer is applied in a thin, even layer. After the first layer of soil has dried, the procedure is repeated again;
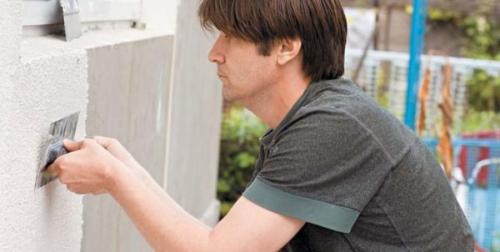
- then you need to glue perforated corners to the outer corners of the foam, using Ceresit CT83 glue. In the process of installing them, use the building level so that they are located strictly vertically or horizontally.
That's all the nuances of preparation. Now you can start reinforcing the penoplex.
Penoplex reinforcement
Reinforcement
Do-it-yourself reinforcement of penoplex is carried out as follows:
- First of all, cut the fiberglass mesh into sheets of the desired length. Keep in mind that the mesh should be turned up at the corners and with an overlap of about 100 mm;
- then prepare Ceresit CT83 glue according to the instructions on the package;
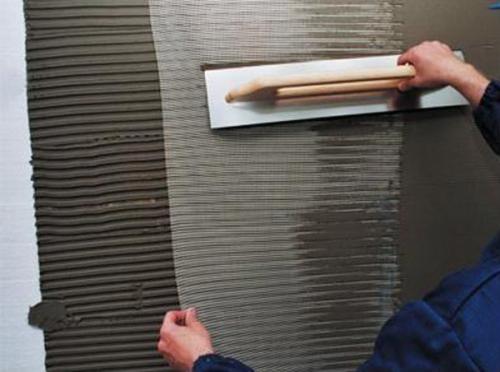
- then apply the glue to a mesh-sized area with a thickness of about 5-7 mm;
- then process the area covered with glue with a notched trowel, while the excess glue that will remain on the spatula, throw back into the container with glue;
- now attach the mesh to the glue, after leveling it, and iron it with an even wide spatula. As a result, the mesh should be completely immersed in the glue;
- according to this scheme, it is necessary to reinforce the entire surface of the insulation;
- after the surface has solidified, it is necessary to apply another layer of glue about 3 mm thick. For the second layer, you can make the glue thinner to make it easier to work with.
In the process of applying the second layer, try to get rid of all surface imperfections, as if you were putting on the walls.
This completes the reinforcement of the insulation.
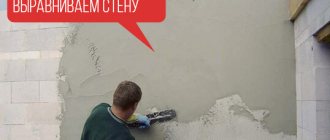
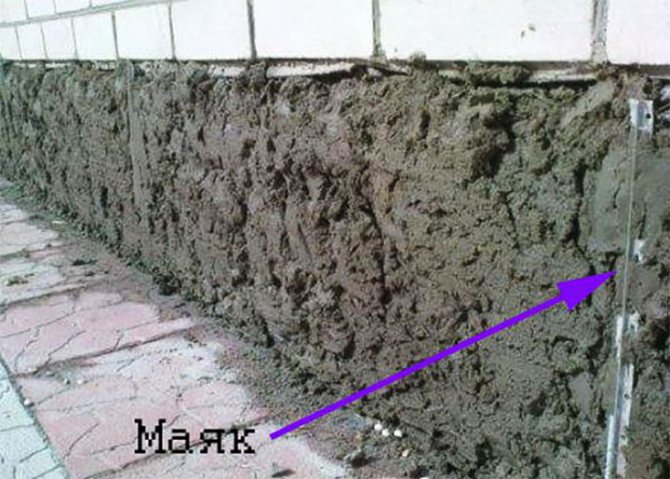
Decorative plastering
Decorative finishing
Decorative finishing of the foam from the outside is carried out as follows:
- start by treating the surface with a universal façade primer. This work is carried out according to the scheme described above;
- then you need to stir decorative plaster in water according to the instructions from the manufacturer, which is on the package;
- then the surface is covered with decorative plaster using a bevel or a wide spatula. The solution should be applied as thin as possible.
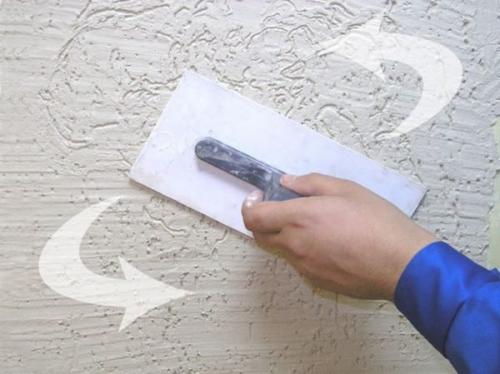
In the photo - mashing decorative plaster
- after 5-7 minutes, when the plaster begins to set on the walls, grouting is performed. To do this, place the beetle flat, and, slightly pressing it against the plaster, make circular or reciprocating movements with your hand;
- after the decorative plaster dries, you can start painting the facade. The easiest way to do this work is with a facade paint roller.
Try to apply the paint in a thin, even layer, and, of course, avoid drips. To paint a surface with high quality, paint in two or even three coats.
It is necessary to apply decorative plaster within one wall in one go, i.e. without interruption. Otherwise, the transition will be conspicuous even after painting.
This completes the exterior decoration. I must say that you can use penoplex for interior wall decoration, for example, if you need to insulate a loggia or balcony. In this case, instead of decorative plaster, you can cover the reinforced surface with putty and then any topcoat.
Installation work
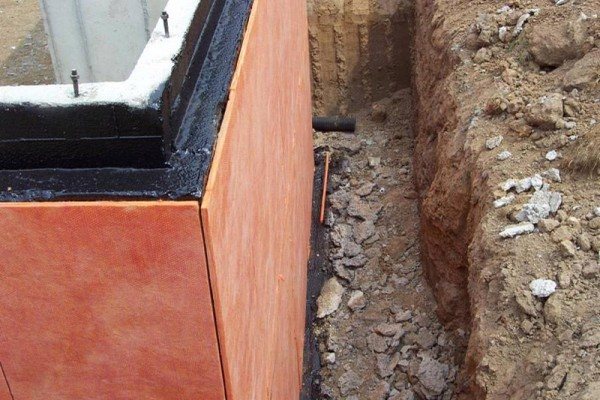
Thermal insulation of the foundation and plinth with Penoplex plates
Starting to install the penoplex, we need the following tools:
- plastic dowels;
- slope corner;
- construction knife;
- a hammer;
- notched trowel;
- trowel (trowel);
- building level.
It is important: materials and tools should be of high quality.
Technology of carrying out work on warming the basement with penoplex
All the work that is required to insulate the basement is quite simple and does not require any special knowledge.It is enough to follow the step-by-step instructions below, and the insulation will be performed as efficiently and quickly as possible.
Preparation for work, tools
In order to complete all the necessary work as quickly as possible, it is necessary to prepare in advance not only the material and accessories, but also the tools that may be needed. During installation, you will definitely need a special slope corner and a construction knife, a trowel, a hammer, a notched trowel and a building level. Do not forget about a sufficient number of dowels and other devices that will help to securely fix the penoplex on the surface of the base.
Insulation installation
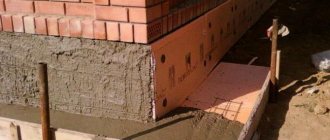
First of all, it is necessary to make a sand or sand and gravel cushion, which should be located under the lower part of the foundation and slope away from the building. In the event that a sufficiently high groundwater level is present, additionally install a drainage pipe.
It is worth installing waterproofing on a surface prepared in advance. The best way is to use a special coating method. You can use mastic or bitumen-based materials.
Some experts recommend combining several different waterproofing options at once in order to get the most positive result. You can also use modern film options or waterproofing membranes.
Further on the glue-foam or a special glue mixture, it is necessary to attach the sheets of penoplex. You should start working exclusively from the bottom corner of the foundation. The slabs must be laid horizontally to the same level as the clean floors of the first floor of the house. If the outer walls are completely insulated, then the foam sheets can be glued a little higher.
When the installation work is completed, it is necessary to glue the reinforcing mesh onto a special glue. When it is completely dry, you can proceed to further finishing work.
In order to get the maximum result from the use of Penoplex insulation, it is necessary to correctly and efficiently perform all the work. It is necessary to ensure that there are no seams or gaps between the sheets of material. It is through them that heat will come out of the house.
Penoplex is considered a fairly good option for insulation, which deserves attention. It is also worth paying a lot of attention to the choice of a suitable material for decoration, which will improve the general characteristics of the insulation and make the house even warmer and more comfortable.