Electric underfloor heating
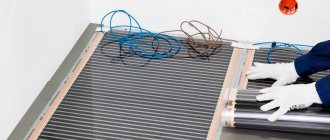
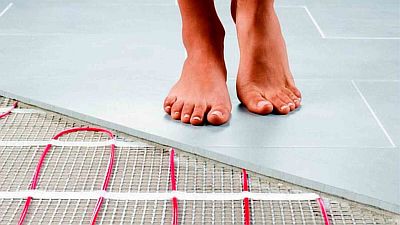
Warm electric floors operate from a 220 W electrical network, energy is transmitted using a special power supply unit. Electric current, passing through wires or carbon plates, heats them. They, in turn, transfer heat to the surface. Thus, electricity is converted into heat energy.
Installation of electric floors is easier than water floors, but many people have questions about safety for human health. Electrical structures emit electromagnetic waves, but their volume is insignificant (especially for infrared films and rod mats), and, according to experts, does not harm humans.
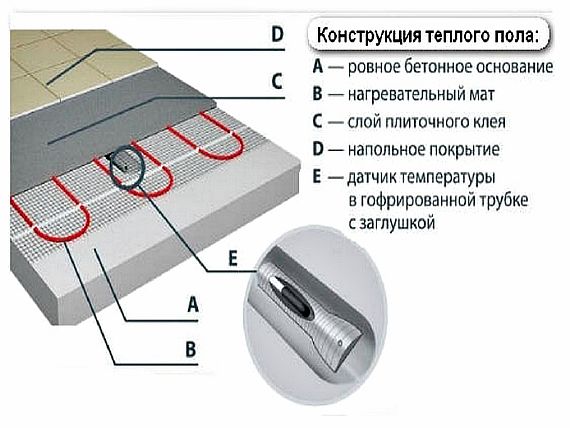
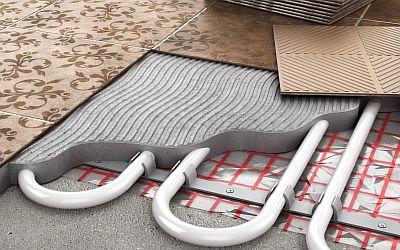
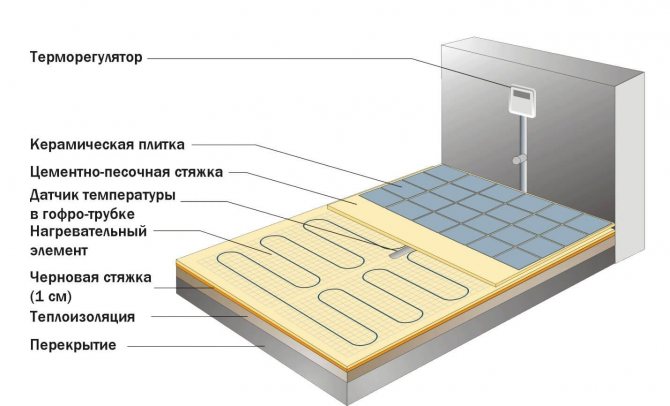
The device of the "pie" is as follows:
- base;
- hydro and thermal insulation;
- foil backing;
- heating cable, infrared foil or rod mats;
- concrete screed or flooring;
- topcoat.
For the installation of these heating systems, you will also need a temperature controller and a sensor.
There are several types of electric underfloor heating.
Cable
Cable - a structure consisting of wires that are laid out on the surface of the subfloor according to a certain pattern.
There are cable mats - there the wires are already fixed on the canvas with a certain pitch. More often such floors are filled with concrete screed.
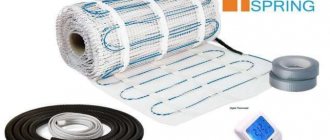
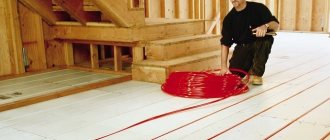
Infrared
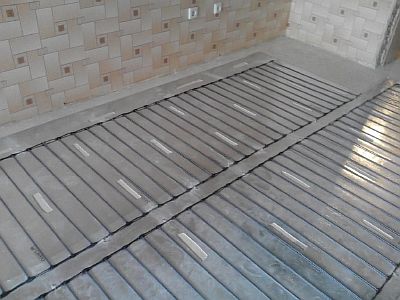
Infrared - double layer film with carbon stripes inside.
The difference between this system and cable floors is that such a device heats not the air in the room, but the objects in it.
It is an economical, fast and most suitable dry-styling option.
Rod
Rod - a type of infrared heating floor, the heating element is carbon rods, which are placed on the mat.
Possible causes of breakdown
The principle of operation of a warm electric floor is not much different from other types of electrical appliances. The current, falling on the heating element, heats it up, it gives off its heat to the screed or floor covering, thereby warming up the air in the room.
The passage of current to the heating system is carried out through a thermostat, the main function of which is to turn the floor on and off, and regulate the strength of its heating. As soon as it reaches the set temperature, the thermostat turns off, which also happens when the coating overheats.
What can cause a weak floor heating or a complete lack of heat?
Typically, the most common culprits are:
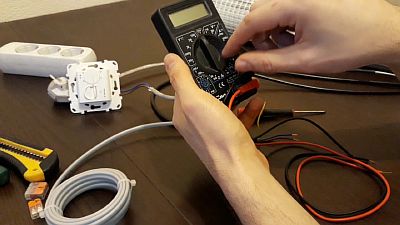
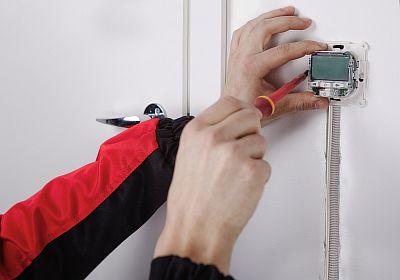
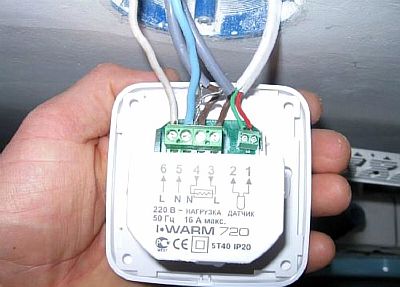
- Thermostat, so you need to start checking with it. To make sure of its malfunction, you should dismantle the device, turning off the light first, and check with a multimeter.
- If the floor is cable, then breakage may become the cause of breakdown. This happens either during installation, or by some mechanical action, for example, with a drill during repairs. The cable is checked by measuring its resistance and insulation. If the data exceeds the readings of the data sheet by more than 5%, then it is damaged or there is a break in it. In the infrared system, rapid deterioration of the film is possible due to an insufficiently dense coating. If, for example, thin linoleum was put, then even a woman's heel can push through the film floor.
- The temperature sensor can also cause a malfunction. If the base does not warm up at full capacity, then it simply does not turn off and the floor works non-stop around the clock, which leads to high energy costs.On the other hand, if the temperature sensor is too close to the heating elements, then it will quickly heat up and turn off, and the floor will not reach the desired temperature.
Whatever the cause of the breakdown, the repair of an electric underfloor heating, if you have the necessary tools, can be done independently.
Read below how to fix an electric underfloor heating.
Reasons for the failure of electric underfloor heating
Despite all the apparent strength of electric heating (cable, infrared and rod), there are several elements in the design that can fail.
The main malfunctions are when the floor does not heat at all or it is not possible to control the heating. To find the cause and eliminate them, sometimes it will be necessary to completely disassemble the "pie", but sometimes it is enough to repair the regulator.
Thermostat - the reasons for its breakdown and repair
If floor interruptions are found, then after checking the power supply, it is recommended to start with the diagnostics of the thermostat. When the device is not working properly, the floor will not heat up or, on the contrary, the system will overheat.
The main function of the regulator is to transmit electric current to the heated floor. He is responsible for the strength and quality of heating. With its help, the temperature is regulated - upon reaching a predetermined level, the device automatically turns off, and it turns on again when the degree of heating in the apartment decreases.
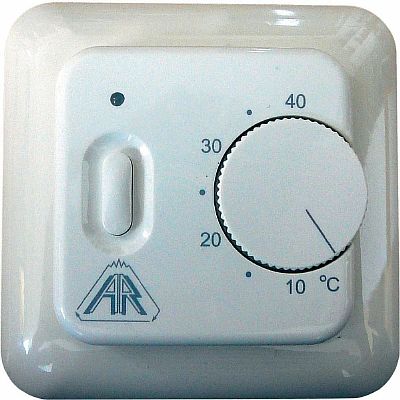
Thermoregulators are electromechanical and electronic. Devices of the mechanical type are simple - vernier, temperature scale and shutdown button, they are repairable.
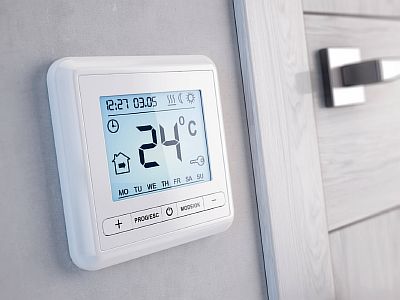
Electronic - more intelligent devices equipped with an LCD screen, and a microprocessor acts as a control element. With their help, it is possible to adjust the temperature taking into account the time of day. Such devices are more reliable, but they cannot be repaired; if they break down, they are simply replaced.
The first thing to start checking the device with is to make sure that there is power in it, the indicators on the screen indicate this. If they do not light up, then you should find out the reason.
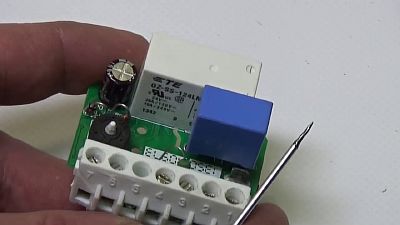
For this, the device is checked using a multimeter - a special digital device. If the problem is in the regulator, then more often this is due to weak contacts of the terminal block located inside. It is not uncommon for a transistor, voltage regulator, relay or capacitor to break down.
If there is voltage at the input, then you need to check whether it reaches the cable or film (infrared or rod).
The control unit repair process is as follows:
- the power supply is cut off;
- the regulator is dismantled;
- the cover is removed, and the screw connections are tightened with a curly screwdriver.
If these manipulations did not have a positive effect, then it is easier to replace the entire device.
For your information! If a microprocessor breaks down in an electronic device, it is more profitable to completely change the unit.
And if there is a malfunction in the switch of the mechanical regulator, then to restore its functions, it is recommended to wash it in a solution of alcohol.
Replacing the display of the thermostat
There are times when the floor is functioning, but the indicators on the screen of the thermostat are not reflected, then the display needs to be replaced.
This is quite simple to do, the main thing is to follow the instructions. To do this, the regulator is disconnected from the cables, then the box is untwisted, the faulty shield is removed and a new one is installed.

Floor sensor
The main problem with the floor sensor is that it works without shutdowns or turns off when the heating has not reached the desired level. This happens if the device is placed close to the heating element.
The heat from it affects the sensor, and it turns off before the entire system warms up. Then the temperature sensor starts to work continuously to warm up the floor to a predetermined value.
Such functioning of the device increases the cost of electricity, and leads to rapid failure of the floor, due to continuous operation.
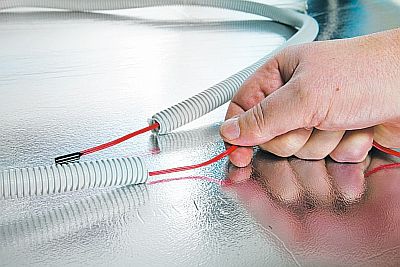
To repair the sensor, it is not necessary to dismantle the structure, since it is placed in a special protective tube. The main thing is to find a way out to it, and pull the device out of it by the wires. The sensor cannot be repaired, so you need to buy a new one and connect it.
For your information! If it is not possible to remove the sensor, then in order not to dismantle the entire structure, it is recommended to replace the thermostat with another model, which has an independent timer.
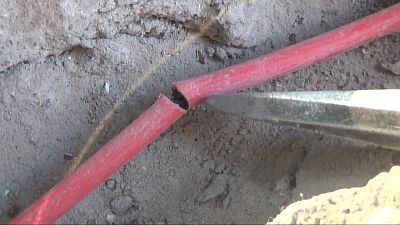
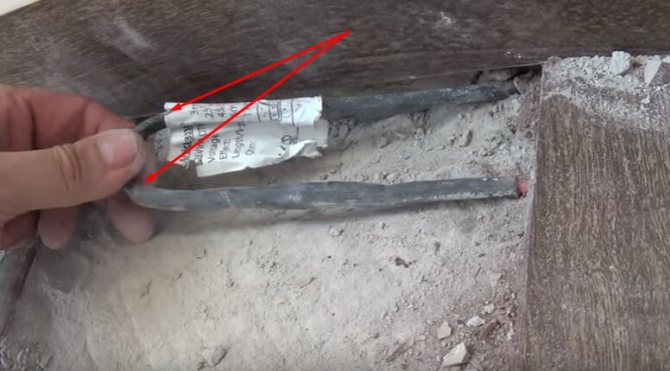
Cable fault - open circuit
One of the reasons electric floors fail is cable breakage. Electrical wiring is often damaged at the time of installation of the structure. In addition, movement along this section during the operation period leads to an increase in the gap.
To make sure that the floor is not functioning due to a broken cable, you need to measure the resistance level. The obtained values should not exceed the nominal values indicated in the technical data sheet for the product. An excess of 5% is permissible, if more, then the wire is damaged.
There are two ways to detect the place of a gust, using various equipment, such as:
- high-voltage generator - it will show the area of the fault, creating the effect of an electric arc;
- audio detector or voltage tester - at the place of damage, the device will emit a peculiar sound, reminiscent of the sound of a metal detector.
The very process of repairing a cable or underfloor heating mat is quite complicated. Therefore, the use of a locator, which establishes the exact location of the break, greatly simplifies the work and allows you not to dismantle the entire concrete pavement.
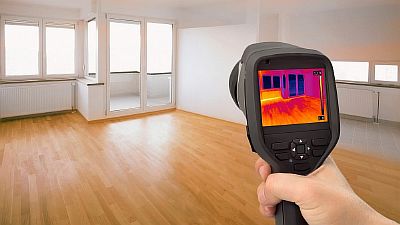
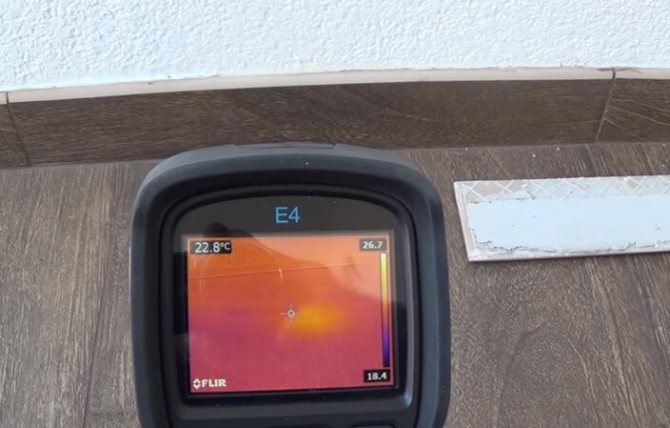
Before starting repair work, you should stock up on a thermal imager, a generator, connection sleeves, heat shrinkage and pressing tongs.
The principle of repair in case of a warm floor break consists of the following stages:
- start by turning off the power and disconnecting the wires from the thermostat;
- then high voltage is applied to the cable through the generator;

- the place with the highest voltage level is established with the thermal imager;
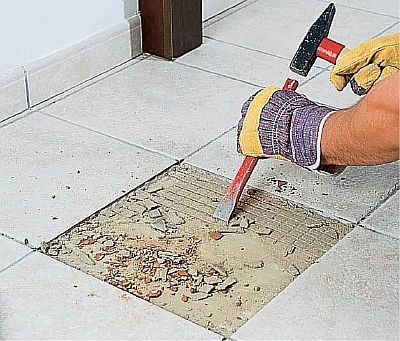
- at this site, the screed is dismantled to the heating elements;
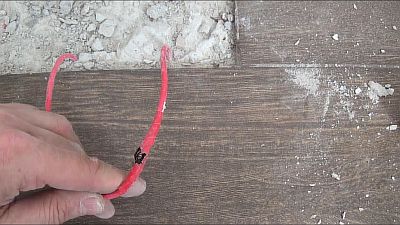
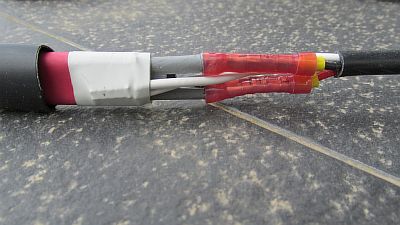
- the ends of the broken wire are protected and connected to each other with a copper sleeve, after which the joint is pressed;
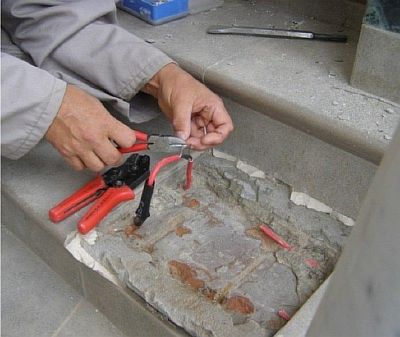
- the connecting section is insulated with special tape or heat shrink tubing.
Important! Before restoring the screed, you must turn on the floor and check its functionality.
For your information! If an infrared or bar floor is used, it is recommended to measure the resistance of each individual canvas, since malfunctions in these devices are caused by poor contacts in the electrical circuit.
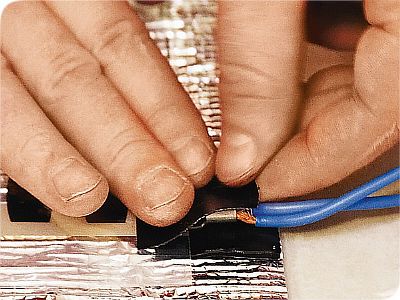
The film is connected to the power supply with wires, they are attached to the copper bus with clamps. It is this poor-quality contact that does not allow the floor to heat up, the metal is oxidized, which ultimately leads to an open circuit. To resume work, the contact must be replaced.
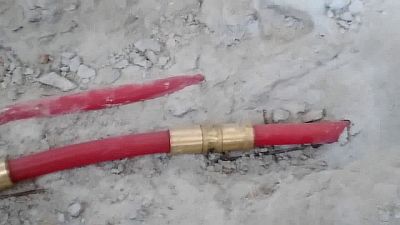
Coupling defect
Another problem of the heating element, which affects the operation of the underfloor heating, is the lack of contact in the coupling. This happens if, during installation, the heating element was turned sharply next to the coupling. Then, at the turn, a strong tension occurs, and the cable is pulled out of the sleeve during the operation of the equipment.
The repair process for underfloor heating with an end sleeve consists of:
- heated by a construction hairdryer;
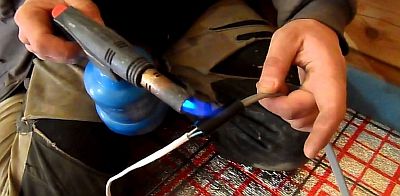
- cutting the coupling with a clerical knife to free the problem area.
Further, the actions are similar to those described above. The cores at the ends of the wire where the problem is detected are protected, connected with a sleeve and compressed with pliers.
An adhesive heat shrinkage is put on this area, which should be heated with a construction hairdryer, until the glue is released. As a result, the connection is tight.
Incorrect installation
Having checked all the connections and parts, and without identifying any problems in them, we can conclude that the reason for the malfunctioning of the device lies in the installation:
- in errors when calculating the heating power;
- in heat loss caused by poor insulation of the room;
- in the inconsistency of the laying step with the technological parameters, when installing the cable;
- in the thickness of the screed or the place for the thermostat was chosen incorrectly.
If the problem is not in the installation of the temperature controller, then it is possible to fix the problems only after dismantling the structure and re-laying it in compliance with technological standards.
In this case, it is necessary to take into account the most common mistakes that are made when erecting electric floors (cable, infrared and rod type):
- Heating elements are located under heavy furniture and plumbing fixtures.
- Materials with a low level of thermal conductivity are used for thermal insulation.
- Not accurate movement is performed when installing on a cable or film. Thus, the heating elements can be damaged, therefore, before pouring the screed, their integrity should be checked.
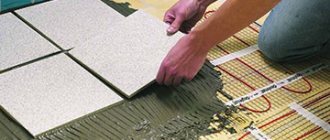
For your information! When laying the heating element in the adhesive, it is easy to damage it with a spatula when gluing the tiles, since the layer is thin. Therefore, the work should be done carefully.
Water heated floor
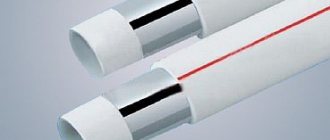
Water floor is a structure made of pipes that are laid according to a certain pattern (snake or snail). Such a device has a long service life - more than 50 years, provided that high-quality material is used and the rules for servicing the warm floor are observed.
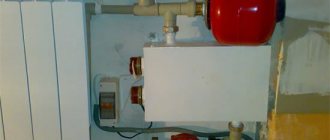
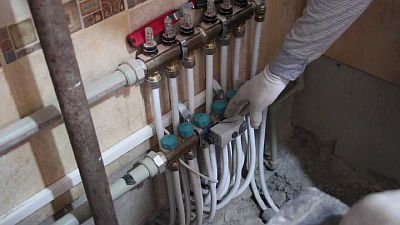
In addition to the pipeline through which the heated fluid moves, the hydraulic floor is equipped with:
- bypass;
- circulation pump;
- a collector and an electric drive - they are necessary to regulate water flows;
- balancing valve - it is designed for mixing cold and hot heat carrier;
- thermostat and thermostat - they are responsible for the heating level.
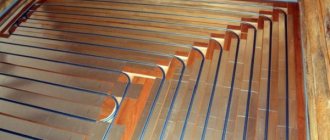
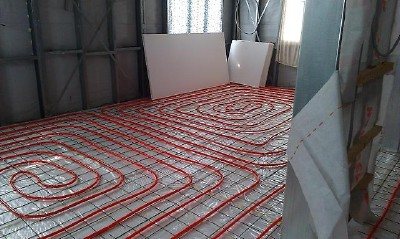
Laying methods
Regardless of the size and shape of the room, there are practically no restrictions for a warm water floor system. There are two main ways of laying the pipeline:
- meander
- "snail".
The meander assumes that a minimum distance of 300 mm between pipes must be observed during installation. The "snail" method provides for a distance of 100 mm. It is also worth noting that the second method is simpler. "Snail" gives an even distribution of heat over the concrete screed, also requires less pump power.
Reasons for the failure of water floors
Water floors, like electric ones, function with low heat transfer with poor thermal insulation, then you will have to completely shift the "pie".
In addition, the presence of errors in the calculation of the power or the installation of inappropriate components also affects the quality of the system. And if a boiler of weak power is installed, then the amount of energy generated may be insufficient to heat the required volume of water.
Damage and repair of the pipeline
Pipes are the main part of the water floor, they can also become unusable. The most common reason is a burst or leak, this can happen when the pressure in the pipeline drops sharply. A leak leads to a decrease in the volume of the coolant in the line, and water flowing out to the outside leads to the destruction of the screed.
To identify the location of the leak, you first need to carry out a visual inspection of the floor on which wet spots can be found.If it is impossible to determine the area of the gust in this way, a thermal imager will be required, using it will make it easy to identify where the damage is.
Step by step, the repair of the hydraulic floor pipe looks like this:
- dismantling of decorative finishes and screeds is carried out in this area;
- the coolant is drained from the line;
- the product is cut with a hacksaw at the location of the break;
- the pipeline is cleaned from debris inside;
- the edges are aligned on both sides with a sweep;
- the coupling is put on both ends;
- the clutch is crimped with pliers.
Before pouring concrete, the system should be checked for leaks. It is filled with water, and pressure testing is carried out to squeeze air out of the pipeline.
Uneven heating
Another reason why the floor does not warm up well is that water is not evenly distributed through the pipeline. This happens if the length of the contours is different.
In long loops, the coolant cools faster. To remedy the situation, it is necessary to adjust all circuits on the manifold separately.
For your information! It takes some time to see the result of heating, which depends on the number and type of construction layers.
And also on the temperature of the water and the rate of its entry into the line, the power of the equipment and the material of the finished product.
Malfunctions in electrical equipment
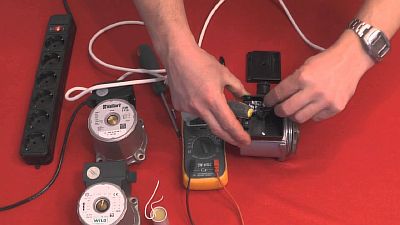
If there is no leak, then the malfunction may lie in the electrical equipment. A circulation pump or thermostat can fail, they are located in the manifold assembly.
The first step is to make sure there is tension in them. For this, a multimeter or an indicator screwdriver is used. In addition, it is possible to understand that the pump is not functioning if there is no characteristic noise when turned on.
In addition, it is necessary to check the voltage at each terminal and temperature sensor.
DIY water underfloor heating repair
If it was found that the pressure drops in the underfloor heating system regularly, then there may be some damage in the pipes. First of all, repairs should be started from finding the defective place. For these purposes, there are several proven methods, which were described in more detail in another article in a construction magazine - how to find a leak in a warm floor.
After the place of the leak is found, it is necessary to clear the access to the pipes of the underfloor heating in order to put the coupling. There should be at least 10-15 cm on each side of the pipe. Only in this way it will be possible to use a manual press under the tension fitting if a floor heating made of cross-linked polyethylene was installed.
For these purposes, the pipe is cut at the site of damage, rolled and prepared for pressure testing. It may be necessary to shorten it a little so that it would be possible to properly install the clutch. It all depends on some specific conditions and the heat-insulating material that was laid under the warm floor.
Repair kit for underfloor heating

A standard repair kit for repairing warm electric floors (cable, infrared and rod) includes:
- electrician's set - pliers, nippers, tester;
- press jaws - to crimp connecting sleeves;
- building hair dryer - to heat the shrink sleeve;
- perforator - to punch and remove the tie.
To repair the water system you will need:
- hammer, pliers, screwdriver, chisel;
- set of wrenches;
- puncher;
- connecting fittings.
Breakdown prevention
To extend the life of underfloor heating and avoid premature damage, it is recommended:
- takes power measurements and calculations seriously;
- produce high-quality thermal insulation;
- place the temperature sensor in the corrugated pipe;
- do not turn on the system until the screed has completely hardened;
- select the cable cross-section according to the size of the room;
- cut infrared film or core floor along special lines.
After installing the underfloor heating, it is imperative to keep the layout of the heating element. In case of breakdown, it will be easier to repair the system with its help.
If your heated floor is out of order, and you are not sure that you can repair the heating device yourself, then it is easier and more reliable to call a specialist, although of course this is a more expensive option.