Floor heating device methods
In wooden buildings, warm floors with a coolant can be mounted in 2 ways:
- Traditional, under the screed made of cement-sand mortar.
- "Dry" method, on wooden logs or beams
Since in houses made of wooden beams, the floors of the first floor or the ceiling above the basement are often concrete, the traditional method of installing floor water systems cannot be completely swept aside. Moreover, you should not be smart on such bases with a warm floor on wooden logs, this will lead to unnecessary costs, and the result may not meet your expectations. It is better to arrange a heating system under the screed on rough concrete floors, and only then lay the flooring made of wood.
The situation is completely different when the house is with wooden beams. Screed with a heating circuit should not be performed on them, and here's why:
- A cement-sand screed has an additional load, for which the overlap is not always designed.
- A good wooden house is constantly "breathing", as a result of which the layer of mortar can crack, since the amplitude of its expansion does not coincide with the processes in wooden structures. It will be necessary to compensate for the expansion of the heating circuit, which is quite difficult and costly.
For reference. Sometimes wooden houses are often built from insufficiently dried profiled timber, which is why, at first, changes occur in the thickness of the structures, leading to cracks in the material. In such conditions, the screed will certainly suffer.
The use of various electric underfloor heating systems is not excluded, of which the most acceptable option is the use of infrared underfloor heating for heating a wooden house. A thin polymer film with heating elements applied on it is laid directly under the floor covering, no screed is required, which greatly simplifies installation work. However, in this case, the choice of energy resources for heating a dwelling is limited to electricity, while the coolant of water-heated floors can be heated from a gas, solid fuel or diesel boiler.
Some homeowners, in tribute to tradition, have built brick ovens in wooden houses with a heating circuit for water. In this situation, there is simply no alternative to floor heating circuits with a coolant.
What is a wood floor made of?
In order to understand how to properly install underfloor heating in wooden houses, you need to understand how the floor is arranged in such houses.
A wooden floor can consist of several layers, as a rule, they are as follows:
- Rough floor;
- Thermal layer;
- Waterproofing layer;
- Floor covering such as linoleum, parquet, laminate, etc.
Heating elements can be located between these layers, which will create the underfloor heating system. It is worth noting that such houses (floors) are built on logs, and in the absence of a foundation, on poles.
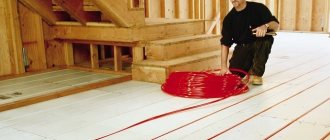
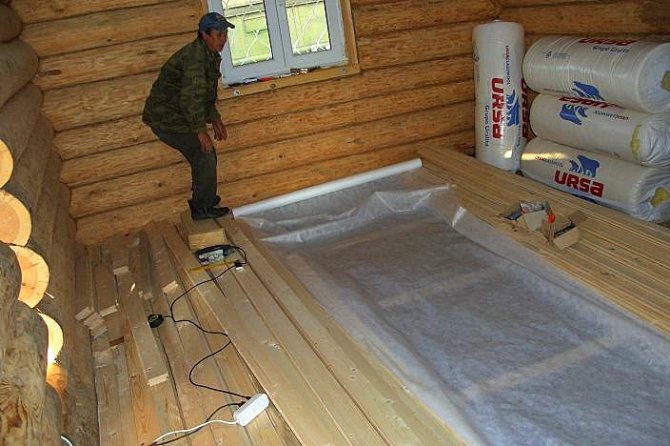
Installation of water-heated floors "dry"
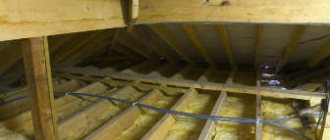
Logs and wooden floor beams are used as load-bearing structural elements of the floor in houses. The logs are installed on a solid base or on a set of point supports, while the beams have 2 support points at the edges and in some cases additionally rest on partitions. Since the beam is a supporting structure of the floor, it is not allowed to make any grooves or cuts in it, this is the main difficulty when installing a warm floor in a wooden house.The only way out is to lay a subfloor made of boards or chipboard sheets, and from it to start the device of the "pie" of floor heating.
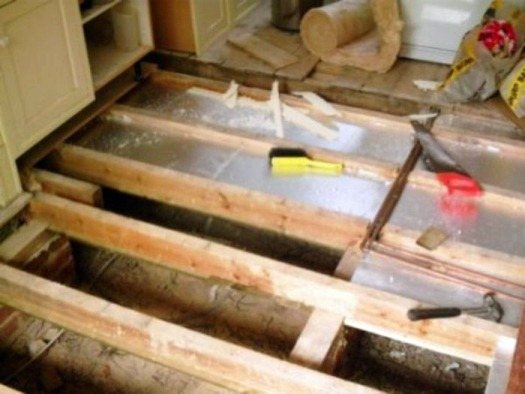
The situation with lags is somewhat different. When the timber is laid on a solid solid base, then there is the possibility of sawing the grooves for the pipes of the water circuit in it and there is no need to make a subfloor. If the logs rest at several points, then it is extremely undesirable to make cuts in them, as in the supporting beams. But in any case, before arranging a rough floor over the beams or logs, a layer of heat-insulating material is laid between them. For laying underfloor heating on wooden logs of the first floor, the thickness of the insulation should be at least 80 mm, and for overlapping, 20-30 mm is enough. In this case, a waterproofing layer of polyethylene film should be laid under the thermal insulation material on the ground floor.
Under the pretext that all floors of a private house constitute a single space, many installation manuals for underfloor heating indicate that the floors do not need to be insulated. Like, there is nothing wrong with part of the heat of the heating circuit going down. In reality, this violates the very principle of operation of underfloor heating, since the heat coming from the ceilings of the room will remain in the upper zone, and in the room where the underfloor heating system is located, it may not be enough. In order for the heat to spread evenly over the rooms for which it is intended, lay a small layer of insulating material, arranging a warm dry floor in the ceiling.
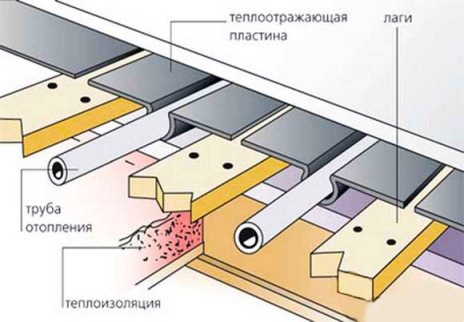
After the heat-insulating material has been laid and a rough base made of boards or chipboard has been mounted, it is necessary to ensure that all the heat of the heating circuit is reflected upwards. This is done in 2 ways:
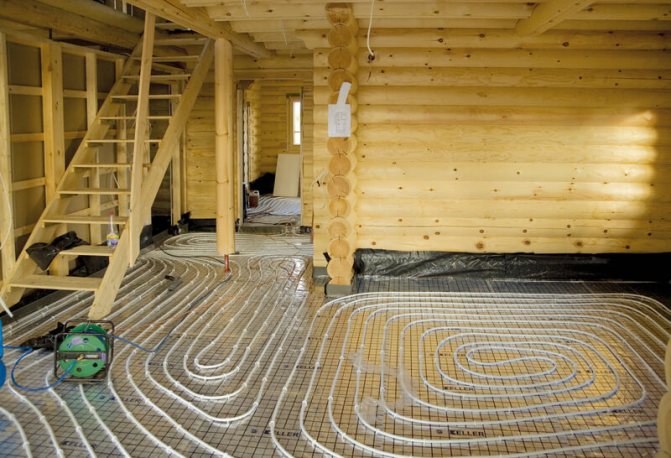
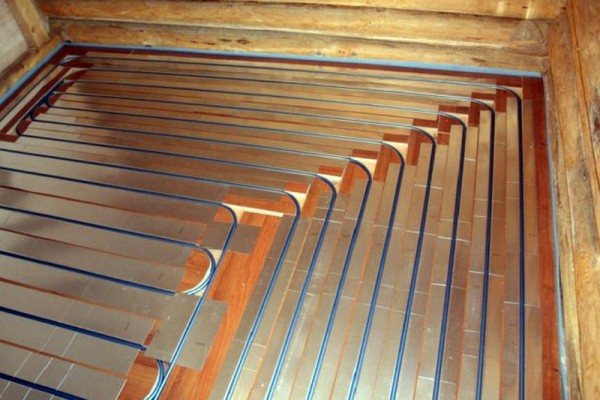
- It is necessary to start the installation of warm wooden floors by laying a foil-clad reflective layer over the entire surface. In the case when the pipes of the circuit are planned to be laid directly on the insulation and through the cuts in the logs, then the foil is laid only between them.
- A more expensive method is with the help of wood-based panel materials and profiled sheets of galvanized metal. Having drawn a diagram of the layout of the contours of underfloor heating on a wooden base, in the intervals between the pipe routes, parts from chipboard are fastened to it with self-tapping screws. Galvanized steel sheets are inserted into the resulting grooves.

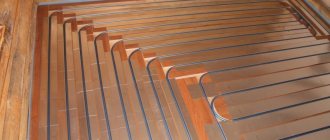
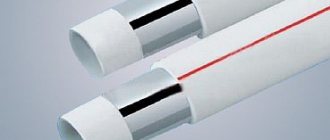
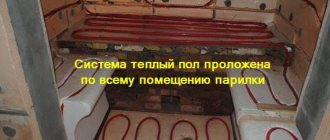
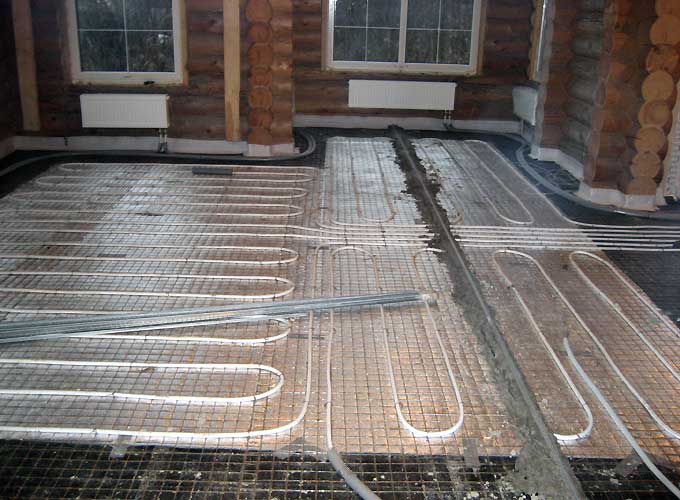
Installation of underfloor heating water continues by laying out the heating circuit pipes. For this purpose, pipes made of metal-plastic with a diameter of 16 mm (DU10) are most often used. The laying step here must be observed less than in warm floors under a screed, since heat transfer in our case will not be so effective. The pipe with the coolant transfers heat to the coating not directly, but through the air gap, hence the decrease in heat transfer. Accordingly, the pipe laying pitch should be 150 mm on average, with a maximum of 200 mm. After that, the circuit is connected to the manifold, it is checked for leaks and a finish coat can be laid for the wooden floor.
Floor insulation
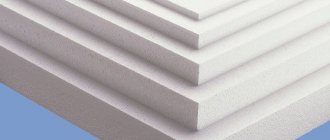
As a rule, no one waits for 28 days, since there is no time for this during the construction phase. They start laying the insulation with their own hands. Extruded foam is used as a proven material for insulating floors in a wooden house. It is a lightweight but very dense and warm material that is often placed under floorboards in a wooden house. Calculations show that the thickness of the foam for the Central Federal District should be at least 3 cm (usually put 5 cm).
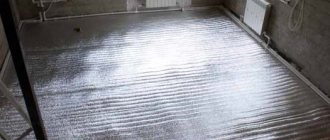
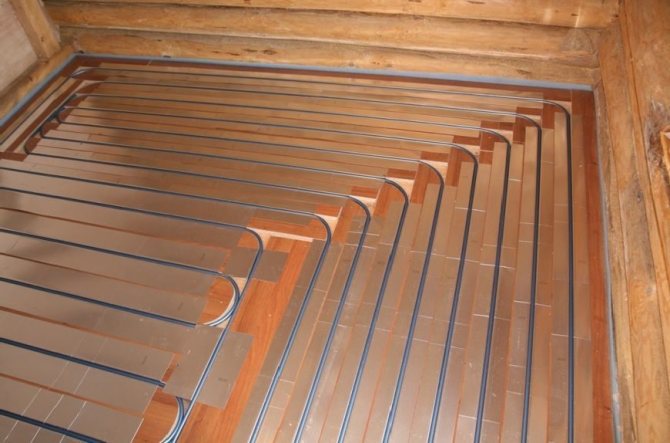
The insulation is spread over the entire area of the house, after which a heat-reflecting film is laid. Actually, the film is a foil base that will reflect heat from the pipe and direct it up.
On top of the insulation lies a reflective metallized film, on which the contours of the warm floor are laid, directed to the collector
There are two types of film - regular and more expensive. The more expensive option is a metallized foil, the cheaper one is the usual one. Metallized foil can be placed on top of the insulation and not additionally protected. For conventional foil, polyethylene protection is required, since concrete can corrode it under the influence of an aggressive environment.
After the reflective foil is laid, covered with a film, proceed to laying the damper tape. The floor screed will deform when heated. Thus, it will press on walls or foundations, which can lead to cracks, deformation. The damper tape is laid along the perimeter of all walls in a private house, slightly protruding beyond the boundaries of the future finishing screed. The excess is cut off at the end of the work.
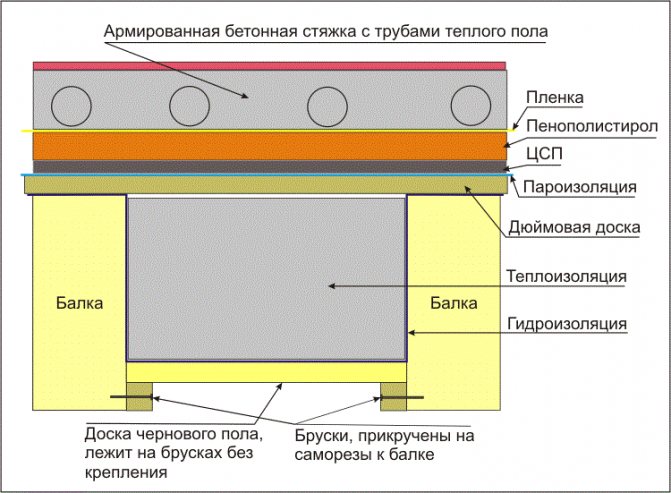
Underfloor heating "under the screed"
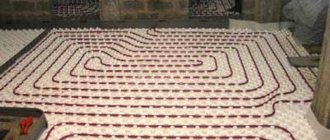
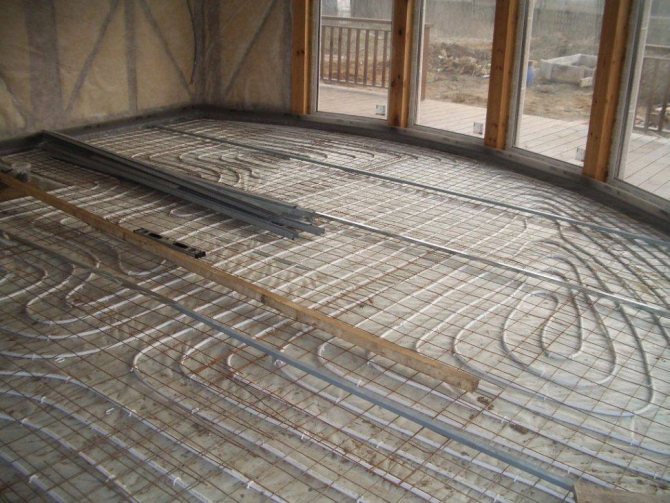
The technology for installing underfloor heating, providing for the monolithing of the contours into a screed from a cement-sand mortar, is widespread and quite well-known, the floor cake is shown in the figure:
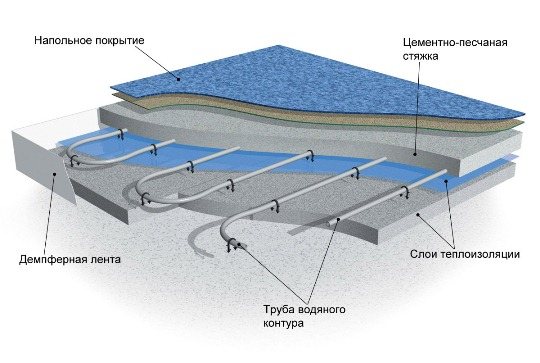
First, you need to ensure the waterproofing of the future slab by laying a plastic wrap over the concrete preparation. Then, in order to compensate for the thermal expansion of the screed, a damper tape is attached along the entire perimeter of the room along the walls, after which insulation is laid over the entire surface of the base.
In order for the water-heated floors to have good heat transfer, a foil film with markings is laid on top of the thermal insulation, along which the pipes are laid out. The laying spacing here varies from 150 mm (for parquet with carpet) to 350 mm (for tiles). It is necessary to ensure that the length of each circuit does not exceed 100 m. The pipes are fastened using special strips or plastic. At the end, the circuit is connected to the distributor and checked for leaks.
The last stage is the filling of the screed. The optimum thickness of the mortar layer is 3-5 cm above the top of the pipe, the time for complete solidification is 3 weeks. After that, you can finally make a warm floor in a wooden house by laying a topcoat over the screed.
How to fix pipes
Everyone who reads this material and comprehends the moment of laying, asks about the fastening of pipes. Actually, the simplest option would be to use clips that go around the pipe and are hammered into the insulation.
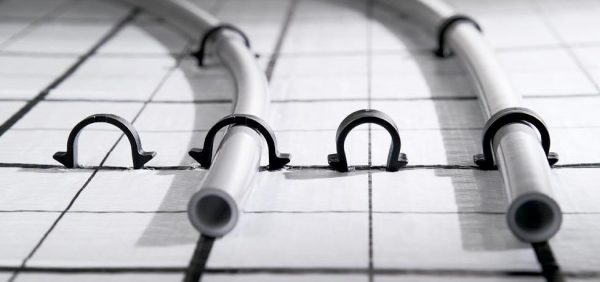
General view of the pipe, which is fixed to the insulation by means of clips
For accuracy of work, first draw the laying contour, then one pulls and rolls the pipe, and the other nails it with light hammer blows to the foam. This method turns out to be quite reliable, since it easily withstands the constant movement of workers through the pipes.
The pipe is laid, the floor level is beaten off for a final screed
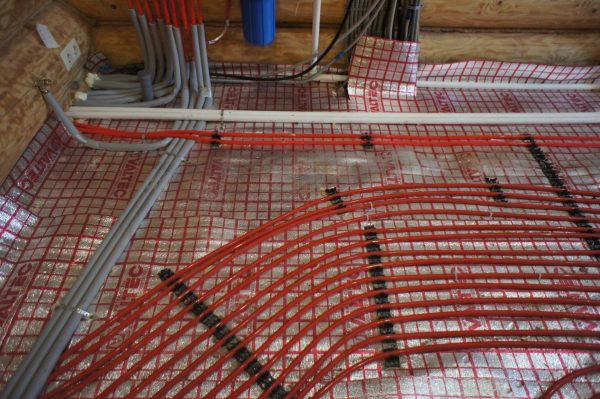
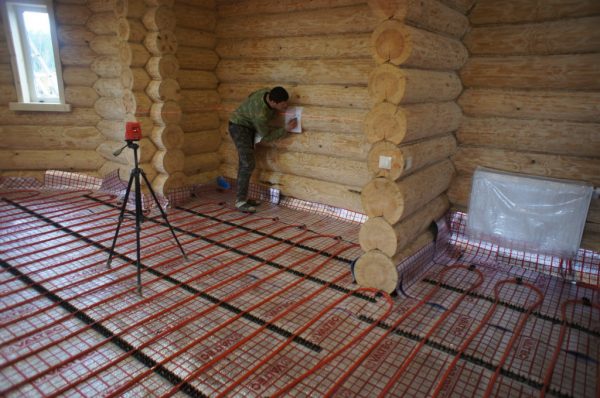
Another option is slightly more expensive, but it allows you to additionally reinforce the finishing screed. Here, a mesh with a small cell of 10 cm is placed, to which the pipe is fastened with ties or knitting wire. If the house has an intermediate room through which pipes pass in transit to other rooms, then lay the circuit so as to save material.
In the boiler room, the pipe is cut with a margin, about half a meter, for the convenience of installing the collector. As soon as the last pipe is brought in and fixed to the floor, it is necessary to fix the pipe in the furnace to the wall. After that, it is advisable to check the system, but quite often a clean screed is poured. As a final floor screed, a semi-dry screed is often used. It is the most successful in its class, which allows you to get a safe, durable, dry and economical water-heated floor in a wooden house.
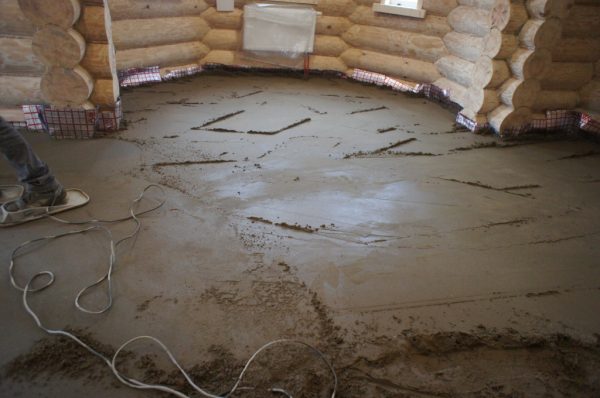
Fine semi-dry floor screed in a log house
Metal-plastic pipes for underfloor heating during installation have to be turned not only 90 degrees, but also 360. To avoid system kinks, use a special corrugated tool.A pipe is passed through it and pulled throughout the entire circuit. When you need to turn, the corrugated tube helps to measure your efforts and not to do too much.