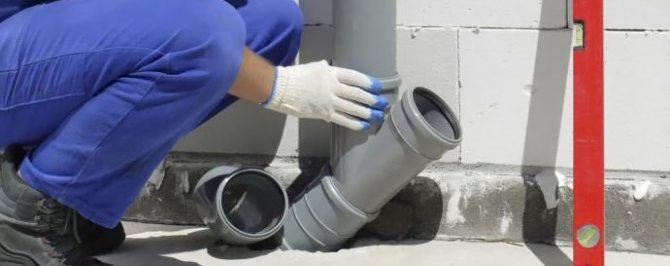
The modern market is replete with a huge assortment of different pipes for sewer systems. The vast majority of which are made of plastic, and this is not surprising, because plastic is a lightweight, strong and durable material. Such pipes are able to withstand the impact on them of the external environment, which is one of the key details when working with risers. In this article, we'll talk about how to install such sewer pipes in a house.
The advantage of plastic sewer pipes
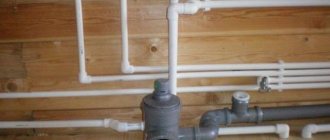
The advantage of plastic sewer pipes will be their small specific gravity, which allows you to calmly work with pipes with your own hands, without attracting additional special equipment. Plastic pipes have a smooth inner surface, which practically eliminates the possibility of clogging.
And one more advantage of this material is its low price. Which makes them out of competition with pipes made from other materials.
Contrary to all of the above advantages, great attention should be paid to the installation of sewer pipes in the house, since incorrect installation of them in the sewer network (CS) can reduce all the advantages of such pipes to zero. So, if a pipe or bend is improperly installed, blockages may appear in some places, which paralyze the operation of the entire sewer network. This often occurs in private houses, less often in urban apartment buildings. Since pipes of a larger diameter are installed in the latter than in a private house, this allows minor errors to be allowed.
Sewerage testing
The final stage in the assembly of a home sewage system is its check for tightness.
To do this, you need to turn on all the plumbing equipment in the house at a time. Also a good test, according to the experience of the masters, will become sharply poured a bucket of water into the bath
or sink.
This will become a kind of imitation of a critical situation and will show how ready the new sewage system is for them. It is also important to test all joints for leaks. If found, such connections must be re-fastened or replaced.
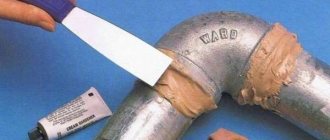
If it happens that the connection of the pipe and the shaped element remains unreliable, then it is worth using a special tool - glue-sealant... To do this, the structure is disconnected, dried and a sealant is smeared on both parts at the points of contact of the parts. Then everything is assembled again. The rubber gasket cannot be removed during the process. After that, it should take some time for the glue to dry and hold the joint together. To confirm the tightness of the system, the test must be repeated.
After reading the article, it becomes clear that by doing the work following the plan, slowly and carefully, everyone will be able to assemble a household sewer using plastic pipes, even without having the appropriate experience. At the same time, the drainage system will turn out to be reliable and will last for many years.
Video lesson on the installation of sewage
Sewerage system
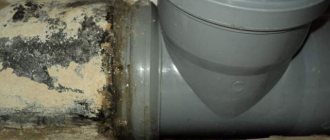
Sewer systems are very often clogged. Often this is not due to violations during the installation of the sewer system, but due to the fact that it is often used for other purposes, throwing various garbage into it.
But it is also impossible to write off errors in the installation of sewer pipes in the house. Since some "masters" use pipes with a rough surface for the sewage system, which clog up an order of magnitude more often than smoothly coated ones.Another mistake is an incorrectly drawn up plan of the COP, and the assembly is correct, the result will be a high-quality assembled non-working SC, which will clog up in places of large bending and turning angles.
All this must be foreseen before starting the installation of the sewer system with your own hands.
Photos of sewerage installation works:
Other photos of sewerage installation >>
Direct installation of sewage systems in public buildings is carried out in several steps. Initially, you need to select the class of consumables used. They differ in a number of parameters:
- life time;
- value for money;
- ease of repair;
- harmony in the interior.
The quality of the work done will depend on the choice made. It is preferable to provide such a selection of the constituent parts to the masters who will perform the planned amount of work. The described method will insure clients against unplanned expenses.
Pipe preparation
Before starting the installation of sewer pipes in the house, it is necessary to adjust the work to size. This is done by slicing them up. This process is performed in several ways:
- Cutting machine - as a result, the edges of the cuts are clean and smooth. It is convenient to use this machine for cutting a large number of pipes.
- A special saw - the result is also quite pleasant, not inferior in cut quality to a cutting machine. This method is very convenient because the saw does not take up much space.
- A hacksaw for metal is the most budgetary method. If you do not want to spend extra money on buying a special saw or, even worse, a cutting machine, then an ordinary metal saw, which almost every craftsman has, will suit you.
How not cool, but to cut off the pipe in these ways, you need free space. What if there is practically none? In confined spaces, where the saw cannot crawl, use a steel cable attached to the handles. In this case, the pipe is not cut off, but rubbed at a right angle. The quality of such a cut is not comparable to a similar cut with a saw, but you will have to try, otherwise the joining will not be of high quality.
Important! Burrs usually remain when cutting. They must be removed, since during subsequent installation they will interfere with high-quality gluing. They will also interfere with drains advancing in the pipe.
They are easily removed with a regular kitchen knife, by scraping off the cut points. This work should be done efficiently, because the entire functionality of your design will depend on how you cleaned the gluing points.
Installation of pipes
Dismantling old pipes
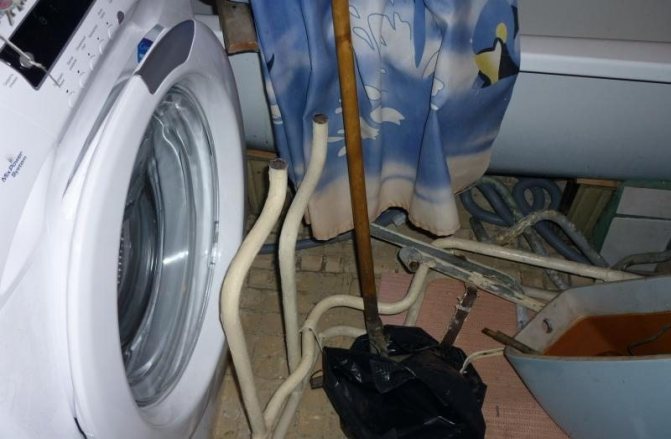
Dismantling pipes
Before the laying of sewer pipes is carried out, if any, existing pipes should be dismantled:
- The first step is to shut off the hot and cold water supply.
- At a height of about 60-80 cm under the location of the cast-iron tee, a careful cut is made with the help of a grinder in half the diameter of the riser.
- At a height of 10 cm under the ceiling, a similar cut is also made, after which they hit the pipe with a hammer and chisel - as a result, the pipe bursts quite easily and can be removed.
- In case the remaining part of the pipe is loose, the tee can be removed from the socket quite easily. Otherwise, it is cut off with a grinder, which usually takes no more than an hour and a half.
Important: when cutting the tee with a grinder, you should carefully ensure that the lower socket is not damaged.
- After the tee is removed, the remaining socket is cleaned of adhering debris and dirt, after which you can begin to install new sewer pipes.
Installation of new sewer pipes
Installation of pipes
Self-installation of sewer pipes includes the following steps (for example, a sewer riser):
- Installing a tee or cross:
- A rubber cuff is inserted into the lower socket;
- The cuff is sealed with silicone sealant;
- To facilitate the insertion of the cuff into the cast iron socket, lubricate the cuff with liquid soap;
- A tee (cross) is reinforced in the cuff.
- Cut the prepared pipe to the required length.
- Carefully fasten the riser to the wall, first of all preparing the clamps:
- Mount a clamp on the wall;
- Mounts are installed on the clamp;
- The lower clamp is installed near the expansion joint next to the fitting;
- The upper clamp is located just below the bell;
- Collect the riser by installing cuffs, gaskets. In this case, the ends of the pipes can be lubricated with oil.
Important: It is recommended to tighten the upper clamp before lowering the expansion joint into the socket.
- Check for leaks in the system, after which the pipe installation is complete.
Installation of sewer pipes
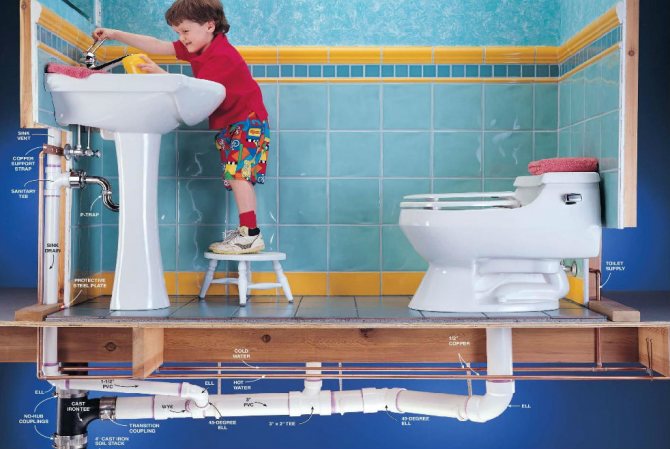
- The first thing to do is to find out the level of the finished floor. It is important to know exactly, and not approximately: how many centimeters will be filled to the level "zero". This is necessary in order to accurately bring the wiring under the sinks: shower, sink, toilet, etc.
- The next step is to put marks where and at what distance each structural element will be installed. You can use chalk, construction pencil, or marker.
- Then we mark the pipes and fittings, while measuring the correct angles of inclination of the structural elements.
- To ensure the tightness of the sewage system, all pipes, bends and joints must be carefully measured and fitted. To achieve this, you must initially measure everything, try to connect, and then glue it together.
- Be sure to check the joining of the parts, since the pipe, with the correct connection, should go into the socket more than half without effort, and then with a little effort. If so, then the fit is correct.
- Be sure to sand the pipe joints with zero-grade sandpaper until it becomes rough.
- Installation of sewer pipes in the house involves the use of special glue for the connection. There is a large selection of such glue in stores, study the instructions supplied with the pipes and find out which glue the manufacturer recommends.
- Methylene chloride is a substance that degreases and softens pipes at the joints when glued. It also needs to be used.
- The glue is applied with a swab, which should come with the glue, but it will be more convenient to use a regular brush. The joint on the pipe is covered with a rather large layer of glue, and the joint in the socket is covered with a small one.
- After applying glue to the joints of the connecting surfaces, the pipe is inserted into the socket so that the marks applied to the connecting parts are a couple of centimeters apart. For a while, the structure should be fixed in this position for 10-15 seconds.
- Further, the parts are turned so that the marks coincide. When glued correctly, the extra layer of glue should come out.
- After gluing, the parts should be held for about 1 minute. Then the joint is coated with glue for reliability.
On average, one gluing operation takes about 2 minutes so that installing sewer pipes in a house with your own hands does not take much time. But you shouldn't hurry either.
By following all of the above rules in the exact sequence, you can easily assemble the sewer system yourself, without resorting to the help of expensive specialists. Good luck in your endeavors!
Indoor sewerage: basic rules for installing (replacing) pipes with lubrication
To avoid all sorts of unpleasant situations, it is recommended to strictly observe the following rules for installing sewer pipes (internal sewer wiring):
- The stand is installed only in an upright position. In this case, the correctness of the pipe connection must be checked - distortion is not allowed.
- The ventilation pipe is usually located at the top of the riser, which should be led out to the roof.
- It is forbidden to lead the ventilation pipe into the chimney, as it is very dangerous.
- As soon as the riser is installed, the branch lines are installed (located in a horizontal plane). During the installation process, make sure that the socket joint does not fall on a variety of obstacles (for example, overlaps).
- The maximum length of the branch pipes is 10 m.
- The cross-section of the outlets from the toilet bowl is 100 mm, and from the sink, bath or shower stall - 50 mm.
WATCH THE VIDEO
- The sewer slope of the pipe should be 2 cm for each meter of the pipeline (an increased or reduced slope is undesirable).
- Preventing the occurrence of congestion will allow the provision of gentle angles of rotation of the highway.
- The connection of plastic pipes is made into a socket. In this case, sealing collars and silicone sealant (additional waterproofing) are used.
- In the process of cutting pipes into pieces, it is imperative to file all the cuts (deburring and chamfering).
- The main line is attached to the walls with special clamps.
Do-it-yourself plastic sewer installation is a task that requires only careful attention and the right choice of materials. And compliance with simple rules will ensure its reliable operation for a long time. Installation of sewer pipes can be done by anyone who knows all the nuances.