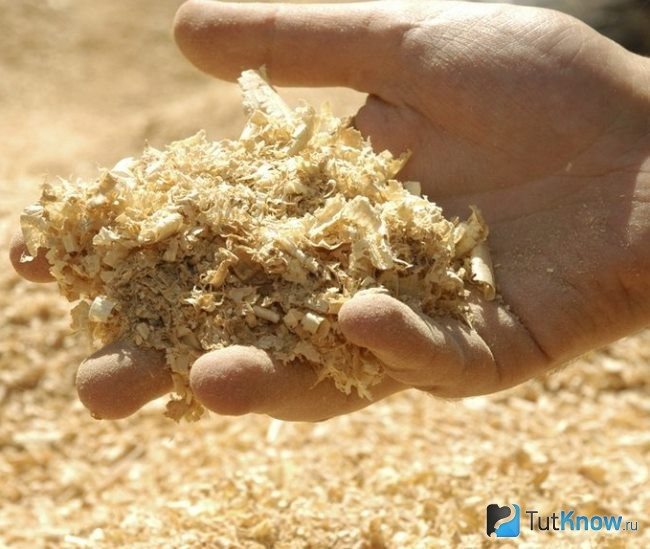
Sawdust as insulation is waste after woodworking in the form of the smallest wood dust and shavings. This recognizable material has been used as a heat insulator for many years, because it is able to keep heat for a long time, releasing wood resins, which makes the material an ideal filler. The use of sawdust, which provides insulation of the attic, ceiling, roof, is ideal, since they can serve for a very long time, providing a high level of thermal insulation.
It should be remembered that sawdust is a habitat for mice or other pests.
In what area are shavings used
Low-rise construction is the main area of application for shavings. Sawdust as a heater has always been added to clay for the purpose of constructing special ceilings from this composition for rural houses.
Sawdust thermal conductivity graph.
If we take this technology of roof insulation with sawdust as a basis, then today the industry is already producing modern building materials. They include wood concrete, concrete with sawdust, wood blocks, which provide a reliable layer of thermal insulation.
Developers of private houses who insulate the roof, walls, ceiling, floor, attic with sawdust are interested in using sawdust in the construction process. Sawdust can be used as insulation in different directions due to their low cost. Roofs, interfloor floors, attic, ceiling, floor and wall structures, attic are insulated with various building materials. A solution of cement, shavings and gypsum can be used to insulate building elements, attic, which allows you to economically spend money.
Why is sawdust processed
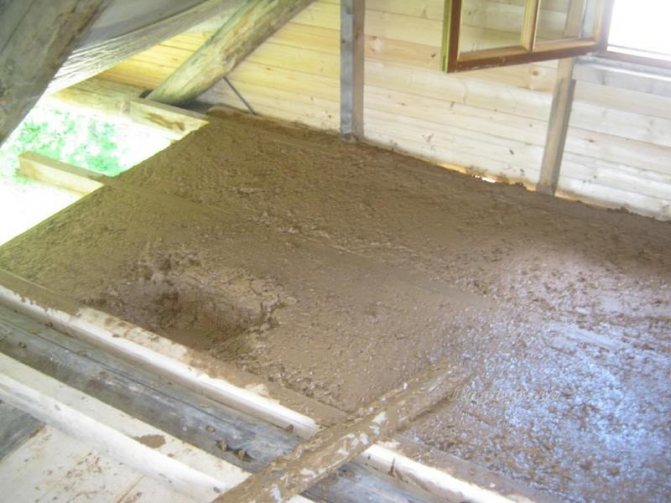
Insulation of floors with sawdust.
To provide thermal insulation, sawdust is used, which is prepared in advance in a certain way. If disinfection is not carried out when processing sawdust, then this material acquires two major flaws, becoming:
- Flammable.
- A habitat for mice or other pests.
Related article: Photo wallpaper for a teenage room
Before working with sawdust, they should be mixed with a composition of lime, cement or gypsum, moistening with a special substance, that is, an antiseptic. The prepared mixture will be fireproof and provide protection from pests. If you start building a frame house and insulate an attic or roof using untreated sawdust, then this can have negative consequences.
Due to the rash use of fire, a timber frame house can burn out. Therefore, before construction, it is imperative to carefully weigh everything. Sawdust can be replaced with other heat-insulating materials, for example, ecowool, which also has its drawbacks. Any shortcomings are leveled out due to the competent implementation of the material used.
Insulation of the attic
The same technology is used to insulate the attic with sawdust.
1. Dry method All gaps in the floor are sealed:
- clay;
- polyurethane foam;
- sealant
To protect against mice, sprinkle everything with slaked lime with carbide. Sawdust is laid on top with a layer of 10-20 cm. Due to the combustibility of sawdust, they must be sprinkled with slag mining. It is especially important that there is slag or other non-flammable substance around hot objects (eg chimneys). Planks are laid on top of the sawdust so that you can walk.
2. Insulating mortar: 85% sawdust, 10% lime and 5% cement. Sawdust is treated with boric acid and dried.All components are dry mixed, after which water is added. You should get a slightly moist and non-crumbly mass.
This solution is poured into a dense layer on the surface of the attic (about 25 cm). After good tamping and solidification of the mass, a plank attic floor is laid on top.
The use of sawdust for the purpose of do-it-yourself insulation
The use of sawdust for home insulation
Often, shavings can be used for the purpose of thermal insulation of one-story buildings. If you plan to collect a heat insulator from sawdust yourself, then you should prepare the following types of materials and tools:
- Cement.
- Lime.
- Sawdust.
- Shovel.
- Stirrer.
- Antiseptic.
The thermal insulation layer can have a thickness, the size of which is determined by two factors:
- The conditions of the area.
- Multifunctional purpose of insulated rooms. A heat insulator with a width of 25 cm will be sufficient for installing ceilings up to 15 cm wide for walls.
For this purpose, a special rack is mounted on the main frame, which creates space for the purpose of filling it with sawdust.
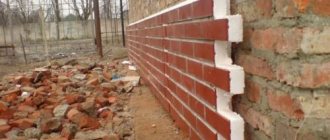
Scheme of wall insulation with sawdust.
In order to correctly perform insulation with sawdust, you need to know the following points:
- It is imperative to take into account the presence of objects with a risk of flammability, which include sockets, wiring, switches, insulated with a material that cannot be ignited.
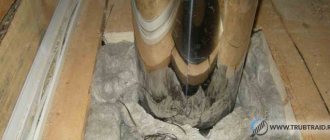
- The electrical wiring and the flue pipe must be connected.
- Electric wires are usually hidden in steel pipes 3 mm thick.
To prevent the cement from absorbing excess water, insulation must be provided. It should be noted that new sawdust contains special substances that prevent the adhesion of cement with water. The consistency of the solution is weak, so this difficulty can be prevented by wetting the sawdust before using it.
Related article: Balcony in a wooden house with your own hands (photo)
How to prepare a sawdust-based mixture for thermal insulation of buildings
To create a heat insulator using sawdust and cement, the following materials should be prepared: for 10 buckets of sawdust, take one bucket of cement and lime. All these components should be mixed for ideal impregnation of the sawdust with the prepared composition, while insulating the roof or attic. Then you should dilute the antiseptic in water, pour this composition into a watering can to irrigate the mixture.
The check is done by taking a little of the composition and squeezing it in your hand, if water does not appear, and the lump does not spill, then this means that the solution is correct. At the next step, the composition with sawdust and cement is backfilled with its layer-by-layer ramming. The blocks should be fully ripe for at least two weeks.
Providing insulation of the ceiling, floor or walls with the help of a composition with shavings, all work is carried out in a well-ventilated area. After two weeks, those places that were filled up must be inspected, which will reveal the presence of voids that arise during drying. In the presence of voids, they are filled with a composition with shavings.
How to insulate an attic, roof, floor, ceiling and walls with sawdust
With the use of sawdust, warm plaster is made, which will serve as a heat insulator not only for interior finishing work, but also allow for insulation of the roof or attic. The solution is used to create slabs that are perfectly compacted and dried. If the shavings are used in their pure form without various impurities, then only for creating plates. At the end, they must be thoroughly tamped and dried.
In the construction process, clean sawdust is not used, since this material is highly flammable, it burns out very quickly.
Using shavings, various heat-insulating materials are produced, such as pellets, ecowool, wood concrete.They can produce high-quality insulation of the attic, attic and other premises.
Experienced builders know that for thermal insulation of cold-type roof structures, they often use backfill insulation. They fall asleep in the space between the lags when arranging the attic floor. This measure will not seem superfluous if you know that more than 20% of heat loss occurs due to the fault of the non-insulated roof. Most builders agree that thermal insulation is necessary for any heated room. But the question of choosing a thermal insulation material does not cause such unanimity: some craftsmen use modern technological materials, while others prefer traditional roof insulation with sawdust. In this article, we will show you how you can use wood waste to optimize the temperature at home.
Sawdust is a waste product of the woodworking industry, which can be purchased for a pittance at any sawmill. They are of organic origin, and therefore are absolutely safe for human health, and also do not cause allergies. Sawdust mixed with clay was traditionally used as a heater in Russia. Since all residential buildings were built from wood, which is still rich in Russian land, a lot of waste remained during the construction process, suitable for thermal insulation of attic floors. Sawdust has the following advantages over other thermal insulation materials:
- Low price. Perhaps the democratic cost of this material is the main reason for the popularity of sawdust insulation. Sawmills and sawmills utilize this production waste, so they often give it to anyone who wants it, subject to self-pickup. Therefore, the cost of the material is equal to the cost of delivering sawdust to the construction site.
- Guaranteed security. Wood shavings are absolutely safe for the health of people living in the house. It does not cause toxic poisoning, skin irritation upon contact, allergies, which cannot be said with certainty about modern heaters.
- Low thermal conductivity. Wood chips, unlike wood, due to their porous structure, have a low coefficient of thermal conductivity, that is, they retain heat well. And a mixture of sawdust with clay or lime increases the thermal insulation effect even more.
- Organic origin. Wood shavings have all the same qualities as wood. It allows steam and air to pass through, which is fundamentally important for insulating houses from a bar and a log with a mansard roof.
- Ease of installation. It is very easy to work with sawdust, you just need to mix them with clay or lime, and then pour them into the space between the overlap logs. Insulation laying technology does not provide for the use of special equipment, complex tools.
Note! The disadvantages of sawdust are the high flammability of this material and the low resistance to biological factors. They are a favorable environment for the spread of mold and fungal microorganisms, rodents, insects. In addition, moisture has an extremely negative effect on sawdust, increasing the thermal conductivity of the insulation several times. To get the maximum effect from the thermal insulation of the roof with sawdust, they should be pre-treated with a fire retardant that prevents the spread of fire, as well as antiseptic preparations.
Other methods of insulation
To arrange the insulation of a house with sawdust, other methods are also used, for example, a plaster solution with a warming effect is prepared from them. This mixture is used for interior decoration. For preparation, mix: sawdust, paper, clay, cement. Sheets are made by tamping and solidifying.
Some building materials are created with sawdust:
- arbolite - lightweight concrete made from sawdust or wood chips, which needs waterproofing. Cement and chemicals are added to it;
- sawdust concrete - not subject to fire and quality blocks. It is made using sawdust from coniferous species, cement and sand, kneaded to a homogeneous composition;
- granular sawdust - produced by pressing. Contains a fire retardant and carboxymethyl cellulose glue;
- wood blocks - also need thermal insulation, consist of sawdust, into which copper sulfate with cement is added
So, you can insulate the whole house with sawdust, if you wish. Now the choice is up to the owner: to use modern heaters or to opt for a cheap, environmentally friendly, time-tested technology.
Preparation of the mixture
In the process of insulating the roof with sawdust, the prepared material is poured into the space between the lags of the attic floor with a layer of 15-30 cm. The guarantee of high-quality thermal insulation is a dense, non-friable coating that settles throughout the entire service life. To improve the performance of sawdust, various substances are added to them, obtaining wet or dry thermal insulation mixtures. Most often, all professional builders use the following "recipes":
Important! In terms of thermal insulation qualities, a 15 cm layer of sawdust is equivalent to a 10 cm layer of mineral wool. But the cost of warming with wood chips is 6-7 times less than the use of mineral and polymer thermal insulation materials. Experienced craftsmen recommend filling in 20-30 cm of sawdust, which will take 2-3 weeks to dry and shrink.
Sawdust as a type of insulation
There are many different types of insulation. These are mineral wool based on various rocks, and extruded polystyrene foam, and expanded clay. However, along with modern insulation, such natural insulation means as sawdust continue to be used.
One of the main advantages of sawdust is its environmental friendliness. This is a completely natural material. All heaters, regardless of what their manufacturers indicate on the packaging, are impregnated with various chemicals. For example, antiseptics. The purpose of these chemicals is to extend the life of the insulation. But they can also cause allergies. Therefore, if there are small children or allergy sufferers in the house, it is better to avoid such materials.
In terms of the ratio of price and efficiency, sawdust is one of the most optimal insulation options. A sufficiently thick layer of them is able to replace a more modern material mounted on a vapor barrier film. Moreover, the finer the sawdust, the more efficiently they will retain heat.
However, wood shavings also have a serious disadvantage. Insulation with it makes the attic completely unusable without additional repair work. Without laying the logs and constructing a flooring on them, it will be impossible to place any utility room there. This point should be taken into account when planning the layout of the rooms and their purpose.
Installation technology
The effectiveness of roof insulation with a thermal insulation mixture based on sawdust and clay or lime depends on the correct installation, as well as on the quality of the preparatory work. It is imperative to treat wood chips with drugs, fire-blocking compounds, an antiseptic, add substances that repel rodents and insects. Insulation with sawdust of a cold roof is performed in the following sequence:
- The wiring running along the attic floors is insulated, retracted into metal pipes. Chimney pipes, air ducts and other communications are trimmed with fire-resistant material or covered with rubble.
- With the help of wooden planks, formwork is installed on the rough floor. For this operation, you can use substandard wood or slab.
- To protect the sawdust from moisture, a waterproofing material (highly diffuse membrane or glassine) is spread on the surface of the subfloor, fixed with a construction stapler on metal staples.
- A thermo-insulating mixture of sawdust and clay or lime is kneaded in small portions, and then without delay is evenly poured onto the waterproofing material with a layer of 25-30 cm. If a dry mixture is used, it is additionally rammed.
- The thermal insulation layer is carefully leveled and then left to dry for 2-3 weeks.
- After drying, the insulating mixture of sawdust and clay is again covered with a waterproofing material, which is fixed with a stapler to the floor logs.
- The last stage of the attic floor insulation is the final flooring.
Experienced craftsmen claim that the effectiveness of insulation depends on the quality of drying of the thermal insulating sawdust sweep. If possible, you need to dry it for 2-5 weeks. If you do not have that much time, it is better to use an unmoistened mixture.
Sawdust stacking technology
Before insulating the roof with sawdust, you should prepare the components of any of the insulating mixtures described above, a bucket, water, a large mixing container, a hoe or a shovel.
The work must be done in this order:
- Install the timber plank formwork on the subfloor of the attic floor. Boards can be taken substandard or even do with a croaker.
- Knead a sawdust-based thermal insulation compound in a container, and then pour it onto the sub-floor covered with a waterproofing material, creating a layer 8-25 cm thick, depending on the components used and the load-bearing capacity of the floor.
- Align the surface of the insulation using the rule and leave it to dry completely.
- After 2-3 weeks, lay another layer of waterproofing on top of the hardened coating and fix the edges of the material on the wooden floor logs.
- Attach a plank flooring, thick plywood or chipboard to the logs with self-tapping screws. They will be the basis for the finishing of the attic floor.
When insulating roof slopes, you first need to create cavities for filling the insulation. A dry mixture of sawdust and lime must be placed between the waterproofing protection and the inner lining of the roof using the technology of insulating frame-panel walls. The backfill layer thickness should be 20-30 cm.
How to insulate the roof with sawdust - watch the video.
Insulation of the ceiling with sawdust is a time-tested effective and economical option. This technology has been used for centuries, so it is still used today, but in a slightly improved form.
The demand for the technology of warming with sawdust of attics and ceilings of low-rise residential, frame and utility buildings is explained by the low cost of raw materials and good thermal insulation performance. In addition, the use of wood waste provides good sound protection. Such insulation is environmentally friendly, completely safe during operation. However, deciding on this option, it is important to take into account the technological features of the material.
Video instruction
Every owner of a private house is looking for budgetary ways to insulate the ceiling. And many, having considered all the available methods, come to the conclusion that the best option would be to use ordinary sawdust, which remains in large quantities at woodworking enterprises. Such material can be obtained for free or for a symbolic price, and the work on its installation does not require much time and effort. For this reason ceiling insulation with sawdust can be done by hand
... This and much more will be discussed in today's article.
The relevance of the use of sawdust for thermal insulation
The current insulating materials are constantly being improved, moreover, more and more heat insulators appear on the market every year.But technological progress inevitably leads to higher prices. Often people have been saving money for many years to renovate their houses (including insulation) or even get a loan from a bank. And if you remember what materials our ancestors used to insulate walls and roofs, then we can come to the conclusion that the “old-fashioned” methods are still relevant and effective. At the same time, it is difficult to predict what the state of, say, polyurethane foam will be after 20 years of operation. But the sawdust has successfully passed the test of time.
So, the main advantages of ceiling insulation with sawdust include:
- the widespread distribution of this material;
- a symbolic price;
- ecological cleanliness;
- extreme ease of installation;
- long service life.
Moreover, the savings here consist not only in reducing capital investments, but also in a careful attitude to natural resources, which contributes to a significant improvement in the environment and a reduction in the cost of heating the home.
Sawdust prices
Note! Insulation of a residential building always consists of a number of stages, including the floor, ceiling and walls. Moreover, each of these surfaces has its own characteristics of thermal insulation. But the ceiling is characterized by the fact that the insulation material can be laid here externally and internally.
For a clear demonstration of the economic benefits that can be obtained by insulating housing with sawdust, consider the cost of popular heat insulators and work on their installation.
Table. Prices for popular heaters.
It turns out that insulation with sawdust will cost almost free. What's more, woodworkers can even deliver sawdust to your home for a small fee. But here it should be clarified: not all varieties of this material are suitable for thermal insulation.
Stage one. Choosing the raw material
The best option for use as insulation is medium fraction sawdust. The reason is extremely simple: it is difficult to work with small starting material, and large-fraction sawdust has insufficient thermal insulation properties. The best are sawdust from sawing in the carpentry industry, since they are distinguished by low humidity, therefore they do not need additional drying, and when used, they will not start to rot.
If you have access to sawdust exclusively from round timber, which has natural moisture, then before laying them, they should be spread out under some kind of canopy and dried thoroughly. There is no need to cover, otherwise they will start to complain.
What types of sawdust are more suitable? Give preference to conifers - they contain a lot of resin, so a lot of inconvenience is created for all sorts of pests. But if you are going to insulate the bath, then it is preferable to take sawdust of deciduous trees.
Also, before laying, the sawdust should be allowed to rest for up to 1 year - during this time, the level of sugars, which provoke decay, will noticeably decrease. Pay attention to the fact that the raw materials are free of debris and other foreign impurities; if present, sift the sawdust and remove coarse debris by hand.
Insulation characteristics
Sawdust is a waste of wood processing. When sawing wood, small dust is obtained, when drilling or planing, chips come out (3-5 cm). Waste of carpentry production is used more often:
- ash;
- pine trees;
- ate
and other hardwoods. Oak sawdust is a big shortage, they are not cheap, but they will save heat even in 30-degree frost. Coniferous sawdust is the best option, since the resin contained in them repels bugs and rodents.
Medium-fraction products are preferable. There is a lot of dust from small ones. Warming with sawdust of large fractions is ineffective.
Sawdust should not have foreign odors. The best option is waste wood processing, which has passed chamber drying.
The shavings, which have natural moisture, are dried in the fresh air. The sawdust is pre-treated with an antiseptic solution and a fire retardant. After drying, a mixture of slaked lime and copper sulfate is added to them - 10% by weight. In terms of their thermal insulation characteristics, sawdust is close to mineral wool.
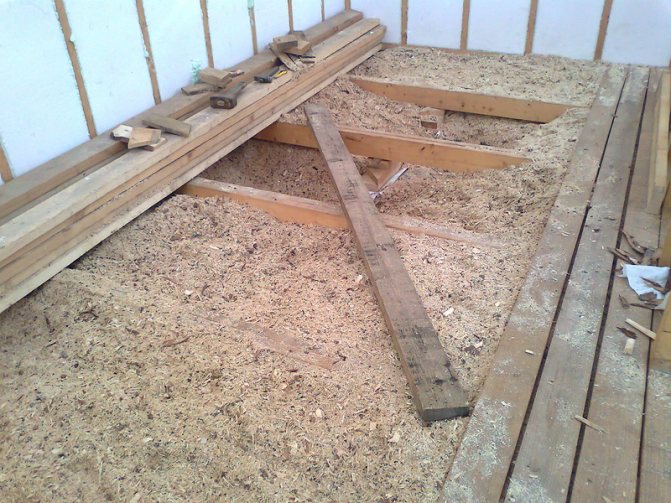
Stage two. We sew floor beams
Start with the ceiling filing. The algorithm of actions is given below.
Step 1.
For filing the ceiling beams, use boards with a thickness of about 2.5-3 cm (the specific figure depends on the pitch between the beams). Ideally, the board should be grooved or with a quarter, and it must be planed and dry, even if it costs more than not planed edged.
Step 2.
On top of the fixed vapor barrier, nail the boards solidly with nails 10 cm or screw them with screws 5-6 cm long (2 pieces in each fastener point).
Note! Drive nails at an angle relative to the plane of the boards. It is important that the direction of the neighboring nails does not coincide - this way the fastening will turn out to be as reliable as possible.
Treat boards and beams with antiseptic and fire retardant even before starting installation work. This will protect the wood from pests, fungi, and also reduce its flammability.
Edged board prices
edged board
Stage four. We lay the insulation
There are several methods of thermal insulation of the ceiling using sawdust, and this can be either the use of pure material or the additional use of special additives (lime, clay, etc.). Let's consider in more detail the popular methods of thermal insulation.
Antiseptic prices
antiseptic
Method number 1. We use clean sawdust
The procedure is extremely simple and consists of only three steps.
Step 1.
Pour sawdust on the ceiling of the attic in a layer from 15 cm to 20 cm, carefully align (this is often done to the top level of the beams), but do not tamp.
Step 2.
Pour a layer of oven ash on top of the insulation. Although today, instead of ash, a superdiffusion vapor-permeable membrane is used.
Note! Thanks to this coating, moisture will be easily removed from the sawdust, which will prevent the development of decay processes. Even such films, if anyone does not know, are characterized by one-sided vapor permeability.
Step 3.
If the attic space will be somehow exploited, then fix the boardwalk along the beams. But nail the boards in such a way that there are small ventilation gaps between them.
Method number 2. We use additives (cement, lime)
There are several recipes that can be applied in this case. As an additive, not only clay can serve, but also cement, lime, etc.
To prepare the insulating mixture according to the first recipe, prepare the following ingredients:
- sawdust, carefully dried (10 parts);
- water (5 to 10 parts);
- lime (1 part);
- cement (also 1 part);
- a little copper sulfate - it will serve as an antiseptic.
The required sequence of actions is given below.
Step 1.
Start by mixing cement with lime.
Vapor barrier prices
vapor barrier
Step 2.
Place the sawdust that you prepared in advance in a container of the required volume. If possible, you can use a concrete mixer instead of such a container.
Step 3.
Add a cement-lime mixture to the sawdust, then mix all components thoroughly.
Step 4.
Add copper sulfate to the product, which, as noted earlier, has antiseptic properties. To prepare a solution of this substance, add 3 tbsp. spoons in 10 liters of water. When working with copper sulfate, remember about protective measures - be sure to use rubber gloves and a mask. Pour the prepared solution slowly into the resulting mixture.
There is another recipe for preparing an insulating mixture from sawdust, cement and limestone. In most cases, this recipe is used to insulate bath ceilings.Here vitriol is not used, since in high temperature conditions it can release harmful vapors into the environment.
Method number 3. We use additives (clay, lime)
In this case, to prepare the mixture, you need to prepare:
- dry sawdust (10 parts);
- water (7 to 14 parts);
- clay (5 parts);
- lime (1 part).
Step 1.
Fill the clay with 2 parts water and wait until it (the clay) is completely wet. Stir the resulting solution thoroughly - as a result, it should resemble thick sour cream in its consistency. There should not be any lumps in the finished solution.
Step 2.
Mix lime with sawdust, add the resulting mixture to the clay solution. Mix all the ingredients well, periodically adding new portions of sawdust to the container.
Step 3.
You can use a simple wooden stick to check if the solution is ready. Place it vertically in the mixture and wait a little. The composition can be considered ready for use if the stick does not fall. If the mixture is too runny, let it sit for 24 hours to allow any remaining moisture to evaporate.
Note! Alternatively, you can use a different recipe that uses the same amount of gypsum instead of clay. However, this recipe has one significant drawback, which is the quick drying of the prepared mixture. Therefore, in this case it is necessary to cook it in small portions.
Sawdust thermal insulation
The procedure for laying a mixture based on sawdust is not complicated and does not differ much from the technology of using pure raw materials. After preparing the ceiling, start laying the insulation in small layers, level and tamp each of them. The height of the insulating layer must be flush with the top of the slab.
Pour a thin layer of ash on top of the mixture - it will protect the material from fungi and pests. After 2 or 3 weeks after installation, when the thermal insulation is completely dry, lay a layer of vapor barrier on top of it. The latter is necessary to prevent the saturation of sawdust with moisture that is present in the air. Fasten the vapor barrier material (in most cases, ordinary PET film is used) to the floor joists using a mounting stapler. As a result, you will get an insulating layer, covered from below and from above with a vapor barrier material.
Video - How to insulate the ceiling with sawdust
How to insulate the roof with sawdust: features and sequence of actions
Ceiling insulation is done from the outside (attic) side. For insulation, dry woodworking wastes impregnated with special compounds (antiseptic and fire-retardant) are best suited. Houses are isolated with waste after processing conifers. They are lightweight, and due to the high resin content in them, they are inedible for rodents, they are not susceptible to rotting and fungal infections. For a bath, you can choose deciduous shavings, which are more resistant to moisture.
The size of the fractions affects the efficiency of energy saving and the convenience of the process. Too small sawdust will dust, scatter to the sides, large ones will not provide the required level of insulation. Therefore, the best solution is medium size.
When choosing a material, it is better to prefer chamber-dried wood waste. They do not have to be additionally dried. At the same time, you should not purchase fractions obtained during the processing of bark, since bugs can remain in them that can damage the insulation and wooden elements of the floors.
How much sawdust do you need?
The amount of starting material depends on the area of the ceiling of the house, insulation technology and the required layer thickness. The latter depends on climatic conditions. If the air temperature does not drop below -20 ° C, then 15-20 cm will be enough.Lowering the temperature for each degree requires additional bedding in the amount of 2-3 cm of material.
Sawdust, as insulation, is rarely used independently and isolated. Most often they are combined with clay or cement, which improve strength and other indicators. The first option is suitable for buildings with reinforced concrete floors, the second for residential buildings. Clay insulation also serves as a hydro-barrier. In case of moisture ingress, the composition absorbs it and prevents it from entering the rooms.
Floor preparation
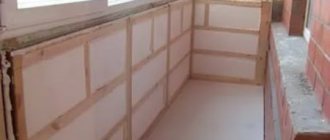
Insulating a roof with sawdust in a wooden house requires a number of preparatory processes:
- carefully clean the attic space, inspect the roof for holes and seal them in order to avoid moisture getting inside;
- remove protruding sharp objects;
- it will be necessary to build up lags if it is necessary to lay chips thicker than the existing structure height;
- treat wooden structures with an antiseptic fire retardant;
- seal cracks, joints with polyurethane foam or sealant.
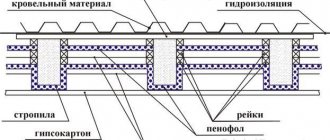
Vapor barrier
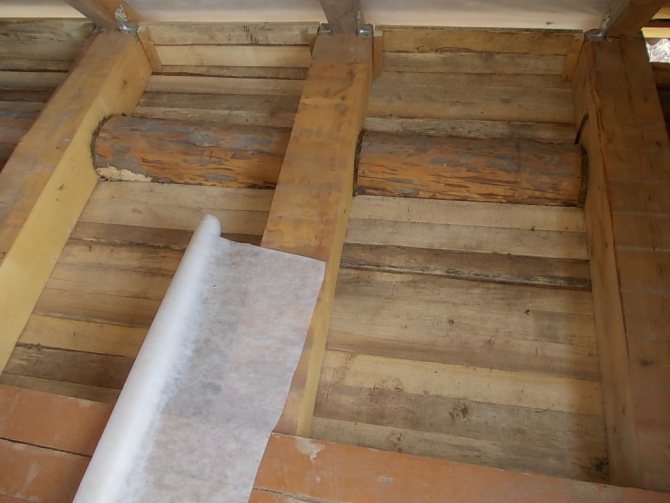
Roof insulation technology requires the obligatory arrangement of a vapor barrier layer. It will prevent moisture from entering the insulation. As a vapor barrier, you can use an ordinary film or a special membrane material. Some craftsmen use glassine or cardboard in several layers.
The insulation is laid with an overlap of 10-15 cm. It can be attached to the beams using a construction stapler. The joints are glued with tape. After that, proceed to the main stage of ceiling insulation.
The second layer is insulation
Insulation of the ceiling with sawdust is carried out in several stages. Each layer is compacted. To prevent the development of microorganisms, fungi, lime is added to the wood mass in a ratio of 10: 1.
To prevent bugs from getting in the insulation, you can sprinkle it with ash on top.
When combining materials, preliminary preparation of the mixtures is required. To insulate the ceiling with clay and sawdust, first prepare a composition with coarse fractions, it fits 5-10 cm thick. The next layer should contain smaller wood waste, it is applied after the lower one has hardened.
Warming solutions are prepared from clay and sawdust in the proportion:
- 1 part lime;
- 10 parts of wood pulp;
- 5 parts of clay.
The clay should be pre-soaked: add 2-2.5 parts of water to 1 part of the clay. Wood raw material with lime is poured into the creamy mass. The finished solution should be lightly tamped when laying. It dries for a long time, so work should be started with the arrival of the warm season.
When small cracks appear, they are sealed with the same solution.
After drying, the insulation turns into a solid monolithic mass on which you can walk.
For the preparation of a sawdust-cement mixture, it is especially important to choose dry, stale raw materials with a low sugar content. The solution is prepared in a 10: 1 ratio. Water is added gradually until a plastic, non-crumbly mass is obtained, from which water does not separate.
The solution is laid in a layer 20-25 cm thick. To obtain a homogeneous structure, the mixture should be tamped. Such concrete grabs and hardens faster than a clay mixture, so work can be carried out in summer and in the off-season.
The third layer is waterproofing
To insulate the attic with sawdust without additional components to be effective, it is important to carry out timely protection from external moisture. The procedure is performed 2 weeks after filling. Isolation is carried out with a vapor-permeable superdiffusion membrane. It does not allow the chips to get wet and will allow evaporating moisture to pass from it.
The material is laid as in the case of a vapor barrier. When backfilling clean sawdust for free movement in the attic, you will have to equip the flooring. Boards should be laid with a small gap to ensure ventilation.
Ceiling insulation technology in a bath
Here, as in the case of a private house, the ceiling must be sheathed with wide boards. To carry out a chimney, you need to perform a ceiling cut - you can buy this ready-made or do it yourself (cut out a sheet of stainless steel that completely blocks the hole, cut a circle in the middle for the chimney to pass through, seal the edges of the cutout in the ceiling with basalt wool, and on top the last to fill the strips of metal; during installation, the chimney is fastened with guide strips, but so that it moves freely during temperature expansions; the plate is screwed on from below, and the resulting passage is insulated).
Step 1.
First, take care of the vapor barrier in the attic. Do not use roofing material, because at high temperatures it will soften, start emitting unpleasant odors or even catch fire. As for PVC film, it is also unacceptable here.
Lay the vapor barrier with an overlap of 10-15 centimeters and the same bend on the walls.
Step 2.
A mixture of sawdust, prepared according to one of the recipes described above, lay in layers, carefully level and tamp each layer. If you plan to use the bath only in the summer, then the thickness of the insulating layer can be 5 centimeters, while for winter use you will need at least 15 centimeters.
Step 3.
At the end of the installation, wait until the layer of insulation is dry. If cracks appear on the surface after that, seal them with the same mixture. By the way, to minimize the number of cracks, add salt to the solution before laying (5-6 tablespoons per 10 liters of water).
Step 4.
When the mixture is dry (which can take up to one month), cover it with a thin layer of lime and lay in a vapor barrier. Then, if you wish, you can cover the surface with boards.
Note! If you use a mixture of sawdust and plaster for insulation, then apply it in thin layers. Gypsum mortar, as noted earlier, dries quickly.
In addition, both methods of insulation can be used for both horizontal and vertical surfaces. But in any case, special attention should be paid to the insulation of electrical wiring. Hide all the wires in high-quality metal corrugated hoses, and seal the ends of the latter with fire-resistant material (for example, PENOSIL Fire Rated fire-resistant polyurethane foam). This will protect the wooden structure from fire in case a short circuit occurs.
Video - Insulation of the ceiling in the bath with sawdust
As you can see, there is nothing difficult in insulating the ceiling with sawdust. This technique has been tested for centuries and demonstrates excellent results, not much inferior to modern methods of thermal insulation. Moreover, the cost of both the work and the material itself is quite low, especially if you do everything yourself.
Increasing the thermal insulation of a private house is not only an additional budget savings
when paying for energy resources, but also additional comfort in the summer heat and winter cold. At the same time, without unnecessary effort and wasted time.
Depending on the building materials used in the construction of the house, the heat loss of the roof can reach up to 20%
general indicator.
If the project does not provide for heating the attic, then the reduction of heat transfer in the room is carried out directly insulation of the ceiling
.
There is a sufficient number of modern building materials for additional thermal insulation of the ceiling, and their range only grows every year. However, in "Old-fashioned" method
heat preservation still has many fans. This is due to many circumstances:
- Environmentally natural product.
- Sufficient thermal insulation qualities.
- good sound insulation properties.
- In this case, the sorbent can be purchased even for nothing or with insignificant capital investments.
If there is a woodworking production nearby or there is a desire to saw them on their own in a nearby forest, then such an insulator will be the most cost-effective offer. The most favorable size
of sawdust material for work will be 2 cm. The dust will also go into business, it is used for pouring large fractions.
When working with sawdust must remember
that they are waste from wood processing, so their main qualities will be similar:
- Sawdust is highly flammable, and uncontrolled spontaneous combustion is possible.
- Small fractions are dusty and inconvenient for installation and operation.
- Large fractions, on the contrary, have a significantly lower degree of thermal protection.
- The material is hygroscopic, therefore it is easily fed to decay, fungus and mold quickly spread in it, over time it cakes, losing the quality of a heat insulator.
- The loose structure attracts insects and small rodents.
All the negative features of the insulation must be taken into account
when preparing raw materials for subsequent work.
Material preparation
At the initial stage of ceiling insulation, thorough drying of sawdust
, which can reach several weeks or even months. Dehumidification takes place indoors with natural ventilation.
At this time, the substrate must be processed antiseptics and fire retardants
... These are special solutions that prevent the occurrence of mold and mildew, as well as reduce the natural fire activity of raw materials.
One of these folk remedies
, time-tested is a solution of copper sulfate or borax. Before drying, it must be sprayed through a coarse pulverizer over the bulk material.
A solution of copper sulfate or borax is poison
, therefore, you need to work with it only with rubber gloves, protecting the respiratory organs with a gauze bandage.
At the end of drying, the material must be sprinkled with lime. in a ratio of 10: 1
... In building materials stores, you can find a lot of options for ready-made antiseptic impregnations and refractory solutions to increase the stability of sawdust.
You can also carry out preliminary processing of sawdust with any paint and varnish material
that does not have a pungent specific smell. The material prepared in this way can already be used to insulate the ceiling in a private house.
Other options for insulation "filling" for the ceiling using sawdust include solution preparation
based on water and hardener, which after drying take a solid state.
After such preparation, the sawdust mass loses all negative qualities as a woodworking product. This alternative are more expensive
, but it is used in practice much more often due to the greater practicality and durability of use.
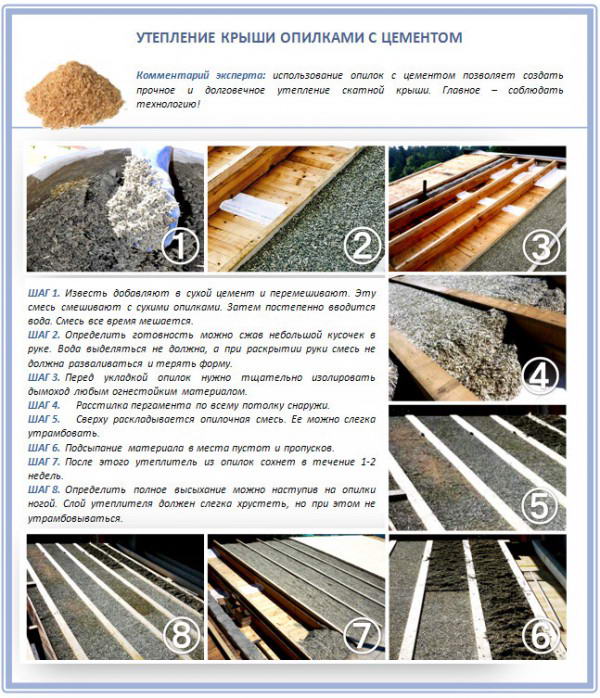
Sawdust and cement (gypsum)
For this option of ceiling insulation, sawdust is added to the sawdust processed by the previous method cement or plaster
in a ratio of 10: 1. It should be clarified that gypsum is a more expensive material than cement, which will significantly affect the insulation budget.
Same must be taken into account
that it sets quickly, so it is advisable to dilute it in small portions and work with the ready-made solution rather quickly. The drying time for sawdust and shavings in this case can be reduced, since water will be used during the preparation of the solution.
To simplify
preparation of the finished composition, lime and cement (gypsum) are mixed in advance in a ratio of 1: 1 to 10 parts of sawdust (not dried). And copper sulfate is added to the water that will be used to knead the ingredients. This work is very time consuming, so it is more convenient to use a concrete mixer, which will save both time and effort.
Sawdust and clay
This method involves adding liquid clay to the sawdust. The resulting mixture is better than others for insulation of the ceiling. Before "Kneading dough"
it is necessary to soak the clay in water in advance and let it stand for several days.
Further work consists in mixing sawdust raw materials into the sodden clay, sawdust should be about three times more. Work automation with a concrete mixer will speed up the laborious process
multiple times.
Advice
: insulation of the ceiling with clay and sawdust should be carried out only in the summer, since the hardening of the insulation filling requires a moderately warm temperature for better adhesion.
If the ceiling is insulated in a residential building, then it is worth adding lime 10%
from the amount of sawdust. When insulating a bath, the clay saw mixture does not require any additional chemical ingredients.
This "Pillow" is perfect
for thermal insulation in a bath, since during an increase in temperature there will be no oxidative decomposition of unstable chemical elements.
Advantages and disadvantages of ceiling insulation with sawdust
It is not very convenient to work with small fragments, but there are many supporters of this method of insulation. The owners appreciate the material for the following qualities:
- This is an environmentally friendly material that does not emit harmful substances and does not provoke an allergic reaction in humans. To prepare the solution, only natural ingredients are used - sawdust, sand, clay, lime, and the owner himself will not add toxic agents.
- The price of the material is minimal, often you can get it for free, subject to pickup. The work does not require special skills and special styling tools.
- The service life of the insulation depends on the quality of the installation, but it is still considered large.
- The thermal conductivity of the sawdust is very low. Good insulating qualities are transferred from the solid wood.
The substance has serious drawbacks, because of which many people prefer to buy modern thermal insulation products. Negative properties include:
- Flammability under high temperature, which creates a high risk of fire in the attic;
- Damage by microorganisms, insects and rodents;
- Hygroscopicity;
- Traceability.
Ceiling construction
Ceiling insulation by any sawdust method goes from the attic
... First, the formwork is mounted from rather wide planed boards, 20-35 cm wide.
The fastening to the beams must be quite durable
, because the "pillow" cooked in a wet way has a lot of weight.
Drive in nails or screws necessary downhill
in different directions. A suitable size for nails is 100 mm and for screws 50 mm.
For protection against decay
, the reproduction of fungus and mold, as well as to increase the fire retardant performance, all wooden structures must be treated with antiseptics and fire retardants.
To protect the insulator
from the penetration of moisture onto the ceiling, it is first laid with an overlap, covering the entire area of the ceiling, as well as the transverse beams of the floors. The connecting seams must be glued with wide tape if PVC film is used or bitumen - in the case of roofing material.
For vapor barrier
pre-prepared sawdust is laid, using any of the previously provided methods. The thickness of the insulation layer, taking into account building codes for central Russia, reaches 20-30 cm.
Dry method
laying sawdust, each layer of raw material must be compulsorily pressed and tamped, moistened through a fine pulverizer. After the loose material has settled, fill up the missing layer and carry out the last processing with ash.
After styling wet sawdust insulation
it is necessary to allow time for complete drying and precipitation of the mixture. This time takes about 1 month during the warm season.
After this period, it can be applied over the insulation "pillow" waterproofing layer
in the form of roofing material or film.
If the attic is not going to be used, then can be done
without erecting floor slabs.This will reduce the cost of the construction budget.
If, during drying, cracks of different depths are formed in the heat-insulating "pillow", need to cover them up
solution of a hardener, i.e. cement mortar or liquid clay.
Tools and materials
For insulation of the ceiling with sawdust not required
any special tools and in-depth knowledge of construction. However, it must be warned that this is a rather hard exhausting work, so additional working hands will come in handy.
Basic materials
and specialized tools to facilitate physical labor that will come in handy at work:
- Sawdust and shavings of different fractions.
- Copper sulfate, lime, ash or specialized antiseptics and fire retardants.
- One of the ingredients: cement, gypsum, lime or clay.
- Cardboard, roofing felt, PVC film or other roll vapor barrier.
- Scotch tape, bitumen, polyurethane foam.
- Stapler, hammer, screwdriver, shovels.
- Nails, screws, staples.
- Containers for mixing and transferring the solution: bath, tanks, buckets, stretchers.
- Planed board.
- Pneumatic lift or assistant.
- Concrete mixer or assistant.
- Time and patience.