The services of a master - specialist in fireplace masonry are not cheap. The price of building one structure from scratch starts from 350 USD. e. (20 thousand rubles), reaching $ 1,500. That is, depending on the complexity and scope of work. Imagine how much money you can save if you fold a brick fireplace with your own hands. But the task is not easy - you need to learn the basics of stove business, choose a suitable design for a hearth, build and melt it correctly. We will try to give as much information as possible on all the above issues and present projects of fireplaces available for self-production.
The device of a classic brick fireplace
Strictly speaking, open hearths are not very suitable for heating private cottages due to the low efficiency of burning firewood, the efficiency is only 20-30%. While a fire is burning in the firebox, heat is spread throughout the room through infrared radiation. After damping, the intensity of heating decreases and stops after 2-3 hours, when the brickwork has cooled down.
An important point. It is unrealistic to build even a small wood-burning stove in an apartment of a multi-storey building - there is nowhere to lead the chimney, and the ceiling is not designed for such a weight. Note: the mass of a mini-fireplace, whose project is presented below, is more than 700 kg, size - 0.5 x 1 m (load area - 0.5 m²).
Despite the low heat dissipation rates, fireplaces remain attractive to homeowners as they create a unique home-like atmosphere. The device of a classic English hearth is shown in the diagram and includes the following elements:
- underground part - foundation;
- base of 2-3 rows of bricks;
- bottom part with forward-protruding furnace platform;
- portal - brick framing of an open firebox;
- smoke collector - an upward-tapering channel in the form of an umbrella above the combustion chamber;
- the chimney tooth at the beginning of the smoke collector serves for better heat extraction from hot gases;
- chimney leading to the roof;
- traction force is regulated by a slide valve.
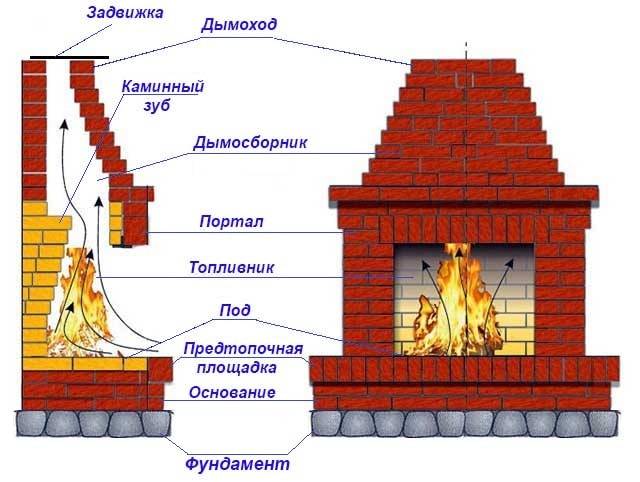
Diagram of the device of a classic open hearth
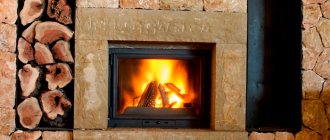
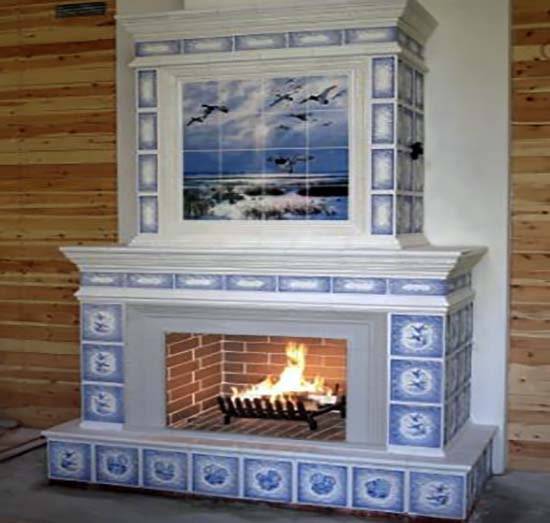
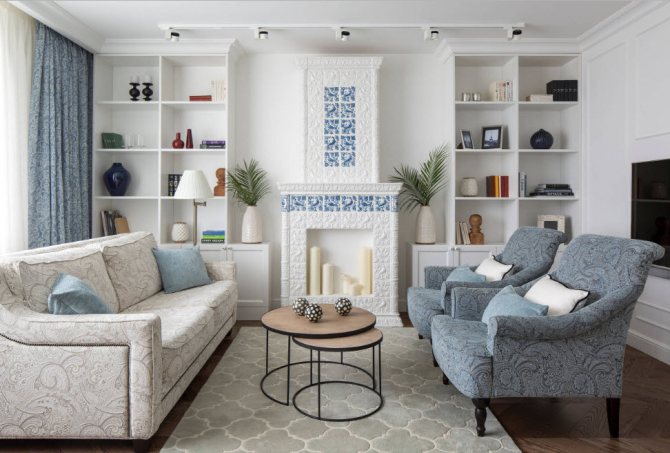
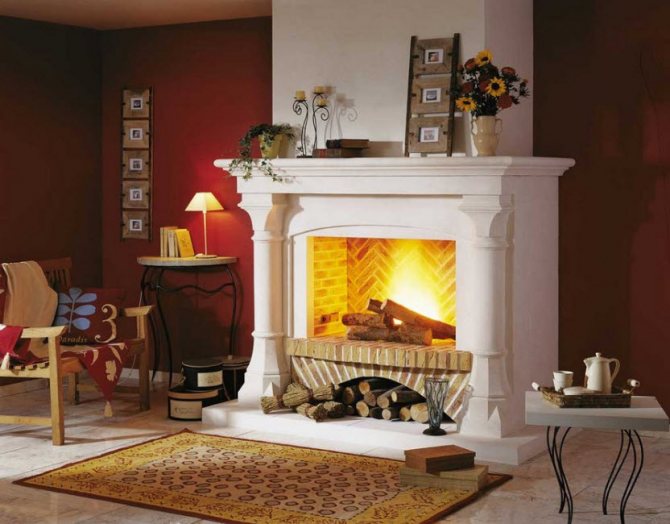
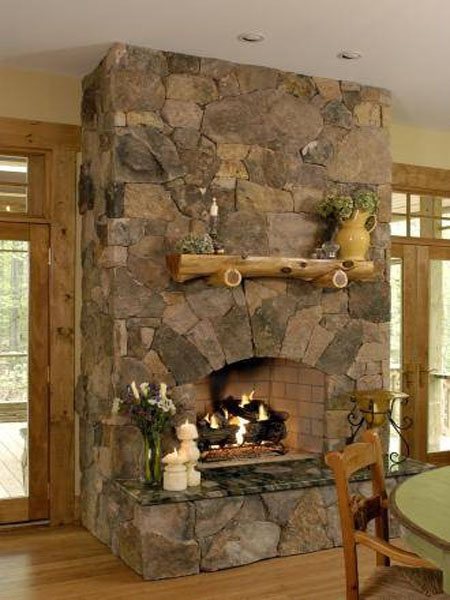
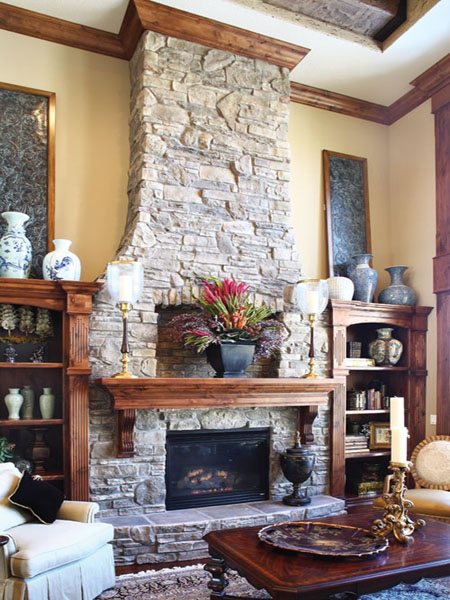
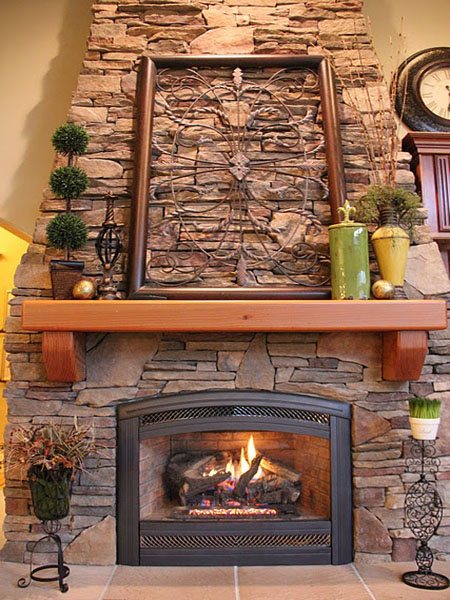
If the construction budget allows, then outside, the walls are tiled, as is done above in the photo. It is not necessary to decorate the walls of the structure - the correct brickwork looks quite neat.
Fireplaces for summer cottages: varieties
First of all, you need to determine the type of fireplace that will be installed in the country house. At the moment, the following types are popular, which have certain features, advantages and disadvantages:
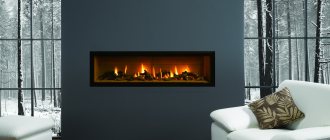
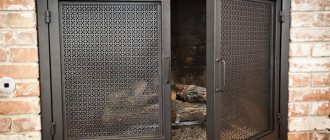
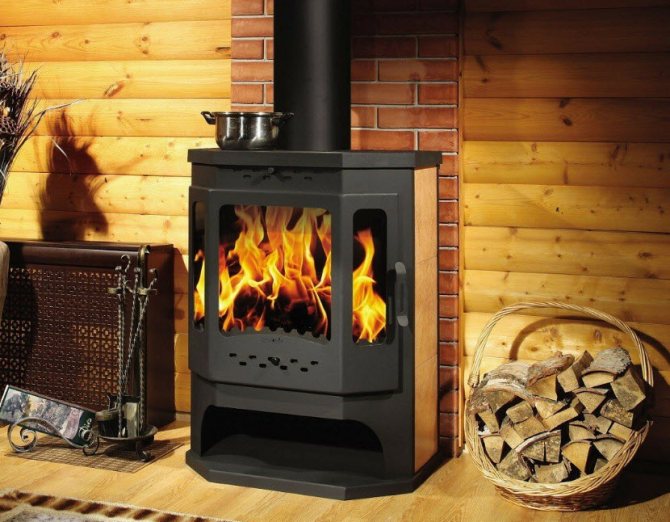
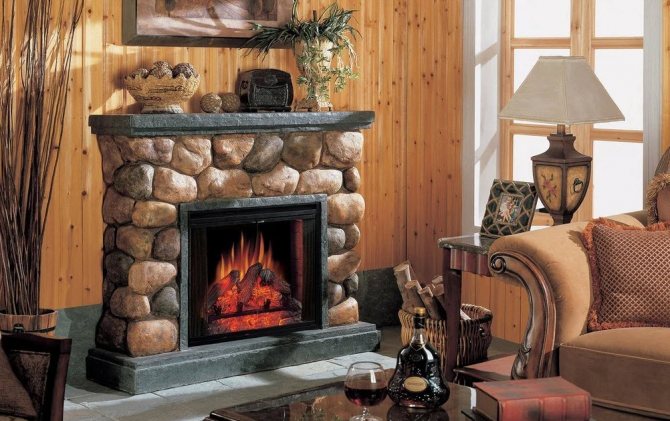
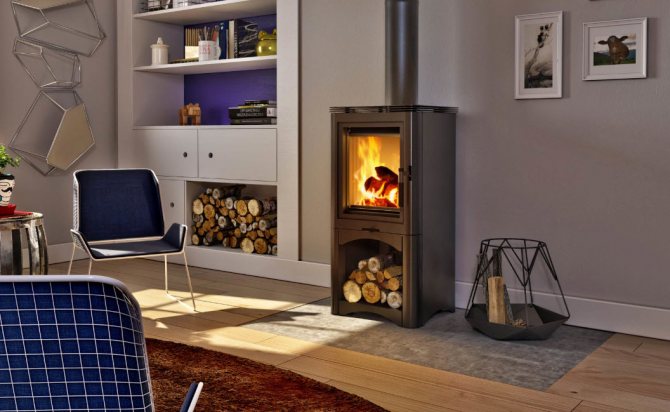
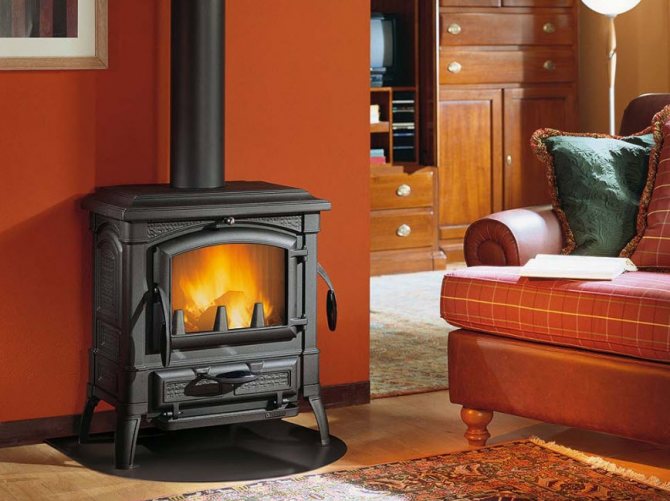
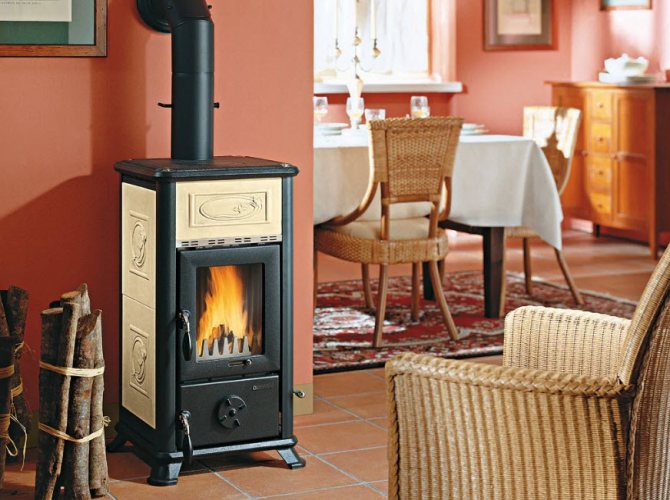
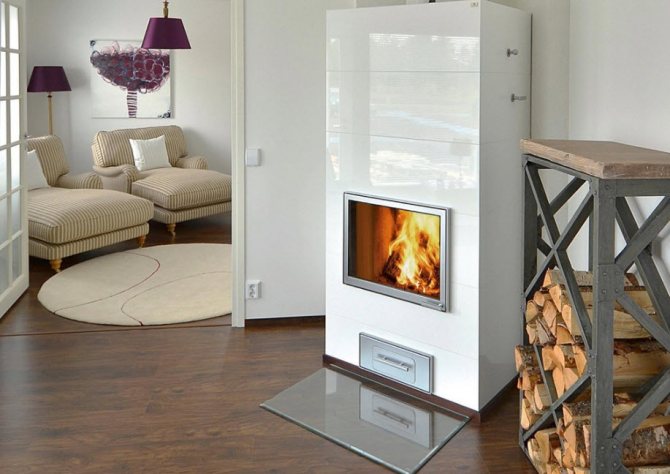
- Wood stoves. This type of fireplace is made of bricks, cast iron and steel, it can be open, half-open or closed. The design serves as a heat exchanger and runs on solid fuel (coal or wood).
- Electric fireplaces are safe and easy-to-use designs that will create a feeling of coziness and comfort. If you don't want to waste time lighting the fireplace, then its electric version will be the perfect solution. In addition, modern models are equipped with a heating device, which allows you to enjoy not only the appearance of the fireplace, but also the heat that it gives off.
- A gas fireplace is a construction that works on the principle of a kitchen stove. Fireplaces have an attractive appearance, and a wide range allows you to choose a design that emphasizes any interior style. It is worth noting that they can also be used not only as a decorative element, but also as an object that heats the interior of a country house.
- A decorative (fake) fireplace is a simple and budget design that you can make on your own.This type of fireplace will make the interior more attractive, and you can decorate it the way the homeowner wants, which allows you to create a unique design.
- Eco-fireplace is a safe and environmentally friendly design. This fireplace runs on liquid fuel (bioethanol), which does not emit substances hazardous to health when burning. As for the disadvantages, it is worth noting the high fuel consumption and the high cost of the structure.
- A fireplace stove with a water circuit is a design that is used in country houses as the main heater. Such a fireplace heats up quickly enough, after which the heat spreads through all the rooms of the cottage, which allows you to heat the internal space, creating comfortable conditions for rest or permanent residence.
- A mini-fireplace is a small portable design that can be placed near a seating area or a dining table.
- A stove-stove is a simple and compact model that economically uses fuel to heat the interior of a country house.
- Cassette fireplace - a metal firebox covered with glass.
- Convection oven, barbecue, grill or barbecue - constructions designed for cooking. Advantages: compactness, low cost, mobility.
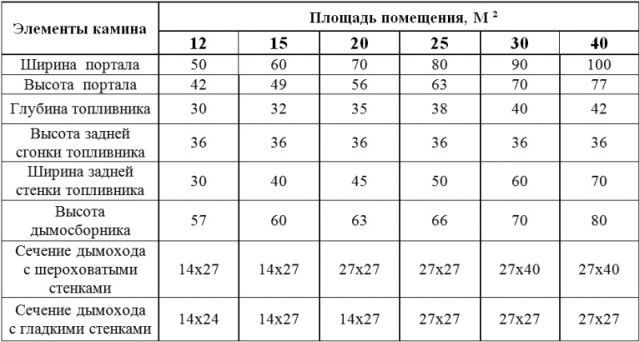
Dimensions and location of the hearth in the room
When choosing the design and drawings of the fireplace, pay attention to the dimensions of the portal, fuel chamber and chimney. The specified dimensions are selected according to the area of the heated room and are interconnected by the following ratios:
- cross-sectional area of the chimney - 1/9 of the square of the portal;
- the depth of the firebox is 1.5-2 times less than the height of the portal opening;
- the area of the open opening is 1/50 of the square of the room.
If you make a large fireplace in a small room, the chimney draft will not have enough air flow. The hearth will begin to smoke into the room or "suck" the air from the neighboring rooms, together with the heat. It is allowed to build a small structure in a spacious room, but the heating will be minimal - the fireplace will serve as a decoration for the living room and will play the role of a barbecue.
For the convenience of determining the dimensions of the firebox and chimney, depending on the quadrature of the room, there is a ready-made table:
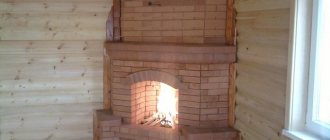
By their shape, fireplaces are divided into 2 types - wall and corner. In the publication, we provide a description of the first variety - it is relatively simple. To build corner-type home hearths, you need to gain experience in stove business. Having decided on the dimensions of the heater, allocate a place for installation, taking into account our recommendations:
- Place the fireplace in the center of the dividing wall. If a private house is in the process of redevelopment, repair or construction, the back wall can be taken out to the adjacent room by making an opening inside the partition.
- It is impractical to make a fireplace near the outer wall - some of the heat will go out into the street.
- Think about convenience - do not place the structure near interior doors and do not place furniture back to back.
- Carefully study the structure of the ceilings and rafter system so that the chimney does not fall into the support beam or on the edge of the reinforced concrete floor slab. The minimum distance from the wall of the gas duct to the rafters is 10 cm (taking into account the fire-prevention oven cut).
When choosing a site for a fireplace, do not forget about the foundation. In the living area, you will have to disassemble the floors, dismantle the screed and dig a pit without affecting the existing base of the building. Remember if the house utilities have been laid in the chosen place - sewerage, water supply or underfloor heating. The basement under the room is also a problem, the weight of the masonry will not withstand every floor.
Choosing a fireplace for a summer residence
When choosing a design, it is important to take into account the style of the room where the fireplace will be located, the dimensions of the room.You also need to pay attention to the features of the fireplace itself, given its simplicity and ease of use, dimensions and efficiency. In addition, you need to carefully study the technical characteristics of the structure, taking into account its appearance and design. The last indicator when choosing a fireplace will be its power, as well as the type of fuel that will be used to heat the interior.
As you know, the Bavaria fireplace stove is very popular in specialty stores, which has a high efficiency, which allows you to quickly heat up the interior of the country house. In addition, the design is equipped with a slow fuel system, which makes the fireplace economical. This model is not only affordable, but also attractive in appearance, it will easily fit into the interior of a country house (dacha).
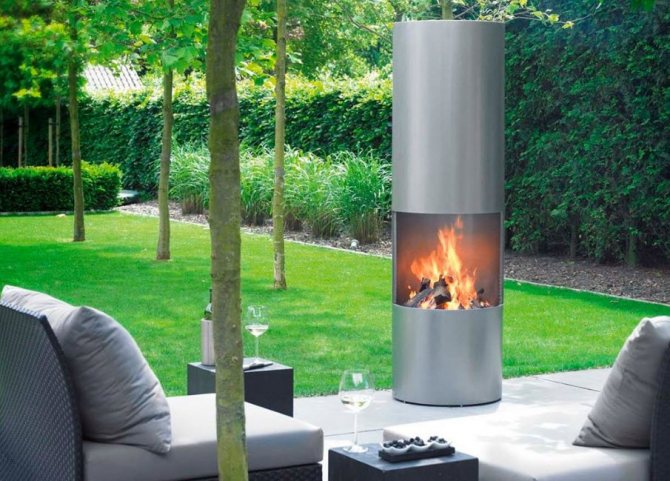
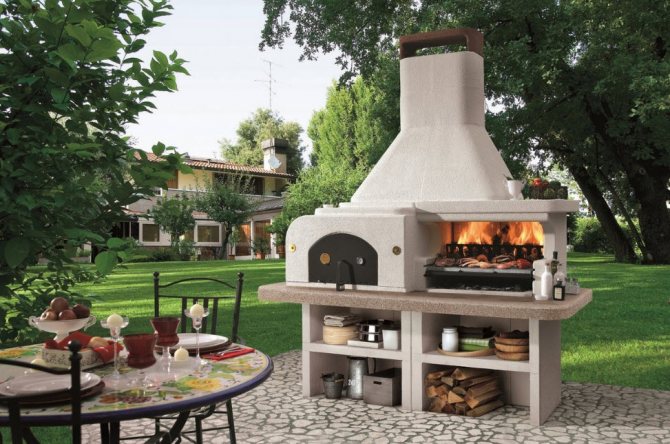
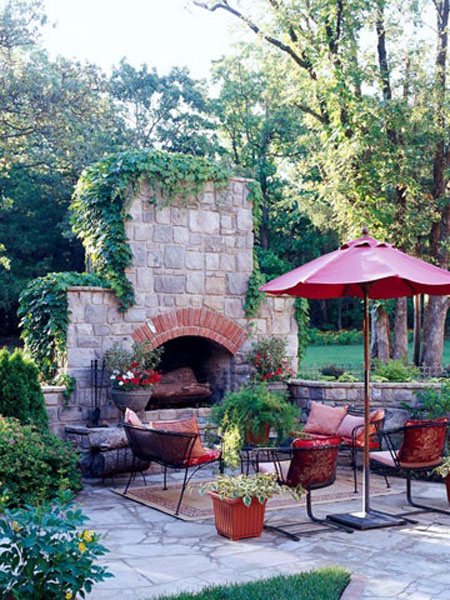
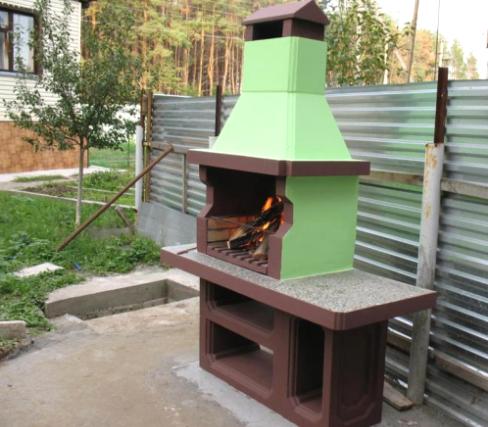
As for the fireplace to be used outdoors, there are fewer requirements. Depending on the number of households and the requirements of the owner of the dacha, the type of construction and its size are determined. Of course, it is better to install a brazier or barbecue in a gazebo or on a veranda, as a last resort, equip a small canopy that closes the space from precipitation and other weather phenomena. It is important that the outdoor fireplace is made of a durable material such as stone or brick.
Construction technology
The procedure for preparing and laying a fireplace with your own hands is proposed to be divided into stages:
- Selection and purchase of building materials.
- Preparing a set of tools.
- Foundation device.
- Brickwork body of the stove and chimney.
- Drying and initial kindling.
Let us consider in detail each item on the list, then we will present specific projects and orders available for execution by novice stove-makers.
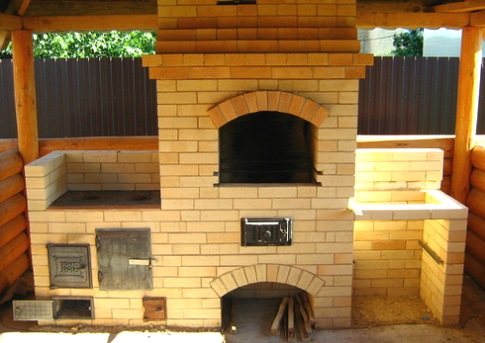
An interesting version of the fireplace stove, where 2 fireboxes are combined - open and closed
Choosing a brick and mortar
Choose a stove brick taking into account the following requirements:
- for the main masonry, take a solid ceramic (red) brick of a standard size 250 x 120 x 65 mm, hollow marks are not suitable;
- the walls of the firebox are laid out of chamotte (refractory) stones of brands Ш, ША or ШБ;
- instead of refractory, it is allowed to use solid clay brick, carefully selected for quality, - without cracks, chips and other defects;
- the body of the fireplace is allowed to be laid from used ceramic bricks, provided that the stones have retained their strength, are not saturated with dampness and are not cracked;
- if your budget allows, buy the curly brick with rounded edges shown in the photo.
Note. The brand of fireclay stones is precisely indicated in the design of the hearth. Specify the number and shape of hewn bricks in accordance with the schemes - orders.
The easiest way to make a high-quality masonry mortar is to buy a ready-made clay-sand mixture in a store, designed for stoves and fireplaces. A similar product is available commercially for refractory masonry - fireclay clay and mortar.
If you are on the path of total savings, make the solution yourself:
- Remove soil impurities and foreign inclusions from natural clay - stones, roots and plant stems.
- Pour material into a large container and fill with water. Soaking lasts for 2 days.
- Topping up the water, bring the mixture to a creamy consistency and pass the clay through a sieve. The goal is to remove all extraneous inclusions.
- Add dry sand to the clay solution, passed through a sieve with a mesh size of 1.5 x 1.5 mm. By mixing the composition, achieve optimal fat content.
A solution is considered suitable for work if a “sausage” with a diameter of 10-15 mm rolled out of it does not crack and does not crumble when screwed onto a wooden stick 4-5 cm in diameter.
Reference. The finished clay-sand mortar is stored indefinitely.If the composition has time to dry before use, it is enough to dilute it with water again.
Methods for checking the solution by squeezing, breaking and winding harnesses on a round handle
A purely clay mortar is not suitable for laying the base and installing a chimney - you need to add lime or cement. Therefore, for the construction of a fireplace, prepare additional building materials:
- Portland cement M400;
- sand;
- roofing material for waterproofing;
- felt (can be used), roofing iron;
- broken stones of any origin;
- boards or panels for formwork;
- polyethylene film (used, but without holes);
- knitting steel wire;
- asbestos cord.
Advice. Basalt cardboard is successfully used instead of felt.
Ready-made masonry mixtures for stoves and fireplaces
Of course, the construction of a fireplace will require stove accessories - doors, latches, and so on. The exact quantity and dimensions are listed in the project. To form the arch of the portal, you will also need metal corners or reinforcement. In order not to plaster and decorate the finished hearth, purchase a special fire-resistant enamel.
Cooking tools for the stove-maker
The complete set of tools used by the kiln masters is shown in the picture. But since the average homeowner does not have all the devices depicted, here is a list of tools that you cannot do without when building a fireplace:
- pick;
- hammer (preferably rubber);
- building level, tape measure;
- square, cord and plumb line;
- wide brush;
- Master OK;
- pliers;
- ruler and scribe - a pointed metal rod.
A beginner, not trained in the techniques of teska and splitting bricks, will make a lot of waste and spoil a lot of material until he gets used to work. Hence the advice: cut stones with a grinder equipped with a concrete circle. To get less dust, go outside or in another room.
In addition to the listed devices, you will need a bucket and a thick cloth to wipe the brick walls. A small spatula or metal scoop with a broom will also come in handy.
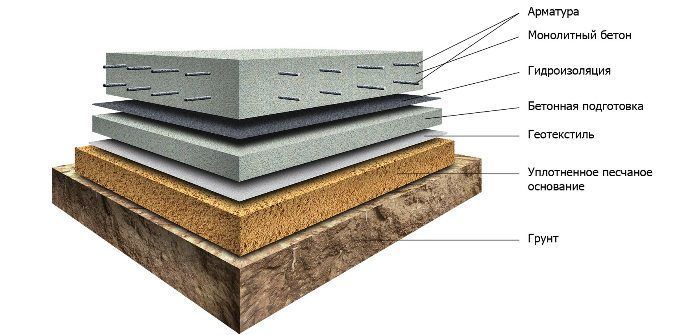
We lay a solid foundation
How to make the base of the fireplace correctly is described in detail in another step-by-step instruction on building a stove. Let's briefly outline the stages of work:
- Digging and excavation of soil from a pit, whose dimensions are 10 cm wider than the dimensions of the future hearth. The depth depends on the location of stable soil layers, but not less than 0.5 m.
- Filling the pit with rubble stone, strengthening with liquid clay or lime mortar.
- Laying 2 waterproofing layers of roofing material.
- Installation of formwork, pouring a reinforced concrete slab with a thickness of 15-20 cm.
- After 4 weeks (complete hardening of concrete) - laying of felt soaked with liquid clay and erection of 2 continuous rows of ceramic bricks.
Note. Instead of a reinforced concrete slab, you can use cement mortar brickwork, ending at the level of the finished floor. In this case, the rubble foundation can be loaded much earlier - after 7-10 days.
The laid base of the fireplace is a completely independent structure, not related to the foundation of a private house. The minimum distance between them is 50 mm, but it is better to withstand 10 cm. Treat the accessible side surfaces of the foundation with bitumen for waterproofing.
The polyethylene film is laid over the backing and formwork so that the liquid concrete does not lose cement laitance. The clay-soaked felt is laid on the finished slab, as shown in the diagram. The first two rows of stones are considered zero and are not reflected in the order of the fireplace, their task is to protect the felt pad from high temperatures. For more information about the technology of laying a reinforced concrete foundation, see the video:
Fireplace instructions
Before laying out the fireplace, select the best brick for the firebox, clean used stones from soot, dirt and adhered old mortar. When ready, proceed to an important stage - laying the first row. Step by step, the technology looks like this:
- Stepping back 5 cm from the edge of the foundation, collect the first tier of bricks dry. Install the outdoor pretty stones first, then fill in the middle.
- Using a square and a wooden plank, line up the bricks with 90 ° angles.
- Measure the length of the diagonals with a tape measure. The maximum allowable discrepancy is 5 mm.
- Place all stones on the mortar, controlling the horizontal with a level.
The next rows are laid out in the same way - shaping the model on dry, fitting and trimming stones, setting for solution. The verticality and horizontalness of the masonry is constantly controlled using a plumb line and a building level.
Advice for beginners. There is a simple trick to ensure the verticality of the fireplace masonry. After forming the first two rows, project the corner points on the ceiling using a plumb line and drive nails or dowels there. Tie cords with weights to them, which will serve as markers for the dimensions of the fireplace. Instead of twines, you can use vertically installed iron corners, then it will become much easier to align the masonry.
When erecting the walls of the fireplace, be sure to observe the following rules:
- Before laying the red brick, immerse it in a bucket of water for 2-3 minutes - air bubbles will come out of the pores. Refractory stones do not need to be soaked, just rinse off dust.
- The maximum seam thickness is 5 mm. Press the brick against adjacent stones, while leveling and troweling away excess mortar on the sides.
- The walls of the gas channels must be smooth. Turn the bricks with a straight edge inside the flue, and every 3-4 rows wipe the inside of the masonry with a wet rag.
- Before laying the chimney with a chimney tooth and inclined walls, where you need to make a lot of trimming, lay the element model dry. This will allow the sawn bricks to fit clearly.
- Do not connect fireclay and ceramic masonry, which have different coefficients of thermal expansion. Provide a gap of 3-5 mm, where the sheets of basalt cardboard are inserted.
- Before installation, wrap the fireplace doors with an asbestos cord at the points of contact with the wall. Fix the elements with a knitting wire, vertically and horizontally.
- Place the valve on a clay mortar - you need to open the valve and apply it to the frame.
The overlap is made of steel corners supported on the portal walls. The top row of stones is laid on rolled metal without mortar, only the side seams are filled. Semicircular arched vaults are formed using special patterns from wood - circled, shown in the photo.
When installing a chimney, change the recipe for the preparation of the solution - add cement instead of clay. The ratio of the binder to the sand is 1: 4, the density is medium. In the wooden floor of the house, a cut is made, which provides a fire-prevention gap of 38 cm from the smoke channel to combustible structures (see the diagram).
Above the roof surface, a thickening of the pipe is made - an otter, which closes the junction of the roofing with brickwork. At the end, a closed-type head is formed, which protects against precipitation from entering the fireplace.
Drying and first kindling
Sandy-clay solution does not harden, but dries. The drying process takes 10-14 days, during which time it is monitored. Small cracks in the fireplace masonry are repaired with the same clay mortar. At the end of the specified period, make a test kindling:
- After opening the latch, light a small heap of brushwood and wood chips on the hearth.
- Add small firewood gradually, keeping the fire low. This will allow the solution to dry completely.
- If after 3-4 hours no cracks have formed in the body of the fireplace, you can increase the amount of firewood. Take your time and first make sure that the walls of the hearth are warmed up.
Advice. Due to an air lock in the chimney, initially there may be no draft. The pipe must be heated with a torch or a small fire lit on a view.
See the following video for masonry techniques:
The sequence of actions when building a fireplace
All work begins with calculating the size of the foundation for a small heating system. The foundation of the summer cottage may not be enough for the normal functioning of the device, therefore it should be strengthened with a non-combustible material - ceramic tiles or other solutions from non-combustible ingredients.
Before starting the construction of a fireplace with your own hands, you need to soak the clay, preferably 3 days before the start of construction. A small amount of water is added to the soaked clay every morning. After adding water, the solution is well mixed with any solid object.
Monolithic slab foundation diagram
Before starting construction work, do not forget about the need to wet the material. It is impossible to build a high-quality heating system on a wet brick. The first rows are laid on a mortar of clay and cement. Each subsequent row is placed on a cement mortar with a gradual decrease in the concentration of clay in it.
DIY fireplace
Sequence:
- Masonry sealing. A small fireplace requires high-quality and inexpensive sealing. An ordinary roofing material will go for giving. Tightly roofing material overlap each other;
- Laying the first three rows. A small fireplace for a summer residence requires continuous masonry of the first three rows;
- The fourth row is laid out only around the circumference of the first three rows. Your task is to make a small hole with your own hands in the treasure for the fireplace stove;
- The fifth row of bricks is laid out taking into account the location of the ash pan. In addition, supports are placed here for a metal lattice, which is attached to the device with steel fasteners. It is worth noting that steel fasteners can be made by hand from scrap materials;
- The sixth row presses the steel fasteners. A grate is placed on top of this layer of bricks;
- The metal mesh is pressed against the bricks of the seventh row. At this stage, the construction of the fireplace portal begins;

Fireplace ordering - diagram - 8-13 are decorative rows that must be tied up with seams. This process determines the appearance of the heating equipment. Do-it-yourself decorative masonry up to row 11. From this moment on, it is necessary to make a "mirror" at an angle on the back wall;
- 14-15 - the future small fireplace requires bandaging the portal. At this stage, the laying process continues to move upward, taking into account the tilt of the "mirror" and the portal;
- 16 - the formation of the "mirror" ends and the lifting of the upper parts of the tooth begins. For this process, you will need the clay that you soaked a few days ago. If the tooth is not coated with a fire-resistant material, then all interior items of the summer cottage may suffer from spontaneous combustion;
- 17-19 - shaping the front of the fireplace;
- 19-22 - creating a hole for the chimney. Practice has shown that it is better to take standard dimensions of 15x28 cm for a chimney.It is such a hole that is capable of providing the most efficient draft and removal of combustion products without harm to the summer cottage;
- 23 - the smoke hole is shaped like a swallow's tail. The 24th row is the final brick layer.
Fireplace masonry
After creating the frame, the heating device must be brought into a divine form - to make the jointing with clay. For jointing you will need dry sand and wet clay. The solution is mixed with your own hands until a homogeneous mass is obtained. The grout is applied to the seams with your fingers. Remember, even summer cottages need neatness, so do not forget to smooth out the seams on the fireplace well and wash out the clay from the brick.
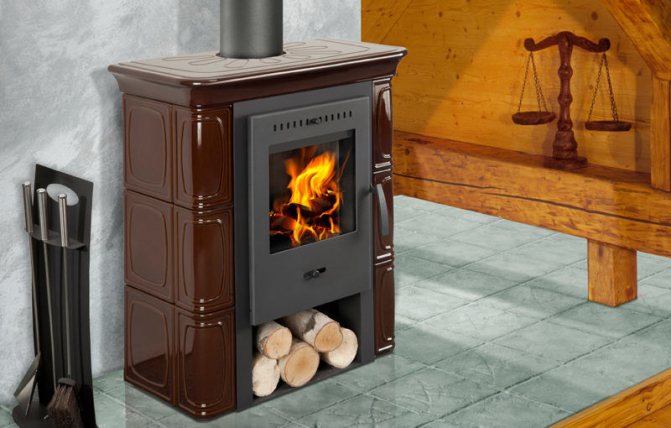
Project number 1 - compact mini-fireplace
This hearth is suitable for heating a room of 16–20 m² in a country house or a small country house.Another option for using the structure is as a street barbecue built in a garden gazebo. A feature of the fireplace is the side convection ducts that heat the air in the room. The size of the building is 102 x 51 cm.
To lay out a mini-fireplace, you will need the following materials:
- solid ceramic bricks - 240 pcs. (chimney is not included);
- revision door 24 x 14 cm - 1 pc .;
- cast iron grates 18 x 14 cm;
- latch 25 x 14 cm;
- stainless steel sheet 1 mm thick, size 500 x 1000 mm;
- a sheet of black or galvanized metal, laid in front of the firebox, dimensions - 70 x 50 cm.
Note. A sheet of stainless steel serves as the rear screen of the firebox. It is allowed not to put it, but then you will have to form an inclined wall from cut bricks.
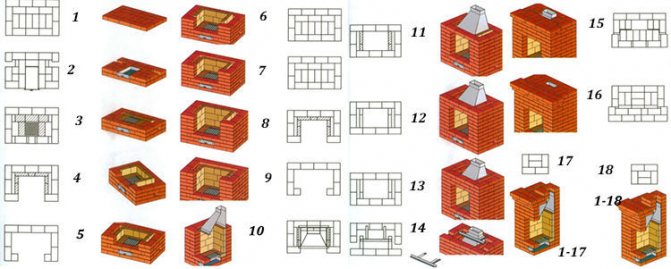
The mini-fireplace shown in the drawing is laid out in this order:
- The first tier is solid. On the second, 3 air channels are laid - 2 side and one in the middle, located under the grate.
- On the third row, the bottom part and the nest of the grate are formed (made 5 mm wider than the product). Then the grate itself is placed.
- A fireplace insert is being built from the 4th to the 10th tier. On the V row, 2 metal rods Ø5 mm are laid for mounting a stainless steel sheet.
- In the 10th row, the rear brick protrudes a quarter into the firebox, the side stones move outward by 40 mm. The width of the firebox in this place is 49 cm.
- The ends of the side stones of the 11th tier are sawn at an angle of 28 ° to the vertical line. You will get the support platforms of the arched vault. 2 stones in the depth of the firebox are placed on the edge.
- The vault is constructed of 9 stones, cut in the form of a trapezoid, with base sizes of 65 and 52 mm, as indicated in the order. The radius of the circle is 51 cm.
- On the 12th tier, the formation of the vault is completed, the upper steel rods are placed and a stainless steel screen is installed.
- Tier 13-14 forms the outlet openings of the convection channels. The inspection door is installed here.
- 15th row - the overlap is being built, 16-18 - the beginning of the chimney.
The master will tell in detail the algorithm for laying a mini-fireplace in his video:
How to make a mini-fireplace for a country house with your own hands
Now modern people visit their country estates at any time of the year. In winter, heating of such rooms plays an important role. A mini-fireplace for a country house can be easily made by yourself.
One has only to determine which type is more suitable:
- Mini fireplace with chimney. Naturally, it cannot be installed in an apartment, but it is a very good option for a country house.
- Electric mini fireplace. Suitable for any space. It is mainly used for decorative purposes, but it also copes well with heating the room.
- Ecological mini-fireplace. Does not provide problems with wood, ash and does not depend on electricity.
All options are good in their own way, but each has drawbacks. Fireplace methods, location and safety are important criteria to consider when choosing a mini-fireplace.
Before starting work, you should take into account all the features of the room, and choose the optimal size of the mini-fireplace. For the safe operation of the constructed creation and maximum efficiency, there are established standards.
Do-it-yourself mini-fireplace
Having familiarized ourselves with the important details, we draw up a drawing and proceed to construction. We start from the bottom. The foundation is laid out in one layer of refractory bricks. It is better to start building a fireplace by laying the back wall of the combustion chamber from the base to the transition to the chimney. The walls of the firebox are built in two layers. The inner wall is made of the same brick as the foundation, and the outer one is made of a simple oven. The height of the wall is about 40 cm. Further, the laying is done with a slope of 20ᵒ, and the wall can be laid out to a height of another 20 cm. After that, they move on to the chimney.
The rest of the fireplace is laid out like this:
- 1-2 rows are made entirely;
- 3 and 4 - build an ash pan;
- 5th row - grate;
- When laying the 6th row, you need to install the firebox door;
- 12-15 row - cooking chamber;
- The transition to the chimney is done on the 19th row;
- 28-30 rows, and the fireplace is almost ready.
The final part is laying out the chimney, and installing a visor on it. Exit to the street can be made from a chimney, but a brick chimney is fine. We prepare the necessary building materials and tools in advance.
Project # 2 - simple heating fireplace
The dimensions of this structure are 112 x 65 cm, height - 2020 mm. The inner size of the portal is 52 x 49 cm. Accelerated heating of the room is provided due to the convective air channel. The building materials kit looks like this:
- clay corpulent brick - 345 pcs.;
- chimney valve - 250 x 130 mm;
- 2 steel equal angles 45 mm wide and 70 cm long;
- metal sheet 500 x 700 mm.
A feature of the masonry of the fireplace shown in the diagram is the setting of a large number of bricks on the edge. Thus, a narrow long channel is arranged where the heated air of the room moves. Let's move on to the construction algorithm:
- The first tier is solid, consisting of bricks placed on the bottom. On the second tier, a heating duct with a section of 65 mm is formed, on the third tier the base of the firebox is laid.
- From the 4th to the 9th rows, the walls of the portal are being erected. The air duct moves to the inside of the rear wall of the fireplace. On the 9th tier, corners are placed - floor supports.
- Tier 10 - overlapping the firebox. On the 11th row, the front stones are extended by 130 mm, the 12th tier is a mantelpiece. The convective channel is divided into 2 narrow shafts.
- Rows 13-25 make up the smoke box. The heating channel ends in the 14th tier.
- Row No. 26 closes the flue, which tapers to a chimney. The gate valve is installed on the 27th tier.
- The remaining rows 28-31 form the beginning of the chimney.
The test lighting technique is demonstrated in the last video:
Making a mini-style fireplace with your own hands
To make a mini-fireplace with your own hands, you just need patience and desire, which will help to overcome all difficulties. The most suitable option for manufacturing is considered to be a biofireplace. The first thing to do is decide on the type of construction.
How to make a desktop biofireplace with your own hands
She may be:
- Desktop.
- Outdoor.
- Wall.
Next, you need to deal with materials, we need:
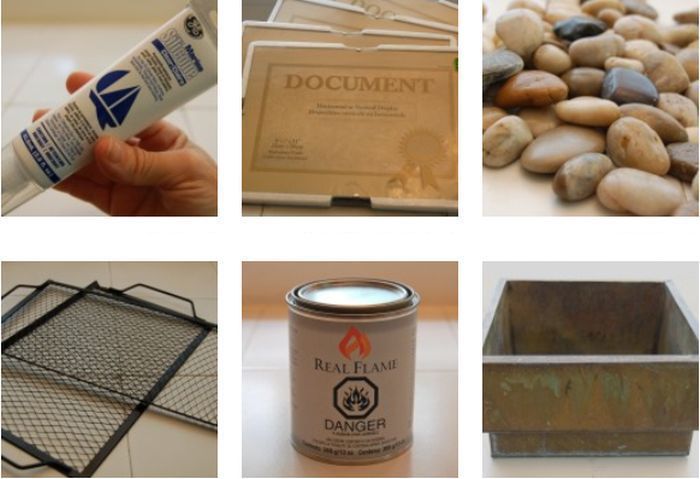
Materials for biofireplace
- Glass A4.
- Sealant.
- Metal mesh (lattice)
- Metal box.
- A rock.
- Wick.
- Fuel.
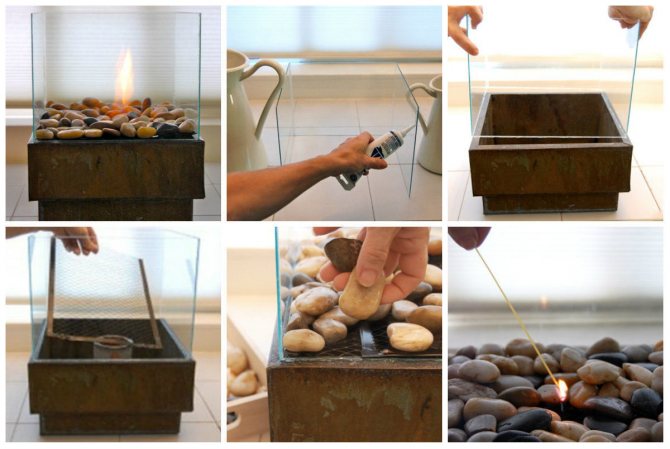
Having decided on the design and dimensions of the future hearth, you can start working. A box is made of glasses. Its dimensions must correspond to the dimensions of the metal box. A sealant is used to connect the parts, it will also ensure the tightness of the structure.
A container for fuel is installed in a metal box and covered with a grate. A wick cord is passed through it.
Now it remains to combine all parts of the structure.
To make the hearth more realistic, decorative stones are placed on the grate, which create the impression of a flame escaping through the stones.
When is a fireplace better than a stove
The fireplace was the first heating device in the history of human civilization. That is why its design repeats the features of an ordinary fire: the presence of an open flame, heating the space only within the line of sight, rather low efficiency.
In the process of evolution, the fireplace gradually turned into a closed stove - a device, undoubtedly, much more complex and efficient for heating a room. Nevertheless, in our time, fireplaces play not only a decorative role, but are also used for heating. And this is due precisely to the peculiarity of their work:
- unlike a stove, a fireplace begins to give off heat almost immediately after a stable flame appears;
- cleaning and maintaining a fireplace is much easier than a stove;
- the construction of a fireplace is not so critical to the mistakes of a bricklayer and therefore can be carried out without the involvement of professional stove-makers;
- there are modern industrial metal fireplaces, the efficiency and safety of which is comparable to the parameters of stoves.
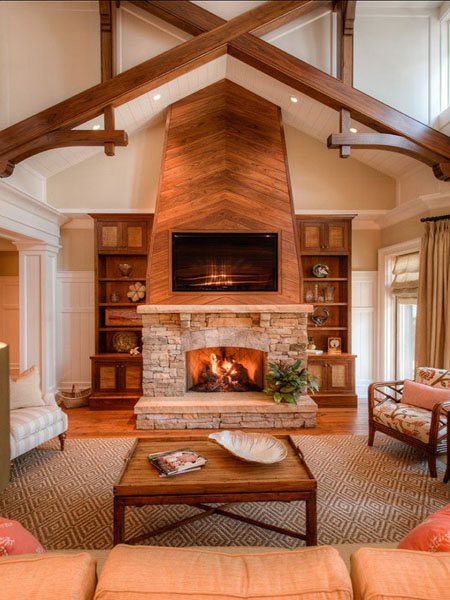
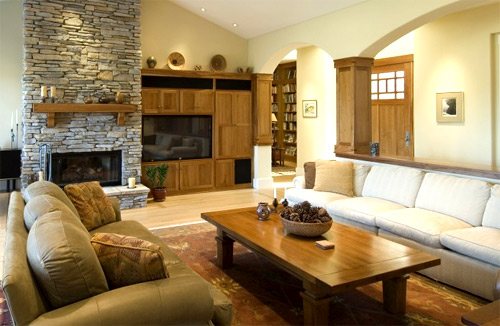
DIY brick fireplace in the interior
As a result, the costs of bricks, materials and work are several times less than the cost of building a stone stove. This is the fireplace in the country, the photo of which is shown below.
Simple fireplace in the house with your own hands
Today, there are fireplace designs that are in no way inferior to traditional Dutch or Swedish designs in terms of their thermal and quality indicators. True, it is not possible to achieve these indicators in a brick structure, therefore, these structures are implemented in metal and are presented in the form of ready-made metal fireplaces of industrial production.
Much needs to be considered before building fireplaces: size, location, arrangement, type of materials used. All this is calculated in advance, often using special programs. High efficiency fireplaces are focused on the use of pallets or other similar slow burning biofuel.
Fireplace for summer cottages with open hearth
A developer who violates the rules of the PPB and lays out an open fireplace in the country with his own hands from bricks is at great risk. Today this issue is easily resolved through the use of glass protection. High-temperature glass easily transmits infrared radiation, providing the effect of the heat of an open flame.
Such a cozy fireplace in the country: 10 photos
Share this
Every owner dreams of creating a stylish hearth in his country house or in a country house. And this is not surprising. After all, a fireplace, besides being a symbol of comfort and coziness, also warms the room. A fireplace in the country can be made with your own hands, but for this you need to have some knowledge and skills. You should also consider the amount of funds that you are willing to spend on building a fireplace. Decide which type of fireplace is best for you: wall-mounted, corner, built-in or free-standing.
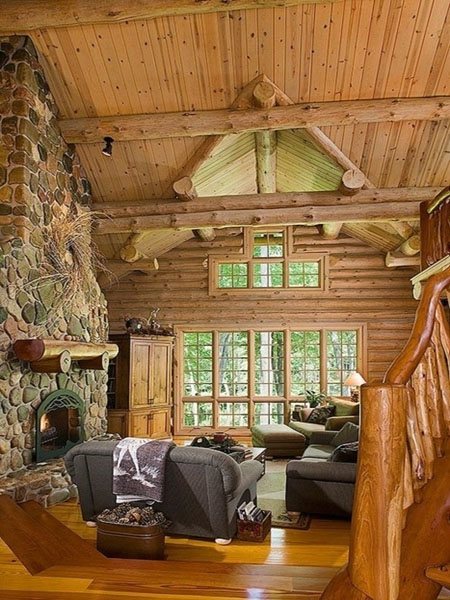
A wall-mounted fireplace can be erected in an already built cottage. In this case, the chimney can be attached to the load-bearing facade wall, which, moreover, must be fire-resistant.
Corner fireplaces are considered the most beautiful and spectacular. The chimney for such fireplaces is laid in one of the walls.

Built-in fireplaces are completely built into a column or wall. Fireplaces of this type are recommended to be erected during the construction of a house.
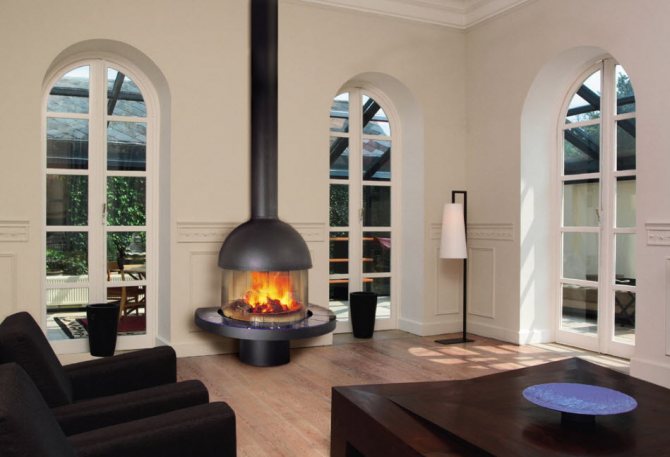
Freestanding or island fireplaces are very beautiful. But they take up a lot of space and are difficult to execute.
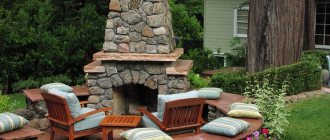
In addition, you can build a barbecue fireplace, which is a separate building. Such a fireplace can become a striking element of the landscape design of your site.
If you decide to build an internal fireplace, it is recommended to place it near the main wall of the building in rooms with an area of at least 15-20 sq.m. The fireplace should not be placed in a hallway or in a draft.
Make sure that in the room in which you plan to install the fireplace, the base of the floor is made of fire-resistant materials. Pay particular attention to the fire safety of the building if your summer cottage or country house is made of wood.
If you decide to build a fireplace with your own hands, then you will need red brick, clay, sand, crushed stone, cement, rubble stone and other building materials. Moreover, you should not save on brick. It must be of high quality, flawless and specifically designed for ovens.
You can choose the decor material for your fireplace yourself. For cladding, marble, granite, fired brick, mosaic, heat-resistant stained glass are used.Also, the fireplace can be decorated with forged elements, ceramic tiles and even specially treated wood.
Carefully consider the choice of accessories needed to maintain the fireplace. They must be reliable, of high quality and convenient.
If you consistently perform the stages of construction, taking into account all technological requirements, then the fireplace will become a real decoration of your home and a hotbed of warmth and comfort.
How the fireplace works
The first fireplaces were an ordinary fireplace with a chimney, fenced off by three walls. The efficiency was low, since the wood burned out quickly, but all the heat flew into the chimney. Everything has changed since the trial and error of stove-makers invented the so-called smoke tooth and the thermal mirror.
Diagram of the components of the fireplace
It turned out that the artificial narrowing of the flue connection point, together with the inclined structure of the rear wall of the hearth, creates a condition for self-regulating slow combustion of flue gases. The heat plug at the point of constriction plays the role of a choke, and the inclined surface forms a slowly rotating vortex of pyrolysis gases, which gradually burn out each time they approach the flame.
The moving stream "blocks" the drawing of fresh air to the place of combustion. As soon as the gases burn out and their temperature drops, the vortex will slow down and there will be an excess chimney draft. The gases go into the chimney, and fresh oxygen is drawn with air in their place in the vortex flow. The flames and gases get hotter, and everything is repeated from the beginning.
How a simple fireplace works
Self-regulation of traction made it possible to use not only firewood, but also high-energy fuels. Even resinous pine wood and coal burn slowly under these conditions, and carbon monoxide gases are reliably kept in a closed vortex. The gas circulation time is 2 to 7 minutes!
Constantly circulating in the fireplace insert, the vortex gives off heat to the stone walls. Therefore, already cooled, barely warm gases come out into the chimney. The inclined surface of the rear wall acts as a thermal reflector. There is no need to make it from reflective material. Ordinary black soot from wood perfectly reflects the invisible spectrum of infrared radiation. The only thing to worry about is to make this ramp as smooth as possible. A good fireplace in the house provides up to 50% thermal efficiency, which is a very decent indicator among other similar heat generators.
Laying fireplaces in the house with your own hands
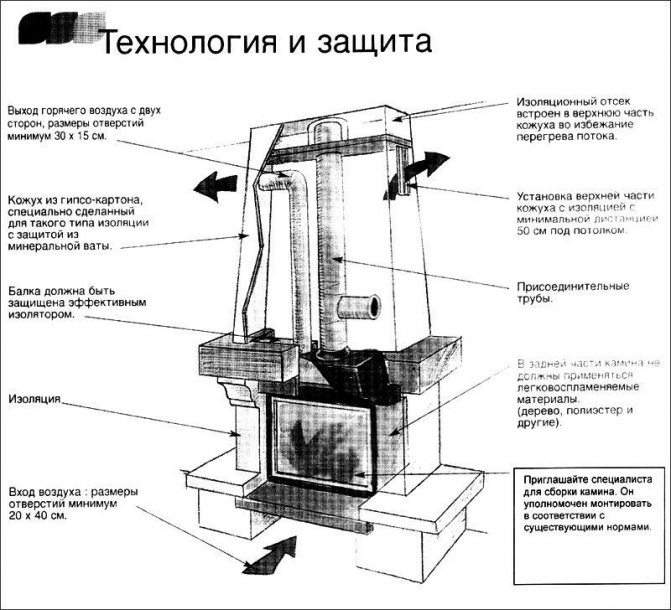
Another option for increasing the heat transfer of the fireplace is the organization of vertical air ducts above the smoke tooth. Passing through the channels due to natural thermal convection, the air heats up and returns to the room already as a heat carrier.
Equipment installation
How to calculate the dimensions of the fireplace
After finishing construction work, you need to install the main components of the fireplace yourself. The following are installed in the heating system:
- Fireplace insert. It is purchased on the market or created by hand. Practice has shown that it is still better to insert a branded firebox into a homemade fireplace, since it is a key element in the functioning of the entire heating system.
Installation and operation of the fireplace insert - The chimney connection is a metal base that allows a hermetic connection between the chimney and the fireplace insert. For maximum protection of the interior items of the summer cottage, the branch pipe must be finished with fire-resistant materials.
- A chimney is mounted on top of the fireplace insert. It is better to choose a metal pipe as a chimney for two reasons: firstly, it is easier to install, and secondly, it does not need additional sealing. The metal pipe must be covered with a thick layer of heat-insulating materials - glass wool, foam glass or aluminum tape.This is done so that the walls of the chimney do not heat up from the hot pipe and do not lead to the destruction of the masonry.
- Pressure equalization grill. This small device does not have to be bought on the market; you can make it yourself from scrap materials. Take a piece of ordinary stainless steel and cut out a small door, measuring 5x5 cm. The workpiece is inserted into the side of the fireplace at a distance of 10 cm from the ceiling. With its help, you will control the pressure in the fireplace. For example, with low pressure, the window must be closed, and with strong pressure, on the contrary, open.
At this stage, the manufacture of a country fireplace can be considered complete. It remains only to add decorative elements for the summer cottage and build a small shed where firewood will be stored for the firebox.
Examples of small firewood sheds
As for the decorative design of the fireplace, almost any style is suitable for a country house. The main requirement for the design of a fireplace is its simplicity. Heating equipment can be decorated with ceramic silhouettes and other fire-resistant materials.
What is under the fireplace insert
Formed by screens, horizontal and slightly inclined surfaces, the lower part of the firebox is called under. In some materials, it is found as a furnace pallet.
As there is no blower near the fire, so in the first fireplaces under the firebox it was solid. But for a quick firewood fire, extra traction does not hurt at all. Therefore, the laying of fireplaces of modern design often provides for a small blower, which is closed after the appearance of a stable fire. The vortex is formed at the moment of closing. Up to this point, all the generated heat flies out into the pipe.
In classic English fireplaces, there was a slight inclination of the hearth towards the floor. This improved the conditions for the occurrence of a thermal vortex, but the burning embers were trying to roll out of the furnace. Therefore, as a protection, the fireplace insert was equipped with a low grate. Today, fire protection is provided by glass doors of a special design. And the lattices are assigned a purely decorative role.
Mini style for giving
Mini fireplace for giving
Mini - FIREPLACE in a bottle
For giving, such structures are often used, which, in addition to decorating the room, can also perform other functions. Based on this, two options for the device can be distinguished:
- Finished fireplace insert. A fairly efficient heater that has a closed firebox. The fuel can be wood or pellets. The dimensions and weight of the structure are much less than the stationary version, but you still have to install a chimney. By covering the camera with a brick, you can get a full-fledged, functioning mini-fireplace for a country house.
- Fireplace stove made of cast iron or steel. The dimensions of this unit are quite small, the only thing that is required is the installation of a chimney.
Calculation of the parameters of the fireplace from the area of the room
The fireplace insert may have different dimensions, but they are calculated based on the volume of the room in accordance with the standards.
Table: calculation of the area for fireplaces, dimensions
- The volume of the combustion chamber must be at least 1/50 of the volume of the heated room;
- The area of the fireplace portal should be about 2% of the floor area of the room;
- The area of the hearth equals 0.7 area of the portal;
- The cross-section of the chimney at its narrowest point is about 0.15 floor area.
- The height of the combustion chamber is defined as 3/5 of its width. And the depth of the firebox is three times less than the height.
Instructions and types of designs: how to make a mini fireplace
There are different types of mini fireplaces. To simplify construction, you can purchase a ready-made steel or cast iron, having taken care of the installation site and the chimney in advance. The doors of such fireplaces are made of heat-resistant glass. They protect against sparks and heat.
Corner options for mini-fireplaces take up less space. They are no worse and cope with their tasks.If a wood-burning hearth is not suitable, then an eco-fireplace can be made. These fireplaces are biofuel and less fire hazardous. There are many varieties of such fireplaces, and it is very easy to do it yourself.
All you need:
- Housing;
- Refractory glass;
- Metal grid;
- Fuel tank (you can make it yourself or buy it in the store).
Today there are different types of mini-fireplaces
A fuel tank is installed in the body, a mesh is attached on top. It does not need to be fixed if the fireplace is stationary. Glass is attached to the body. It can be attached in a special workshop, or you can do it yourself using a heat-resistant sealant.
For better heat distribution, stones or any other suitable materials are laid out on the metal mesh.
In advance, you should remove the wick from the fabric cord. It will be most convenient to set fire to a torch. The size of the finished product depends on the selected body, depending on it, the dimensions of the remaining parts are selected. An eco-fireplace can be made, both floor-standing, wall-mounted and table-top.
The desktop version is much smaller than the floor one, but when creating a wall one, there are some nuances. There are 2 types of such fireplaces - wall-mounted and built-in. With the hinged one it is much easier, the main thing is that there is no wallpaper nearby. Eco-fireplace, although it is safe, is still a source of fire and heat. Built-in options for their installation require a special niche. When using these types of fireplaces, the space required is minimized. Corner models are also a great option for small spaces.
Examples and diagrams of simple fireplaces
In order not to think for a long time how to make a fireplace with your own hands, we offer a diagram of a simple fireplace, available for self-construction. A complete list of materials is presented in the table:
Fireplace material table
When erecting the walls, it is necessary to ensure the minimum possible thickness of the seams, the verticality of the masonry and the accuracy of its dimensions. When vaults are formed, the protrusion of each next row should not exceed 6.5 cm above the previous one (a quarter of the size of a brick). To facilitate the task, the inclined screen is made of sheet steel.
Do-it-yourself fireplace stove - dimensional drawings Fireplace made of bricks - dimensional drawings
The fireplace has air ducts for thermal convection. This increases the thermal efficiency and the rate at which the room warms up. Taking into account the small size of the fireplace and the simplified design, its efficiency is up to 20%.
The order of the fireplace is shown in the diagram below:
How to make a fireplace with your own hands - ordering diagram
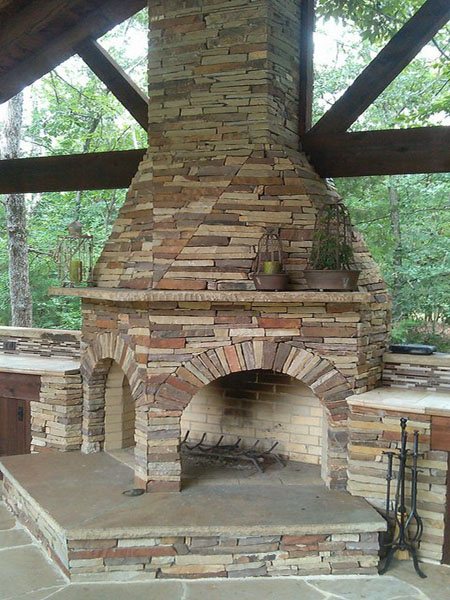
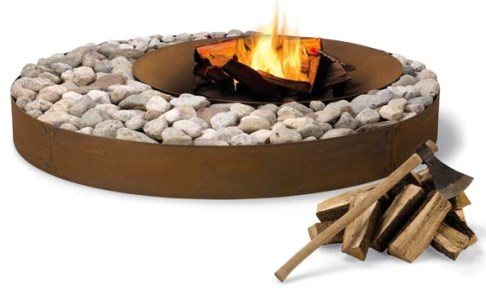
Types of garden fireplaces for summer cottages
You can decorate the flame in different ways, everything will depend on the purpose for which you will use the fire. By this criterion, the types of fireplaces and other similar structures can be distinguished.
So, if you plan to assign only a decorative role to the fireplace, which you want to look at, admire the flame or just create a cozy atmosphere, then the fireplace will look like a classic room fireplace in the form of a home.
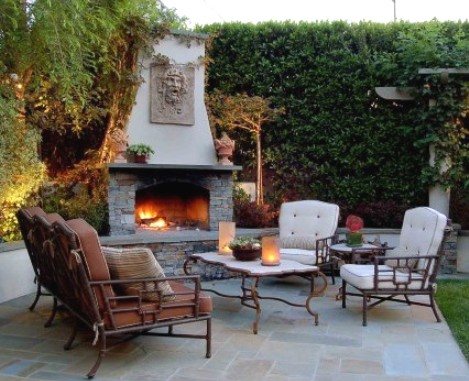
It will have the same constituent components, but what to make it from and how to arrange it, you will have to think. Another difference from indoor fireplaces is the effect of precipitation and other adverse environmental conditions.
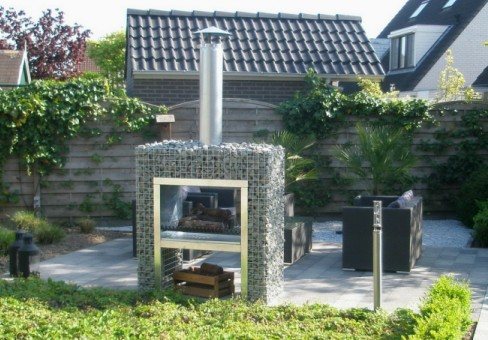
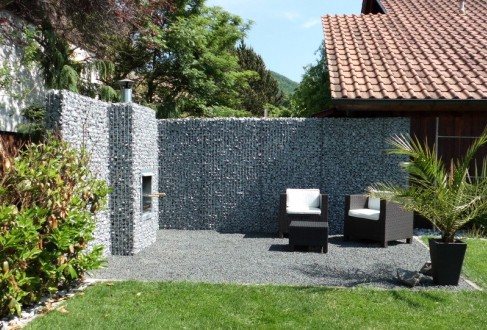
The material can be very diverse, the main thing is that it is refractory. The base can be made using brick or stone masonry. The modern option is to use gabions.
It can be built into a retaining wall or set up free-standing. But then it is better to make a background in the form of a high hedge or to plant ornamental trees and shrubs in the back. The base of the retaining wall will be decorated with plantings of low-growing flowering plants.
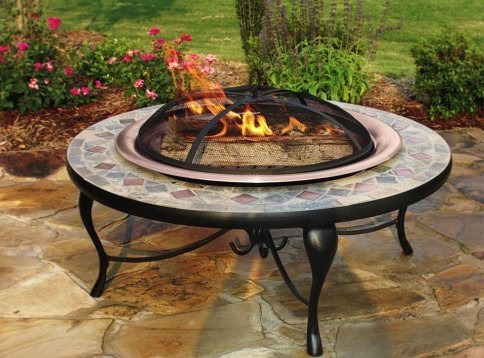
It is also worth remembering that even a fireplace for a garden needs a competent chimney device.... Of course, you can try and do everything with your own hands, or you can buy a ready-made one, install it in the garden and decorate it beautifully with green plants. An example is the Zen fireplace developed by AK47 Design.
The development is an open structure, which includes a round steel sheet, grill grate and barbecue. It can be filled with any decorative refractory filling (gravel, sand), raised above the ground or buried.
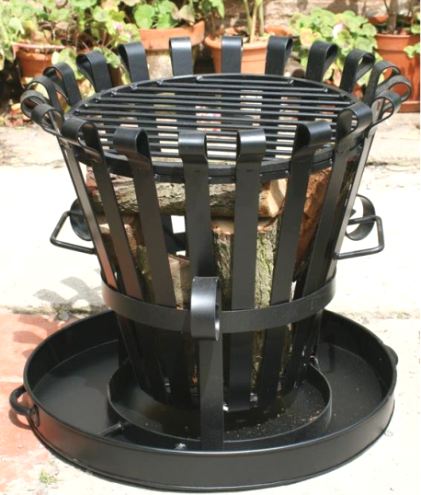
Another interesting view that can be installed even on a lawn is a mobile fireplace.... It usually has a compact shape, different heights and styles. Sometimes there are built-in shelves in the package.
You can either do it yourself (which is not easy), or buy it ready-made. In any case, this is a great solution for small areas. You can store it in your garage or pantry.
The next option is to create a fireplace with a barbecue... Such a structure will play not only a decorative role, but also a utilitarian one. You will be able to cook various dishes, the most popular of which is the aromatic kebab. You can also install a brazier there, but an interesting option is to build it into the overall structure.
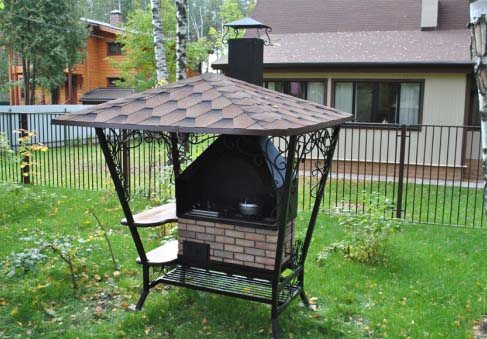
You will also need a canopy and a paved platform. This option can not only be done by yourself, but also, if you wish, you can buy a ready-made structure.
If you have a small country house that is used for its intended purpose only in the summer, and there is practically no place for a kitchen, it does not matter, you can attach an open terrace with a canopy to the house and fold an outdoor stove under it.
How to make a mini fireplace out of bricks with your own hands
Most often, brick is used to build a fireplace. It not only looks aesthetically pleasing and soundly, but is also one of the most inexpensive and high-quality among other building materials used for laying fireplaces. You can lay out a mini brick fireplace for a country house with your own hands. It is not difficult to build its simple structure even for someone who has not come across a similar one. But first, there are several important points to consider.
The laying of a mini fireplace should be carried out according to a pre-drawn up project. First, you should decide on the location of the future structure. Depending on where the mini fireplace will be located, its dimensions are calculated, and, accordingly, the amount of material required for construction.
It can be in the wall or in the corner. A corner mini fireplace, which will be discussed a little later, has its own characteristics and its own construction technology. The fireplace is usually set up in a seating area, but it should not be located near sleeping or seating areas. Lack of oxygen resulting from combustion can cause headaches. In a construction project, it is best to indicate such nuances as the number of brick layers and their width. In advance, it is necessary to provide for the location of the opening and door for cleaning, the ash pan (a niche in which there is a metal box for collecting ash), the chimney and the combustion chamber, as well as the technique of their masonry. In a word, the project must be prepared from start to finish, so that it remains only to implement it without any further thought.
An ordinary mini fireplace consists of several basic uncomplicated parts - a firebox, a firebox and walls with heating ducts. These elements are laid out in stages and have certain normalized parameters that must be observed. In this case, one should take into account the intensity of using a mini fireplace.
If it is supposed to heat it once or twice a week, then ordinary brick of good quality can be used for construction. In the event that the country house is supposed to be heated more intensively, refractory bricks should be used for masonry.
You can combine refractory and ordinary bricks with each other, since the laying of some elements is carried out in 2 layers.In this case, there must be a refractory brick inside the structure. In general, the use of refractory material is the most reliable. Standard sizes of 250x120x65 are suitable. The joints between the bricks should not exceed 5 mm. As a rule, usually a mini fireplace has a height equal to 28-30 rows of bricks, 180-300 bricks are spent on its construction.
- At the beginning of the construction of a mini fireplace, a foundation is laid and a firebox is placed, into which firewood is laid during heating. At this stage, a beginner may have some difficulties. But if you follow certain technical laws, then it is easy to get around them and carry out the firebox in the correct way. So, the optimal size of the firebox for a mini fireplace is 1 / 4-1 / 5 of a square meter. You can deviate a little from the standards and make the firebox of the desired size, but still, it should be close to the average parameters. The foundation of a mini fireplace should not be too high, but it is necessary that it protrude by a third of the height of the entire structure of the fireplace, excluding the chimney. The foundation and the firebox are laid in one layer.
- Next, the construction of the firebox is carried out - the back wall of the mini fireplace is placed in 2 layers. Its height is usually 40-50 cm. The first ten layers are laid in the usual way, then you can overlap ¼ of the brick. The back wall of the firebox can be straight, or it can be curly, with deviations at an angle of 20 degrees.
- After the construction of the rear wall, the side walls with heating channels are laid out. The channels are formed by laying bricks with a deviation from the side walls at an angle of 45 degrees. As a result, cavities are formed between the firebox and the side walls. The front part of the mini fireplace is being erected according to the planned plan.
- Next, a chimney is built, a visor is installed and cladding is performed. Do not forget during the construction process that in the rows outlined in the drawing it is necessary to leave space for the doors, ash pan and holes. [/ su_list]
Choosing the type of fireplace

To begin with, you should think about what kind of fireplace you want to contemplate in your suburban home. In the case of choosing a fire fireplace, which will be the "heart" of your home, you must decide on the fuel that is convenient to use for this type of fireplace. And to help determine, consider their main types. Each of them has individual characteristics, but they all have one thing in common - the ability to create a unique atmosphere of comfort around them:
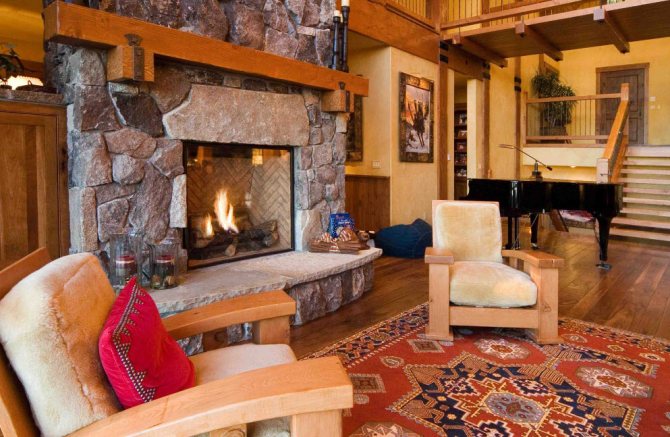
- traditional fireplacesthat run on solid fuels. They can be heated with wood and coal. These fireplaces are made of stone, brick, steel and cast iron. They come with a closed, half-open and open firebox. Fireplaces with an open firebox look more aesthetically pleasing, and with a closed firebox they give more heat;
- decorative biofireplacesthat run on liquid fuel. This is a beautiful design with an open firebox; bioethanol is used as fuel. Since bio fireplaces are intended for decorative purposes only, they do not require a chimney. Its "highlight" is a real fire without soot and smoke;
- gas fireplacessuitable for houses with gas heating. It is enough to turn on such a fireplace with one movement of the hand and use it both for decorating the house and for heating it;
- electric fireplaces of a wide variety of modifications and shapes are best suited for heating houses that do not have a chimney. Despite the fact that they perform the function of an ordinary heater, they look much more sophisticated.
- fireplace stoves usually installed in a sauna or bath. You can install it at home and for beauty, and for heating, and for cooking. Some of them run on gas, some on solid fuels.
Corner mini brick fireplace for a country house
The laying of a corner mini fireplace will differ slightly from the laying of a conventional mini fireplace, in particular, at the initial stages of construction.It is best to design such a structure at the stage of building a house, and build it after the concrete walls have hardened. In the event that a tree is used for the construction of a summer cottage, before laying a corner mini fireplace, it is necessary to insulate the walls, and the rear wall of the fireplace is laid out at a distance of 1.5 meters from them. Cement is added to the mortar for laying bricks in the basement.
For the construction of a corner mini fireplace, as a rule, smooth fireclay or ordinary bricks, crushed stone, as well as clay-sand mortar, dried for 3 days and squeezed through a sieve, are used to lay the foundation. It must be designed in such a way that the plinth to be erected in the next step is 60 ml less than the foundation area.
To lay the foundation, a pit is dug, the area of which, in size, should be 100 mm larger than the future foundation. Further, a pit 15 cm in height is covered with crushed stone, filled with cement and sand. The ratio of sand and cement should be 1: 3. To dry, you should leave the pit filled with solution for several days, having previously covered it with a film. After the foundation has dried, the firebox, firebox, side walls with channels and a chimney are laid, according to a pre-completed project.
Mini fireplace for a country house
The design of this fireplace was published in the book by K.A. Borisov "Stoves and Fireplaces". To increase heat transfer, the fireplace is equipped with two heating ducts located on its side walls. Cold air from the room enters these channels in 2-3 rows, heats up, passing through the vertical channels, and gets heated into the room through the holes located in 13-14 rows.
The rear wall of the fireplace firebox is made with projections on 11-12 rows, necessary for the formation of a smoke tooth. In addition, four metal pins are mounted in the rear wall, on which an inclined stainless steel screen is attached. If you wish, you can make the back wall sloped from bricks, but you will have to process the bricks in the rows that form this wall.
The fireplace has dimensions at the base of 1020 x 510 mm, excluding the chimney. The height of its main part is 1120 mm. A cleaning door is installed on the back wall of the fireplace, which allows cleaning the fireplace tooth from ash and soot.
Unlike the original, indicated in the original source, the arch overlapping the fuel chamber was made not of 7 bricks, but of 9. At the same time, the gaps between the bricks of the arch are reduced, and the central brick has non-standard dimensions, reduced in thickness.
If you want to get an introduction to the device of this fireplace, use the link below.
For more information, see the video suggested in the article.
Complete information required for self-construction of this mini-fireplace is contained in the project.
In order to display the project in full screen mode, click on the icon located in the upper right corner of the project. In the window that opens, you can familiarize yourself with the project and download it in the format PDF.
Using the link below, you can download the project in the form ZIP-archive containing PDF and DOC version of the project.
Download the project of a mini-fireplace for a country house.
| Download | |
| Ya.Disk | zip (pdf, doc) |
| DropBox | zip (pdf, doc) |
Also, in the work with the project, you can use an electronic assembly made in the SolidWorks software. However, this will have to. But this, as they say, is not for everybody.
Download electronic assembly.
| A source | File format | Download |
| Ya.Disk | sldasm | |
| DropBox | sldasm |
If there are broken links, please let us know in the comments.
| Next> |
Using fireplaces to heat the room
The use of fireplace heating has long faded into the background, and today such designs are used only to convey a certain style to the room. In addition, the presence of an open flame in it provides certain conditions of comfort. Each of us loves to watch the tongues of fire, which sway monotonously depending on the air currents. This process allows you to fence yourself off from everyday worries and relax, relax mentally and emotionally.
Project and interior design of a cottage with a fireplace
That is why in modern construction, more and more often there are similar systems, the purpose of which is not at all to heat the home, but to give it a more comfortable and softer atmosphere. At the same time, installing a fireplace in houses equipped with gas heating has the following advantages:
- special comfort and coziness of the room is achieved;
- the atmosphere in the house becomes more aesthetic;
- the efficiency of the main heating system increases due to the presence of an additional heating source;
- the chosen interior becomes more detailed and homey.
The above factors once again emphasize the fact that the use of a fireplace in a private house is still relevant and carries many advantages. However, the planning of houses and cottages equipped with fireplace systems requires a much more careful and detailed study, since the creation of similar structures is a rather responsible process.
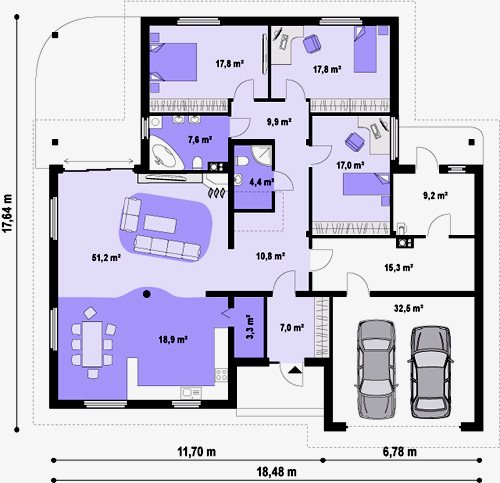
House layout with fireplace and garage for two cars
It is no secret to anyone that the source of open fire, which is present in the fireplace, requires special care and some additional operations aimed at preventing its penetration deep into the living room. Based on the requirements of fire safety, the planning of country houses with a fireplace is carried out with special care in such a way as to avoid the slightest possibility of flame spreading into the building.