Types of mini ovens
Steel furnaces. This type of mini-oven is inexpensive and easy to install, but the service life of such a model will be short-lived.
Cast iron stoves. The cost of such stoves is quite high, but it can also serve for a very long time, but only if it is not subjected to sudden changes in temperature.
Mini brick oven. This type of stove is the most popular today and there are reasons for this:
- Keeps warm for a long time
- The ability to do it yourself
- Available fuel
- Possibility to make a stove with a stove or oven
- High reliability
Due to the availability of material and simplicity in execution, even a novice stove-maker will be able to make a mini-oven with his own hands.
Most often, a mini-oven for a summer residence is made with or without a cooking stove. It is the second option that we will consider in more detail.
Miniature can oven
This version of the stove is perfect for those who like to relax in nature. The finished product is lightweight and takes up very little space in your backpack. With all the simplicity of the design, the stove from the can is very convenient and productive - a liter of water can be boiled by spending a few small dry branches on it.
At the same time, such a homemade stove can work not only on branches, but also on leaves, cones and even hay. You will definitely not stay hungry!
Prepare three cans of different sizes in advance. Canned food containers are perfect. From the largest jar, you will make the body of the oven, place the medium-sized jar in the body, and from the small container, make an improvised burner.
Cans
In addition, prepare scissors, a block, an electric drill and a felt-tip pen.
Wooden block
First step. Insert a block of wood vertically into the largest jar and mark a couple of lines on the wood approximately at the level of the lid at a distance of about 8 mm.
Insert a block of wood vertically into the largest jar and mark a couple of lines on the wood at a distance of about 8 mm approximately at the level of the lid
Second step. Saw out a rectangular recess along the marking so that the top edge of the container can freely enter into it.
We offer you to familiarize yourself with Brandywine black tomato
Insert a block into the jar and draw two lines with a marker approximately at the level of the lid
We drill a recess according to the marking
Step three. Set the bar so that the can rests steadily on it, and the upper edge of the large can, at the same time, is kept in the previously prepared recess in the bar.
We put the can on the bar
First step. Draw a line over the bottom edge of the largest jar. This line will serve as a markup for creating ventilation holes. The line can be applied with an ordinary felt-tip pen.
Making the markup
Second step. Drill holes along the marking line. The optimal number of holes can only be found empirically. Excessive ventilation will lead to too fast combustion of fuel, and if there is insufficient draft, the stove will simply not be able to work normally.
Making holes

Therefore, first make a small number of holes, and then, if necessary, drill them after the initial tests of the furnace.
Drill holes under the upper edge of the middle can
Drill many holes in the bottom of a medium-sized container. Select the size and number of these holes so that the loaded fuel will not fall out in the future. As a result, the bottom of the can will look like a sieve.
We drill the bottom of the middle can
Insert a medium-sized jar into the largest container. The pairing should be quite tight, but not tight - a small gap is required between the walls of the two cans for air circulation.
We insert a medium jar into a large
Use the smallest tin can to create the hotplate.
Cut off half of a small can, make holes closer to the edge, as well as one hole in the bottom
First step. Prepare holes in the side of the can in the same way as you did with the previous containers.
Second step. Cut out the bottom of the can using a metal-cutting scissors.
Step three. Align the edges of the burner carefully and clean them with a file.
Fold up the chips
Load the chips into the middle jar and set it on fire
Take the main part of the stove (medium container inserted into a large one) and load fuel (cones, wood chips, leaves, small twigs, etc.) into it. If possible, load dry twigs directly from the trees into the oven, as fuel from the ground may be damp.
The smallest detail is the hotplate. We put it on top
Light the load and let it warm up. At first, you may not be very good at it, but very soon you will learn how to light the stove with literally a couple of matches.
We heat food or put on the kettle. Camping mini oven ready
Allow the fuel to heat up intensively, place a burner on the stove, and a saucepan, kettle or other container on it.
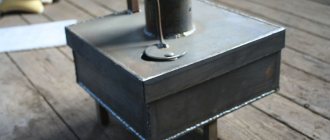
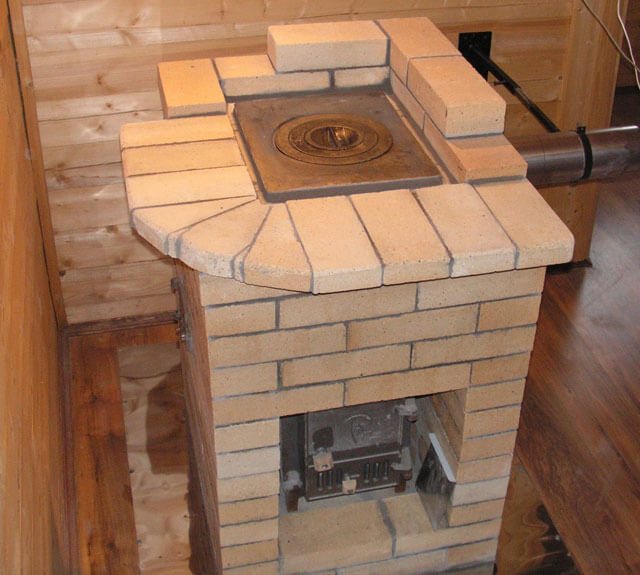
Improved model of the mini supercharged stove
Advantages and disadvantages of mini ovens
Like other stoves, the brick mini stove has positive and negative sides. Of the positive aspects, one can single out:
- The stove will last a very long time if it is used correctly.
- Such a structure heats up quickly and retains heat for a long time, giving it to the room.
- You can make a mini brick oven with your own hands.
- During manufacturing, the structure can be made in any size and shape.
- If desired, you can add a stove or oven to the structure.
- A mini-oven made of bricks is safe, since it does not heat up very much, unlike ovens made of other material, therefore the likelihood of getting burned is minimal.
There are also disadvantages to this design:
- Due to the large weight, a foundation is needed for the furnace, which will take time to fill.
- During operation, it is necessary to take into account all the nuances of safety and clearly follow the drawings in order to make the oven correctly. Otherwise, it can be dangerous to use the oven.
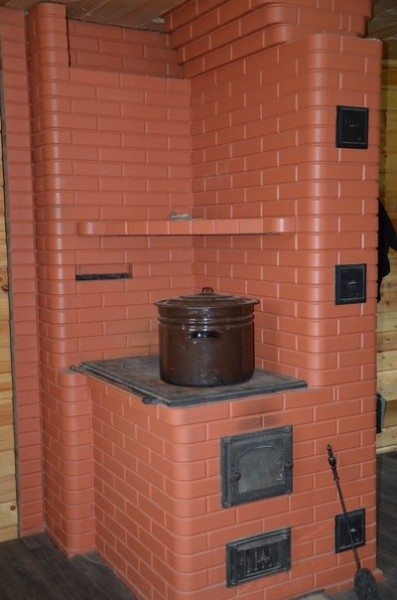
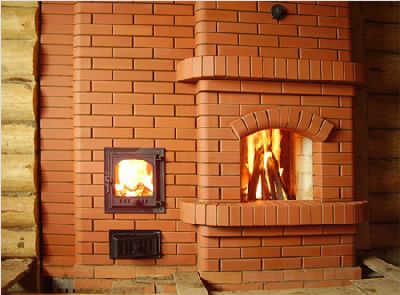
Cooking oven Swedish
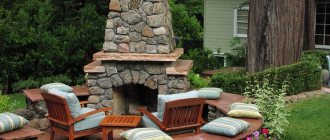
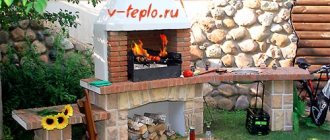
A small combined structure equipped with a hood is designed not only for heating, but also for cooking.
Strict adherence to the order, the use of a plumb line and a building level will ensure the construction of a geometrically correct, functioning structure. Excessively thick mortar joints or the presence of voids in them are not allowed. It is recommended to monitor the parameters of the cross-section of the smoke channels in order to avoid their narrowing.
At the end of the work, the finished oven is cleaned of dust and excess solution and left to dry for several days. High-quality materials, adherence to work technology and fire-prevention measures will ensure a long period of its impeccable service.
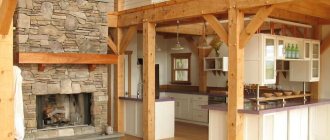
All lovers of out-of-town recreation dream of a stove in their cozy houses in their dachas. As you know, a brick stove is the oldest universal design for space heating. Its effectiveness and high performance has been proven for centuries.
It is not at all necessary to build a serious bulky structure. Sometimes a small-sized stove is enough, which you can build with your own hands. The models may differ in shape, size, type or layout of the chimney, but in general, their construction will not take you much time and will not require serious stove-maker skills.
DIY materials for making a mini-oven
In order to make a mini-brick oven with your own hands, you will need the following materials:
- Two types of bricks (fireproof and red)
- Building and fireclay clay
- Fine sand (well sieved)
- Roofing material
- Doors for the furnace, blower and for the hole through which the furnace will be cleaned
- Grate
- Gate valve
- Trumpet
From the tools it will be necessary to prepare a trowel, a level, a plumb line and a tape measure. After everything you need is prepared, we move on to laying the stove.
The foundation for the furnace and the dimensions of the furnace
Before starting work, you need to choose a place so that the walls of the furnace are at least 50 cm away from the walls of the room. You should also think about the foundation: you can make a regular foundation from sand and cement. To do this, it is necessary to mix cement and sand in a ratio of 1: 3. The sand must be of good quality, and if you take ordinary sand, then it must be sieved well. The dimensions of the foundation depend on the size of the furnace plus 10 cm for a stock on each side, but the height of the foundation should be about 1 m.It is worth remembering that such a foundation dries for a long time.
For a mini-oven, you can make a foundation of clay and brick. To do this, we dig a hole, the depth of which should be at least 5 rows of bricks. Then we fill it with clay to a height of a couple of rows of bricks and tamp it well. Then we put roofing material on the clay, and on it bricks, which must be coated with clay. The last row of bricks must be level with the floor, and it must also be covered with roofing material. Only after that do we start making the oven itself. This option of the foundation is preferable in that it requires less time and effort than the previous option, and you can start manufacturing the structure right away.
Considering that the stove will be smaller than the usual ones, the dimensions of the furnaces for mini-stoves will be smaller, but they can be of the usual sizes if desired. If the firebox is small, then it will be inconvenient to put firewood, so we will consider the option of a mini-oven made of bricks with our own hands with the dimensions of fireboxes for an ordinary stove.
Construction of a brick country oven
The small-sized oven occupies only 0.4 sq. M. It is laid out of bricks, placed on the edge or flat. If you know the basic rules for building a furnace, then for its construction you don't even need a diagram or preliminary calculations.
Due to the relatively low weight of the mini-oven, it does not need a foundation, but in this case a thick, solid board should be used for the floor, well fixed to the logs.
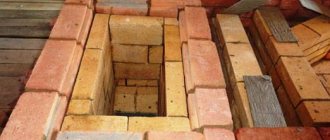
Masonry order
- The first stage is traditionally - choosing a place and preparing it for the construction of a furnace. To do this, it is necessary to lay on the surface a piece of plastic film, roofing material, hydrosol or glassine 78 by 53 centimeters in size. Pour dry sand on top of the litter (layer thickness 1 cm) and level it.
https://www.youtube.com/watch?v=jTKaiStDdxM
The first brick row is laid on the sand (12 pieces of bricks are used without fastening) strictly horizontally, which can be checked with a level. On top of the first row, thinly apply a clay solution and install the blower door. Pre-wrap the door with a piece of asbestos cardboard or wrap it with a cord. Secure it with wire.
- We lay the second row of our oven.
- We lay out the third row from fireclay bricks. We install a grate on it, which will be located strictly above the blower.
- In the fourth row, the bricks are laid with an edge. And inside the chimney, a stand is mounted on which an internal partition will be installed. When laying the back wall of the stove, do not use clay, but provide for the so-called kick bricks (for this they should protrude slightly outward).
- The next mandatory element of any stove is the firebox door. Wrap it with asbestos cord before installing.We fix the door with a wire, use two bricks for temporary fixing: one at the back, the second on the first, and on top of them we will install the door.
- Lay the bricks in the fifth row flat, repeating the contours of the fourth row.
- We put the bricks of the sixth row on the edge, and then rub the walls of the stove with a damp rag.
- For the seventh row, put the bricks flat again. At the same time, in order to ensure a bunch of this and the next rows, you need to start with a three-quarter. Then place two bricks on the edge and start building the back wall.
Benefits
A small brick oven for a summer residence does not take up much space compared to traditional Russian ovens, while retaining most of the advantages for its owners.
In the past two to three decades, modern metal furnaces have taken an undeniable monopoly in individual construction. This is caused by a number of factors:
- Comparative cheapness in comparison with brick stoves and fireplaces;
- Ease of assembly and installation;
- Short terms of installation of the heating device at the place of final operation;
- High rates of efficiency and firewood savings declared by the manufacturer;
- The apparent complexity of the construction of a brick oven and the difficulties associated with finding a worthy specialist in this area, fear of independent construction of such a monumental object;
- No need for complex work with the roof when installing the chimney;
- Relative compactness, which is important for a country house;
- An advertising campaign for manufacturers of metal furnaces, claiming their undeniable advantages.
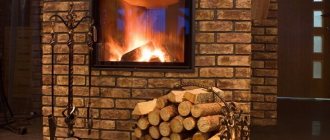
However, once the owner of a metal device finds himself in a room equipped with a stone oven, his views change dramatically.
It is impossible to deny the fact that the heat produced by such a stove is incomparably more comfortable and pleasant. It is easy to breathe in the room, there is a pleasant smell, special atmosphere and coziness.
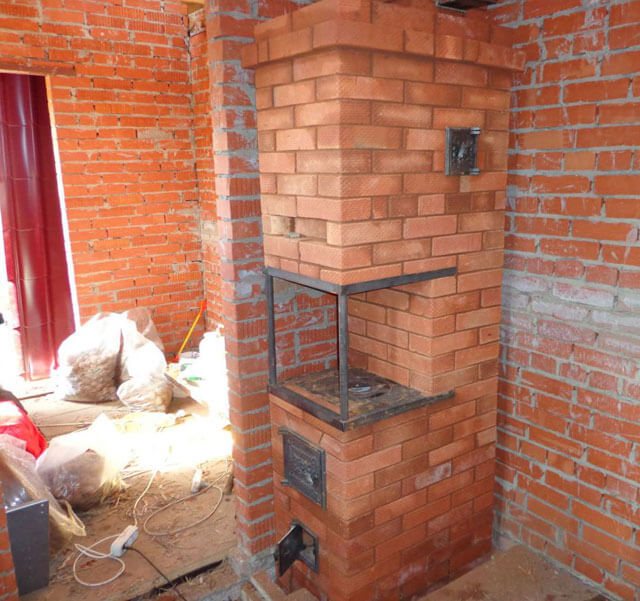
The photo shows a small brick oven for the house. Isn't it pretty?
Food cooked in a stone oven is also different. The special temperature regime, smoky flavor and oven effect give it a unique taste and aroma.
In addition, there is a lot of data on some of the healing properties of heat radiation emanating from brick stoves and fireplaces, warm clay heated to 70 - 75 ° C. We will not go into the jungle of physics and biology, we will note the fact itself.
So, the advantages of a brick oven, collected in a single list:
- Huge heat capacity and inertia of the device. It is enough to heat such a stove once, and it will give off heat to the room for a long time. Even in severe frosts, the number of furnaces does not exceed two per day;
- The stove does not overheat from the outside, and it is impossible to burn yourself on it, which is extremely important for families with small children;
- The oven does not dry the air in the way that metal counterparts do;
- Heat radiation is much softer, not as aggressive and heavy as from steel and cast iron surfaces;
- Less firewood (controversial opinion, but many owners agree);
- Incomparably longer service life;
- The smallest brick oven creates more coziness and comfort than the largest metal one;
- Easily allows you to heat large volumes of water, and if you install a coil or register, warm water will always be there;
- In the oven and firebox, you can bake a large amount of bread and other flour products, as well as cook porridge and other dishes;
- Even small brick stoves look great and decorate the interior, create inexplicable coziness and special surroundings in the room.
Naturally, nothing is perfect and absolute, so it is necessary to talk about the difficulties and disadvantages of stone heating appliances.
disadvantages
It is believed that cats feel bad places and avoid them. They seem to approve of brick ovens.
Since we have listed the advantages of brick stoves, let's be fair and remember the disadvantages. We do not run an advertising campaign, so we are not afraid of objective assessments.
So, among the disadvantages of stone furnaces, you can list the following features:
- A very laborious structure, especially for a person who has no experience in the construction of such products;
- Quite a costly event, especially if you involve an experienced master stove maker, the cost of the efforts and skills of these guys is definitely high;
- There is a risk of unsuccessful construction, and alteration of a stone monolithic structure, as you understand, is not an easy task;
- The danger of operating a faulty or improperly built stove is associated with carbon monoxide poisoning, which can lead to very sad consequences;
- Requires more space in the house than a metal counterpart, although today more and more projects of small stoves appear, which practically eliminate this drawback;
- High inertia is associated with a fairly long warm-up and kindling, therefore, in order to heat the room well, it may take several hours.

As you can see, the oven can take up a minimum of space.
This is where the question of the purpose of the furnace arises. It is obvious that stoves are different, both in design, and in size, and in function.
Appointment of ovens
Well, what is a bathhouse without a stone stove?
Another important point is the correct choice of the configuration, design and purpose of the stove. Since we are talking about a summer residence, we should proceed from the requirements of temporary suburban housing.
We offer you to familiarize yourself with Stoves for the home: 54 photos of placement ideas and installation options
In general, there are four main types of ovens:
- Heating;
- Cooking;
- Bathrooms;
- Mixed.
Strictly speaking, bath stoves can be attributed to a specialized subspecies of heating devices. But we will not delve into the intricacies of classification, since this occupation, in general, is useless.
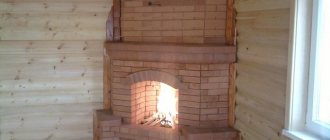
Let's just say that for a summer residence I would like to have exactly a mixed type - something like a brick fireplace stove, since it is irrational to arrange a separate heater and stove from the point of view of saving space.
An example of a mixed oven design.
Therefore, you can voice the requirements for a summer cottage brick oven based on the above:
- Simplicity of design, so that you can master the construction with your own hands;
- Compact size, this is a summer house, not a castle or residence;
- Multifunctionality, that is, a mixed-type oven with which you can cook food, heat up water and warm up the house.
Next, we will consider an option that is acceptable in our opinion. An example is the instruction with which a working model was built.
Layout drawings for masonry with explanations.
We need a clay-sand mortar, a building brick (double silicate brick M 150 will not work, you need a clay brick), a trowel, a bucket, a mixing trough, a plumb line, a level, an asbestos cord, fireclay bricks, doors, latches and other stove accessories, steel galvanized wire, hammer with a pickaxe, grinder with a disc for concrete.
The stove will take up 0.4 m², while its weight will be insignificant, so you can do without a foundation. If you have a weak floor, then it is better to make a screed under the masonry.
So, laying a small country stove in steps:
- On the place chosen for the stove, we put roofing material or glassine with a size of 530 × 780 mm for waterproofing;
- Pour one centimeter thick sand on top and level it;
- According to scheme No. 1 (figure at the beginning of the paragraph) we lay out the first row of bricks, without fastening, and level it with a level;
We line the first row.
- Apply a thin layer of clay mortar. We take the blower door, wrap it with a double layer of asbestos cord and fix it with twisted wire.
- We spread the second row of bricks.
Second row with a door.
- We take fireclay bricks and lay out the third row. After its formation, we install the grate.We observe the gaps for thermal expansion of materials up to 1 cm.
From fireclay bricks we lay out a row with a place under the lattice.
- With a brick installed on the edge, lay out the fourth row. Inside the chimney, we make supports for the internal partition. We put the "knock-out bricks" of the back wall without clay with a slight protrusion outward.
- We install a furnace door, pre-wrapped with asbestos. We fix it with twisted wire and temporarily fix it with two bricks: we put one on the back of the priest, the other on it and the door on top.
We install the furnace door.
- We spread the fifth row flat along the contour of the fourth, and the sixth on the edge. We wipe the chimney walls with a wet rag.
We fasten the door with wire.
- We put the seventh row flat from the three-quarters (we cut off 3/4 of the whole brick with a grinder) for a bundle with the eighth row. The back wall is back to the edge.
We cut the bricks with a grinder.
- In the eighth row we close the furnace door with two bricks above it. We install a beveled brick above the firebox to center the flame under the burner.
We cover the furnace door.
- We put the ninth row with a backward shift (small) to keep the door open. Before laying, lay out a wet asbestos cord to seal the joints between the brick and the hob.
- With the tenth row, we begin the formation of a chimney, which will gradually expand backward. We will make the pipe attached so as not to shift the center of gravity of the structure, or a mounted one made of light iron.
We start forming the pipe.
- In the eleventh row, we lay the valve, seal it with an asbestos cord coated with clay.
There will be a catch here.
- Next comes the chimney into a quadrangle, which is joined with a light metal pipe.
We continue the chimney to the docking point.
- Now we take out the knockout bricks and clean the lower part of the chimney from debris.
We take out the chimney under the pipe.
- We close the gap between the first row of bricks and the floor of the metal L-shaped sleeve and nail the plinth.
- We whitewash the stove or cover it with stove varnish, seal all joints between metal and brick. Metal parts can be painted with black fireproof paint.
We whitewash and decorate the stove.
- We make a test furnace with paper and small branches, then give it 2 weeks to dry.
Step-by-step instructions for making a mini oven
Considering the layout of the mini-oven for the summer cottage, let's get to work.
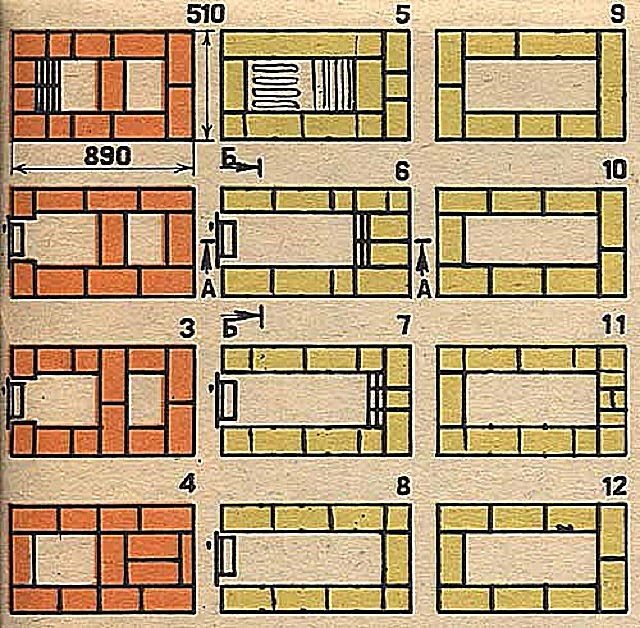
Stages 1 to 12

Steps 13 to 24
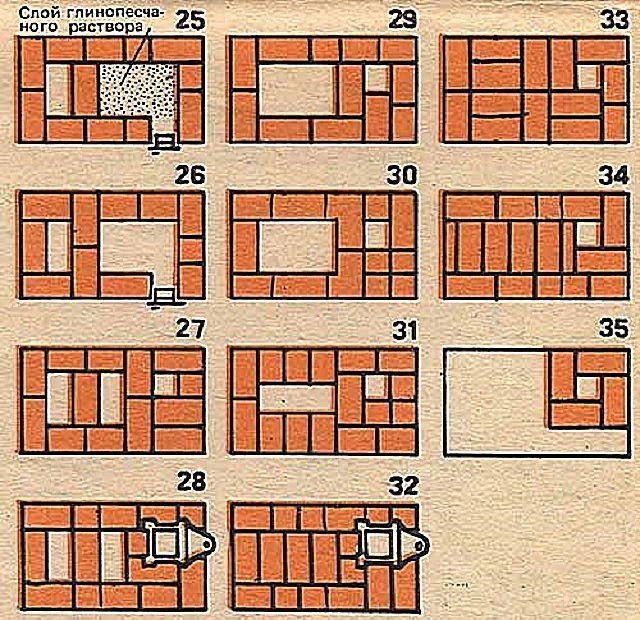
Stages 25 to 35
Laying from 1 to 12 rows
The first row is laid out, and in the second it is necessary to provide a place for the blower door. The rows must be coated with a solution. Before installing the blower door, it must be wrapped in asbestos, and the door will be fastened with wire.
Next, the 3rd row is laid out, in which refractory bricks and a mixture of refractory clay are used.
During the laying of the 5th row, a grate is installed. Starting from this row, up to the 15th, masonry should be made with refractory bricks.
In the 6th row, a firebox door should be installed, with which the same work should be done as with the blower door (wrap with asbestos, secure with wire).
Lay out the 7th row according to the layout. Each layer must be coated with a solution. Lay out the 8, 9, 10, 11 and 12th rows in accordance with the layout.
Laying from 13 to 24 rows
From the 13th row, we begin to form the combustion chamber and vertical channels. The main thing here is to carefully follow the orders, otherwise you can violate the correctness of the design.
On the 15th row, it is necessary to lay out a layer of clay-cement mortar. It will strengthen the bottom of the cleaning chamber, after which you can install the door itself.
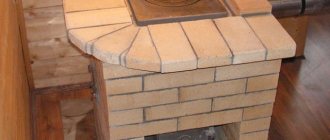
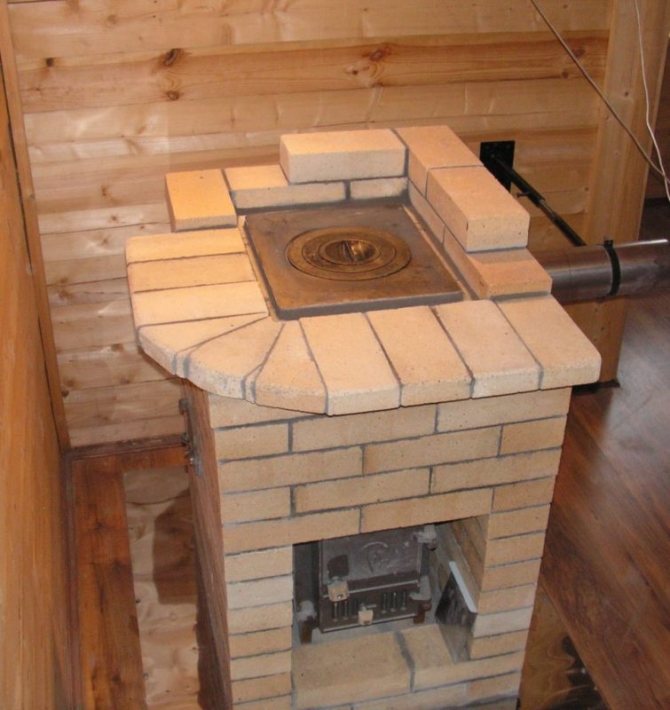
Simple baby brick oven for home
Novice stove-makers are advised to pay attention to just such a simple brick stove. The finished structure has a small size - the total occupied area is no more than 0.5 m2
Start by preparing the fixtures necessary for the construction of the unit in question. You will need the following:
- red oven brick;
- fire-resistant brick;
- fireclay and building clay;
- sifted fine sand;
- roofing iron;
- roofing material;
- doors for furnace, cleaning and blowing chambers;
- grate;
- stove for one burner;
- gate valve;
- steel pipe;
- plumb line;
- yardstick;
- protective gloves;
- trowel;
- level.
Furnace masonry
Mini oven
Do-it-yourself baby oven
Having prepared all the necessary devices, go directly to the stage of arranging the "baby" brick stove.
First step. Choose a place for equipping the heating unit. The distance from the walls of the oven to the nearest walls of the room must be at least 300 mm.
Ordering
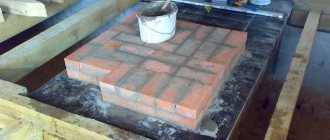
Second step. Lay out a brick foundation measuring 76x50.5 cm. The depth of the foundation should be at least 5 rows of bricks. Dig and level a hole of a suitable size, lay a layer of clay on its bottom, tamp it carefully and cover it with a layer of roofing material.
Step three. Lay out a 12 brick platform. Cover each brick with a clay mortar.
After laying out three rows of the base, cover them with a second layer of roofing material and continue laying. The level of the foundation must match the level of the floor.
Fourth step. Lay out the first row above the floor. Lay out the second row in the same way, but provide a place for mounting the blower door. Before installing, wrap the blower door around the edge with strong asbestos rope. Secure the door with wire.
Fifth step. Lay out the third row of the fireclay brick oven. For masonry, use a separate refractory clay mortar.
Sixth step. Install a grate in the fourth row and continue laying, placing bricks on the ribs. In the fifth row, lay the brick flat, in the sixth - again on the edge.
Seventh step. When laying the eighth row, install a sloped brick. In this design, it will take over the functions of a smoke tooth and will provide the displacement of the fire when the fire door is opened.
Eighth step. Wrap the combustion chamber door with asbestos cord and reinstall it in place.
Installing the firebox door
Ninth step. When laying the ninth row, fit the hob.
Tenth step. Continue laying the stove until you reach the beginning of the chimney device (starting with the tenth row). In the chimney, prepare supports for the installation of the internal partition. Place an outward protruding (knockout) brick in the rear wall of the kiln unit. It is not necessary to lubricate it with a solution, because by the end of the work, this brick will need to be removed.
Eleventh step. When laying out the eleventh row, install the valve, previously wrapped with asbestos rope. Install a metal flue gas pipe.
Twelfth row. Remove the previously unsecured protruding brick.
Let the oven dry for a week and you can start using the unit. The best fuel option is firewood.