Brazier do it yourself
A real picnic in nature is most often associated with gatherings around the fire and barbecue. It is the process of cooking meat on coals that gives the rest with friends the soulfulness and solemnity of the moment. Most often, men are involved in the action, claiming that "the barbecue does not tolerate female hands." Let us not dispute their right to cook meat from the most ancient times.
The birth of fragrant pieces in the smoke is a kind of sacrament that can melt the heart of any unapproachable beauty, and if the brazier is also made by hand, then the barbecue becomes a real culinary masterpiece.
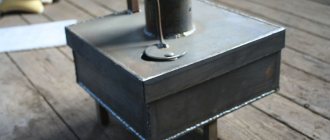
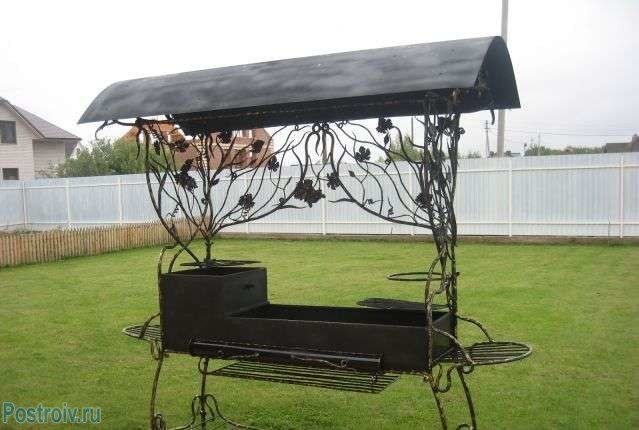
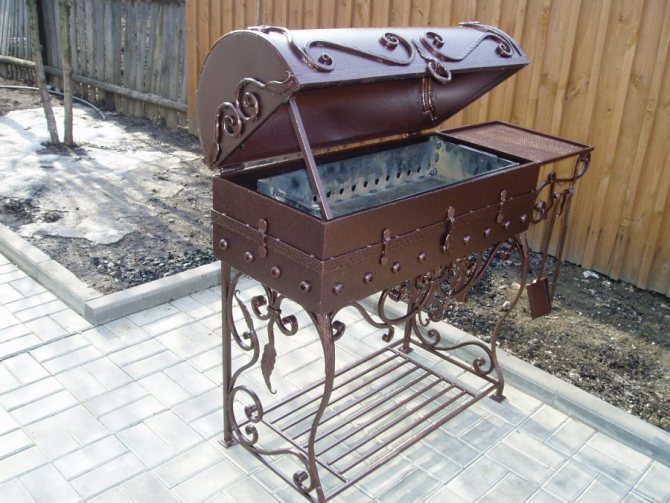
Brazier made of metal with a roof with drawings and a photo for making it with your own hands (option 3)
But this option will no longer be ashamed to put on the site. At the same time, he will delight both you and your guests, and the neighbors will certainly envy you. Let's hope kindly! It all started with the fact that once, having visited a federal chain of stores, I was staring at a metal brazier. It was made like nothing at all, but the price tag was so-so  Not that there was no money to buy, but I really wanted to try my hand ... What can I do if I try to pile something like that? Well, once it is decided, then we begin to work. The first step was to draw a drawing. A drawing, of course, can be called a stretch. It looked more like a sketch, a hand-made sketch on a piece of paper. A copy was taken from it to the garage, in which I made a brazier and a scan, which I present to your attention.
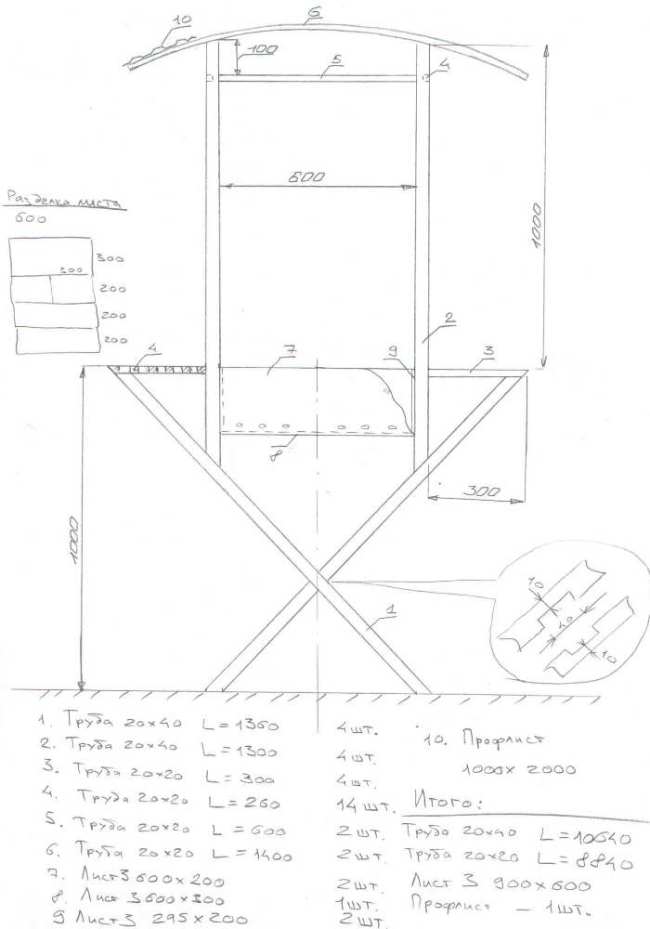
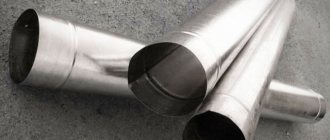
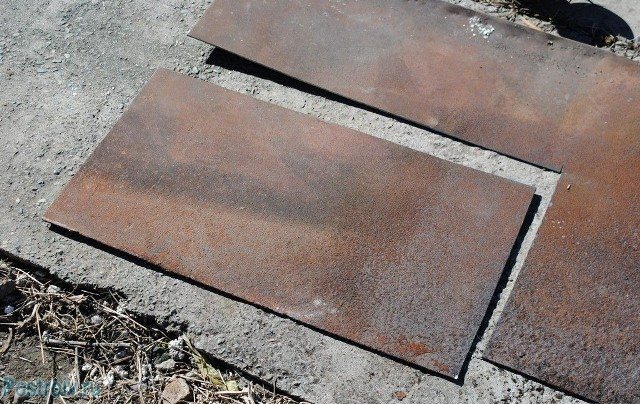
Here the need for metal was estimated. Everything is listed on the sheet, but in fact, for the multiplicity of the ordered profile, the following turned out. Attached is an excerpt from the account ...
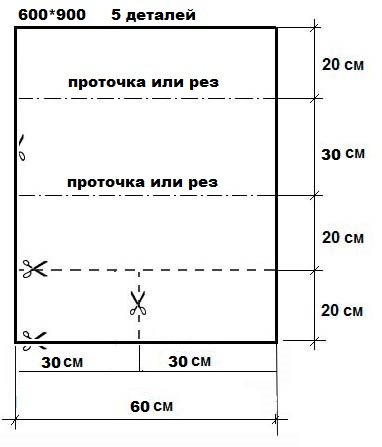
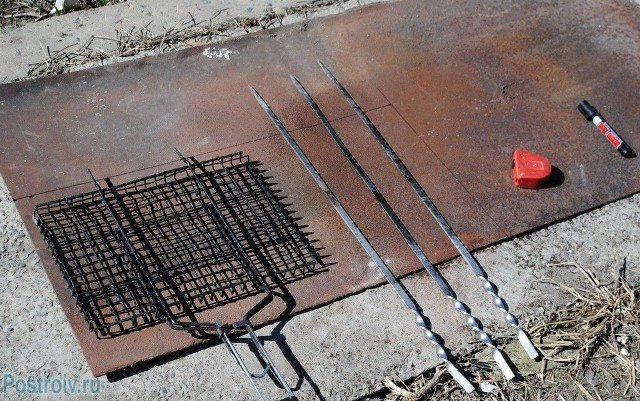
The grill itself was ordered as for the very first option, that is, from a sheet of 600 * 900. Thickness 4 mm (see account)
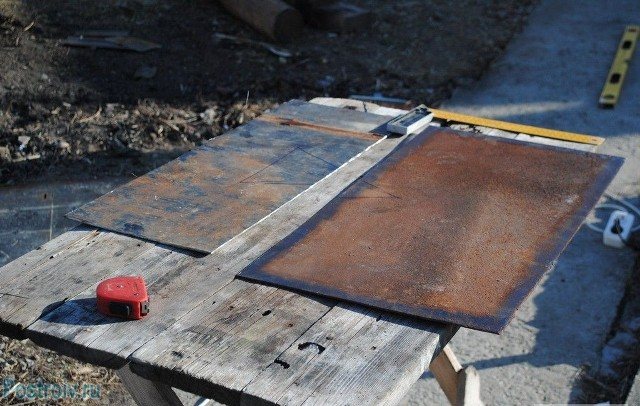
You can safely take the same amount, there are still scraps, but not a lot. Now, after the purchase of metal, forging was also purchased. It's up to you. I do not attach an account for it, since this is a personal matter, you want to buy it for decoration, or not. All of the above metal was delivered to the garage. There, I laid out one side of the barbecue on the floor. Since it was difficult to calculate the angles in the drawing, or rather a long time, it was decided to make cuts in place.

So, in order to make cuts, you can use a sharp nail or balloon paint. Paint was applied over the superimposed metal from a can. After I turned the profile over, it became clear how to cut the details.
The most difficult cut is at the convergence of the barbecue legs. Although it turned out very well, and it turned out to be not so difficult.
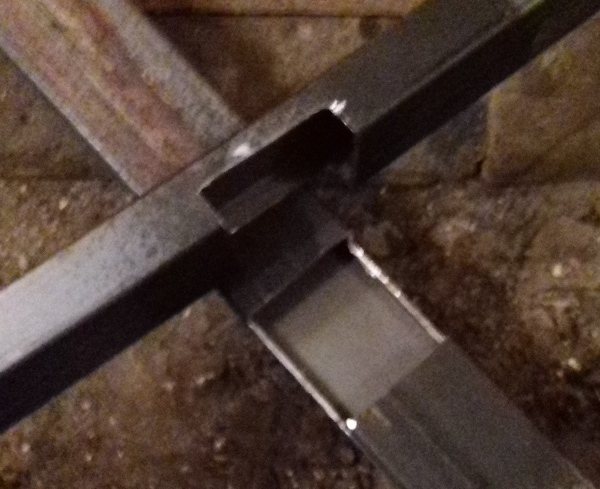
Trying on the legs together.

Now let's try on how the other cuts turned out, according to what I posted earlier.

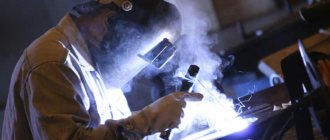
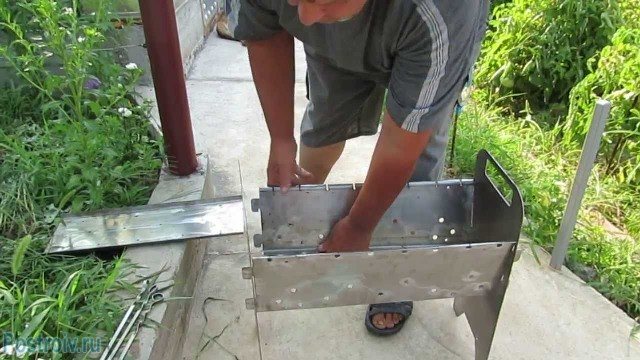
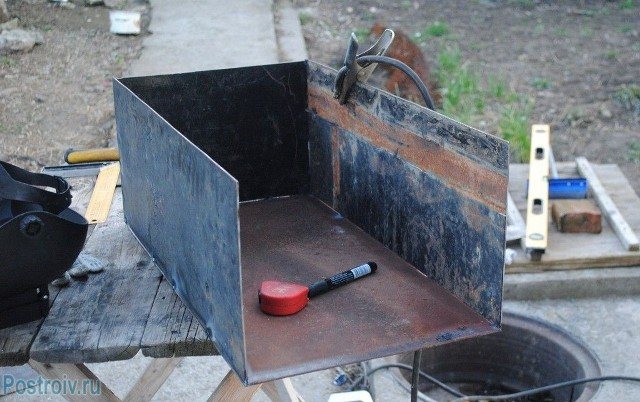
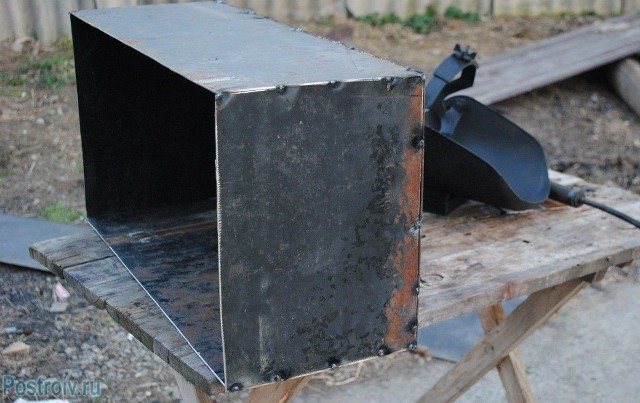
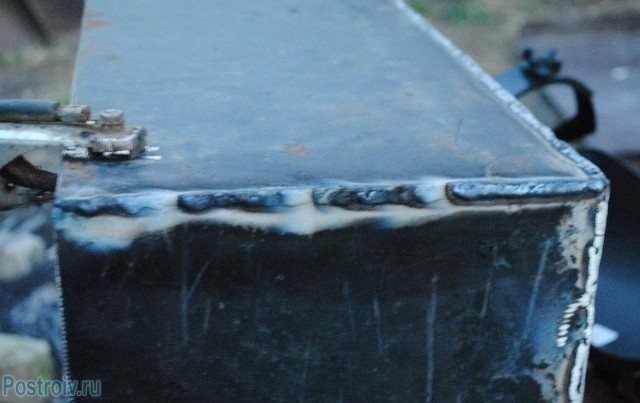
Now the metal welding process begins. We take a welder, in my case, the simplest Chinese welder that has been working faithfully for more than a dozen years, and we begin to weld the seams with electrodes - 3 mm. We also cook the second side of the barbecue, while the mirror is the opposite. There are two such parts. Not connected yet.
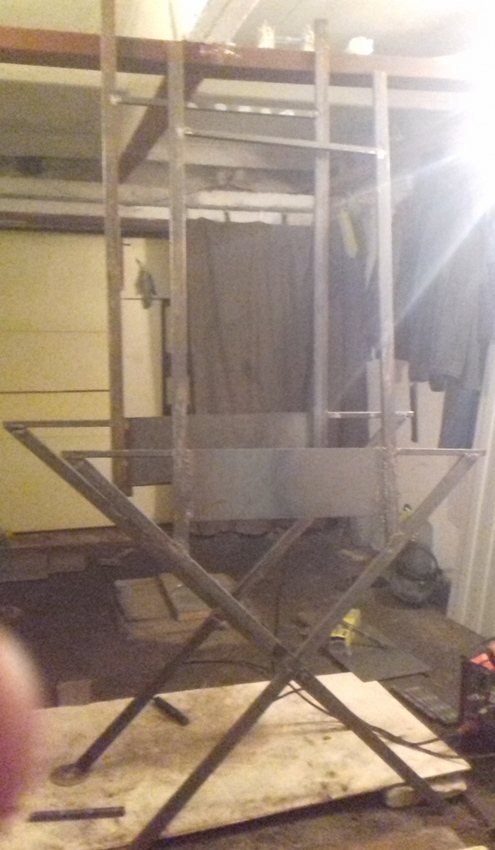
Now we take the jumpers and connect the sides together. At first, it is better to fasten it to the tack so that you can slightly adjust the position of one side relative to the other. Then we scald everything as expected.

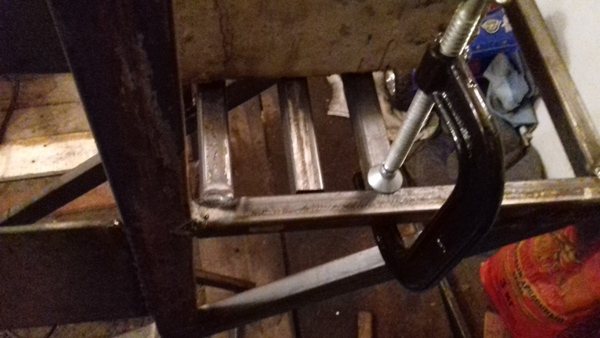
We proceed to the sides of the barbecue. I decided to make them as a lattice. When cooking, there are always not enough shelves around, then put a saucepan, then a plate with ready-made kebabs.It is because of this that the shelves will be on both sides. The clamp was found, the only device used in the manufacture of the entire structure. She clamped the jumpers on the shelf, and cooked accordingly.
It turned out something like that.

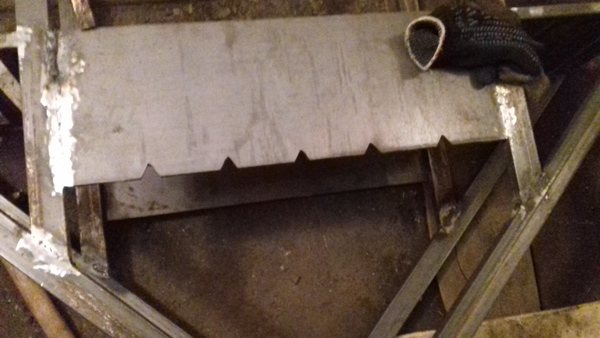
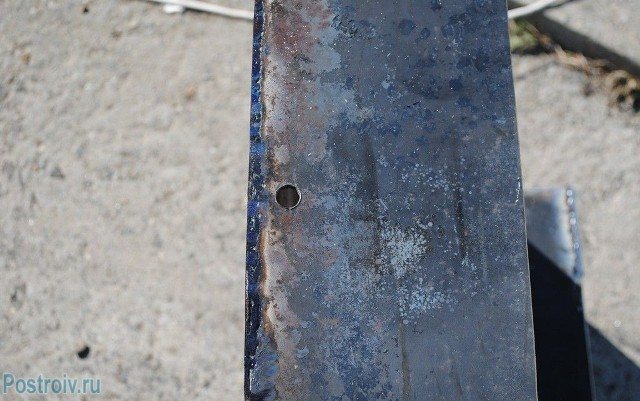
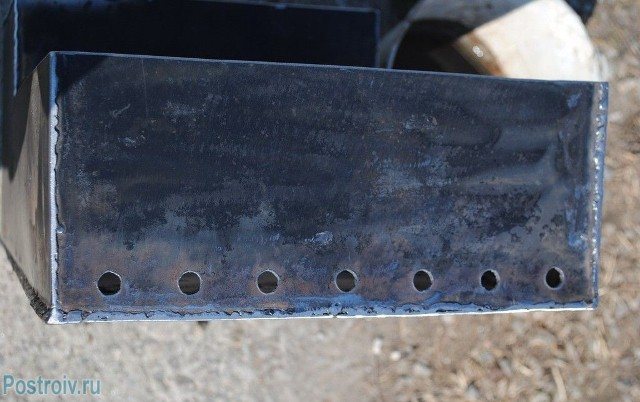
Since initially there were no holes for traction in the sheet, the moment should not be missed. They were cut before installing the bottom of the barbecue.
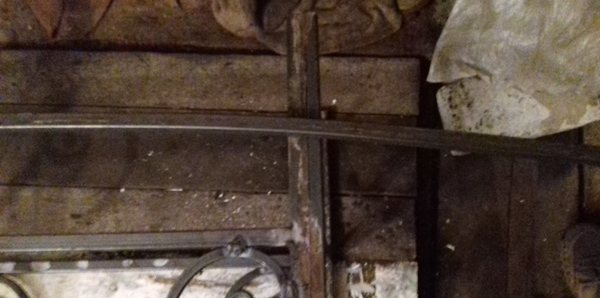
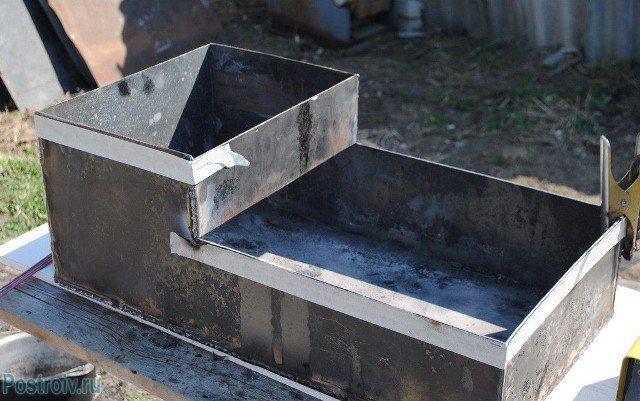
Further, with the help of hands and an angle, arcs were bent onto the roof. There was no need for a pipe bender either. Everything turned out pretty smoothly.

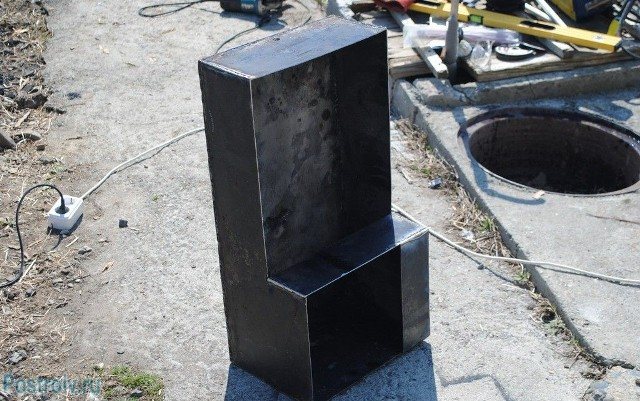
The metal on the racks was marked along the upper pipes, attaching the pipes to them.
After the racks are cut in place, and the upper arcs are welded. It's time to cook the bottom.
Here they called from the TK and said that the kovanina had come. Well, quickly on a typewriter and rolled to the receiving terminal. Here's what we have in stock.
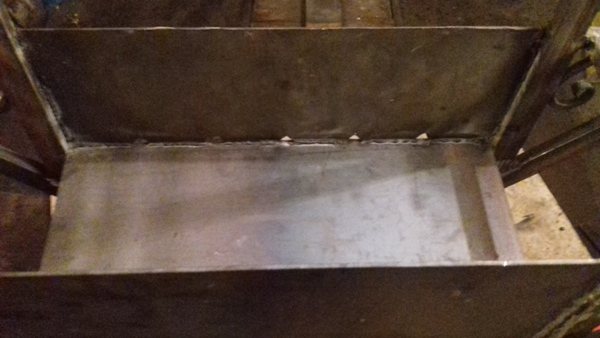
We cook all this in accordance with our artistic ideas about how an ideal brazier made of metal with a roof should look like. I got the following.

Next, it remains to weld the side walls of the barbecue. Since the brazier was planned to be installed on the site and for transportation, I did not fasten a sheet of metal on top - a profiled sheet. I decided that this should be done directly when installing the barbecue, so as not to wrinkle the roof. Here is the actual otography and from the place where the brazier was installed, and also tested ...
For stability, and also so that the brazier would not be torn out by vandals, it was welded to the hammered metal pipes and concreted.
Delicious kebab. Success factors
The success of a self-made barbecue on the grill depends on several factors:
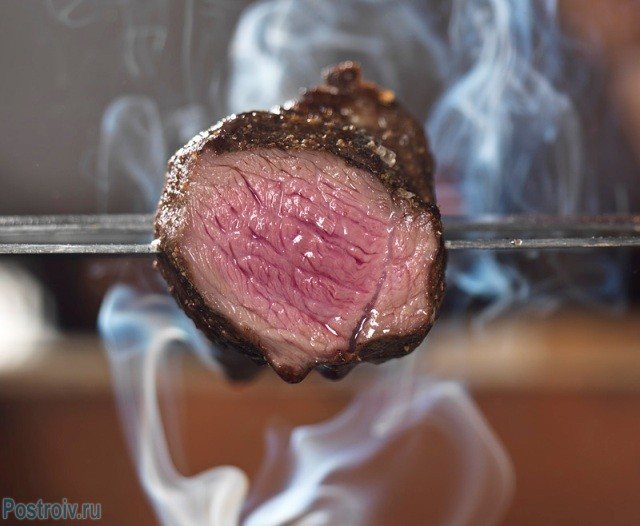
Properly marinated meat. No need to get carried away with ultra-modern recipes using mayonnaise, fermented milk products and sauces. The classic kebab is wine or vinegar, onions, parsley and spices. And other marinades are good only for the most tender and soft pieces.
The organic acids found in vinegar and parsley are best for successfully denaturing meat. In this case, denaturation means the splitting of protein molecules to a state most suitable for digestion by our body. In addition, the acidic environment prevents fire from creating harmful carcinogenic compounds in food.

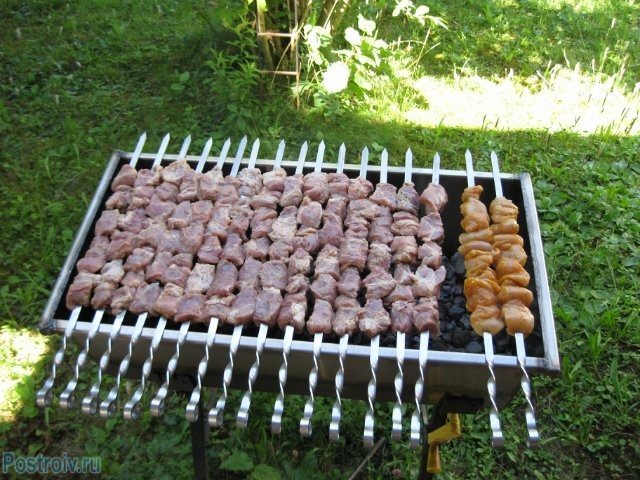
Pieces of meat for barbecue, which are planned to be cooked on the grill with your own hands, should be cubes with sides of at least 4-5 cm. This will allow them not to dry out, to be juicy and soft.
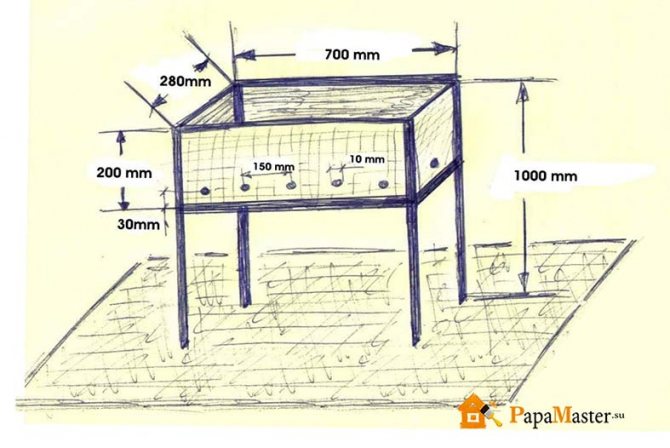
"The right brazier", made by hand. The dimensions of the appliance must be sufficient to accommodate the skewers with sufficient clearances.
As a rule, the length of the barbecue is taken equal to the length of the skewers minus 10-15 cm. The width can be calculated from the condition that one skewer must have at least 80 mm of space. The distance to the coals should be no more than 100 mm, and the depth of the fire should be up to 200-250 mm, with slots for skewers along its long side.
Wall thickness - the bigger, the better. And there is no need to clean off the soot from their inner surface, this is a source of infrared rays, without which you will simply get meat baked on a fire. In order for the kebab to be not only a tasty, but also a healthy dish, the holes for the air flow for the hand-made barbecue should be in the bottom, as in the numerous photos of devices that are filled with specialized sites.
When air passes through the coals from the bottom up, all oxygen will burn out in it and it will be possible to avoid harmful oxidation of food enzymes. With the lateral arrangement of the blowing holes, oxygen in the outgoing stream will remain, which means that the kebab will not be so healthy.
"Fragrant" coals. Analyze an archive of home videos of eating a barbecue, cooked on the grill with your own hands.Do you notice that the broadest smiles of those present are present precisely during the tasting of dishes cooked on wood from fruit trees? It is difficult to overestimate the fairness of this joke - firewood from cherries, apricots, apple trees, pears, etc. will give the dish a unique taste and aroma.
We start making the barbecue. On the network you can find drawings and photos necessary to make a brazier of any type with your own hands - from simple metal to brick or stone. Consider all designs, gradually moving from the simplest - from sheet metal, to more complex ones, such as a brazier, a smokehouse, created by hand, or a stone brazier-oven.
Portable skewer cases or stationary structures
Often in the suburban train, you can meet a crowd of excited people who, obviously, gathered for a picnic. This can be identified by their heavy backpacks and bags, as well as their portable metal barbecue case. This household item is usually made independently. The dimensions of such a barbecue with their own hands made of metal are made in such a way that they can be easily carried in a folding form. Stationary structures, which are installed in the garden of a private house or a summer cottage, can have different sizes, which allow the simultaneous preparation of barbecue on 4 - 16 skewers.
barbecue drawing (described in the article)
do-it-yourself grill made of metal
Benefits of metal structures
The most important advantage of barbecues made of metal is their low cost. Even if you buy metal sheets, corners, bars and pipes necessary for the job, the cost of materials will be significantly lower than the finished product from the store. And if we take into account that unnecessary metal trash in the form of barrels, cylinders, pieces of sheet metal and scraps of corners will fit for such a structure, then the price of the finished product will approach zero.
The second indisputable advantage is ease of manufacture. Anyone with the slightest knowledge of welding will be able to repeat the most complex design. Thirdly, such barbecues can be easily installed in a new place or taken with you to a picnic. Fourth, a sufficient thickness of sheet metal will allow the grill to serve for a long time. And fifth, the pleasure of the result. Having created a real masterpiece from scrap metal, you can proudly recall this at every opportunity.
Barbecues with insufficient wall thickness suffer from disadvantages - they quickly burn out, they can be driven when overheated, and they can rust from rain and moisture.
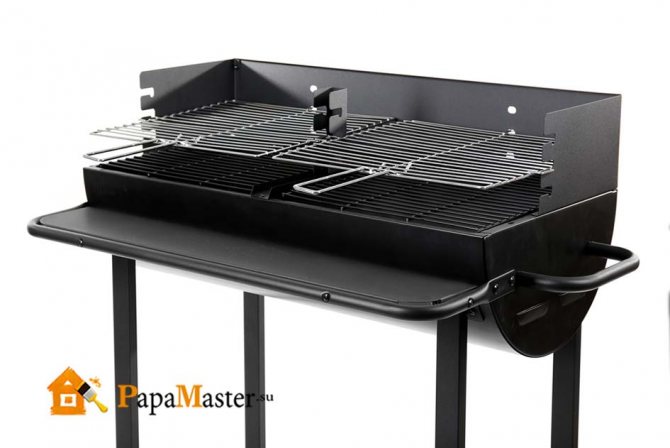
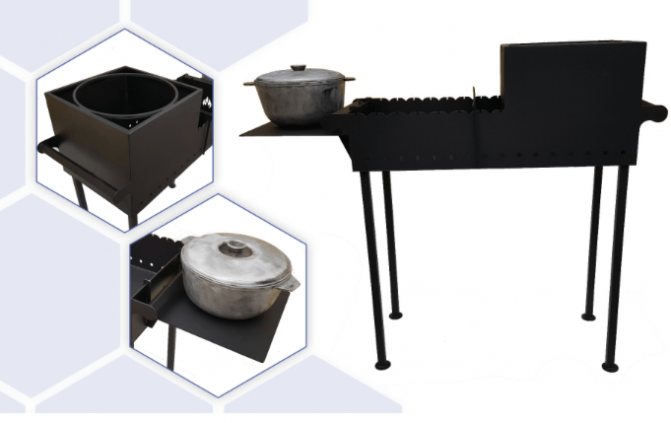
Do-it-yourself metal brazier with a shelf and a double bottom (option 2)
The second version of a metal barbecue is more complicated. In general, for those who want to obtain a similar product with improved performance characteristics. The main advantages of this barbecue compared to the previous one are the presence of high legs, a shelf between them, handles for carrying it, as well as a double bottom, which will ensure a more even combustion of coals or firewood. Now let's talk about everything in order. We take the metal and mark it on the bottom and walls.
… We cut the metal along the marked lines.
From the resulting details, we cook the barbecue. In principle, everything that has happened so far can be called an analogy to the previous version.

We clean the seams from scale.
Now about the double day. The double bottom is slightly smaller than the "native" bottom, which we have already installed, since it will be inserted inside the barbecue.
In order to ensure the uniformity of the air draft, we drill holes along the entire bottom area, like those in the photo.
For remote placement of the "second" relative stationary bottom, we weld a 20 * 20 cm corner around the perimeter.
On top we scald the body square with a pipe and make slots for skewers.We also cut two holes in the lower part so that the air passes under the “second” bottom.
Now, using bolts and nuts, fasten the "second" bottom to the stationary one in the grill. The bottom is screwed onto dismountable fasteners to ensure the possibility of thermal expansion of the metal, without deformation. Also, by unscrewing the bolts, it will be possible to clean the "first" bottom and the cavity between the two metal plates.
We weld the legs and jumpers between them.
We collect handles from studs and nuts.
We weld the handles into place.
We install plywood on the lintels. Now, to give an aesthetic appearance to the barbecue, you can cover it with thermal paint, and plywood with a protective impregnation for wood.
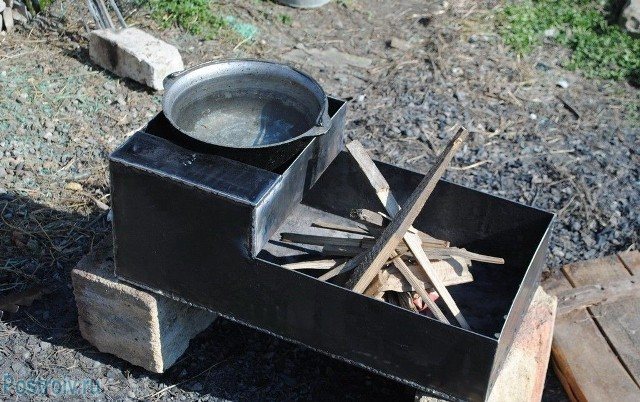
Do-it-yourself sheet metal brazier
A brazier made of metal with your own hands will serve you faithfully for many years only if the thickness of the sheet is sufficient and the metal can withstand high temperatures without the risk of burning out. In addition, a product with a thickness of 4-5 mm will never lead, which often suffers from structures welded from roofing sheets. Most often, a device with a wall thickness of 1-2 mm is needed for outdoor trips. Its weight is much less, and a self-made brazier of a collapsible design, the drawings of which are on the network, are also more convenient to transport.

Before starting work, you need to stock up on a sufficient amount of sheet metal with a thickness of 2-4 mm, an angle with a shelf width of 40 mm, a welding machine and an angle grinder, an electric drill with drills, a ruler, a marker and a construction square. For the manufacture of legs, you need to prepare a pipe or square with a cross section of 400 mm2. The work on the manufacture of a stationary barbecue with your own hands from sheet metal is performed in the following sequence:
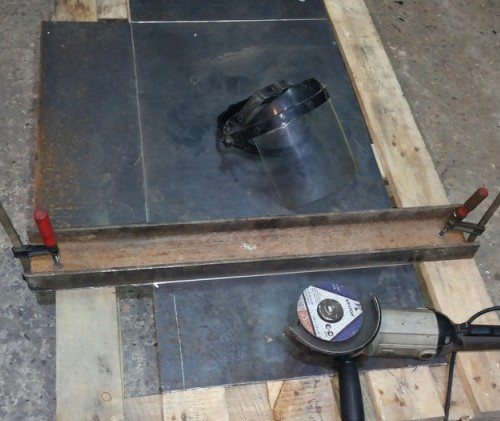
- Transfer the drawing to a metal sheet and cut out the blanks with the help of a grinder. In the case of using a material with a thickness of 2 mm, a drawing is applied in the form of a scan, and then the workpiece is bent at right angles along the line of abutment of the side walls to the bottom.
We measure
Cut out the required format

Clean up the edges of the bottom sheet
Measurements again
We bend the sheets and grab
- With the help of a square, the side walls are seized by welding perpendicular to the bottom, and then the seams are welded along the entire abutment line.
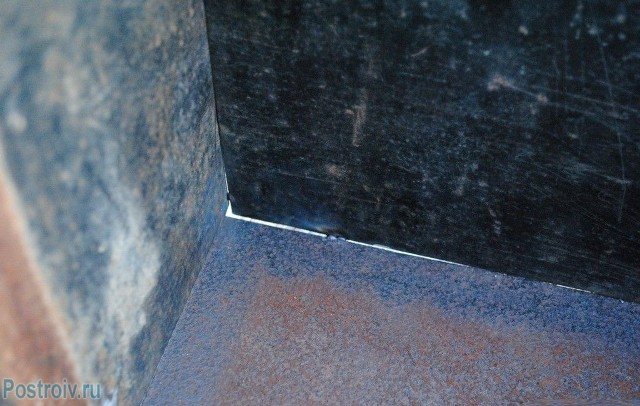
Welding is required to fix the sheets

We take the welding machine
We weld the joints
Welding
We clean the seams
- With a drill with a diameter of at least 12 mm, holes are drilled for air flow in the lower part of the side walls or the bottom, depending on which drawings you use when making a brazier with your own hands. If the air flow will be through the bottom, then an additional bottom ash box should be provided.

Cut out part of the box
Next, we weld the partition
And on the lid
We drill holes with a diameter of 13 mm
As a result, we get such holes for traction
- In the long walls, slots should be made for skewers. It is best to alternately cut the grooves 3-5 cm and 6-8 cm long. This will allow you to set the required height of the skewers above the coals.
Fill in water, fill in firewood

Water reached a boil from 10 degrees in 20 minutes
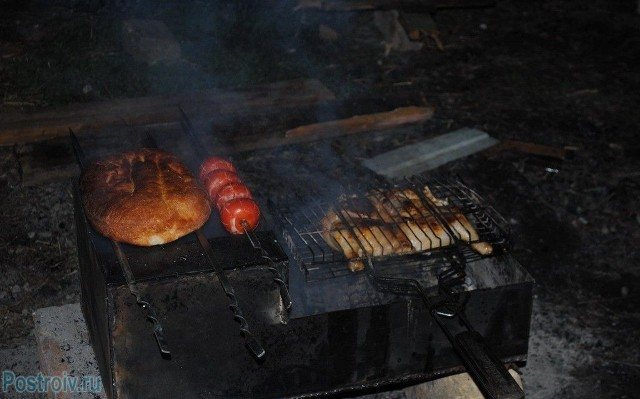
Testing a homemade barbecue
- The next stage will require you to study the photo of braziers on the network or design your own frame in which a brazier assembled by yourself will be installed. Such a frame is mounted from a metal corner and a profile using welded or bolted connections. Its design should provide shelves for dishes, firewood and appliances.
- If you plan to make a brazier with your own hands from metal of small thickness for outdoor trips, the frame drawings can be set aside. You won't need it. It is better to weld short (up to 8 cm) pieces of metal pipe with a diameter of up to 25 mm in the corners of the bottom, into which pieces of a bar or pipes of a smaller diameter (up to 20 mm) will be inserted as legs. Their length is selected based on their needs.
- Handles from a metal bar should be welded to the top of the short walls of the barbecue for easy portability.
- The roof, installed over the barbecue, will be able to protect the hearth from snow and rain. It is not at all difficult to make it, it is enough to provide side posts and a pair of floors, on which roofing iron of the required size is laid.
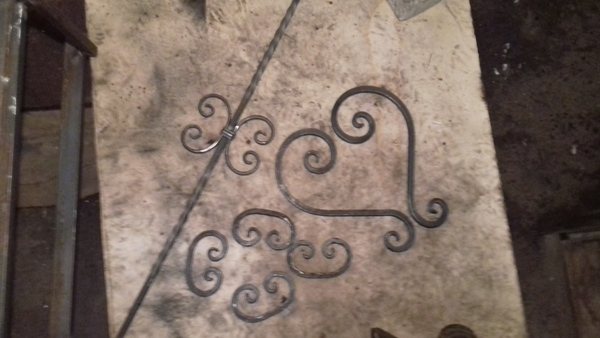
- Do not forget to decorate your work with various forged decorative elements that can be purchased from the store. Next, the product and the frame are cleaned with a metal brush and painted with heat-resistant paint. After it dries, making a barbecue from metal with your own hands is considered complete and they begin to test the barbecue.
In the process of work, you can correct the drawings and make a brazier with your own hands that best meets your technological and aesthetic requirements.
How to choose a barbecue
Many people believe that a barbecue brazier and a brazier are exactly the same designs in terms of operation and design. While most DIY designs can support this claim, it really isn't. Masters rarely attach importance to all the subtleties when arranging a barbecue, and only true connoisseurs and admirers know all the secrets and nuances. For this reason, if you want to make the perfect DIY metal barbecue roaster, you should get to know these connoisseurs better.
What is the difference between barbecue and barbecue?
There are only two main differences.
Firstly, despite the fact that the principle of operation and the device are somewhat similar, the brazier and barbecue differ in the furnace part during operation. It turns out that the released heat affects fish and meat in different ways, and the final effect is also different. In the grill, food is warmed up by combustion products from wood and a little heat from hot coals. And in a barbecue, cooking and heating are due to radiation, since in this case the flow of air to the surface is weaker and goes to the inside.
Secondly, in a barbecue, the heating of the product is softer, since the bulk of the heat goes to heating the coals, metal, and thanks to the grate, cold air flows around and cools the already fried surface. Unfortunately, only the chef can fully explain the difference, but in short, when cooking on a metal barbecue roaster, fat and moisture remain inside the product, and do not evaporate with a stream of hot gas, making the dish juicier and richer in taste. If you have a barbecue, it will not be difficult to cook a juicy steak, and to get the same result on the grill, you will need to wrap the workpiece in metal foil.
In the classic barbecue brazier device, there are metal bowls in which the coal is kindled, and in them it smolders. In the old varieties, firewood was used instead of coal, and they were piled up in a heap in a metal container and burned to coals. As soon as the cup was filled to the brim, they put a wire rack or some steel rods and start cooking. To obtain a similar effect in the grill, you need to constantly turn the skewers with meat and try not to overdry the meat or vegetables, and at the same time achieve good roasting.
Brazier design
The classic device implies that a metal / stone bowl will be used for cooking, over which there is a metal grate (ideally, nickel-plated), but you can use the most common one, even from thick steel wire. In modern production, braziers have special heating bowls for metal barbecues.
Air enters the glass, partially burns the coal, and after that the combustion product is removed outside along the metal walls. This way you can keep the temperature high without bothering with fanning.
Collapsible brazier made of metal
If you do not want to transport an overall all-metal box, then look after a collapsible structure or a diagram of a barbecue for making it yourself. Such products are compact, easy to repeat and durable enough. In addition, the portable device can be assembled in a matter of minutes. Drawings and detailed diagrams are presented to your attention that will help you assemble a brazier with your own hands. Step-by-step instructions and photos of the assembly process will help you delve into the smallest details.

For work, you will need the same materials and tools as for the manufacture of a welded one-piece structure. Additionally, you need to stock up on a jigsaw and reinforced scissors for working on metal, as well as a set of dies and fasteners. Are you ready to make a collapsible brazier with your own hands? A step-by-step guide will help you not to overlook anything. Determine the required dimensions of the product, taking into account the dimensions of the trunk of your car. We offer the best option, suitable in most cases:
- Width - 300 mm;
- Length - 600 mm (designed for 6 portions, if necessary, it can be increased at the rate of 100 mm for one skewer);
- The height of the walls is 150 mm, taking into account the distance of 20 mm under the grate;
- The height of the support legs is 600 mm (it is better if the length of the legs coincides with the width of the barbecue, because we need a compact design).
As a rule, any self-made collapsible brazier, the production video of which can be found on the network, has the following elements:
- Metal corner frame;
- Bottom;
- Longitudinal and lateral sides;
- Grate;
- Fasteners.
- To make a frame from the corners, weld a rectangle of the required size (if you take our barbecue dimensions as a basis, you should weld a frame 230 mm wide and 570 mm long with your own hands). At the corners of the structure, weld 50 mm pieces of water pipe with an outer dimension of 17 mm. In the future, they will be inserted into the support legs.
- The legs need four pipes with an inner diameter of 18-20 mm. We have already discussed the length of the supports. Plugs can be installed on the other side of the pipes that will stick into the ground.
- Cut out the bottom and side structural elements from the metal sheet, cut the grooves in them and drill the necessary holes.
- In accordance with the diagram of a brazier intended for making with your own hands, attach the bottom to the frame with bolts. To do this, drill through holes in them, laying a frame from the corners on the base of the barbecue.
- As grates, you can use a grate welded from a bar or reinforcement with a diameter of 8-10 mm. Weld legs 15-20 mm long from the same material along the edges of the grate.
- We fasten the sides on four rods (knitting needles). To do this, cut threads at their ends for wing nuts and weld the rods to the upper and lower sides of the short walls. If it is not possible to weld, fasten the spokes to the sidewalls with horseshoe bolts.
- Tip: install all bolts from the side of the hearth. This will help keep the threads from sintering.
- To assemble such a brazier with your own hands, step-by-step instructions are not needed - the process itself is very simple. It is enough to fix the bottom on the legs, and then get into the slots on the long sidewalls with the protruding ends of the spokes and tighten them with wing nuts. After attaching the assembled sidewalls to the base and installing it inside the grate, the brazier can be considered self-assembled. A photo near this grandiose structure will serve as proof of your skill in social networks.
Brazier from a gas cylinder or barrel with your own hands
The options for making a barbecue from these containers are varied, including those with a lid and handles. All gas is discharged from the cylinder. To check, the opening of the open valve is moistened with soapy water. If it does not bubble, there is no gas. After that, the cylinder, after removing the valve, must be turned over and the condensate removed.For reliability, it does not hurt to fill it with water and hold it for a couple of days.
Manufacturing begins with the fact that the cylinder or barrel is cut in height into two halves, or only a part is cut out, leaving the ends intact. A lid is then made from it. The stand is made of a pipe bent by an arc with legs welded to it. Or two racks in the form of the letter M are assembled from the corners and connected with rods. The resulting shelf is used to store firewood and accessories.

After installing the container on the racks, the cut points are covered with corners on which the skewers will be placed. If the future brazier is supposed to be used as a grill, then racks are attached to the sides under it. To prepare a barbecue, brackets are welded inside under the grate.
The cover from the cut-out sector is hinged. Its presence allows you to use the brazier as a smokehouse, if you install a chimney from the end. If the barrel is cut correctly, it can be connected to the filler neck. The cylinder uses the hole where the valve was installed. So that all the coals do not roll into the central part, it is recommended to weld two corners to the bottom along the length.
Finishing of metal products
After finishing work, the metal brazier must be cleaned of rust with a metal brush, which is placed on a drill or grinder. Welded joints are sanded with an angle grinder.
Further, the outer surfaces of the barbecue are degreased and painted with heat-resistant paints and varnishes. Ornaments in the form of leaves and curls can be ennobled with a patina, giving them the appearance of antique products. The inside of the products does not need to be painted. Also, it is not necessary to clean this side from the carbon deposits that appear during the operation of the device. It is believed to have a positive effect on the quality of the food prepared.
What types of barbecues are there?
There are a large number of interesting and original projects, according to which you can create a brazier from metal with your own hands. Common to all structures is a rectangular case, into which coals or firewood are loaded. To improve fuel combustion, holes with a diameter of 10 mm are made in the sides. Products are simple and complex, in the style of minimalism or with decorative elements. In the manufacture can be used steel profiles, old household and automotive equipment.
Brazier designs are divided into the following types:
- stationary;
- collapsible;
- folding (portable).
Each model has its own characteristics, advantages and disadvantages. When deciding on the choice of the type of product, you need to take into account a number of nuances regarding your capabilities, abilities and plans for operating the product.

Collapsible
The peculiarity of a collapsible barbecue is that it is taken out into the yard and used for its intended purpose as needed. Structural elements are connected using bolts, nuts and hinges. The legs for the hearth are made in a folding or sliding version. Products are popular due to the ability to quickly put into working condition and dismantle immediately after cooling. Heavy products can be equipped with wheels for ease of movement around the yard. When folded, the product fits easily into a bag and trunk of a car.
Plain portable
Portable mini barbecue is a small steel case, which contains accessories for cooking barbecue and fasteners. At the same time, the case is a brazier with hinged folding sides. At the corners, the sides are connected with knitting needles. The legs are removable, made of shaped pipes or corners, sharpened at the bottom for easy fixing in the ground.
The small size of the barbecue allows you to carry it in a backpack during a hike or constantly carry it in the trunk of a car. The product is quickly assembled and folded. The disadvantage is the low leg height. Because of this, you will have to cook a shish kebab in a sitting position or bending over to the hearth.
Stationary
Stationary structures are heavy monolithic structures for which a separate foundation is set up. A beautiful brazier is installed in a conspicuous place, a separate path is laid to it.
There are such modifications of stationary foci:
- All-metal. Consist of the minimum number of options required for barbecuing or barbecuing. They can be decorated with elements of artistic forging.
- Embedded. The brazier is inserted into a base of fireclay bricks or paving stones. Equipped with a cutting table and shelves for storing firewood and equipment.
- Artistic. Original and beautiful barbecues are made in the form of a car hood, a steam locomotive, a ship or a large animal. For protection from weather conditions, they are equipped with hoods and awnings.
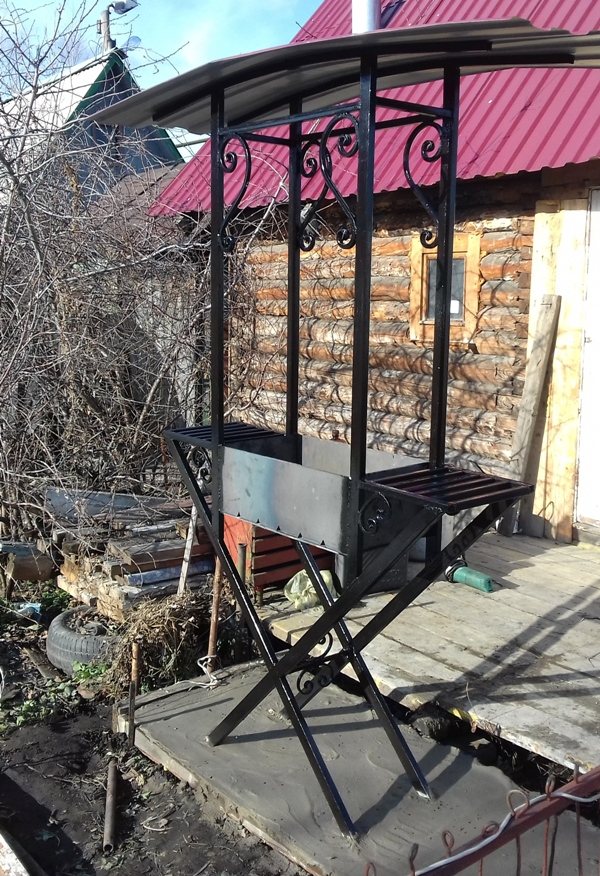
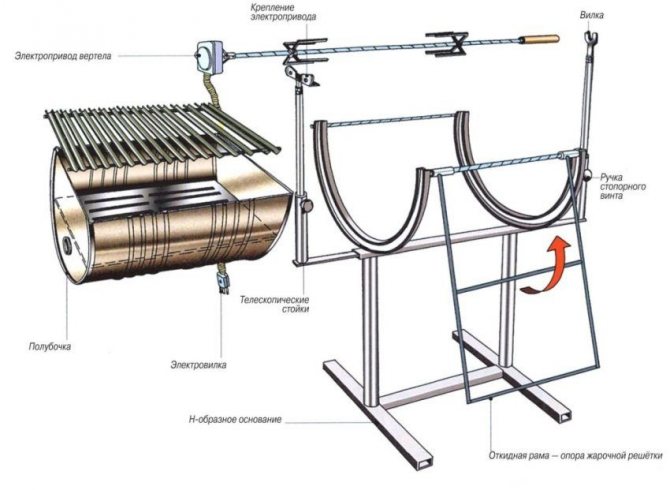
Metal braziers with a canopy
If you make a brazier with your own roof, then you can cook delicious meals on charcoal under any field conditions. Precipitation will not annoy the cook, and the coals will not flood with water.
There are such options for arranging sheds:
- With combined supports. The hearth is welded to the uprights, being a single whole with them. The disadvantage of this solution is that the side racks will heat up and cannot be used to store accessories.
- With separate supports. The racks are dug in and poured with concrete when arranging the foundation. A strapping is made from above, on which the roofing material is laid. Racks can be equipped with shelves for placing cutlery and crockery.
When choosing a roof covering, you need to dwell on materials that do not support combustion.
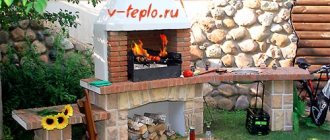
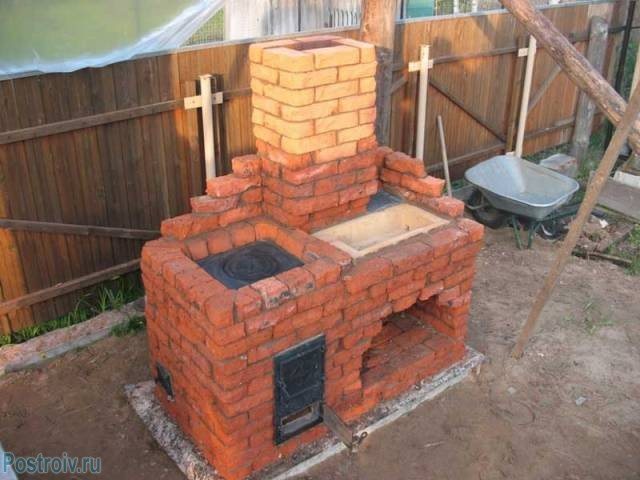
DIY brick braziers
A stationary brick brazier, built with your own hands, is good for its solidity - its thick walls keep heat for a long time and allow you to cook a wonderful shish kebab or barbecue with your own hands without the risk of burning tender meat. The structures of brick barbecues sometimes form a single whole with a gazebo and a patio, being, in fact, a whole complex that complements the general style of the garden area. Having built such a brick brazier with your own hands, you can cook not only barbecue, but also cook fish soup, shurpa, pilaf, as well as smoke poultry or fish.
Their only drawback stems from the solidity of brick braziers - they occupy a permanent place. They cannot be moved or hidden in the far corner. That is why it is necessary to very carefully approach the choice of a secluded place, having decided to install an outdoor brazier with your own hands.
Brazier and its characteristics
A metal brazier is an oblong rectangular container installed on a stable base. Combined installations can be complemented by a small stove with a firewood insert. Products are made of iron, since this material is durable, heat-resistant and retains heat for a long time.
Homemade universal grill has the following characteristics:
- Functionality. The design can be used for cooking on skewers, a wire rack and in a cauldron. Structures can be equipped with shelves and crockery hooks, a wood rack, a hood and a canopy.
- Security. Iron furnaces do not melt or burn out. The fuel is contained in an enclosed space.
- Mobility. The brazier can be made portable, mobile or transportable.
- Aesthetics. A properly designed product will be a decoration of the yard and a source of pride for the master.
- Profitability. The hearth does not consume much fuel. With a properly equipped blower, its consumption will be minimal.

The optimal size of the barbecue
There are several recommendations that you need to follow in order to properly cook the brazier.
The optimal parameters of the focus are as follows:
- metal thickness for the hearth - 3 mm or more;
- the height of the side is 13-15 cm (with low walls, the meat will burn, and with high walls, you will have to impose a lot of fuel);
- the distance between the skewers is 8-10 cm;
- the width of the focus is 25-30 cm;
- lesion length - 50 cm or more, depending on the number of skewers;
- the depth of the grooves is 2-3 cm;
- working part height - 80 cm.
The brazier with a double bottom is equipped with a grill, which prevents the product body from burning out in the lower part. If a chimney is installed, the height of the exhaust duct should be at least 200 cm so as not to hinder the actions of the cook. A canopy made of flammable material should be raised at least 250 cm above the ground.
Getting Started
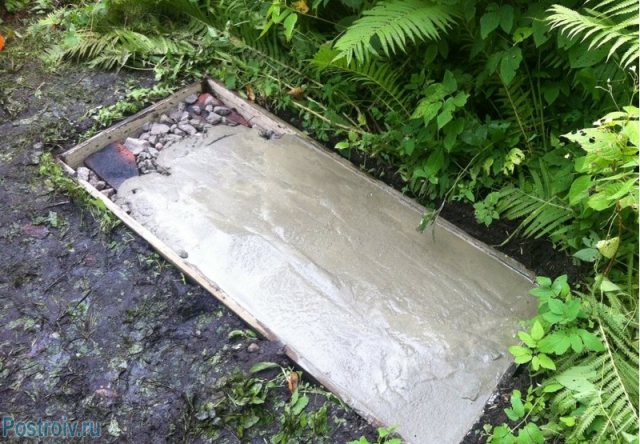
Like any capital structure, a garden brazier requires the arrangement of the foundation. Best of all, for building a brazier made of bricks with your own hands, a tape-type foundation with a pit depth of up to 0.6 m is suitable. The pit is covered with large crushed stone or stone, and poured with sand-cement mortar. A foundation of rubble stone is laid above the surface of the soil, up to 0.3 m high. The best material for such a fireplace is natural stone or red oven brick. Stone masonry is quite laborious and requires a lot of experience. It is quite possible to build a brazier made of bricks with your own hands, the main thing is to do the work carefully and without haste.

Before starting construction, consider the design of such a barbecue. As a rule, they all represent a firebox with a low chimney. A grate is installed inside the firebox, under which there is an ash pan (one or more), closed by a blower. A niche for storing firewood is arranged under the ash pan.
Are you interested in do-it-yourself barbecues made of bricks? Step-by-step instructions will help you fully understand all the nuances of such structures.
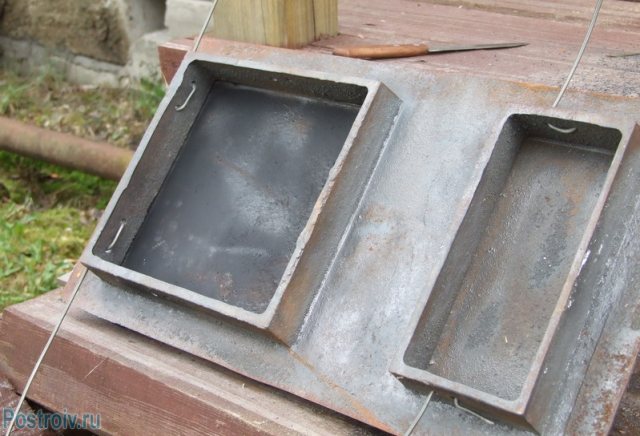
To build a small brick barbecue you will need: 400-450 pcs. bricks, clay, river sand, a pair of grates, a copper hood for an exhaust hood, an angle of 30x40 mm and 40x40 mm, valves or ash pan doors.
- Choose a place for the stove - in an open space or under a gazebo canopy. The composition of the solution depends on this. For the first option, heat-resistant cement will be needed, and for the second, clay solution will do.
- Equip the foundation.
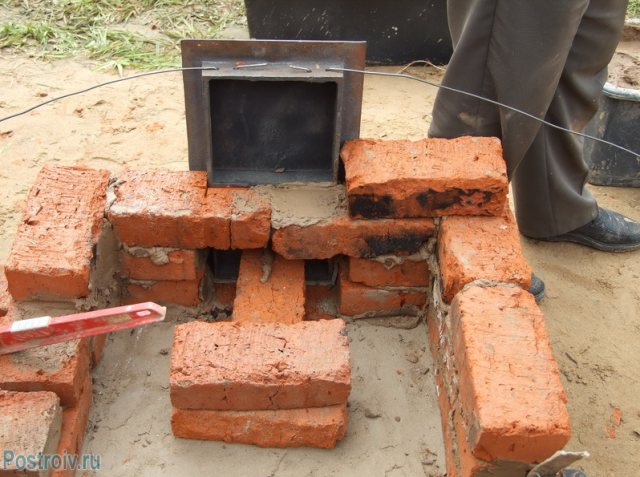
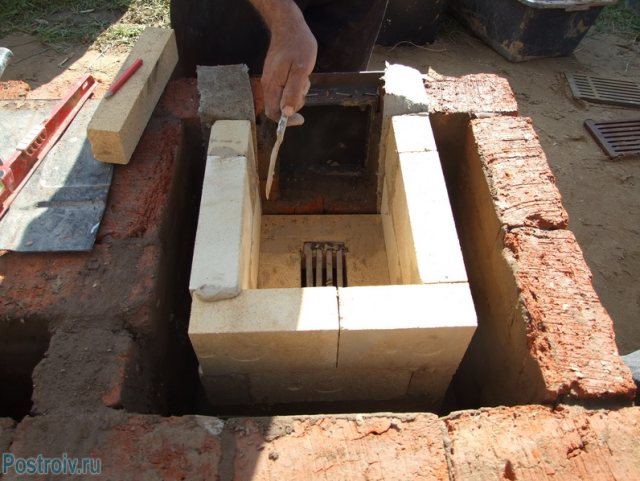
- Lay out a niche measuring 0.75x0.5x0.5 m. Lay a row of bricks above this niche (spoon masonry). Here, use the support from the supplied metal corners. Install the equal-flange corner in the back of the row (in the 8th row of the masonry), and 30x40 in the front, making slots in the front brick of the 9th row for the corner shelf.
The second row is needed to eliminate overheating of roofing material We form the volume of the furnace on the 3rd row
- The tenth and eleventh rows are formed by ash pan-blowers measuring 0.12x0.25 m. Doors or valves are also installed here to regulate the air flow. For the installation of the grate in the 11th row of bricks, a quarter is cut off.
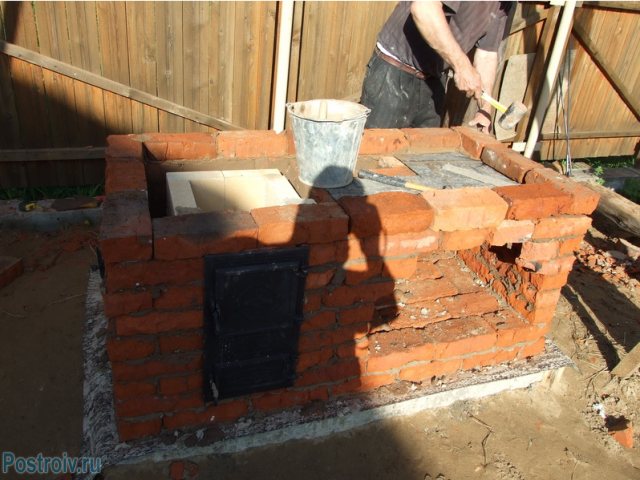
In the original, this door was used for the oven.
Fastening the oven door
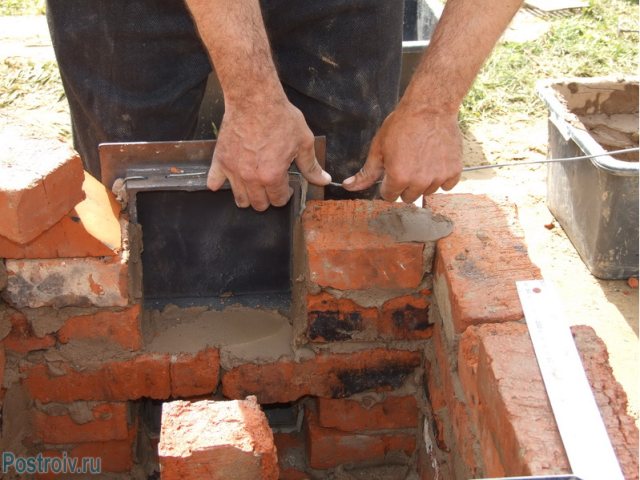
We fix the wire for fastening the door
- In the twelfth-thirteenth row, we equip a ledge for skewers.
- The masonry of the firebox is continued until the 21st row. Further, it is covered in the same way as a niche under the ash pan, only the laying is carried out in half of the brick - butcher.
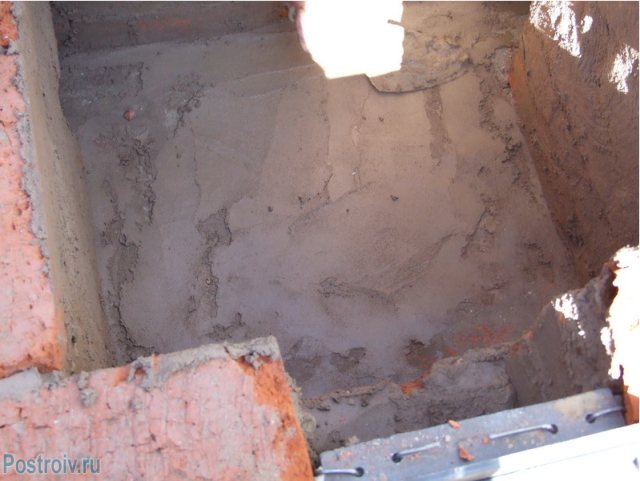
Site for laying the firebox

We lay out the bottom of the firebox
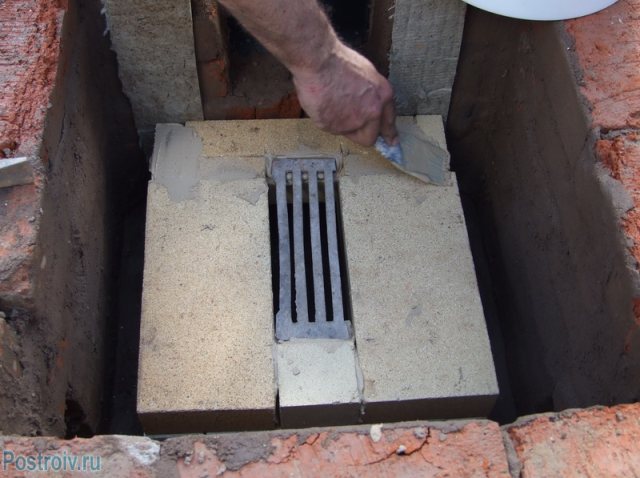
We put the lattice
We erect the walls of the firebox
Covering the woodshed with a sheet of metal
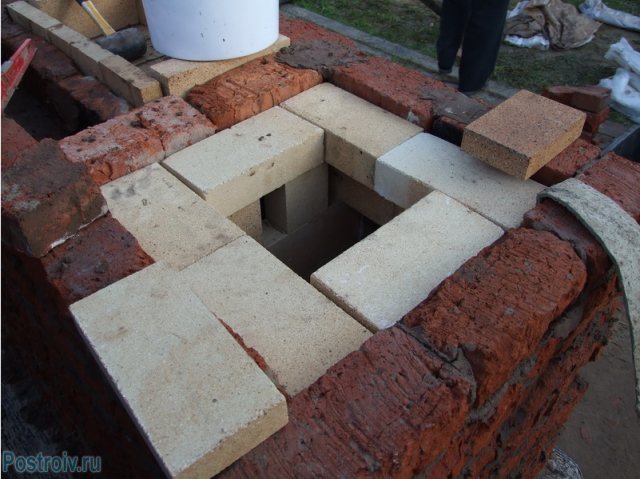
- From the 24th row, the masonry begins to narrow with ledges. On the sides, each row is reduced by 35 mm, and at the front by 17 mm. The back wall of the smoke box is laid out perpendicular to the base.
- The last row of the brick barbecue will be the 33rd, with a copper exhaust hood, installed by hand. A photo of this design will help you navigate how to do this.
We form 6 outlets of smoke from the firebox
Then we close the firebox. Lay the flooring on top
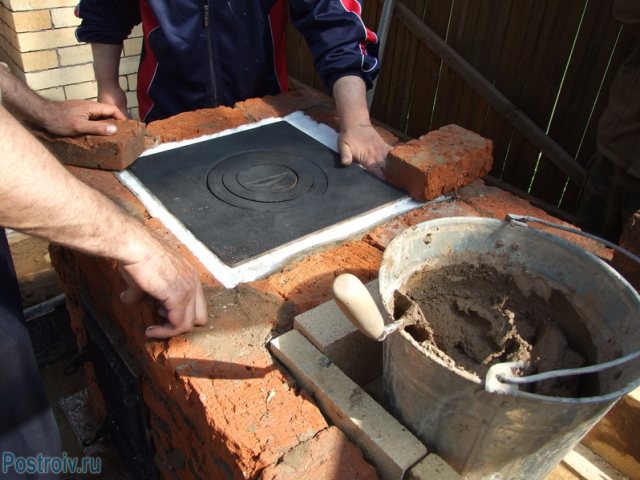
We put heat insulation and cooking floor on top of the firebox.
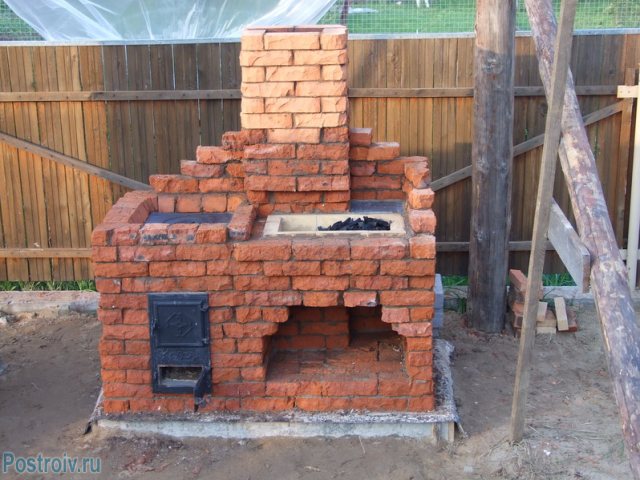
Chimney masonry. The brazier is ready!
The presented drawings of brick grills will help you build the most suitable structure with your own hands.A photo of such buildings will help you appreciate their design and splendor.
However, building a brazier out of bricks with your own hands is not enough. We still need to install a chimney.
Correction is always possible
We told how to build a stationary brazier with our own hands from metal with our dimensions. If desired, these dimensions can be adjusted in any direction. You can make the base wider and the length shorter or longer. Some owners calculate the format of the barbecue for the size of the lattice, and its height for their height.
READ ON TOPIC:
How to build a brick brazier with your own hands without special skills in such work.
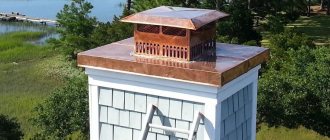
Requirements for chimneys and hoods
In order for the brazier, built by your own hands, not to smoke the gazebo with smoke, hot gases are removed through the chimney. A special smoke hood is designed to collect smoke, which must exceed the dimensions of the metal barbecue by at least 30 cm in each direction. There should be at least 80 cm from the lower section of the hood to the upper section of the chimney. If you make a hood with an adjustable suspension, you can adjust the thickness of the smoke cover over the skewers. This kebab will be much more flavorful.
Do-it-yourself brick mangals should not have any smoke flows and smoke teeth. It is necessary to equip only straight smoke channels with a built-in view to adjust the draft. Otherwise, carelessness in handling the stove can turn into waste.
The presented gallery of barbecues, equipped in summer cottages, will allow you to fully experience the beauty of technical and design solutions, feel the aroma of a barbecue being prepared, plunge into the atmosphere of warmth and harmony, and imagine yourself in the circle of your closest and beloved people. And maybe you will be so interested in how to make a brazier that you stock up on tools and start doing magic with your own hands.
Types of construction
Brazier with cauldron can have different shapes and types of construction... When choosing a particular model, when buying or manufacturing, you should be guided not only by personal preferences, but also to assess the suitability of the barbecue for your summer cottage, ease of use and other factors.
Indoor oven
The creation of a covered barbecue from metal is much easier than building a brick stove with a barbecue, since you do not have to create complex structures. This kind of oven consists of:
- Mangala.
- Frame.
- Roofs.
- Little tables.
The structure is stationary; for its manufacture, a drill, a hacksaw should be added to the initial list of materials.
The list of materials is also different:
- Corners or shaped tube (4x4 cm).
- Roofing iron (more than 0.4 cm thick).
- Roof material.
- Boards.
When making a brazier, it is worth considering that for a skewer with 7 pieces of meat, a width of 21 to 25 cm is enough. The length can be any. But the height of the brazier should be from 18 to 20 cm.
Don't forget the cutouts in the walls.
Universal oven
The universal cauldron-brazier stove consists of a small base and a metal box made of metal sheets. Its main advantages are a simple design and the ability to manufacture a portable barbecue.
Among the merits are lightweight, small footprint and durability. For a non-separable model, a heat-resistant steel box with a wall thickness of 0.3 cm is welded. So you can simultaneously place up to 10 skewers with meat or one barbecue grill and a cauldron.
For convenience, you can also add a chimney to the project, which will make it possible not to inhale soot and smoke.
BBQ from a balloon
If the household has an old cylinder that previously had gas, it can be used to create a barbecue. This is a very simple and convenient option, but here it is worth noting that you need to work as carefully as possible. Incorrect actions can lead to dangerous consequences, including an explosion.Therefore, first, the propane cylinder must be completely detoxified and make sure that there is no gas left inside.
After this element is prepared for further work, you can start making a barbecue. The base in this case will already be ready, it will only be necessary to improve it a little and attach the legs for the stand.
First you need to pour water into the bottle, rinse it, and then cut off the place where the valve is located. There will be a chimney pipe here. A square hole is cut in the center, and the cut off part is attached back, but already on the hinges. Thus, a barbecue comes out with a ready-made lid. Inside, you need to install a pre-made lattice, and then attach the legs made of identical pieces of reinforcement.
Excellent barbecues are made from an old gas cylinder. If everything is done correctly, and then cleaned and tinted, an excellent device will come out for cooking meat over an open fire and smoked dishes. However, at first, you need to use such a barbecue as carefully as possible. It is important to start with a good burning of the inside of the barrel. This is necessary due to the fact that unpleasant odors can be emitted from the gas for some time, which will be absorbed into the food. Therefore, you just need to burn the coals several times in order to exclude a situation in which food may deteriorate.