Design features
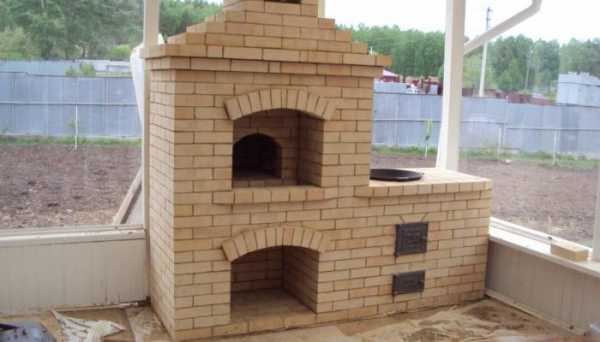
This design can have either one or two foci. It consists of:
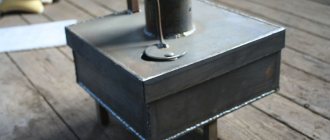
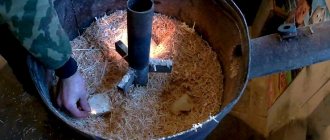
- internal combustion chamber for fuel filling;
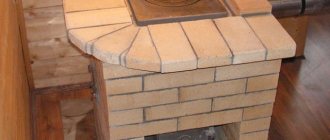
- countertops for cooking (optional);
- outer hob;
- firewood - a special compartment in which fuel is stored for drying (optional);
- places for the grate - can be combined with the internal combustion chamber.
Note! The larger the combustion chamber, the larger the dimensions of the structure itself and, accordingly, the greater the functionality will become. But remember that heating up an oven that is too large will take a long time, as will cooling it down.
Stage 1. Selection of material for manufacturing
Despite the huge selection of building materials, there are not so many of them that can be used in our case.
- fireclay brick or aerated concrete - both materials are very resistant to high temperatures;
- finished metal or cast iron products are an expensive option, but installation times will be significantly reduced.
Let's look at the problem from a practical point of view. Aerated concrete blocks will cost less than bricks, but in terms of aesthetic indicators, they definitely lose. In addition, these blocks need additional cladding.
Note! Many people resort to buying ready-made stoves, and the reason for this is undeniable advantages: easy installation (using glue) from a set of parts according to the attached instructions.
If we talk about the combustion chamber, then everything is more complicated here, because it is extremely difficult to acquire a suitable option. Therefore, you need to do it yourself. And the structure itself, in theory, should be the way you want it to be - from the preferred design to the method of cladding.
Stage 2. Choosing a suitable location
Let's make a reservation right away that the street stove should be located in the most convenient place. Ideally, its location should be determined at the initial stage of building a house. But if the house has already been built, then the choice of location will depend on specific conditions.
In this case, you should adhere to a number of mandatory requirements:
- the structure should be placed near a recreation area, terrace or veranda (otherwise, you will have to build a canopy and put several benches);
- there must be lighting;
- regarding the dimensions, we cannot advise anything specific, since they depend only on your personal preferences and needs;
- between the gazebo and the stove (if the distance is large enough) you need to lay a path;
- the structure should be located on the leeward side so that smoke does not enter the house;
- it is better not to build it next to plants and bushes, because they can suffer from high temperatures;
- the space around the stove must be laid with stone or tiles;
- and most importantly, there should be no flammable materials nearby!
How to build a summer cottage stove on the street with your own hands
If you want to build a stove yourself, you should choose a project without complex consolidated masonry. It's easy to do it yourself without the help of a professional stove-maker.
Project selection
Having decided on the design, you need to order a project for the future furnace. It is extremely difficult to make it yourself, since it is necessary to calculate the draft and correct smoke extraction.
Attention! Only an experienced craftsman can put together the right project. From its quality the durability of the structure depends.
Materials (edit)
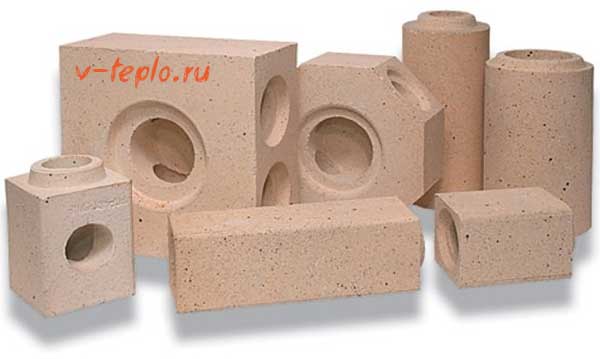
To equip an outdoor oven, you will need a heat-resistant brick that can withstand temperature conditions up to 1000 ᴼC.
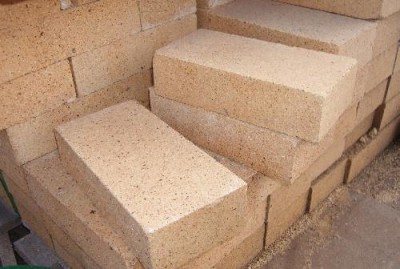
The material comes in two sizes: 230x114x65 and 250x120x65 cm. You can use the following types of bricks:
- fireclay;
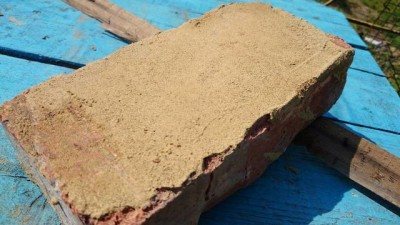
- red;
- decorative;
- refractory kiln brick.
The number of bricks depends on the external dimensions of the structure.
For example, on average, the construction of a Russian stove will require from 2500 to 3500 pieces.
Important! The mortar consumption depends on the quality of the brick. If used brick is used, then it is needed clean thoroughly.
Solution
The main task of the oven laying mortar is high-quality adhesion of bricks. Moreover, it should not crumble at strong temperature changes. The easiest option is to choose special solution for laying fireplaces. However, you can make it yourself. This will require:
- clay;
- sand;
- water.
Sieve solid materials before use to get rid of large foreign particles. First, the clay is prepared. Lay it in a layer in 15 cm and fill with water so that it completely covers the surface. After that, leave the finished mixture for a day, and then add sand.
The amount of sand depends on the quality of the clay, its viscosity and fat content. Optimal clay to sand ratio determined empirically.
To do this, after mixing, dissolved in water, the clay and sand adhere two bricks and leave to dry.
Then, using any metal object, for example, a trowel, they try to pick out the solution. If no cracks appear on it, then the ratio is chosen correctly, otherwise repeat the procedure again until the ideal sand to clay ratio is determined.
Reference. The three lower tiers of the Russian stove and fireplace can be made of overheated bricks, since these layers are not subject to heating. However, in a Russian oven it is possible. only in the absence of bottom heating.
Site preparation
Having determined the purpose and type of street oven you need to choose a place for construction. This should be an open area, next to which trees do not grow, and there are no buildings near the house, made of flammable materials. Its size must be larger than the selected oven.
Important! If an outdoor stove is installed near the house, then you need to take into account which direction the wind most often blows, so that smoke does not penetrate into the living quarters.
Construction stages
- Pouring the foundation.
First of all, dig a hole with a flat bottom surface. Its diameter should be larger than the oven by 15-50 cm... The pit is poured with concrete and reinforced. Depending on the depth of the foundation, it will take from 1 to 3 weeks.
- Erection of walls.
The walls are erected according to the order specified in the project. Check each row with a level for evenness. The correct location of the corners is controlled using a plumb line.
- Installation of cast iron elements.
When installing the hob, firebox, doors and dampers, cover each of them with basalt wool and carefully wrap it with an asbestos-cement cord. This is necessary so that the metal elements do not expand when heated and do not press on the brick.
- Chimney.
The quality of smoke extraction is the most important element in the construction of any stove. It is better to use a system of modules, in which the chimney is assembled as a constructor, and then bricked on the outside. At the joints, the models are fixed with clamps and heat-resistant sealant.
- Decorating.
After completing the main stage, you can start decorating the street oven. It is important to choose the right plaster. It should be heat resistant and not crumble. Optionally, brickwork is decorated with artificial stone.
Difficulties and mistakes when laying the device
During installation, the most common errors are:
- Too strong narrowing of the smoke channel. This impairs the traction and combustion rate of the fuel.
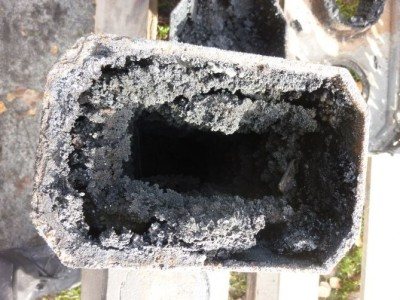
- Lack of inspection of the inner walls of the oven for smoothness... Soot accumulates on the walls due to irregularities. This becomes the reason for the rapid clogging of the chimney.
- Using plaster for the interior surface ovens. Even types of this material, resistant to temperature extremes, will burn out in a matter of minutes.
- Lack of asbestos-cement cord during installation furnace door, grate and other cast iron elements. Such a cord acts as a thermal gap. Its size should not be less than 0.5 cm along the entire perimeter of the installation.
- Use of low-quality asbestos-cement cord. To purchase quality material, you need to check it for flammability directly in the store.
- Installation of the oven end-to-end with the combustion chamber... This will impair the uniformity of heating and cause the food to burn.
- Using pipes made of galvanized metal for the manufacture of a chimney... The durability of non-galvanized metal is several times higher, while galvanized elements quickly burn out.
Stage 3. Getting started
First, work out a plan of action and draw up a diagram, preferably in great detail. Think about where the stove should be located, how it will look, etc. This way the time spent on work will be significantly reduced, and the amount of materials required will be determined as accurately as possible.
Note! It is advisable to use only high-quality building materials - this will help avoid problems in the future. If, for example, the brick is of good quality, then when laying you use a minimum of mortar (at least, experienced stove-makers say so). You can, of course, use second-hand brick, but before using it for internal elements, thorough cleaning of the surfaces is required.
- The prepared solution should be plastic, but in no case liquid! So the seams will be completely filled, and the appearance of streaks will be excluded.
- It is recommended to sift the mixture through a fine mesh sieve (mesh diameter - maximum 1.5 millimeters).
- If the clay is used oily, then it must be mixed with sand.
- The solution is mixed with utmost care. Check the entire mixture with your hands at the end of the kneading, knead the lumps and remove unnecessary impurities. Remember - the solution should only be homogeneous!
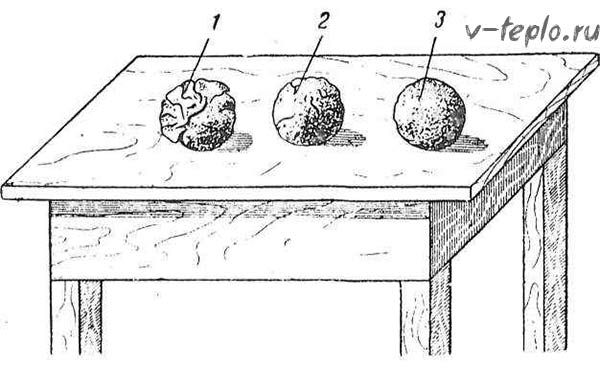
- Before work, the clay should be checked for fat content. Do it as follows: take 1 liter of each composition of a solution of clay with sand, then roll up balls with a diameter of 0.5 centimeters. When the balls are dry, drop each ball on a hard surface from a height of one meter. A ball that won't break and will be the perfect mix.
- The clay should be soaked at least two days before starting work. During this period of time, it will “turn sour” enough and acquire the required plasticity.
Also, an outdoor oven provides for the use of tools and materials such as:
- brick (preferably fireclay), the amount of which is determined by a previously drawn up project;
- nylon rope;
- clay;
- shovel;
- cement;
- trowel;
- sand;
- mounting level;
- blower door;
- door for the furnace compartment.
Choosing a stove for a summer residence: options for the street and at home
Furnaces for summer cottages are represented by a large assortment of models, and in the selection process there is an opportunity to purchase not only a functional heating device, but also an element of modern home interior decor.
Furnace for giving: basic requirements and characteristics
Harsh climatic conditions and a short warm period presuppose the choice of high-quality, efficient and reliable heating equipment, even for country houses, subject to seasonal residence.All modern and heat-efficient country stoves must necessarily meet a number of requirements, including operational safety and heat capacity indicators. Also, all types and models differ in size, which allows you to choose reliable heating equipment for both small premises and two-story cottages.
The specificity of the operating conditions for summer cottages assumes that the equipment meets several basic requirements:
• convenience and availability of service;
• simplicity and ease of use;
• rapid heating of air masses in the room;
• the ability to maintain a stable air temperature for a long time;
• compactness of the device and convenient dimensions;
• high rates of efficiency;
• increased strength and guaranteed durability;
• simplicity and ease of implementation of ignition;
• affordable cost for an ordinary buyer.
Among other things, you need to consider the possibility of using different types of materials in addition to firewood during operation.
Outdoor country stoves
An overview of country heating devices will be incomplete without mentioning outdoor country stoves. Such furnaces have been known for a long time and in most southern regions were actively exploited almost all year round. Recently, such designs have become more functional and aesthetic, which made it possible to use garden wood stoves not only for their intended purpose, but also as an element of the landscape.
Depending on the level of functionality, purpose, design features and technical capabilities, street ovens can be represented by the following options:
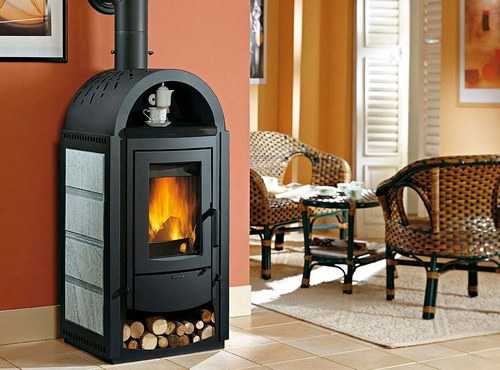
• A wood-burning outdoor stove is a simple and affordable option. Finished models have a hob and oven. For melting, firewood, coal, briquettes or other types of solid fuels are used. The compact version takes up little space, and the mobility allows you to remove the equipment for the winter in the utility room. The main disadvantage of such equipment is represented by insufficient functionality;
Also read: Choosing a drainage system for a country house
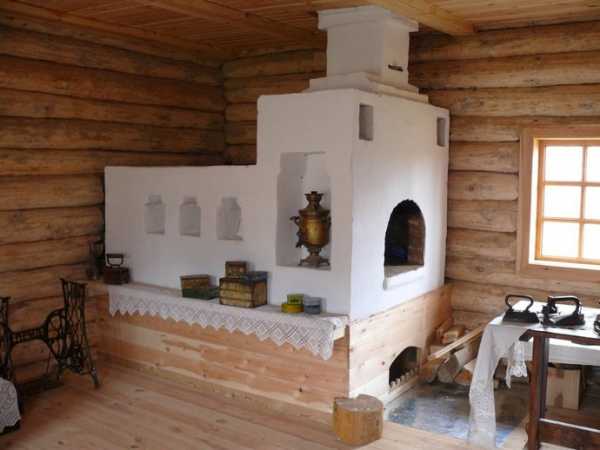
• The Russian stove is one of the most popular in our country, classic options. The design is designed for cooking on the stove, baking baked goods, stewing and frying. It is imperative to protect the outer walls with heat-insulating materials that allow the operation of the hearth in the cold season;
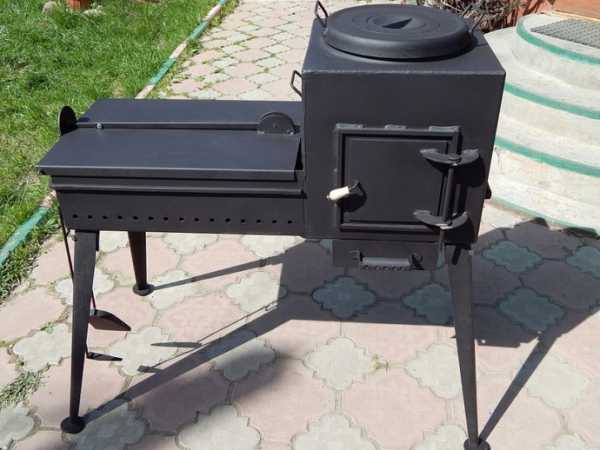
• a compact brazier stove differs from the Russian stove in smaller dimensions and insufficiently extensive capabilities. The oven is perfect for baking pies, roasting meat and fish dishes, stewing. The upper grill allows you to quickly grill a kebab. A certain disadvantage is the need for a relatively long preheating;
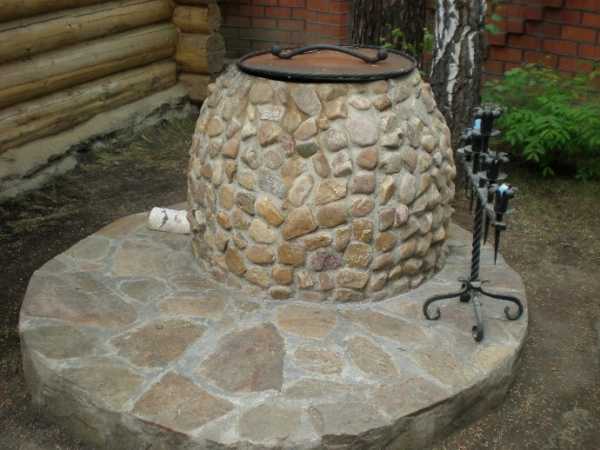
• the oriental version of "Tandoor" allows you to cook not only meat and fish dishes, but also national oriental dishes, represented by flat cakes baked directly on the walls of the oven structure. It is also possible to install a cauldron for cooking pilaf. Manufacturers produce stationary and mobile models equipped with special wheels;
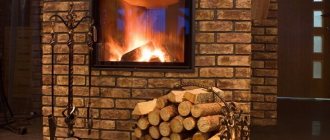
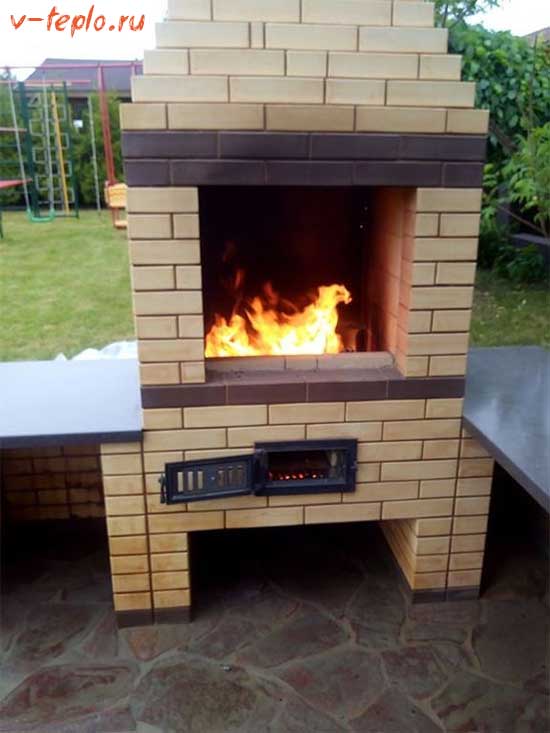
• a fireplace stove equipped with a spit and a special grate is the best outdoor option for picnics. The model is designed for the preparation of almost any meat and fish dishes. Manufacturers offer ready-made fireplace structures made using modern refractory materials, coated with moisture-resistant compounds;
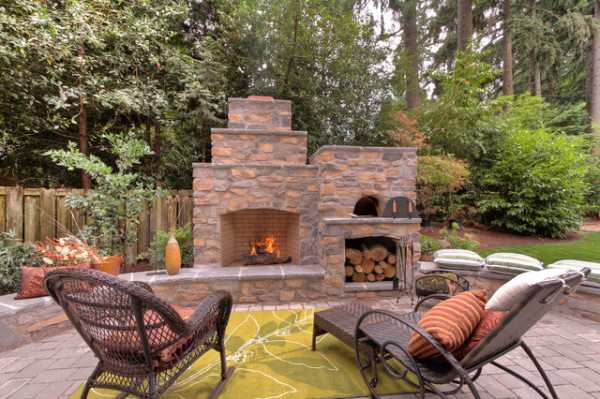
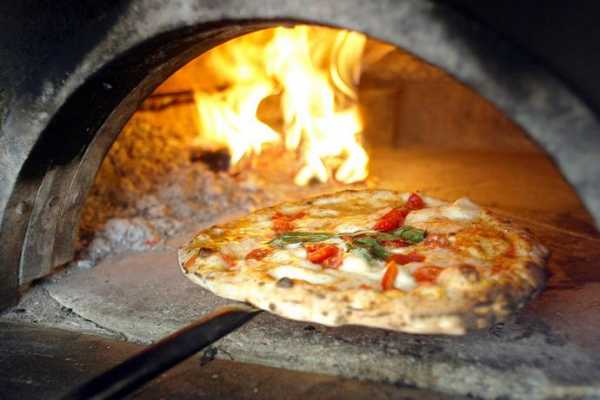
• The oven-pizza maker is an amateur design, ideal for preparing dishes from Italian cuisine.The disadvantages include insufficient functionality, limited to baking pizza and baked goods. A design feature is the presence of a hemispherical vault and the ability to integrate into almost any complex garden systems;
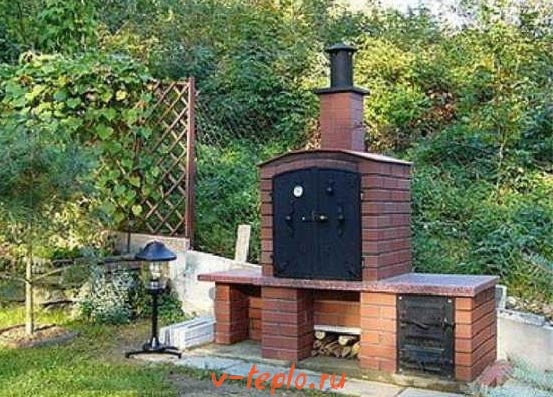
• a barbecue oven deservedly occupies a leading position and is most often found on personal plots. This model is a kind of version of American mobile metal braziers, which are adapted to the life and climatic conditions of our country. The covered-type stove structure allows to protect open fire from precipitation and gusty winds. A fully functional system is represented by a grill, a hob, a stand for a cauldron, a smokehouse, a pizza oven and a large spit.
Also read: Options for exterior home decoration
When arranging a garden or outdoor kitchen, the structure should be located at a sufficient distance from garden plantings and wooden structures. It is advisable to provide the outdoor stove with a solid and reliable, monolithic-reinforced foundation base, decorated in accordance with the features of landscape design.
How to build a fireplace brazier with your own hands (video)
https://youtu.be/uuu0aWTAv6M
Types of stoves for country houses
For the construction of furnaces, a different type of material can be used, which must be strong enough, reliable and durable. Depending on the material used, the following types of summer cottage oven structures are distinguished:
• steel model made of cast iron and having excellent thermal and technical characteristics. The disadvantages include high weight, as well as a significant amount of time required to warm up;
• brick stove, which can be easily done on your own, provided that the order is correctly and correctly calculated. A distinctive feature is the excellent heat capacity. The downside may be the need to provide such heating equipment with a sufficiently reliable foundation base;
• a stone stove belongs to the category of rather expensive, complex and heavy devices that are difficult to carry out independently and are distinguished by their attractive appearance and durability.

The most popular in recent years have become factory-made stoves, which also include the Dachnitsa model. Among other things, the classification of summer cottages can be determined by the type of fuel used:
• wood-burning models belong to the traditional types, and are fired with wood or coal. Regular monitoring is required for smooth operation, but the stoves can even be performed independently. Often complemented by a stove, oven and grill;
• electric models, common due to mobility and ease of installation. Functioning depends on the availability of electricity in the house. A high-quality electrical installation is characterized by good power ratings and a high degree of reliability. Modern equipment is capable of almost perfectly simulating a real fire, accompanied by the sound of cracking logs. The disadvantage is the high cost and increased power consumption;
• gas models are considered the most affordable in terms of operation, but require strict adherence to safety precautions and regular filling of gas cylinders in the absence of main gas supply.
Also read: Do-it-yourself wood veranda

For private households and apartments, it is recommended to purchase electric stoves, which will be safer and more reliable. However, for heating an ordinary country house, it is advisable to use standard wood-burning structures.
Equipment safety precautions
Heating equipment, represented by various types of stoves, when operating in private households, requires mandatory compliance with safety measures:
• in the areas where wooden floors adjoin to the flue duct or pipe-mounted pipes, cuts should be arranged in the form of thickenings in the masonry pipework;
• when using backfill in attics based on easily combustible materials in the form of sawdust and peat, chimneys are cut above the backfill surface;
• chimneys within the attic space are rubbed with lime mortar and whitewashed;
• Combustion floors in front of the fireplace inserts must be covered with 50 x 70 cm sheet metal roofing.
It is especially important to observe the fire safety rules in the winter, when the heating of the stoves is carried out especially actively.
Do-it-yourself barbecue oven (video)
https://youtu.be/uuu0aWTAv6M
Heating stoves for private houses and summer cottages begin to be in high demand just before the start of the heating season, so you need to take care of purchasing such heating equipment in advance. Best of all, only specialists in this field understand the variety of modern stoves, therefore, when choosing, it is inappropriate to rely only on their own strength, and it is advisable to get recommendations from experienced consultants who implement heating structures.
A source
Stage 4. Laying an outdoor stove
So, you have on hand a detailed design diagram, as well as all the necessary equipment and building materials. Therefore, you can prepare for the main work - remove all debris and completely level the place of future installation.
Foundation construction
Traditionally, you should first prepare the base for the future structure. It certainly needs to be strong enough to support the weight of the entire oven. The sequence of actions is as follows.
Step 1. First, using a nylon rope, mark the place for the future foundation. It is characteristic that the base should be about 10 centimeters wider than the main masonry.
Step 2. Dig a small pit 0.5 meters deep.
Step 3. Prepare the solution. To do this, mix the "three hundredth" cement with sand in a ratio of 1 to 3, mix and fill with the required amount of water. Bring the resulting mixture to a liquid state.
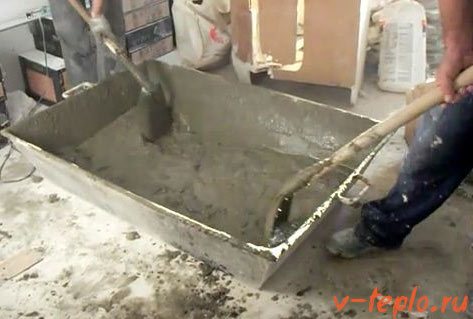
Step 4. Cover the bottom of the pit with a crushed stone "pillow", tamp it down, and then pour the liquid solution.
Masonry procedure
After the solution dries, cover the base with roofing material - it will serve as a waterproofing layer. Then you can lay bricks.
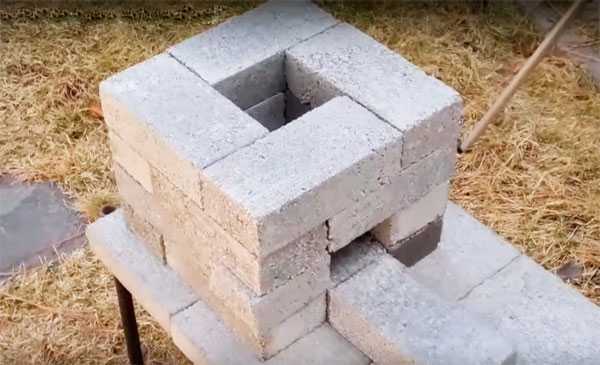
Step 1. First, use only a whole brick, then 3/4 and 1/2 of the product. Thanks to this, the order will be reliably connected. After the first row is completed, proceed to laying the second. At the end of each row, check the structure with a mounting level to ensure that it is parallel to the ground.
Step 2. Having finished the first row, install the blower door, having previously wrapped it around the contour with an asbestos cord for additional sealing.
Step 3. To secure the door, put in order a steel wire? 3 millimeters - it will help secure the door.
Note! Some people recommend installing steel plates and attaching the doors to them - in fact, this is fundamentally wrong! To fix such plates, you will need special welding, which only an experienced specialist can work with (after all, cast iron is quite difficult to weld to metal). And the quality of the seam in this case is not guaranteed in any way.
For this reason, we recommend using only wire.
Step 4. Using the "grinder", make a small groove in the brick for the wire.
Step 5.The gap that should form between the brick and the door should be approximately 1 centimeter.
Step 6. After blocking the blower, install the grate. To this end, make cuts in the brick so that the lattice is located no higher than the brick row strictly along the gap. Under the influence of high temperatures, the metal heats up, but in no case should it touch the masonry.
Step 7. Continue laying until the installation of the second door is required. If the brick does not fit, then carefully cut it with the same grinder. Also remember about a centimeter gap between masonry and metal elements!
Step 8. Cover the upper part with a stone slab (although you can use metal as well) so that food can be heated on the stove.

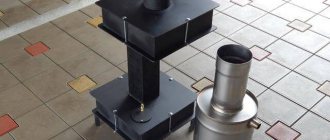
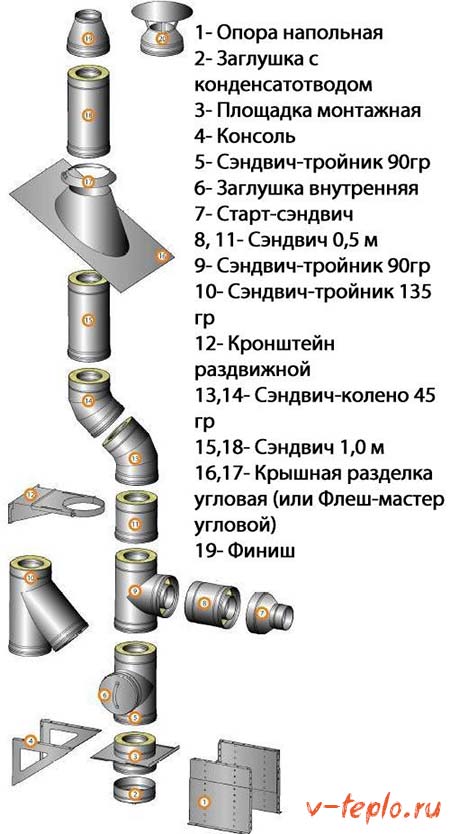
Chimney for an outdoor stove
When the street oven is installed with your own hands, start working with the chimney. The best option (especially in our design) may be to use only a modular chimney - it is durable enough to serve you for a long time. Moreover, it is very easy to install, and heat-resistant sealant or clamps can be used to isolate the joints.
Also note that there are a number of rules that must be followed during installation.
- The installation procedure should be started from the stove.
- If you are interested in the possibility of observing the fire, then you can purchase a door made of heat-resistant glass and put it on. But remember that the connections in this case should also be sealed with asbestos cord.
- The joints between the modules should be as tight as possible. When connecting, components of a smaller diameter must be inserted into adjacent ones by at least 50 centimeters.
- To make the joints as tight as possible, it is advisable to seal them with a heat-resistant sealant.
- All connections must have sufficient free access (this is necessary for cleaning).
- Brackets should be installed at least every two meters.
- No gaps in ceilings or walls should remain.
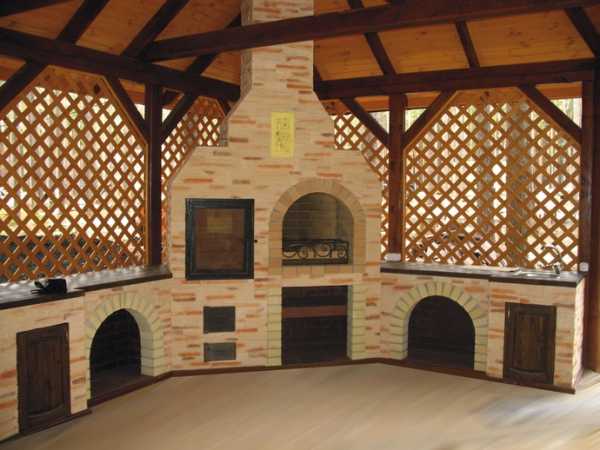
After all this, it remains only to put up a gazebo, as well as equip the surrounding area. A do-it-yourself outdoor stove can be finished with both tiles and decorative plaster. For a more detailed acquaintance with the construction procedure, we recommend watching a thematic video.
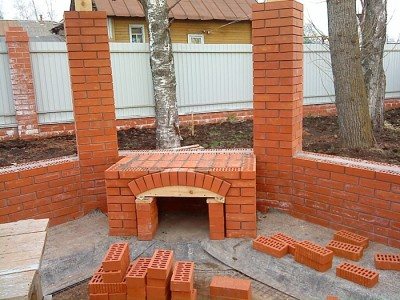
Do-it-yourself outdoor brick oven - construction features
Recently, a do-it-yourself street stove for a dacha made of bricks has been very popular. Thanks to such a structure, its owner can solve not only a number of economic issues, but also make the rest in the country more comfortable and cozy. It is hard to imagine cooking or preserving home grown fruits and vegetables in the fresh air without such an oven.
Design features
The way to make an outdoor hearth depends on the taste of the homeowner, the size of the site, and the dishes to be cooked. In summer cottages, the following types of furnaces are built:
• cooking;
• Russians;
• barbecues;
• tandoors.
A small plot does not imply the construction of a massive hearth. When choosing a design option, they usually proceed from considerations:
• functionality;
• practicality;
• durability;
• security;
• the possibility of making your own hands;
• low cost.
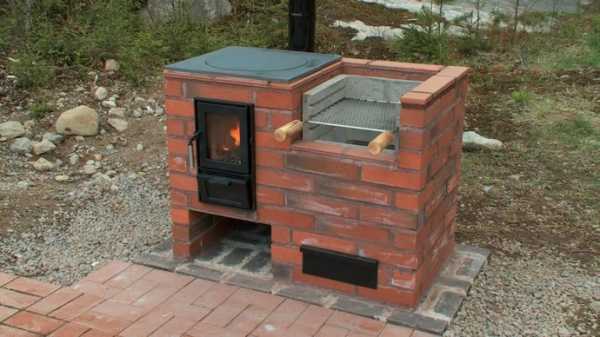
The cooking structure is the most common outdoor stove. It is made of ordinary baked red brick on a light foundation. If there is a refractory or other used material, then you can make a furnace out of it, having previously cleaned it from soot and mortar residues. Its structure has a rectangular shape, on the short side of which the ashpit and firebox doors are installed. The dimensions of the stove depend on the size of the cast iron hob with burners, which covers the upper part of the firebox. The bricks are laid on the bed, forming spoon rows.
A chimney is made of them at the far end, but asbestos-cement or metal pipes with a diameter of 150 mm and more are more often used. They are mounted on the smoke collector, and a deflector is installed on top, which protects against rain and increases draft. Cooking ovens are designed for cooking and home canning. Thus, they replace gas and electrical appliances. A canopy is installed above them to protect from atmospheric precipitation. It is possible to make a brick oven with your own hands, even if a person has never faced such work.
Russian stove
Such an outdoor brick oven is a variant of structures that were once erected in huts and were not only a hearth for cooking, but also heated the room. Now a similar hearth on the street serves only for thermal processing of products. For this, there is no need to erect a bulky structure with a high heat capacity, which means that the costs of its manufacture will be significantly reduced.
To install the stove, choose a flat leeward area, free from trees and away from outbuildings. If there is a recreation area in the yard, then the installation of the hearth can be carried out in the immediate vicinity of it. Having chosen a place, a work plan is drawn up with a drawing of the furnace and orders.
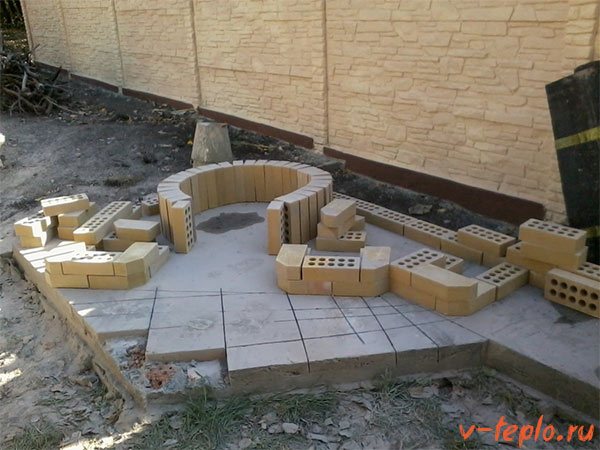
Construction work begins with the manufacture of the foundation. For this, a hole is dug 0.5-0.6 m deep and 15-20 cm larger than the base of the hearth. A layer of sand 5-10 cm is poured onto the bottom and carefully rammed. Reinforcement rods with a diameter of 12-14 mm are laid on top, if possible, a welded mesh is made or the frame is tied with wire. It is raised above the sand level by 5-10 cm and installed on supports (stones). After that, the pit is filled with concrete made from cement, sand and gravel in a volume ratio of 1: 3: 5. The foundation should rise 10-15 cm above the soil level. The site is leveled and covered with plastic wrap to reduce moisture evaporation. Concrete gains full strength in 4 weeks. Laying can be started after the lateral protruding parts of the foundation acquire a gray shade.
The finished foundation is covered with roofing material in 2 layers, they act as waterproofing. Brickwork begins by making a solid row. A cement mortar is used for the bond. The second row is laid with a bandage of 1/2 brick. In the middle of the building, a furnace (firebox) is being set up for storing and drying firewood. Its dimensions depend on the size of the furnace and the fuel supply. The top is overlapped with a backing with a bandage, which forms a small six and is made of facing material. After two rows, the laying is carried out with refractory (fireclay) bricks. The platform laid out in this way will be the hearth of the furnace.
Making a firebox
This element of the hearth is usually in the form of an arch. To lay out a vault of this shape, a template is used. It is manufactured using durable, flexible material. From chipboard or OSB, 3-4 semicircular shapes are cut to fit the size of the firebox of the hearth. The template material is attached to these elements with screws or nails. The finished structure must fully comply with the shape and dimensions of the crucible. The resulting structure is installed along the centerline of the shaft and hearth.
The laying is carried out with fireclay bricks on clay mortar. Work begins on both sides of the template. In this case, the spoons should be tightly pressed against the material of construction. The seams in such masonry resemble wedges. In the first two rows of the arch, the upper bricks are not installed, and a chimney is erected on the resulting hole. Brick wedges will close each subsequent row. After the structure has dried for 2-3 days, the template is carefully removed.
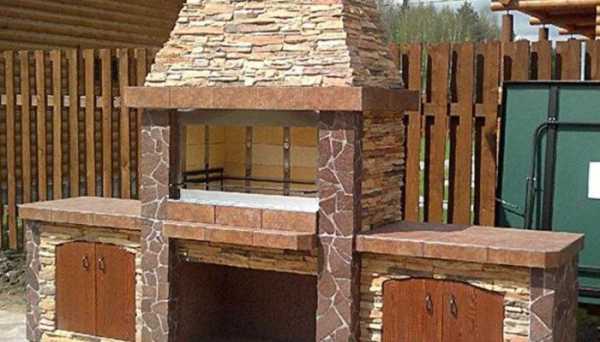
The simple street design of the hearth does not provide for the overlap of the furnace vault. The rear end part of the firebox is covered with refractory bricks.The construction of the hearth ends with the construction of a chimney. In order to prevent the stove from getting wet in the rain, a canopy is arranged over it. The hearth is usually covered with natural materials. It is better not to plaster street structures, since after a while the material will begin to fall off, and the work will have to be started again.
To improve combustion and warm up the furnace, a smoke threshold is mounted on the vault. The gases go out into the straight-through pipe through the hailo, which is a conventional smoke collector mounted above the pole. A cap must be installed above the pipe, which will prevent water from entering the internal cavities and will serve as a spark arrestor. The design of such a hearth allows not only to cook food, but also to dry fruits, mushrooms and berries outside. In some embodiments, a cooking oven and other structures are attached to the main structure. In this way, you can get a whole kitchen complex.
Other types of ovens
A barbecue stove or barbecue is now firmly part of the suburban buildings. Such a structure can be made both separately and in a complex of structures. To understand whether it is necessary to separately build such a hearth, it is necessary to understand its structure. Structurally, a brazier or barbecue is made in the same way as a Russian stove, but with one difference. It consists in the fact that the chimney is equipped in the vault of the furnace, and special devices are used for cooking dishes, which can be made independently. That is, if the summer cottage is already equipped with a recreation area with a Russian stove, then there is no need for an additional hearth. Having made barbecue devices, you can successfully cook such dishes in a Russian stove.
Having built a tandoor, the owner gets the opportunity to cook oriental cuisine. In such a structure, wonderful cakes are obtained. The hearth differs from the classic version by the presence of a chimney and a damper that closes the firebox.
Equipping his plot with a recreation area with a Russian stove, the owner gets a universal hearth, where he can cook almost any dish, using different cooking methods.