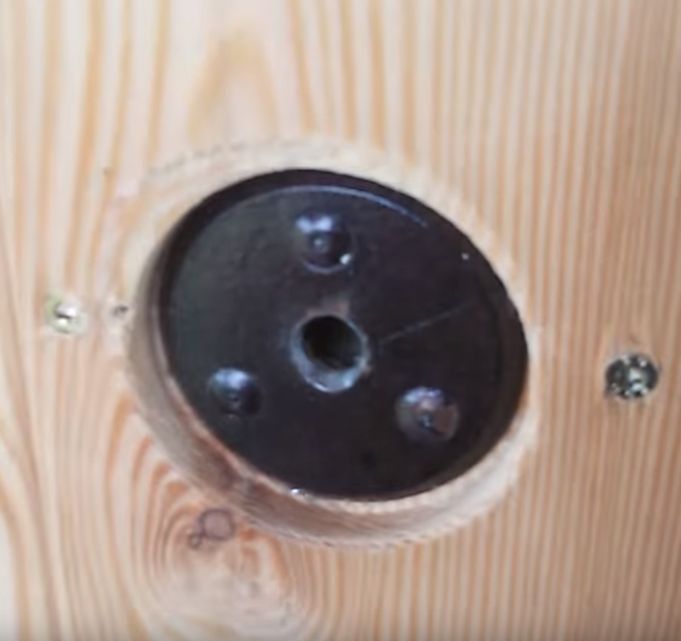
About insulation
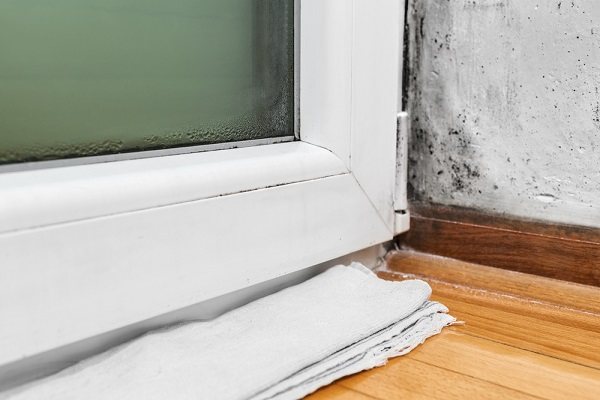
The microclimate of the room depends on the windows. Because of the non-insulated windows, the glasses fog up, cracks and fungus appear on the slopes, there is always a draft and street noise. To effectively insulate windows, it is necessary to determine the reasons for the low thermal insulation.
Most often they are as follows:
Wooden windows
First of all, insulation is required for old window structures for the following reasons:
- before the glass was fixed in the frame with a special putty. Over time, it dries up and crumbles;
- the frames dry out, so cracks and gaps appear between the glazing bead and the glass;
- the sashes are deformed and do not hold tightly to the frame.
Plastic windows
It is mistakenly believed that such windows are quite airtight, therefore, they do not need insulation. Unfortunately, after a few years, the seal collapses, and one cannot do without insulation.
There are other reasons why it is necessary to deal with plastic windows:
- violation of window installation technology;
- distortion of the window structure due to the shrinkage of the house;
- factory defects of the window structure;
- mechanical damage to structural elements.

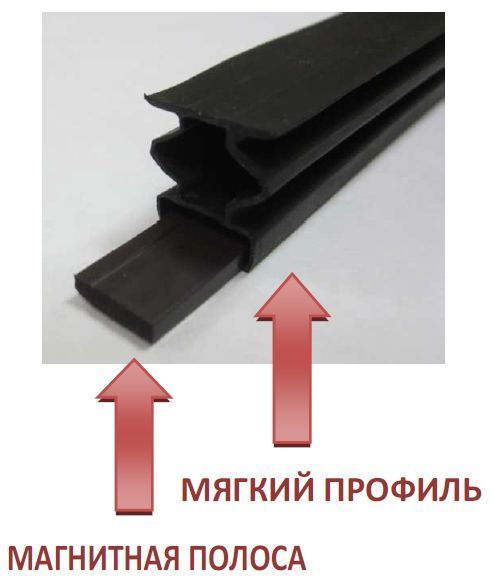
Swedish window insulation technique
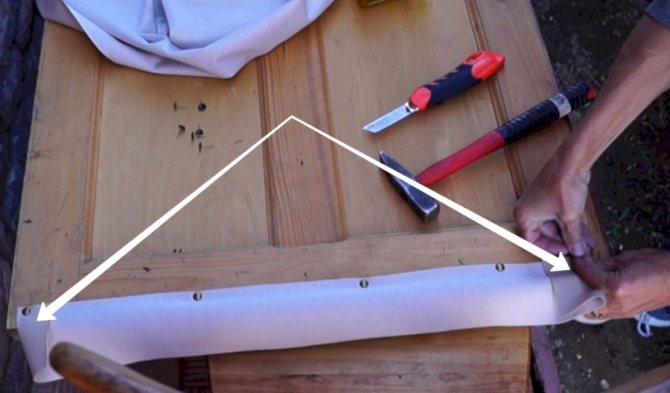
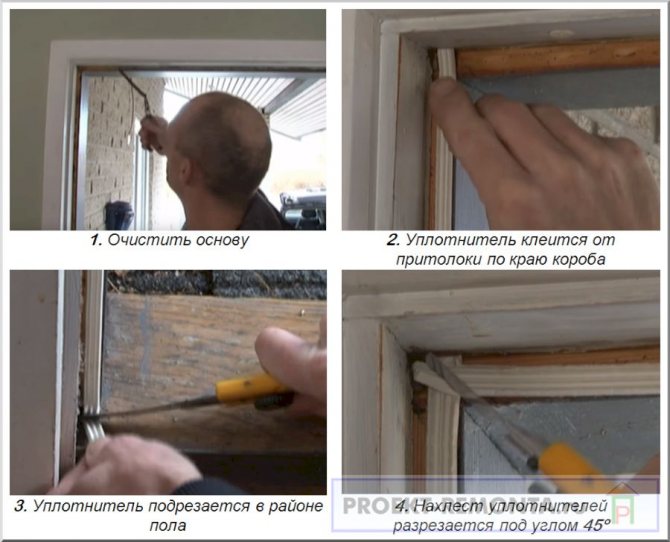
Another way to insulate a window structure, which is laborious, but more reliable than the two previous ones, is a groove (Swedish technology).

The groove method of window insulation is the most reliable
The sashes must be removed from the frame, along their perimeter a bevel is selected with a mill at an angle of 45 degrees in the direction of the strip.
The chamfer is selected with a milling cutter at an angle of 45 degrees
In place of the loops, an untouched gap is made three centimeters larger than the size of the loop.
The groove should be well cleaned from the remnants of shavings and sawdust.
Insulation with a seam is installed in a chamfer and pressed in. To do this, you need to buy a special video that will greatly facilitate this process. Do not stretch the insulation tube by driving the roller in one direction, it must be moved back and forth.
During tape installation, the roller must not be moved in one direction.
The leaves are installed on a frame structure and the quality of the seal is checked by closing the window.
After installing the seal, you do not have to worry about the cold weather in winter, in addition, the seal will perform soundproofing functions.
Replacing the seal on wooden windows is simple: the tape is removed from the structure, its places of stay are cleaned and degreased, the frame is ready for the installation of a new sealing tape.
A house with wooden windows is a structure in which the most optimal, comfortable and healthy microclimate is always maintained. All thanks to the properties of wood. In living rooms with such windows it will always be free and easy to breathe, because they will not trap air, but allow it to circulate freely.
However, all wooden structures, in comparison with plastic ones, have lower heat-saving qualities. However, now this problem is easily solved if you know how to insulate a window made of wood. In this article, we will see how to insulate wooden windows with your own hands and provide an optimal microclimate in the premises. By the way, the optimal microclimate will help to create a humidifier for the air, and you can find out how to choose it in the corresponding article.
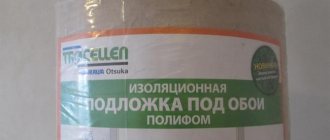
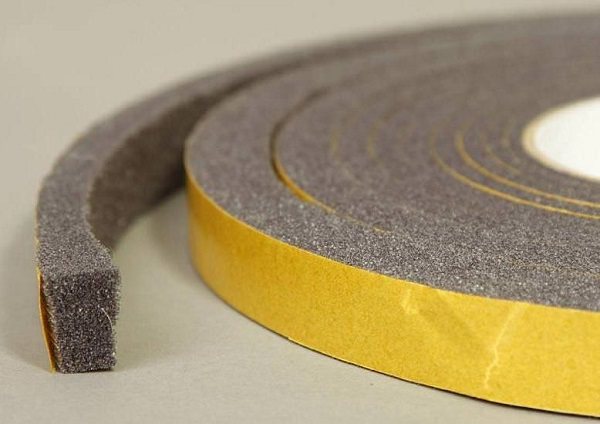
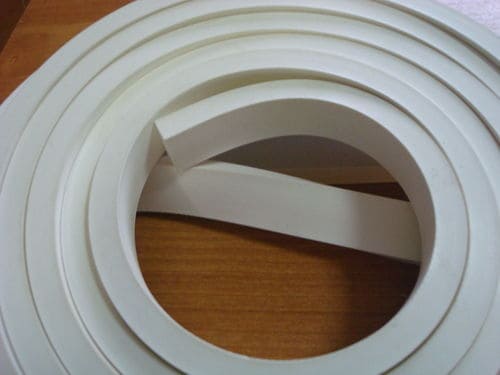
Varieties of insulation tapes
Widespread use of tapes for insulating windows is explained by a number of reasons:
- no annual replacement required;
- insulation is carried out in a short time on its own;
- there is no dirt when pasting, since no water is used;
- no adhesive traces remain on the frame;
- there is no diffusion of the adhesive layer with the paint of the frame.
But this method of insulation also has disadvantages:
- after gluing, you must not open the window sashes;
- poor-quality or poorly adhered tape lags behind the frame in small sections.
In hardware stores, they offer two types of tapes that differ in the way they are installed.
Pasting
Belts of this type have a wide grip. The adhesive is applied during manufacture (self-adhesive type) or during installation work.
To create a self-adhesive tape, polyvinyl chloride, rubber and polyethylene foam (foam rubber) are used.
Due to the ductility of these materials, the tape is easily compressed to the size of the gap. So that the insulation does not stand out against the background of the window, dyes are added: black, brown, white.
Typically, the packaging indicates the size of the gap that the tape covers. Popular options in sizes 3 - 7 mm.
Foam bands were the first to be used. Their popularity is due to a number of advantages:
- high compression ratio;
- the frame does not collapse in places of insulation;
- low cost;
- high protection efficiency.
These tapes have negative qualities:
- insufficient efficiency for large gaps;
- short service life. Effectively work during one winter season;
- in cheap models, the adhesive tape is poorly fixed;
- low resistance to water.
Important!
It is more convenient to use self-adhesive tapes on foam rubber for insulation.
They stay on the window longer and regulate the degree of sash pressure.
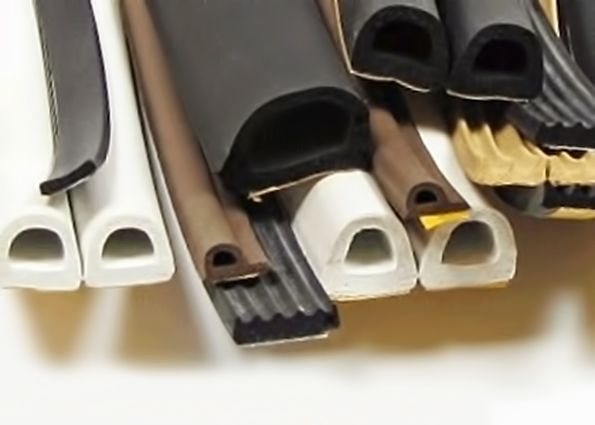
Sealing
This type of tape has a hollow tubular shape, which is why heat is retained. Rubber and polyvinyl chloride are selected as the material.
On one side of the tape there is a groove hook or a paper-backed adhesive coating.
It is believed that the groove is more resistant to mechanical stress.
The following qualities are considered advantages:
- gaps up to 0.7 cm are blocked;
- any temperature drops are maintained;
- it is possible to choose a color to match the color of the frame;
- the use of the window is not limited;
- affordable cost.
But most of the disadvantages apply to adhesive tapes:
- not suitable for all window designs;
- when the temperature drops, the adhesive layer is destroyed;
- with frequent deformations, delamination occurs in the glued places;
- The foam tape gets wet quickly and dust adheres to it. For this reason, frequent replacements are carried out.


Mount types
A distinction is made between sealing elements with self-adhesive tape, with magnetic fastening, as well as with an additional clamping mechanism. Let's consider each type in more detail.
Magnetic seals
This novelty appeared on our construction markets relatively recently, but has already become quite popular.
The magnetic seal for metal doors is a special frame that precisely follows the contours of the door opening. The product consists of a special magnetic insert and a soft sealing part. The material is thermoplastic elastomer. It has several advantages - after the product is worn out, it can be sent for recycling. In addition, thermoplastic elastomer is highly resistant to adverse factors and temperature extremes.
Magnetic seals are also resistant to UV radiation and moisture, reliably protect the room from extraneous noise and drafts, dust and dirt. With these elements, the door will slam shut quietly, and powerful magnets will attract the metal sheet to the door frame, thereby ensuring high tightness and silent closing.
For metal doors, use triple-edge gaskets. The first two are located on the canvas, and the third on the door frame.
Advantages and disadvantages
The material used is thermoplastic elastomer, which repeats the properties of vulcanized rubber. Manufacturers assure that the service life of the product can be up to 10 years, while there will be no loss of quality.
Magnets help hide various defects that may have been made when installing doors. These are the gaps between the canvas and the box, backlash. This device will help to increase the strength characteristics of the door leaf.
There are also disadvantages - if the manufacturer used very powerful magnets, then children may have difficulty opening and closing the door. If the magnets are weak, then the structure will open in much the same way as the refrigerator door. Such products are no better than ordinary sealing fittings.
Another drawback is the high price and non-repairability. In case of any problems with sealing, solving the problem with your own hands will not work. You will need the help of specialists.
Installation of magnetic seals
This process does not take long and does not require any special skills. Of course, it is better if professionals do it. Installation of such systems is carried out on canvases where there are no decorative elements.
Although this seal for metal doors has a lot of advantages, it is not suitable for everyone. The main thing is to choose the right strength of a permanent magnet so that children do not have any difficulties.
Features of the selection and installation of self-adhesive seals
When choosing such an element of accessories, it is imperative to clarify whether the adhesive layer is suitable at the time of purchase. Also, it is not recommended to use a foam rubber seal on a metal door - these elements have a low price, however, serious loads are placed on the front door. Foam rubber will quickly deteriorate.
When choosing, it is very important to study all the information about the manufacturer and materials. The expiration date and other specifications are also important. To check the tightness, it is enough to press on the product - if it quickly regained its shape - then you can buy it.
If the attachment to the adhesive layer seems unreliable, you can additionally glue the product with silicone glue. Also, when choosing, color is important - there are several different shades.
Installation involves gluing a seal around the perimeter of the door. Anyone can handle this - the process is very simple.
Selection Tips
As a rule, the tape is selected according to three criteria.
By material
- Foam rubber - has been used for insulation for a long time. Currently, it is included in the tape.

- low cost;
- high elasticity that allows you to close gaps of different sizes.
There are also disadvantages:
- due to the porous structure, moisture is quickly absorbed. The drying process takes a very long time;
- low durability. With prolonged use, the material turns yellow and crumbles.
- Polyvinyl chloride (PVC) - material with high strength and adhesion. He is not afraid of humidity and temperature fluctuations. The tapes are fixed on any surface and stretch well.

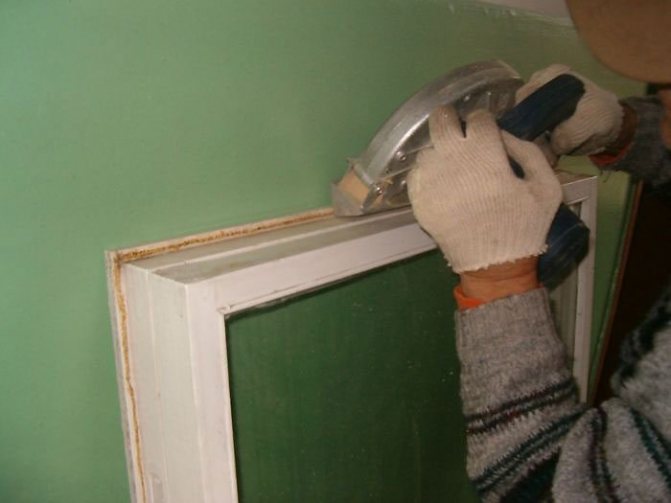
How to glue windows for the winter: we use various methods
With the onset of cold weather, the question arises about the insulation of your home. It is the insulation that makes it possible to save heat and save on heating. First of all, the question of window insulation arises, since large heat losses occur through them.
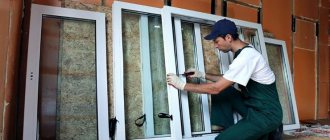
The best way to insulate is, of course, the installation of new plastic windows equipped with double-glazed windows. But this is an expensive option and not everyone can afford it. There remains the option of insulating old wooden frames.
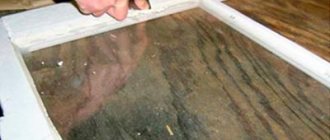
Everyone knows that over time, wood, under the influence of moisture and temperature changes, warps and crumbles, which entails the formation of cracks and gaps, through which heat is emitted in the future. Together with the frame, the glass moves, which also contributes to the depressurization of the room.
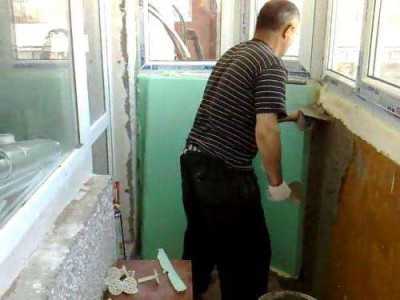
Tidying up wooden frames
To make the house comfortable and cozy in winter, it is necessary to inspect the slopes and windows in general annually. Naturally, this must be done before the onset of winter, before the heating season.
Before you start insulating windows, you should bring them to their proper form. The service life of window frames is 10 years, but usually the frames are used as much as the whole house, and this is sometimes more than a dozen years.
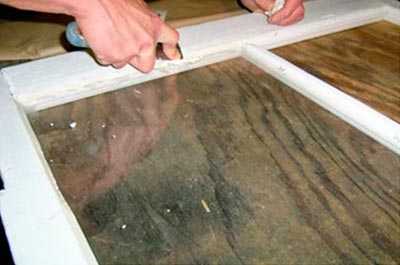
Therefore, before insulation, it is necessary to carry out a small repair of the frames themselves. To do this, inspect the frames and glass attachment points. If cracks or glass are found that do not fit tightly to the frame, these places should be smeared with a special putty. Excess putty is removed with a dry cloth.
To keep the glasses stronger in the frames, you can hit the nails that hold the glazing beads with a hammer, if necessary, you can add more nails.
If there is a desire to overhaul the frames, then it is better to remove the glass, coat all joints with putty and insert the glass back.
If no putty is available, you can use oil paint. The whole process of repairing a frame using paint as a putty consists of the following steps:
- the glazing bead is carefully removed;
- the glasses are taken out;
- the folds are cleaned of old putty;
- a layer of paint is evenly applied to the folds;
- without waiting for the paint to dry, glass is inserted and a glazing bead is nailed;
- glazing beads are tinted.
You can use the old glazing bead for fixing the glass, but it is better to replace it with a new one. If there is no paint or putty, you can use plasticine, but it is not resistant to high temperatures and at temperatures above 25 degrees can leak and stain the glass.
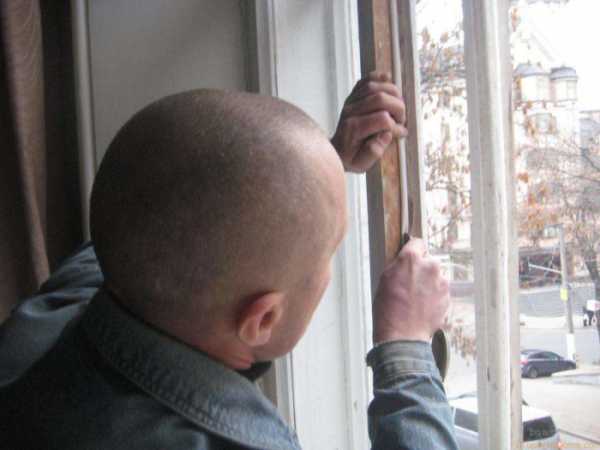
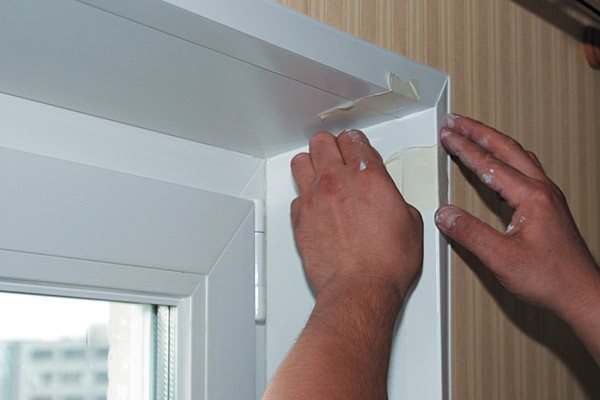
After the frames have been repaired, you can start to insulate them. Now the question arises: how to glue the windows over the winter?
Before gluing the windows, the surface of the frames should be degreased, this will increase the adhesive properties of the adhesive tape.
To do this, you can use a special liquid for degreasing surfaces, or you can take any alcohol-containing liquid, for example, vodka.
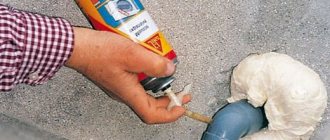
About half a glass of vodka will go to one window. Then the cracks must be filled with insulation.
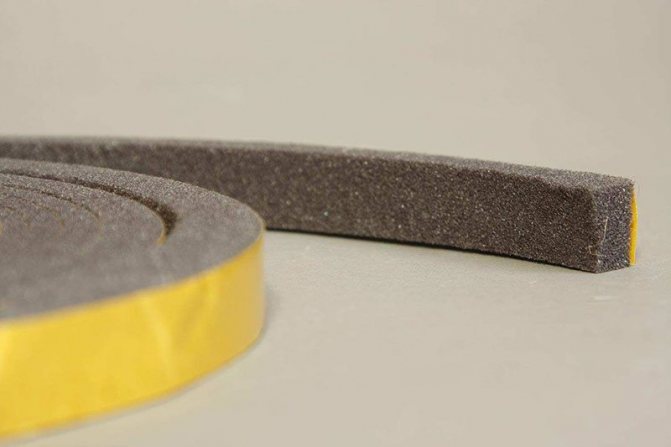
We use tubular profiles for insulation
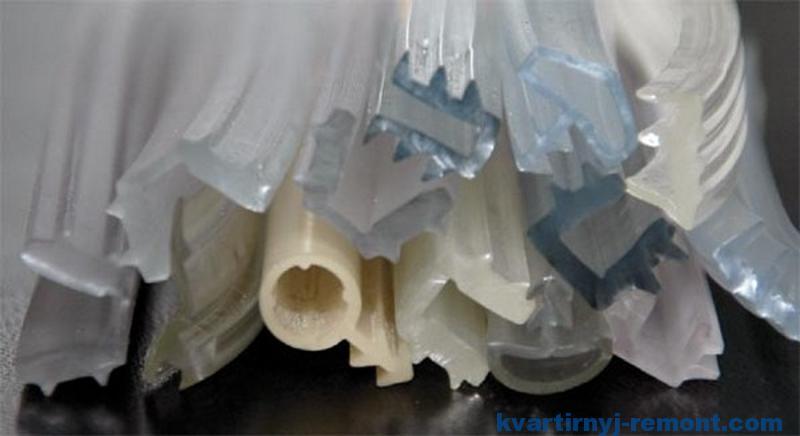
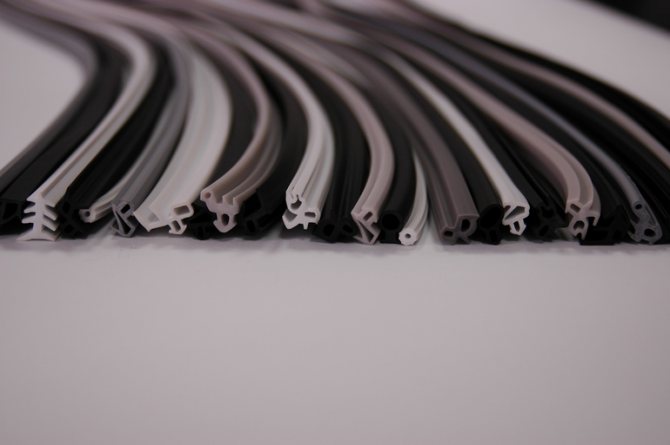
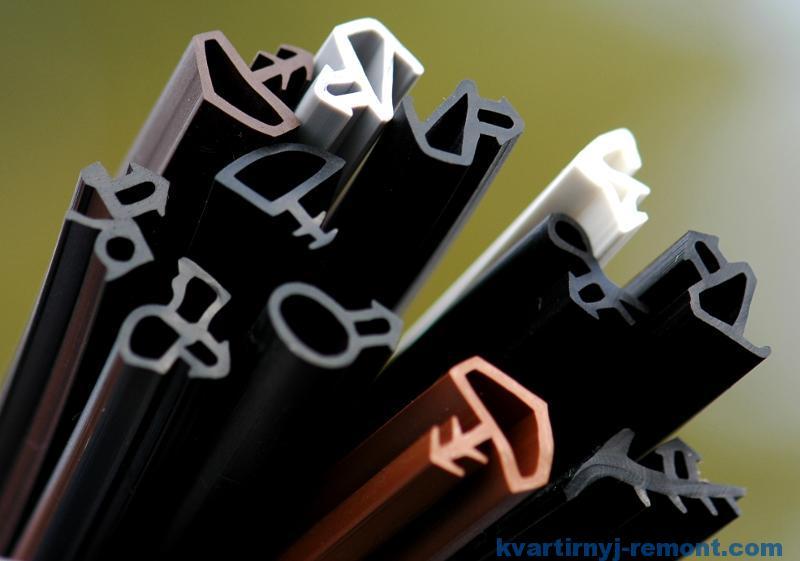
There is a very wide variety of insulation materials. More modern are special tubular profiles, often called gaskets. They come in a variety of sizes and shapes.
P, D spacers are for large crevices, and E shaped spacers are for small crevices. Tubular profiles have the following advantages:
- invisible;
- firmly attached to one side of the frame: the window can be freely opened and closed, while the tightness is not disturbed;
- service life is about 5 years.
When working with heaters, do not tighten it, since some of them must be glued at a temperature of at least +10. The gluing procedure requires accuracy and patience, so it takes a lot of time.
You can glue the windows with various materials for gaskets: rubber, foam rubber, polyethylene foam, polyurethane, polyvinyl chloride (PVC). In addition, heaters are divided into two types: self-adhesive and those that must be glued with glue. Self-adhesive is more convenient to glue: the protective film is removed and the insulation can be glued.
When buying a self-adhesive insulation, you should pay attention to the expiration date of the glue, which is indicated on the package. If it has expired, then the gasket may either not stick, or quickly fall off after gluing. It is safer to glue the insulation with your own hands. All you have to do is choose the right glue.
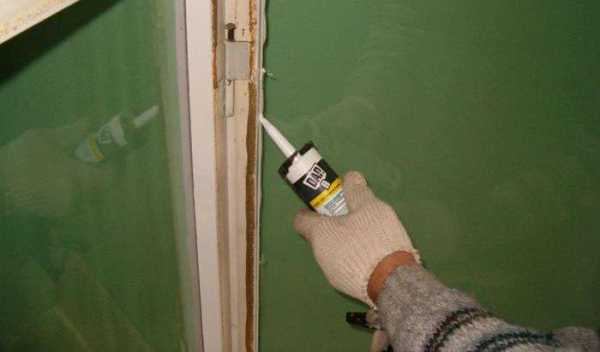
The most suitable glue is silicone sealant: it is not afraid of moisture, it stretches and shrinks well in any state. Therefore, it will hold the gasket with repeated slamming.
Silicone sealant can be used as insulation by filling the gaps evenly with a pistol.
After the silicone has hardened, the excess is cut off with a sharp knife. This work must be done carefully so as not to damage the paint on the window. Similarly, you can use polyurethane foam. However, when using it, you need some experience, since it forms a layer that is too thick, which is not suitable for narrow window gaps.
Some qualities of PVC insulation are better than rubber ones: they are frost-resistant, less brittle, do not deform and do not crumble. But rubber wears out less. When choosing rubber heaters, you should choose softer types, since they can withstand deformation a large number of times.
The material of the seal must be indicated on the packaging. All these heaters can be purchased at the construction market or in a hardware store.
Grandfather's methods of insulating window frames
Consider the options for insulating windows using the old proven methods:
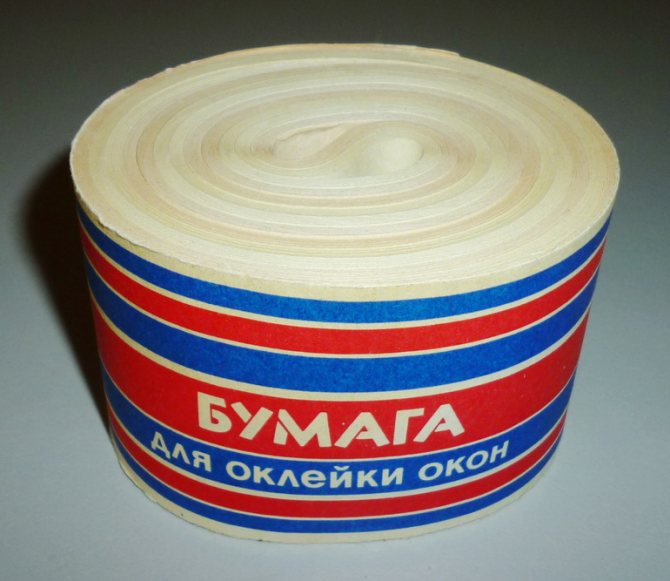
- Warming with newspapers. The windows can be covered with newspapers. If it is not planned to open the frames for ventilation in the winter, then the strips of wet newspaper are folded into bundles and inserted into the slots. In addition to newspapers, cotton wool, tow and rags can be pushed into the cracks.
On top you need to glue strips of white paper. The disadvantage of this method is that in the spring you will have to knock it all out of the windows. During the winter, this all adheres tightly to the windows, so in the spring it will be necessary to paint them again.
- Warming with a white cloth. You can insulate the windows with strips of white fabric, making them from an old sheet. To do this, it is necessary to prepare in advance not very wide strips of fabric about 4-5 cm each. The prepared strips of fabric should be moistened with water and squeezed out. Then the resulting wet rags are rubbed abundantly with laundry soap (you can take any soap that you do not mind) and glued to the cracks of the window frame.
The advantages of this method are as follows: soap is an excellent insulator that practically does not allow air to pass through; the white fabric is almost invisible on the white window frame; the fabric does not turn yellow, unlike paper; in spring, fabric strips can be easily removed from the window frame.
There is one drawback to the method - due to the temperature difference, the fabric may come off and you will have to glue it again.
- Warming with foam rubber. Sealing cracks with foam rubber has always been an equally popular method. Foam insulation consists of the following steps:
- strips or pieces of foam rubber are taken and hammered into the cracks;
strips of white fabric are prepared from an old sheet 4-5 cm wide, if desired, you can buy a new fabric;
- further, as in the previous method, the strips of fabric must be moistened with water, squeezed out, rubbed with plenty of soap, and then they must be sealed with them.
- Warming with paraffin. For this method, you need to prepare paraffin candles. Before use, paraffin candles are pre-melted in a water bath at a temperature of 65-70 degrees. Then, when the paraffin is melted, it is filled into a syringe. Further, the paraffin from the syringe is evenly squeezed out into the window slots, filling the free space. When the paraffin hardens, it perfectly acts as a barrier from the cold.
- Insulation with adhesive tapes. Some homeowners use medical tape to seal their windows, making a big mistake. The adhesive mass that is on the plaster eats into the paint very strongly, which is fraught with not very pleasant consequences. In spring, the plaster can only be removed with a wet rag and knife, while also peeling off paint and pieces of plaster.
Instead of a medical patch, you can use regular paper tape. In spring it can be easily removed without tearing off pieces of paint. You should not use masking tape, as its sticky mass dries quickly and after 2 - 3 weeks it begins to fall off.
You can also use paper instead of strips of fabric, but it looks less aesthetically pleasing and turns yellow over time.
Warming is done with the help of self-adhesive foam tape, which is inserted between the frames. To stick the foam rubber to the frame, it is enough to remove the protective film. In this case, it is necessary to make a small release, then the gaps between the window frame and the frame are better closed. True, it is difficult to predict the size of the foam rubber release. If it is not enough, then it will not protect from the cold, but if there is a lot of it, then the frame may not close.
Elimination of drafts
Drafts are one of the enemies of heat. Therefore, when insulating windows, you should also take care of the elimination of drafts. To do this, not only the windows should be insulated, but the balcony and entrance doors should be insulated.
The front door can be insulated with felt by nailing it along the contour with nails or glued along the contour with self-adhesive felt, which can be purchased at the store. In addition, in panel houses, you should pay attention to cracks and open joints, which must also be thermally insulated.
From all of the above, it follows that there are many ways to insulate windows and keep warm in the house. Further actions depend on the financial capabilities and personal needs of the owners.
The best, but also the most expensive, way is to install plastic systems. But it is quite possible to use old-fashioned methods to preserve heat in the house, while economically gaining significant benefits.
Watch a video selection on the topic:
strojkarkas.com
Features of preparing a window for insulation
The preparation of a window for insulation with tape is almost the same as preparation for other insulation. However, there are some peculiarities.
The main steps are as follows:
- Everything is removed from the windowsill. The blinds are removed from the window.
- Frames are washed with soapy water and then dried. The tape needs a dry and grease-free surface.
- The glasses are carefully examined. Glass windows have cracks in wooden windows. They must be replaced as they are a source of heat loss.
- Grooves are prepared for the sealing strip. They should be free of old tape, dirt and paint.
- Before the start of work, they are determined with the places from where the cold air comes from the street. They are insulated first. Weak points are sashes, slopes, windowsill.
How to avoid drafts in the future
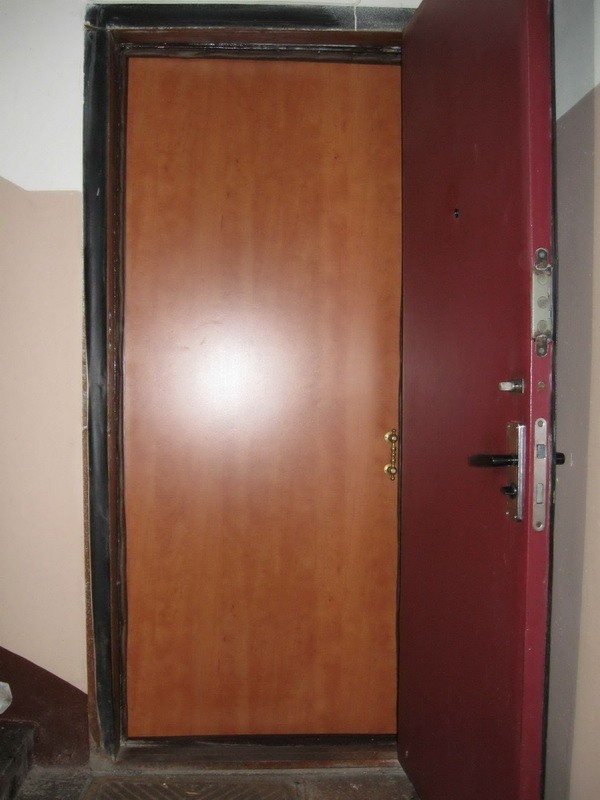
It is necessary to understand that the most effective and simple way to avoid problems with the tightness of the entrance structure is to choose and install the door correctly. Often, an attempt to save money at the stage of purchasing a product or its subsequent installation leads to much more serious expenses in the not too distant future. That is why you should be extremely careful when choosing a metal door.
An additional argument in favor of purchasing a quality product is also the fact that the insufficient tightness of the installed structure leads not only to drafts, but also to sounds from the street or from the entrance to the living quarters, as well as dust, dirt and unpleasant odors. All this has an extremely negative effect on the comfort of staying in a room where such an entrance door is mounted.
Particular attention should be paid not only to the choice of the product, but also to its competent installation. Most experts recommend concluding a contract immediately for the manufacture and subsequent installation of the structure with one previously carefully selected specialized company. This approach will not lead to a significant increase in costs, however, it will ultimately allow you to get a high-quality, reliable and, importantly, a sealed front door that can last a long time and without problems.
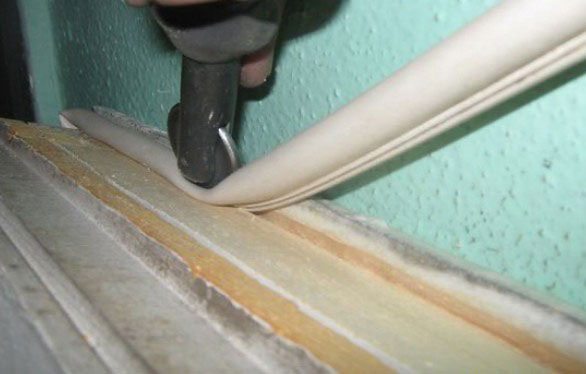
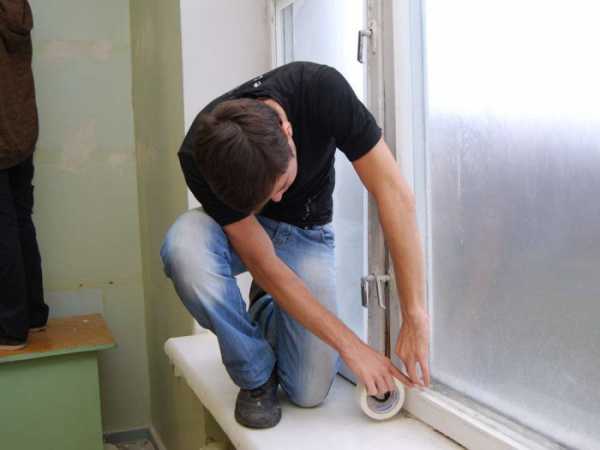
Insulation with adhesive tape
Insulation technology is not very complicated. First of all, you must follow the sequence of work.
Plastic windows
Warming is performed in the following sequence:
- the previously removed old insulation is used, firstly, for the acquisition of a similar material, and secondly, for preliminary cutting to the size of the old material.
- gluing starts from the top of the window. As you progress, the protective layer is removed in small sections, and the tape is pressed tightly.
More details in our video:
1. The adhesive tape should not have many breaks.
2. In the corners, the tape is not cut, but wrapped.
Wooden windows
For these windows, in addition to adhesive tape, thin foam rubber is often used. The work is performed in the following sequence:
- foam rubber strips are cut along the window opening;
- cut foam rubber fits between the frames;
- the tape is cut to the size of the window;
- with a sticky layer, the tape is applied to the foam rubber and smoothed with a napkin.
Such insulation will last up to three years. But it is better to do as shown in the video:
Classification: main types
Seals are produced by many manufacturers and differ in the following parameters:
- Material type. It can be rubber, silicone, polyethylene foam, plastic, foam rubber.
- Design... The material in question can be completely made of one material or supplied with a clamping metal strip.
- Fastening system... The seals are self-adhesive (adhesive is applied to one of the sides, protected with paper tape) or are attached with self-tapping screws. But the latter can only be installed on wooden doors.
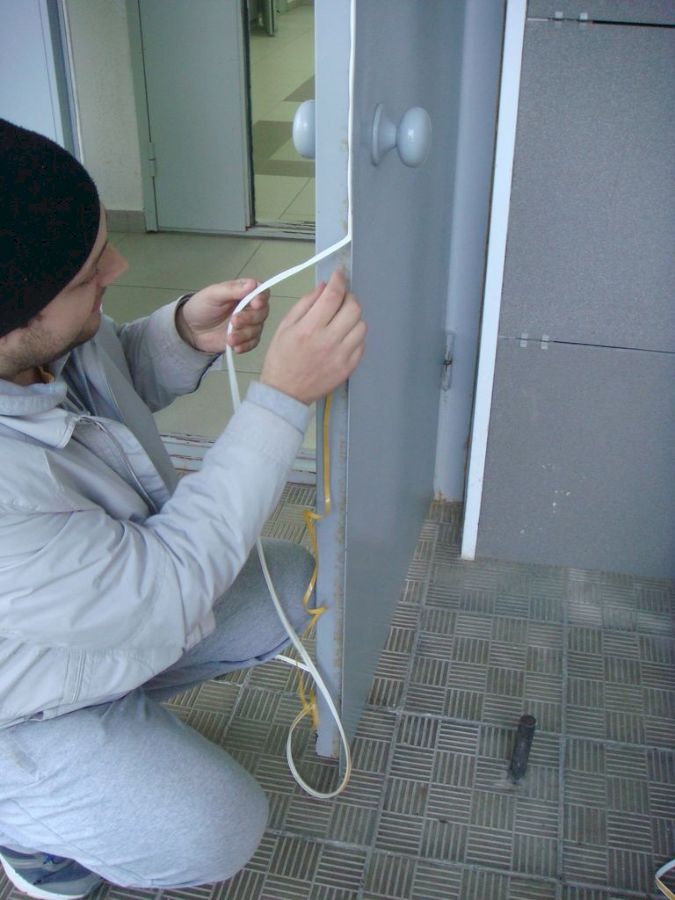
For reference. You can also make a seal yourself by wrapping a strip of foam rubber with leatherette or artificial leather. Another option for eliminating door gaps is to insulate the entire structure (see How to insulate an entrance metal door) and a venting device along the perimeter of the canvas.
As a rule, the seal is sold in the form of a roll, the length of the tape in which is about 6 meters - this is just enough for installation on a standard door. In the package you will find installation instructions and fasteners, if necessary. But for a metal door, self-adhesive seals are mainly used.
Insulation with sealing tape
Plastic windows
Usually, plastic windows lose heat for two reasons:
- breakage of fittings;
- wear of the seal.
Correct installation of the tape increases the insulating capacity of the window. The following sequence of work is recommended:
- before installation, the tape is kept at a positive temperature, since it depends on its expansion inside the groove;
- the tape is cut to fit the window. The joints are cut at right angles. For thermal expansion, a stock is created: for each meter 1 centimeter of material;
- the tape is pressed into the groove with a spatula, and the adhesive strips are removed in small sections.
Important!
1. In the corners of the frame, the tape is connected only butt.
2. To prevent impregnation from coming out, the tape does not shrink more than the allowable value.
After mounting the sealing tape, the locking mechanism is adjusted: the clamp is changed by pins, which are located at the end of the sash.
Adjustment is made with a hex wrench. The pressure increases when the trunnion head is installed in a horizontal position.
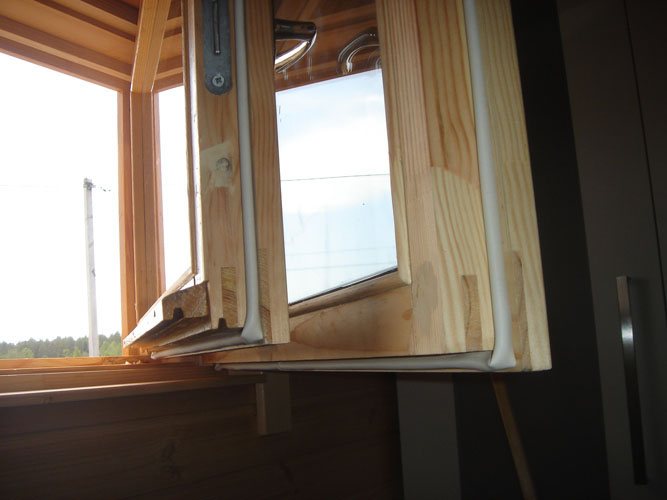
Wooden windows
The Swedish method of insulating such windows using the EuroStrip technology is in great demand. It has the following advantages:
- there is no need for annual window insulation;
- after airing, the tightness of the windows is not disturbed;
- the service life of the frames increases;
- high degree of protection against dust and street noise.
For insulation, two types of tapes are used: rubber and silicone.
By the way, branded Swedish silicone seals are easily inserted into the groove and serve up to 20 years.
Wooden door seal
For such doors today it is customary to use a variety of slats. They allow you to prevent the occurrence of drafts or get rid of them altogether. There are several types of them.
- Wedge strip.
- Plastic tube.
- Plastic or metal strips with a brush, etc.
Let's consider how to properly install them.
Installation of a wedge-shaped strip. The plank must be cut to the size of the upper part of the doorway, as well as on the sides of both sides. At the joints, the planks are cut at an angle of 45 °. In places where the hinges and door lock are located, the plank must be cut. Further, it is nailed down. All the work will not take much of your time.
Installation of the outer strip. The plank, as in the first case, is cut strictly to the size of the doorway. But only now the bar is screwed on with screws. After its installation, a sheet of paper should fit between the door in the closed state and the strip.
What is: description
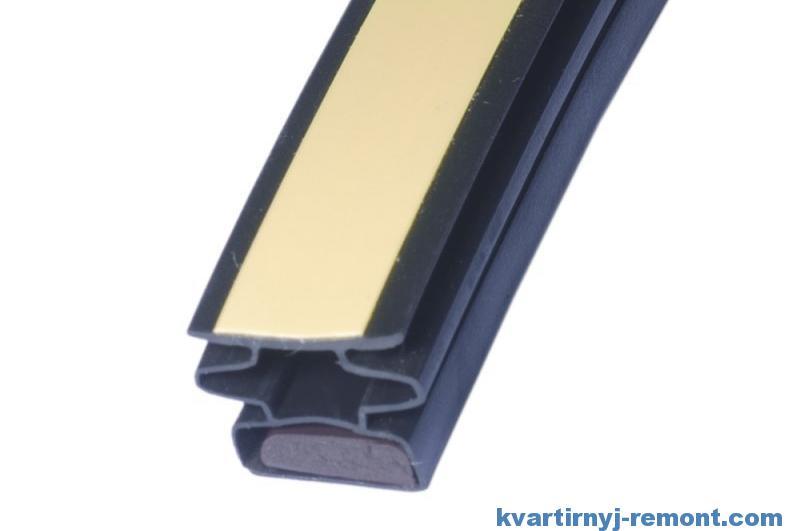
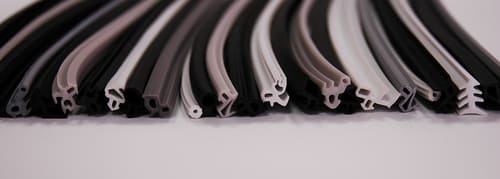
The main materials from which the insulation is made are rubber, PVC, foam rubber and polyethylene foam. On one side of the insulating tape, an adhesive composition is applied, protected with special paper. When the insulation is applied, the paper is removed.
Insulation materials are delivered in the form of cut strips, combined into bobbins, or in the form of formatted rolls.
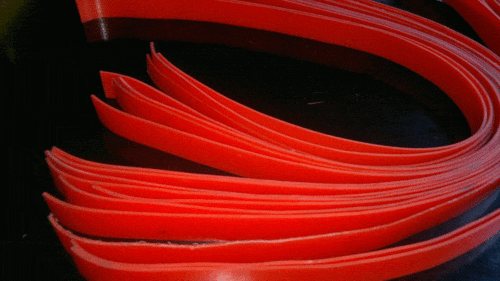
Rubber
They differ in the lowest price among analogs. They effectively retain heat and are attached with glue or a stapler. Among the disadvantages is poor resistance to moisture: when water gets on the rubber, the material quickly peels off.
If you buy a rubber insulation, then it is the softest. Rigid models do not adhere well to the window and allow heat to pass through.
PVC
Reliable and environmentally friendly insulation, which is characterized by good frost resistance and resistance to deformation.
When choosing, it is important to pay attention to the rigidity of the product: excessively hard models will not adhere well to the surface. The service life is 2-3 years.
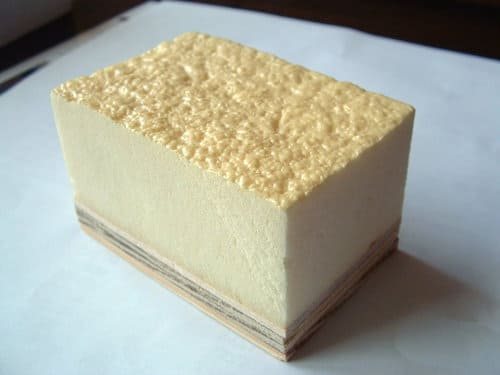
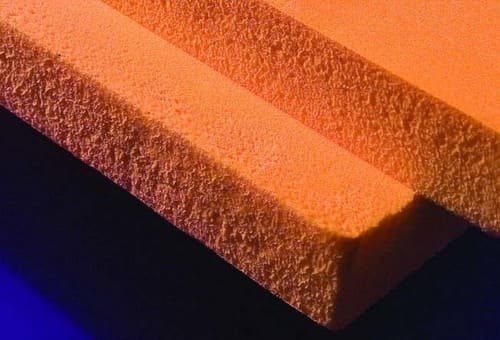
Foam
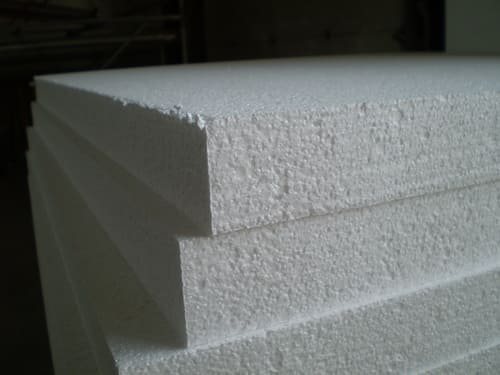
Safe in operation and reliable insulation. In addition to thermal insulation, they provide good protection against extraneous sounds. Foam insulation is supplied in the form of strips. Of the advantages of such seals, one can single out the low cost and the provision of air flow for the room.
However, in terms of thermal insulation, foam rubber is significantly inferior to PVC and polyethylene foam, plus it quickly peels off the surface.
Digit: the shelf life of foam rubber is 1-2 years.
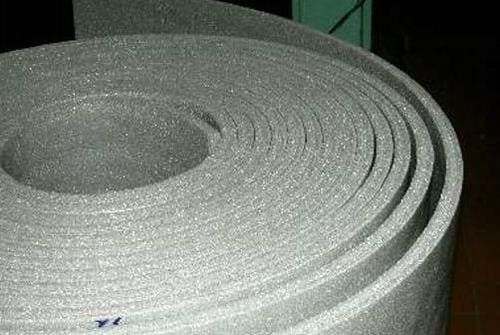
Foam polyethylene
They are bundles made of foamed polyethylene. They perfectly retain heat, provide sound insulation and even protect against moisture release on the balcony. The most expensive heaters among those presented. The service life is 3-5 years.
Benefits and characteristics
Advantages and technical characteristics of self-adhesive insulation include:
- Frost resistance... Depending on the material from which the insulation is made, its thermal conductivity coefficient varies. However, it is at a high level for all: after application, the tape will maximally limit the contact of the room with the environment and prevent drafts and cold bridges.
- Versatility... The insulation is suitable for gaps up to 7 mm wide.
- Reliability... The material is not afraid of temperature extremes, moisture, chemical influences.
- High quality sound insulation... Most of the types of insulation are able not only to protect the room from frost, but also from extraneous sounds.
- Environmental friendliness... The materials do not come into contact with the environment or react with chemicals. Insulation materials are absolutely safe for human health.
- Convenience... After application, the insulation will not interfere with the closing and opening of windows. And the installation process itself does not require the help of specialists: the owner of the house will be able to insulate the window on his own.
- Low cost... In comparison with other methods, self-adhesive insulation has an optimal combination of price and quality.
- Variety of colors... Among them - white, black, dark brown, which allows you to choose the material to match the windows, providing a harmonious appearance of the finished structure.
- Fire safety... The materials from which the heaters are made are classified as low-flammable and hardly flammable.
Varieties of seal for metal doors
Seals for metal doors may differ depending on the type of material used in the manufacture. Wherein the most popular are products
created from the following materials:
Despite the material used in the manufacture of all seals are produced in strips that differ both in shape and color. In this case, the shape of the sealing material will depend on the thickness and characteristics of the slots. In turn, the color of the product is selected in accordance with the color of the metal door structure. Today, the most popular products are rubber seals, which have a high degree of wear resistance and durability
- parameters that increase the service life of the material.
Subtleties of choice: manufacturers and prices
When choosing a self-adhesive tape, you should pay attention to the profile and material from which the insulation is made. For slots 1-3 mm wide, profile C or E is suitable, for 3-5 mm - P and V, for 3-7 mm - B and O.
Important: the shelf life plays an important role in insulation, as the glue dries out over time.
The modern assortment of heaters includes many manufacturers:
- rubber heaters, which can be found in any store - from 160 rubles per 5 meters;
- Ultima - Polish foam rubber seals, price from 220 rubles for 12 m;
Penosil - two-component EPDM rubber insulation, price from 600 rubles;
- "Penofol" - foil-clad polyethylene foam, price from 108 rubles per m 2.
But how and where you can use liquid insulation in Polinor cylinders, you can find out by reading the content of this article.
It will also be interesting to know what kind of insulation to put under the linoleum and how to do it correctly.
But what is the price of insulation for a warm water floor and which one should be used, this information will help to understand.
What insulation for the floor under the screed is the best to use and how to use it correctly, you can read in this article.
But what is the price of foil insulation for the floor and where it is worth using such a building material, this information will help to understand.
What kind of insulation is better to choose?
To make a do-it-yourself insulated wooden door, you will need heat-insulating material, as well as material for the upper decorative finish. The slots are closed with a sealant. When the question arises of how to insulate a wooden door in a private house, pay attention to the following materials:
- Styrofoam it is better to use it as an internal insulation of wooden entrance doors. Plates can be sheathed from the side of the room.
- Foam rubber it is considered the most common insulation, which is covered with artificial leather on top. The porous material creates a volumetric effect. Foam rubber loses crumbling over time.
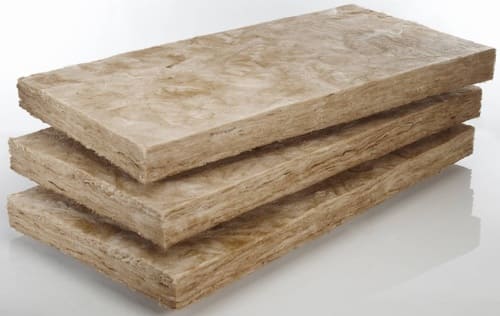
- Minvata does not burn, has good thermal insulation properties, but cakes quickly. When exposed to dampness, it accumulates moisture. Slides off a vertical surface under the weight.
- Foamed polyethylene - Isolon resembles foam rubber in structure. The material is distinguished by the best thermal insulation performance, a long service life. Izolon does not tolerate long exposure to direct sunlight.
- Polyurethane foam applied by spraying, firmly adheres to wood, penetrates into all cracks. The disadvantage is the impossibility of performing work without the presence of special equipment.
- Expanded polystyrene resembles polystyrene, but has improved characteristics. The material has self-extinguishing properties when exposed to open fire.
When choosing a heater for the doors of a wooden house, it is important to take into account the thickness of the material. Thick layers will make the sash heavier, create an obstacle to normal closing. Thin is useless. You need to find a middle ground between these two parameters.
Types of seals for door frames
In addition to thermal insulation, you will need a sealant to seal the cracks along the perimeter of the canvas. It is a tape that differs in thickness and material:
- Foam strip fixed due to the glue base. The seal wears out quickly during the season.

- Silicone strip resistant to moisture, elastic. Over time, it begins to stick, tear in pieces.
- Rubber rubber the seal for wooden doors will serve for many years. The tape is resistant to wear, moisture, mechanical stress.
- Thermoplastic - the best in terms of wear resistance, but difficult to install.
- Polyurethane strip glued on due to the sticky base. In terms of characteristics, it is not inferior to a rubber seal.
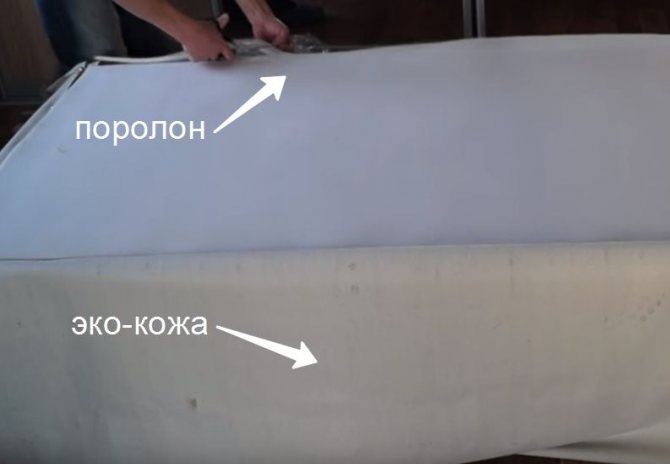
Thermal insulation cannot be done without decorative finishes. Usually, the insulation is covered with artificial leather. Fix with furniture nails with a wide decorative cap. From the inside, the canvas is sheathed with laminated MDF panels. The trim from genuine leather looks beautiful, but the material is very expensive.
How to glue
After selecting a certain insulation, it remains only to glue it correctly. For this you need:
An important point: you need to glue the insulation in a single piece, and not in cut strips. This will achieve the best adhesion of the tape to the surface.
Full adhesion occurs after 2 hours. To check the window for gaps and gaps, you can bring a lighter or candle to the places of insulation. If the flame does not fluctuate, then the insulation is glued correctly and there will be no heat loss. If breakdowns are found, the tape should be re-glued.
On the video, how to glue self-adhesive insulation for windows:
With self-adhesive window insulation, you can minimize heat loss in the room in a short time and create a comfortable indoor climate. The main thing is to carry out work on the thermal insulation of windows on time - at the beginning of autumn, when the weather is warm enough.
We know that we are insulating
Wooden windows, no matter what condition they are in, have several points with cold bridges. In other words, places for cold air to enter. If you insulate one point and not process another, then you can not count on the preservation of heat by the entire window. That is why, before the arrival of cold weather, it is necessary to conduct an examination of the entire window structure - frame, window sill, glass. It is these cold bridges that must be searched for. Where to find them, you ask? Let's see in more detail:
- Glass;
- Slopes;
- Window sills;
- Lintels over windows (beams laid to reinforce openings).
If there is a need to insulate the jumpers, then it is best to do this outside the house. This can be done by sealing the space above the window with foam or extruded polystyrene foam. In general, according to this principle, you can decorate the whole house and then the cold will definitely not get inside.But back to the insulation of the jumpers. If for some reason it is not possible to do it outside or there is no desire to do it, then you can perform the operation inside. However, when using EPP or foam, you will have to make some kind of box or decorative cornice in order to hide the insulation. In general, insulation from the inside is not the best option for jumpers.
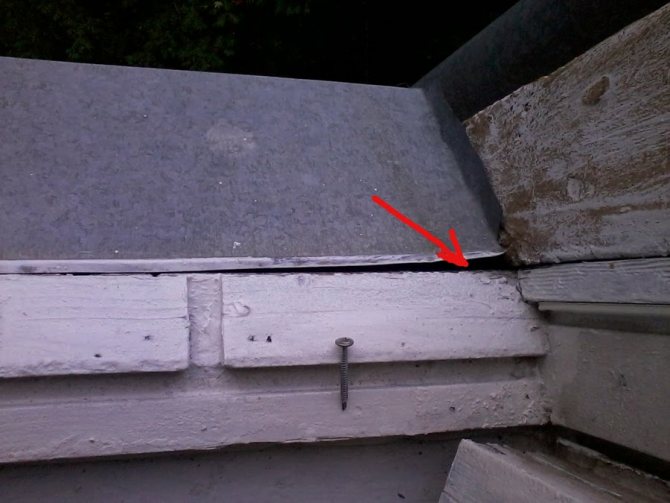
The next location to survey is the slopes. They always need to be given special attention. Even when the frames are installed correctly, there are still small gaps between it and the wall, which are always insulated and sealed into the slopes. But not everyone looks under the windowsill and checks it for heat leakage.
According to surveys, in 34% of cases, the largest amount of heat is lost under the windowsills. At the same time, the window sills were either initially set incorrectly (foaming was carried out incorrectly), or for a long time of operation in the brickwork under the window sill, the mortar layer gave cracks.
Warming of window sills is also best done outside the house. And, of course, this should be done not just before the colds, but during the warm periods of the year. At the same time of the year, it is desirable to insulate the floor in the house.
So, having studied the causes of the appearance of cold, let's start eliminating them. However, before showing how to insulate windows for the winter with our own hands, let's see what materials will work better.
Installation and replacement of the seal for various types of doors
The tool required for self-assembly is simple and can be found in every home:
- pencil or marker;
- tape measure and ruler;
- sharp knife;
- a brush with a long (2-3 cm) bristle.
To install the brush seals, you will additionally need a hacksaw for metal.
The glue is waterproof, best of all - rubber. For degreasing and cleaning the edge of the door, acetone solvents and sandpaper are used.
When working with a solvent, it is necessary to protect the respiratory system from poisonous vapors with a respirator.
If the old seal is being replaced, it is necessary to remove the used tape from the doors and carefully treat the surface with fine emery. Before directly gluing the tape, the end of the frame (or canvas) is washed and degreased. Small bumps are grinded, and small depressions are puttyed (pre-filled with glue and dried).
Do-it-yourself door insulation
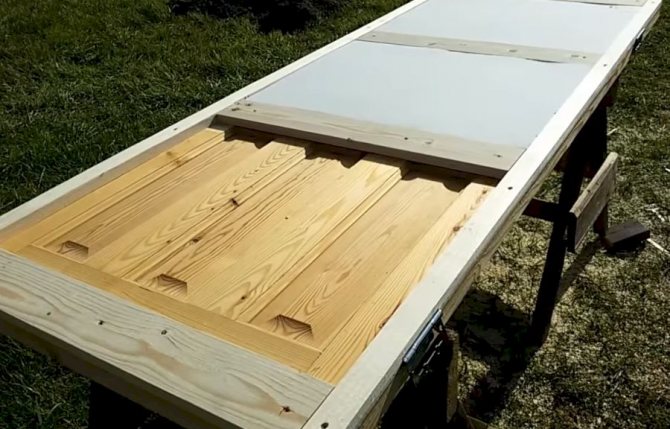
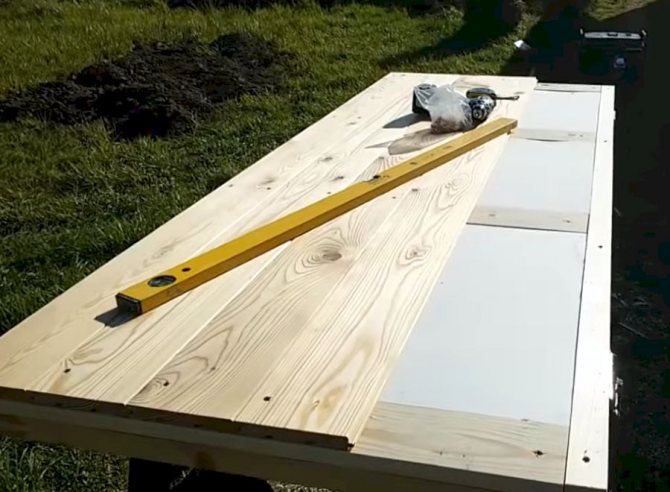
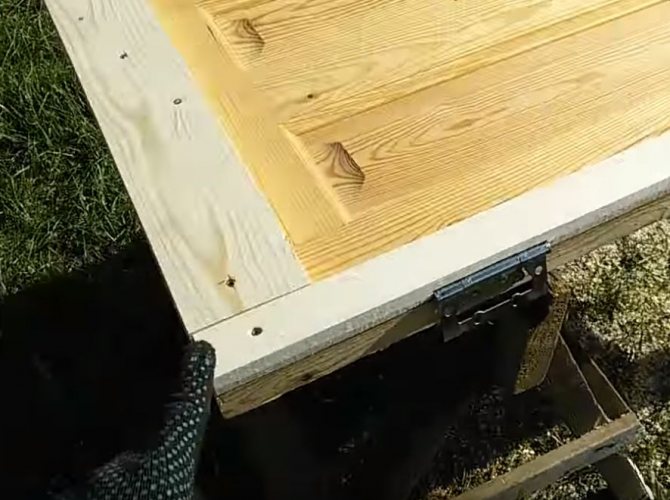
To insulate an iron door with your own hands, in addition to the insulation itself, it is necessary to prepare such a set of materials and tools:
- sheet for interior cladding - fiberboard, OSB, plywood;
- wooden beam;
- polyurethane foam;
- glue or liquid nails;
- materials for fasteners;
- plaster;
- sealing tape;
- jigsaw, screwdriver, spatula.
We examined the process of insulation for each type of door in the previous paragraphs of the article.
Let us consider in more detail the features of installing the inner finishing layer:
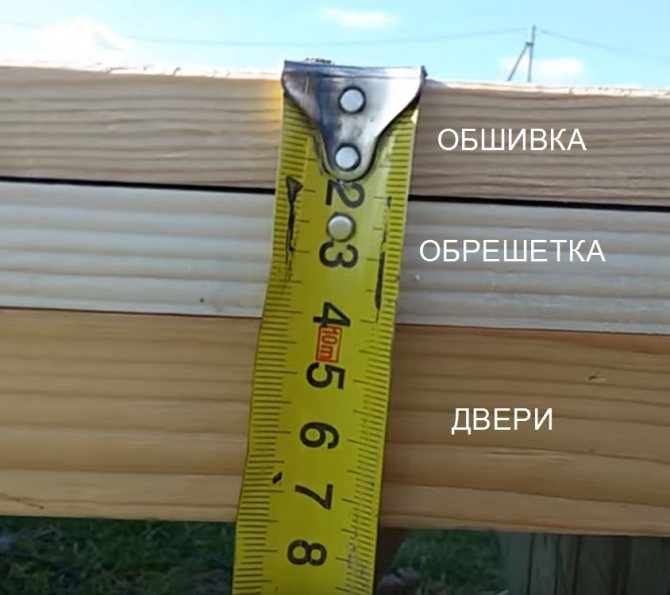
- From a sheet of the selected material, you need to cut a canvas that matches the size of the door. Moreover, the resulting sheet should exactly coincide with the outer perimeter of the frame.
- Using a jigsaw, holes are cut in the canvas for a keyhole, an eyelet and a handle.
- The sheet is attached to the wooden frame with glue and self-tapping screws along the entire perimeter. An equal distance of 30-40 cm must be observed between the fasteners.
- Overhead elements are mounted in the prepared holes.
- The door peephole and other fittings are fixed with a sealant during installation.
TO
The final stage of the interior cladding will be the decorative design of the surface. For this, fiberboard, eco-leather or any other upholstery technology can be used. The main thing is that the finished version fits harmoniously into the interior of the room. A door insulated according to the described algorithm will be a good protection against noise and cold.
Testimonials
In a sense, we were lucky - the plastic windows and glazing of the balcony were made in the house several years ago during a general large-scale renovation.They looked very good, so we didn't change them during the renovation in our apartment. But as it turns out, free is rarely good. It began to blow from the balcony door, and quite strongly. This does not always happen, apparently when the wind is blowing in a certain direction. But I don’t want to depend on the vagaries of the weather, just like calling the wizard for adjustment (if at all possible for these windows). Therefore, the easiest option is to close up the targets, and this is what we preferred. This is not just a tape that sticks on top, to which all users of old wooden windows are accustomed, this seal needs to be glued right inside the joints, which means that it is invisible from the outside. By the way, I have known Aviora products for a long time and I liked all of them. I don't remember a single puncture - good, high-quality and easy-to-use materials for improving everyday life.
ursulusa
https://otzovik.com/review_4218806.html
For some reason, there are people who think about keeping warm already when they are frozen. So I remembered about the seal for the door, when the wind blew from the north side and in the morning it was very cold in our corridor, because all the heat "ran away" through these invisible cracks. The hardware store recommended this seal. The seal itself is very soft, elastic, holds its shape well, is easy to stick on and just as well adheres to the front door. More than a month has passed, nothing has come off, and it has become much warmer in the corridor. The seal did not crumple, it just as well prevents cold air from passing through the door to the room. Self-adhesive strips - just remove the protective paper and stick on. Material - looks like finely porous rubber, thickness is about 5 mm. The seller said the material is “waterproof, windproof, temperature-resistant,” and durable. The door with this seal also closes well, it is not noticeable. A good sealant for keeping warm in the house.
Ellochka
https://otzovik.com/review_1598246.html
Winter 2016–2017 began in the fall, and if we compare the weather conditions with the previous year, they are not comparable. Frosts on the street in Kiev reached -19 degrees, and with wooden windows, without warming up in advance, you can safely prepare a fur coat and a hat in order to successfully fall asleep. However, I began to think about insulation in advance, and my successful purchase of a self-adhesive foam rubber seal from MasterLenta helps me to successfully survive severe frosts. I bought this tape in "Auchan", the price of 1 piece is about 22 UAH. (48 rubles). In one package there are 3 meters of sealant, not much, but, for example, it is quite enough to cover the door to the balcony almost hermetically. The general dimensions of this self-adhesive tape are: - 3 meters long; - 20 mm width; - 10 mm thick. On the one hand there is standard foam rubber, and on the other - adhesive tape, 2 in 1. This tape is intended for high-quality sealing of joints and gaps in window frames or doors. In addition, it is resistant to sunlight, does not allow moisture, noise, and dust to pass through. Also, the technology of its manufacture does not allow any fungi and other mold to multiply. Of course, you can buy standard foam rubber, which is almost 3 times cheaper, but this tape provides almost 90% tightness of the joints. The shelf life of the tape is 5 years, made in Kiev. Conclusion: an excellent tool for home insulation and frost resistance!
Framboise1
Installation of the seal
Installing frost-resistant insulation on the door leaf is only half the battle to eliminate the penetration of cold air into the living space. Even with the door closed, there remains a small gap between it and the frame, through which cold will penetrate. Eliminating drafts is the next task for a home craftsman.
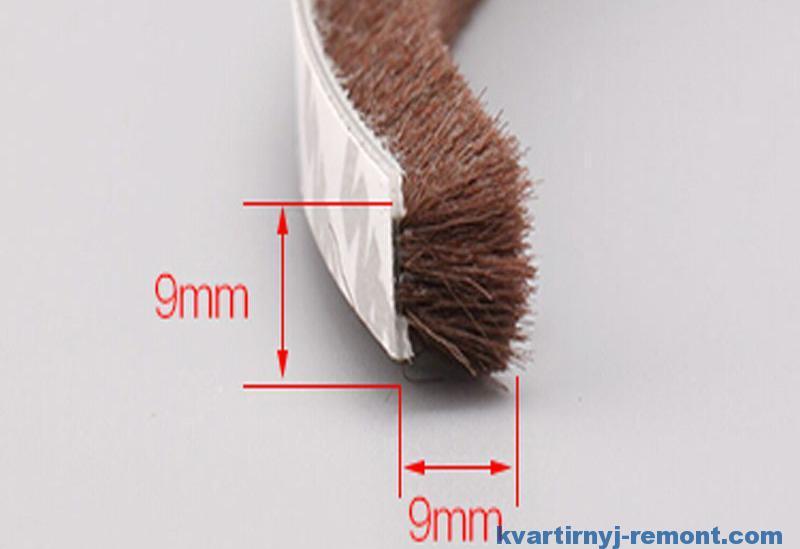
To do this job, you need to choose the optimal type of seal. Today manufacturers can offer the following types of this material:
- Foam seals;
- Silicone seals;
- Rubber seals.
The first type of seal allows you to quickly and inexpensively solve the issue with drafts. It is ideal for the doorway of such a structure as a summer cottage, where there is no high intensity of opening and closing doors.
Foam seal - inexpensive, but also short-lived
The use of a silicone door seal will allow you to get rid of the draft for a longer time than a foam rubber analog can do. The shape of the product guarantees a tight pressing of the canvas to the box, which will not allow air masses to move inside the room.
The best option is a rubber seal. Due to its characteristics, it allows you to get a warm opening for a long time, even with the most intensive use. In addition, the variety of shapes of this product makes it possible to install it on all types of door blocks.
Having chosen the desired version of the seal, it remains only to install it in place. There are two main mounting options:
- With an adhesive strip.
- With a harpoon in the groove.
The fastest way to install a new seal on the door is to use self-adhesive products. But this type cannot please with durability, therefore many experts recommend a harpoon mount in a groove.
It will be quite difficult to choose a small groove in a quarter without disassembling the boxes. Therefore, it is allowed to carefully nail the seal with small nails. Fastening must be done in the very corner of the quarter. This will allow the curtain to take its position in the door block without difficulty and provide reliable protection against drafts.
We insulate a Chinese one-piece door
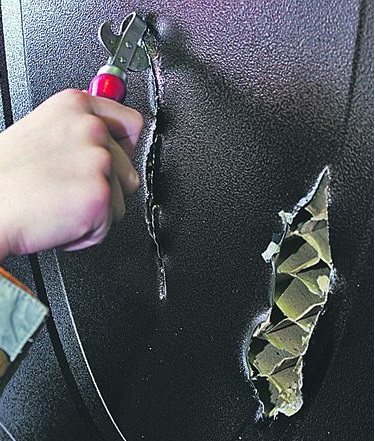
In most cases, Chinese doors are either hollow inside or filled with honeycomb cardboard, which, although it should function as a heater, actually does a poor job. Therefore, the buyer of Chinese products will certainly ask the question of how to insulate an iron door from the inside.
The process of insulating a non-separable structure is almost identical to the method described above. But before insulating a metal non-separable door, you will have to install a strong frame on the inner side of the canvas, which is necessary for fixing the cladding.
Preparing the door
The canvas must be removed from the hinges, laid horizontally and all overhead elements removed from it. After that, try to remove the cladding layer. In the case of Chinese doors, the casing cannot be unscrewed, so it will most likely have to be cut off.
Installing the frame
It is undesirable to choose metal as a material for the frame, because the purpose of the alteration is insulation, and iron, as already mentioned, has a high thermal conductivity. Therefore, it is better to take a wooden beam that is installed around the perimeter.
After that, you need to install the stiffeners. Moreover, you cannot put only horizontal or only vertical partitions - it is better to combine 2 types of floors. This will help keep the material from sagging or shifting.
The width of the block should correspond to the maximum width of the protruding part of the frame.
Insulation lining
In the resulting sections of the frame, you need to place the selected thermal insulation material. It is fixed with a swivel or with glue. It is even better if both methods are combined. Therefore, between the insulation or frame elements, the gaps should be minimal.
Installing the decorative layer
The final step in the insulation and decoration of the entrance metal door is the installation of the interior cladding. Most often, MDF, plywood with a decorative coating or dermantin are used for these purposes.
Insulation of a metal door from both sides is allowed, i.e. the frame is installed both from the inside and from the outside of the apartment. In this case, different materials can be used for the decorative cladding of the structure, for example: a fiberboard sheet for interior decoration, and lining for exterior.
Another option for insulating a one-piece door is filling the cavity with foamed insulation (vermiculite or perlite). However, this method is only suitable for structures with securely welded seams, otherwise the insulation will easily seep through the holes. In addition, without disassembling the door, it is difficult to be sure that the entire interior space will be filled.
How to insulate a metal split front door
The main difference between the one-piece door is its design. In the first case, a frame with stiffeners is already provided inside, in the second, it must be done independently.
In the case of a split structure, it is enough to remove the cladding layer from the inside of the apartment and set it aside for the duration of the work.
Let's consider in stages how to insulate an iron entrance door with a split structure:
- Lay the door leaf on a flat surface, remove all overlays, and then the cladding layer.
- Cut the selected insulation according to the size and shape of the cells.
- Cover the metal surface with glue or apply liquid nails.
- Place the insulation in the cells of the frame and press it to the surface.
- Screw the cover back on.
If the casing was damaged during dismantling, it can be replaced with another suitable material. The cladding performs not only a decorative, but also a practical function, since it enhances the noise and heat insulation effect, and also protects the insulation from moisture.
This is how the process looks if you use solid insulation - foam rubber or expanded polystyrene. If cotton wool is chosen as a heater, then before laying it, the door is covered with a film over the entire inner surface.
It should protrude 1.5-2 cm beyond the canvas. Further, the cotton wool is cut into strips in accordance with the size of the cells, but with an overlap of 1-1.5. After the insulation is laid in the section, the structure is covered with a second layer of film and fixed with tape. As a result, the cotton wool will be reliably protected from moisture.
We insulate the front door with foam rubber
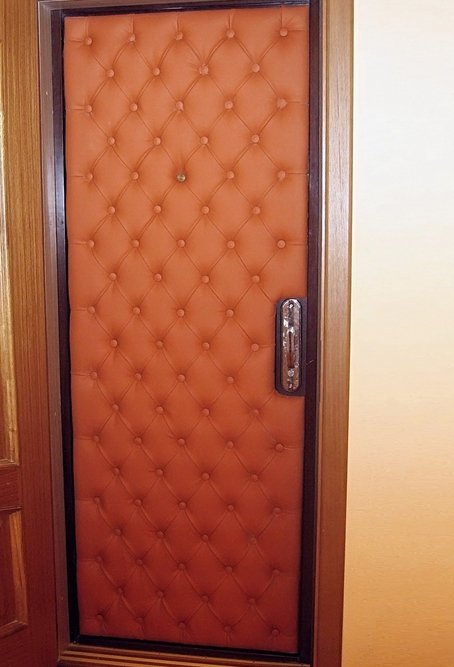
To insulate the front door made of wood, foam rubber can be used from the outside. For this you need:
- Remove the door frame from its hinges and place it on a flat horizontal surface such as stools. Then remove all protruding parts of the door (lock, eye hole, handle).
Advice! Before insulating the door with foam rubber, wrap the door leaf with an iron sheet to strengthen it.
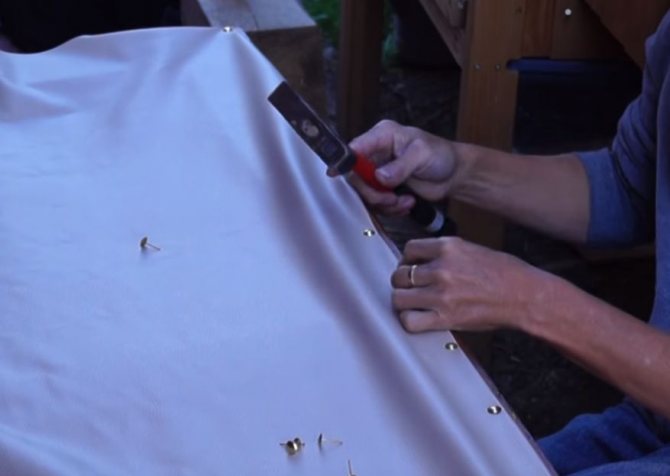
- Next, you need to make a base for the rollers necessary to plug the hole between the door and the frame. For doors that open outward, 3 stripes with a width of 140 mm are cut out of leatherette, of which the length of the first is equal to the length of the door, and 2 others are equal to its width. Three strips are nailed with nails along the edge of the door frame, having previously retreated from the edge of 15 mm. The side on which the hinges are located is not upholstered. For doors that open inward, 4 strips 140 mm wide are cut and nailed on all sides.
- From cotton wool, you need to make bundles with a diameter of 30 mm, wrap them in leatherette nailed from below, and nail the resulting roller at the very edge of the door.
- Next, foam rubber sheets are laid on top of the door leaf.
Foam rubber
- From leatherette, you need to cut a canvas according to the parameters of the door, plus 10 cm on each side. Spread the leatherette on top of the insulation and nail it with nails, first the side corners, and then the lower and upper
- Next, you need to make the remaining three rollers (this applies to doors that open outward) and nail them so that the upper edge of the upholstery fabric overlaps the lower one.
- Then you can nail the panel around the entire perimeter, ending with the edge on which the loops are located.
Advice! You can decorate the door leaf by nailing studs with hats according to a specific pattern. This way of "decorating" the door does not allow the foam rubber to settle.
- At the end, you need to cut holes for all the protruding parts of the door, fix the handle in place and you can hang the door back on the hinges.