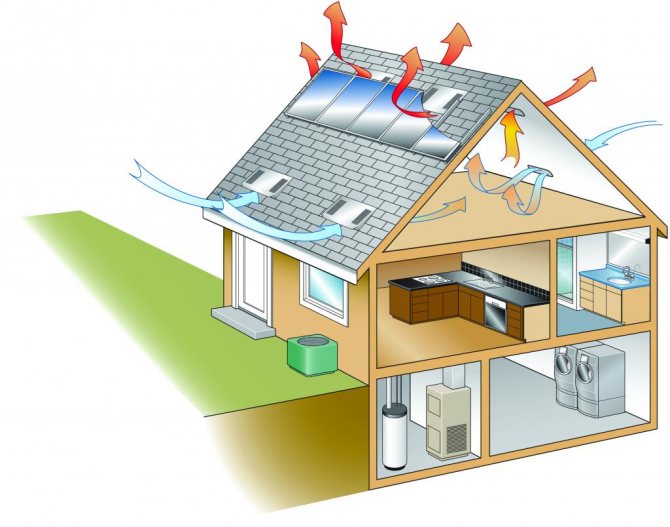
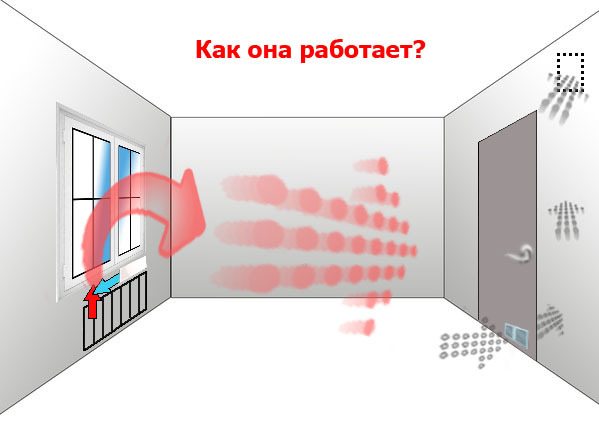
Sometimes it is required to create a simple air exchange system in a dwelling or a country house that can function under normal conditions. The simplest option is to ventilate through the wall using special valves working in one direction and an outer pipe. This method can only be used for rooms with normal operation.
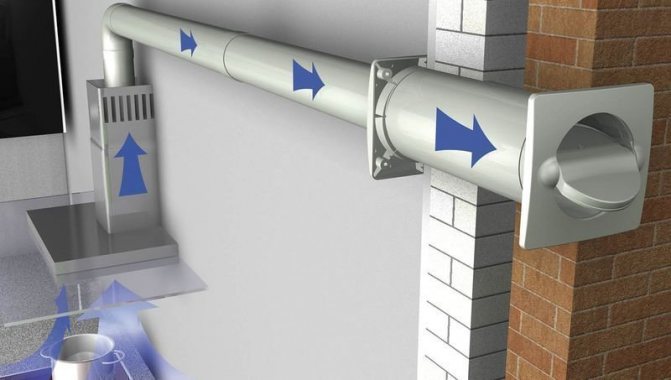
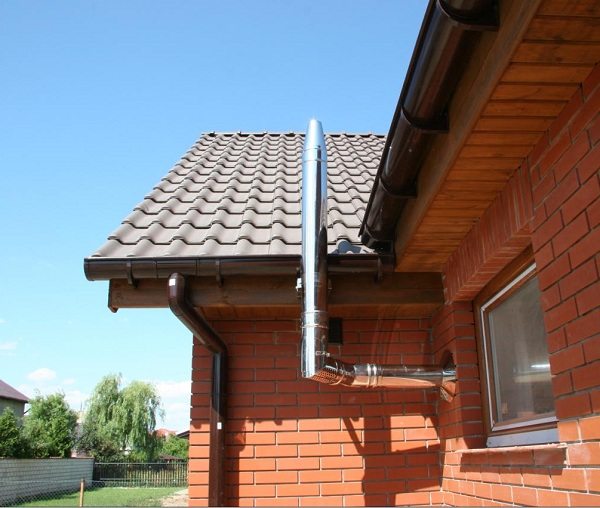
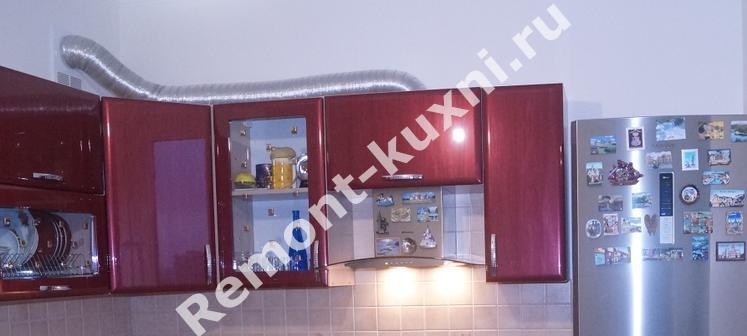
The photo shows a ventilation pipe in the lateral plane.
Advantages and disadvantages of the method
To decide on the creation of such an air exchange system, it is necessary to consider all the pros and cons, then the choice will be the easiest to make. However, conclusions should be drawn based on the existing conditions, because in fact this is an alternative version of a conventional network in a simpler design.
List of merits
The most important advantage of organizing such air exchange is the relatively low price. All the necessary elements are cheap enough to avoid high costs.
Other positive qualities of this type of ventilation are listed below:
- The main elements of the system are small, therefore, the aesthetic characteristics of the premises are not compromised.
- During installation, there is no need to reduce the tightness of the roofing, because when installing the pipe, cutouts in the roof are not made.
- Do-it-yourself installation work is a great way to save financial resources.
- Due to the absence of complex elements, the installation time is significantly reduced.
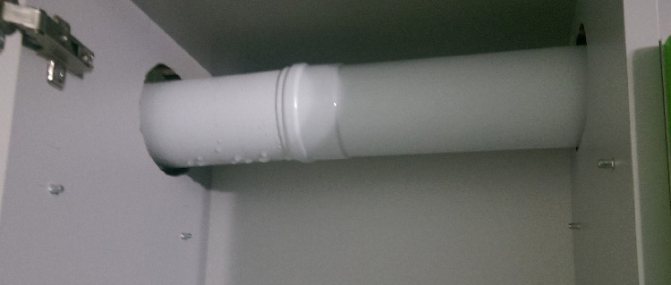
This is how the supply valve looks in the wall.
Negative points
- The dependence of operation on weather conditions and other factors somewhat reduces efficiency, but this is solved by installing a fan.
- The need to drill in multiple locations makes the job somewhat more difficult.
- When performing poor-quality installation, problems with waterproofing may arise.
Note! When ventilation is arranged through the wall in a private house using supply ventilation valves and an external pipe, the set of tools will depend on what material was used to erect the structure.
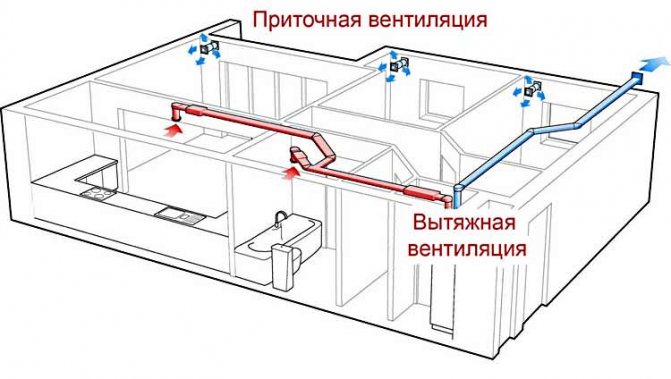
Features of the ventilation scheme
In principle, everyone understands the main points of its organization. What is the flow of air masses between zones, why a fan is needed - these and similar questions are easy to answer. But competent installation of the system presupposes knowledge on this topic at least at a semi-professional level. Therefore, something should be clarified.
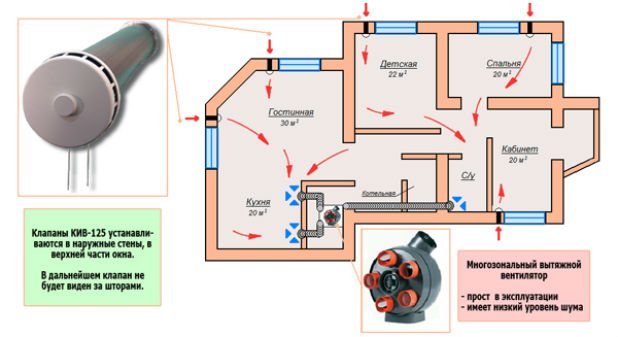
- A building can have several independent ventilation / systems covering the same type of sectors, levels, and so on. Everything is determined by the dimensions, number of storeys, and the layout of the building. For a private house, as a rule, one is enough, but on condition that it is correctly calculated and mounted. Criterion - all rooms, without exception, must be involved in the ventilation scheme.
- Mandatory presence of points of entry (intake) of air from the outside and its removal (removal) outside. In our case, they are located in the walls.
Calculations performed
Even such a simple ventilation system must be carefully calculated, because in order to provide the premises with fresh air, it is necessary to know the number of elements used for the inflow of the working medium and the throughput of the exhaust.
Next, we consider how to carry out preliminary calculations for the area using the example of a 6 × 9 m residential building with a ceiling height of 250 cm.
- The first step is to determine the approximate volume of the entire dwelling. To do this, you need to multiply the length, width and height. As a result, you should get: 6x9x2.5 = 135 cubic meters. m.
- Based on the data obtained, the number of supply valves can be calculated. For example, if the throughput of the elements is 40 cubic meters. m / hour, then it turns out: 135/40 = 3.375≈4 pieces.
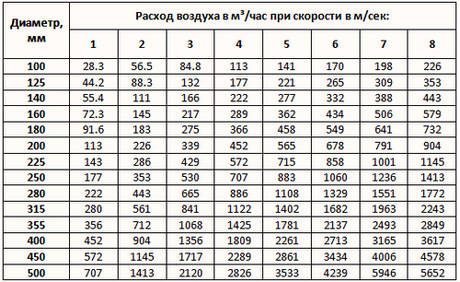
Auxiliary table for selection of the chimney diameter.
Answer! For a high-quality air renewal in the presented object, you will need to install only 4 valves. Based on the above calculations, the diameter of the chimney is also determined.
Supply devices
In connection with the advent of modern materials, buildings began to be more airtight, which led to another problem associated with a decrease in air intake.
If earlier houses and apartments could be ventilated without additional air supply, now the situation has changed. It is especially difficult to breathe in a home if plastic is used as the main material.
About functionality
Ready-made products for air intake from the street are able to completely prevent the penetration of dust, insects and all kinds of sounds. After installation, there are no drafts in the premises. The supply device resembles an air reducer in its principle of operation, which slows down the flow rate.
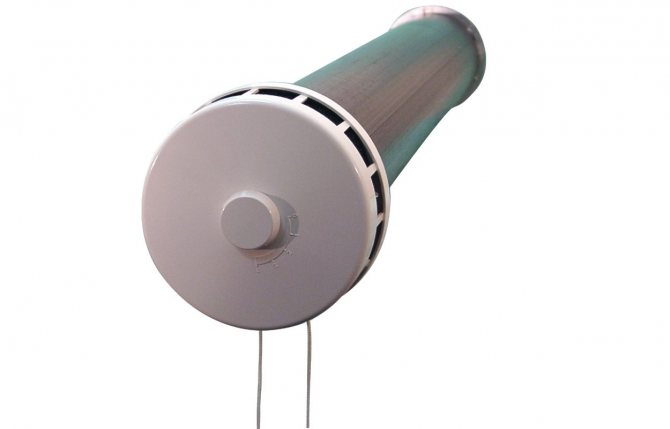
This is an air intake valve.
It is extremely easy to operate the supply valve, as it is equipped with a convenient handle for closing the channel. Its visible part fits perfectly into the interior of the room. Being from the outside, it does not spoil the impression of the facade of the building. During operation, you will not have to spend financial resources.
More about product design
An element with an air permeability is a small plastic tube, the diameter of which can vary considerably. Inside there is insulation to prevent the penetration of sounds.
Below it is proposed to familiarize yourself with the structure of products of this type.
- The plastic duct is a basic component, since it is through it that air enters the room.
- The adjustment knob is on the inside. It can be used to block the channel.
- The filter element allows cleaning of incoming streams from dust particles.
- The inner piece of the headpiece, equipped with a ventilation flap, is the main limiter.
- The O-ring is designed to improve the sealing between the elements of the product.
- Insulation material provides the ability to protect the interior from sound and other effects.
- The outer grille helps protect the structure from precipitation.
- The mosquito net inside it allows you to completely prevent the entry of insects.
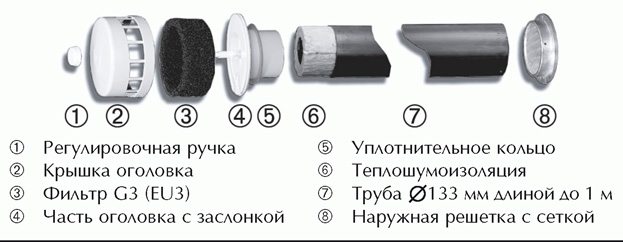
The main parts of the product are shown.
Attention! The length of the plastic sleeve can vary between 40-100 cm in 10 cm increments. Therefore, when choosing, the wall thickness should be rounded to these values. The excess part is simply cut off.
Installation work
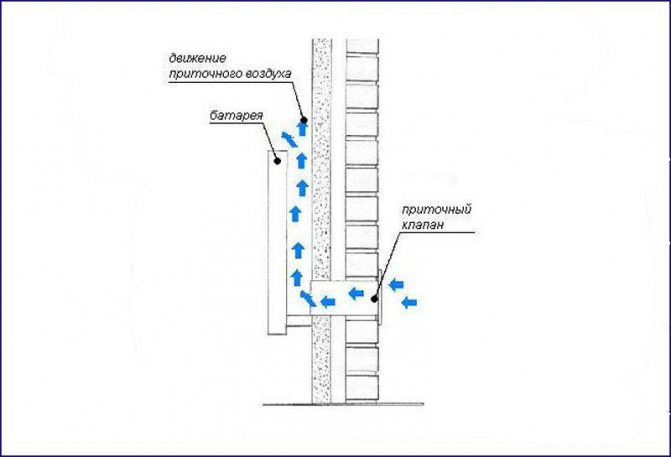
The first step is to choose a suitable place for the installation of the element on the side plane bordering the street. The functional head must have direct access, otherwise control will be problematic. The most optimal option involves installation next to a heating radiator so that the incoming air has time to warm up.
One of the installation options is demonstrated.
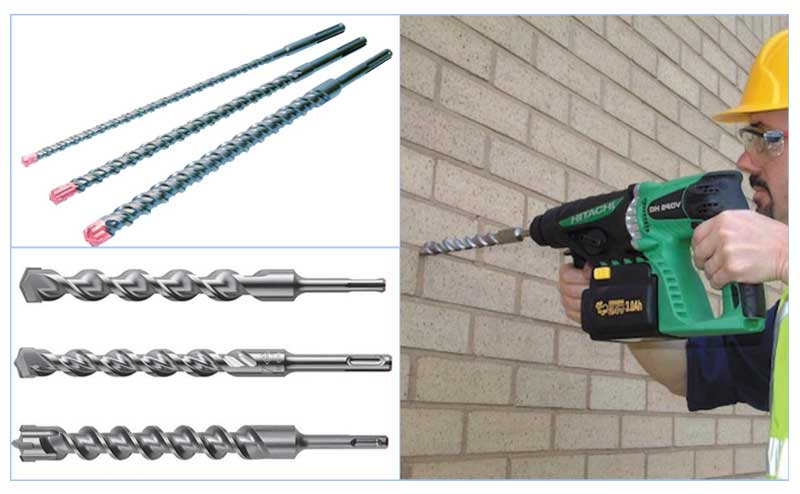
After selecting an acceptable place, proceed directly to making a hole. If the walls are wooden, then a conventional drill and drill are used. In other cases, diamond drilling is carried out with a special tool.When constructing the opening, it is recommended to make a slight slope towards the street to drain the condensate.
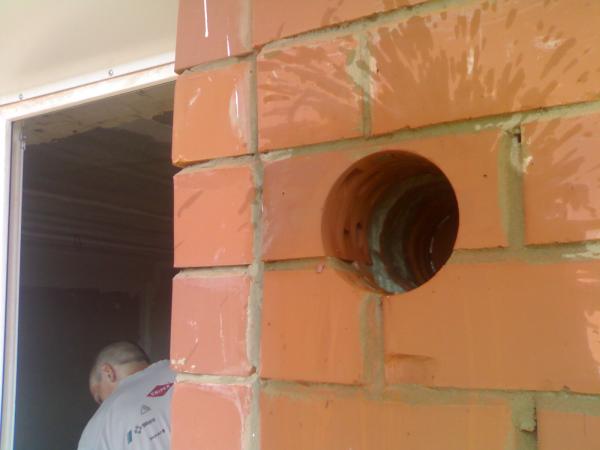
You will have to make approximately such a hole.
A plastic sleeve of the required size is inserted into the finished hole. A ventilation grill is installed on the outside, and a functional head is inserted from the inside. In the process of fixing the elements, small bolts are used, with the help of which the structure gains rigidity.

Expert advice
As in any other work, when making holes, there are features and nuances that you need to know about in order to achieve the desired result. For example, how to correctly size the holes. The choice depends on the material in which they are performed. If a hole is made in a tree, then a gap is left, which is determined by the thickness of the heat-protective and waterproofing layer. It is not recommended to make too large, more than 10 cm allowances, then it is difficult to close them up. It is sometimes difficult for a DIY craftsman to make a round hole in wood. It is allowed to make a square opening, which is much easier to make in practice.
Conversely, holes in concrete walls and ceilings are best made to be precise in diameter. The material is resistant to temperature and humidity extremes. Some of their typical mistakes in work can be the following design features of the house:
- Wiring. It is undesirable to start work without knowing exactly the wiring diagram of the electrical network. Recovery will take a lot of time and money;
- Armature. Without special equipment, it is difficult to find a place where it is guaranteed that it is not. If suddenly the drill runs into an obstacle, you should stop the operation, try to make a hole in another place or cut the metal;
- Weakening of the load-bearing wall. A hole in a concrete, monolithic wall can be made without fear. However, brick or block masonry is less durable. Working with a hammer drill, with a sledgehammer, you can easily break the integrity of the area above the hole, which can crack, and in some cases collapse.
All work is carried out in accordance with applicable law. Holes with a diameter of less than 200 mm are not subject to regulation and can be made by property owners at their own discretion. When, according to the plan, it is necessary to make an opening with large values, then this operation must be coordinated in the appropriate structures, otherwise serious troubles may arise, up to a rather large fine and restoration of the hole made.
Exhaust pipe installation
When exhaust ventilation is arranged through the wall to the street, it is possible to reduce the labor intensity of the work, since there is no need to touch the ceiling and the roof. In addition, the length of the pipe can be reduced by moving away from the ridge part.
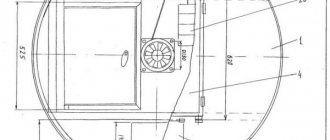
The system assembly process is presented below.
- A preliminary marking is applied to the surface of the wall to make it easier to cut the hole. It is recommended to place the opening close to the ceiling to maximize traction.
- A neat cut is made using a special tool. After that, a corner piece is inserted into it. A check valve is installed on the inside to protect it from external influences.
- From the street, the next piece is attached to the established corner - a straight pipe. It is fixed with special clamps. A deflector is installed on top to prevent precipitation from getting inside.
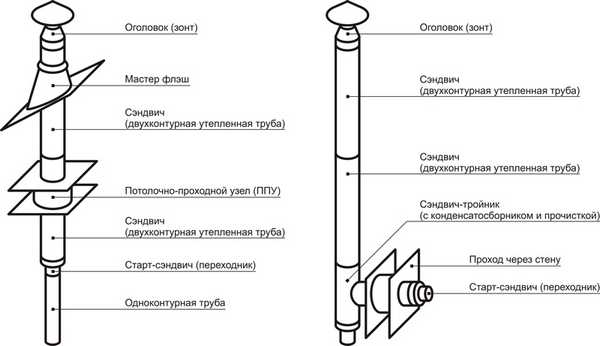
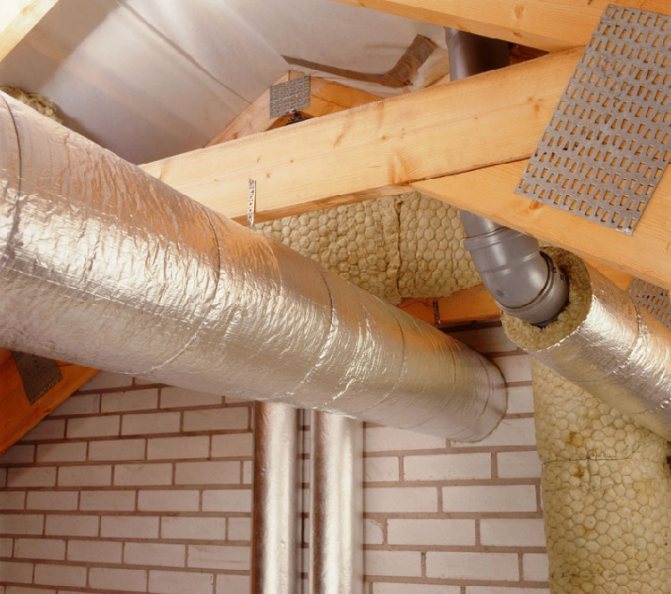
On the right is an assembly diagram through the wall.
Important! When assembling the exhaust duct, it is recommended to seal the joints, otherwise it will not be possible to achieve the most efficient exhaust air discharge.
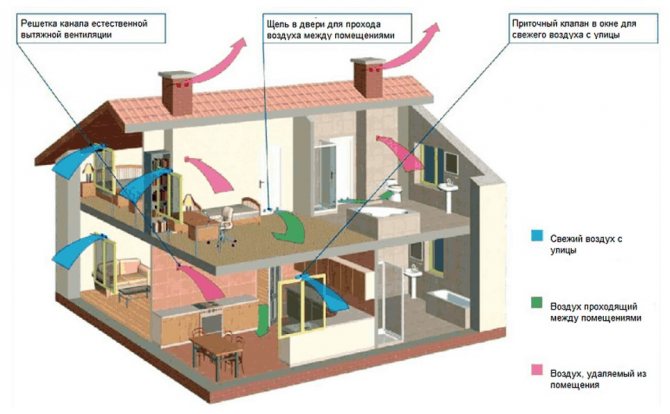
About internal circulation
For the passage of streams from one room to another, special grates are used.By installing them on a door or built into a wall, you can achieve free movement of air masses. This is necessary in cases where it is required to pass the supply flow to the hood.
To insert an element into a door or wall, a cut must be made that corresponds to the dimensions of the working part. Having removed the unnecessary fragment, you need to insert the main frame directly into the opening. Fixation is carried out with screws, which are closed by the front panel.
Ventilation scheme through the door.
Reasons for the appearance of condensation in the ventilation system
The reasons, in fact, are many, and which of them leads to the appearance of liquid droplets on the inner surfaces of the air channels, it is possible to find out only as each is eliminated.
Have you already encountered the problem of condensation in the ventilation system?
Yes, I had to fix flaws No, a competent system was originally mounted
The main sources are:
- Air ducts not insulated.
- Improper operation of the ventilation system as a whole.
- Violation of the tightness of the air ducts.
- Destruction of the mouth of the ducts in the attic or roof.
- High humidity in the room.
The inevitable cause of condensation is the meeting of warm, humid air from a room with cold air masses of the street. And the greater the difference between the temperature of the air flows in the ventilation system and the air temperature outside, the more moisture will condense on the walls of the ventilation ducts.... It is not for nothing that all problems begin in the off-season and end with the warm season.
Additional Information
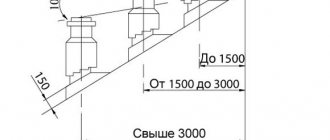
- The ventilation pipe should protrude so that the angle between the ridge and its upper part does not exceed 10 degrees, otherwise the draft level will be significantly reduced.
- In the inner part of the air ducts, as well as at a distance of five centimeters from them, cables, gas pipelines and other elements of communication systems should not be placed.
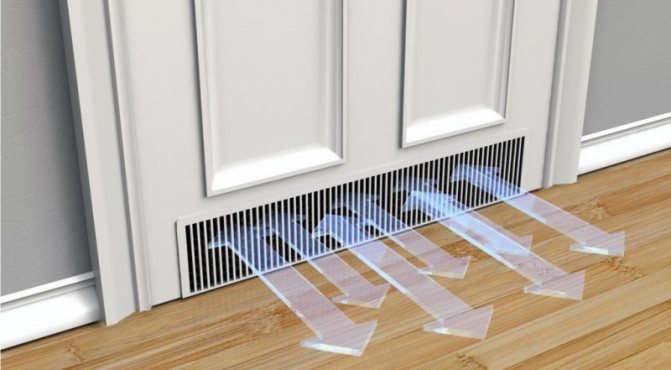
- The passage of flows should be carried out to the hood even with the interior doors closed, and not in all cases it is necessary to install gratings. It is enough to leave a gap at the bottom with a width of 1.5-2 cm.
- Too weak ventilation of the living space does not allow achieving a high level of environmental safety, especially if materials based on plastics, formaldehyde resins, and so on were used in the finishing process.
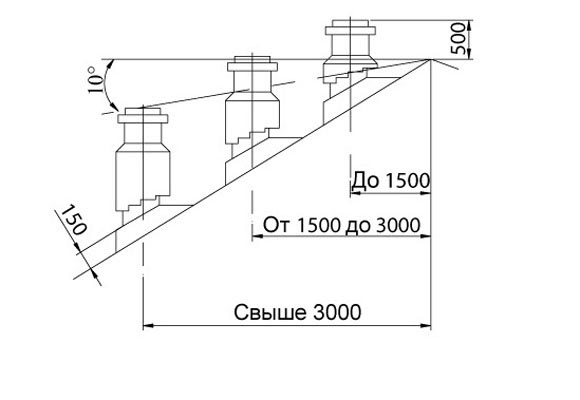
The installation height of the chimney is determined according to this principle.