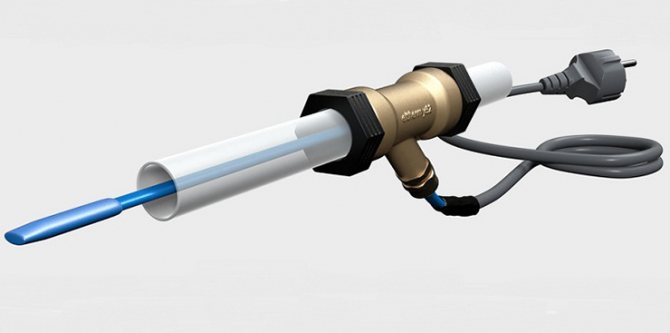
How is the heating cable arranged?
The heating cable prevents the pipeline from freezing due to the electric current passing through it. It consists of a protective, general sheath and an inner core:
- A solid aluminum or copper layer of material protects the inner core of the cable;
- The main part in the heating wire is the inner core, which creates excellent electrical resistance. It is made of a special alloy;
- The upper sheath protects the entire wire with high quality, made of polyvinyl chloride.
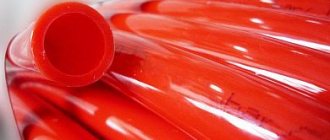
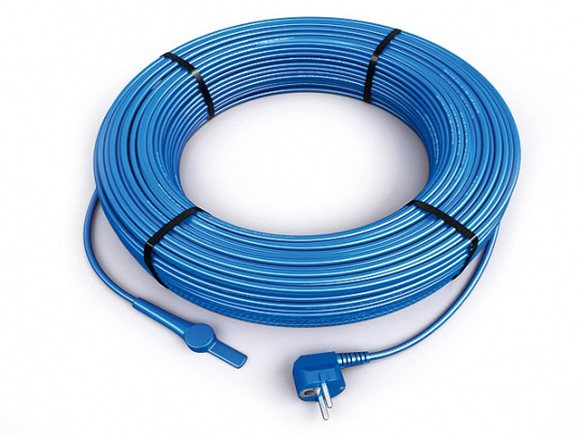
Self-regulating heating cable
How to get a ready-to-use product
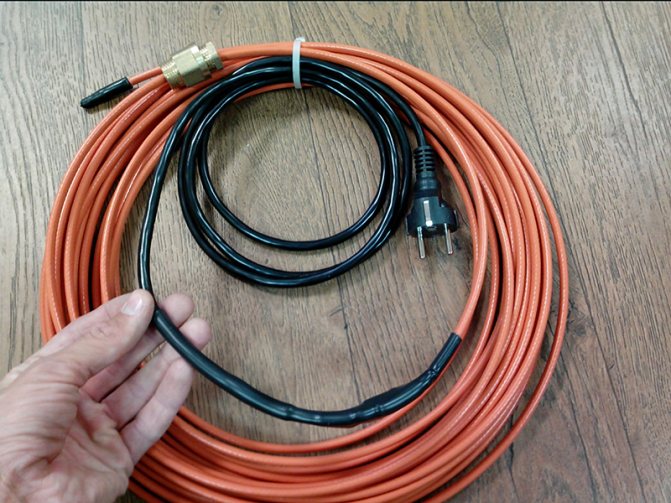
So, before connecting the heating cable to the object, you need to take care of connecting it to the electrical network. We need to seal one end of the wire, and the other end to dock with the power cord. We will tell you how to connect a heating cable with a protective copper shield. To work we need:
- heating cord;
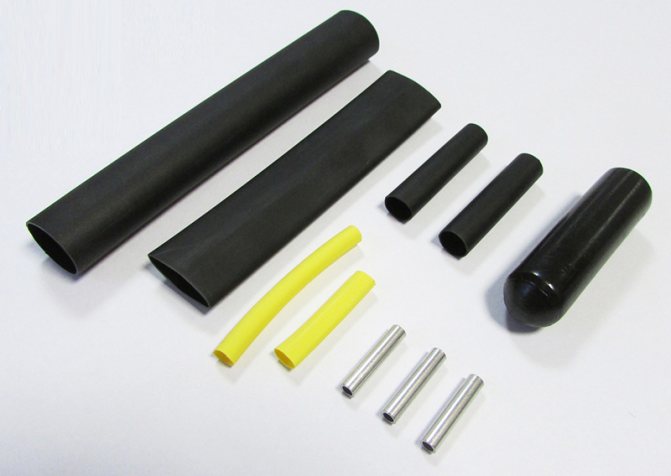
- a set of tubes, sleeves and couplings;
- electric wire with a plug;
- tools.
Docking with an electric wire
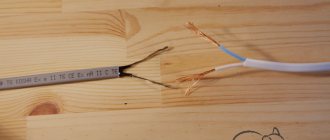
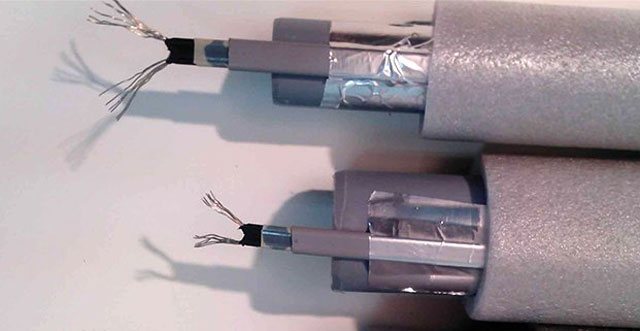
The first step is to carefully remove the outer insulation. Do-it-yourself cutting of the heating cable is usually done using a special tool, but you can also use a regular knife. The length of the cut is usually indicated in the attachment to the kit. Next, we twist the braid and twist it into one core. We will need it to set up the grounding of the heating cable in the pipe.
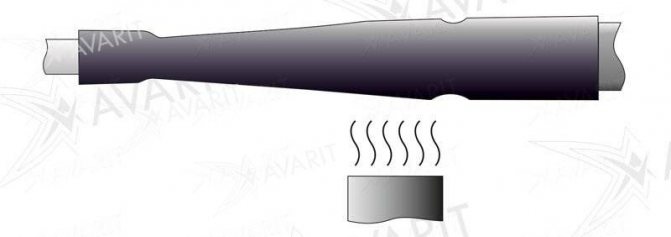
We make an approximately two centimeter cut in the next layer of insulation and carefully remove it. An internal matrix appears in front of us, which also needs to be "exposed". And so that the conductive cores are not damaged. At this stage of cutting the heating cable, we need a hair dryer and pliers. We make a small cut on the matrix, heat it and tighten it. It should "go" effortlessly. If resistance is felt, then the material is not hot enough.
Having cut the heating cable with our own hands, we got to two cores. We equip them with connecting sleeves and crimp them with a professional tool (you can just use pliers with a cutting edge, but very carefully). If the wiring is damaged, it is better to cut the heating cable for the water supply pipes and repeat the operation.
We find the appropriate heat shrink tubes in the kit and put them on. It is necessary that they completely overlap the open veins, reaching approximately the middle of the sleeves. We warm with a construction hairdryer, leave and wait until it cools down. For the further installation of the heating cable, we will need one more heat shrinkage of a larger size. It must be dressed in such a way that it covers both the matrix and the places from which the veins come out. We process it with a hairdryer and squeeze the middle with "narrow-nosed" pliers. Before connecting a thermal cable for 220, you need to take measures so that the conductive cores turn out to be isolated from each other at the junction, and we did this.
We put on the coupling, which will hide the place of connection with the plug, on any of the wires in advance. In our case, the heating cable is installed on the pipe with grounding, so we make the "ground" on the electrical cord a little longer. Most likely, it will need to be trimmed later. We put on heat shrinks on the other two cores by analogy with a self-regulating heating cable for heating pipes. In this case, the stripped ends should not be covered. We connect the cores of the wires, shift the heat shrinkage, overlapping the joints, and heat it with a hairdryer.After the structure has cooled down, we get completely sealed joints.
Now, our heating cable connection diagram requires you to deal with grounding. First, we cut the conductor of the electrical wire to the required length and equip it with a sleeve. We also shorten the braiding of the heating cable to the pipe. It should reach plus or minus half of the sleeve. We push the heat shrinkage onto the electrical “ground” and connect it to the braided “wick”. We shift the heat shrinkage and process it with a hairdryer.
This completes the main part of connecting the self-regulating heating cable to the electrical wire. Carefully close the resulting assembly with a clutch. The joints should be located approximately in the middle of the sleeve, and its edges should grip "whole" parts of the cords. We "cool" the resulting heating cable into a pipe with water with a construction hair dryer. Heat should be done from the middle to the brim to avoid excessive thermal stress on the joints and to avoid the formation of air bubbles.
Sealing the second end
To mount the heating cable completely, we need to properly process the other end of it. It takes much less time and effort. By analogy with the above procedure, remove the outer insulation and untwist the braid. We do not twist the latter into a cord, but simply cut it off. We continue to install the heating cable with our own hands, making a V-shaped cutout at the end. To solve this problem, we use pliers. We put on heat shrinkage on the internal thermal insulation and heat it by clamping the end with pliers. After the heating cable for pipes has cooled down, we cut off the excess with our own hands.
We tighten the outer sleeve, heat it and again hold the end with pliers. We are waiting for it to cool down. Here, in fact, is everything you need to know on the topic of how to assemble a heating cable with your own hands. We have in our hands a product that can be used to heat a wide variety of objects. Next, we will tell you how to properly connect the heating cable to the pipe.
Types of heating cables
Plumbing cables are divided into self-regulating and resistive. It is necessary to insulate the pipeline before laying them, since in severe frosts it will be necessary to spend a lot of electricity power, and this threatens with high monetary costs.
Resistive cables maintain the same heat generation at all times, regardless of the outside temperature. A metal conductor in a cable heats up when an electric current flows through it. In order to reduce the cost of electricity during warming, regulators and temperature sensors are installed in the system. When laying this type of wires, it is necessary to ensure that they are not located tightly to each other, as this threatens overheating and breakdown. Resistive cable is divided into single-core and two-core:
- Single-core wires are not always convenient because they are connected to the mains with two ends;
- The two-core wire is good because, on the one hand, a plug for a 220 V network is installed, and on the other, a plug.
Heating cable use and classification
In its pure form, the heating cable is used mainly in winter to warm up water supply systems at risk of freezing, as well as drainage systems and anti-icing systems for steps of porches, roofs, gutters, etc.
Various heating cables are used for different applications. They are subdivided according to the principle of operation and execution options:
1. Resistive structures are subdivided into:
- single-core, in which the vein is connected to the network at its two ends;
- two-core, in which one core is heating, and the second is connecting, a plug is placed at the end of such a cable.
2. Self-regulatory differ:
- type of matrix (polyolefin and fluoroplastic);
- type of shell;
- specific heat release (from 6 to 100 W / m).
3. Zonal ones are extremely rare here, as they are produced in the USA and Great Britain.
4. Armored cables, which in their essence are resistive cables (also single or two-core), have a protective sheath that allows them to be used in gutters without cables, and they are also the only ones laid directly on concrete.
Resistive cables are designed for a specific section of the pipe that needs to be heated and are practically not used on roofs and gutters, due to the fact that they have the same heating temperature along the entire length and are extremely difficult to adapt to changing operating conditions. But, the predicted dying off of this type of heating cables for a water supply system seems clearly premature, in view of the fact that they are radically cheaper than self-regulating ones and, in combination with the same thermostats, can quite cope with a certain range of applications.
In addition, it is this type of heating cable that is suitable for making it with your own hands, which further reduces the cost of the system as a whole when solving the same problems.
Self-regulating cable at the first meeting throws most people into shock from not understanding the principle of operation. After all, not only does it turn on automatically when the temperature drops to a certain level, it also heats in pieces, exactly where you need it and as much as you need, having different temperatures in certain areas. It does not require the selection of the parameters of the electric current, unlike a resistive cable, connecting to a standard network with any pieces, from several tens of centimeters to tens of meters, without additional regulating devices. But it also costs 20 - 30% more. It is made in various versions, differing in the amount of heating, the possibility of placement in pipes with drinking water, etc.
How to connect the cable?
- A cable is threaded into the thermopipe, after which 5 cm of the top layer and 1 cm of aluminum are removed from one side of it. The emerging wires are cleaned of the insulating layer and separated.
- Pipes are taken a little smaller and put on each wire. Their ends are heated and cleaned to 6 mm, combined, and then clamped in an iron tube.
- The top sheath up to 8 cm is removed from the power cable and unwound into parts. One wire is left long for grounding, all the rest are cut by 3 cm. All wires are stripped to 6 mm.
- The supply and heating wires are inserted into an iron bushing installed in a heat pipe, after which they are heated and strongly clamped.
- The joints are insulated with heat-resistant tape.
- Then use a pipe, wider in size, with which the connection is closed.
Installation methods
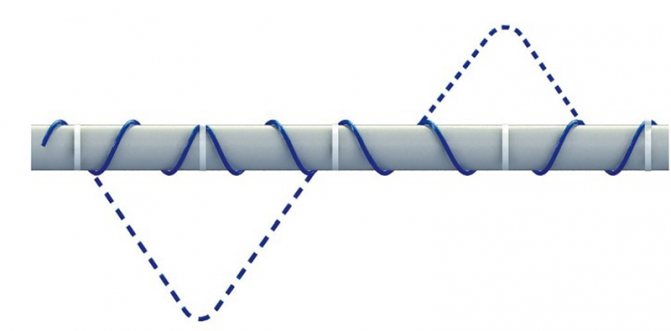
There are indoor and outdoor methods of laying wires along communications. When installing the cable system on the outer surface of the pipeline, different methods can be used:
- spiral winding;
- turn winding;
- straight laying.
The last of the options is less preferable, since heating is carried out only on one side of the communications. It is best used when it is planned to install the heating cable inside the pipe. Heating system installation instructions:
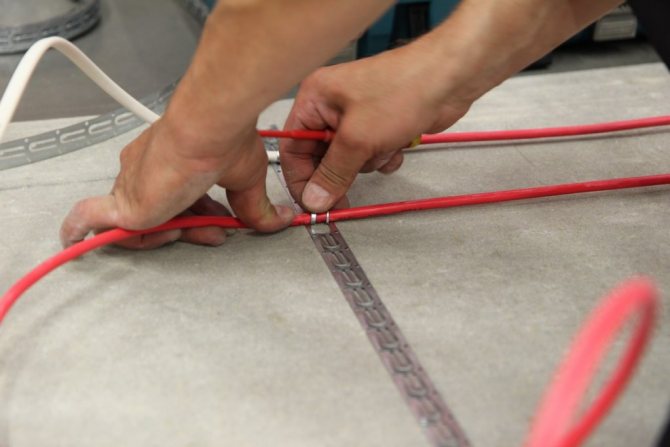
- using adhesive tape and plastic clamps, the material is wound;
- thermal insulation of the structure is performed;
- the cold end of the cable system is not insulated;
- the temperature sensor is installed at a distance of no more than 1-2 cm from the heating element;
- the thermostat is connected using terminal blocks to the power supply, heating system and temperature sensor.
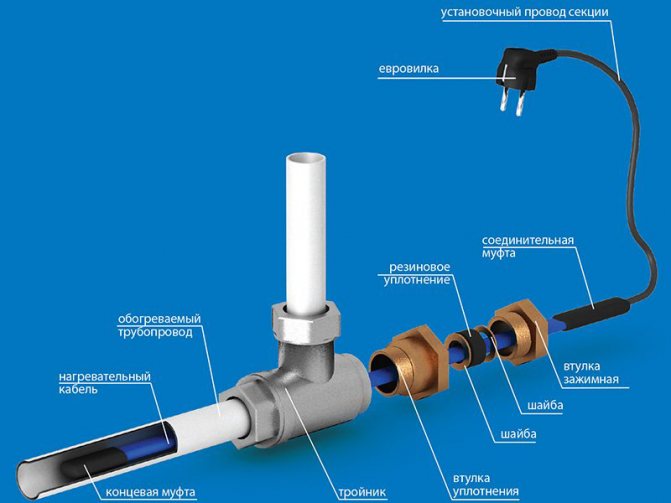
For internal laying, communications with a cross section of at least 40 mm are suitable. This method is most often used for vertical installation. In this case, a sealing sleeve and a tee are mounted, due to which the heating system does not move during operation.
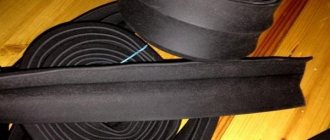
How to insulate a pipeline?
If the pipe needs to be buried in the ground, good insulation will be needed. You can insulate it with expanded polystyrene. It has ideal thermal insulation properties, high density, which can withstand heavy loads, is not afraid of moisture. Created in the form of pipes of various widths in the form of a shell. Also, a rigid plastic sewer pipe is suitable for this; it is worn on top of a foamed polyethylene insulation. You can use foam rubber if the pipe is located in the sewer.
Can not use!
- Mineral wool is afraid of moisture, when it gets wet, it loses its properties, and it is very difficult to remove moisture around the pipe. After freezing, it crumbles into small particles.
- But it is also impossible to use heaters that lose their thermal insulation qualities under the influence of loads.
Installing a thermostat
To make less money spent on heating the water supply, you can install a thermostat. By setting the temperature of +5 degrees on it, it will automatically turn off after reaching this line, thereby several times reducing the cost of heating the water supply. Since the heating cable has a certain service life, which is measured in the number of working hours, it will last much longer.
The thermostat is connected to the electrical panel in the house using a circuit breaker. The heating cable and temperature sensor are connected to the connectors on the thermostat housing. There are designations on the case, which show what is connected to what. If there is no marking on the purchased thermostat, it is better to replace it with another one.
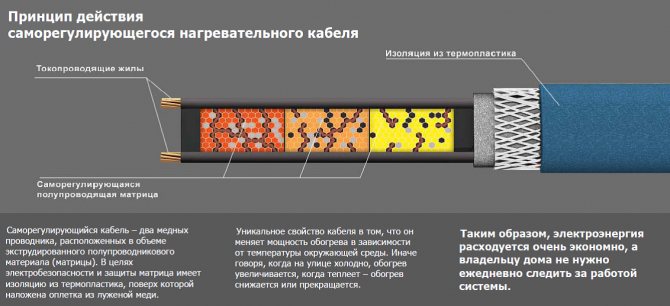
Principle of operation and design of the heating cable
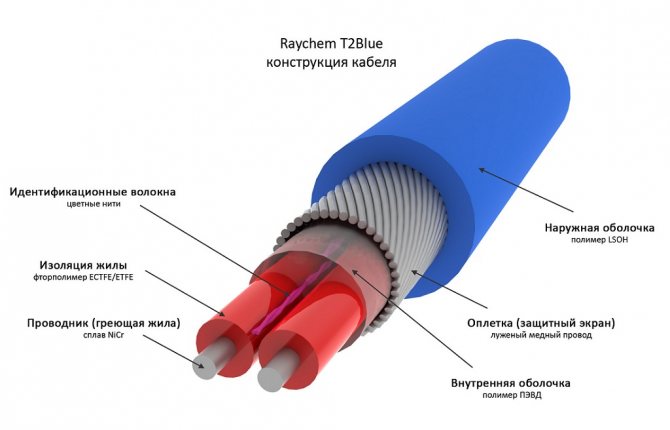
The heating cable structure includes:
- The fuel cell is a carbon-based polymer matrix that changes its resistance with temperature.
- Two conductive copper conductors.
- Thermoplastic electrical insulation.
- Standard metal braid (shield).
- Outer polymeric shell.
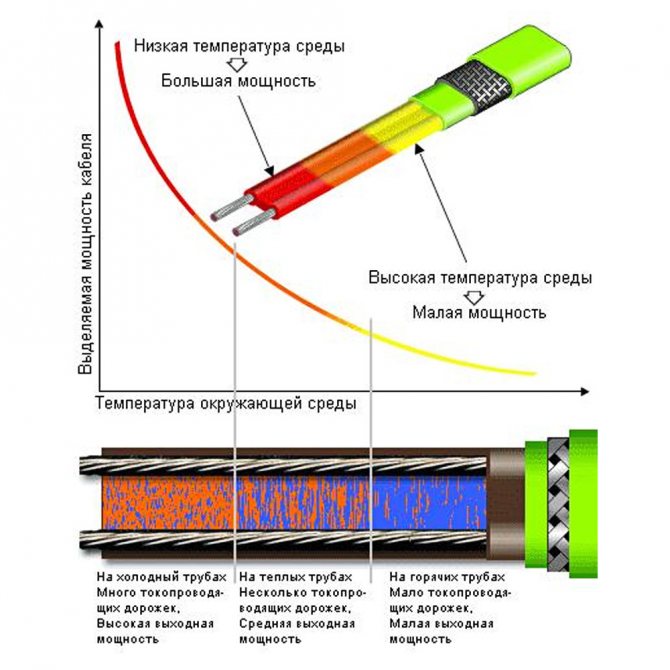
The principle of operation of a self-regulating cable for pipes is to convert electrical energy into heat. When current passes through the semiconductor matrix, it heats up, as a result of which the cable resistance increases and the power consumption decreases.
At a certain temperature of the heating wire, an equilibrium is achieved between the released heat and consumed electrical power. In this way, a self-regulation process is achieved: the same cable emits different amounts of heat energy depending on climatic conditions... In this case, the heating force in different sections of the pipe may differ.
DIY cable making
Using some materials, you can make your own heating cable. For this, a telephone wire under the number P274-M is suitable. It is strong enough, tough, has a suitable diameter, and thanks to its good insulation, it can be used in a humid environment. It will lack self-regulation, but if it is laid outside the pipeline and rarely connected, for example, in the country, then this will be enough.
The telephone cable is divided into several separate wires, one of which is folded in half and then twisted back. With the help of a sealing gasket from the water supply hose, a sealed entry is created at the open end of the wire. It is fixed with a connecting pipe with wires running inside.
Fill the connecting nipple with epoxy glue, crush it a little. Then tighten with a union nut, so the connection will be much tighter.
Outdoor cable
When laying the heating cable on top of the pipe, it is not dispersed into separate wires.It is enough to connect the heated part of the pipeline from the reverse side with wires, not forgetting to insulate all connections well. In this case, the cable is carefully fixed on the surface. This method of external heating is also well suited for sewer pipes.
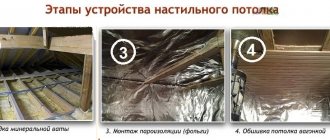
- First, the pipe with the heating wire is wrapped with foil;
- To tightly press the wire to the surface of the pipe, wrap it with tape from above;
- Then they are twisted around with mineral wool.
Frost protection of pipes
Installation
On the cornice, the cable is laid in a zigzag and fixed with special clips glued to the roofing. To heat the gutter, the heater is placed inside and secured with special plastic clips held at one end by the edge of the tray.
The section passed into the drainpipe is fixed in its upper part. If the building has several floors, the heater is attached to a steel wire, otherwise it will break off under its own weight. On the path, porch or floor in the house, the cable is laid out in a zigzag, fixed with clips with dowels and poured with a screed. On pipelines, the cable heater is placed outside or inside.

With external heating, the line is laid over the pipe in one of the following ways:
- in the form of one or more straight sections under the pipe;
- zigzag under the pipe;
- spirally wound around the pipe with equal pitch.
The cable is fixed with plastic clamps or fiberglass self-adhesive, then the pipe is insulated with a heat insulator in the form of flexible mats or shells. Some manufacturers indicate the specific material of the heat insulator and if this point is not observed, the instructions will refuse warranty service.
When using rigid insulation, for example, expanded polystyrene, the place where the cable passes through the insulation is sealed with special bushings. Aluminum tape is wound over the insulation - protection against mechanical damage. If the surface of the pipe to be insulated is rough, it is recommended to wrap aluminum tape on it before installing the heater.
Internal heating is used on short pipe sections with a diameter of more than 40 mm - in the absence of access from the outside. A special type of cable is used - in food-grade plastic insulation.
To enter the heater, a tee is cut into the pipeline. The cable is passed through the hole in the plug provided with O-rings. After installation, the pipe is also insulated.
It is recommended to connect the heating cable to the mains cable prior to installation in the pipe. Connecting after assembly will be more difficult.