28.09.2014
Many are interested in the question of how easily and quickly it is done to insulate the floor on the balcony - one of the coolest, but necessary rooms in every house or apartment. Neglecting the heat-insulating layer, in the future it will be necessary to deal not only with cold air currents that also penetrate into living quarters, but also with the appearance of dampness and its numerous consequences.
With a competent approach to insulation, you can turn your balcony into a full-fledged workplace, several such projects are presented below:
- 1 Video instruction on do-it-yourself insulation
- 2 Choosing the right insulation
- 3 We insulate the balcony floor on the logs 3.1 Waterproofing and laying insulation
- 3.2 A little about concrete screed
- 3.3 Preparing the mixture
Advantages and choice of material for a wooden floor
The balcony is an auxiliary area. It is not designed for large, abruptly changing loads. In addition, as the age of the house increases, the load-bearing capacity of the balcony slab decreases.
Therefore, the choice of wood as a material for the floor on the balcony is quite justified. Light weight, low thermal conductivity and sufficient strength in combination are the most preferable qualities that a material should have for such a purpose.
Pros of wood for a wooden floor on the balcony:

Wood tolerates contact with sunlight and rain moisture normally.
Installing a wooden floor does not require a lot of tools and manpower.
As wood wears out, it changes easily.
Back to content
Wooden coverings
To build a wooden covering on the balcony you will need:
- Board 30 mm.
- Bars 30x40 mm.
- Cement, sand, water.
- Insulation 30 mm thick.
- Rotary hammer with a drill (6 mm)
- Screwdriver.
- Sharp knife.
- Self-tapping screws (6x65), dowels.
- Pencil, tape measure.
- Beacons.
- Linoleum.
- Plywood.
Such a "light" tie is needed so that the logs lie flat on it.
Before starting repairs on the balcony, assess the evenness of its slab. If the house is old and the screed is uneven, cracked, it is better to completely remove it. The slab is leveled with cement mortar 3-5 mm thick. Such a "light" tie is needed so that the logs lie flat on it.
The floor of the open balcony is filled with rainwater, which must drain somewhere.
Therefore, the balcony slabs are laid with a slope outward.
When making a new screed and installing logs, you need to remember this.
Related article: Installation of plastic windows: rules, sequence
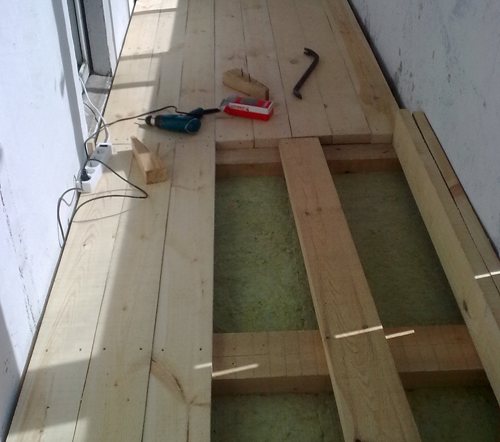
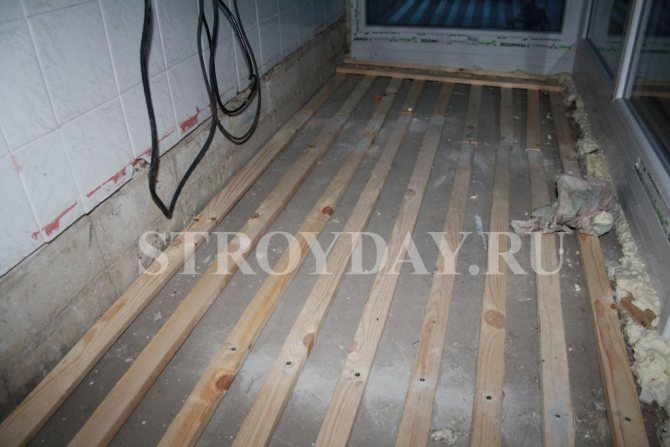
Wooden blocks are taken as lags. Lags and all other wooden parts are impregnated with an antiseptic. It will not be superfluous to paint them. This will protect the tree from rotting and damage by insects. This floor will last a long time. Lags are installed across the balcony (it is possible along, depending on how the boards on the balcony will be laid - along or across).
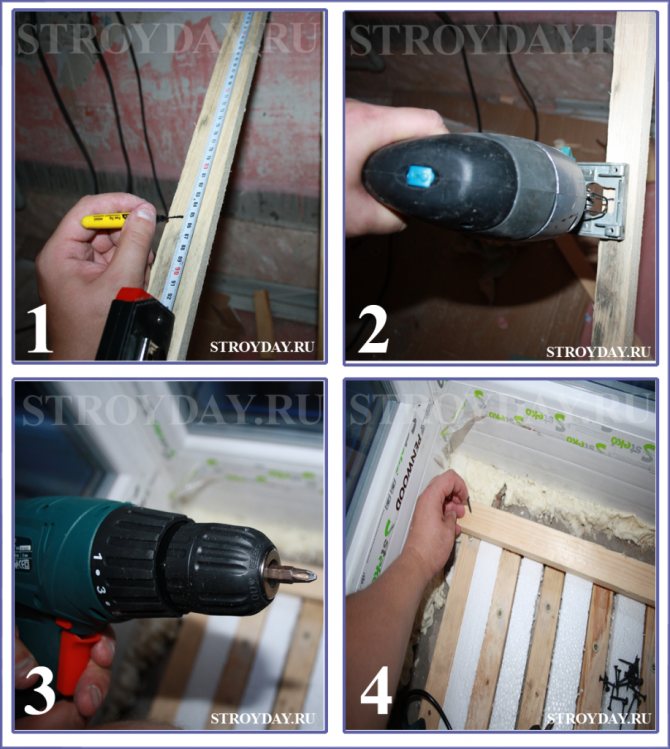
Due to non-observance of right angles, the dimensions of the left wall of the balcony and the right one are most often different. Therefore, it is undesirable to cut all the logs at once. Having measured one side of the balcony and taking away 1.5-2 cm, the first lag is cut off. It is laid, stepping back from the side wall by 10-12 cm. The dimensions of the following lags are determined in the same way as the first, they are installed in increments of 50-60 cm. The last lag should also be 10-12 cm away from the wall. For this, the middle lags can be slightly shifted. Placed logs must be attached to the balcony floor. Boards laid on fixed joists do not creak.
When laying the lag, you need to monitor the horizontal plane of the plane. The bars are leveled first. The level is placed on the logs, and, where required, beacons are placed.As them, you can use pieces of aluminum profile or hardboard. Be aware of the slope. Check the position of the bars and relative to each other. For this, the board is laid on the outer two beams. If necessary, add (or remove) beacons under the bars, and in the same amount on both sides of the bar.
Check the position of the bars and relative to each other. For this, the floorboard is laid on the outer two beams.
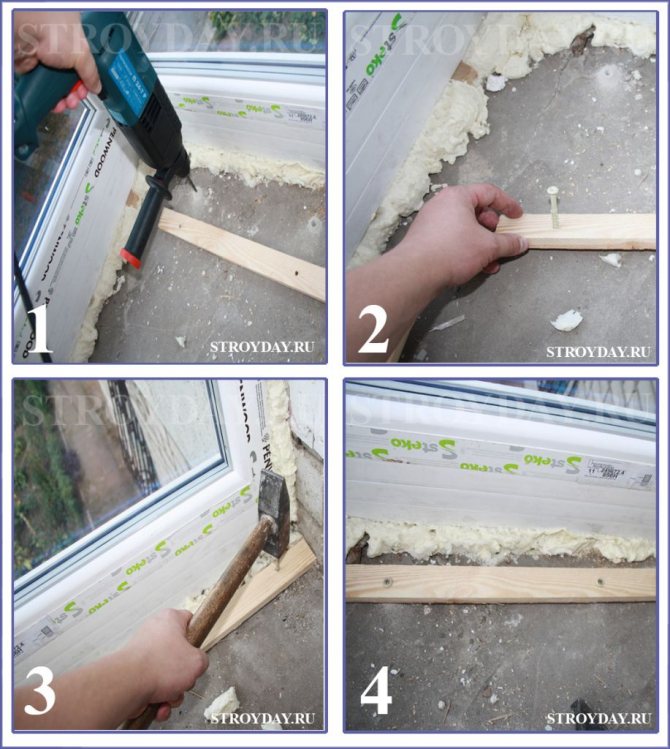
Fix the logs to the balcony floor using a puncher. First, a hole is drilled through the beacon beam in the concrete slab. Next, the dowel with a self-tapping screw inserted into it is driven with a hammer through the bar into the hole in the concrete, after which the self-tapping screw is tightened to the end with a screwdriver. Each bar is attached with 3-4 self-tapping screws. Painted floorboards are laid on the aligned and fixed joists.
Related article: Electric underfloor heating under tiles: do-it-yourself technology for laying tiles on a warm floor
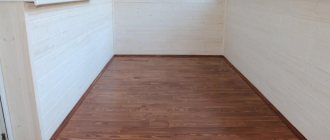
Linoleum can be used instead of boardwalk. It can be laid out directly on the concrete screed, but the flooring will be cold. But if you first strengthen thick plywood on the logs, and then lay linoleum, then the floor will be warmer. The linoleum coating is easy to clean, it does not get dusty.
Above, the question was considered how to make the floor on the balcony, unprotected from rain and snow, so that it does not overload the remote plate and is durable. But on the loggia, the concrete slab can withstand greater loads than on the balcony. Therefore, answering the question of how to make a floor on a loggia, as the first option, you can offer the same wooden floors, but with additional insulation.
Features of insulation
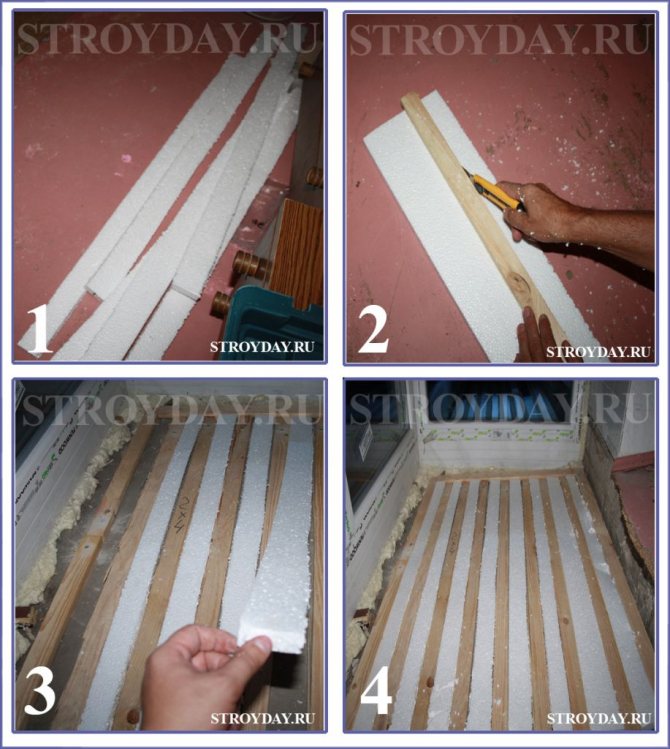
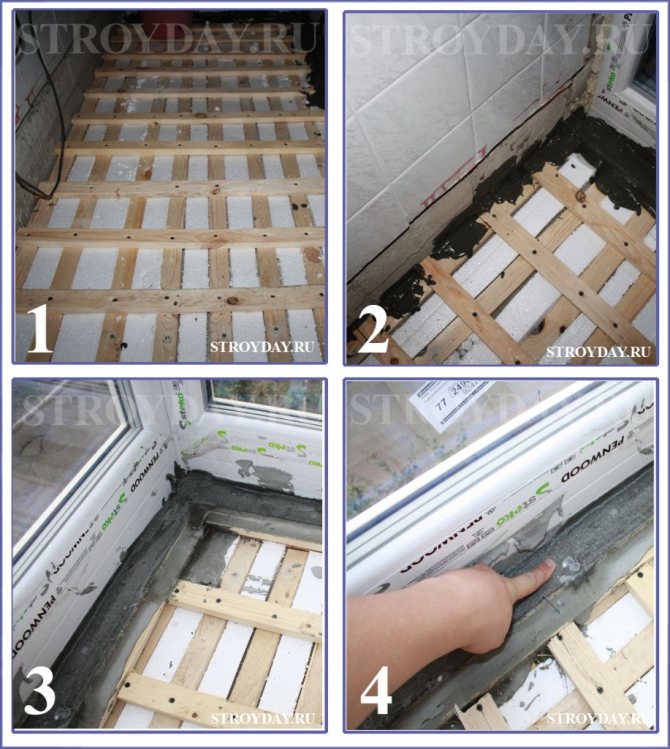
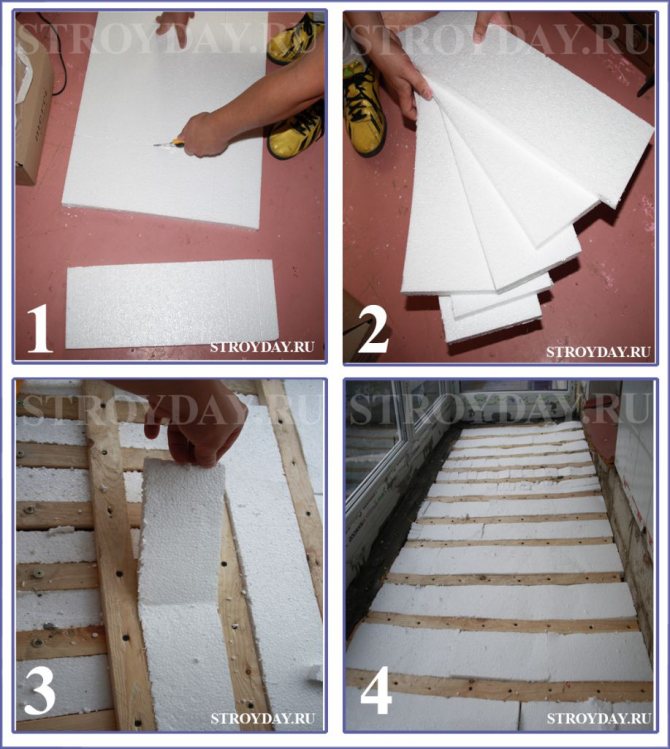
To do this, on the loggia between the logs, a heater is laid, cut according to the measurements taken between the bars.
Cut the insulation along the guide. A bar is used as it. A sharp knife with effort is carried out several times along the bar along the marking line and the insulation is bent to a break. It will break easily at the notch.
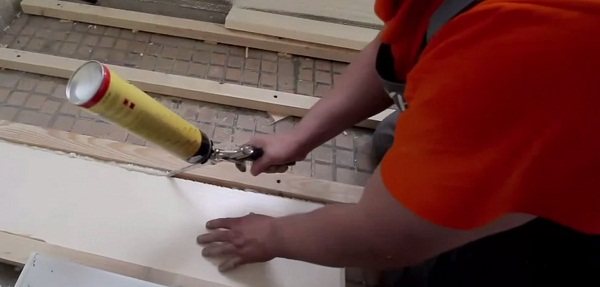
The cut pieces are laid out between the lags. If gaps have formed somewhere, they are filled with polyurethane foam. A board is laid on top. Everything, the insulated floor on the loggia is ready.
Preparatory work
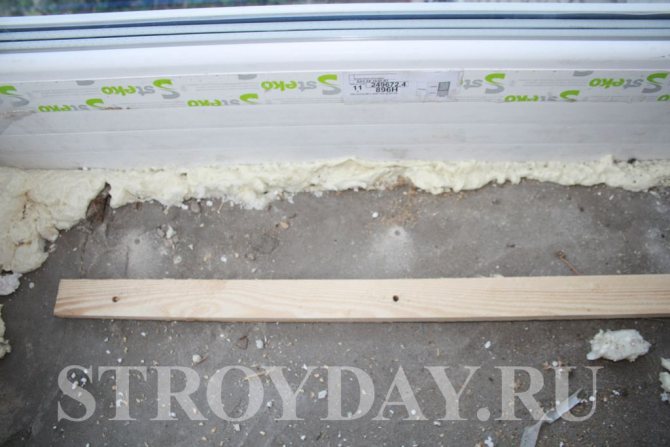
First of all, you need to remove everything from the balcony that is on it. Remove old coating (if any). If necessary, the existing defects of the concrete surface should be plastered, it is good to fill the cracks with polyurethane foam.
Inspect the metal fence, if necessary, weld, paint, remove rust. Purchase materials for covering - a substrate, a timber for a log, a floorboard, fasteners (screws, corners, dowel-nails).
You will need some kind of antiseptic for the boards, as well as varnish or paint to protect the finished floor.
Back to content
"Rough floor" - screed or wooden lathing
The two most common leveling technologies are screed and lathing installation. The choice also depends on what kind of finish you have chosen (tiles should be placed on a cement screed), on how much money you are willing to spend (wooden crate will cost more), on what tools are at hand, and even on which work is more pleasant or more familiar to you - with wood or with concrete mortar.
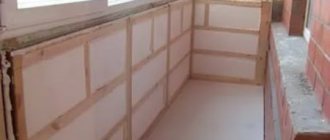
Leveling with lathing and insulation
In order to level the floor on the loggia with a wooden lathing, you must:
- Lay a beam of 50x50 cm transversely with a distance of 40 to 60 cm from each other and attach each to the floor with two (if the width of the loggia is not more than 1.2 m) or three anchors, tightly pulled to the floor. There is no need to level the cross beam.
- Lay logs from the same timber longitudinally on the "crossbars" with a distance of at least 45 cm.
- Using the level, find the highest point on the extreme logs, and from it set the extreme logs along the level, placing mounting wedges under them on the "crossbars" from both sides, and attach them to the "crossbars" with self-tapping screws, and then, placing the level on the extreme logs, align and secure the mids.
- If insulation is required, then between the crossbars and the lags, you need to lay the insulation so that there is no empty space, but without tamping. In order to make high-quality insulation, it is necessary to raise the floor by at least 7 cm, or better - to the level of the floor in the apartment.
- Attach the sheets of chipboard cut to size to the lags with self-tapping screws. The part of the sheet, which is located near the entrance, must be cut so that half of the width of the log remains free, so that a threshold can be attached to this half.
- It is imperative to fill the space between the walls and the chipboard with mounting foam.
Leveling with a screed
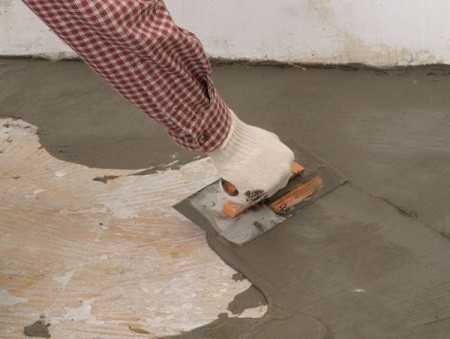
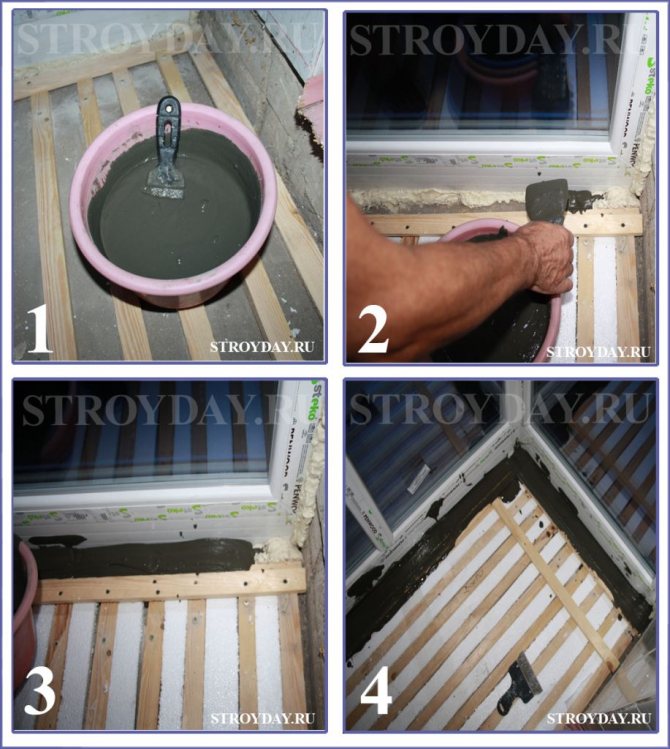
It is not difficult to level the floor on the loggia with a screed. Beacon profiles must be installed on a thick cement mortar using a level, at a distance of 50-60 cm from each other and allowed to dry.
It is not difficult to level the floor on the loggia with a screed. Beacon profiles should be installed on a thick cement mortar using a level, at a distance of 50-60 cm from each other and allowed to dry. The solution must be prepared in the ratio: 1 part of cement grade 400 to 3 parts of sand with the addition of crushed stone or gravel (by weight). The consistency of the solution should resemble thick mashed potatoes. Let the lighthouses dry. Put the mortar and level it with a grater, and the next day rub it again with a grater - so that the screed does not crack.
In order to insulate the screed, it is better to use foam. On the first layer of the screed, you must first lay the roofing material, then the foam, cover the foam with plastic wrap in two layers and put another layer of the screed. But you need to remember that a layer of concrete on the loggia can be made no more than 5 cm, otherwise the screed will be very heavy. If the floor has a large slope, then it will be more correct and cheaper to make a wooden crate.
https://youtu.be/EmsXWnchQXE
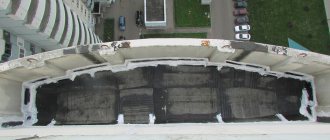
Waterproofing the balcony floor
The need for waterproofing is not an insurance policy. Without proper protection, the floor can begin to gain moisture, mold, metal parts of the floor and fencing begin to rust.
First of all, it is necessary to provide a slight slope for the drainage of rainwater. You can't let her stagnate on the balcony. One of the options for a waterproofing coating can be called a concrete-bitumen screed.
It will allow you to bring the desired slope and at the same time protect the balcony slab from moisture collection. Roofing material is laid on the screed as a second layer of waterproofing, or some other insulating coating is used, the choice of which is wide enough, for example, a special waterproofing membrane.
The canvas should be wider than the balcony so that its edges overlap the wall by 20-25 cm.
Video:
Back to content
We insulate the floor on the balcony with our own hands
Before you insulate the balcony with your own hands, you need to order its glazing for specialists, if there is none. After that, you can start creating a warm floor.
First of all, you need to remove the old decorative coating, thoroughly clean the concrete base. If there are cracks, chips on the surface, they need to be embroidered with a puncher or grinder. The same work should be done at the joints of the walls and floor in order to exclude the penetration of cold. A solution of cement, construction mixture is poured into the resulting cavities. If the insulation work needs to be done quickly, you can use epoxy resin instead of solutions.
floor insulation on the balcony
Then a waterproofing layer is created. You can use plastic wrap as it. But if you want to create a reliable structure, it is better to use special liquid waterproof compounds or a waterproofing membrane.
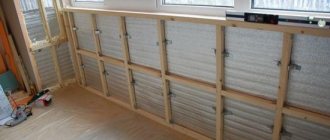
In creating the basis for the construction of thermal insulation, beams are used, the cross-section of which must be at least 4x4 cm. The width of the step when laying them depends on the sheets of insulation. With the help of a building level, the system is leveled using wedges, which are placed under the joists in the right places. After setting the level, the logs are fastened with self-tapping screws. The bars are fixed to the walls with plastic brackets and anchor bolts.
Laying a wooden floor
The first step is to strengthen the first row of logs. The distance between them should be about 45-50 cm, they are attached across the balcony and attached to the floor with dowel-nails. They should not reach the walls by 2-3 cm in length.
The second step is the laying of the second, longitudinal layer of the log. This layer is the main one, it is made of a thicker bar and carries the floorboard layer.
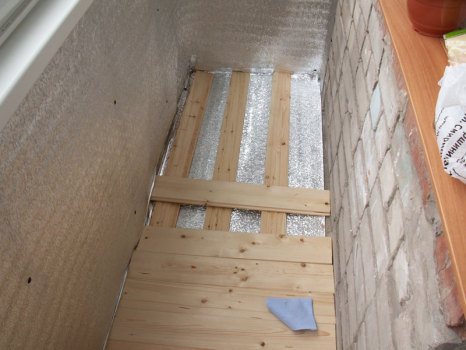
The lags of the main layer are located along the balcony, the distance between them is 45-50 cm, from the walls - about 3-5 cm.
This lag layer must be leveled horizontally, placing pieces of wood under them, if necessary, to adjust the level. Between the lags, it is advisable to lay a layer of insulation - mineral wool or some similar, which is cut with a knife to size and located in the intervals. There is a separate article for this.
Then they start laying the floorboard. It is cut into pieces across the balcony so that there is a gap between the board and the wall of about 1 cm.A spike must be cut off from the extreme board and attached to the logs with self-tapping screws. The screws must be screwed into the groove at an angle so that they cannot be seen after attaching the next board.
Sometimes, instead of a floorboard, thick plywood or chipboard is used, but this option seems short-lived due to its low resistance to moisture, and even atmospheric humidity will destroy such a coating pretty soon.
Video lesson:
Back to content
Wooden floor on the balcony: design features
The most widespread option is full dismantling the old floor and replacing it with a new wooden floor.
All work can be done absolutely on my ownand achieve good results.
The main thing is to follow all those rules and recommendationthat you will read in this article.
You are required to be removed everything items and things from the balcony, remove old cover and remove old material. In this case, the wooden structure will be installed on all rules and standards, thanks to which it will serve you many more the years.
Preparatory stage
Any independent work on the installation of a wooden floor should begin with calculations the length and width of the balcony.
It should also to prepare floorboards, wooden beams, buy special fixing elements. You will also need a tool that will protect floor covering from moisture.
At the preparatory stage, it is important to calculate everything correctly and make sure that you have all the necessary elements at your disposal.
Leveling the floor surface
The next step involves careful alignment surface. It is not necessary to do this to perfection, however certain work you have to do.
You are required to put lags (horizontal bars). Boards will be laid on these logs in the future.
It is worth carefully examining the concrete slab so that there are no cracks and irregularities on it.
Construction of the lathing
This is necessary in order to insulate balcony at the bottom, as well as to enable good circulation air under the floor. Between the concrete slab and the planks, you can put a high-quality insulation. This is especially true if the balcony is be used as a living space.
The lags are attached to the balcony slab using dowels. Before that, you need to drill into the plate small holes.
Bars are placed all over perimeter balcony, additional joists are installed in such a way that to protect bending boards. If the balcony is long enough, it is recommended to lay the boards across.
Basic rules for laying a frame from a log
- The frame is laid out in the form of a box plus an additional bar in the middle;
- The wood is sometimes covered varnish or another agent capable of resisting moisture;
- The strength of the frame is checked in this way: it is worth stepping on it first in one part of the balcony, then in another. If its elements not stagger, which means that the frame turned out durable and reliable;
- The floorboard is being laid perpendicular bars.
The final stage of work
Now only anchor a floorboard. This is not at all difficult to do. Each board is stacked alternately, one by one, with their own hands. Boards are attached to the logs with self-tapping screws.
The first board is fixed facial side out to one side of the prepared frame, and the next board inserted into the groove.
As a rule, the ways of fastening the material described in the instructions that come with the packaging of the material you have chosen to finish the floor.
Wooden floor enough easy to do it yourself. First, you will save your finances on this. Secondly, quickly learn to similar work on laying floor coverings, thanks to which you can carry out more complex work in the future. This floor will be fine look on the balcony and will be able to protect the room from extreme cold.
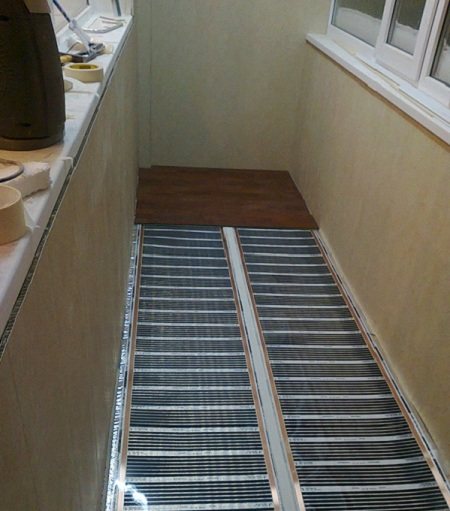
Laying a film infrared floor on the balcony
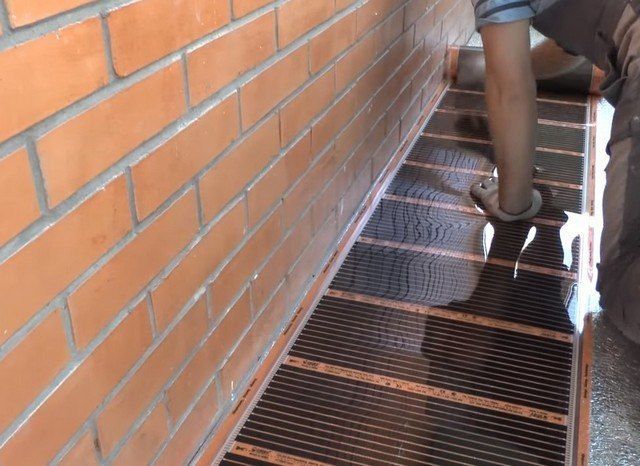
Before you start laying the warm floor on the balcony, you need to ensure that it is easy to connect to the power supply. Therefore, in advance, you need to drill a hole in the wall through which the wires will be fed. It is important in the future to carefully close this gap, excluding freezing of a small area in the next room. Once the preparatory work is completed, the following work is carried out:
- The old coating is removed, the screed is leveled, and the seams are closed with cement mortar.
- The surface is being leveled.
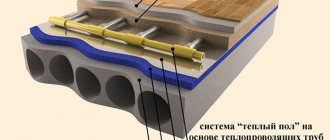
- Heat-reflecting roll material is laid.
- Film sheets are cut and prepared for stacking.
- The sheets are stacked and additionally fixed with masking tape to the lower layer: this will exclude their displacement in the future.
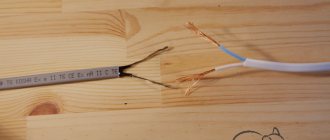
- The thermostat is installed, the wires are connected (according to the instructions attached to the kit).
- Isolation of the junction of the wires.
In the future, finishing with tiles, laminate is carried out. Such insulation of the concrete floor on the balcony with your own hands also allows laying carpet or fluffy carpet. The advantage of this method is the efficiency of heating the room and low power consumption when the heated floor is periodically turned on. Constant heating can be costly and unprofitable.