A ventilation duct in a private house is the only way to get fresh air in a living space. The air flow must be constant so that everyone in the family can stay healthy. It is not difficult to create ventilation, but it is not easy to choose one of the options. The scheme of the house will help in this matter, because the future hood will depend on the structure itself. And she will provide the residents of the house with protection from mold, fungi, dampness.
- 2 Natural ventilation and its disadvantages
- 3 Options for improving natural ventilation
- 4 Forced ventilation in a private house
- 5 Supply ventilation in the house
- 6 Supply and exhaust diagram with recuperator installation
- 7 Creating ventilation in a private house with your own hands
7.1 Calculation of ventilation by the area of the house
- 7.2 Selection of the duct cross-section for a private house
Types of ventilation in a private house
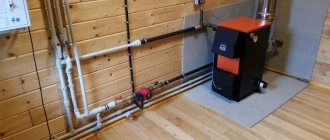
Installation of ventilation in a private house will become an integral part of the building. Experts in the construction business claim that this particular work requires a lot of effort. In a private house, you can create two options for exhaust systems:
- exhaust ventilation;
- supply and exhaust.
Exhaust ventilation will allow the air inside the room to flow out freely with the help of forced intervention, and fresh air will flow through the ducts in a natural way.
The supply and exhaust scheme implies forced discharge and inflow of fresh air into the house. This scheme is much more complicated in execution, the prices for the elements are more expensive, and therefore it is rarely used in the construction of small private houses.
In turn, each of the proposed ventilation systems can be divided into centralized hood and decentralized... In the first case, a special ventilation unit is used. With its help, air circulation in the room occurs. The second option involves the location of several units throughout the system. Each of them works independently of the others and is installed in every room of the house.


Additional Information
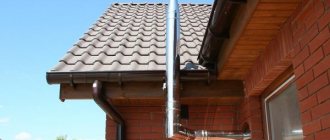
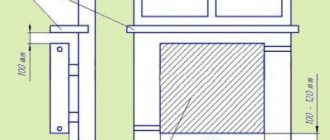
- The ventilation pipe should protrude so that the angle between the ridge and its upper part does not exceed 10 degrees, otherwise the draft level will be significantly reduced.
- In the inner part of the air ducts, as well as at a distance of five centimeters from them, cables, gas pipelines and other elements of communication systems should not be placed.
- The passage of flows should be carried out to the hood even with the interior doors closed, and not in all cases it is necessary to install grilles. It is enough to leave a gap at the bottom with a width of 1.5-2 cm.
- Too weak ventilation of the living space does not allow achieving a high level of environmental safety, especially if materials based on plastics, formaldehyde resins, and so on were used in the finishing process.
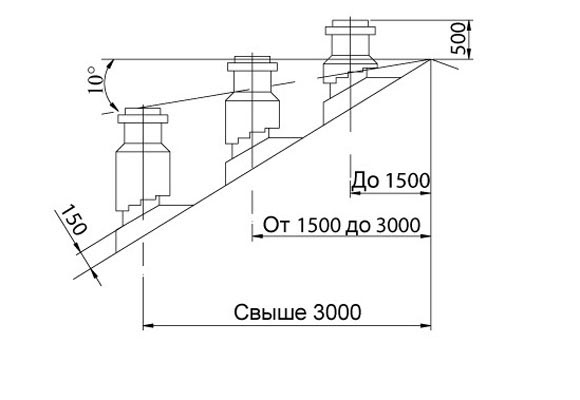
The installation height of the chimney is determined according to this principle.
Natural ventilation and its disadvantages
In a private house, a system such as natural ventilation may be present. It is not always possible to create it with your own hands in a full-fledged form. This question arose sharply when most people began to use plastic windows and wall insulation. The situation gave rise to numerous problems - increased dampness, the formation of mold and mildew in the house. Such problems did not arise when old windows were used, because they let fresh air through the cracks. The draft created the necessary conditions to reduce dampness in the corners of a private house.
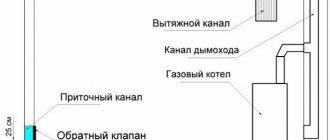
This ventilation system uses the principle of vertical ducts. They are mounted indoors at one end, and the other is displayed just above the roof of the house. Since the air in the room is warmer than the one around the room, it is pushed into the exhaust duct and contributes to the intake of a new portion of air from the external space. This ventilation system implies many factors that are beyond human control - ambient temperature, wind, and the channel section can be made of the required diameter with your own hands.
If you turn to specialists in the construction business, they argue that such a ventilation system of a private house will work only when the temperature of the external space is equal to not higher than 12 degrees on the Celsius scale. If it gets hotter, the cooker hood starts to work much worse.
This situation may seem ideal for the winter season, but there is also a particular drawback that cannot be ignored. Since the temperature difference in the house and outside is quite noticeable, the ventilation system starts to work faster. The heat that has accumulated in the house during the day literally flies out into the chimney. Therefore, residents of private houses spend more resources on heating their premises than is required by normal conditions.
The ventilation scheme of a private house implies the creation of such channels in the bathrooms. Often, such hoods can be seen in the kitchen, basement and a number of other rooms where it is necessary to make a large outflow of air from the room. Particular attention should be paid to premises that are located in a private house below ground level. Radon gas is often formed in them. To reduce its amount, it is recommended to build powerful ventilation duct.
The same experts say that sometimes these measures are not enough. At the same time, the rationality of the system is completely lost. This is used by people who can open the window at any time, create a strong air flow in the premises and quickly ventilate the house. Only one nuance is lost - such a ventilation system is unacceptable, since it puts all residents of the premises at risk of illness.
As a result, there are significant drawbacks - ventilation in a private house of this type implies uncontrolled air flows, and also does not allow regulating the outflow and arrival.
Supply devices
Due to the advent of modern materials, buildings began to be more airtight, which led to another problem associated with a decrease in air intake.
If earlier houses and apartments could be ventilated without additional air supply, now the situation has changed. It is especially difficult to breathe in a home if plastic is used as the main material.
About functionality
Ready-made products for air intake from the street are able to completely prevent the penetration of dust, insects and all kinds of sounds. After installation, there are no drafts in the premises. The supply device resembles an air reducer in its principle of operation, which slows down the flow rate.
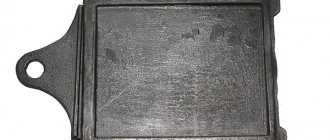
This is an air intake valve.
It is extremely easy to operate the supply valve, as it is equipped with a convenient handle for closing the channel. Its visible part fits perfectly into the interior of the room. Being from the outside, it does not spoil the impression of the facade of the building. During operation, you will not have to spend financial resources.
More about product design
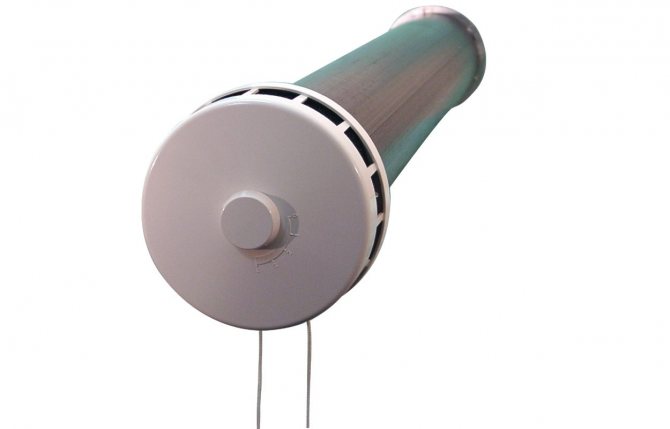
An element with an air permeability is a small plastic tube, the diameter of which can vary considerably. Inside there is insulation to prevent the penetration of sounds.
Below it is proposed to familiarize yourself with the structure of products of this type.
- The plastic duct is a basic component, since it is through it that air enters the room.
- The adjustment knob is on the inside. It can be used to block the channel.
- The filter element allows cleaning of incoming streams from dust particles.
- The inner piece of the headpiece, equipped with a ventilation flap, is the main limiter.
- The O-ring is designed to improve the sealing between the elements of the product.
- Insulation material provides the ability to protect the interior from sound and other effects.
- The outer grille helps protect the structure from precipitation.
- The mosquito net inside it allows you to completely prevent the entry of insects.
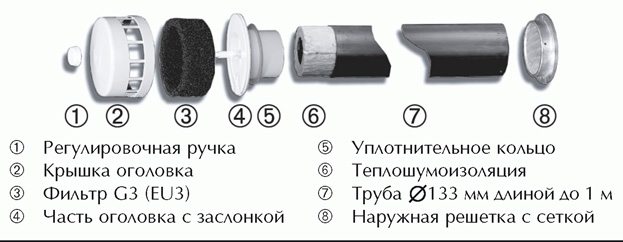
The main parts of the product are shown.
Attention! The length of the plastic sleeve can vary between 40-100 cm in 10 cm increments. Therefore, when choosing, you should round off the wall thickness to these values. The excess part is simply cut off.
Installation work
The first step is to choose a suitable place for the installation of the element on the side plane bordering the street. The functional head must have direct access, otherwise control will be problematic. The most optimal option involves installation next to a heating radiator so that the incoming air has time to warm up.
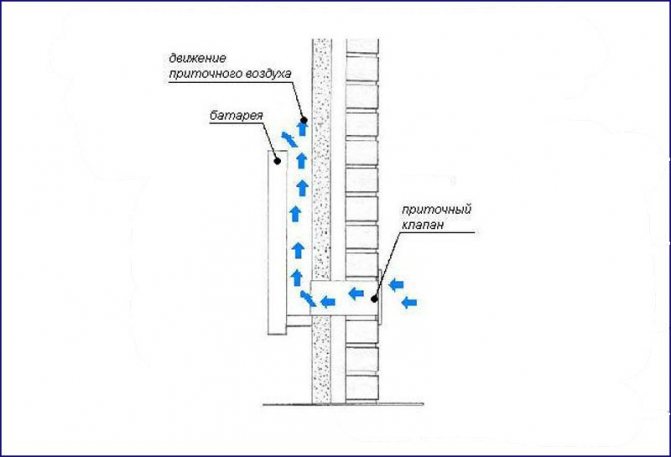
One of the installation options is demonstrated.
After selecting an acceptable place, proceed directly to making a hole. If the walls are wooden, then a conventional drill and drill are used. In other cases, diamond drilling is carried out with a special tool. When constructing the opening, it is recommended to make a slight slope towards the street to drain the condensate.
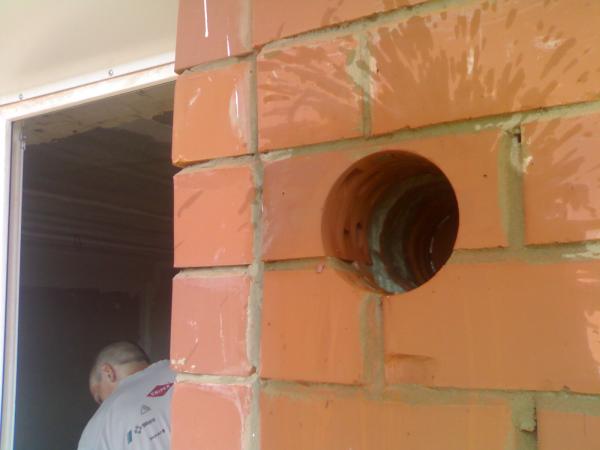
You will have to make approximately such a hole.
A plastic sleeve of the required size is inserted into the finished hole. A ventilation grill is installed on the outside, and a functional head is inserted from the inside. In the process of fixing the elements, small bolts are used, with the help of which the structure gains rigidity.
Options for improving natural ventilation
You can always improve the effect of natural ventilation in a private house, even with your own hands. For this purpose it is necessary use a special valve... It is customary to mount it at the entrance to the canal located indoors. This device is equipped with an automatic system that reacts to humidity. If an increase in the indicator is observed in the room, then the automatic relay is activated and the valve opens the channel more. Otherwise, it closes. The sensor becomes a sensitive element, which is mounted outside the house and receives a signal of the ambient temperature.
When the cold season comes, the valve must be covered with your own hands. This nuance will reduce the ingress of cold air into the house through the ventilation duct. Unfortunately, even this control option is not able to hide all the shortcomings of the natural ventilation system.
Forced ventilation it is installed in a private house using another existing method. This option will become much cheaper than the previous one, but more effort will be needed to maintain it. It implies installation of special grilles with valves on the air inlet and outlet channels. Moreover, the latter are controlled exclusively by hand. The adjustment is carried out when the ambient temperature changes. It is recommended to change the position of the ventilation valve at least once a season.
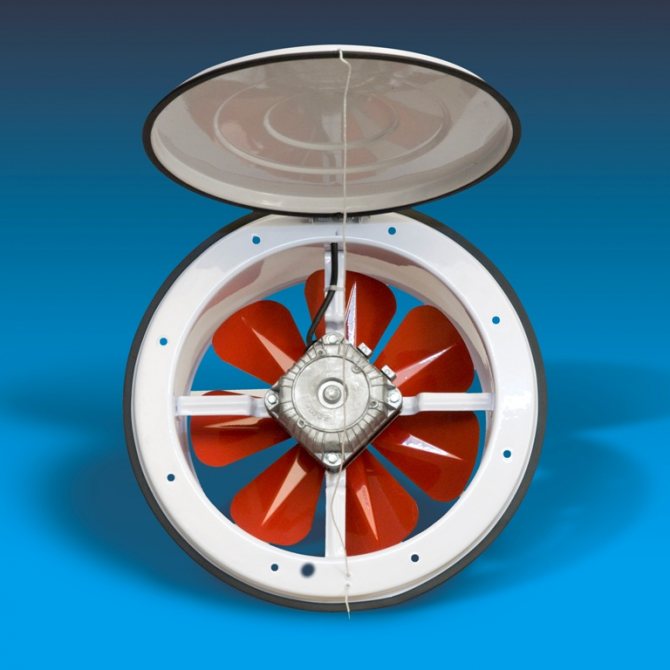
The last option for improving the natural ventilation system is the installation of special fans on the ducts. The similarity of such a hood system can be observed in the kitchen. The only downside is what happens destabilization of the entire ventilation system... In other words, air can begin to arrive from a duct in a pantry or back room.
How to make a drywall hood with your own hands
Consider the process of making a hood characterized as a domed hood. Passive type. First, we will decide on the material and tool, and then we will analyze all the stages of the proposed work.
Materials (edit)
To equip the hood option under consideration, you will need the following set of materials:
- drywall for the construction of the structure. It is desirable that it be moisture resistant. This will keep the duct intact,
- metal corners by 75 mm with a thickness of 2 mm,
- metal profiles required for fixing drywall,
- corrugation having a length of 2 to 5 m, which is individual. There is a dependence of the distance between the device and the ventilation shaft,
- putty and enamel for finishing.
Attention! The hood frame must be at least 65 cm from the hob surface. Moreover, the permissible maximum of such a height is 75 cm.
As for the tool, you will need:
- puncher,
- screwdriver,
- scissors for metal,
- spatulas and brushes,
- tape measure and level (preferably laser).
Procedure
The first stage of work is the layout of the kitchen area. It is necessary to focus on the ventilation hole and determine the position of the duct for air exhaust. The width of the hood should correspond to the size of the top surface of the slab. If the exit to the ventilation shaft is to the side, then a corrugated hose is required. Otherwise, when the desired hole is located directly above the plate, the corrugation can be dispensed with. The condition must be met when hood, located under drywall, and the plate is aligned along the axes.
The assembly of the frame looks like this:
- A galvanized profile is attached to the wall. Through the level, the bottom of the future box is marked. Installation is carried out through the use of anchors.
- A start profile is set in accordance with the markup. If you need to give a relief to the box, then the profile is set in the desired direction. To do this, it is simply bent or pre-cut in the right places.
- Several vertical guides are attached to the mounted profile. Self-tapping screws are used. Suspensions are formed, on which another profile is fixed. This completes the assembly of the frame.
- The strips are attached to the lower part, installed across.
Info! The material of the hood can be MDF, moisture-resistant drywall, plywood, sheet metal, thick foil and non-combustible plastic.
The next stage is the assembly of such a part of the structure as hood box in the kitchen:
- The frame is made from the profile and fixed to the wall. The sides of the case will need to be attached to an already installed structure.
- The main profile is used for the manufacture of elements necessary for docking with the lower frame.
- With the help of jumpers from the profile, the required duct stiffness is set. This is achieved by strengthening its lateral parts.
- Corrugation is installed. First, you need to check that there is a draft in the ventilation shaft. To reduce noise ductcreated by do it yourself, is wrapped with soundproof material.
- Plasterboard cladding is made. Sheets are cut in such a way that the workpieces are even. If this is not the case, then it will not be possible to achieve an acceptable quality of joints, and this will negatively affect the finishing process. Use a sealant to cover up work blemishes. A metal corner is suitable to protect the corners of the hood.
- The last stage of work is variable. The application of a paintable putty is the easiest way to finish. You just need to choose the right color in harmony with the interior of the kitchen.The choice of decorative finishes not only complicates the work, but also leads to additional expenses associated with the purchase of the appropriate material. Finally, ornaments and patterns add originality to the kitchen space. Although this design requires certain skills.
The above steps allow you to assemble a passive type hood. Although this is not a verdict. It is enough to install an electric fan at the inlet to change the type of hood.
Important! When installing an active hood, do not forget about the check valve - a door version with a spring. The air flow created by the fan opens the valve, which leads to the release of the fumes outside, and its stopping blocks the intake of air masses from the outside.
Forced ventilation in a private house
This ventilation option can only be considered if a sufficient amount of fresh air is supplied to the private house. The disadvantage of the hood becomes the problem of its dismantling, which may be needed for a variety of reasons.
Reduced channel performance becomes a secondary issue. At this moment, a decrease in circulation is observed. The room is left without the required amount of fresh air. It is recommended to install such ventilation in a basement or basement room, where the risk of dampness is much higher than in other parts of a private residential building. Experience shows that there are no problems with installation and adjustment of the correct outflow and flow of air. This procedure can be done by hand in a short period of time.
Do not forget that the exhaust scheme may imply the presence of fans... These devices are able to regulate the supply of fresh air. Any owner can install them with his own hands.
What is exhaust ventilation for?
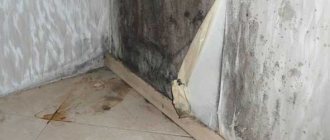
High humidity is almost always observed in the bathroom and toilet.
If air is not removed from the room in time, the following negative consequences can be observed:
- Condensation on the ceiling and walls.
- The appearance of an unpleasant, often putrid odor.
- Mold development.
All this not only reduces the comfort of being in a given place, but can also pose a danger to human health.
To solve the problem, it is enough to install an exhaust fan in the stretch ceiling in the bathroom.
This will not only help to establish air exchange and maintain an optimal microclimate, but also significantly reduce the risk of the reproduction of pathogens.
Supply ventilation in the house
One of the problems of a private house is the lack of fresh air. Therefore, its delivery should be compulsorily established. You can achieve the desired result using a special device called supply valve... In addition to the main function, it is able to provide:
- minimizing the amount of noise from the outside world that enters a private house;
- air filtration;
- thermal insulation of the case, which reduces the likelihood of its freezing, as well as the creation of condensation;
- you can adjust the operation of the device yourself.
Every home ventilation duct will require additional installation of this device. In extreme cases, you can do with one valve, provided there is centralized ventilation.
The function of the valve depends on the temperature difference between the room and the surrounding world. During the operation of the forced draft, the adjustment is carried out in manual mode.
Supply and exhaust scheme with recuperator installation
If a supply and exhaust ventilation scheme is used in a private house, improve her work possible by mounting a recuperator. The device is used to heat the air supplied to the premises. The principle of operation lies in heating the air by means of that which is removed from the house. Moreover, the system does not mix them. During the summer period of the year, you can establish a reverse process in the house.The air entering through the forced ventilation duct can be cooled.
This technique is deservedly the leader among the most diverse options for hoods around the world. According to the expert, the future is assigned to this scheme, which allows managing energy-saving technologies. The cost of this system is great. If you use it constantly, then after a short period of time it will fully recoup the costs.
Exhaust fans
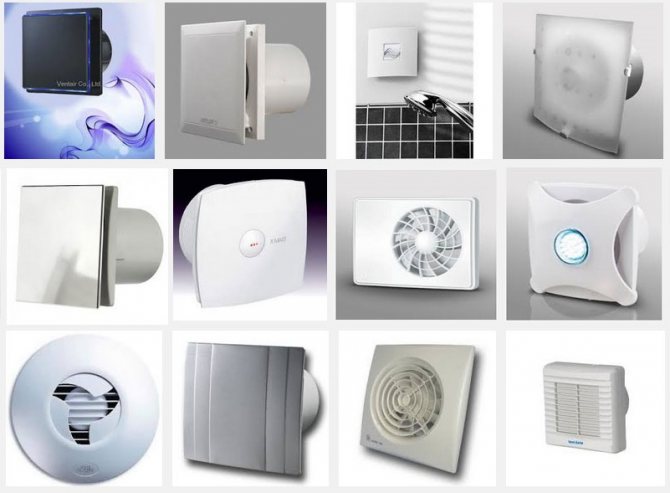
If a ceiling hood for a bathroom is installed, it is necessary to select in advance not only the mounting method, but also the fan itself.
By the principle of installation, the devices are divided into:
- Duct. For their installation, in addition to the diffuser, the presence of air ducts is also required.
- Channelless. Installed in a wall or ceiling hole. Available in a variety of shapes and sizes. They can be selected not only according to the required technical characteristics, but also in appearance. Such models are easy to fit into any interior.
Based on the design features of ceiling fans, the following types are distinguished:
Diametric devices. Their main difference is the presence of a drum impeller. Their low performance should be noted, so they are rarely used.
Axial ceiling fans. The blades mounted on the axle, rotating, inject air in a given direction. The maximum working pressure is 50 Pa. Can only be installed in ductless ventilation systems. On the positive side, low cost and ease of installation should be noted. These fans are highly efficient.
Centrifugal type devices. Their main advantage is their high efficiency. Quiet operation also makes them stand out from others.
There is also a classification based on where the device will be mounted. There are the following types:
- wall-mounted;
- ceiling;
- wall and ceiling;
- channel.
In addition, ceiling fans can be subdivided depending on the availability of additional features. For example, with a check valve or with a humidity sensor.
DIY ventilation in a private house
The time has come when all the elements of the ventilation puzzle in a private house are collected. Selected specific exhaust system, the material is purchased and all that remains is to correctly install all the elements. The first step is to understand what calculations should be made before installing ventilation. One of them is the calculation of the required amount of fresh air. This parameter will be needed when installing channels, as well as when choosing additional equipment.
Calculation of ventilation by the area of the house
This calculation is carried out in order to obtain accurate data on air exchange. It is necessary to take into account all the nuances thatCan affect the result:
- The minimum and maximum rate of received and discharged air is calculated for the entire area of the house. The calculations are performed taking into account special standards.
- One of the obtained values is used as the minimum unit of the productivity of all ventilation ducts in a private house.
- The above result is compared with calculating the height of the roof of the house, as well as the maximum length of all exhaust ducts.
- Standard ventilation ducts are installed indoors, although this depends on the characteristics of the room.
Choosing a duct cross-section for a private house
When it becomes necessary to select the diameter of the ventilation duct, the following system applies:
- the minimum indicator of the channel diameter should not be lower than 150 millimeters;
- under ideal conditions (vertical installation of the channel, length 3 meters), this diameter allows you to get 30 cubic meters of air per hour;
- when it is necessary to increase the air flow, the length and section of the selected channel increases;
- on the same floor of the house, the length of the exhaust ducts must be the same. In this way, you can achieve an even distribution of air throughout the house;
- the diameter of the ventilation ducts, for the convenience of mounting the ventilation system, set the same.
DIY materials and equipment for a ventilation device
Both when using window fans and centralized ventilation, in the case of air supply (forced ventilation), an air distribution system must be installed. Usually these are various kinds of rotary grilles, directing the air flow to the ceiling and dividing it, eliminating the occurrence of drafts.
Recommend: How to make ventilation in the attic floor
The fan should, if possible, be able to adjust the amount of air flow, and necessarily a system that closes it when it is off. It can be a diaphragm or a regular door.
It is better to purchase ventilation ducts ready-made, plastic or galvanized steel. The latter are used for ventilation of rooms where air can be heated to high temperatures (say, a kitchen or a sauna) at which plastic parts can warp.
The cross-section of the boxes is selected according to the formula C = Os * 2.778 / V.
Here: "C" - the estimated cross-sectional area of the duct, cm²; "OS" - the volume of air passing through the section, m³ / h; "V" - air speed in the duct, m / s; 2.778 is a dimensionless coefficient.