Water heater installation rules
First of all, you need to decide where to hang the boiler. There are no strict restrictions. But there is one important requirement. It's all about the device itself. If it is electric, that is, it belongs to the category of electrical appliances, then the installation is carried out away from water.
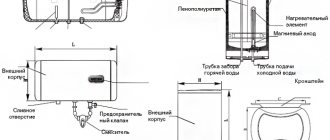
As for the process of fixing the water heater itself, it all starts with measurements. The thing is that the mounting on the boiler is two brackets that are attached by welding or bolts to the back of the device. For measurement, two parameters are needed:
- the distance between the brackets, or rather, the middle of the lugs;
- the distance from the lower edge of the brackets to the upper edge of the water heater itself.
It is clear that the first parameter is necessary in order to correctly install the hooks between themselves on the wall in order to put the boiler on them. The second determines the distance from the blade to the device. If we take this distance less, then, firstly, the water heater will not hang on the fasteners, and secondly, it simply does not fit into the prepared space. Therefore, at least 5 cm must be added to the second size.
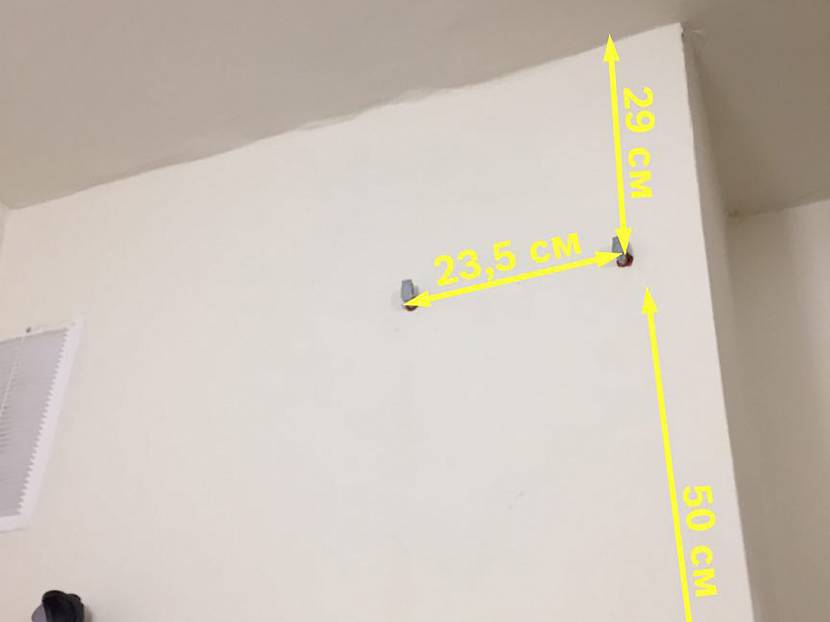
Marking on the wall for mounting a water heater Source proklimat.com
So, first, the second dimension is deposited on the wall in the place where it was decided to carry out the installation. A vertical line should be drawn along this size. And already from it, half of the first parameter are laid in two directions. Here it is important to mark the hooks strictly along a horizontal line, for which you need to use the building level. If this is not done, then the water heater will simply hang crooked.
The markup is applied, you can proceed to drilling the wall. We drilled two holes, drove plastic dowels inside, screwed in the hooks. Please note that the fastener for the water heater is a product that comes with the device in the kit. But not always. If you didn't find them in the box, you'll have to buy.
And one moment. The hooks must not be screwed in completely. There must be a gap of at least 1 cm between the curved elements and the wall surface.
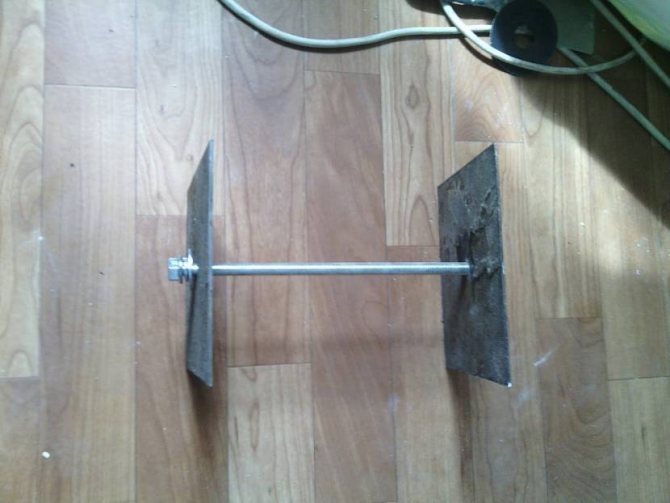
Reinforcement element for a thin partition in the form of steel plates
This is how the installation process should be carried out if the wall is concrete or brick. The latter has its own subtleties. For example, if the wall is a thin partition in half a brick, then it is better not to install a water heater on it. If, nevertheless, it is decided to carry out the installation, then the attachment section must be strengthened. Alternatively, two metal plates of a square cross-section with dimensions of 30x30 cm minimum, which are installed on both sides of the partition and are fastened together with pins. Hooks are welded to one of the plates by electric welding, on which the boiler is installed. That is, two such plates are required for each hook.
Fastening the boiler to a brick wall can be carried out using other fasteners:
- anchor screw;
- hairpins.
But in this case, there is one requirement - the thickness of the wall should be at least one brick.
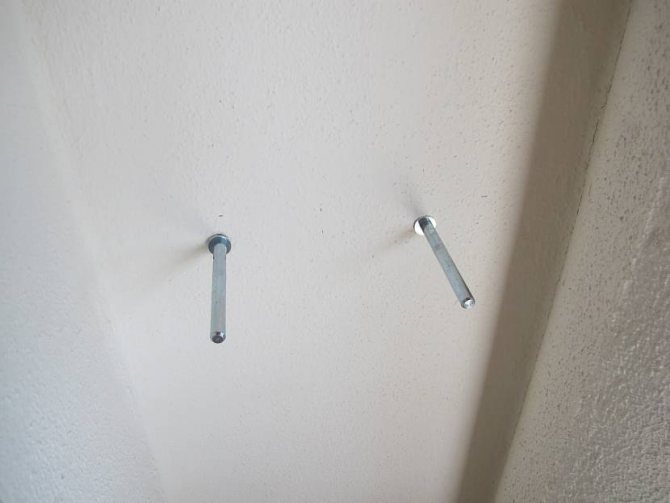
Studs in the wall for installing a water heater Source otdelkasten.com
Installation on foam concrete
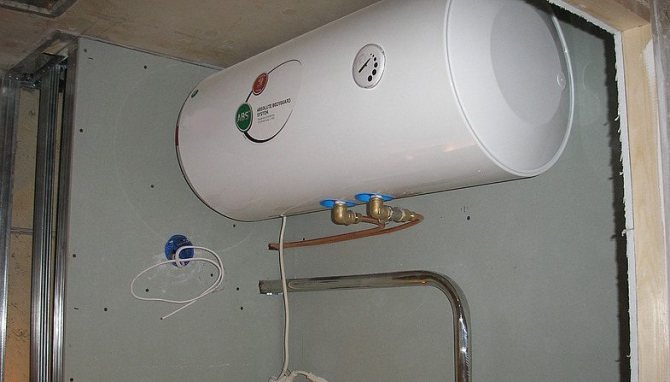
Foam concrete blocks, so popular in private housing today, have one drawback. They have a weak point bearing capacity. For example, if a water heater with a capacity of 50 liters is hung on the wall, then the standard mount for the boiler is selected - hooks for plastic dowels. If the volume of the water heater is 80 or 100 liters, then you cannot do without steel fasteners.
What is suggested for fixing the water heater to a foam concrete wall:
- All the same steel plates measuring 30x30 cm, which are attached to the wall with pins. The latter are passed through the wall. From the outside of the house, they are tightened with nuts, under which wide washers must be laid.
- In hardware stores, you can purchase anchors for foam concrete walls. As practice has shown, this type of fastener cannot withstand heavy loads.
- Use chemical fasteners. He's glue.
The latter option is more acceptable. First, adhesive fasteners are an environmentally friendly material. Secondly, it does not change its characteristics under the influence of temperature and humidity changes.
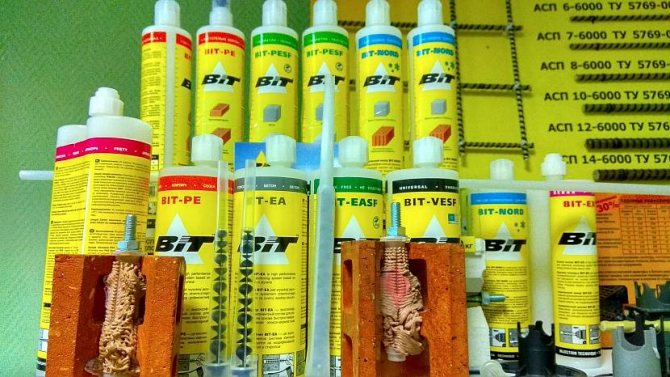
Adhesive composition for wall mounting Source stroi-baza.ru
See also: Directory of companies that specialize in electrical work and installation of engineering systems
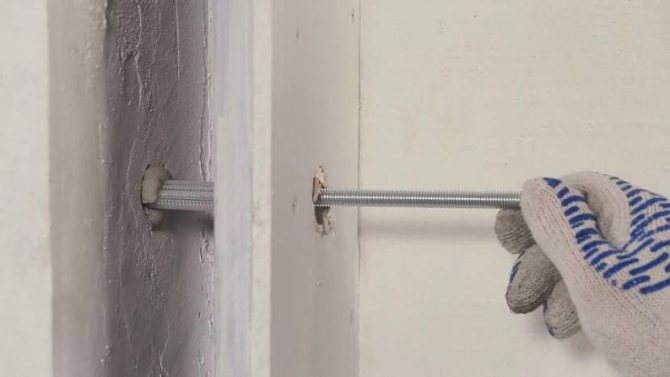
Chemical bonding technology:
- a hole is drilled in the wall at a slight angle from top to bottom;
- in this case, the hole expands from the outside with the same drill by rotating the latter in a circle;
- it turns out a pocket in the form of a cone, where the adhesive is poured;
- an anchor or hook is immediately inserted inside.
The adhesive inside the hole forms a solid plug. It is very difficult to remove it. As practice shows, the dismantling of such fasteners often leads to the tearing out of a part of the foam block. In the case of installing a boiler, it is necessary to make the holes for the fastener deep.

The deeper, the higher the bearing capacity. Source yandex.net
Installation on drywall
Fastening a water heater to a wall made of plasterboard sheets requires laying in the wall frame, it is also a partition, a larger number of profiles. Therefore, even at the design stage of the wall, it is necessary to determine the location of the boiler installation. And it is in this place to build a reinforced structure. For example, reduce the distance between vertical profiles, plus increase the number of transverse profiles. In this case, it is necessary to accurately determine the place of installation of one of the latter, on which the water heater will be mounted. Ideally, the hooks will be attached to vertically installed frame elements.
But even in this case, it is not recommended to use plasterboard partitions for installing boilers. Such a wall will withstand an empty tank without problems. And when filled, there is a high probability that the partition will simply bend at the installation site. Therefore, it is not worth the risk.
If the load-bearing wall is sheathed with plasterboard, then you can hang a boiler on it. This will require long anchors. Under them, holes are made in the load-bearing wall through the plasterboard lining, where the fasteners are driven.
Installation of fasteners on a wall sheathed with plasterboard Source technosova.ru
What is needed from the tools
To hang any model of a water heater on drywall, you will need the following tools:
- electric drill;
- building level and tape measure;
- regular pencil and ruler;
- magnets.
In addition to tools, you will need to purchase the following materials:
Boiler brackets
- brackets;
- dowels;
- construction tape.
Only after you have bought all of these lists, you can hang the boiler on a drywall wall.
Connecting the boiler to water and electricity
To begin with, there is nothing difficult in carrying out the processes of connecting a water heater. There are simply certain nuances that you need to pay attention to.
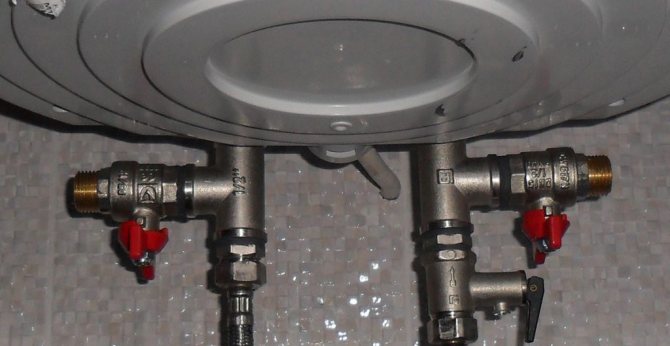
First, to connect the device to the water supply, you need to install a check valve with a diameter equal to the diameter of the water pipe. Usually this element comes with the boiler, but not always. The valve is an important element that will ensure the safe operation of the water heater.
The valve itself is screwed onto the boiler. Please note that there is an arrow on the body of this element.It shows the direction of movement of the water. That is, from the pipe to the water heater.
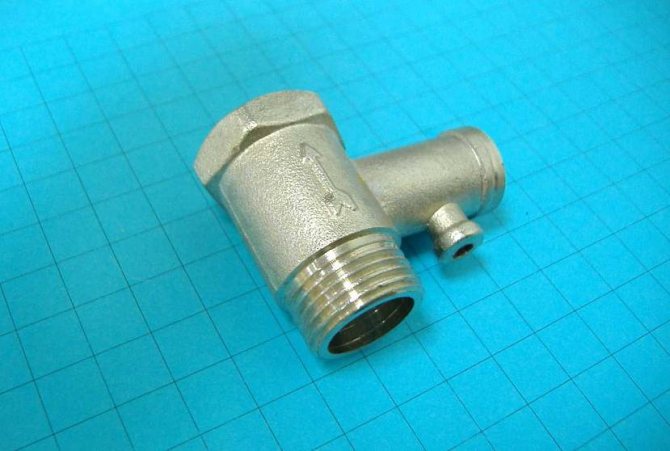
Check valve for a water heater Source cdn.ru
The check valve is necessary to contain the water located in the tank, which expands during the heating process. That is, an excess pressure is formed, which will give a counterflow to the water from the water supply. Many may note that a thermostat is installed in the boiler itself, which monitors the temperature of the water. But it is he who often does not work, working out his operational resource.
That is, inside the tank, water heating occurs uncontrollably in this case. The water boils, expands, air pockets form, and the pressure inside the device increases. It is with the help of the check valve that the pressure is released.
Attention! If the pressure that the safety valve can withstand is less than the pressure in the hot water supply system, then it will operate all the time.
So, the next procedure in the process of connecting the boiler to water is the installation of flexible hoses that connect the device to the water supply network, and the water heater itself with a tap or mixer.
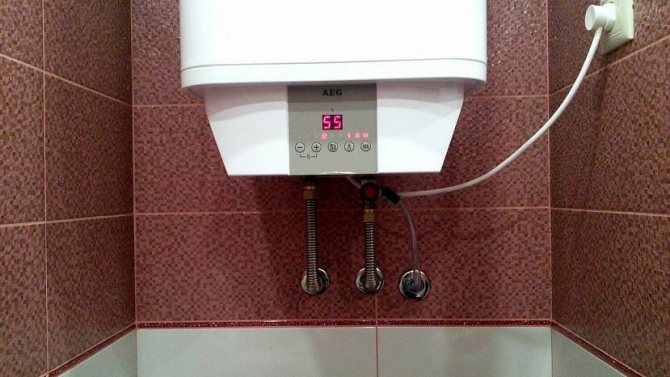
Water heater plugged into the outlet Source san-kras.ru

Preparing the water heater for operation
The boiler is installed, its electrical connection is complete, you can fill it with water.
- The tap opens slightly on the cold water pipe supplied to the device.
- The hot water tap on the mixer opens.
- The hot water tap on the boiler itself opens.
- It takes time for the liquid to come out of the mixer. So you have to wait.
- At this time, the joints should be checked for leaks. If any are found, they must be eliminated immediately by tightening the nuts.
- As soon as water flows from the hot water tap, it means that the water heater is full. We need to close the mixer.
- Now you can connect the device to the socket.
- The temperature regime is set. How to do it correctly, you need to read the instructions that are attached to the water heater. You should not read various Internet resources. The manufacturer knows best how to do it correctly.
Briefly about the main
Before you hang the boiler, you need to determine the location of its installation. It is ideal if the wall will be load-bearing, but it will work just as well with a high load-bearing capacity.
The dimensions of the canopies on the water heater itself play an important role in the installation process. Therefore, it is important to accurately measure the distance between the lugs. And also the distance from them to the upper plane of the boiler, adding 5 cm to it.
Depending on the material from which the wall is built, fasteners are selected. Brick, concrete - anchors for a water heater or self-tapping screws with plastic dowels. Wood - anchor with screw thread. Foam concrete is a better glue option.
The connection to the water supply system, as well as to the mixer, is made with flexible hoses.
To connect to the power supply, a separate loop is formed to the switchboard. In the latter, a separate machine and an RCD must be installed.
Ratings 0
Work order
To install a water heater, perform the following work:
- The location of the boiler is determined, it is important to place it as close as possible to taps, mixers and an electrical switchboard.
- When the place is selected, a marking is made at the required height where the fasteners will be located.
- Holes of the required diameter and depth are made with a perforator or drill.
- Plastic dowels are hammered into the holes with a hammer, if necessary, a metal shield is installed.
- Anchors are inserted into the lugs at the rear of the heater, which are screwed into the hammered dowels with a screwdriver.Instead of anchors, special hooks are used, which are screwed into the dowels; a water heater is suspended on these hooks.
If instead of dowels and anchors, a metal plate was mounted with threaded pins, then it is important to press it tightly with nuts on 2 sides.