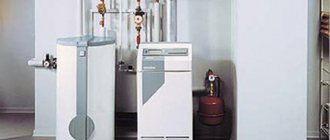
How to prepare the sewerage system for winter in an unheated cottage
One of the weak points of an unheated summer cottage, more precisely, a summer cottage where no one lives in winter, is the sewer system, of course, if there is one.
The fact is that even if no one uses the sewer in winter and the sewer pipes are laid with the correct slope, there is still water in the siphons and knees, the so-called water plug.
The task of the water plug is to keep odors and gases from the sewer out of the house. This quality, which is very necessary and useful in summer, can turn into harmful in winter. Because water, due to its physical properties, expands during freezing and can damage siphons and knees.
In order for the sewage system to work properly next year, in the fall, before leaving for the city for the winter, it is advisable to perform a few simple steps:
Myth 2. The larger the volume of the accumulator, the better.
So much the better for what? For the accumulator itself, for the reliability of the system, for the pump? A large volume tank is more expensive, takes up more space, and the cost of replacing a membrane is higher. Some cons.
But there is a certain logic in the statement and it consists in the following: the larger the volume of the hydraulic tank, the less often the pump will turn on. And the less often the pump is turned on, the longer it will work, since the resource will be preserved (the mode of starting the electric motor is the most intense - a jump in the starting current, high starting torque, increased load on the pump parts).
However, on the other hand, it is logical to assume that there is a certain limit in terms of the volume of the accumulator, at which it is necessary to stop. After all, it never occurs to anyone to buy a hydraulic accumulator for a private house with a volume of thousands of liters. Although with such a tank, the pump can turn on only once or twice a day or not turn on at all. Do not forget that the effective volume of the accumulator is about 30%.
The misconception is that even if we reduce the number of pump starts per hour by half (by increasing the volume of the accumulator), the pump will not last twice as long. Even knowing the number of starts per hour, we cannot estimate the total operating time in each cycle, which is much more important for the resource. Likewise, if you only use the pump for six months, for example, during the summer season, you do not need to expect that the pump will last twice as long as that of a neighbor who uses the pump all year round.
Read also Pump for sewer cleaning
Engine manufacturers do not give a specific limit on on / off for the entire service life, after which the engine fails or requires repair. The engine life is affected by the total operating time and thermal conditions. But at the same time, it is really important that the number of short-term pump starts per hour does not exceed the values specified by the manufacturer (these data are in the technical documentation for the pump). This is the main criterion by which the volume of the accumulator is selected. And if the pump is equipped with a soft starter, then the number of these same starts can be increased. Those. the volume of the hydraulic tank can be reduced.
Myth 3. All accumulators are the same. If there is no difference, why pay more?
If we pay attention only to the external aspect, then it is difficult to disagree with this statement. If we are talking about standard hydraulic tanks with a replaceable membrane, then outwardly they really look alike like twin brothers.
But as often happens, the most important thing is inside. Although the accumulators have a really simple device, even here there is room for nuances.That is why air escapes in some hydraulic tanks, and the membrane fails in a year or two, while others hold pressure and serve much longer.
Myth 4. The accumulator needs to install an air vent.
The water supply system (not to be confused with the heating system) can do without an air vent without any problems. Air bubbles with correctly laid pipes are removed through the tap during the drawdown. And with improperly laid pipes (with the possibility of the formation of air pockets), the air vent will not save the matter.
Note that pressure switches can also work with air (for example, installed on compressor equipment).
It is possible to install an air vent for complacency, but this does not give a real effect.
Myth 5. All accumulators are blue.
Helping the buyer to navigate in the variety of expansion tanks, most manufacturers actually produce hydroaccumulators (expansion tanks for water supply systems) in blue. The standard color association works, and there is nothing wrong with that.
However, the accumulator is only painted on the outside, so there is no technological problem for color change.
Hydraulic accumulators are an integral part of many domestic and industrial pumping stations (they come with them). Manufacturers of pumping equipment do not independently produce expansion tanks and purchase them from specialized enterprises. For marketing purposes, these tanks may have not only a different nameplate with a different name from the original (which is not uncommon today), but also a different color. At the request of the customer, the manufacturer of hydroaccumulators can paint them in any color at the factory.
For example, Grundfos used green accumulators for a long time, Pedrollo had red tanks, and DAB used white ones. Moreover, even different consignments of goods could be of different colors. Sometimes the choice of the color of the accumulator depends on the general color scheme of the pump manufacturer.
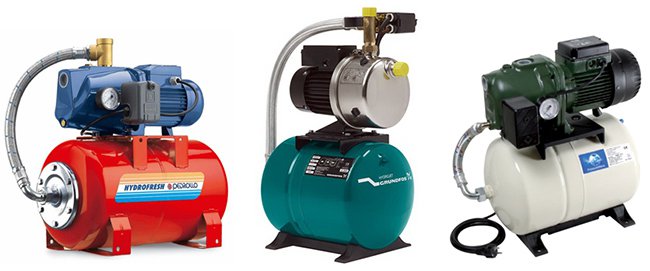
The color itself does not in any way affect the technical characteristics of the accumulator and, by and large, can be anything.
Therefore, if, for example, a green hydraulic tank from a Grundfos station is out of order, there is no point in looking for a tank of the same color.
Of course, blue is the most common color on the accumulator market, but not the only one.
Myth 6. For the winter, it is necessary not only to drain all the water from the accumulator, but also to release the air.
Indeed, if you plan to still use your accumulator next year, then it is necessary to drain the water from the tank. However, there is no need to bleed air after draining the water. The membrane is strongly compressed under air pressure and squeezes out all the water.
It is believed that the membrane is easier in a free state and it is better to remove it for the winter. Without arguing or even taking into account labor costs, here is just one important counterargument. All accumulators are sold with preliminary factory air injection, which greatly deforms (compresses) the membrane, since there is no back pressure of water when not connected. In this form, a new tank can be stored for more than one month, or even a year, until it finds its owner. And there is nothing wrong with that. The accumulator is installed, the air pressure is controlled, the system is started and everything works great.
Read also How to properly preserve grape shanks until spring
Our experience in the operation of domestic water supply systems indicates that the positive effect of the complete emptying of the air cavity for the winter period has no practical confirmation.
Of course, you can go to the extreme, disassemble half of the water supply system for the winter and a hydraulic tank in addition. Rinse, dry and fold everything at home in a warm place. But this option is better left for "experts".The maximum that needs to be done is to drain all the water and purge the system with a compressor.
Myth 7. It is better not to replace the membrane, but to change the entire accumulator at once.
If the membrane fails, it is necessary to decide the issue of replacing only one membrane or replacing the entire accumulator.
Want to extend the life of your membrane? Remember to control the air pressure.
It is logical that the decision is made on the basis of comparing the cost of the new membrane and the entire accumulator assembly. For some expensive European brands, the cost of the membrane is about 60% of the total cost of the product. Of course, this is not the real cost of the membrane, but the impudent policy of the manufacturer trying to make money on spare parts and service, which is quite usual today. In addition, it is far from always possible to find a similar replacement, since manufacturers can specially manufacture membranes with a non-standard neck. Therefore, it is not surprising that the buyer makes the decision to buy new equipment.
For other manufacturers, the cost of membranes is at the level of 30-35% of the cost of a new accumulator. In this case, we would advise you to assess the condition of the body and flange, and, if they are in a satisfactory condition, make a choice in favor of replacing the diaphragm. This operation is not difficult.
If the accumulator is not always in a humid environment, then its body and flange can serve for a long time.
Preparing the toilet.
The largest water plug in terms of volume is in the toilet, and it is understandable - the largest traffic is through the toilet. In addition to being the largest, this plug is located in the knee of the ceramic toilet bowl, which has very low deformation properties. Simply put, when the water in the toilet bowl freezes, the bottom of the knee simply breaks off. Sometimes this happens very nicely and neatly, so that the breakaway part can be glued in place, but it is better not to risk it.
When preserving the summer cottage for the winter:
- flush the toilet cistern several times,
- shut off the water supply to the toilet cistern and flush out the water from the cistern.
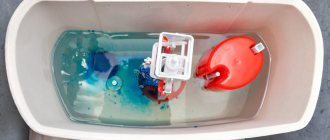
- unscrew the tank lid and make sure that there is almost no water left in the tank, if you wish, you can remove the remaining water with a rag or sponge (this is not necessary if there is not much water left in the tank).
- Scoop out as much water as possible from the toilet bowl. It is best for this to use a special scoop made with a wallpaper knife from a plastic bottle, shaped like a ladle. However, you can scoop out the water with any means at hand.
- Remove excess water from the bowl with an old cloth or sponge.
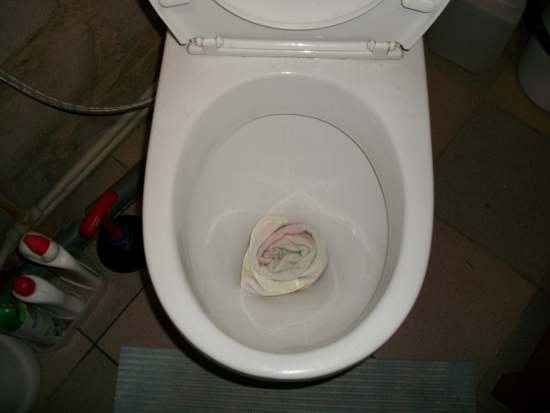
- To prevent odors from the sewer network from entering the house in winter, plug the hole in the bowl tightly with a rag.
- You can still throw rags on top and even close the lid, although this is not necessary:

Dacha and House
If your house in the country is designed for freezing in the cold season, then you need to drain all the water from the water supply system and all water-containing units every time before leaving the house. The concept of freezing a house in winter has its pros and cons.
The disadvantages of constant heating of a seasonal residence include energy and, therefore, financial costs, the risk of power outages and freezing of not drained water in the water supply system, the risk of electric heaters catching fire. The disadvantages of the concept of freezing a house include increased wear and tear of house structural elements and interior decoration with more frequent zero crossing, the need for labor to drain the water every time before leaving. The advantages of the freezing concept include cost savings, reduced risk of accidents and fires.
In general, the optimal operating mode of the house depends on your lifestyle: if you come to the country house every weekend in winter, it is more advisable to keep the house heated: + 5C using electric floors, for example, as one of the most economical and safest heating means. Before arriving at the dacha or in severe frosts, you can turn on additional convectors via SMS (with the installation of an appropriate controller), which will raise the temperature in the house. If in winter you do not come to the dacha, or you come a couple of times in half a year, then there is no point in keeping the house heated.And so that the pipes do not freeze, the water from the water supply must be drained.
Useful links on the topic: Installing an electric water heater, Washing machine does not drain water
Draining water before winter
In order to minimize the laboriousness of draining water from the water supply before winter, you need to think through several important details before designing the water supply and sewerage system.
What you need to provide for a convenient regular drainage of water:
1. A tee and a drain valve in front of the check valve in the pipe supplying water to the house (in the well or in the caisson of the well.
2. In case of emergency freezing, winter operation, the pipes must be made of material that does not tear during expansion - for example, low pressure polyethylene, polypropylene, etc.
3. In each branch of the piping in the house, install a tap at the lowest point to drain the water.
4. If it is impossible to get to the lowest point of the water supply (pipes are sewn into the floor and there is no basement), provide tees for connecting an adapter to a car compressor for purging each branch of the pipeline.
5. When connecting the water heater, provide a tee and a tap for water drainage with a hose nozzle before the check valve on the pipe entering the water heater. And the same tee with a tap on the outlet pipe from the water heater for quick air supply when draining the water.
6. If the volume of water heating is more than 50 liters, provide a sewer branch that does not go to the septic tank in order to prevent the death of the microflora of the septic tank when a large amount of boiling water is discharged. Or drain hot water through a hose outside, but not into a septic tank.
7. Choice of mixers. If possible, use traditional ceramic or rubber-sealed taps, rather than single-lever valves that are sensitive to freezing of residual water.
8. Expansion membrane tank. The amount of residual water in the rubber bulb after the water has been drained must not cause damage due to freezing. The author checked this on his tank - the tank survived 5 winters, but on the 6th the rubber bulb had to be replaced.
9. Location of the washing machine. Remember to drain water from washing machines, dishwashers, etc. devices. Unfortunately, in this case, a simple drainage of water is not enough - manipulations will be needed by turning the washing machine over or blowing it with a compressor. Therefore, when choosing a place for it, ensure free access to it.
Below is an illustration of how to drain water from a simple temporary plumbing, specially unprepared to drain water before winter.
| In order for the sewage system to work properly next year, in the fall, before leaving for the city for the winter, it is advisable to perform a few simple steps: 1. Preparing the toilet. The largest water plug in terms of volume is in the toilet, and it is understandable - the largest traffic is through the toilet. In addition to being the largest, this plug is located in the knee of the ceramic toilet bowl, which has very low deformation properties. Simply put, when the water in the toilet bowl freezes, the bottom of the knee simply breaks off. Sometimes this happens very nicely and neatly, so that the breakaway part can be glued in place, but it is better not to risk it. When preserving the summer cottage for the winter:
2. Preparation of siphons for washbasins, sinks, sinks. If you have a plastic sewage system and, accordingly, plastic siphons, then theoretically they can be strongly prepared for winter and not cook. The water plug in plastic siphons is small in volume, plastic has higher thermal insulation properties than metal or ceramics, in addition, plastic can deform a little, so usually the water that does not have time to evaporate from the siphon before the onset of frost freezes a little slower than in ceramic bowl or cast-iron knee and turning into ice siphons do not tear. If you have cast-iron siphons, then it is imperative to remove water from them for the winter. This can be done in several ways, for example, with a kvachem (plunger) push the water from the siphon further along the pipe. If there is no plunger, then you can try to blow it with a bicycle or car pump, or gently insert a cloth between the drain grate and gradually soak up all the water. After removing the water, plug the drain hole with a stopper or rag (it is advisable to press the rag from above with something heavy) so that odors from the sewer network do not enter the house. | |
| The first step is to drain the water from the supply line. For this, we have a tee and a tap in front of the check valve in the well (1). Use a long stick (3) to open the tap (2). We hear a murmur and observe air bubbles rising from the tap: the water is drained. | Second step: draining the water heater. It is good to pre-cool the water. In the absence of special drain valves, unscrew the safety valve on the supply pipe (on the right) and connect the water drain hose. Then we release the nut on the outgoing pipe - air is sucked in and the water from the water heater begins to drain into the hose. |
| If there are no special taps for draining water from the water supply system, we disconnect the pipe joint at the lowest point and drain the water from the pipeline. | If there is a special tap for draining water, we use it. |
| Disconnect the drain and the supply hose of the washing machine. We drain the water from them. | We turn the washing machine upside down. This will get rid of the remaining water in the lower points of the drain system. In this position, we leave the washing machine for the winter with a long trip. (I'm not kidding!) |
| Draining water from the washing machine. The rest of the water is hidden in the corrugated cabin going from the tank to the pump: we squeeze the tube like a pear and blow out the rest of the water - they will come out through the drain hose. | We disconnect the supply pipes of the flexible hose of the shower stall. We drain the remaining water from them. |
| Remove and blow through the rain shower head - water always remains in it. We put the watering can in place. | Draining water from the shower stall. We start purging the shower taps. Remove the shower head, put the three-way tap (1) in the hand shower position. And alternately open the hot and cold water tap (1) blowing the pipes through the shower hose (you can use a compressor, a frog pump, the power of your lungs for blowing). Then we alternately change the position of tap 2 in order to drain the remaining water in it. |
| The most enjoyable part of the job is draining the toilet bowl: you can use any household pump for this (bicycle, sprayer, enema, Janet's syringe). We scoop out everything clean. If your sewage system tends to emit pleasant aromas (my septic tank does not smell), then pour antifreeze into the toilet. In the spring, it will also need to be pumped out, and not drained into a septic tank. In addition to the toilet, it will remove water from the siphons of sinks and floor drains. | Draining water from the filter: Remove the fine filter housing (it is unscrewed clockwise) and the coarse filter housing. Pour out the water and discard the used cartridge. |
| Drainage of water from the pumping station: Open the main plug on the pump housing of the pumping station and drain the water into a previously prepared container. | We unscrew the plug on the side of the pump housing and thoroughly purge the pump, getting rid of the remaining water. If you use a submersible pump in a well or well, then do not worry, the water there will not freeze in the conditions of a normal winter. |
dom.dacha-dom.ru
Preparation of siphons for washbasins, sinks, sinks.
If you have a plastic sewage system and, accordingly, plastic siphons, then theoretically they can be strongly prepared for winter and not cook. The water plug in plastic siphons is small in volume, plastic has higher thermal insulation properties than metal or ceramics, in addition, plastic can deform a little, so usually the water that does not have time to evaporate from the siphon before the onset of frost freezes a little slower than in ceramic bowl or cast-iron knee and turning into ice siphons do not tear. If you have cast-iron siphons, then it is imperative to remove water from them for the winter. This can be done in several ways, for example, with a kvachem (plunger) push the water from the siphon further along the pipe. If there is no plunger, then you can try to blow it with a bicycle or car pump, or gently insert a cloth between the drain grate and gradually soak up all the water. After removing the water, plug the drain hole with a stopper or rag (it is advisable to press the rag from above with something heavy) so that odors from the sewer network do not enter the house.
I have been using these technologies for 15 years and so far everything is reliable. And yes, don't forget to drain the tank. One friend of mine did everything right, but she did not drain the water from the tank. When frosts came, the tightness of the gasket in the tank was broken, the water went into the bowl and froze there. As a result, I had to change the toilet.
I hope, dear reader, the information presented in this article helped you at least a little to understand the problem you have. I also hope that you will help me get out of the difficult situation that I found myself in recently. Even 10 rubles of aid will be of great help to me now. I don't want to burden you with the details of my problems, especially since they will be enough for a whole novel (in any case, it seems to me so and I even started writing it under the working title "Tee", there is a link on the main page), but if I was not mistaken in your conclusions, then the novel will be and you may well become one of its sponsors, and possibly heroes.
After successfully completing the transfer, a thank you page with an email address will open. If you would like to ask a question, please use this address. thank
... If the page did not open, then most likely you made a transfer from another Yandex wallet, but in any case, you do not need to worry. The main thing is that when making a transfer, please indicate your e-mail exactly and I will definitely contact you. Plus, you can always add your comment. More details in the article "Make an appointment with the doctor"
Yandex Wallet number for terminals 410012390761783
For Ukraine - hryvnia card number (Privatbank) 5168 7422 0121 5641
Preparing the cottage for wintering
It doesn't really matter whether you come to your country house on weekends in winter or don't go to the country house at all while there is snow on the street, anyway, before the onset of frost, the house and the plot should be prepared for wintering.
Getting rid of water
An obligatory part of preparing a summer cottage for wintering is to drain all liquids that may freeze. It is important not to miss a single container, not a single device or device, one way or another connected with water.
Unfortunately, water sometimes manages to hide from the eyes of even the most attentive homeowners.
In order not to run into property spoiled due to frozen water in it in the spring, let's see where water can freeze in a house that is not heated in winter.
First of all, it is necessary to shut off the water supply and drain the water from all pipes, up to the source of water supply (well, well, central water supply).
Particular attention should be paid to metal ball valves on the water supply, which should be left in a half-open (45 degrees) position, otherwise they can be torn apart by the water remaining in the special cavity of the ball chamber.
Next, you need to make sure that there are no jars and bottles with freezing liquids left in the house. Water-based paints, pickles, wine, milk also freeze, albeit at a temperature lower than pure water.
At summer cottages visited in winter on weekends, beer, soup in a saucepan, or milk in a can are often forgotten in a working refrigerator. Under normal conditions, nothing will happen to them, because thanks to the thermal sensor, the refrigerator stops cooling, reaching a temperature of about two to four degrees Celsius.
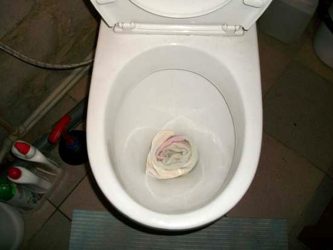

All devices connected to the sewage system have water constipation without fail. That is, in the knee of the toilet bowl, the siphons of sinks, baths and showers. But water cannot be simply removed from them, since a bad smell from the sewer will enter the room.
Typical solutions are to replace the water in waterlocks with concentrated sodium chloride solution or an anti-freeze liquid, such as a car anti-freeze glass.
Surprisingly, but about a liter of water remains in washing machines and dishwashers, which must also be drained by unscrewing a filter or a special drain pipe.
It is dangerous to forget to completely drain water from water heaters, especially since in a number of storage models, even after the water stops pouring out of the drain, up to several liters can remain. In the heat exchangers of flow-through models, there may also be enough water to damage them.
Water also remains in the water filter flasks. You can drain it from there only after disconnecting the flasks from the filter.
A pumping station is also at risk. Disconnect the hoses and turn the station over to drain the remaining water from the pump and membrane tank.
Outside the house, do not forget to drain water from absolutely all containers, including barrels for collecting water, hoses, buckets, watering cans and containers for a summer shower.
In the absence of ventilation in a hermetically sealed house for the winter, humidity rises and conditions are created for condensation on the walls, furniture and household items. Since a full-fledged ventilation system in the house cannot be quickly made, it is necessary, if possible, to facilitate the implementation of air exchange in the house.
Most houses have enough leaks and cracks for air flow, and the problem with organizing ventilation comes down to organizing an effective exhaust. In this regard, in particular, the chimney valve left open, a loosely closed hatch to the attic and, of course, a ventilation riser in the bathroom, can help in this regard.
At the same time, it is better to leave the interior doors open so that it is easier for air to move around the house.
We suggest that you familiarize yourself with What onion is better to plant before winter? When to plant onions before winter?
In various situations, snow can both save many of the plants from freezing and prevent the ground from freezing deep, and, having accumulated in large volumes, break off tree branches and bring down the roofs of various buildings.
Oddly enough, the snow protects the ground from freezing quite well, and where it lies in a sufficient layer, the ground will freeze through only a couple of centimeters. In places where there is no snow, the depth of freezing by the end of winter reaches a meter or more.
In order to freeze the beds less, as well as to facilitate the drainage of melt water in the spring, the earth dug up in autumn is not leveled. This leads to the retention of snow in the beds and its accumulation in large volumes.
For these purposes, dry foliage should be used with caution, since pests can hibernate in it.Snow can also be used to protect the soil from freezing in closed greenhouses, where, however, it will have to be moved manually.
But snow can do trouble. If the greenhouse is closed with a removable film, it must be removed for the winter, since the film becomes fragile in the cold, and even its slight sagging on the greenhouse frame will lead to a large accumulation of snow.
The snow that has accumulated and thawed during thaws has a large weight, for which neither the frame of the greenhouse, nor the film itself can be calculated. Modern greenhouses covered with polycarbonate can be produced in a lightweight version that is not designed for a significant snow load.
Additionally, you can make vertical supports for the greenhouse vault, which will greatly increase its strength. Supports must be placed on a solid base so that they do not sink into the ground.
Most trees and shrubs can easily survive frosts without any help from people.
Another thing is that, in addition to the cold, trees may need protection from hares, which in winter dare to come close to human habitation and especially like to gnaw the bark of apple trees and plums in a circle, which leads to the death of these trees.
However, in especially hungry winters, this may not be enough, and you will have to resort to mechanical types of protection. Especially valuable trees can be protected with a wire mesh frame; a more budgetary option is wrapping the trunk with bags made of polypropylene fabric or even nylon tights.
Heat-loving species of garden trees and shrubs will need to be protected from frost. Peat and mulch can be used to protect the root system directly at the trunk. The barrel can be wrapped in burlap. It makes sense to cover bush roses with spruce branches.
Also, before winter, it is supposed to prune dry, sick, weak and interfering branches.
The main thing in preparing a lawn for winter is cutting it to a height of about seven centimeters. It is necessary to mow the lawn before frost, as the grass must have time to recover.
Fallen leaves should also be removed.
Modern mowers with accumulating containers for cut grass allow you to do both of these operations at the same time, since they suck in fallen leaves along with the cut grass.
Removal of melt water
Despite the fact that the snow will begin to melt profusely only in the spring, preparation for the diversion of melt water from the site must be carried out in the fall, since in winter everything will freeze and be covered with snow. These activities are reduced to deepening and cleaning the drainage ditches from foliage and other debris, as well as checking for blockages in drainage pipes.
Garden equipment for the winter must be cleaned of any kind of dirt; metal parts are oiled.
For equipment equipped with internal combustion engines, the fuel must be drained from the gas tanks, especially for two-stroke engines that use a mixture of gasoline and oil: it loses its properties over time. It is advisable to check the condition of the spark plug, fuel and air filters, as well as the electrical system.
Rodents
It is not recommended to leave anything edible in the house, since food, even hidden in metal or glass containers, still attracts rodents with its smell. If in your house mice have nothing to eat, they are unlikely to stay in it for a long time.
You cannot leave mousetraps or baits with poison in a house that is closed for the whole winter, since the smell of even one dead rat will saturate the whole house through and through.
Dead mice have almost no smell, but few people will be seduced by the prospect of finding their corpses during the next summer in the most unexpected places.
Conclusion
Leaving your house for the whole winter or at least for the weekend, it is better to turn off all electricity in the house and turn off the gas.Naturally, you need to think about protecting your home from thieves, but this is a topic for a separate article.
Treat basement and cellar from mold
The end of the summer cottage season is a good time to process the cellar and basement, so that the "mold kingdom" does not start in them during the winter. First of all, in dry weather, take all the jars outside and dry the room, and then treat the walls and other structures with an antiseptic (this procedure must be repeated every few years).
As an antiseptic, you can use a solution of copper sulfate (100 g per 1 liter of water).
Fans of solving problems in a radical way recommend using a sulfuric smoke bomb to treat the basement. Seal all ventilation openings in an empty room, cover metal parts (if any) with polyethylene. Check that there is no one in the house (you will have to leave it for a day), and then set fire to the wick of the checker, go out and close the doors tightly. When you return, ventilate all areas properly.
Exchange contacts with neighbors
If you are still not familiar with your neighbors in your summer cottage, fix it immediately. This is necessary not only in order to fit into the framework of social etiquette, but also for mutual assistance "if something happens." Exchange phone numbers or other contact information with your neighbors. Agree to contact each other if you suspect that something is wrong with the neighboring area.
In addition to all of the above, do not forget about the flower garden: dig up and store perennial plants that require it, cover roses and other flowers. Read about what else needs to be done in the garden in our material:
Preparing the toilet.
The largest water plug in terms of volume is in the toilet, and it is understandable - the largest traffic is through the toilet. In addition to being the largest, this plug is located in the knee of the ceramic toilet bowl, which has very low deformation properties. Simply put, when the water in the toilet bowl freezes, the bottom of the knee simply breaks off. Sometimes this happens very nicely and neatly, so that the breakaway part can be glued in place, but it is better not to risk it.
When preserving the summer cottage for the winter:
- flush the toilet cistern several times,
- shut off the water supply to the toilet cistern and flush out the water from the cistern.
- unscrew the tank lid and make sure that there is almost no water left in the tank, if you wish, you can remove the remaining water with a rag or sponge (this is not necessary if there is not much water left in the tank).
- Scoop out as much water as possible from the toilet bowl. It is best for this to use a special scoop made with a wallpaper knife from a plastic bottle, shaped like a ladle. However, you can scoop out the water with any means at hand.
- Remove excess water from the bowl with an old cloth or sponge.
- To prevent odors from the sewer network from entering the house in winter, plug the hole in the bowl tightly with a rag.
- You can still throw rags on top and even close the lid, although this is not necessary:
How to drain the toilet for the winter
It may be necessary to install or change a toilet bowl under a variety of circumstances: moving, repairing, or its unexpected breakdown. If there is no time to wait for a plumber or you want to save money, then it is quite possible to do it yourself.
Preparing a summer cottage for the winter - 15 important things you could forget about
In order not to end up in a “broken trough” with the beginning of the next season, you need to properly close the current season. It's time to carry out work that will help preserve the suburban area until spring. So, here's how to prepare a summer cottage for the winter.
Surely, you have already begun to perform the main part of the work. We have no doubts about your summer cottage experience, and, nevertheless, we propose to check - suddenly something "flew out of my head"?
The main reasons for draining water from the underfloor heating system
There can be quite a few reasons why it becomes necessary to drain the water from the heating system pipelines yourself - from the upcoming long absence of residents in the house to replacing the water in the system with antifreeze. In order to do everything right, and not damage the heating system, we will figure out in more detail how to drain water from a warm floor on our own.
A common reason for the need to drain the coolant is the preservation of the heating system for the winter when used in the ordinary water circuit. Before the onset of cold weather, this event is mainly carried out in dachas and in country houses that are not used in winter. To simplify and accelerate the draining process, special equipment is used.
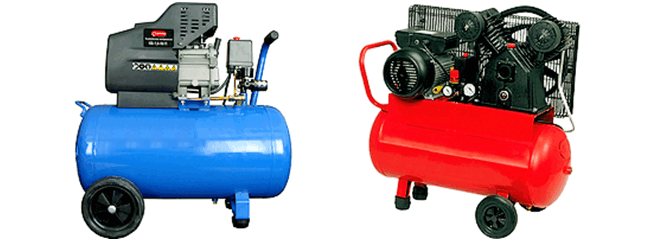

Portable air compressors (motor driven)
Another equally important measure in the operation of underfloor heating is preventive work on the heating system. Boiler water contains a lot of impurities, which, when heated, precipitate or form layers on the walls of the pipeline
Due to a decrease in the internal clearance of heat pipes, the circulation of the coolant in the system is disrupted, and heat transfer is reduced. For this reason, when using water, the coolant must be drained once or twice a year.
An antifreeze-filled water circuit does not suffer from this problem. The replacement of the coolant in this case is carried out every 3-5 years - provided that the boiler is operated without overheating (for underfloor heating, the maximum permissible threshold for the heating medium heating temperature is 45-55 0 С).
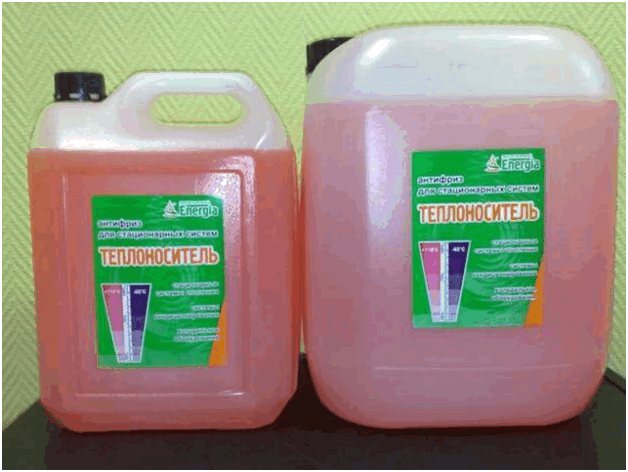

One of the types of antifreeze for filling the contours of the underfloor heating system
Another reason for the need to drain the coolant can be the loss of its physical properties by the liquid. A change in the characteristics of antifreeze occurs after overheating - the solution begins to foam, filling individual sections of the heat pipes with foam, which disrupts the circulation of the coolant in the system and reduces heat transfer.
Failure to comply with the technology of installing a warm floor, the use of materials that are not intended for contact with chemicals, causes the occurrence of corrosive processes in the heating system, as a result of which the circulation of the coolant is also disrupted, and leaks of the water circuit occur.
Naturally, you will have to drain the water from the underfloor heating pipeline when replacing it with antifreeze - modernization.
These are the main reasons for the need to empty the underfloor heating system and, regardless of the base, the water must be drained in accordance with all the rules, with the implementation of safety measures and the observance of the technological sequence of the constituent operations.
Prepare the lawn for wintering
The first step is to clear the lawn of debris. A layer of dead leaves or twigs will interfere with photosynthesis and can also be an excellent home for pathogens and pests. Also, the lawn needs to be mulched to preserve the sown grass and reduce moisture evaporation. Do not forget about cutting the grass - this procedure in the middle lane can be carried out until the end of October. Moreover, the mowing height should be 1-2 cm higher than usual (i.e. if during the season you cut the lawn up to 4 cm, now the grass height should be 5-6 cm).
In the first half of October, do not forget to feed the lawn with phosphorus-potassium or special autumn lawn fertilizer (according to the instructions). If pits and bald spots have formed on the cover, they need to be “patched up” by adding soil and sowing seeds.
Communities Boys and Girls Blog How to Protect Your Toilet from Defrosting Without Draining
Comments 163
from some kind of dacha forum apparently stolen) I have a village at my dacha. generally nishtyak, it doesn't even smell too much
We drain the water from the tank, disconnect the supply, squeeze the water out of the siphon with a plunger. Even if a drop remains, it will simply freeze and that's it. Is this a problem?
complete stupidity to build a comfortable toilet on the street
even at + 5 there is no buzz on the toilet, the cold does not sit down
Such clever advice, I'm shocked. Buy a pack of salt, dissolve it in warm water and pour it into the toilet and all the siphons in the washbasins. Cheap and cheerful!
Previously, there were amenities on the street) Now I'm finishing building the cottage there everything inside, everything is convenient and thoughtful)))
All the same, our army in the fresh air is more pleasant))
yeah in summer, maybe in winter? at -25?)))))
I do not happen there in the minus)
Elementary. As well as the car. Pour antifreeze into the tank.
Well, if it's a crack, then change it unambiguously, but if it's just from the inside, then repair it, it's not difficult.
Is it difficult to change? It's just ridiculous to discuss.
and if not already issued?
You take off the mechanism and go to the store
I heard the story of how a long time ago, in the toilet at the factory, someone thought of pouring a bucket of solvent into the toilet ... then a man came in, sat down on a large scale, lit a match and threw a match into the toilet, not suspecting a surprise ... they say he took out the stall door running out)))) picture)
I heard such a fable))
I heard the story of how a long time ago in the toilet at the factory someone thought of pouring a bucket of solvent into the toilet ... then a man came in, sat down, lit a match and threw a match into the toilet without suspecting a surprise ... they say he took out the door of the booth running out)))) I spent a long time imagining picture)
because you don't have a kuirt on the glasses ...
But free hair removal)
on the ass then? do you need it at all?
As an option, antifreeze dlch smstm heating, it does not freeze into ice.
Check the well
The well does not require special preparation for winter. But if the water has acquired an unpleasant smell of hydrogen sulfide (the smell of rotten eggs) or a cloudy sediment, you need to take measures for cleaning and disinfection. You will probably cope with a small well (2-3 rings) on your own. Use a drainage or pump pump to pump out water, go down into the well, clean the walls of dirt. Then disinfect the well.
To disinfect the well, you can use tablets designed for purifying pool water. They are dissolved in a bucket of water (1 tablet per 1 well ring), then the mixture is poured into a well filled with water and left for 6-8 hours. After that, the water is pumped out again.
If you clean the well in the fall, it will not be necessary to do this in the spring - ordinary disinfection is sufficient.
Installing a new accumulator membrane
If water is found in the air compartment, urgent measures are taken to replace the membrane. It serves as a fuse between the two main units of the device, the accumulation chamber and the air chamber. To get to the membrane, unscrew the flange with the water supply connection. The membrane is removed. The tank is dried and a new part is installed.
During installation, hermetic means are used. They are used to coat the contact point of the flange with the membrane. This allows you to organize the correct operation of the water supply system, protecting the tank from loss of air pressure through the unprotected joint. After carrying out all the work, the accumulator is connected to the water supply and drainage pipes. If the membrane is replaced not before the winter period, the device is put into operation.
«>
Prepare plumbing
The water supply system in the country in winter is especially vulnerable, so you need to take care of its safety in advance. If you do not plan to use it in the winter, then the water will have to be drained from the pipes. To do this, you need to shut off the water supply and open the drain taps at the lowest points so that the water flows out by gravity. If there are no drain valves, use an autocompressor. To blow through the pipes in the country for the winter, close all the valves on the manifold and attach a compressor to the pipe. Then you need to create a pressure of 3-4 atmospheres and open one of the collector taps - under air pressure, water will come out of the pipe. Repeat the procedure with each line.
For the safety of the pipeline outdoors and in unheated rooms, leave the valves slightly open and dismantle the mixers.Also, don't forget to drain the water from the filters.
If the pipes are not deep enough, they must be insulated. To do this, over the place where the pipes pass, lay sheets of expanded polystyrene or polystyrene and fix it by pressing down with bricks and digging in.
Drain the water! Tips while waiting for frost
30 Sep 2013
Listen
81678
Summer always ends earlier than we would like. It seems that the grass is still green, and the leaves are not falling, but it is clear that very soon there will be the first frosts, and then there will be snow and cold.
Summer always ends earlier than we would like. It seems that the grass is still green, and the leaves are not falling, but it is clear that very soon there will be the first frosts, and then there will be snow and cold. The rest in the country is coming to an end and work begins on preparing it for winter. Quickly tint something according to the last sun, check (with the help of autumn rains) the condition of the roof, remove the grill, swing, trampoline placed all over the site in the barn ... And at the end of October drain the water from all the devices and devices in which it is located.
Sometimes even experienced owners who have a house for seasonal living make mistakes when preserving it for the winter. And if the owner of the house bought it in the spring, and this is his first winter, then he should prepare for it as carefully as Nansen for the drift on the ship "Fram" through the center of the Arctic.

Let's leave aside the option in which electric heaters, for example, warm floors, remain on to maintain a positive temperature in the house. Such a solution is fraught with fire in the event of a failure of electrical equipment or, which happens much more often, "defrosting" of everything that is filled with water in case of an emergency power outage. Let's carry out the "classic" preparation of the house for the winter.
Water pipes
What should you pay attention to? What and where to drain? Let's walk around the house together and see. Obviously, first of all, you should take care of draining the water from the water pipes. The designs of the summer water supply system can be different for everyone, the material of the pipes and types of valves, the working pressure and the place of installation of the pump may also be different, but a properly made system should have several common properties: - The pipes are laid so that they have a slope towards the water source (for example, a well), which facilitates its drainage. - On the pipe through which the water is supplied to the house, there is a "check valve" that prevents it from being drained in operating mode. Depending on the length of this pipe and the depth of the well or well, the valve can be installed either in the well or in the house, next to the accumulator. The owner's task is to "neutralize" it and ensure that the water is drained back into the well (if a well is used), or into a specially arranged drain (if a well is used).
For this, a drain valve is mounted on the supply pipe, located between the check valve and the accumulator. If the crane is located in a well, it is supplied with a long pull handle, which allows it to be operated without going down. Instead of a manually operated valve, a so-called “normally closed” solenoid valve can be used. When voltage is applied to it, it opens, allowing the water to drain. The advantages and disadvantages of this solution are obvious - you can drain the water without leaving your home by simply pressing a button, but this requires either mains voltage or connection to alternative power sources.
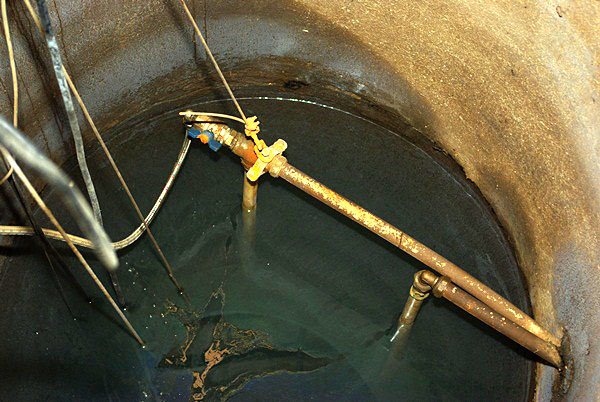

If the check valve is located in the house, near the accumulator, then everything is much simpler - in a properly mounted system, the section of the pipe equipped with such a valve is duplicated by a parallel pipe on which the drain valve is installed, and for manual control they do not need to climb into the well. If there is no such pipe with a tap, then you will have to disassemble the water supply unit, drain it manually.Some owners disassemble this unit sometimes in order to make sure that the accumulator is empty, believing that freezing of water residues in it can damage the rubber membrane. However, many years of experience in operating this device have shown that freezing a small amount of water in it does not lead to its destruction.
Having finished draining the water using the drain tap (by the way, the taps on the mixers should be open at the same time), you should make sure that it has left the pipes laid through the house. With proper installation of the system, tees with drain valves are installed at the lowest point of each branch of these pipes. However, for complete confidence in success, it will be useful to purge the system. But we will talk about this operation a little later.
Filters and pumps
As a rule, before and after the accumulator, filters are installed - mechanical coarse and fine cleaning, coal, ion-exchange and others - that bring water to the required parameters.
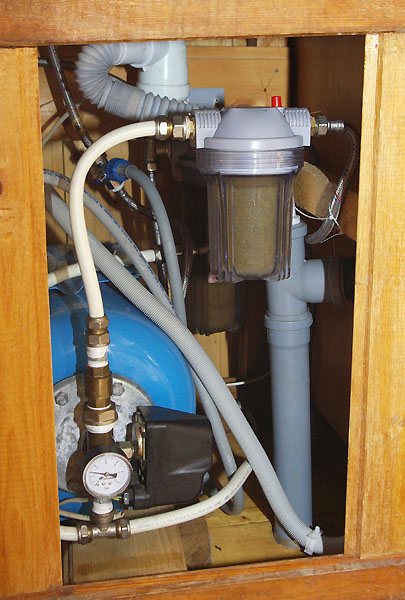

The coarse filter installed at the very entrance to the system, as a rule, self-cleaning by the method of backwashing, after which it should be left without water. The rest of the filters have replaceable cartridges. All of them, after draining the water, must be disassembled, cartridges, the shelf life of which has not expired, washed and stored (if their design allows a long stay without water).
The next element of the system that should be inspected is the pump. It can be in a well or a well, then there is nothing to worry about - in the Moscow region, wells do not freeze, at least they do not freeze to the depth where the pump is usually suspended. If the pumping station is installed in the house, then you should open the special drain plugs and make sure that there is no water left in the pump housing.
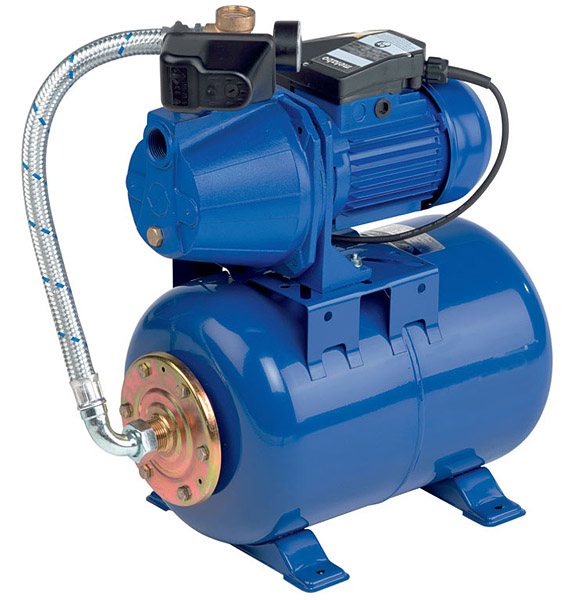

Sometimes it should be tilted to make sure the water drains out completely. This operation should be described in the pump manual.
Water heaters
Now we should deal with water heaters. From flowing electric heaters
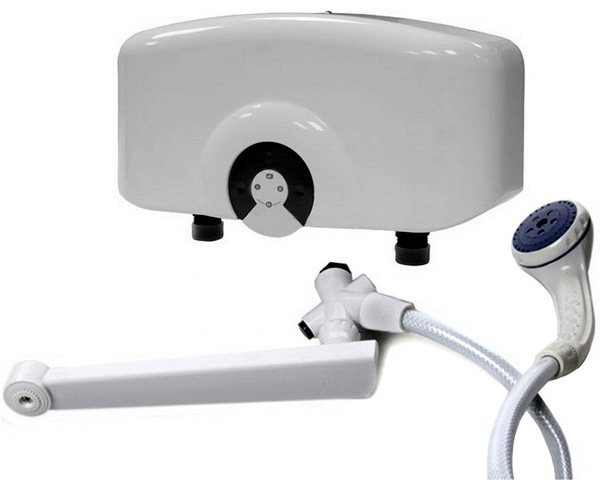

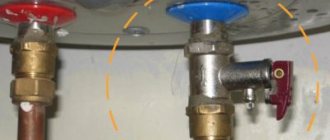
water leaves when the system is drained, although checking if this has happened will be the right decision. However, storage heaters of the boiler type are more common. I am familiar with several "dacha owners" who at one time equipped houses with storage heaters, and after the first winter threw them out - they did not manage to drain the water properly. How can you avoid mistakes? First of all, it should be borne in mind that the pipe through which hot water is supplied to the mixer takes it from the top of the tank, and the cold water supply pipe should be used for draining. A safety valve is normally installed on it, the purpose of which is to exclude the possibility of heating elements operating without water in emergency situations, or to start discharging water when the operating pressure is exceeded. Formally speaking, through the safety valve, opening it manually, you can drain the water from the tank. However, this requires patience. It is recommended to place a tee equipped with a drain cock with a drain hose between the safety valve and the cold water inlet.
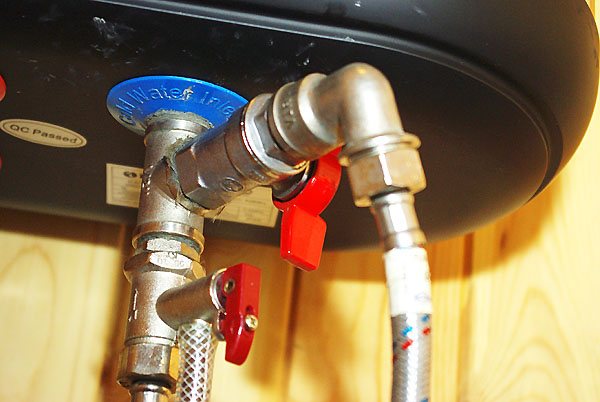

You can do without a tap,
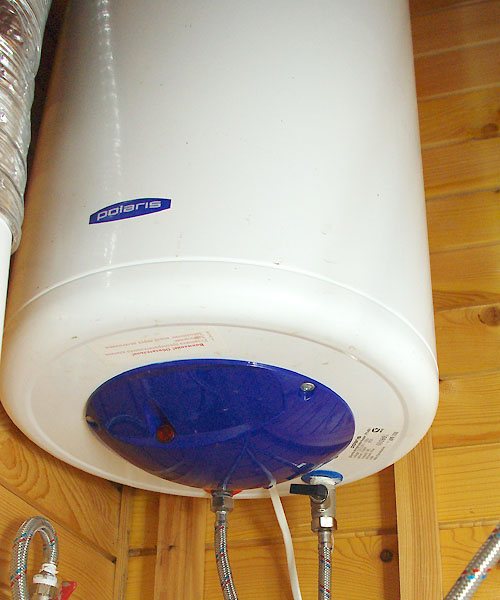

but then every time the water is drained, you will have to remove the safety valve and substitute, for example, a bucket. If the volume of the tank exceeds 40-50 liters, the drain valve, the hose from which is connected to the sewer, is the only way to quickly and conveniently release the heater. In this case, do not forget that if there is a septic tank, you cannot pour hot water into it - the microflora will not withstand this.
When draining water from the tank, allow air to enter it. It is best to disconnect the pipe supplying hot water to the mixer for this. As a rule, storage heaters are suspended from the upper part on the wall in such a way that their lower part only rests on it. When the water stops flowing out, you should shake the tank several times without removing it from the wall. Most likely, some more water will flow out of it.After that, you can safely leave it until spring.
Purging the system
After the water heaters are released and the pipes supplying them with water are disconnected (as a rule, such heaters are connected to the network using flexible hoses in a metal braid), the plumbing system will be divided into several fragments, in which a significant amount of water should no longer remain ... Now, for complete confidence in its absence, they can be blown out. For this, a special valve is used, to which a pump or compressor is connected to inflate car tires. The valve is screwed to the ends of pipes or flexible hoses released after draining the water from the heaters. By closing the mixer taps and opening the drain taps, the compressor is put into operation and the pipes are freed from the remaining water. Sometimes such a valve is installed permanently in the system.
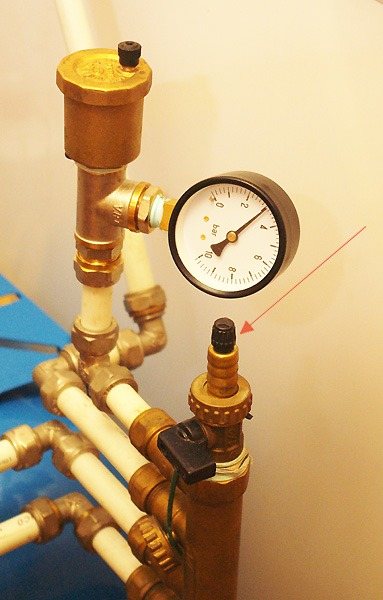

Since all valves in such systems are ball valves,
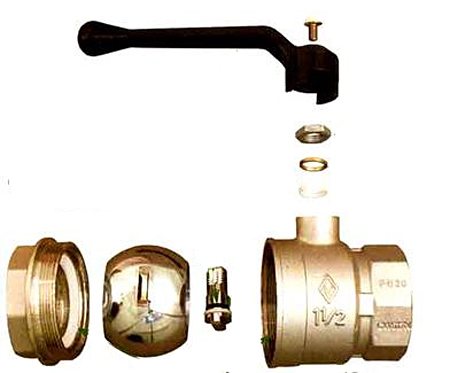

then it must be borne in mind that they have a cavity in which no water should remain in winter. This can happen if the ball valve on the pipe is closed before draining the water from the pipe. The same is true for one-handed mixers. Therefore, at the end of the pipe draining operation, open all mixer and drain valves and leave them in this position. The shower net, especially the one that is equipped with a mode switch, should be removed from the tube, poured (or even shaken out) the water, removed before spring.
Washing machine and dishwasher
Nowadays, you will not surprise your neighbors in the country with a washing machine and dishwasher. How to prepare them for winter?
The washing machine should be disconnected from the water supply and sewerage system and the ends of the hoses should be lowered into a vessel with low edges, for example, into a basin. Switch on drain mode. At the end of work - disconnect the machine from the power supply and unscrew the cover of the drain pump,
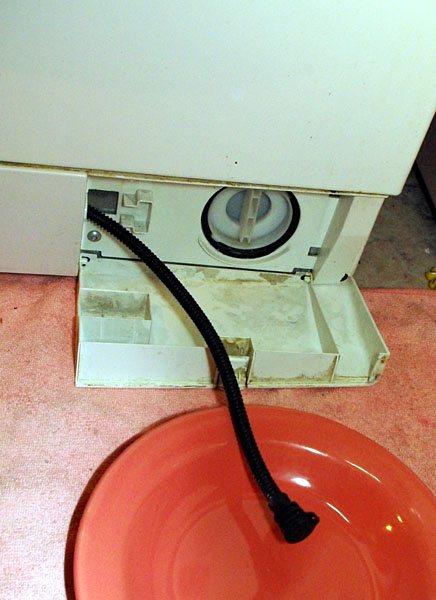

substituting some kind of small flat vessel. There is now a small amount of water left in the machine in the thick rubber hose connecting the tank to the drain pump. Freezing of this water is permissible, but sometimes it is advised to turn the car upside down and leave it until spring. Some machines are equipped with a special pipe for draining the remaining water.
The situation with dishwashers is less clear.
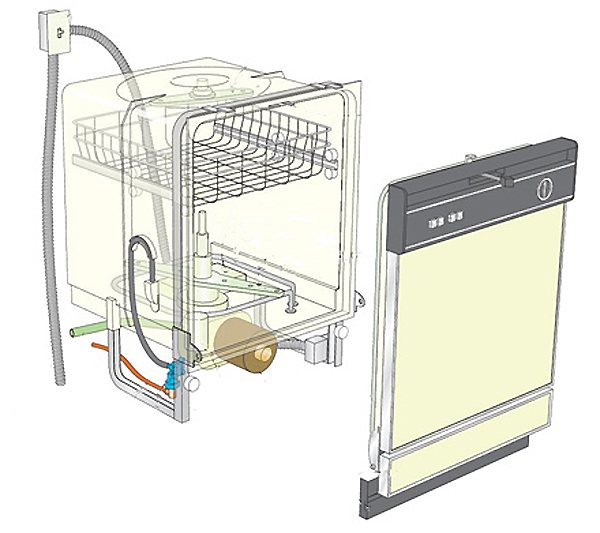

Their designs are very diverse, the paths of movement of water and the cavities in which it can stay differ depending on the manufacturer of the machine and its type - for example, floor and table machines have noticeable differences. If the instructions for the car do not directly indicate that it can be in an unheated room in winter and there is no algorithm for preparing it for this, then it is better not to risk it.
There are no trifles
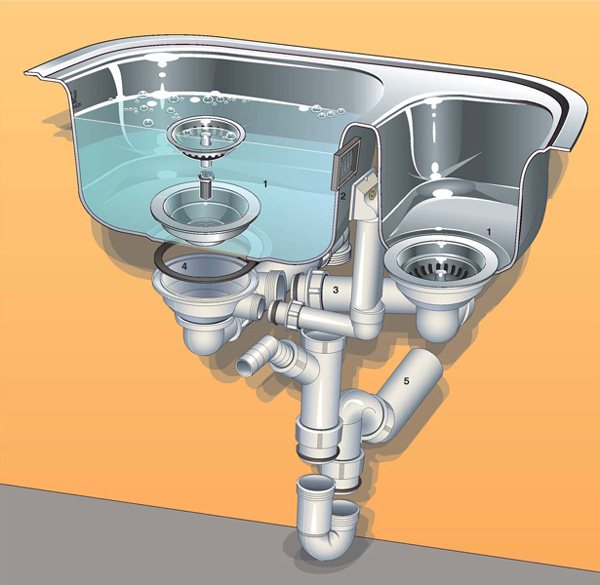
Let's not forget that in addition to the water supply system, we have a drainage system, and the water in it also has a place to freeze. You should, at a minimum, disassemble the siphons under the sinks. If there is a toilet bowl, the water from the tank should be drained, and from the water seal - pumped out with a syringe, rubber bulb, etc. So that after pumping out the house is not filled with the "aromas" of the septic tank, antifreeze is poured into the water seal. In the spring, it is pumped out in the same way as water in the fall. Of course, you cannot drain antifreeze into a septic tank.

As a rule, in country houses there is another device that requires attention at the end of the season, although it has nothing to do with the water supply. This is a mobile air conditioner. Our "nervous", as meteorologists say, the climate forces us to purchase this device and actively use it in the summer for cooling, and in the rainy off-season - for heating and fighting dampness.
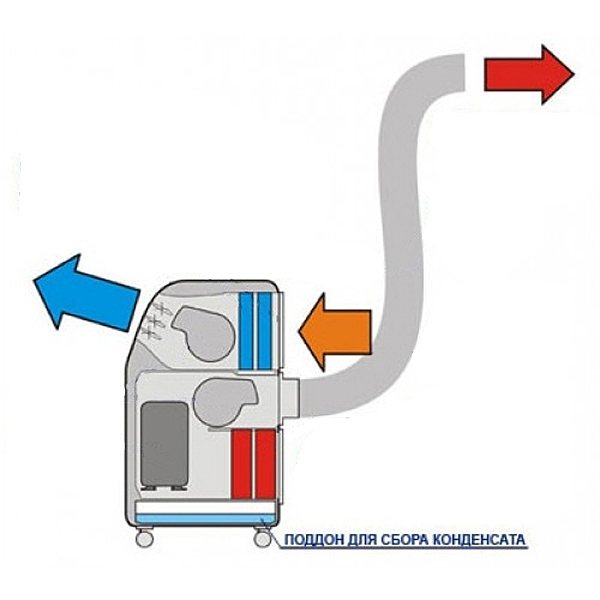

Do not forget that, unlike window air conditioners and split-systems, a floor-mounted mobile air conditioner does not have drainage pipes, and the water taken from the air during operation is accumulated in a special container.Some models have special pipes for draining water into a sump or basin during operation of the air conditioner, but even in this case, a noticeable amount of water may still remain inside it. Residual water should be removed by tilting the device towards the drain hole. In addition, it is highly advisable to turn the air conditioner on for winter storage for about an hour in ventilation mode in order to dry the heat exchanger.
*** Well, we have finished preparing the "water-containing devices" of a typical country house for winter. While we were doing this, a short autumn day came to an end, and the sky was strewn with bright October stars. We fiddled for a long time! Now we have to go home after dark ... It's a good thing that we didn't have to service the solar water heater and the hydromassage shower.
But the main thing is that the job is done. And now you can calmly rest from the dacha until next spring.
Is it possible to cope faster?
Faster - it is possible, but in the case of an improved system. Therefore, this information will be useful to those who are going to rebuild or seriously alter their summer water supply system.
First of all, you can get rid of the main drain valve on the supply pipe, which was discussed at the beginning of our conversation and, accordingly, not waste time on manipulations associated with it. It is replaced by a drainage device of two types. The first, the most primitive option is a tiny (about 1 mm) hole in the wall of the supply pipe in the well, right after the check valve. The pump capacity is so high that the presence of such a hole does not affect the consumer qualities of the system, but when the pump is turned off and the mixer taps are open, water leaves the system rather quickly. A significant drawback of this method is that the water slowly leaves even with the taps closed, forcing the pump to constantly turn on to maintain the operating pressure in the system.
The second, very elegant from a technical point of view, is the installation in the same place of a non-volatile automatic drain valve that opens the drain hole when the pressure in the system drops to 0.2 atmospheres, that is, when the pump is turned off and all the taps are opened.
Above we talked about plumbing systems assembled from rigid pipes. As a rule, they use metal-plastic pipes and connecting elements for them, the choice of which is very large on the market, as well as polypropylene pipes. Such pipes are considered more resistant to freezing of water residues in them, since they have some elasticity. It is very convenient to connect them by welding, but for a summer water supply it is better to use special couplings - in this case, in the spring we can easily replace the burst section. The operating pressure in such systems is up to 3 atm., And the relay that controls the pump is usually set so that it turns off when the pressure reaches 3 atm., And turns on at 1.7 atm.
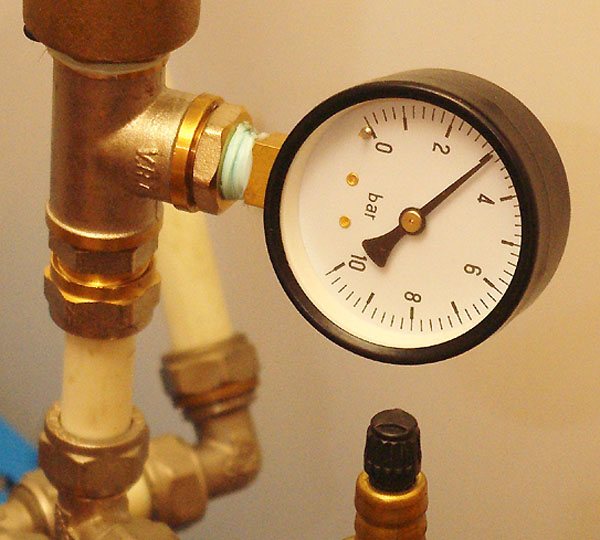

It is possible to radically change the complexity of servicing the system by using flexible hoses that are not afraid of freezing water in them from the well to the house. There are hoses that can withstand high pressure - 3-6 atm., But you can use ordinary garden reinforced hoses. True, they will not withstand high pressure, and the relay will have to be adjusted so that the pump turns off at 1.7-1.8 atm., However, if 3-4 people permanently live in the house, and they do not open all the taps at the same time, then this pressure quite enough.

These hoses can safely survive severe frosts in the absence of the owners. They can be laid directly on the surface of the earth, used until late autumn, and at the last moment rolled up and removed. Even if we miss the moment, and the water in them will freeze before our arrival (and it will freeze earlier than in the pipes laid in the house), they can be safely left in their places until spring.
Even more useful information from the real estate world on our Youtube channel Real Estate +
Answers from experts
Take a toilet brush and push the water down into the pipe with it. Almost all the water will go away, it will become a little. And then a good remedy, I have - SANOX, pour it for a few minutes.
directly with gloves and directly into the water with a special chemical agent. I do not pump anything out and everything is washed
do not start and the duck helps cool + ordinary toilet brush, go for it)))
buy those chem. the product is washed with water, and if something is a glove + a brush, that's all. what's so complicated about that.
do not want to moor, fill in a 33% solution of hydrochloric acid and leave it for a few hours and you will be happy
buy 4 different products, then pour them in, and the plunger will finish its job)))
you just need a good toilet cleaner. I bought it here, you don't have to drain the water. everything is well washed. just pour in for a few minutes
xylitol for toilets and no need to climb anywhere everything eats away after 10 minutes
Check back often, use special tools and there will be no problems.
Think correctly if the toilet is very dirty and there will not be any layering without pumping out. Put on gloves, soak with a sponge, then pour Silit for toilets, let it stand with it for 5-10 minutes, then take an iron washcloth and go. This is for heavy dirt.
You go and buy a new fan pipe at the store
Throw a floor rag, then pull it out as it absorbs water
Push out with a plunger, of course, it won't work dry, but this will be enough
How to completely remove water from the toilet (from the toilet siphon)?
It is necessary to completely drain the toilet, that is, not only drain the tank, but remove the water from the toilet siphon.
How can this be done, what is the best, more convenient and faster way?
At the beginning, you need to turn off the water supply tap to the toilet, then completely drain the water from the toilet tank, perhaps the tank is leaking (drain fittings) and if this is not done, then the water will constantly drain into the toilet (bowl).
Further options to choose from:
If this is a toilet bowl with a PVC drainage attachment to the floor, or the toilet bowl is installed through just such a corrugation,
We unscrew the bolts (key for 10, less often for 9-11).
Raise the toilet with a slope towards the sewer and drain the water from the toilet siphon.
It is not necessary to remove the toilet cistern, unless it rests against the wall and does not interfere with raising the toilet at an angle (talking about a compact toilet)
If this option is not suitable (for example, the toilet is installed on a cement-sand mortar, sealant, or the neck of the toilet goes into a cast-iron tee), then you can drain the water without dismantling the toilet.
You can use this pear
If there is no such pear, a large-volume medical syringe, or even an enema, will do.
If this is not the case, then you need a large rag, a natural fabric that absorbs water well.
We lower the rag into the toilet siphon (the rag should be large so that it does not slip into the sewer), take it out, squeeze it into a bucket and repeat the steps.
It is better to work with gloves, the cloth can be replaced with a sponge.
After you completely remove the water from the toilet, change the damp cloth to a dry one and wipe the toilet.
Possible malfunctions of the unit
How to drain water from a water heater
If the pump turns on too often and turns off immediately, then you must immediately check the air pressure in the accumulator. With underestimated indicators, it will be necessary to pump it up. But it will be possible to fix the problem in this way only if the membrane and the tank body are not damaged. Only contacting the service center to the repairmen will help here.
If water drops appear on the air valve nipple, the accumulator must be immediately disconnected from the water supply system. This is a direct sign of membrane damage. In such a situation, you cannot do without replacing it. Air should not enter the plumbing system of a private house through the membrane tank.
If the pump does not want to turn on at all, then it is worth looking at the pressure switch adjustment. There are times when it is set to too high a pressure.But it is also possible that air enters the suction hose, which triggers the dry-running protection.
How to drain the toilet for the winter
Preparing the toilet
- Flush the toilet cistern several times, shut off the water supply to the toilet cistern, and flush the water out of the cistern. unscrew the tank lid and make sure that there is almost no water left in the tank, if you wish, you can remove the remaining water with a rag or sponge (this is not necessary if there is not much water left in the tank).
- Scoop out as much water as possible from the toilet bowl.
- It is best for this to use a special scoop made with a wallpaper knife from a plastic bottle, shaped like a ladle.
- However, you can scoop out the water with any means at hand. Remove excess water from the bowl with an old cloth or sponge.
To prevent odors from the sewer network from entering the house in winter, plug the hole in the bowl tightly with a rag. You can still throw rags on top and even close the lid, although this is not necessary.
Video: instruction: draining water for the winter in a double house
How to defrost the water in the toilet bowl?
Immediately, I want to note there should not be water in the toilet cistern, if it is a toilet in an outdoor toilet, or a toilet in a house that is not heated. She (water) is simply not needed there, no one uses the toilet.
To prevent the smell of sewage from entering the room, the toilet (structurally) has a "siphon" which provides a water seal.
It is the toilet siphon that will have to be defrosted.
I strongly advise against using boiling water, the toilet will burst immediately due to the temperature drop (unless, of course, this is a stainless steel toilet, such a toilet is very rare).
Instead of boiling water, the desired temperature at which the water will thaw, it is better to use a regular hair dryer (construction is not the best option).
We turn on the hairdryer and gradually warm up the bottom of the toilet (there is water).
A warm stream of air from a hair dryer should be distributed evenly, that is, one area cannot be heated for a long time.
In time, this process is long, you can completely defrost the toilet for 30-40 minutes.
If there is water in the toilet cistern, it defrosts in the same way with a hairdryer, do not drain the cistern until it is completely defrosted.
Video: preparing the toilet for the winter
Purpose, device, principle of operation
Initially, let's make it clear in terms - the hydraulic tank and the expansion tank are not the same devices. The hydraulic accumulator is used in water supply systems of a private house, arranged to supply water with a pump from an external source, while an expansion tank is installed in heating and hot water supply systems in order to stabilize their pressure and prevent water hammering.
Consider the main functions of a hydraulic tank in water supply systems:
- the device prevents pump wear due to frequent switching on - since the tank constantly contains water, the pump will start only when it is empty, which will have a positive effect on the durability of the unit;
- the accumulator reduces the likelihood of water hammer in the pipeline when the pump is turned on, it also maintains a stable pressure in the system, preventing pressure fluctuations when several taps are used at the same time;
- the tank provides a constant supply of water, which is especially important in country houses with problematic power supply.
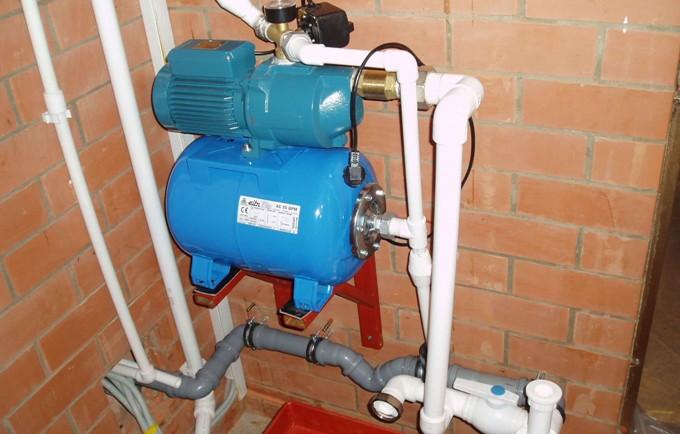

Pumping station with a hydraulic accumulator
The device of the hydraulic tank consists of a metal tank directly and a membrane inside it, which divides the tank into two chambers - one for water, the other for air. The water chamber is made of butyl - a sanitary safe type of rubber, the liquid stored in it does not come into contact with the metal walls of the tank. Water supply and discharge occurs through two threaded nozzles, to which pipelines are connected, the nozzles have an identical diameter.
A pneumatic valve is responsible for regulating the pressure in the air chamber.Large-volume accumulators (100 liters and more) are equipped with a check valve, which is needed to bleed air from the water chamber. A shut-off valve performs a similar function in small tanks. The standard air pressure in the accumulator is 1.5-2 bar.
Varieties of hydraulic tanks and features of their calculation
Depending on the shape of the body, this equipment is divided into two types - horizontal and vertical hydroaccumulator. There is only one structural difference between them - vertical tanks with a volume of more than 50 liters are equipped with a valve for bleeding air, which accumulates in the water chamber and reduces the efficiency of the device. In horizontal tanks with a volume of 50-100 liters, the valve is located in the end part of the side of the body.
In all accumulators with a volume of less than 50 liters, air is released from the water chamber by completely draining the water. The choice of the shape of the tank is based on the size of the room where it will be mounted. There are no tricks here - you need to take the tank that fits better into the space allotted for it.
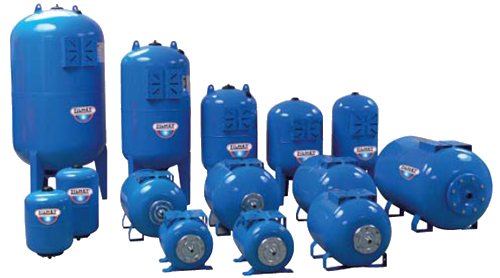

Varieties of accumulators
More difficult is the choice of the tank according to the performance parameter. Here we need a calculation of the equipment that will help determine its required volume. The calculation is performed according to the formula: O = K * Rmax * (Dmax + 1) * (Dmin + 1) / (Dmax-Dmin) - (P + 1), in which:
- K is the power factor of the pump connected to the hydraulic tank;
- Rmax - the highest planned consumption of liters of water per minute;
- Dmax - water pressure level in the tank to turn off the pump (Bar);
- Dmin - water pressure limit to turn on the pump (Bar);
- P is the air pressure in the hydraulic tank (Bar).
The pump factor depends on the power of its engine:
- power 0.55-1.5 kW - coefficient 0.2;
- 2-3 kW - 0.375;
- 4-5.5 kW - 0.625;
- 5-9 kW - 0.875.
The calculation of almost any accumulators for domestic water supply stations will show that it is necessary to use a tank with a volume of 25-50 liters. This is the optimal volume for most pumps for wells and wells, which will be enough for a full water supply of a private house.
