What is a heat storage device?
The heat accumulator is a buffer tank designed to accumulate excess heat generated during the operation of the boiler. The saved resource is then used in the heating system in the period between the planned loads of the main fuel resource.
Connecting a properly selected battery allows you to reduce the cost of purchasing fuel (in some cases up to 50%) and makes it possible to switch to the mode of one load per day instead of two.

In addition to the function of accumulating the released heat, the buffer tank protects cast-iron units from cracking in the event of an unexpected and sharp drop in the temperature of the working network water
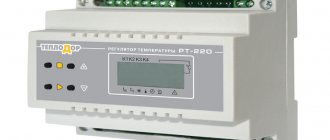
If the equipment is equipped with intelligent regulators and temperature sensors, and the supply of heat from the storage tank to the heating system is automated, heat transfer will increase significantly, and the number of portions of fuel loaded into the combustion chamber of the heating unit will noticeably decrease.
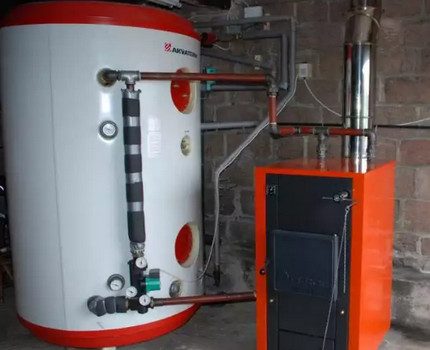
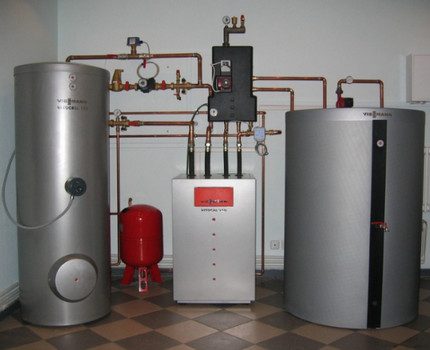
Features of the internal and external device
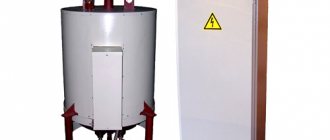
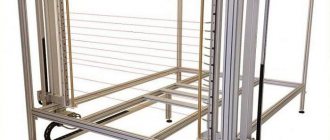
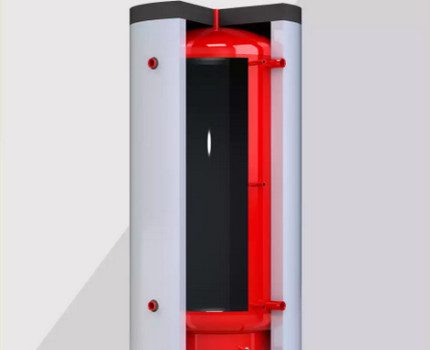
The heat accumulator is a vertical cylinder-shaped reservoir made of high strength black or stainless steel sheet.
There is a layer of bakelite varnish on the inner surface of the device. It protects the buffer tank from the aggressive influence of industrial hot water, weak solutions of salts and concentrated acids. Powder paint is applied to the outside of the unit, which is resistant to high thermal loads.
The volume of the tank varies from 100 to several thousand liters. The most spacious models have large linear dimensions, which make it difficult to place equipment in the limited space of a home boiler room
External insulation is made of recycled polyurethane foam. The thickness of the protective layer is about 10 cm. The material has a specific complex weaving and an internal PVC coating.
This configuration prevents dirt particles and debris from accumulating between the fibers, provides a high level of waterproofing and increases the overall durability of the thermal insulator.
The heat insulator is not always included with the heat accumulator. Sometimes you have to buy it separately, and then independently mount it on the unit
The surface of the protective layer is covered with a good quality leatherette cover. Due to these conditions, the water in the buffer tank cools down much more slowly, and the level of total heat loss of the entire system is significantly reduced.
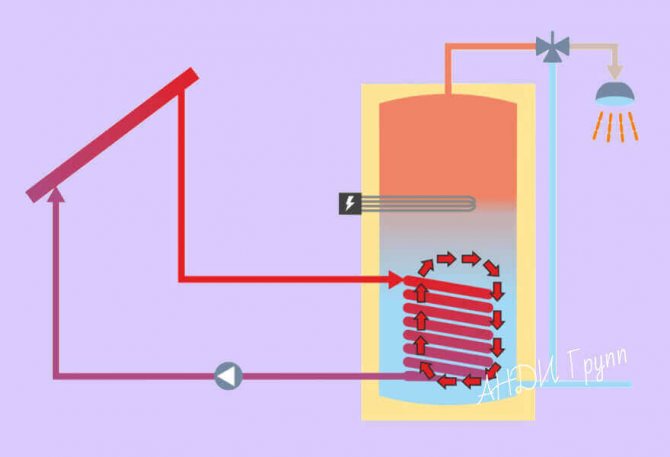
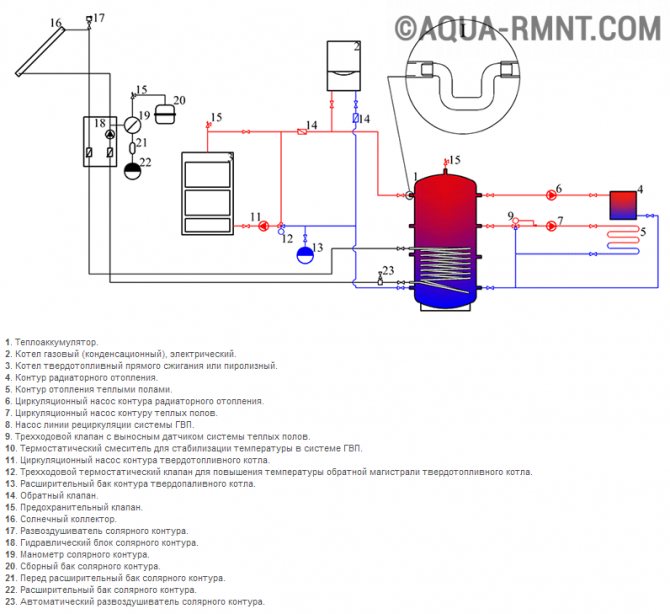
The principle of operation of a heat-saving product
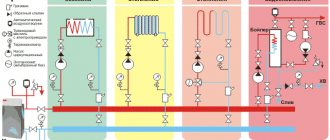
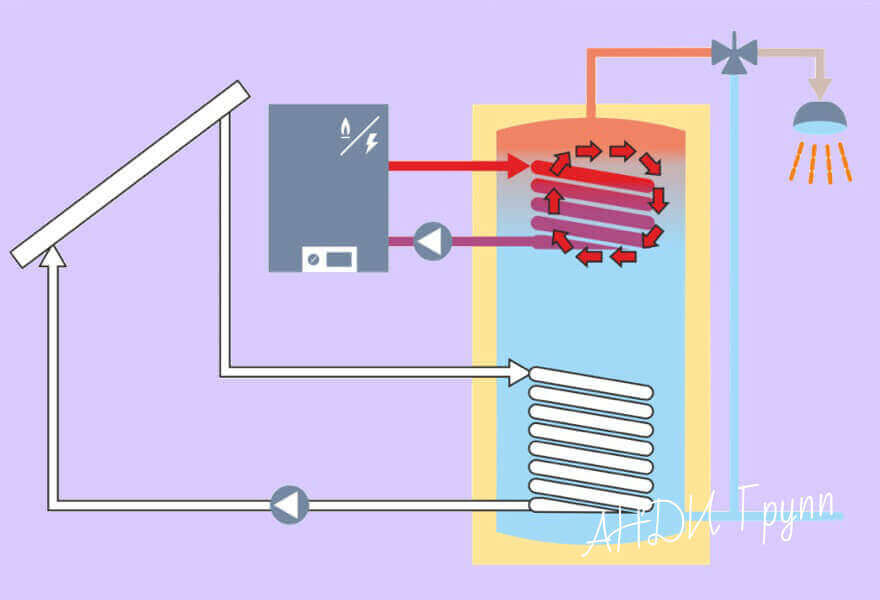
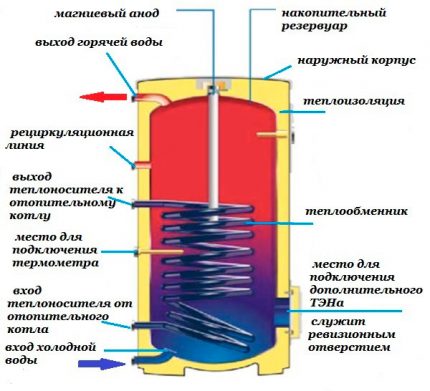
The heat accumulator functions according to the simplest scheme. From above, a pipe from a gas, solid fuel or electric boiler is supplied to the unit.
Hot water enters the storage tank through it. Cooling down in the process, it goes down to the location of the circular pump and with its help is fed back into the main passage in order to return to the boiler for the next heating.
The installation of a heat accumulator prevents overheating of the coolant at the moment when the boiler is operating at full capacity and ensures maximum heat transfer while saving fuel. This reduces the load on the heating system and extends its service life.
A boiler of any type, regardless of the type of fuel resource, operates in stages, periodically switching on and off when the optimum temperature of the heating element is reached.
When the work stops, the coolant enters the reservoir, and in the system it is replaced by a hot liquid that has not been cooled due to the presence of a heat accumulator. As a result, even after turning off the boiler and switching it to passive mode until the next fuel loading, the batteries remain hot for some time, and warm water comes from the tap.
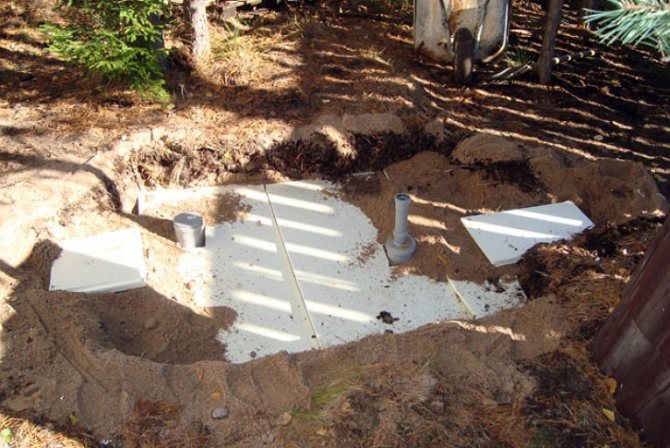
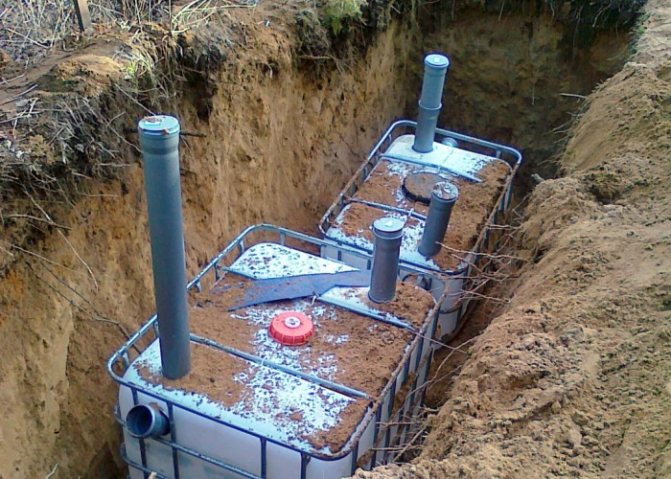


Creation of a septic tank from euro cubes
To make a septic tank, you need to take two eurocubes, channels for air discharge are made in them, incoming and outgoing pipes are installed, through them the liquid enters, and overflows from one container to another. The outlet pipe is protected with a reverse-acting valve so that the purified liquid does not fall back into the septic tank. A septic tank is a treatment facility that consists of separate chambers. In order for the second Eurocube to be fully utilized, the two tanks are well fastened, while the containers are displaced up to 25 centimeters in the vertical direction. All pipe connections must be sealed with sealant. The septic tank needs to be insulated with foam.
Varieties of heat storage models
All buffer tanks perform almost the same function, but have some design features.
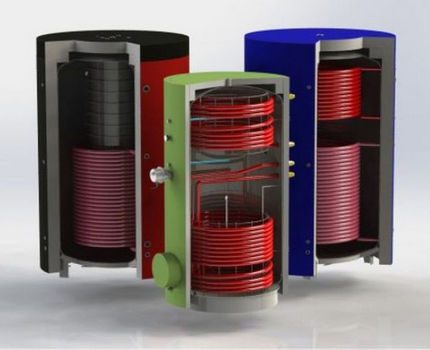
Manufacturers produce storage units of three types:
- hollow (without internal heat exchangers);
- with one or two coilsensuring more efficient operation of equipment;
- with built-in boiler tanks small diameter, designed for the correct operation of an individual hot water supply complex for a private house.
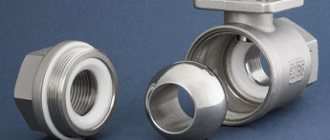
The heat accumulator is connected to the heating boiler and the communication wiring of the home heating system through the threaded holes located in the outer casing of the unit.
How does a hollow unit work?
The device, which has neither a coil nor a built-in boiler inside, belongs to the simplest types of equipment and is cheaper than its more "sophisticated" counterparts.
It is connected to one or several (depending on the needs of the owners) power supply sources through central communications, and then through the 1 ½ branch pipes it is wired to the points of consumption.
It is planned to install an additional heating element operating on electrical energy. The unit provides high-quality heating of residential real estate, minimizes the risk of overheating of the coolant and makes the operation of the system completely safe for the consumer.
When a residential building already has a separate hot water supply system and the owners do not plan to use solar thermal sources to heat the room, it is advisable to save money and install a hollow buffer tank, in which the entire usable area of the tank is given to the coolant, and is not occupied by coils
Heat storage unit with one or two coils
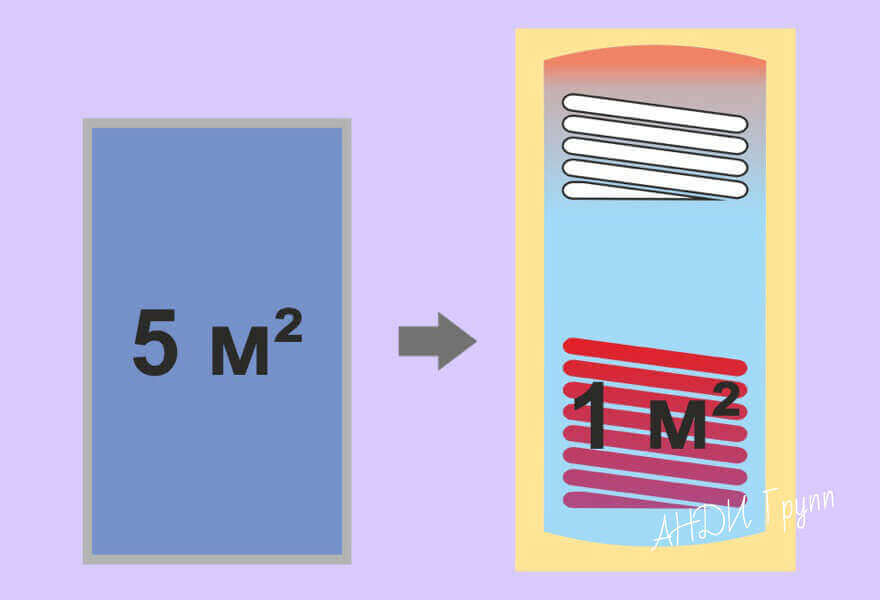
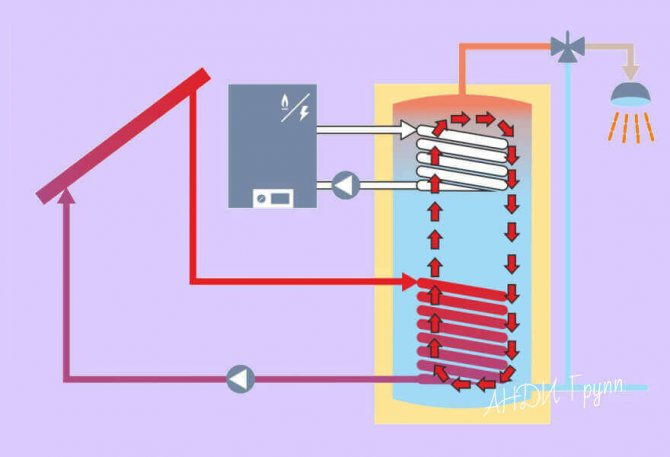
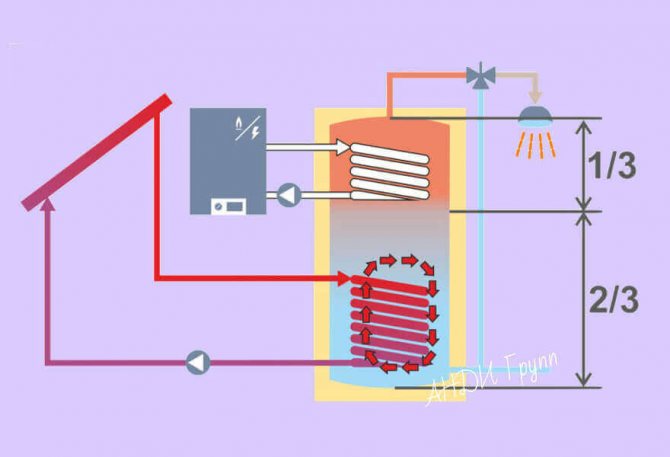
A heat accumulator equipped with one or two heat exchangers (coils) is a progressive version of equipment for a wide range of applications. The upper coil in the structure is responsible for the selection of thermal energy, and the lower one carries out intensive heating of the buffer tank itself.
A device equipped with heat exchangers has a higher price than a hollow unit, but the costs are quite justified here. The device significantly expands the functionality of the system and makes its work much more efficient
The presence of heat exchange units in the unit allows you to receive hot water for domestic needs around the clock, to heat the tank from the solar collector, to warm up the house paths and to use the useful heat as efficiently as possible for any other convenient purposes.
Internal boiler module
The heat accumulator with a built-in boiler is a progressive unit that not only accumulates the excess heat generated by the boiler, but also ensures the supply of hot water to the tap for domestic purposes.
The internal boiler tank is made of stainless alloy steel and equipped with a magnesium anode. It reduces the hardness of the water and prevents limescale build-up on the walls.
The owners choose the appropriate volume of the buffer tank on their own, but experts say that there is no practical sense in buying a tank less than 150 liters.
The unit of this type is connected to various energy sources and works correctly with both open and closed systems. It controls the temperature level of the operating coolant and protects the heating complex from overheating of the boiler.
Optimizes fuel consumption and reduces the number and frequency of downloads. Compatible with all solar collectors and can function as a substitute for a hydraulic pointer.
The scope of the heat accumulator
The heat accumulator collects and accumulates the energy generated by the heating system, and then helps to use it as efficiently as possible for efficient heating and providing residential premises with hot water.
It is necessary to purchase a device for accumulating excess heating resources only in specialized stores. The seller must provide the buyer with a product quality certificate and complete instructions for use.
It works with different types of equipment, but is most often used in conjunction with solar collectors, solid fuel and electric boilers.
Heat accumulator in the solar system
A solar collector is a modern type of equipment that allows you to use free solar energy for everyday household needs. But without a heat accumulator, the equipment is not capable of fully functioning, since solar energy is supplied unevenly. This is due to the change in time of day, weather conditions and seasonality.
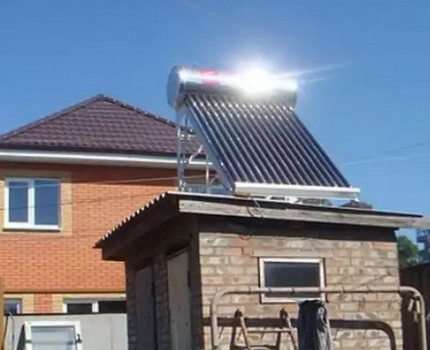
A solar collector equipped with a heat accumulator is placed on the south side of the site. There, the device absorbs maximum energy and gives an effective output.
If the heating and water supply system is powered only from a single source of energy (the sun), at some moments the residents may have serious problems with the supply of the resource and getting the usual elements of comfort.
A heat accumulator will help to avoid these unpleasant moments and make the most rational use of clear, sunny days for energy storage. To work in the solar system, it uses the high heat capacity of water, 1 liter of which, cooling by only one degree, releases the thermal potential for heating 1 cubic meter of air by 4 degrees.
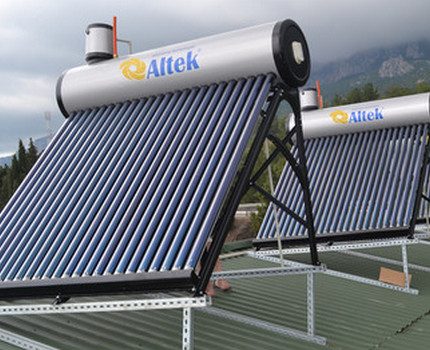
The solar collector and the heat accumulator form a single system, which makes it possible to use solar energy as the only source for heating a residential building
During the period of peak solar activity, when the solar collector collects the maximum amount of light and the energy production significantly exceeds the consumption, the heat accumulator accumulates the surplus and supplies them to the heating system when the supply of the resource from the outside decreases or even stops, for example, at night.
The following article, which we advise you to read, will acquaint you with the options and schemes for alternative heating for suburban property.
Buffer tank for solid fuel boiler
Cyclicity is a characteristic feature of the operation of a solid fuel boiler. At the first stage, firewood is loaded into the firebox and warming up takes place for some time. The maximum power and the highest temperatures are observed at the peak of the burning of the bookmark.
Then the heat transfer gradually decreases, and when the wood finally burns out, the process of generating useful heating energy stops. All boilers operate according to this principle, including devices for long burning.
It is not possible to precisely tune the unit to generate heat energy with reference to the level of consumption required at any given moment. This function is only available in more advanced equipment, for example, in modern gas or electric heating boilers.
Therefore, immediately at the time of ignition and at the time of reaching the actual power, and then in the process of cooling and the forced passive state of the equipment, the thermal energy for full heating and heating of hot water may simply not be enough.
On the other hand, during peak operation and the active phase of fuel combustion, the amount of energy released will be excessive and most of it, literally, will “fly into the pipe”. As a result, the resource will be spent irrationally, and the owners will have to constantly load new portions of fuel into the boiler.
In order for the house to heat up for a long time after turning off the solid fuel boiler, you need to purchase a large buffer tank. It will not be possible to accumulate a solid amount of a resource in a small reservoir and its purchase will turn out to be a senseless waste of money
This problem is solved by installing a heat accumulator, which, at the moment of increased activity, will accumulate heat in the tank. Then, when the wood burns out and the boiler goes into a passive standby mode, the buffer will transfer the collected energy to the coolant, which will warm up and begin to circulate through the system, heating the room bypassing the cooled device.
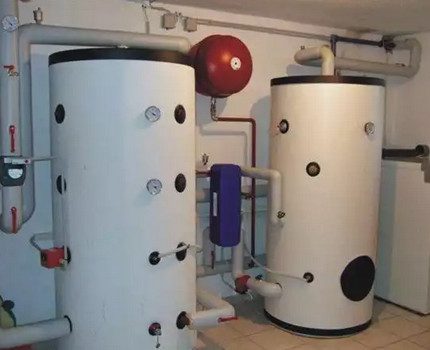
Electrical system reservoir
Electric heating equipment is a rather expensive option, but it is sometimes installed, and, as a rule, in combination with a solid fuel boiler.
Usually, the electric type of heating is arranged where other sources of heat are not available for objective reasons. Of course, with this method of heating, electricity bills are seriously increased and home comfort costs the owners a lot of money.
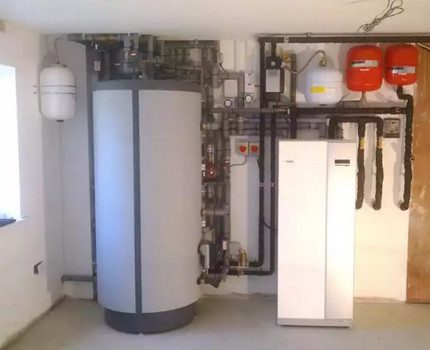
Install the buffer tank directly next to the boiler. The equipment has solid dimensions and in a private house you will have to allocate a special room for it. The system will fully pay off within 2-5 years
In order to reduce the cost of paying for electricity, it is advisable to use equipment at the maximum during the preferential tariff period, that is, at night and on weekends.
But such an operating mode is possible only if there is a capacious buffer tank, where the energy generated during the grace period will accumulate, which can then be spent on heating and supplying hot water to living quarters.
How easy it is to make a battery
Hello again everyone mozochinov!
Today I will tell you how to make a battery yourself and from scrap materials!
AA batteries are widespread cylindrical batteries with a rating of about 1.5V, approximately 49-50mm in length and 13.5-14.5mm in diameter. It is easy to make them yourself, and the very manufacture of this brain self-made
can serve as an excellent visual aid for explaining physical and chemical processes to children.
Step 1: materials and tools
- corrugated board
- copper flat washers with a diameter of 10 mm - 12 pcs.
- zinc flat washers with a diameter of 10mm - 14-16 pcs.
- heat-shrink tubing
- distilled water - 120ml
- vinegar - 30ml
- table salt - 4 tablespoons.
- soldering iron and solder
- mixing bowl
- digital multimeter
- scissors
- sandpaper
- needle nose pliers
- lighter or hot air gun
- old AA battery for verification
Step 2: stripping the washers
The basis of this homemade
11 copper-zinc cells that "give out" 1.5V.Copper and zinc washers must enter into chemical reactions, so we clean them from oxides, dirt, etc. Using
brain skin
with 100 grains, we don't just clean the washers, but polish them to a shine.
Step 3: Prepare the electrolyte
Copper and zinc create a potential difference, but you also need a medium through which charges will pass between these potentials. For the electrolyte, dissolve 4 tablespoons of salt in 120 ml of distilled water, mix everything thoroughly until completely dissolved, then add 30 ml of vinegar and let it brew.
Step 4: cardboard
To keep the washers at a distance from each other, you need to lay them brainboard
, namely, corrugated board impregnated with electrolyte. We cut the corrugated cardboard into squares with a side of 1 cm and soak them in electrolyte, which was infused for at least 5 minutes after adding vinegar.
Step 5: stretching the tube
Now you need to modify the heat shrink tubing a little. To make it easier to install the copper-zinc battery cells into the tube, use the needle nose pliers to stretch the tube itself by about 10% of the initial diameter.
Step 6: testing
Now is the time to test our elements. We put on a copper washer brainboard
soaked in electrolyte, and a zinc washer on it. Use gloves! Next, we turn on the multimeter in the "constant 20V" mode, touch the copper washer with the black wire, and the zinc washer with the red one. The multimeter should show about 0.05-0.15V, this is enough to create a battery of 11 copper-zinc cells.
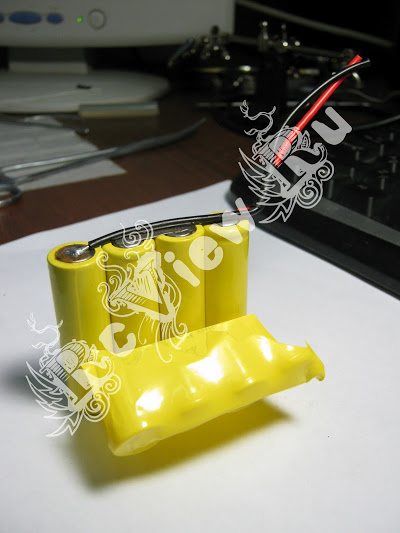
Step 7: battery assembly
We assemble the battery from the prepared elements: copper - zinc - cardboard. It is in this sequence. See photo.
First, we insert a copper washer into the tube, align it perpendicular to the length of the tube, put a zinc washer on it, then cardboard and so on all 11 elements. For convenience, lightly tamp the elements with a plastic rod.
After installing the last zinc washer, we check the resulting workpiece homemade
with an old standard AA battery, if necessary add another zinc washer. After fitting along the length, we heat the tube, thereby forming a battery, cut off the excess ends.
Step 8: wiring contacts
It remains to add contacts. We heat up brain soldering iron
and solder balls of solder to the ends of the battery. That is, we solder a ball of solder onto the copper end, so that when installed in the battery holder, our homemade product touches the contact of the battery holder. Then we turn the battery over and do it with the zinc end too.
Step 9: Everything is ready, let's apply!
The homemade battery is ready, let's try it in action. We connect the multimeter in the "constant 20V" mode and measure the voltage, it should be about 1.5V
If the voltage is below 1.5 V, then try to stretch the battery a little, if this does not help, then you may have made a mistake in the order of installing the washers.
If everything is in order, then install the battery in your favorites brain gadgets
and enjoy their work!
How easy it is to make a battery
How easy it is to make a battery Again, greetings to all brainworms! Today I will tell you how to make a battery yourself and from scrap materials! AA batteries are widely
Recently, all inexpensive radio-controlled models began to be equipped with Ni-Cd batteries (nickel-cadmium batteries), or rather, assemblies of these batteries. Batteries of this type have a low market value for a number of reasons.
Relatively simple and cheap manufacturing technology
Have a memory effect
Small number of recharges
Small specific capacity
Sooner or later, your favorite toy stops turning on, the battery becomes unusable, and the question arises where to find a new one. But where to find the size you need, and most importantly with the same type of battery connector ?!
You don't have to look for anything if you have a soldering iron, a pair of wires, a heat shrink tubing, and 30 minutes of free time.
So, let's say you have a toy powered by a 7.2 V Ni-Mh or Ni-Cd rechargeable battery with a capacity of 400 ma / h. Naturally, we want not only to bring the toy back to life, but also to extend the playing time on a single charge. Therefore, we will increase the capacity of new batteries several times!
By turning the old battery in your hands and cutting its shell, you can easily make sure that it is assembled from ordinary AA-class AA rechargeable batteries by the serial connection method.
Therefore, we need, in our example, this:
· 6 rechargeable batteries Ni-Mh class AA, each battery 1.2V, respectively, to obtain 7.2V = 1.2V * 6, Equal Capacity!
· Heat-shrink tubing
Soldering equipment: soldering iron, flux, solder
File / skin
Copper stranded wire about
You may have noticed that the batteries in the old battery are not soldered. And this was done for a reason, because with strong heating, the battery can be damaged, but, as they say, "everything is good in moderation." We will connect the batteries by soldering, but using a certain technology.
In order for the solder to quickly "stick" to the contact surface of the battery, first clean the surface with a file. When processing with a file, irregularities and scratches are also created that will create conditions for reliable contact.
Personally, I use ordinary rosin or soldering fat as a flux, and ordinary tin-lead solder, the temperature of the soldering iron is 450 degrees.
We will tin the contact pad. If the solder does not "stick" it is not necessary to heat up the battery plate for a long time, this can lead to its failure. In this case, add flux and solder and try again.
I do not recommend using insulated wires to connect the battery, because they will greatly change the size of the battery, in some cases this is a very important factor. Therefore, I usually strip the insulation and make a kind of flat connecting plates by tinning the bare wire.
Since we tinned the contact pads of the battery in advance, it will not be difficult for us to solder the connecting plate.
We connect the battery in series, that is, the "+" of one battery is connected to the "-" of another, and so on. The positive contact of the first and the negative contact of the latter, respectively, will give a total output voltage equal to 7.2 Volts.
Having connected all the necessary wires, including the charging connector, we put the assembly in a heat-shrinkable tube and heat it (you can use a regular hair dryer).
Let's summarize. You were the owner of a weak battery with a supply voltage of 7.2V, a capacity of 400ma / h, which was based on 6 rechargeable Ni-Cd batteries. Taking the connector from the old "dead" battery and doing all the work described above, we got: a battery with a capacity of 1800 ma / h, supplying voltage 7.2 volts, Ni-Mh without memory effect.
Was the article helpful to you?
There are many ideas on the Internet how you can make a battery from improvised means. All of them, in principle, can only be experimentally - cognitive. Every lover of homemade products will be interested in making a battery from improvised means.
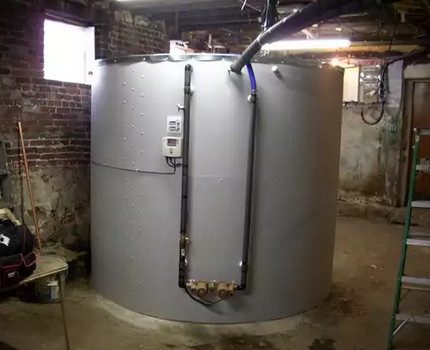
DIY energy storage
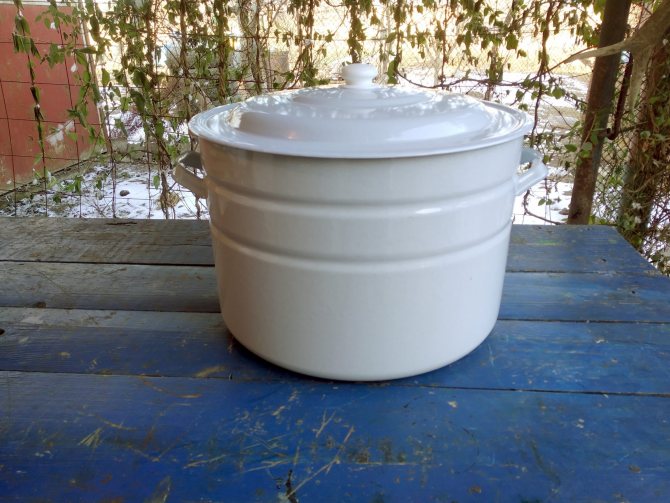
The simplest model of a heat accumulator can be made with your own hands from a finished steel barrel. If one is not available, you will have to purchase several sheets of stainless steel with a thickness of at least 2 mm and weld from them a container of a suitable size in the form of a vertical cylindrical tank.
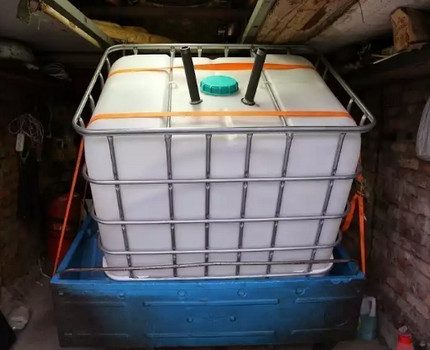
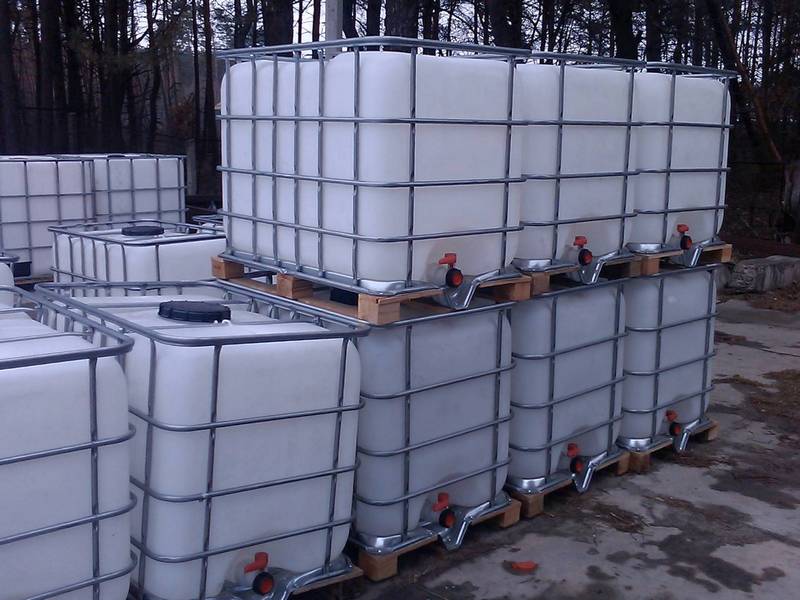
It is not recommended to use eurocube for the manufacture of a heat accumulator. It is designed for contact with a coolant with an operating temperature of up to + 70 ºС and simply cannot withstand hotter liquids
DIY Guide
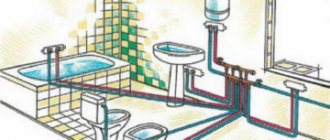
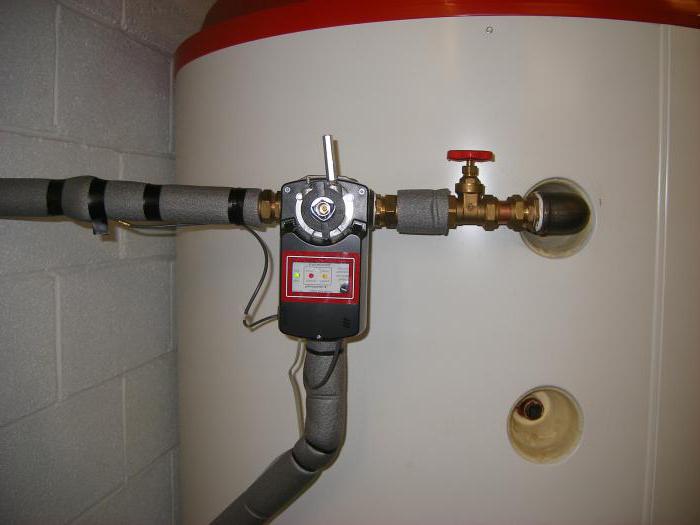
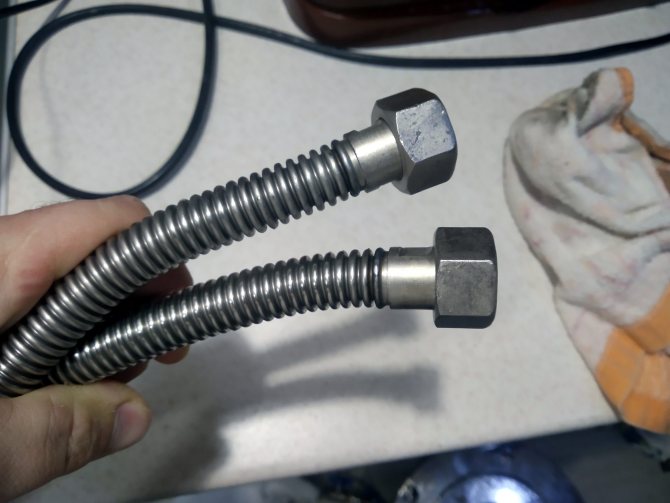
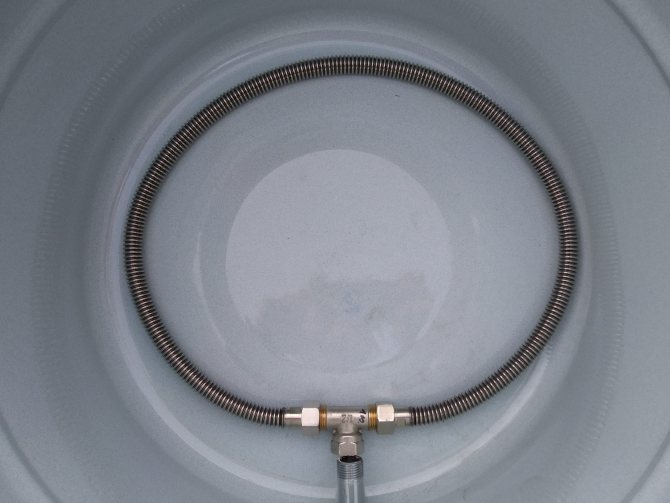
To heat water in the buffer, you need to take a copper tube with a diameter of 2-3 centimeters and a length of 8 to 15 m (depending on the size of the tank).It will have to be bent into a spiral and placed inside the tank.
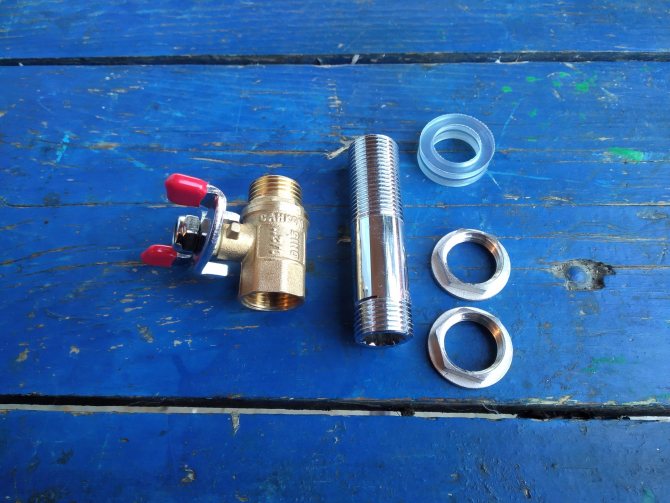
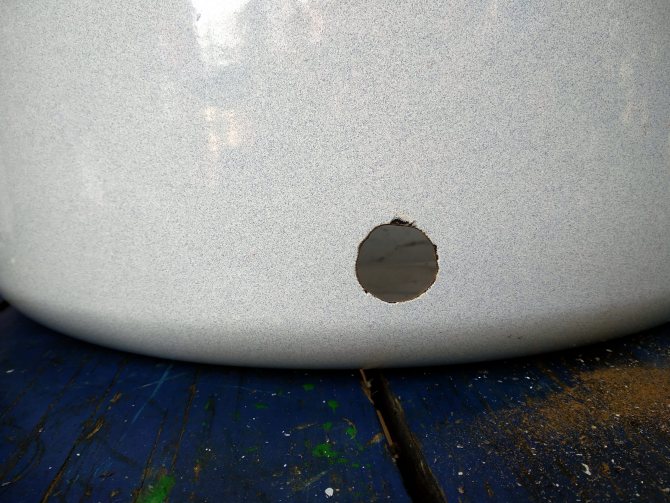
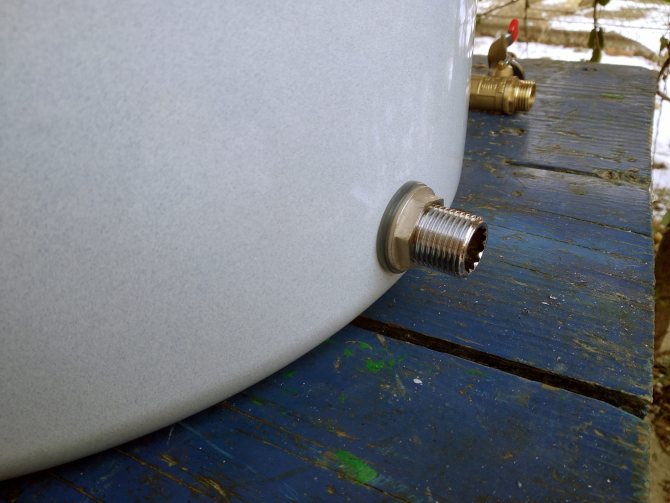
The upper part of the barrel will act as a battery in such a model. From there you need to remove the branch pipe for the outlet of hot water, and make the same from below for the inlet of cold water. Equip each outlet with a valve to control the flow of liquid into the storage area.
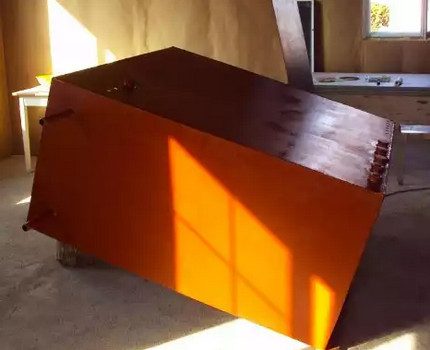
In an open heating system, a rectangular steel tank can be used as a buffer tank. In a closed system, this is excluded due to possible surges in internal pressure.
At the next stage, it is necessary to check the container for leaks by filling it with water or lubricating the welded seams with kerosene. If there is no leakage, you can proceed to creating an insulating layer that will allow the liquid inside the tank to remain hot for as long as possible.
How to insulate a homemade unit?
To begin with, the outer surface of the container must be thoroughly cleaned and degreased, and then primed and painted with heat-resistant powder paint, thus protecting it from corrosion.
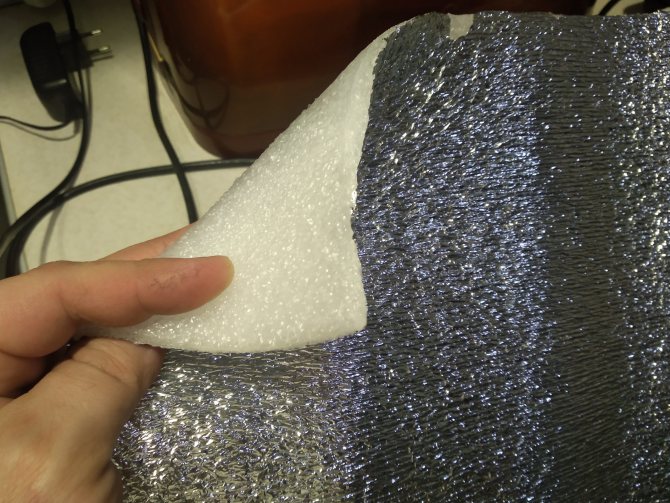
Then wrap the tank with glass wool insulation or rolled basalt wool 6-8 mm thick and secure it with cords or ordinary tape. If desired, cover the surface with sheet metal or "wrap" the tank in foil film.
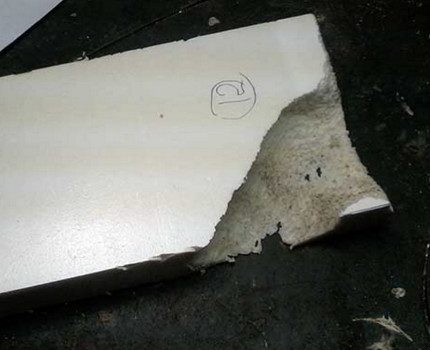
Do not use extruded polystyrene foam or foam for insulation. With the onset of cold weather, mice can start in these materials, looking for a warm place for winter residence.
In the outer layer, cut holes for the branch pipes and connect the container to the boiler and heating system.
The buffer tank must be equipped with a thermometer, internal pressure sensors and an explosion valve. These elements allow you to control the potential overheating of the drum and relieve excess pressure from time to time.
How to assemble
First, let's prepare the wire and remove the insulation from it. We twist it in a tight spiral to increase the area. It is necessary to cut several galvanized plates of the same size. Let's prepare several insulated conductors so that we can connect the network with them later.
Use salt water or vinegar as a conductive solution. You will also need several disposable cups.
We roll the galvanized plates into a cylinder, and bend the end in order to fix the conductor there. As a cushioning material, we will use a plastic plate that can be cut out of a bottle. We will place it between the copper and zinc elements.
Next, the battery assembly process begins. As a result, we get a serial chain, from several glasses. If you fill the elements with brine, then the output can be up to 7 V. Using an acid-type solution, for example, vinegar, will yield up to 8 V.
The most effective result will be obtained with an alkaline solution. In the field, it is found in ash. Then, the voltage will be equal to 9.6 V. By adding such elements to the serial network, you can get the required voltage level for charging the phone.
The rate of consumption of the accumulated resource
It is impossible to accurately answer the question of how quickly the heat accumulated in the battery is consumed.
How long the heating system will work on the resource collected in the buffer tank directly depends on such items as:
- the actual volume of storage capacity;
- the level of heat loss in the heated room;
- outdoor air temperature and current season;
- set values of temperature sensors;
- useful area of the house, which must be heated and supplied with hot water.
Heating a private house in a passive state of the heating system can be carried out from several hours to several days. At this time, the boiler will "rest" from the load and its working resource will last for a longer amount of time.
Safe operation rules
Do-it-yourself thermal accumulators have special safety requirements:
- Hot elements of the tank must not adjoin or otherwise come into contact with flammable and explosive materials and substances. Ignoring this point can provoke the ignition of individual objects and a fire in the boiler room.
- A closed heating system assumes a constant high pressure of the coolant circulating inside. To ensure this point, the structure of the tank must be completely sealed. Additionally, its body can be reinforced with stiffening ribs, and the lid on the tank can be equipped with durable rubber gaskets that are resistant to intense operating loads and high temperatures.
- If there is an additional heating element in the structure, it is necessary to very carefully insulate its contacts, and the tank must be grounded. In this way, it will be possible to avoid electric shock and short circuits that could damage the system.
Subject to these rules, the operation of a self-made heat accumulator will be completely safe and will not cause any problems and hassle to the owners.
Advantages of septic tanks from eurocubes
This type of septic tank is notable for its low cost, and the drains undergo additional treatment and are reused. This design can be used all year round, as it is equipped with insulation material. During the operation of the facility, there is no unpleasant smell. The construction of Euroblocks is durable, reliable, does not deteriorate from corrosion or chemicals, and is resistant to various climatic conditions. During the installation of the structure, you do not need to make bulky floors or use special equipment. The tanks are installed on any soil, while the height of the ground water does not matter.
- The main advantages of Eurocubes are the reliability of wastewater treatment, ease of installation, low cost, as well as the possibility of placing additional chambers.
- In order for the system to work, no electricity is needed, this is an additional savings.
- When purchasing used containers, taps, plastic pipes, and other accessories, you can save on costs, since the materials are not expensive.
- You can add a few more containers, if this is planned in the future, then a spare pipe is installed, and the inlet is hermetically closed. At the same time, the correct installation site is chosen so that there is a site for additional containers.
- The plastic container is dense and has a long service life. But the septic tank must be in a metal frame, if it is not there, the cube will lose its shape. Therefore, the service life will be long if the eurocube is protected by a grill. The container itself is reliable and durable. In this case, it is forbidden to pour nitric acid, fluorine or chlorine into the tanks, these substances can corrode the cubes.