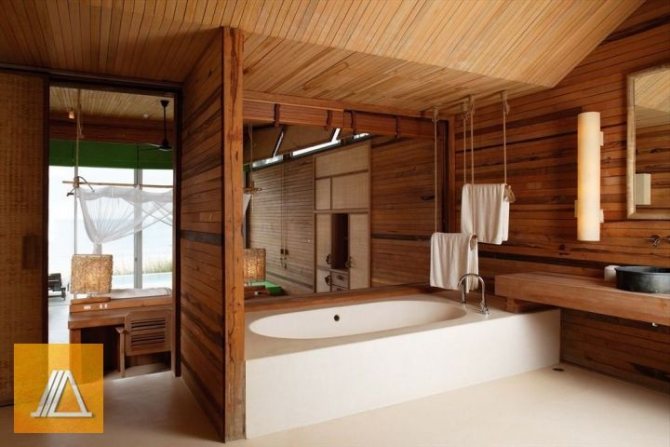
Home / Bathroom / Waterproofing a bathroom under a tile: which is better, examples on video
The bathroom room is characterized by high humidity: moisture particles accumulate in the air, condensation settles on the walls and ceiling. Over time, a fungus may form under the wallpaper, tiles, but the worst of all is leaks, when water through microcracks and ceilings will cause stains on the neighboring ceiling, or even worse - streams of water. Neighbors are unlikely to like such a "shower", and you are in danger of serious troubles and additional costs - not only for your own, but also for neighborly repairs.
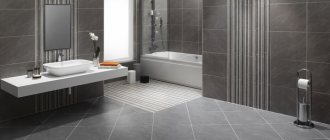
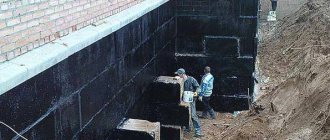
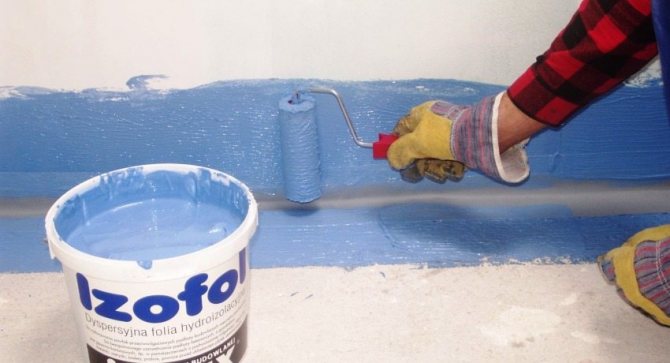
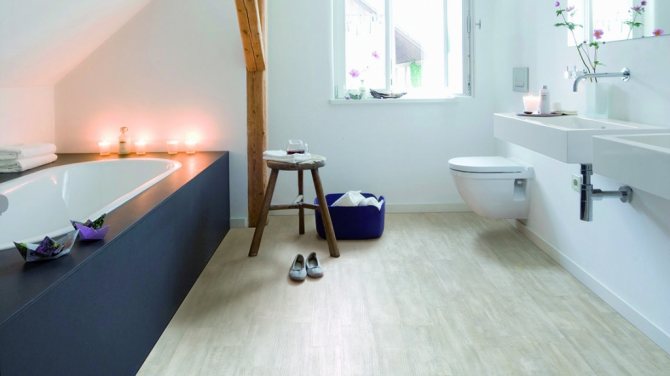
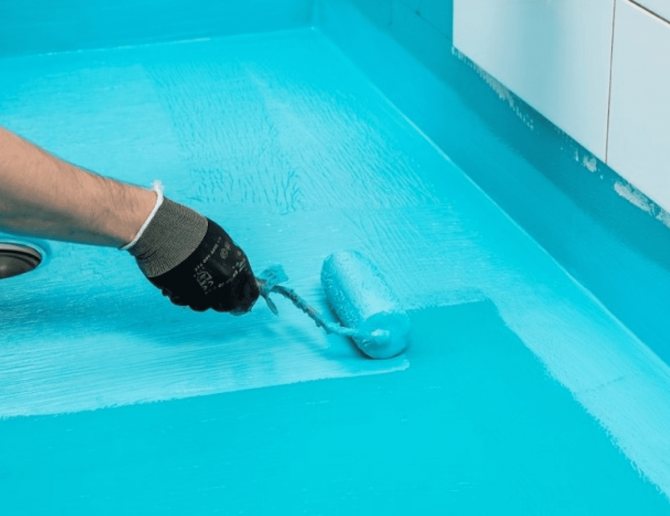
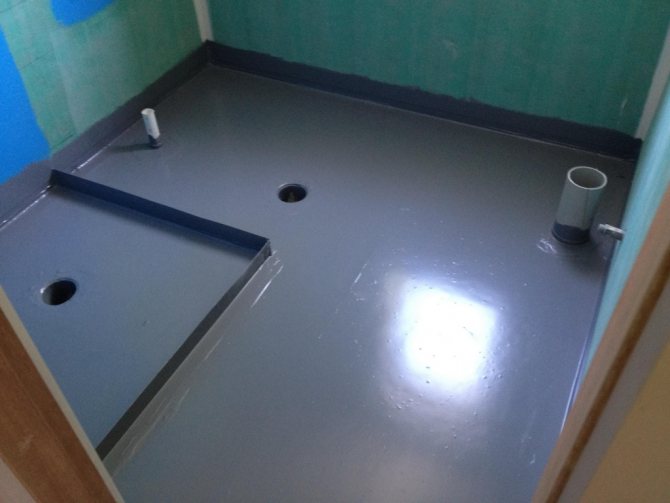
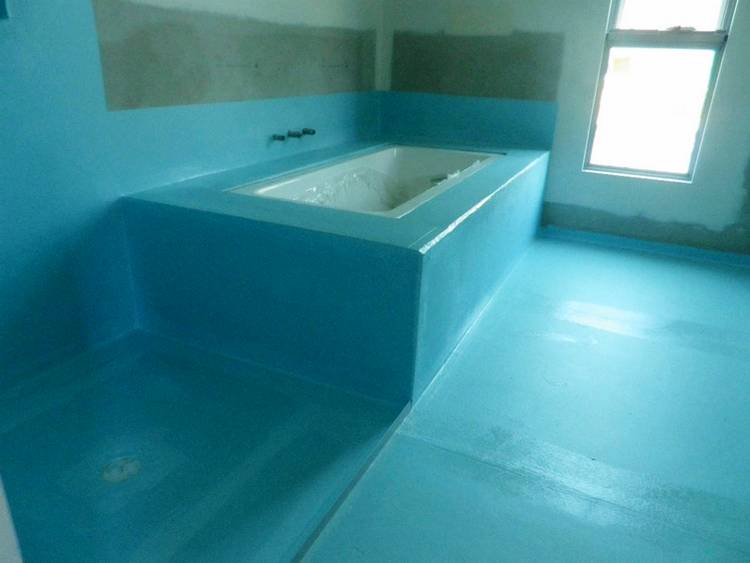
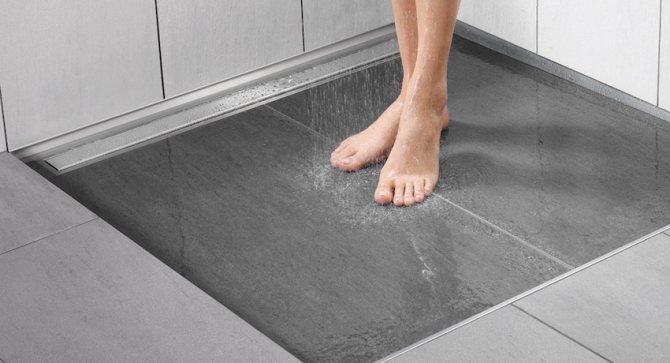
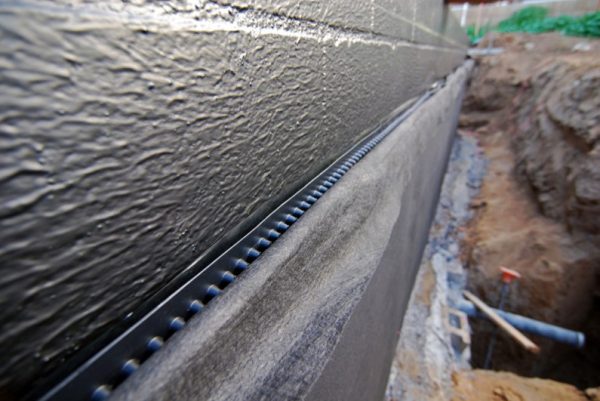
Waterproofing protects the concrete base of the bathroom from moisture
Why do you need waterproofing in the bathroom
In conditions of constant humidity, especially in a small room where natural ventilation cannot cope with airing the room, over time, any, even the most moisture-resistant materials will begin to deteriorate. If the repair in the bathroom is not done very well, small drops of water penetrate between the tiles, the joints of panels, rolls of wallpaper, and eventually accumulate there, causing the formation of mold.
Consequences of improper waterproofing in the bathroom
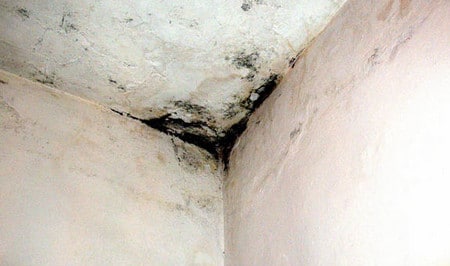
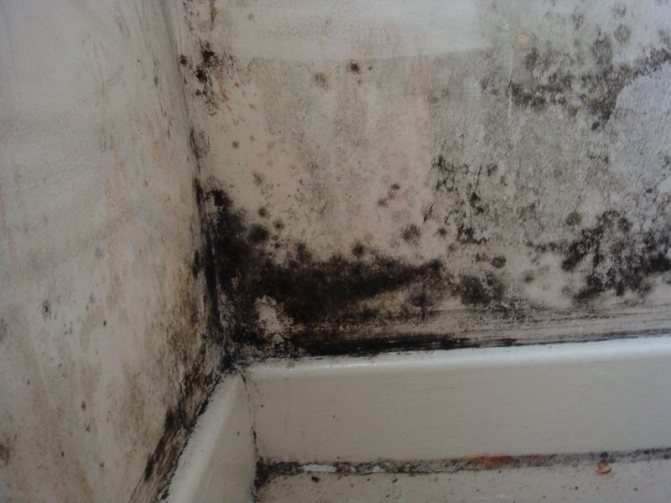
Fungus is not just ugly black spots, a terrible smell. It is capable of causing allergic reactions, and then serious illnesses, but getting rid of it is not easy. Therefore, a high-quality waterproofing is necessary in the bathroom, it will not allow the parasitic fungus to settle in your bathroom, eliminating the need to make repeated repairs.
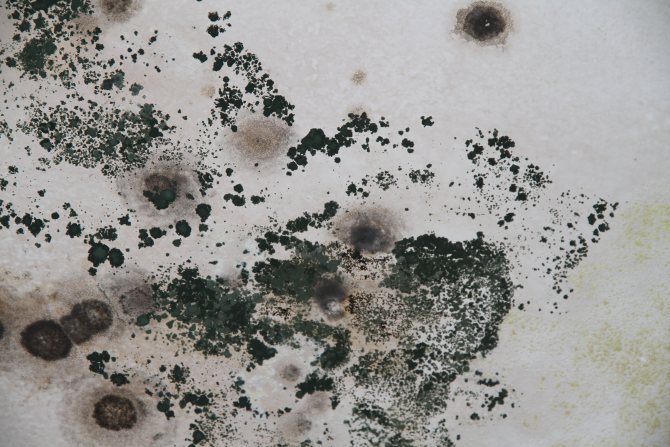
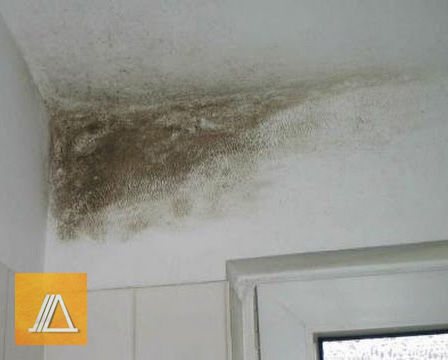
It looks like a fungus that has grown in a bathroom without waterproofing
Floor waterproofing
A variety of materials can be used to properly isolate a room from the effects of water and moisture. But still, you need to take into account the peculiarities of the bathroom when choosing waterproofing. For example, any materials will be acceptable for small premises. The main thing is to follow the manufacturing technology of the waterproof membrane. And to be completely sure that the insulation will not fail, try combining penetrating compounds with coating compounds. First, the base is covered with a coating material, then a concrete screed is made, and only then a penetrating solution is used. With this technology, leaks are not guaranteed.

What needs to be isolated
Ideally, all surfaces in the bathroom. You can leave the ceiling and the upper part of the walls alone, but the floor, the bottom of the walls in the "wet" areas - near the sink, bathtub or shower stall - is a must. No matter how carefully you and your household use the water, splashes fall on the floor and walls. In case of problems with plumbing, a burst of pipes, a blockage of the sewage system, leaks are inevitable.
Wall protection
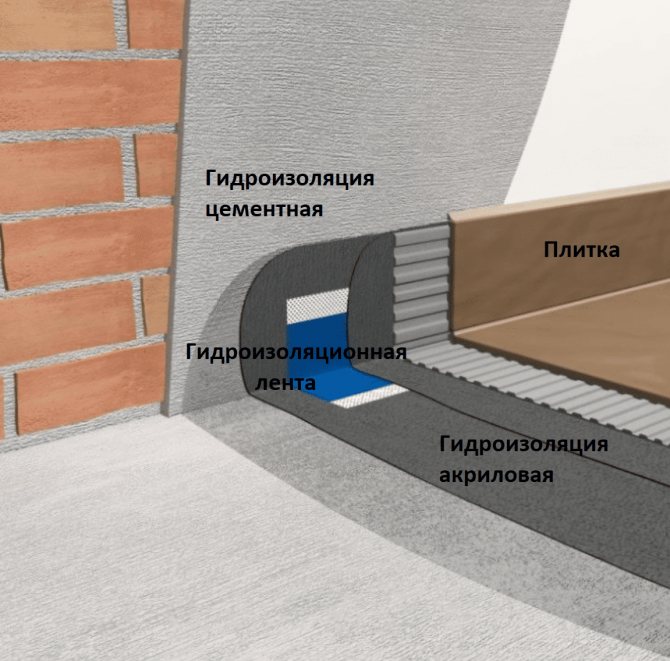
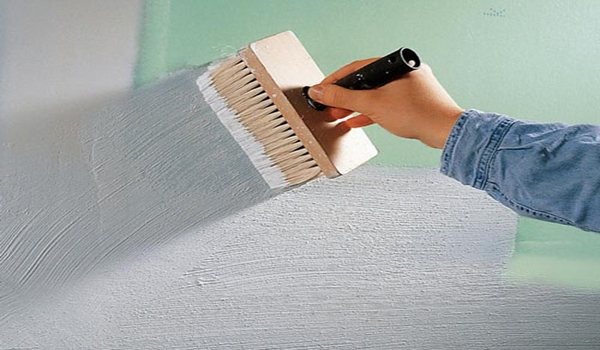
It is considered mandatory to waterproof the wall in the immediate vicinity of the shower stall, near the bath, under the washbasin, near the toilet. It is mandatory to waterproof an area of at least half a meter from a source that creates high humidity. The walls of the bathroom must be protected to the same height. This will avoid the penetration of moisture under the tiles: over time, it can cause destruction of the cement composition on which the tiles are held.
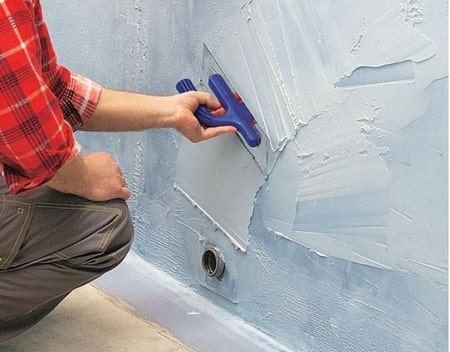
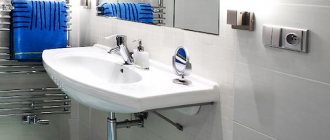
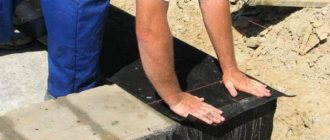
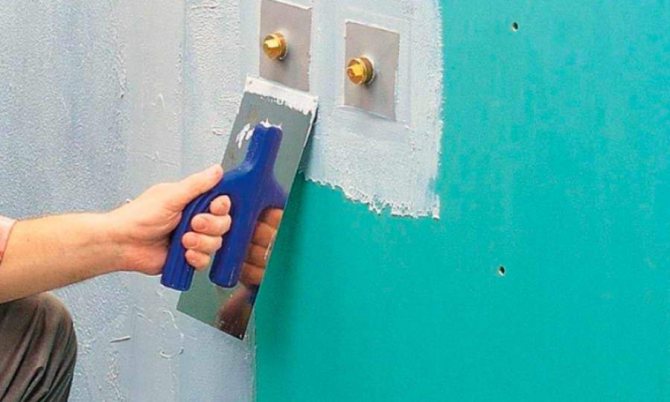
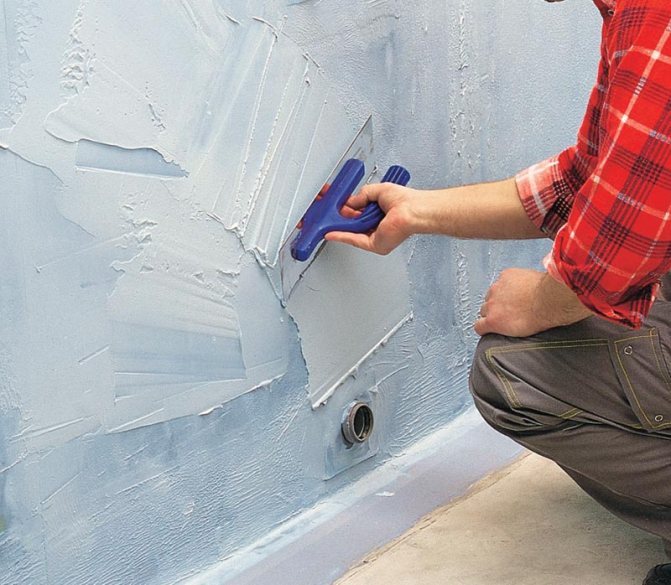
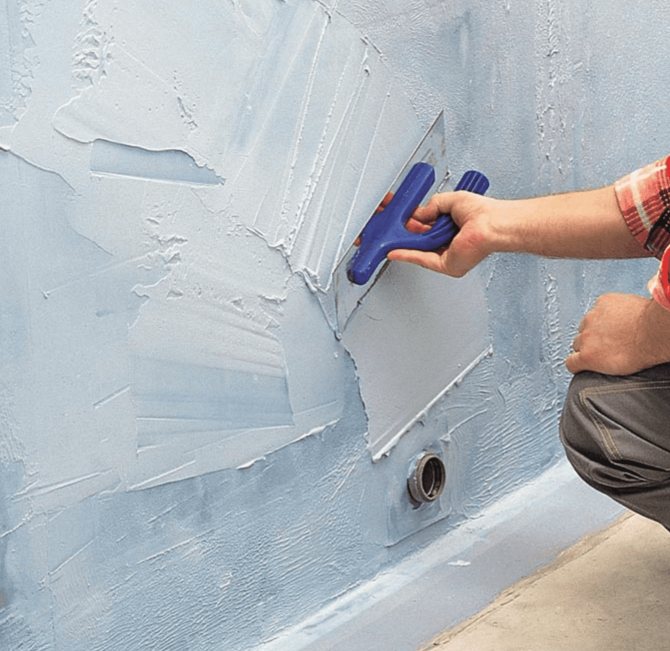
Applying cement-polymer waterproofing to bathroom walls
In addition, water can make tiles or other materials used for wall decoration unusable or not aesthetically pleasing.Considering the cost of purchasing materials, the work of tile laying specialists, the additional costs are unlikely to please anyone.
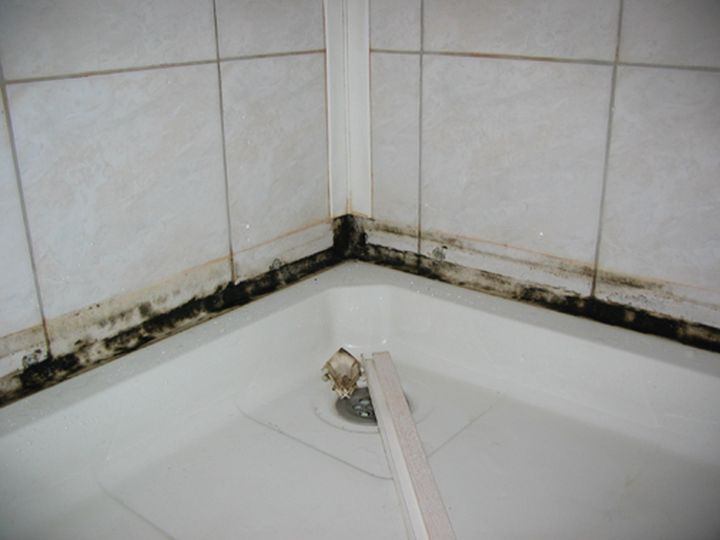
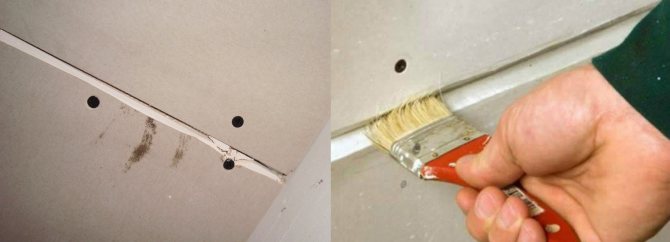
Most often, the fungus appears at the junction of the wall and the shower or bath
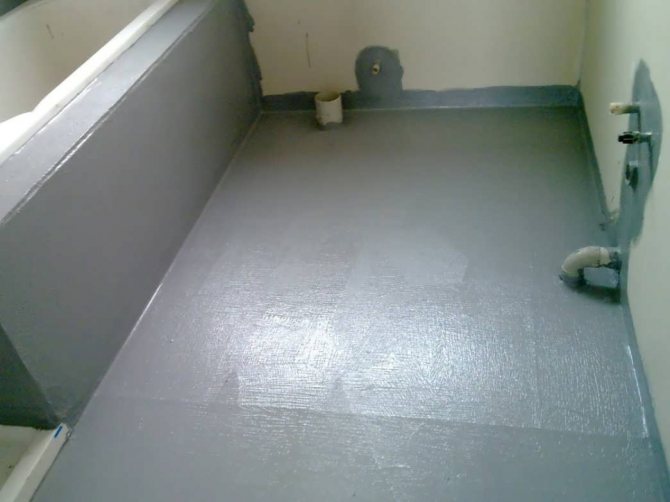
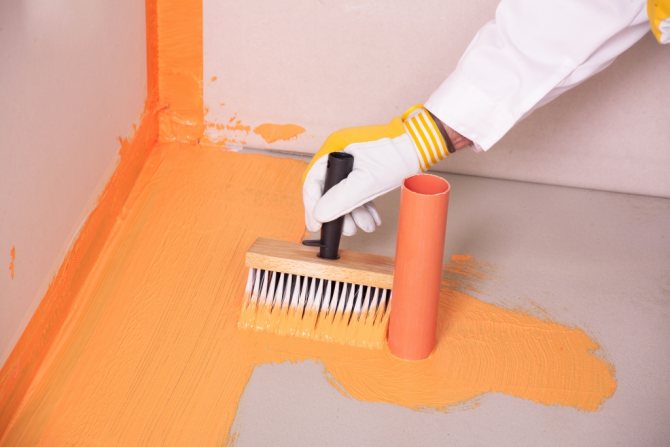
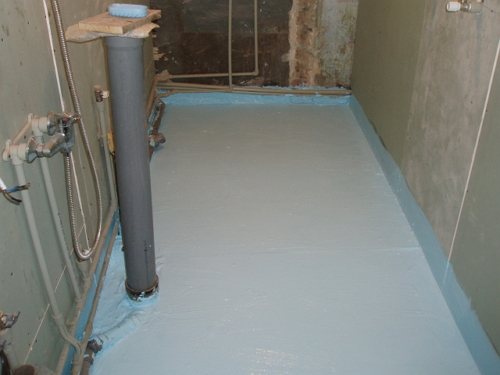
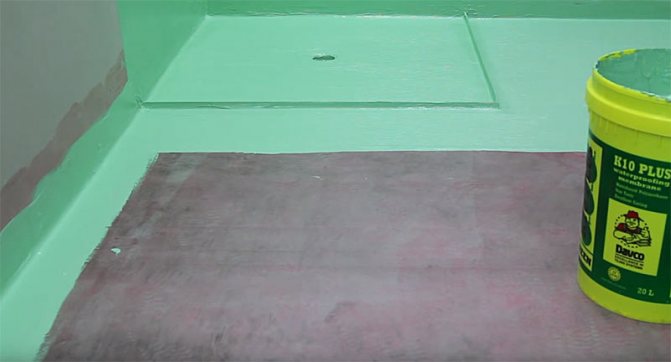
Floor waterproofing
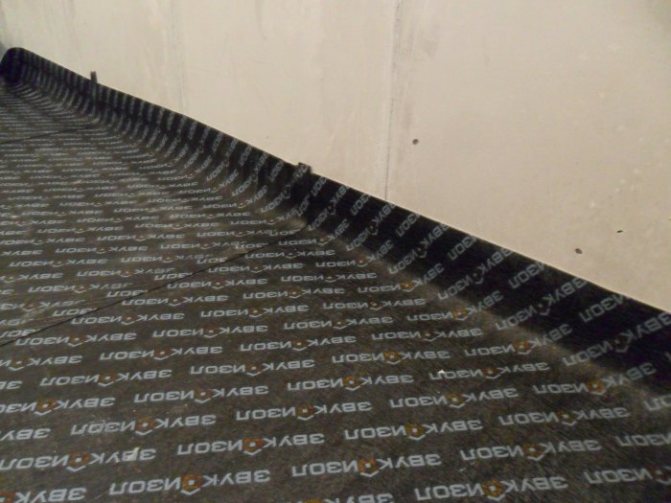
The entire bathroom floor must be protected from leaks: not only in "wet" areas, but also in "dry" ones. So you can protect yourself and your neighbors in case the water floods the room too much. For this purpose, in the case of coating waterproofing, protective sides are made that extend onto the wall to a height of at least 10-15 centimeters.
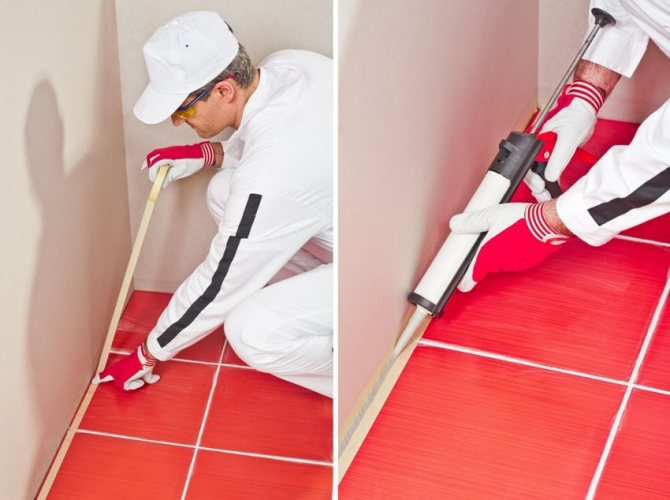
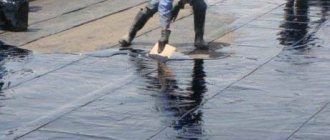
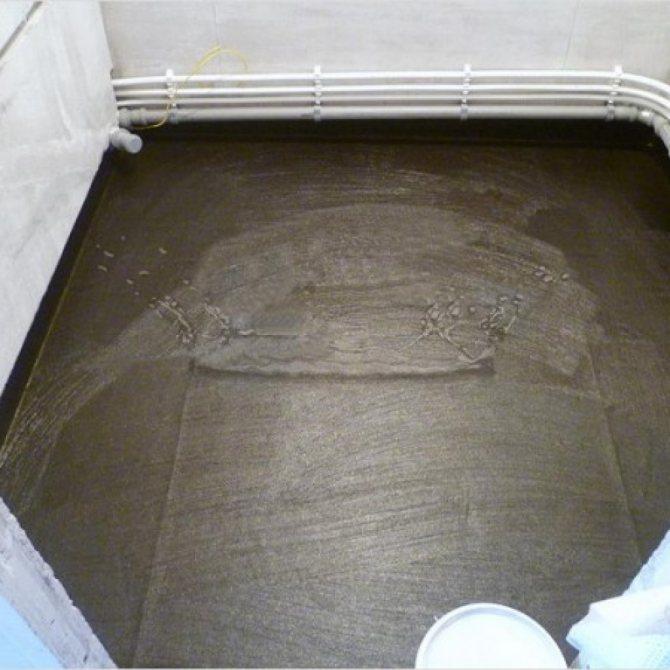
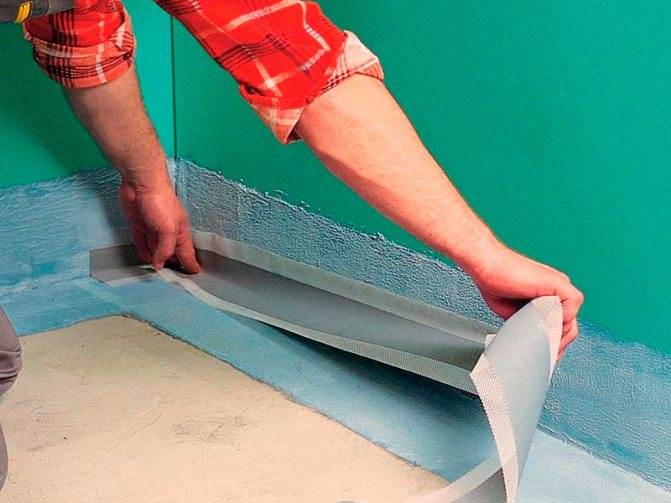
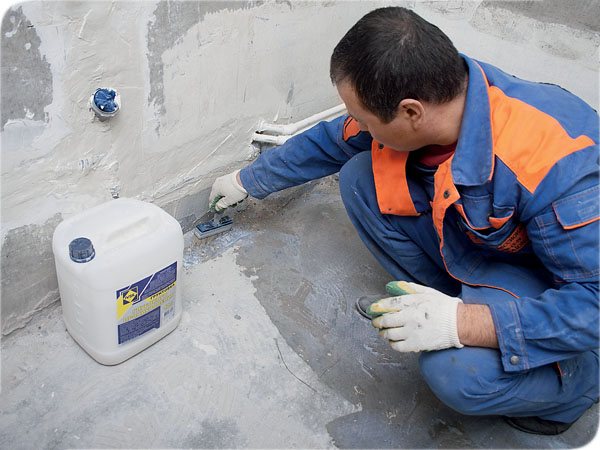
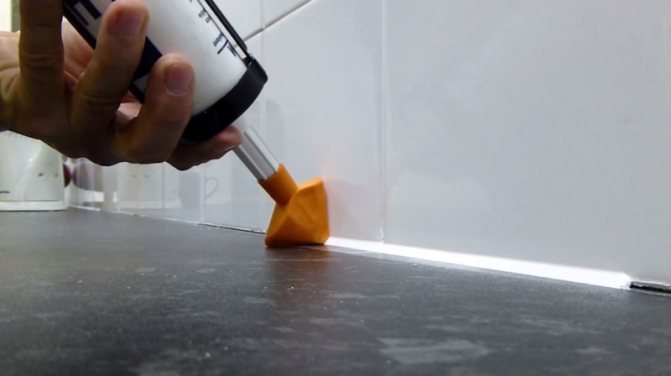
Sealing floor and wall joints with waterproof sealant
Particular attention should be paid to places in the immediate vicinity of water and sewer pipes - they suffer from leaks more often and more strongly.
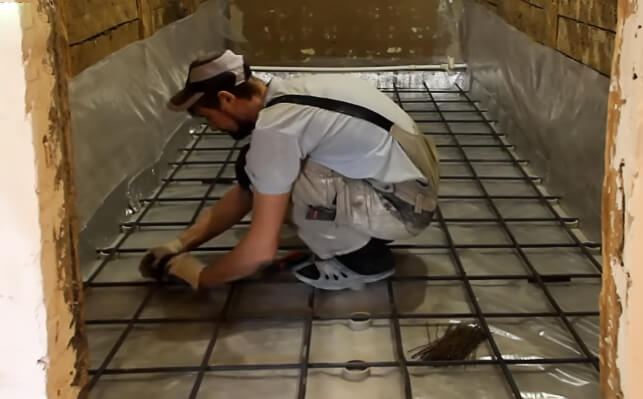
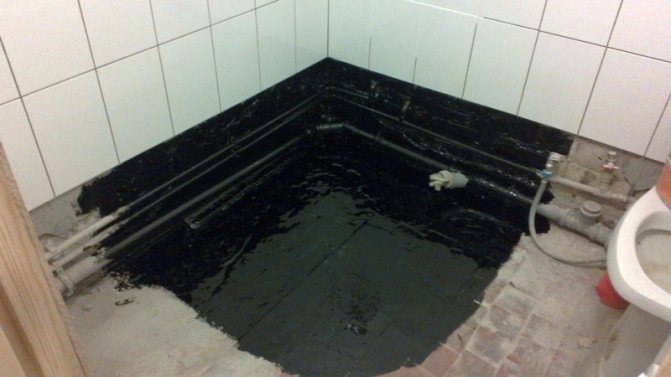
The process of installing waterproofing under the shower
Types of waterproofing materials
Modern materials that are able to provide good waterproofing of the bathroom floor and walls are distinguished by the method of application and composition:
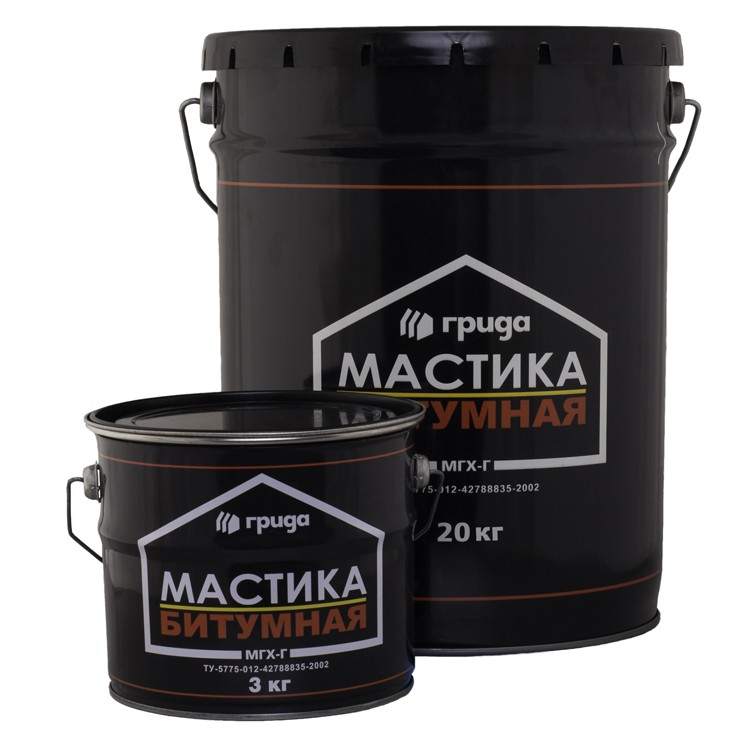
- Lubricating compositions - the most widespread are materials based on bitumen (bitumen-rubber, bitumen-polymer) and cement-based (cement-polymer mastics), others, for example, acrylics, are used less often.
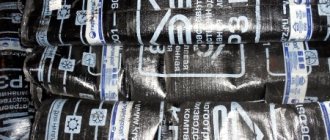
- Gluing or roll materials are made on a polymer or fiberglass base.
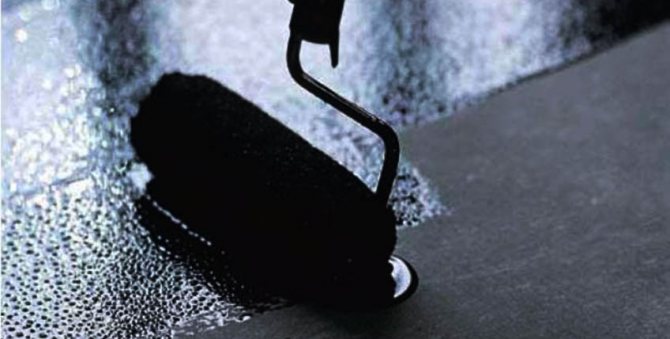
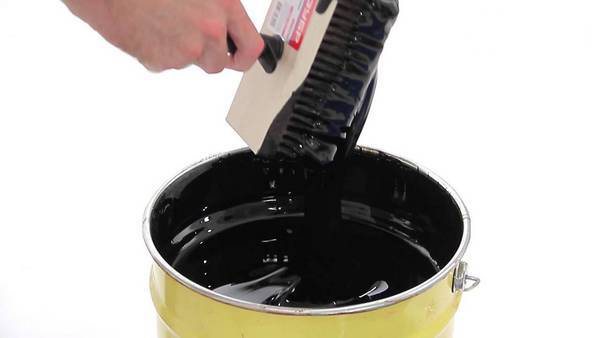
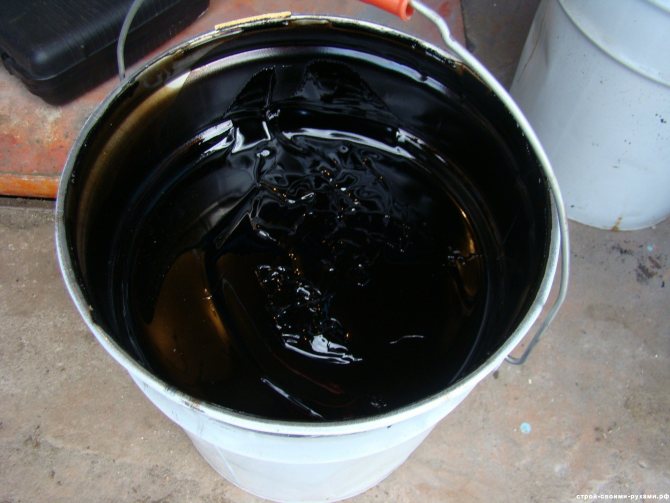
Waterproofing compound
Types of waterproofing
There are three main types of waterproofing: coating, gluing and impregnating. They differ in their protective composition, appearance and method of application.
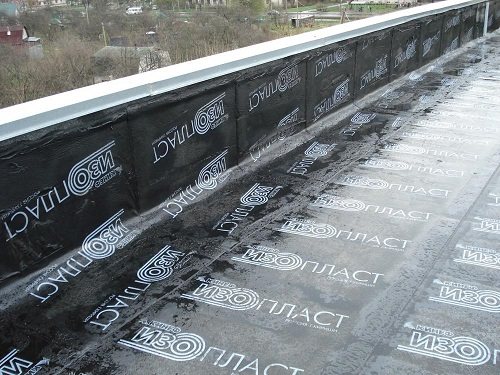
Okleechnaya
This type of bathroom floor protection is a coating of surfaces with a special film coated with a bitumen, rubber or polymer composition. This type of waterproofing includes familiar and modern coatings:
- Roofing material;
- Ecoflex;
- Isoplast;
- Isoelast.
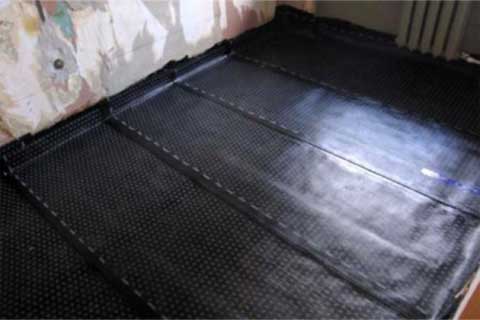
Laying roofing material under the floor tiles in the bathroom
In fact, all of them are based on a bitumen coating with a filler applied to a fiberglass or polyester base.
Laying isoplastic on the bathroom floor
Advantages and disadvantages
The advantages of such a waterproofing coating are:
- No need to wait for the material to dry completely - you can walk on it right away;
- Durability;
- Good waterproofing properties.
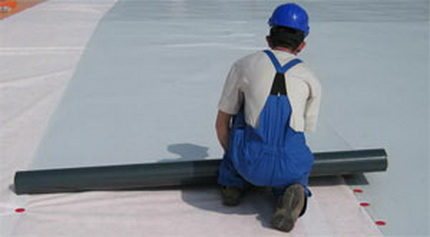
Rolled waterproofing adheres tightly to the surface, does not require drying and allows you to immediately continue repair work
However, such a coating requires special care when laying, in addition, the process is quite laborious, so it is better to invite specialists to properly perform waterproofing work in the bathroom.
The application of glued waterproofing requires special knowledge and experience.
In addition, before laying the protective film, thorough preparation of the surface is necessary, leveling - only differences of no more than 2 mm are allowed.
Coating
This is a solution based on bitumen, rubber or synthetic ingredients, which is applied directly to the floor, bathroom walls, before laying the tiles. It is used more often than other waterproofing methods.
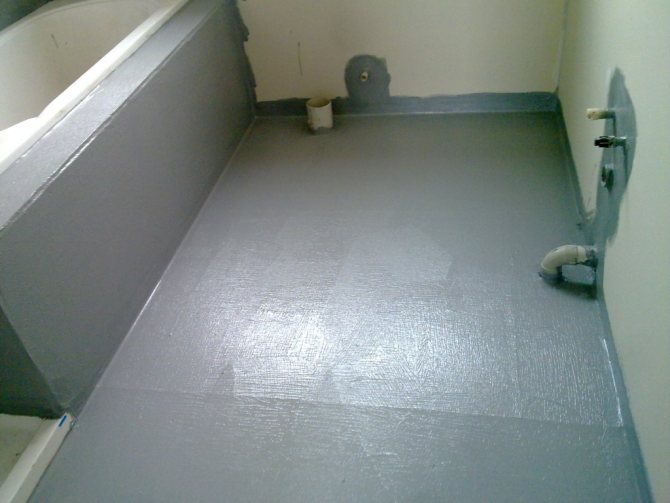
Moisture-proof waterproofing is applied to the surface from one millimeter to several centimeters
Advantages of coating
Unlike pasting waterproofing, the coating composition can be applied to any surface without first leveling it. In addition, it does not require preliminary drying - and the waterproofing solution is easily applied to a damp surface after plastering without losing its properties.
Due to its liquid consistency, the composition is applied in an even layer, has no joints and fills in all cracks and irregularities. Due to this, it gives the surface of the walls, floor in the bathroom increased moisture resistance.
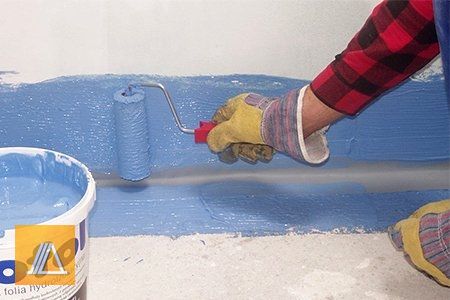
Applying a waterproofing layer in the bathroom
Among the advantages, it should be noted that such a composition is inexpensive, and it is easy to apply it yourself, without experience and special skills. In addition, it does not have an unpleasant odor, unlike a roll coating.
Treatment of a bathroom with a liquid coating solution
Types of coating waterproofing
The main types of waterproofing compounds are bituminous and cement mastics. The former include:
- Bitumen;
- Rubber crumb, latex fillers, plasticizers;
- Solvent.
Application of polymer coating waterproofing
The result of the combination of such components is a durable elastic composition that reliably retains moisture, preventing it from penetrating inside. In addition, this waterproofing is able to withstand both cold and hot temperatures.
Important! Reinforcement of the surface requiring waterproofing avoids cracking, which leads to a decrease in the protective properties of the coating.
Carrying out reinforcement before applying the coating waterproofing
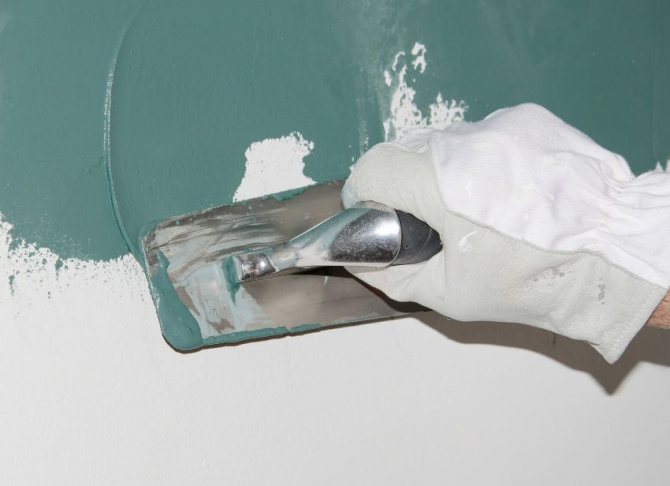
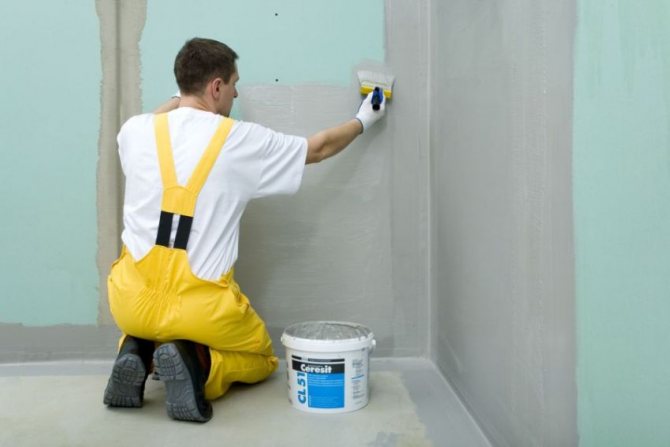
Cement waterproofing compounds are a mixture of cement, water, mineral filler. The mastic is easily applied to the surface and has high adhesive properties. It is more resistant to temperature changes than bitumen.
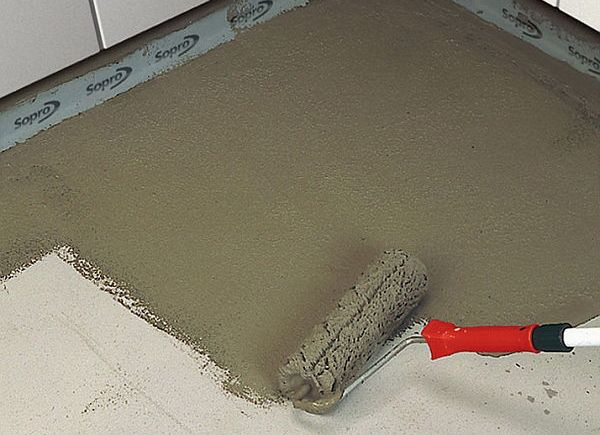
A paint roller is used to apply cement-based coating waterproofing.
Lubricants
Waterproofing coating compositions include liquid agents that, when cured, are waterproof and waterproof. In addition, these materials must have a long service life and withstand temperature fluctuations.
The coating materials include:
- Cement-polymer mixtures. It is a combination of cement with polymer modifiers and plasticizers. The finished mixture has the necessary water-repellent properties and is easy to use. Also, these materials are characterized by good adhesion and a short setting time (about 5 minutes). An additional advantage of this type of coating insulation is its low price. You can buy both a ready-made solution and its dry composition.
- Bitumen and polymer based mastics. This group of waterproofers has earned the recognition of professional builders. They include bitumen dissolved in water or special solvents, plasticizers and latex. The finished mixture, when solidified, firmly lays on the base, forming a monolithic elastic membrane, which is resistant to water and temperature changes. Most often, bitumen-polymers are used for processing building structures made of concrete.
- Bituminous solutions. These are the cheapest materials, which ensures their stable popularity. They are applied hot or cold. In the first case, the mastic is heated to a temperature of no more than 180 ° C, and then applied to the surface of the structure. But it will be difficult to use such material in a residential apartment. Therefore, it will be more practical to use a bituminous solution, which can be worked with in a cold way. Its only drawback is not such good adhesion of the material, as with the heated mastic.
- Acrylic compounds. Of all the above materials, these are the most modern and high quality ones. They consist of water-based acrylic. This coating has high strength, elasticity and durability. An obstacle to the use of acrylic can only be its high price.
Thus, when choosing a coating composition, be guided by its service life and price.
Surface preparation
Bathroom waterproofing is carried out during a major renovation. The preparation of a bathroom for waterproofing begins with cleaning the surfaces - old paint, tiles, and plaster are removed from the walls. The floor and walls are cleaned down to the concrete base.The walls and floor are leveled as much as possible, debris and dust are removed.

Before applying the waterproofing layer, level the surface of the walls and floor
Before starting work in the bathroom, you need to tap all the walls - if there are voids, cracks - embroider them, remove the screed, plaster, seal all the seams.
Primer
Priming is the first stage of work after cleaning. The primer is applied if there is no need to carry out a leveling screed. Apply it with a roller in several layers, applying each layer perpendicular to the previous one. So there will be no gaps. In this case, the primer itself will become an additional waterproofing impregnation.
The primer can be applied with a brush
Pay attention to the type of primer: it must be compatible with the selected type of waterproofing.
Important! The bathroom floor must be below floor level in the rest of the apartment, otherwise a high sill will have to be installed.
Moisture-proof primer will protect against excess moisture in the bathroom
Preparation of problem areas
These include wall and floor joints, corners, pipe joints. They need additional processing: they are usually glued with sealed tape, and tight rubber plugs are put on the pipes.
Work technology
Let's consider how the waterproofing of the bathroom floor is done with your own hands. This operation is carried out as follows:
- the surface is thoroughly cleaned;
- all existing defects must be repaired, the permissible level of height differences is no more than 2 mm per 2 running meters of the surface;
- all joints of plates, places of entry of pipes and places of intersection of the floor and walls are filled with silicone sealant or putty;
- rubber seals are additionally put on the pipes, and a sealing tape is glued to the joints;
- not only the floor surface is prepared for application, but also the lower part of the walls to a height of about 20 cm from the floor;
- coating materials are applied with a brush or a spatula, sheet materials are applied with an overlap and rolled with a roller;
- after applying the coating materials, they must be given time to harden;
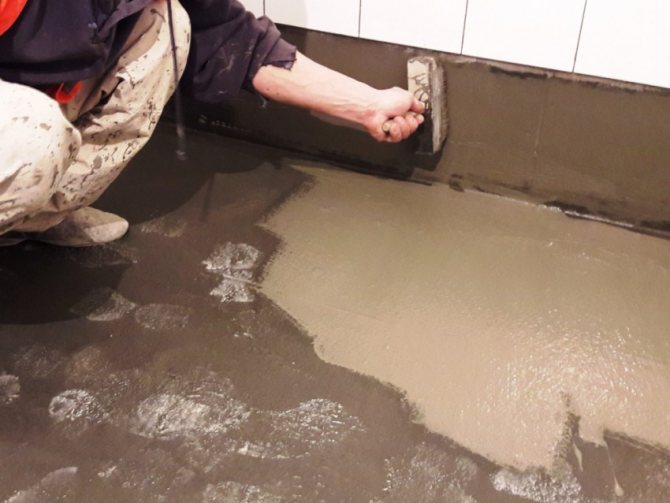
- then either a thin concrete screed is performed, or they immediately start laying the tiles.
So, there are various materials for waterproofing the floor in the bathroom, so it is difficult to choose the best option. Experts do not recommend using paint compounds, they are short-lived and do not provide a high level of protection against moisture. The layer of colorful waterproofing will collapse in a few years, and this will contribute to the appearance of dampness and the growth of mold. It is best to choose roll materials or mastics based on polymer cement for tiles, these two options are optimal for performing waterproofing work.
Laying waterproofing
Installing or pouring waterproofing materials in the bathroom can only be done after the primer has dried well. Each layer of waterproofing coating in the bathroom should be at least two millimeters, at least four millimeters at the pipe exit points.
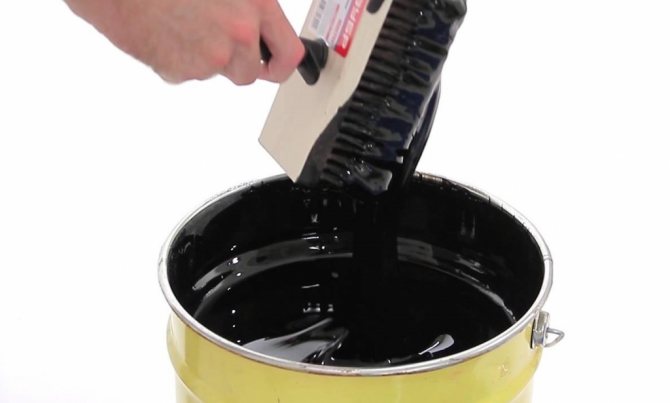
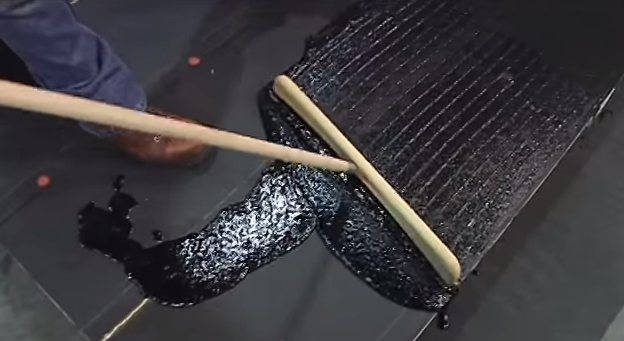
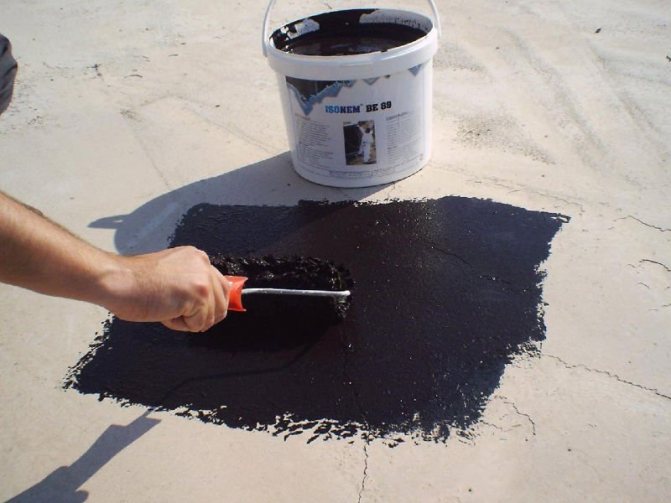
Applying mastic to the floor
In building markets, waterproofing mastic can be sold ready-made or in the form of a dry semi-finished product. The dry mixture must be diluted before use according to the manufacturer's recommendations. Sometimes, not water is used to prepare the solution, but a special emulsion.
As a result, the finished composition should be similar in consistency to molten plasticine - viscous and elastic - in this form it is convenient to apply it to the surface, and it hardens faster. Apply mastic near the openings of the sewage system and the water supply - the outlet of the water pipes. It is more convenient to work with a brush in hard-to-reach places.
To make the waterproofing of the bathroom correctly, you should follow the technology:
- They start processing from the corners, which are coated especially carefully.
- Then the joints of the walls and the floor are processed, after which a waterproof rubber tape is applied to them.
- The mastic is applied to the floor in several layers. Each layer is applied after the previous one has completely dried. Thus, it will take you 2-3 days to process the bathroom.
Important! It is necessary to apply the mastic in several layers, carefully smearing the entire surface so that there are no untreated areas left.
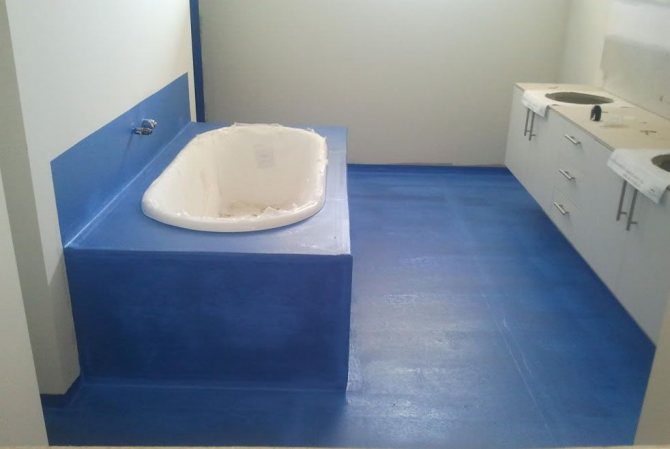
Wall waterproofing
When processing the bathroom floor, you need to smear the walls too - at least 15-20 cm from the floor, and better even higher. Here the disadvantages of bituminous mastic appear - it flows, therefore, when choosing such a waterproofing for the floor of the wall, it is better to treat it with a cement moisture-protective composition.
After the floor and walls are dry, they are primed again. If bituminous mastic was used, you need to make a screed for laying the tiles. When using acrylic or cement mixtures, the screed can be omitted.
General requirements for waterproofing
In the manufacture of waterproofing, first of all, it is necessary to pay attention to the integrity of the coating. Whichever material is chosen, it must form a sealed membrane, without cracks and defects. If you plan to make a multi-layer coating, each subsequent layer is applied after the previous one has dried. This technology makes it possible to obtain the most durable fabric. Be sure to observe the manufacturer's recommended overlap size for waterproof sheets. To ensure good adhesion of the insulation, thoroughly clean the base of the structures from contamination.
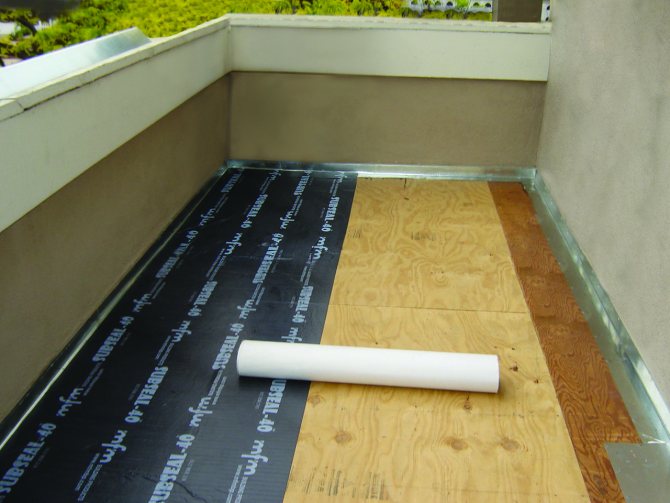
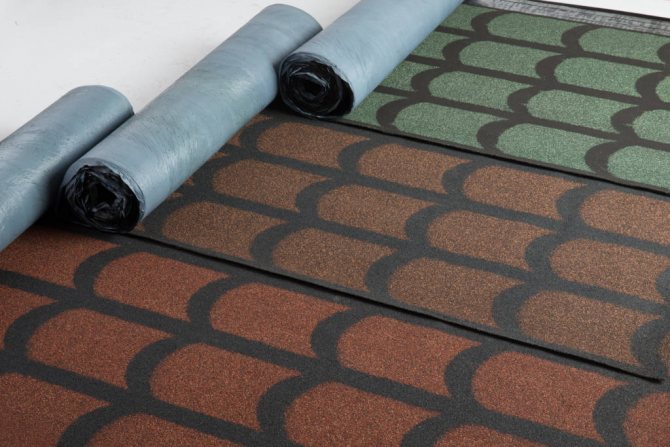
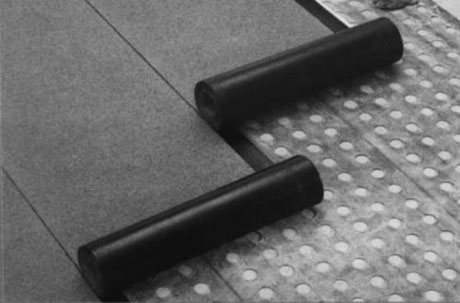
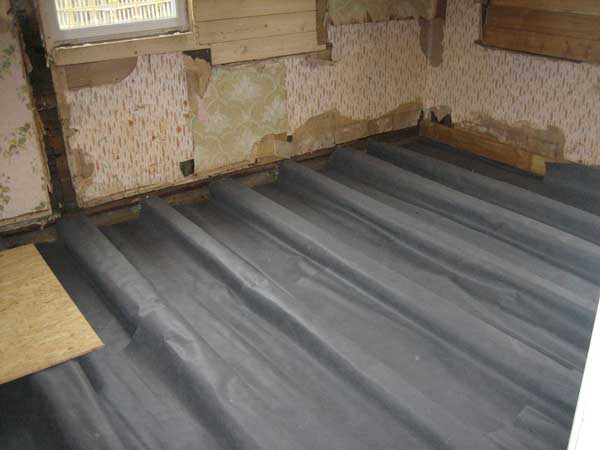
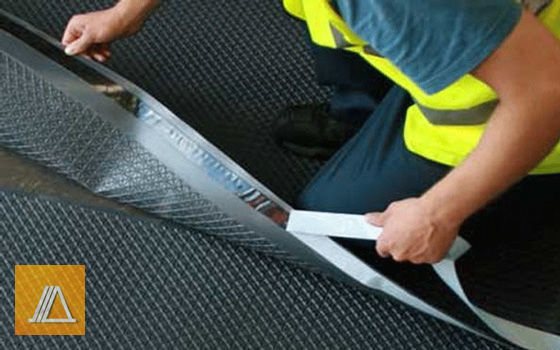
Laying roll waterproofing
This method will cost more - both the water-resistant material itself and the work on its installation. All roll-up protective materials for the bathroom are divided into self-adhesive and weldable. As the name implies, the former have an adhesive layer, while the latter will require a gas burner.
Adhesive waterproofing
Laying such a film is simple:
- The protective coating is removed from the adhesive side;
- The roll spreads out, capturing part of the wall;
- The next layer is applied side by side, slightly overlapping.
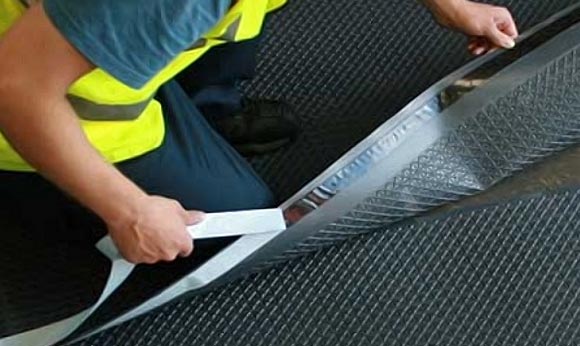
The peculiarity of this method of waterproofing a bathroom is that it is necessary to lay layer by layer very carefully - it will be impossible to correct the error. In order for the film to lie flat on the floor, you need to roll it with a wide roller for better adhesion to the surface.
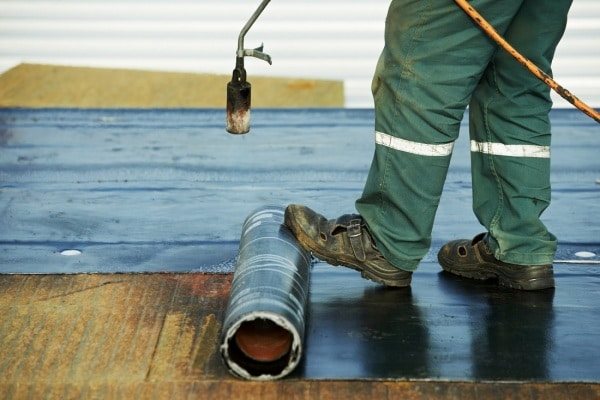
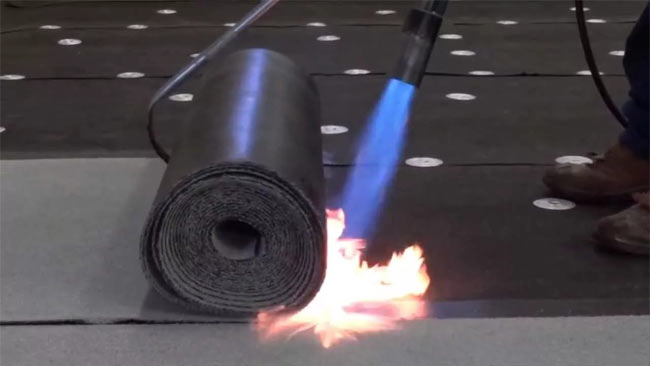
Deposited waterproof film
Such a waterproof material for the bathroom consists of slate dressing, bitumen polymer applied to glass fabric (elastic polyester). The waterproofing "cake" is completed by a film that burns out when heated.
A gas burner is required to install the waterproofing. It is undesirable to use it in an apartment, especially in a limited, poorly ventilated room. Therefore, it is advisable to invite experienced specialists to carry out the work.
The moisture-proof "sandwich" is laid in this way: the roll is rolled out, the bitumen layer is heated with the help of a gas burner, which ensures its adhesion to the concrete floor surface. Here, too, mistakes are not allowed - it is impossible to tear off the cover.
The subtleties of laying roll waterproofing
Before laying the rolled waterproofing, it is necessary to treat all joints, corners, and pipe exit points with bitumen-based mastic. Where you have to bypass engineering communications, you need to make holes in the film for them with a smaller diameter than the pipe - then you can organize small sides.
In addition, it is advisable to use rubber seals and first coat all joints with mastic, and then strengthen with a waterproof tape. After finishing laying the waterproofing layer, you can make a screed for laying tiles.
Important! After laying the tiles, treat the joints with a sealant, and only then grout them.The more waterproofing layers will be made in the bathroom, the quieter you can live without fear of leaks.
Useful video on waterproofing wet rooms
Times viewed: 326
Interesting related article: Painting floor tiles: a new look with little effort
Excellent article 0
Author rating
The author of the article
Oleg Grishin
The flooring specialist with 10 years of experience. Oleg has something to share with our readers
Articles written
103
- Even more interesting:
- Types of floor tiles: classification and specifications
- How to lay metlakh tiles yourself?
- How to install toilet tiles?
Features of waterproofing a wooden floor
Such a floor, and sometimes the walls of the bathroom, require some preparation. The bituminous composition is unsuitable here - it is fluid and will penetrate the wooden floor. It will take many layers of mastic before it stops absorbing. This is very expensive.
Training
Waterproofing technology in a bathroom with a wooden floor consists of several stages:
- Cleaning the floor from dirt;
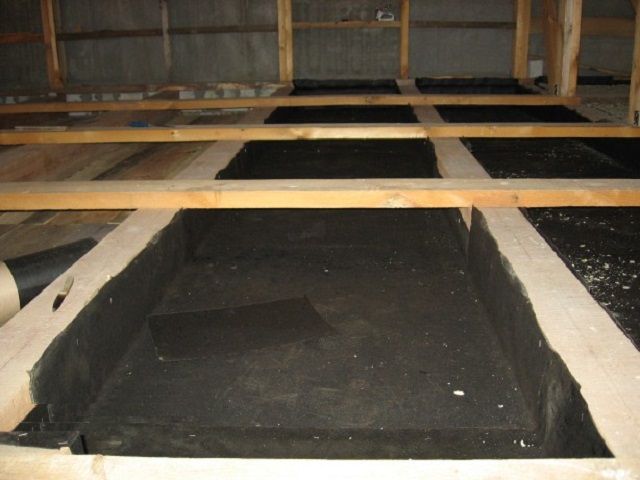
- Laying lags, then a vapor barrier film;
- Plates of insulation are laid next - for example, expanded polystyrene;
- The joints are treated with a sealant.
When mineral wool is used instead of expanded polystyrene, the "pie" will become even thicker - waterproof plywood is placed on top of the mats.
Waterproofing
To protect the wooden floor from moisture penetration, liquid rubber is taken, which is mixed with an activating compound and quickly applied by rolling with a roller. Particular attention should be paid to the joints of the floor and walls, cracks, which must be filled with a sealed hydro-resistant compound as much as possible.
After waiting for complete drying, you need to carefully inspect the surface - so that there are no non-oiled areas. The floor should be flat and uniform. For confidence it is better to apply a second coat. Then a screed is made - a reinforcing mesh is laid. When using rubber compounds as waterproofing, it is necessary to make a screed - the tile adhesive does not adhere well to the rubber-impregnated surface.
If it is planned to leave the floor wooden, the so-called thermal tree, treated with steam in special vacuum boxes, is chosen. Instead of conventional waterproofing, parquet varnishes, stains, priming varnishes are used. In this case, all cracks, joints must be carefully missed. This method can be used in particularly humid rooms, such as a bath.
Waterproofing a bathroom under a tile - which is better, is it needed?
For those who are planning renovations in the bathroom, the question often arises: is it necessary to make waterproofing under the tiles, or can you do without it? In this article, we will talk about the principle of action of the moisture-protective layer, and about in what cases you cannot do without it. You will also learn about the detailed technology for applying materials, and find answers to the following questions:
- What is bathroom waterproofing?
- Why is it needed?
- How do waterproofing materials work?
- How to choose application technology and materials for your bathroom?
Why do you need waterproofing under the tiles?
A bathroom is a room with an individual microclimate. This room is characterized by frequent temperature drops, constant high humidity and condensation. The walls of most bathrooms are made of brick or concrete, which have a porous structure and always need protection from moisture and subsequent destruction.
Any finish has a certain percentage of moisture saturation and moisture yield. During the operation of the bathroom, hot steam, water, and moisture penetrate the tiles through the tile joints.
This process is very slow and can last for years, but after a certain period of time, tiles, marble or granite are completely saturated with moisture.
Marble and granite are absorbed faster, and ceramics a little longer, but after the tile is completely saturated with moisture, it begins to give it to the plaster mixture, which in turn gradually swells and loses its adhesion properties with the tile, and as a result, the plaster layer is destroyed , walls and mold in places.
In conditions of high humidity, waterproofing of the floor and walls under the tiles is necessary in order to keep the floors, walls and ceilings from moisture, mold, and to extend the life of the tiles and reduce costs for subsequent repairs.
Where do you need waterproofing?
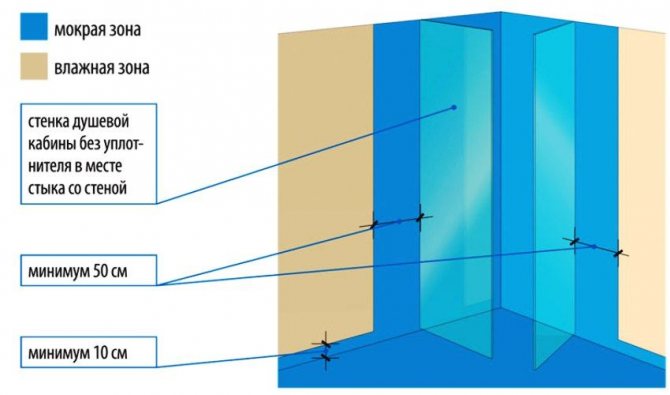
Before starting work on waterproofing the bathroom, we define its "wet" areas or zones - this is part of the walls and the entire floor.
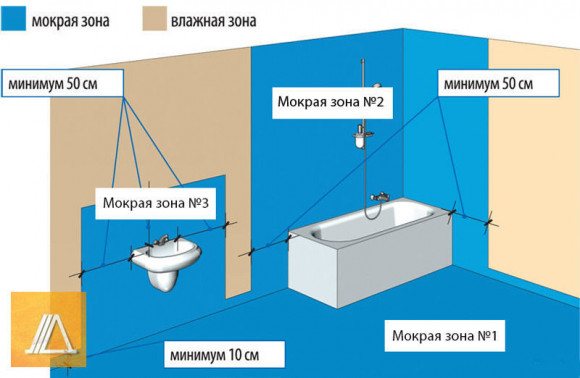
"Wet" zone number 1
As a rule, the area of the entire floor is subject to frequent wetting, therefore it is the wet zone # 1. Therefore, ideally, you need to equip the entire floor with a minimum approach to the walls of 20-30 cm.
"Wet" zone number 2
"Wet" zone number 2 is considered to be the walls adjacent to the bathroom or shower stall and pipes.
Before the stage of finishing with tiles, you need to equip a waterproofing apron, approximately 50 cm high.In those places where water splashes constantly fall on the cladding, the insulating material is applied 50 cm up and on the sides of the object.
"Wet" zone number 3
The area near the sink, shower and in the places where plumbing fixtures and accessories are located is “wet” zone # 3. Wall waterproofing for and around these objects is also applied 50 cm up and to the sides.
Types of materials for waterproofing a bathroom. What is the best choice?
Previously, only bitumen was used as waterproofing, but modern industry now offers a wider range of materials of various costs with an improved composition and better technical characteristics.
The most popular types of waterproofing materials:
Mastic
Mastic is a multifunctional synthetic material that is resistant to cracking and aging. For waterproofing the bathroom, bituminous and acrylic mastics (polymer) are used.
Bituminous mastics are affordable, have a high density, specific smell and black color. The composition adheres well to the surface to be coated, but when exposed to direct sunlight or high temperatures, it begins to flow, while the waterproofing properties are preserved. To prevent this from happening, the insulator is applied only under the tile.
Acrylic mastics do not allow heat to pass through, insulate well from water and hot steam, and are resistant to temperature fluctuations.
The advantages of mastics are their price, a high degree of protection of the bathroom from dampness, mold and mildew, the shelf life is practically unlimited. Working with mastics does not require special skills, so they are often used to waterproof a bathroom and a bathroom with their own hands.
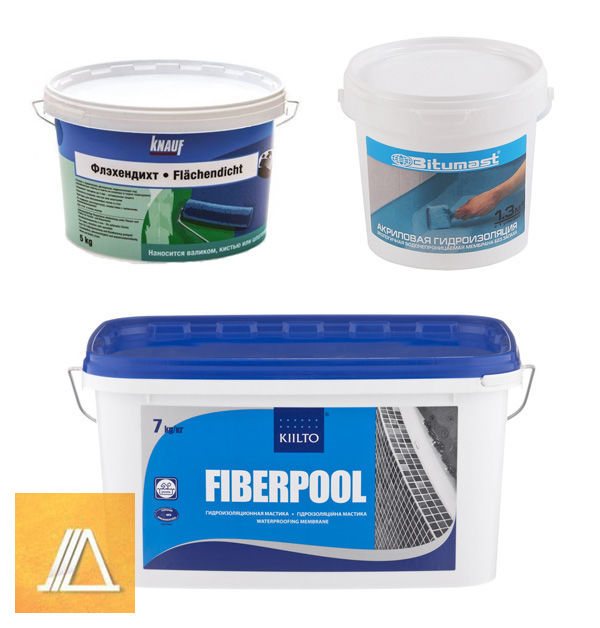
Popular and famous mastics: Fiberpool (Kiilto Fiberpool) the most popular in this category: Knauf Flahendicht, 5 kg and Bitumast rubber-bitumen mastic 3.8 l,.
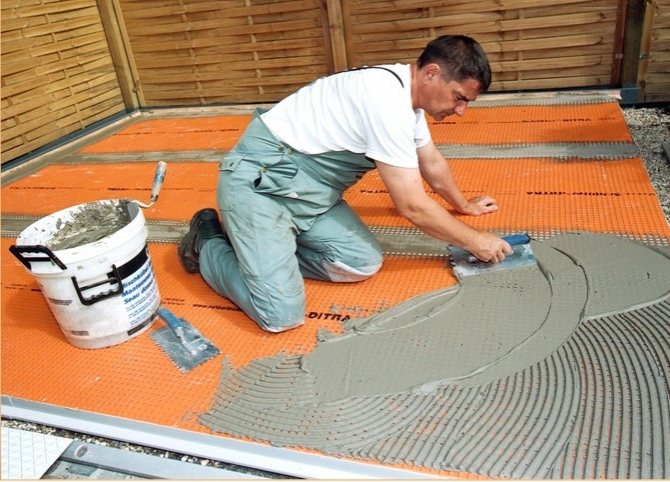
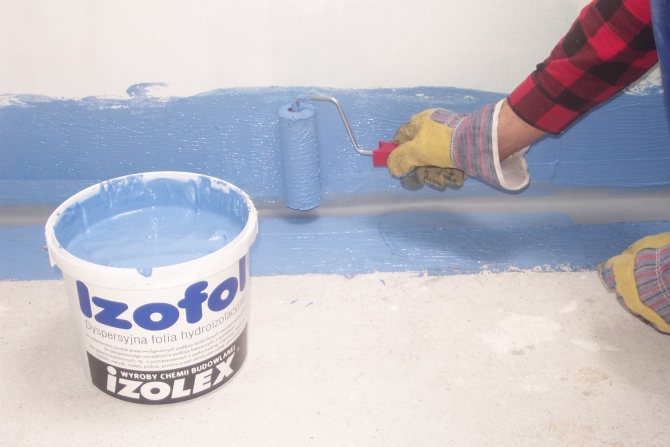
Polymer-cement waterproofing
Polymer-cement waterproofing is a universal waterproofing mixture based on cement, with the addition of hydrophobic substances. They have good waterproofing properties, a high degree of adhesion to any type of surface.
Such cement-polymer mixtures are used when working with ceilings, walls and floors, because they are absolutely moisture-repellent and easy to use. A spatula is used for application.
Such a coating is strong and durable, because waterproofing mixtures of this category have increased mechanical resistance and high vapor permeability. The scope of their application is quite wide, so these materials are used for waterproofing bathrooms, toilets, baths, foundations and pools.
Popular and well-known types of cement waterproofing: Waterproofing coating "GIDROLAST Universal" and GIDROLAST P 15 kg.
Roll-on waterproofing with impregnation
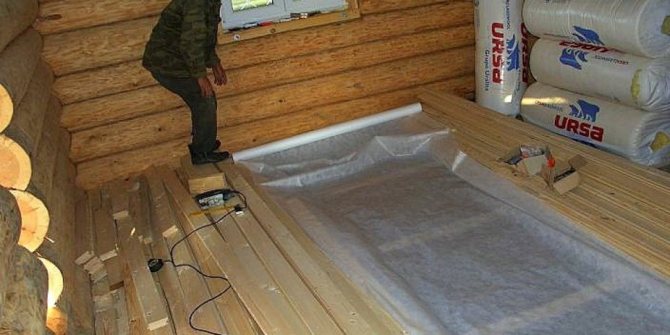
Rolled waterproofing with impregnation is one of the materials that is applied on a flat, dust-free base (permissible irregularity height - 2 mm). All sharp protrusions must be removed and deep cracks must be repaired. For the bathroom, it is better to use self-adhesive rather than weldable materials. The bottom layer of waterproofing is impregnated with glue, which provides a strong bond with the base, and the top contains components that improve contact with the tiles. In case of an emergency, roll-up waterproofing of the floor is one of the most affordable and reliable methods to protect the lower floor from water leaks.
Popular and well-known brands of rolled waterproofing materials: TechnoNIKOL.
Do-it-yourself waterproofing in the bathroom
By choosing the right materials and application method, you can make a moisture barrier yourself. Depending on the type of material and the number of areas to be treated, the application technology is somewhat different, but the principle of operation of the future hydro-barrier and the initial stage of work are always the same.
First, you need to clean all surfaces of the room from the previous coating and remove construction debris. Defects and damages on the surfaces of the bathroom are removed with plaster.
After that, it is worth maintaining a two-week interval, when the leveled surface dries, and proceed to the direct arrangement of the waterproofing layer.
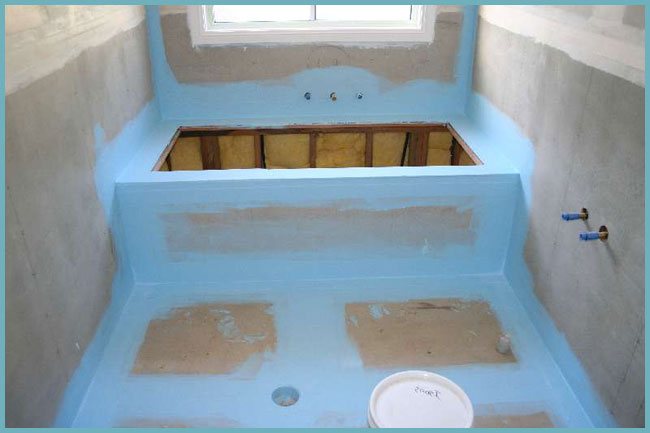
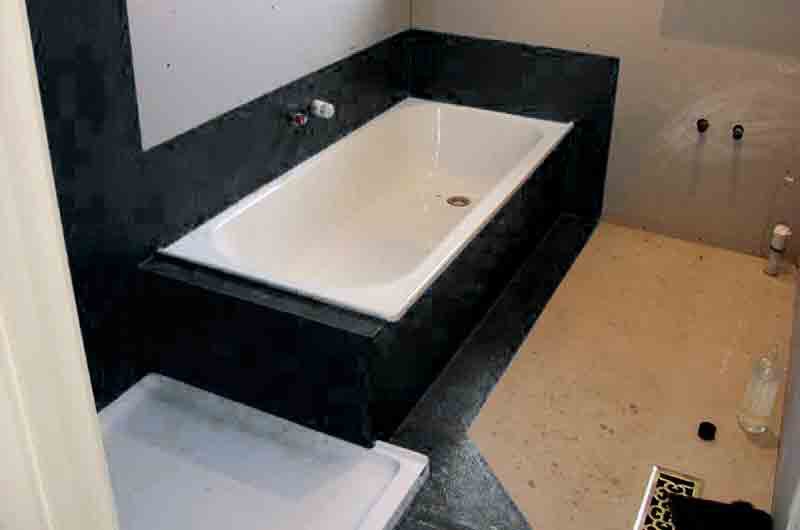
Waterproofing a bathroom under tiles
Classic tiling is popular as ever. A huge variety of types of tiles allows you to create any interior, but since the tile has the ability to gradually absorb, accumulate and then give moisture to the plaster, it is necessary to apply a waterproofing coating before laying it.
Waterproofing walls in the bathroom
The walls of the bathroom are waterproofed not in order to protect them from leaks, but so that condensate does not penetrate under the tiles, contributing to the destruction of the walls and the growth of harmful bacteria.
In order to save money, they make partial waterproofing of the walls, 50 cm up and to the sides at the locations of sanitary equipment and pipes, but for more effective protection of the walls, it is recommended to apply a waterproofing coating over the entire surface.
Lubricants (cement-polymer compounds, mastics) are used as an insulator. The waterproofing mixture is applied with a trowel, it forms an even surface and serves as an excellent base for tiles.
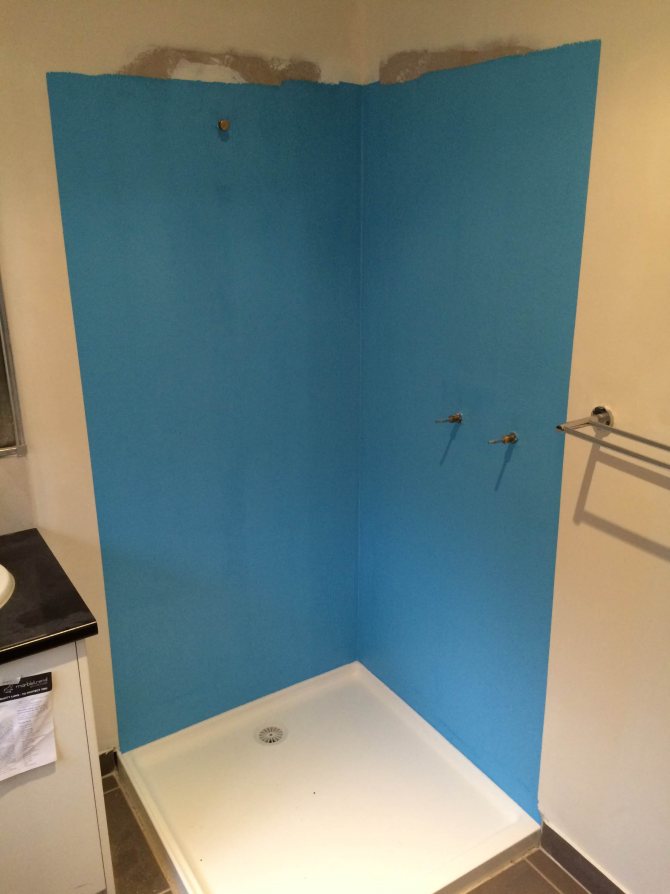
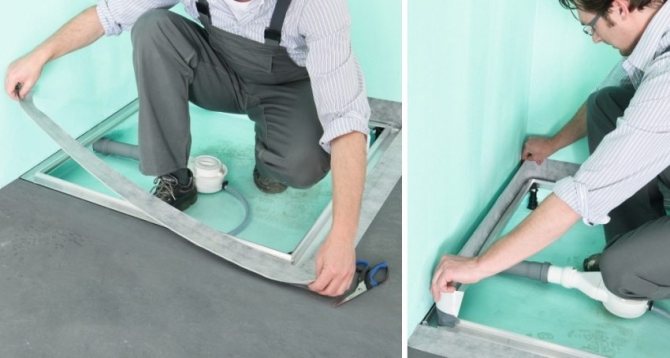
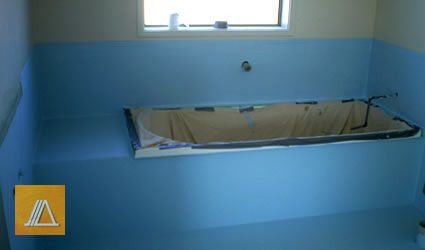
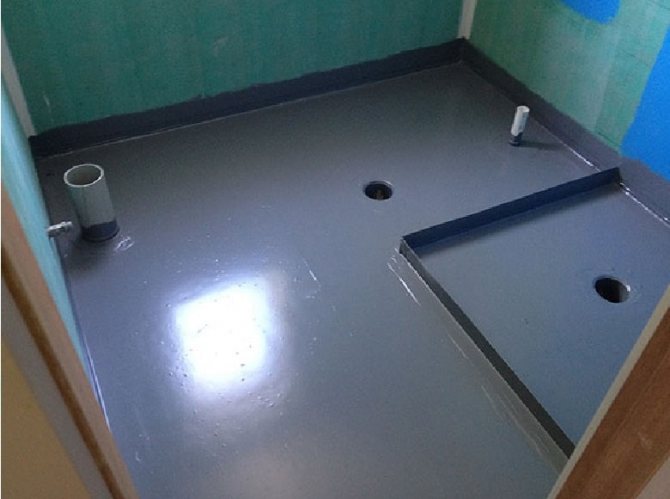
Shower cabin waterproofing
If it is planned to install a shower cabin in the bathroom, the walls and floor near it, and other plumbing items will be considered wet areas. Before starting work on waterproofing, the floor is leveled, a screed is made.
After the screed has dried, we glue polystyrene foam plates on the floor at the place where the booth is installed, they insulate the bottom layer of the pallet and exclude the occurrence of moisture. At this stage, we install a drain and treat all seams and joints with a sealant.
After that, we insulate the floor using coating mixtures or roll insulation. For a bathroom with a shower cabin, the floor should be insulated with a minimum approach to the walls - 20 cm. The wall near which the cabin is located is completely insulated.
If you have a shower with a tray, first insulate the floor under it, then install the tray and the stall, and after that you should apply a waterproofing coating near the shower. The rest of the bathroom objects are processed according to the principle described above.
Waterproofing a bathroom in a wooden house
Wood is an organic material that swells when exposed to a humid environment and gradually decays over time.
Due to constant temperature and humidity changes, the walls in buildings made of timber often "dance", since under the influence of various factors, the timber can swell and narrow.
The bathroom in such a house should be as tight as possible in relation to the rest of the premises. Before arranging a wooden floor on the logs, the foundation of the house is waterproofed with mastic or a cement-polymer composition. The lags are treated with an antiseptic and thoroughly dried.
Before laying the floor, wooden boards are treated with one of the waterproofing compounds. To do this, use a bituminous or primer varnish, which have a high degree of elasticity (narrow and expand upon deformation). Parquet varnish is used after laying a wooden floor, it protects the outer surface of the wood from moisture. The walls and ceiling of the bathroom are treated with the same means, paying special attention to the joints or corners. If the walls are made of plasterboard, before applying the waterproofing layer, it is treated with a moisture-resistant impregnation.
Features of the application of roll waterproofing
Rolled materials, in contrast to coating materials, require a longer installation. A prerequisite is a flat floor surface and a screed. Before laying the tiles, an additional layer of a thin screed is applied to the roll waterproofing.
Laminated materials have a high degree of elasticity, so their use in wooden houses is highly advisable. Despite the regular "movements" of the tree, the insulation does not collapse, but maintains its integrity.
The vapor permeability of the glued waterproofing allows the tree to "breathe", thereby prolonging the term of its exploitation. Laying the material requires special skills and, in some cases, the use of special equipment.
findings
Having studied the technology, you can independently make the waterproofing of the bathroom under the tiles, or by entrusting this important matter to professionals. In any case, the applied composition plays an important role in the arrangement of the hydro-barrier.
In our hardware store, a wide range of materials is presented, among which you will find the optimal waterproofing for any type of room, and if you have any questions about waterproofing materials, you can always get a free consultation from our specialists.
How long does waterproofing dry
If you have chosen a roll-up waterproofing for a bathroom under a tile, you do not need to wait until it dries. It dries instantly - after laying the rolls, you can walk on the floor.
The mastic takes longer to dry - in about a day. Considering the need to lay two or three layers of waterproofing to better protect the bathroom, it will take several days before continuing with the renovation. It is undesirable to walk on the bathroom floor until it dries completely. Do not put anything on it, do not spill water. After complete drying, you can install plumbing in the bathroom, supply water to it, lay tiles on the walls and floor.
Waterproofing a bathroom is an important renovation step that cannot be ignored. No one is insured against leaks, gusts. Even daily water procedures can, over time, not only spoil the carefully made repairs, but also create a favorable atmosphere for the development of a pathogenic fungus.
Proper waterproofing will help protect tiles from the negative effects of moisture and steam, and neighbors from unpleasant streams from the ceiling. Having completed it once in compliance with all the rules, you can forget about possible "wet" problems for a long time.
Types of waterproof materials for the bathroom
Waterproofing for the treatment of bathroom walls is:
- tough;
- elastic.
Rigid cementitious waterproofing is used on a solid, solid foundation that does not withstand deforming loads at all. Cannot be used on moving parts, expansion joints.Walls are easy to process, paint, mortars. Any tile can be glued.
Rigid waterproofing
The auxiliary dumbbell mastic belongs to the rigid ones. Manufacturers recommend for sealing irregularities, rounding corners. Permeates moisture, and is covered with a waterproofing film on top. For the bathroom, this is an extra expense of money, since you can use cheaper materials, for example, a simple cement mortar.
Other cementitious mixtures contain a polymer that makes the film flexible. They are divided into two categories:
- one-component;
- two-component.
One-component consists of a ready-made dry mixture, which must be diluted with water. After applying to the wall, you must wait a day before tiling.
Two-component waterproofing consists of dry powder and liquid mortar. After cooking, the resulting mass needs to be worked out quickly, some dry very quickly, within a few seconds. But for the bathroom, they usually do not use it. They are distinguished by their ability to stretch. For example, if the gap covered with the protection expands by 0.75 mm, the coating will remain intact.
In addition to cement, there are:
- roll;
- liquid;
- astringent.
Some are not suitable for interior work, others are too expensive. Impregnation insulation belongs to a separate type, but its use in the bathroom is not rational either. Other species information: