Increasingly, underfloor heating is being installed in private and multi-storey buildings. The power of such a system is regulated by oneself. The most popular is the concrete heating system. This is due to some reasons, including cheap installation, no need for additional materials, high-quality result.
It is very easy to learn how to use such a system. To install a heating element, you should know a few subtleties of using materials. You can turn to any construction company for help. For the amount set in the price list, the pros will carry out high-quality work on the installation of a structure for heating.
Varieties of underfloor heating
Water
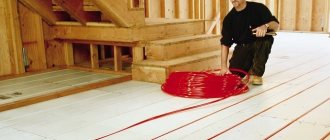
The heat source of such a system is hot water. How does a water floor work? A heating pipe (part of the mechanism) is installed on it, hot water circulates in it for heating. A pipeline is connected to the central heating system or to the purchased gas boiler. This is how the floor heats up.
Advice: connect the piping to the boiler so that the heating is not dependent on seasonal heat supply, temperature drops or pressure.
Benefits:
- cost-effectiveness (you pay only for the equipment, installation does not require significant cash costs);
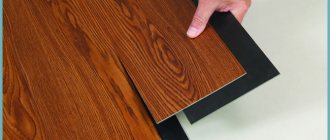
- the system of such a floor can be combined with other types of bases (carpet, tiles, laminate, linoleum);
- autonomous use;
- saving heat and energy;
- alternative to the central heating system;
- the floor temperature does not depend on electricity (in stand-alone mode).
Disadvantages:
- this type of heating is not possible in multi-storey buildings. Suitable only for private premises;
- it is impossible to regulate heating;
- the house / apartment can be flooded if no crack is found in the pipeline.
Back to the table of contents
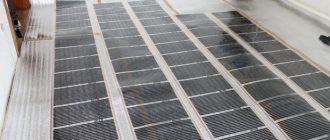
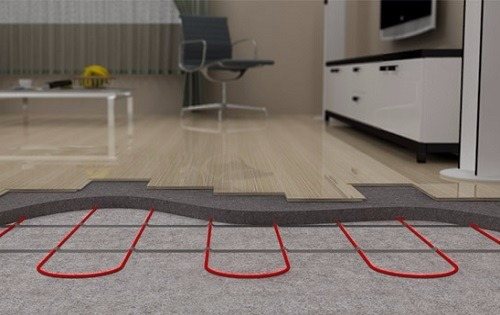
Electric
This heating system is carried out using special wires (consume electricity), which heat up themselves and, accordingly, heat the floor. The concrete with which the surface is poured is made from special mixtures to increase the level of thermal conductivity. The mechanism can be installed in apartments with central heating.
Benefits:
- can be connected to the central network;
- no additional materials for installation;
- used for 40-50 years;
- provides comfort;
- local repairs can be carried out.
Disadvantages:
- you should choose a special coating with the desired marking;
- the risk of varicose veins, leg diseases, varicose veins;
- the room warms up for 3-4 hours;
- it is recommended to put wooden furniture in a room with a warm electric floor;
- it is required to take permission to install such a floor from the controlling services.
Back to the table of contents
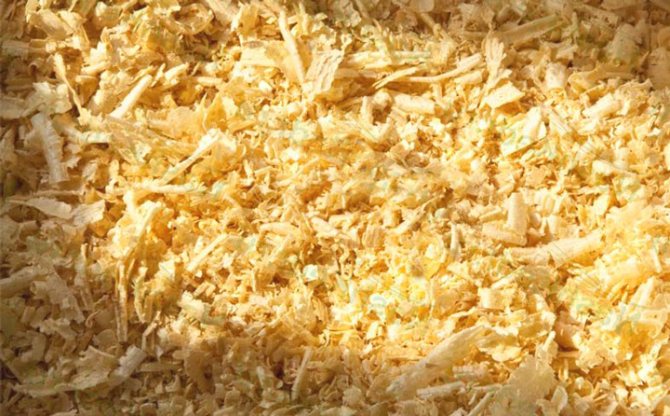
Chipboard
Many people think about how to insulate a concrete floor in a private house. Here you can select a large number of materials for work. Particle board stands out among them. It is great for concrete substrates. Chips, which are part of the concrete floor insulation, are able to minimize the noise level. But at the same time, it retains the necessary level of heat in itself.
The final quality is influenced by the thickness of the chip layer. The minimum indicator is 22 mm. If the layer is smaller, the result will be negligible.
The installation process is very simple and does not take much time. To begin with, a waterproofing layer is laid, which can be an ordinary polyethylene film, and after that chipboard sheets are stacked tightly to each other.Next, it remains only to carry out the flooring of the selected flooring option.
Underfloor heating screed
Back to the table of contents
Preparation of materials / tools
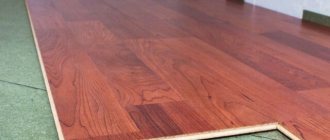
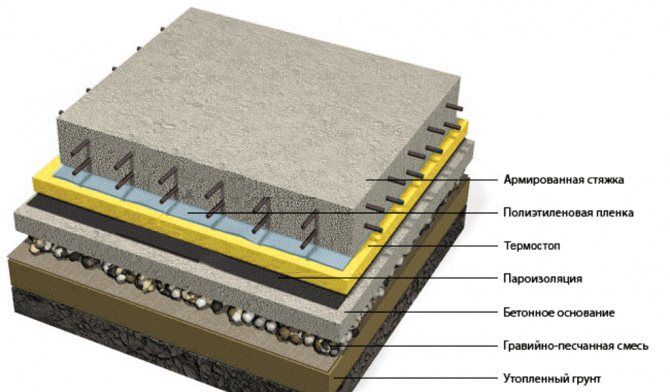
Both water and electric floors are poured with concrete, but with one difference: in the case of an electric floor, special substances for thermal conductivity are mixed into the concrete. All materials and tools that will be used for floors should be carefully prepared before starting work. Concrete should be poured, and then the surfaces should be treated with putty. Then they put the necessary material for the surface (parquet, linoleum, etc.).
Tools to be used during installation:
- building level;
- spatulas;
- solution bucket;
- puncher;
- concrete mix;
- reinforcement net;
- tester (to check the connection);
- roll foil.
Install the heating system using concrete pouring and the above tools. Use the attached instructions. For a fee, you can hire a team of builders who will quickly and efficiently install your heating system.
Back to the table of contents
Installation of beacons
After the first step, proceed with the installation of the concrete floor. The first priority is to install beacons. Use metal profiles for lighthouses:
- Install the mesh reinforcement.
- Spread the grout in lumps across the room (50 mm high).
- Place the slats on the clumps (use a level for accuracy).
- Mount the beacons on the floor (on opposite walls).
Back to the table of contents
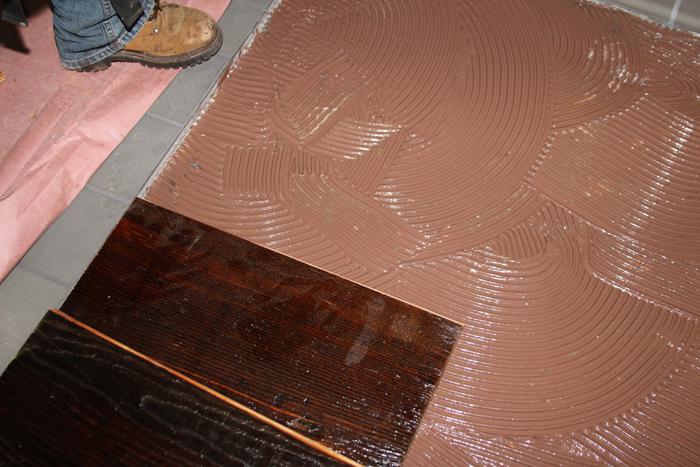
Preparation of the solution
The next step is concrete mortar, the so-called screeds. Do not use clean concrete for the screed (it has low thermal conductivity). This applies to both water and electric floors. Purchase a dry screed mix from a specialty store.
Cooking consists of only 2 stages:
- sift concrete (fractions should be 5-7mm);
- fill in the plasticizer (for thermal conductivity and plasticity of the screed).
Back to the table of contents
Fill
After the water or electric concrete floor system is assembled and the mortar (screed) is mixed, pouring can begin. Floors must be installed at a temperature of 5 ° C (or higher). If the temperature is lower, the screed may begin to crumble and crumble. For underfloor heating, a special thermal element should be selected. He must be constantly under pressure. If the pressure weakens, the pipes begin to deform, during deformation they heat up and begin to harm the floor, destroying the composition.
The room is left for 28 days so that the necessary processes take place in a warm field. The concrete will become strong and stable during this period, the mortar will harden, and only after that the heating system should be started. If you do not have the time and desire to wait, you can use a special drying. The surface will reach the desired parameters after 10 days. There is no fundamental difference between floors (water and electric) in further care. The temperature should be raised gradually until the performance is achieved. Adjust the system temperature manually.
Back to the table of contents

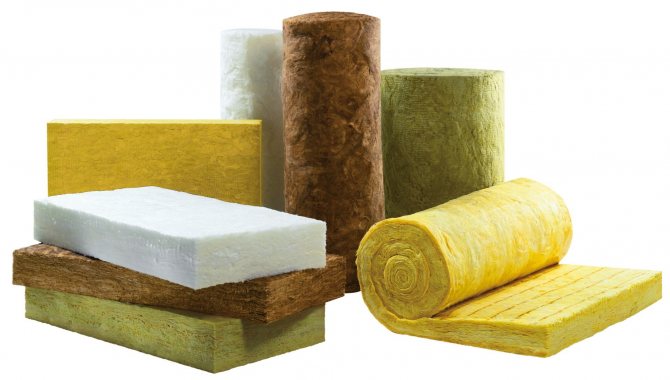
Features of insulation
Before you start insulating a concrete floor, you should dwell in more detail on the features of the technology itself, as well as the choice of a specific material for installation. The work includes several very important stages that must be carried out sequentially one after another.
- The first stage is carried out before pouring the concrete floor mortar.
- In the process of creating a concrete floor.
- When laying any kind of flooring.
Work on creating a warm concrete floor should be started from the very beginning. Only in this case, you can get a really high-quality result. The level of insulation will be high.
There are enough ways to insulate a concrete floor.Each of them can be performed at a certain stage of the floor installation. They can be used in combination with each other, as well as separately. Everything will depend on the specific situation. If it is not possible to lay the insulation under the screed, then you should stop at the use of expanded clay in the work, and subsequently - the finishing coating in several layers. But when it comes to a warm floor, then a warm coating at the finish can be omitted.
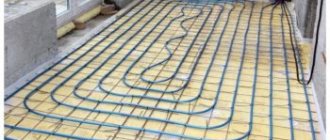
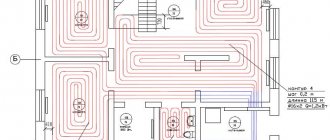
Pipe arrangement options
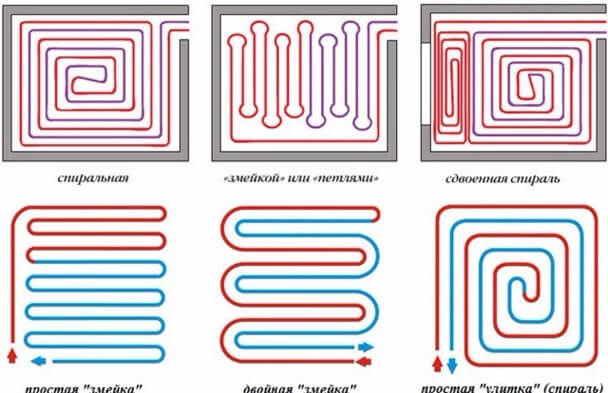
Pipe arrangement options.
There are 3 types of pipe dislocation that use warm surface systems:
- spiral;
- serpentine;
- winding.
In the first case, the pipes are installed in a spiral, the heat in the concrete will begin to be distributed evenly, since the pipeline is directed directly to the center of the room. Heat spreads from the source to the middle of the room, and from the middle begins to be directed over the entire surface of the room. There are no sharp bends or straight lines. Smooth lines maintain stability thanks to special fasteners.
The serpentine method of location provides a point of distribution and release of heat from different sides of the room. The water will cool down as it reaches the edges of the room. Thus, the distal part of the pipe will always be hotter than the proximal part. The total length of the pipes used in the serpentine system is 70 m.
The looping type is very similar to the serpentine type. The only difference is that the spiral will not be single, but double. Accordingly, you will have to use a little more material. With this method, the pipes and the floor will be heated evenly.
Back to the table of contents
Raised floor and plywood
Another option for insulation under a concrete floor is to create a raised floor from boards or plywood sheets. The floor becomes noticeably warmer, but it acquires one main drawback - the room is reduced in height by about 20-25 cm. If the room has already low ceilings, then it is better to put this option aside and consider the available others.
Wood logs are created, on which plywood is subsequently laid. The resulting space under the plywood can be filled with absolutely any material for thermal insulation. This option for creating a warm base facilitates the use of any floor covering in the future. There are no restrictions.
Thermal insulation layer
This layer prevents heat losses from going down. It can be carried out from any materials permitted in housing construction. But regardless of the type of material used, when buying it, you must follow the rules:
- the thermal resistance of all heating layers should be less than the thermal resistance of the heat-insulating layer at the maximum load on the entire floor;
- the higher the heating load, the thicker the heat-insulating layer;
- the greater the thermal resistance of the finished coating of the construction cake, the thicker the heat-insulating layer.
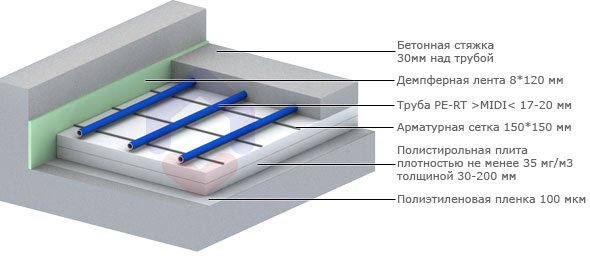
Floor heating device diagram.
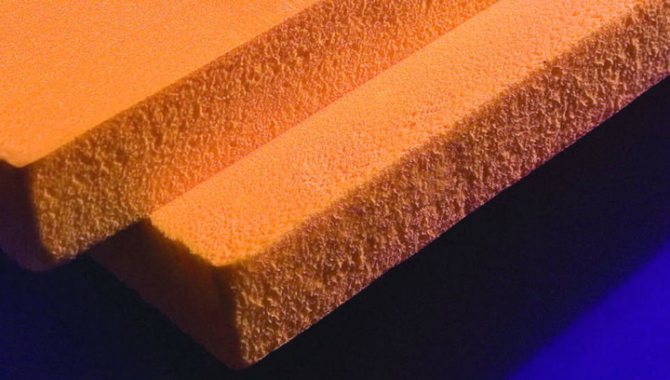
In modern residential construction, the most common thermal insulation material is polystyrene. When arranging a concrete warm floor with your own hands, you must use a heater with a density of 35 kg / cu. m and more. Using less dense material can lead to its destruction. Especially when the concrete is not poured soon, and the heating circuit is already ready.
The use of warmer, denser polystyrene (50 kg / m3) and extruded is advisable where a large mechanical load on the floor covering is expected. This can be a car center, a warm warehouse with heavy forklift trucks, or road heating.When choosing polystyrene, pay attention to the marking (for example, PSBS25, 35): often manufacturers are cunning, and the actual density value is one step lower than what is indicated on the marking.
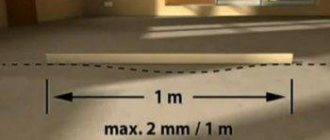
Step width between lags
The step between the lags is selected taking into account the thickness of the floorboard. The thicker it is, the more it is allowed to take a step between the bars. In addition, the thicker board sags less under stress.
The table below allows you to quickly select the distance between the bars.
You can also resort to the following rule: with an increase in the width of the logs by 5 mm, their step increases by 10 cm.
When installing plywood, the lag section is calculated differently. This is due to the fact that it has great bending strength. With a sheet material thickness of 1.5-1.8 cm, it is fashionable to place the logs against each other at a distance of up to 40 cm. It is necessary to install the beams so that the sheets are fixed at the edges and in the middle. Moreover, the edges of the sheets should fit in half the width of the timber.
Heat insulating paint
When a concrete floor is set up, it can be easily insulated using a concrete floor insulation such as heat-insulating paint. Many will immediately wonder how to insulate a concrete floor in a house in this way. The prepared base surface (removal of stains, dirt, dust) is leveled with cement mortar. To fill cracks, voids and gaps, liquid penoizol is used, which is injected inside using a construction syringe.
As soon as the screed after pouring has set and is completely dry, paint can be applied. Usually the coating is at least 2-3 layers. Everything will depend on the requirements and the need for insulation. But there is also a very important condition here - one layer of paint must dry for at least a day before the next application. Only in this case will effective thermal insulation be obtained. So you should know how to properly insulate a concrete floor.
Izolon
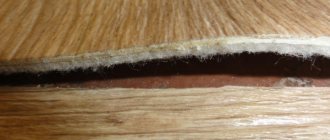
Not so long ago, such a material for thermal insulation of a concrete floor, as isolon, appeared. It can be called a new technology presented in the form of a foam base. Izolon is perfect as a substrate for floor coverings such as laminate or parquet.
The installation process does not take much time and requires minimal knowledge of the construction industry. A roll of this material is spread on the concrete floor. It remains only to stick it on the base with foil tape. It is in this way that it is fixed on the surface.
We prepare the material

After everything you need has arrived at your home, you can start unrolling the rolls. It is necessary that the material lie in a completely unfolded state for about two days. So he will be able to take on his shape and size. All pieces must be laid out where it is planned to lay it.
We also need glue, a jigsaw, a screwdriver and a hammer drill, cold welding or double-sided tape. You also need to use a sharp knife and spatulas.