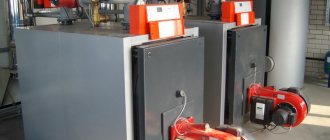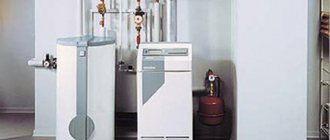
BHeat Air are energy-saving electric heaters that eliminate the need to install expensive gas heating and avoid the waste inherent in conventional electric heating. "Golden mean", allowing you to save money when buying and not overpay when using.
We will answer the 5 most important questions:
- What is it?
- How does it work?
- How does it work?
- How are the savings?
- How to compare with other heaters?
For those who like brevity - 5-point key messages.
For those who love clarity - an example of "Two Baths".
Answers to frequently asked questions can be found in the Question - Answer section.
What is it?
Vapor-droplet heater or heater with variable heating medium - modern reincarnation of a steam boiler in miniature
but instead of a complex system of boiler, radiators, steam supply and condensate return pipes, vapor drip heaters are an all-in-one solution.
That is, steam is generated, supplied and condensed within the fully sealed housing of the device.
Each device is equipped with controls and automation that monitors both internal processes and temperature changes in the room and controls the operation of the heater in such a way that the room is maintained at the temperature set by the consumer.
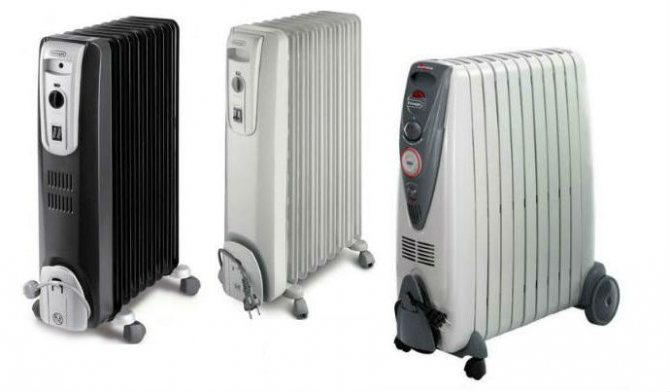
Infrared heaters or oil radiators
Oil radiators have a low surface temperature and are quite comfortable. They are mobile and, if necessary, can be easily carried from room to room. Advanced models are equipped with a fan that increases the heating rate of the room several times.
At the same time, they have all the disadvantages of convection heaters. A liquid or oil heater slowly warms up the room.
When operating such radiators, you need to carefully monitor the state of the paintwork and the metal of the case: oil leakage can lead to overheating of the heating element and a fire. When choosing: infrared or oil, you need to proceed from the service life, reliability and energy consumption.
How does it work?
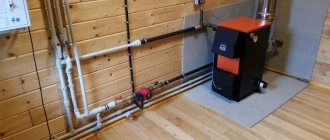
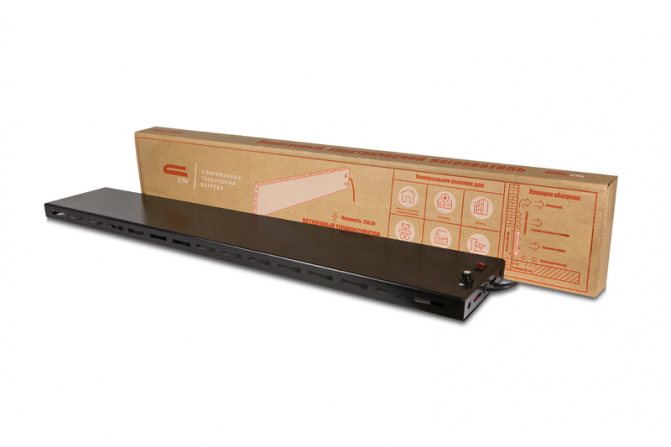
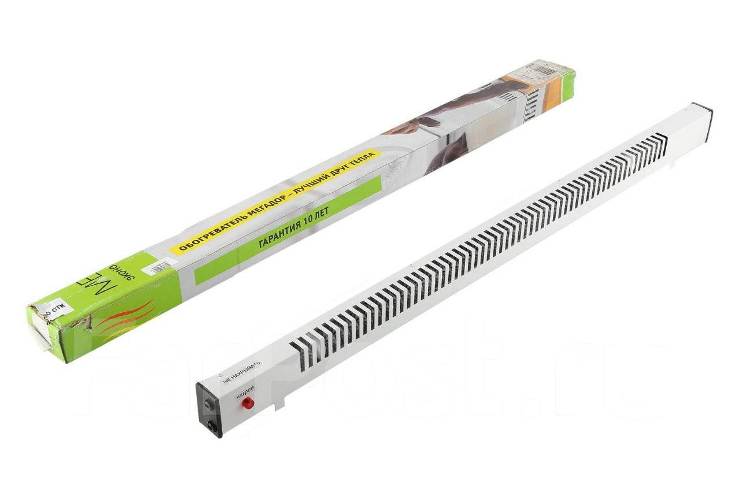
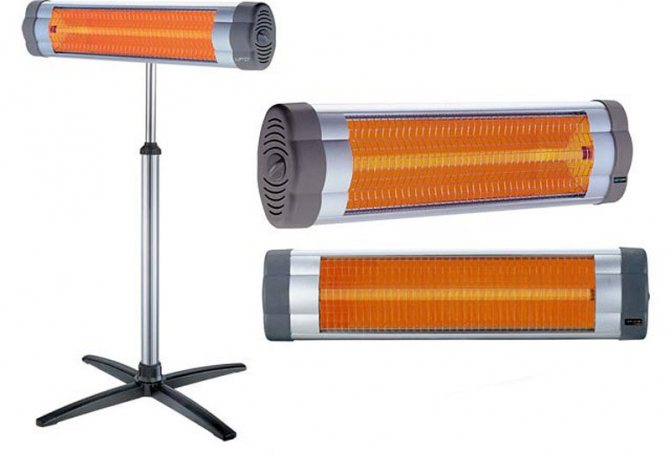
Structurally, the vapor-droplet heater consists of an aluminum body and a plastic control panel.
The control panel contains indication and control buttons for the device, inside the panel there is a board with a microprocessor and several temperature sensors.
The board and sensors act as an electronic thermostat and control the operation of the heater according to the preinstalled software.
The aluminum housing, in turn, consists of a sealed inner chamber in which a heating element is installed and a small volume of coolant is poured (about 10% of the internal volume of the chamber, so the heater is not afraid of freezing, since there is free space inside for expansion of the coolant without deforming the case and heating element), and fins, which heats up from the walls of the inner chamber.
Cold air, contacting along a large plane with heated fins with a developed structure, heats up and, by means of natural convection, rises up and is supplied into the room.
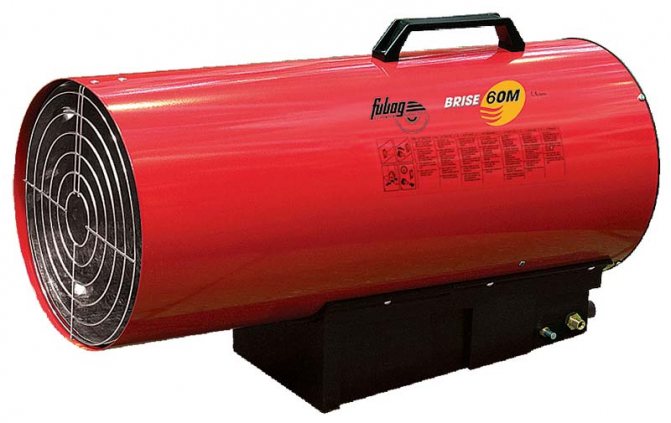
Infrared heaters or gas
Gas heaters are independent of power supply and can be installed outdoors to heat terraces. It is possible to use such heaters in residential premises only under constant supervision and for initial warming up.
Despite the sophisticated safety systems, gas heaters are considered a source of possible fire. Continuous heating is permissible only for stationary heaters connected to the chimney.
The unit cost of thermal energy is lower for gas heaters. The cost of the equipment is higher than for infrared heaters of equal power.
How does it work?
Inside the sealed chamber, a continuous process of vaporization takes place through intense evaporation of the coolant (namely, evaporation, not boiling, which ensures almost silent operation of the heater):
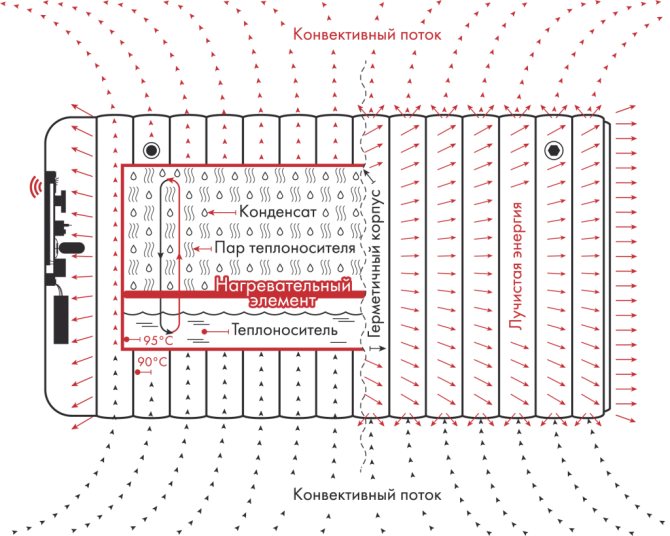
- The heating element converts electrical energy into heat and heats the coolant.
- The heat carrier passes from the liquid to the vapor phase and is evenly distributed over the internal volume of the heater.
- Thanks to the original technical solution, the heating element not only carries out the process of vaporization, but also acts as a superheater, i.e. the generated steam, rising upward, washes the heating element and receives additional heat, due to which an additional increase in the temperature of the steam occurs.
- Upon contact with the colder walls of the heater, the steam condenses in the form of drops, instantly transferring heat to the walls of the heater, and under the influence of gravity goes down to the heating element.
- The cycle starts over.
Hence the simplified name for this type of heaters "steam" and "drops" - vapor-droplet.
The heating element and coolant are hermetically sealed inside the chamber. The heating element does not have direct contact with air and does not overheat it by evaporating moisture (i.e. it does not dry the air). The coolant does not evaporate during operation and does not need to be refilled during operation.
Infrared heaters or underfloor heating
A classic underfloor heating, in which heating occurs with pipes with a heat carrier or electric heating cables, has the same advantages over convection heating at home as infrared heaters.
Compared to infrared heaters, underfloor heating:
- higher equipment cost
- complex and expensive installation; a cement screed device is required;
- the height of the room is reduced;
- water floor heating has a risk of leakage.
Infrared electric floor heating or heating mats are devoid of these disadvantages.
How are the savings?
The main feature of vapor drip heaters is the ability quickly remove heat from the heating element
at a constant temperature on a large surface of an aluminum case with developed fins and also
quickly compensate for the heat loss of the room
.
Due to this, vapor-droplet heaters can operate at a lower power than more powerful counterparts (for example, convectors and oil radiators) and warm up the room to a comfortable temperature with less energy consumption.
Inside the heater, the heating medium is converted into saturated steam in order to take advantage of the features of the heat exchange process through condensation.
The main feature of this process is that heat is supplied and removed at a constant temperature. Heat transfer during condensation of saturated vapors is the instantaneous transfer of heat by vapor molecules to the cold wall of the heater.
The steam condenses, and at the same time a sharp decrease in its volume occurs, thus, its own translational movement of the steam towards the wall occurs.
That is, all the heat "removed" from the heating element is quickly transferred to the inner walls of the heater (1 liter of steam gives off 2300 kJ of heat during condensation. The same volume of heat carrier, when cooled by 50 C, gives off only 100 kJ of heat).
It should also be borne in mind that during heat exchange through condensation, steam is formed in a large volume (1672 liters from 1 liter of water), i.e.heat is transferred quickly and over a large area.
Since the steam increases sharply in volume when the coolant passes into the vapor state, a small amount of the coolant in liquid form is enough and, as a consequence, a small amount of electricity is required to heat it and start the vaporization process.
Vapor-droplet heaters, although they are positioned as convective-type heaters, have a powerful, developed surface for creating convective flows, but they are also sources of infrared radiation
since have two surfaces with spherical IR emitters (ribbing) with a large exposure zone, a sufficiently high temperature on the ribbing (up to 80-85 C) and a shagreen paint, which additionally increases the working surface of infrared radiation (similar to “textured ceramics” in ceramic heaters) ...
Key points:
- Small volume of coolant (from 0.25 l, depending on the model) - low power consumption for starting and maintaining the vaporization process.
- Large steam exchange (1,672 liters from 1 liter of water) - high rate of heat transfer from the heating element to the heater body
- Heat transfer by condensation - instantaneous transfer of a large amount of heat (2 256 kJ of heat per liter of steam) to the heater body
- Developed structure of ribbing and painting "shagreen" - a large area of the heat-transfer surface
- A sufficiently high temperature on the case is additional infrared heat.
Eventually:
high rate of compensation for heat loss in the room and low power consumption.
Example "Two Baths"
In order to clearly explain what is remarkable about the process of heat transfer by condensation, we will give an example with two identical Russian baths.
In one bath, everything is done as it should be: the stove is heated, stones are warming up, water splashes on the stones, from heating the water turns into a vaporous state and cloudes the entire steam room, warming up the walls, ceiling, air. The temperature in the steam room (together with the humidity) rises rapidly. When the required temperature is reached, they begin to put much less firewood in the firebox in order to only maintain the required temperature.
In another bath, it was decided to conduct an experiment. Everything is done as usual, only water is not poured onto the stones, but they are waiting for the stones to warm up the room themselves. Due to the fact that the area of heat transfer of stones to the air is small and the heat transfer itself occurs through convection, and not condensation, heating the room to the desired temperature takes longer and requires constant maintenance of a high heat of stones. And, therefore, firewood must be placed in the same amount, otherwise the heat transfer will drop and the target temperature cannot be achieved.
Those. in the second bath there is a constant increased consumption of the resource (firewood), while in the first the consumption can be reduced due to the fact that the steam, having a large volume and fast heat supply (through condensation), quickly removes heat from the heating element (furnace with stones) and quickly transfers it to the premises.
The BHeat Air body is the walls, ceiling and floor of the bath.
Heating element - firebox with stones.
Water and steam - water and steam.
Unlike a bath, the body of the heater is made of aluminum in order to quickly transfer the received heat outside (to the heated room), and not keep it inside.


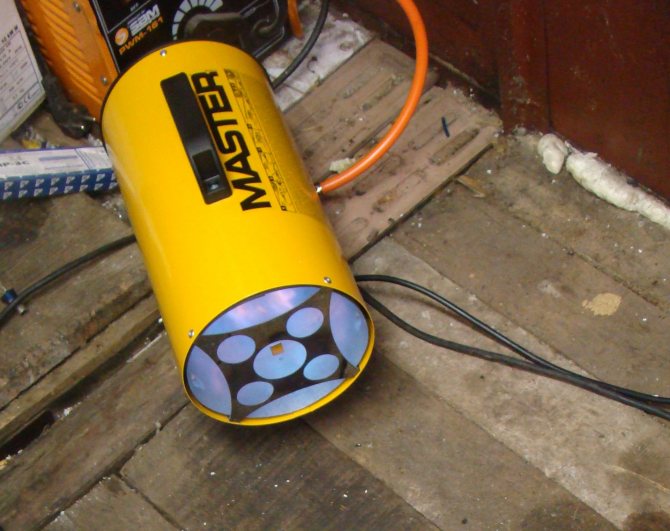
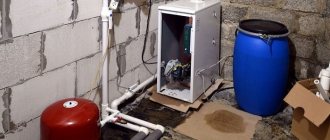
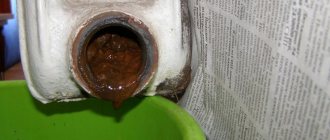
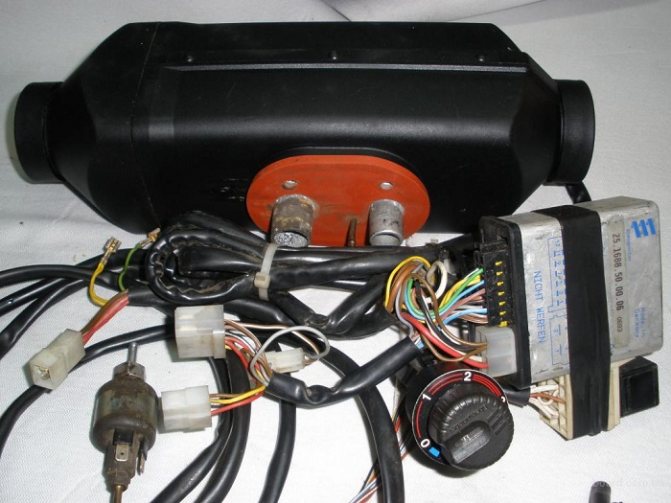
How to bleed the fuel system of an autonomous heater. Fuel supply problems.
With the arrival of cold weather, problems begin with the operation of the autonomous heater. This often occurs due to malfunctions in the fuel system of the heater. Yes, this is not strange, because not many drivers start heater in a warm period.We will consider what can affect the occurrence of a problem with fuel and how to pump the fuel system of the heater in this article, and also see the diagram of a simple device for controlling the booster pump of an autonomous unit.
A malfunction in the fuel system of the heater can occur due to air leaks through the union in the fuel intake (preferably for Scania cars), or a loose valve in the metering pump, or due to freezing of the fuel or clogging of the union of the auxiliary tank.
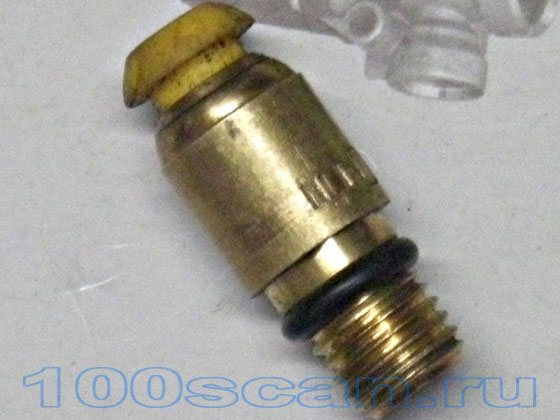
But this problem is solvable: in the first case, by replacing the union, in the second, we are trying to pump the fuel system, in the third case, we are looking for a malfunction. You can try to pump fuel even without additional devices. A serviceable fuel metering pump will pump fuel after 3-4 heater starts (i.e., 9-12 start attempts). If the pump is hooked up, an injection can be made by injecting oil into the pump from the side of the strainer (under the aluminum fitting at the pump inlet).
At the service, in order not to waste the client's precious time, we use a simple home-made device for pumping the fuel system autonomous heater (we use it mainly to control the metering pump of Eberspacher D1LC, D1LC compact, D2, D4 heaters).
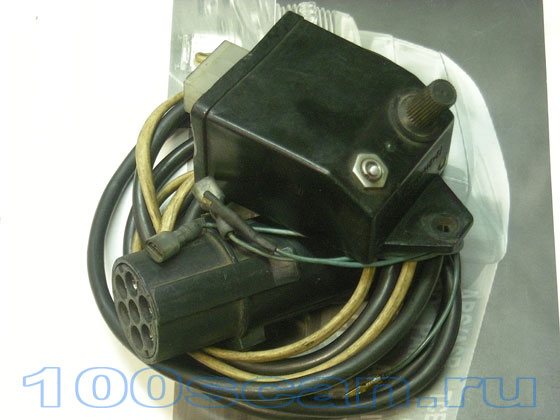
The device is assembled according to this scheme.
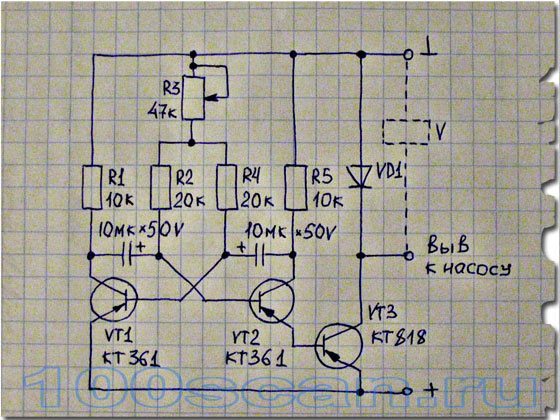
The multivibrator, made on KT 361 transistors, controls the VT3 output stage, which in turn controls the V metering pump (by modifying the output stage, you can also control the Webasto metering pump). Using a variable resistor, we adjust the frequency of the pump (although the device always operates at the maximum frequency). A device is mounted in a plastic case from the turn signal relay of a VAZ car. The controls are taken out. To indicate operation, an LED was used (not shown in the diagram, it is connected between the output to the metering pump and the ground, through a resistance of 1 KoM). We connect the dosing pump using female connectors of 5 and 3 mm.
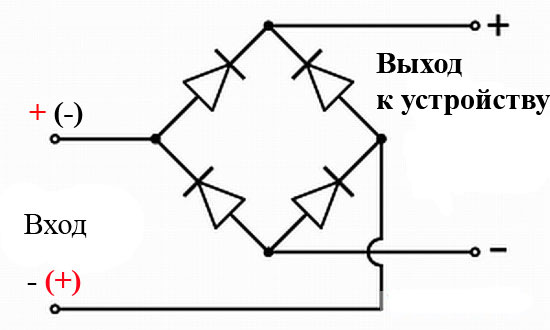
Since the policy of most cargo services is "all mechanics can do everything!", Then to protect against reverse polarity, the power was connected through a diode bridge. As a result, the device became polarity-independent.
In order not to open the battery cover, the device is powered from the lighting socket, using the power supply of the side lights of the trailer. But on trucks, 15-pole sockets are increasingly used instead of two 7-pole R and S type lighting sockets. Therefore, it is better to use an ABS socket to power the device.
Well, now the most important thing is how to use this device.
- We connect the device to a power source (directly to the battery, to the tractor's lighting socket or ABS socket).
- We connect the outputs of the metering pump to the device.
- Remove the fuel pipe at the heater inlet.
- We turn on the device.
- After pumping the fuel system of the autonomous heater, we return everything to its place.
- We turn on the heater.
Read further on the website:
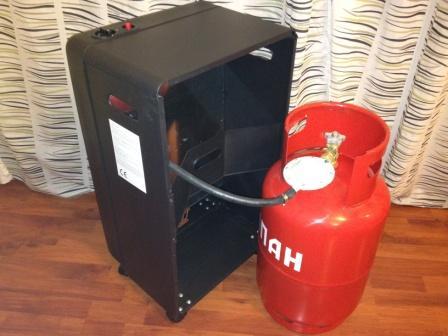
Installation example for an auxiliary heater on MAN Installing an additional fuel tank
How to compare with other heaters?
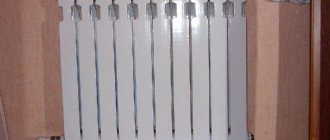
BHeat Air vapor drip heaters have numerical designations that make it possible to understand with which models of electric convectors they are comparable in terms of heat output.
For example, the BHeat Air 1500 model is comparable in terms of heat output to 1500 W electric convectors, i.e. provided that the premises are 15 sq.m. and a standard configuration (ceilings 2.5m, one window, etc.), BHeat Air is able to heat such a room to a predetermined temperature with 30-50% less energy consumption than a conventional electric convector.
Benefits of IR Heaters
IR heaters have a number of advantages over other heating systems:
- efficiency: less electricity is spent on heating the air to the same temperature next to the floor;
- the speed of warming up the room: the floor becomes warm immediately after turning on the device and begins to give off heat to the air;
- no air currents, minimal dust transfer;
- the possibility of arranging local heating zones, for example, next to the bed;
- wide area of use: such heaters can be installed in any rooms with normal humidity, both residential and utility rooms, including premises for farm animals and greenhouses;
- operational safety: the devices have minimal fire hazard;
- do not have a harmful effect on people and pets;
- ease of installation, stealth
- easily fit into the interior;
- convenient and effective for installation in children's rooms and places where the elderly stay.
There are also some disadvantages to IR heaters. These include unpleasant sensations during prolonged stay directly under the device. They are comparable to overheating in bright sunlight. The advantages far outweigh the disadvantages. And to the question: which is better, a convector or an infrared heater, the answer is unequivocal: infrared.
Is autonomy possible in an apartment?
There is only an electric heater for the apartment.
In principle, it is possible to use an autonomous gas heater in an apartment, but in practice no one does this. All modern apartment heaters are powered by the electrical network. It is convenient and safe. Yes, while you are dependent on electricity, so what? You are also dependent on water and gas and possibly central heating. Does it bother you too? Then it's time to move to a private house.
If the lights are turned off and it is cold, then as a last resort you can warm yourself up with a gas stove. You just need to open the window. Then put the refractory brick on the burner, light the flame and the heater is ready, you will not freeze anymore. And if there is no light or gas, then even the most modern heaters for an apartment will not help. At the very time to take an alarming suitcase and head to the village, since it is impossible to live in such an apartment.
How to make garage heating with your own hands economically and quickly?
What are the options for heating the garage? The answer is here.
DIY installation instructions
So that later repairs of autonomous car heaters are not required, most manufacturers initially recommend contacting specialists for installation. Of course, it is better to entrust the installation of such a system for a cab or a car interior to professionals, especially if you are faced with such a task for the first time. But sometimes car owners have to install AO on their own. This issue is especially relevant for motorists from small towns, in which there are simply no good specialists and, accordingly, the possibility of high-quality installation.
In addition, it is sometimes necessary to install a gasoline or electric AO for 12 or 24 volts on our own due to the high cost of installation. However, it is always necessary to remember that car owners do not always manage to save money on self-assembly of AO. After all, if you accidentally break at least one fastening of an electrical AO for 12 or 24 volts, this can lead to serious financial costs.
So, in order to make an independent installation of an electrical system for 12 or 24 volts in the cab or interior of the car, you should perform the following steps:
- First of all, in order to correctly install a gasoline, diesel or electric 18 volt AO, it is necessary to determine the place of installation of the stove heater itself. To do this, you need to find the most optimal place in the engine compartment.
- The next stage in the installation of a gasoline or electric 12 volt AO will be the laying of the highway.If this is an electric 12 volt version, then it can be powered by a cigarette lighter or battery. Connect the device power supply to a 12-volt battery or cigarette lighter accordingly. If we are talking about the fuel option, then a line should be connected to the heater of the stove, which can go directly from a tank or a gas pump. If necessary, you can use the junction in the engine compartment.
- Further, the electrical connection should be made to activate the operation of the control unit. It is advisable to place the unit itself in the passenger compartment of the vehicle. Please note that the unit should not be exposed to moisture and high temperatures, as this will negatively affect its functionality. An unloaded circuit protected by a fuse can be used for connection. The use of a fuse or relay is important as the control unit may burn out during power surges. But, as practice shows, blocks from well-known manufacturers, as a rule, serve for a long time.
- Then you need to route the air ducts from the device to the interior of the vehicle. For this, as a rule, the lines of the standard stove of the machine or other holes are used.
- Make sure that there are no gaps at the entry points of the heating pipes, as this will lead to the ingress of cold air flow into the passenger compartment. In order to get rid of gaps, use the sealing elements that should be included in the kit.
- After the additional heater of the passenger compartment is installed, it is necessary to check its operability. It is advisable to do this before you begin to assemble all the components of the engine compartment. Turn on the stove and, in accordance with the operating instructions, check the system's performance in all modes. More details about the installation of such a system are described in the video (video by Timur Safin).
Diesel energy-saving heaters for summer cottages
Diesel automatic heater made in South Korea.
Modern heaters for homes outside the city on diesel fuel need electricity. They have a fan that disperses the heat and supplies the flame with oxygen. Therefore, of course, this device cannot be considered completely autonomous. Consider it as partially autonomous, since the power consumption is no more than 100 watts. Installing a small solar battery or mini wind power station will be able to provide a diesel heater with electricity. In extreme cases, even a conventional UPS for a heating pump will last for a long time.
Considering convection units of direct and indirect action, the first ones are immediately excluded from the list of contenders for the title of energy-saving heaters for the home. They simply cannot be used in a confined small space where people live. These are rather production units. At home, only appliances with a chimney and a filtration system can be used.
In the absence of an alternative, among diesel units, it is the indirect action devices that are the most energy-efficient for the home. They do consume little fuel, but they burn oxygen, since there is a source of open flame, similar to gas infrared devices. At the same time, diesel units heat the air.
Disadvantages of diesel heaters:
- burn oxygen;
- dry the air;
- fan and burner noise;
- large dimensions.
As for the dimensions, this is a separate conversation. Apparently, manufacturers do not consider diesel units as energy-efficient automatic home heaters. They are really very bulky. For example, the new model made in South Korea is only suitable for warehouses or production facilities, but not for homes. The dimensions of the device are 940x320x1020 mm, which is very important. Designed for heating rooms from 55 to 88 sq. M.They can work unattended, there is a remote control panel. Consumption per hour of 1.2 liters of high quality diesel fuel and 80 watts of electricity.
Installation steps
Gas heater IGC AS-GH03
- First of all, a place for installation is selected. Everything will depend on the size of the purchased heater. If it is small, then it has a place under the window. If the dimensions are too large, then the device should be placed near the window. Then the installation site is marked. For this, the heater is attached to the wall, on which the mounting points of the brackets are marked.
- A hole is made in the wall for a coaxial chimney. There are different models of gas heaters, in which the chimney is led out of the casing in different places. If this is the lower part or the upper part, you will have to buy a branch of the corresponding diameter to the chimney.
- A gas pipe is supplied. Pay attention to which side the inlet is installed. A chimney is installed, and the gaps between it and the wall are closed.
- The heater itself is hung and connected to the chimney.
- The device is connected to a gas pipe. Please note that the highway must be laid along the street, and only its end with a squeegee must be brought inside. A special gas hose will be connected to it.
That's all, and you can carry out the first ignition of the heater and its settings. By the way, there is a thermostat in the design of the device, with which you can regulate the temperature regime inside the premises. It is not only convenient, but also economical in terms of efficient use of fuel.
Remote systems NOBO Energy Control
It is quite easy to use such developments of specialists. Control is carried out through a single center - Orion 700 devices. Auxiliary elements allow you to remotely control absolutely all electrical appliances and convectors. The user can remotely control power consumption. Experts have made sure that the temperature regime is maintained exactly up to 1 ° C. The radiators are switched on and off according to a preset program, and the universal built-in timer can be programmed not only for a day, but also for a whole week. Thanks to this, the final electricity consumption is reduced by 30%, but without compromising the comfort of living.
Passive space heating
In addition to the use of heaters, there is a whole range of measures aimed at improving the efficiency of heating units and, consequently, their efficiency.
But, in addition to universal operations, for example, external insulation of building envelopes, there are technologies that are applicable only to premises for keeping animals or poultry.
After the external, and preferably also internal, insulation of the walls and ceiling of the chicken coop, the floor is insulated. With regard to the chicken coop, the technologies of these works do not differ from performing identical operations in other rooms. But in the poultry house, after the floor is insulated, an additional warming procedure is performed - laying with a thick layer of loose bedding, the components of which chemically react with each other and generate heat.
You can prepare such a mixture yourself, or you can purchase one of the ready-made compositions offered by compost manufacturers.
Bulk materials of natural origin with a low coefficient of thermal conductivity are used as a bedding material for the winter period when it is independently prepared: chopped straw, wood chips, moss, sunflower husks or mixtures of these components.

Deep insulating bedding in the poultry house for the winter
The layer is formed with a thickness of 30-50 cm, and over time, as it compresses, the same substrate is added to it in the amount necessary to restore the original volume.
Poultry droppings, mixing with organic matter, initiate decomposition processes and the release of heat.
Important! The deep bedding must be periodically loosened (1-2 times a week) - to prevent the temperature of the layer from rising to dangerous values, the weathering of ammonia from it and drying.
Thus, deep bedding is also a kind of autonomous means of heating the chicken coop in winter, but not the main one in terms of intensity.
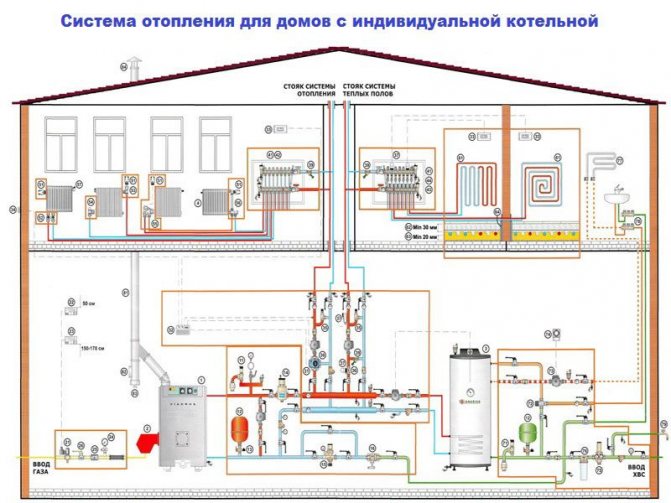
Remote automatic heating of a standard summer cottage as an integral part of the overall scheme
A professional approach to real estate heating allows the equipment involved to function stably in various modes. With the right approach, you can combine several systems at once to achieve a good result. This remote correcting option does not have a central controller. But at the same time, a fairly large percentage of the unused capabilities of the units can be used in other "smart home" schemes. Even the classic GSM module is able not only to receive incoming calls, but also to send reports on the situation in the house to the smartphone. Thanks to this, you can quickly find out about flooding or an incipient fire.