Technologies and principles of block bath insulation
The considered category of materials retains heat qualitatively, does not react to temperature drops, and exhibits high hygroscopicity. Its only weak side is that the insulating properties are inferior to natural wood. Thermal insulation of a bath from the blocks from the inside is a mandatory measure, external strengthening is not enough, energy losses will lead to increased consumption of firewood.
This condition is explained by the fact that in order to fully heat the internal space, it is necessary to increase the temperature of all structural units - floor, ceiling, walls. Unlike living quarters, where heating devices always create a positive microclimate, the bath is heated only a few times a week.
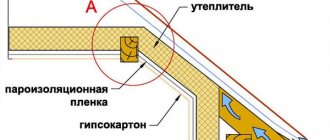
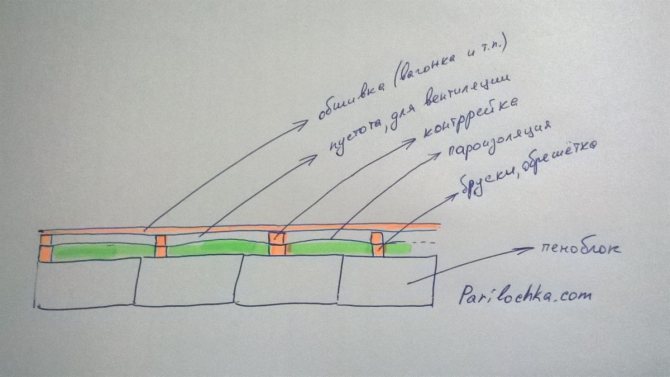
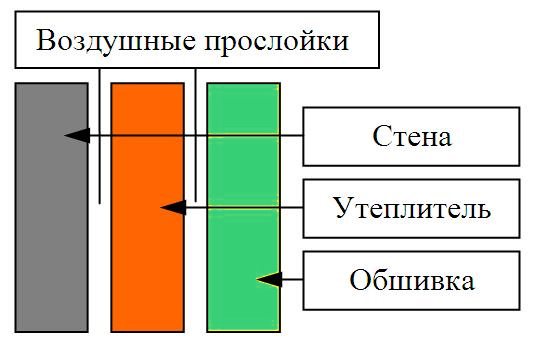
Since the surface temperature of the blocks is adapted for high elevations, the panels must be insulated to prevent users from getting burned by accidental touch. Internal insulation is made up according to the principle of a pie, it necessarily includes a crate, elements of steam and water protection, and a ventilation gap.
The wood used in the finishing must be impregnated with protective compounds. The crate, which serves as a frame for insulation, is assembled from a galvanized metal profile or wooden beams impregnated with antiseptics. U-shaped elements are fastened with galvanized ties. You will also need dowels for fixing - they provide a tight connection.

Outside
The main load lies on the exterior of a house or a foam concrete bath. It is necessary to completely cover the disadvantages of cellular concrete and at the same time ensure the optimal characteristics of the entire enclosing structure.
The best option is a heat-insulated ventilated facade. It allows you to use insulation with low vapor permeability and reliably protect foam concrete from external factors. The aesthetic appearance of the ventilated façade is also a major advantage.
Insulation materials can be used:
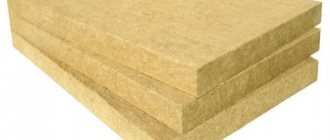
- basalt wool, mineral wool;
- cellulose;
- expanded polystyrene;
- jute felt.
Materials such as polyurethane foam or extruded polystyrene foam (EPS) are categorically unsuitable, since they do not provide adequate vapor permeability, which can lead to strong moisture in the foam blocks and their rapid destruction.
The surface of the wall is treated with soil and penetrating waterproofing. A heat insulator is laid along the crate made of wood or metal profile. To protect against external factors, the insulation is protected by a membrane, which covers the entire plane of the wall.
A counter grill is mounted to form a ventilation gap. It fixes the vapor-permeable membrane and provides free air movement. The bars of the counter-lattice are attached on top of the first layer, moreover, each rail is divided into two unequal parts and mounted so that there is a gap of 10-15 cm between them. This will ensure lateral air movement.
Lastly, the lathing for siding is mounted, which is a board, lining, PVC panels or metal wall panels for ventilated facades.
Insulation scheme from the outside using a ventilated facade
Ventilation gaps are installed along the lower edge of the facade and under the roof canopy. It is advisable to close them with protective gratings, excluding the penetration of rodents into the insulator layer, which can spoil it.
It is also allowed to paste over the walls of the house with thermal insulation, followed by plastering. The main thing is to choose the required thickness of the material.
Bath
In the case of a bath, a simplified version of external insulation is allowed. The building is not always operated, and it makes no sense to equip an expensive ventilated facade. It is enough to perform wet plastering on top of the selected insulation.
External or internal insulation of the bath is necessary. This reduces fuel consumption and slows down the cooling process of indoor air. If the structure is not insulated, then it will take several times longer to heat the steam room to the desired temperature.
Comparison of insulating materials
When choosing finishing materials, you need to be guided by the following parameters:
- Waterproofing.
The wall cladding must be resistant to high humidity and steam.
- Resistant to high thermal stress.
During operation, there should be no warping, cracking or deformation of the cladding.
Bath finishing materials
- Fire safety.
It is necessary to choose a material that will not ignite even when in contact with an open flame.
- Environmental friendliness.
It is better to use natural materials that do not emit harmful or toxic substances at high temperatures.
- Strength and durability.
The interior decoration of a foam block bath is done for more than one year. How often it will require repair depends on these criteria, so choose a cladding that is less susceptible to mechanical, chemical and thermal damage.
- Smooth surface.
Serving a grooved or ribbed surface is problematic, and chipping or chipping can be harmful to your health. When buying, pay attention to the appearance of the material.
The choice of insulators for insulating the walls of a bath from expanded clay concrete blocks is based on the following criteria:
- ease of installation, the ability to quickly assemble;
- functionality;
- heat resistance;
- heat saving;
- hygroscopicity.
The most popular is thermal fiber, it attracts with safety and versatility - it can be used both inside and outside. Before installation, preliminary preparation of the walls is necessary - they are cleaned of dust, dirt, plastering. The latter also serves as additional insulation.
Natural jute felt is easy to install and does not have specific requirements for conditions. This is an efficient, environmentally friendly option. Polyfoam and mineral wool have good insulating characteristics, they attract by their low cost, low own weight, and ease of installation. Mineral wool is preferable here, since it does not arouse interest in rodents.
Expanded clay insulation is used to insulate a bath from blocks
Expanded clay insulation is still relevant, since it is free-flowing, it can only strengthen the ceiling and floor. Basalt wool is fireproof, mold and fungi do not multiply in it, it is durable and environmentally friendly. Expanded polypropylene is used in tandem with foil, this combination can withstand heating up to 150 ° C.
Thermal insulation of a bath from foam blocks: inside, outside, wall insulation
Home page »What is the best way to build a bathhouse» Bath from foam blocks »How to build a bath from foam blocks
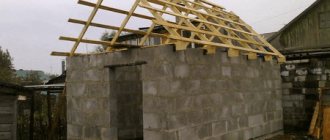
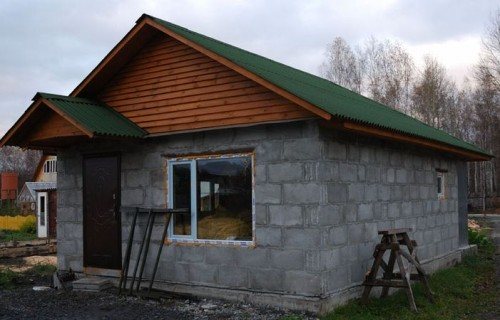
Traditionally, the advantages of the foam block are lightness, fire safety, long service life and low cost. A successful combination of the characteristics described above makes it one of the most common options in the choice of materials for a bath.
It is being built in the shortest possible time and does not require significant financial investments. At the same time, the properties of the material and, first of all, its porous structure are vulnerable to cold and moisture.
In the bath, given the specificity of the application, this requires additional insulation.The procedure does not differ in complexity, it can be ordered by specialists or, having familiarized yourself with the main points, you can perform it yourself. Careful work will guarantee a constant indoor climate, guaranteeing people warmth and comfort.
When starting the process of warming a bath, priority should be given to the walls. Here, the main role is played by the inner frame, which ensures reliable fixation of the insulation and other materials used in the insulation procedure. The insulation is evenly distributed under the frame, and then the structure is sheathed with waterproofing. Most often, it is based on foil and similar components, whose features prevent heat from escaping from the room.
As the name suggests, the material also serves as a reliable protection of walls and insulation from moisture. In no case should you neglect waterproofing, otherwise there is a high probability of mold, mildew and other unpleasant moments. When the material is laid, the walls of the bath are sheathed with wood. Here, with an equal share of success, an ordinary lining or planed board can be used. Along with interior decoration, external wall insulation is also used. All the features and stages of both procedures will be discussed below.
Important: wall insulation during the construction of a bath from foam blocks may not be necessary, especially if a block thickness sufficient for your climate is used. It is up to you to decide whether to insulate or not, further material will help weigh the pros and cons.
Heaters
There is a huge amount of materials on the market for insulating foam block baths. Each of them has its own advantages and disadvantages, which the article will help to understand. So, most often they use:
- Styrofoam. One of the traditional materials for insulation. Recently, it has been used less and less for walls, keeping heat worse than competitors. At the same time, as a basement and foundation insulation, it seems to be the best option;
- Glass wool. With proper waterproofing, it is able to reliably protect the room. Its structure includes glass production waste, sand, felt. In general, it keeps heat well, and the disadvantages include a specific smell during the aging process of the material;
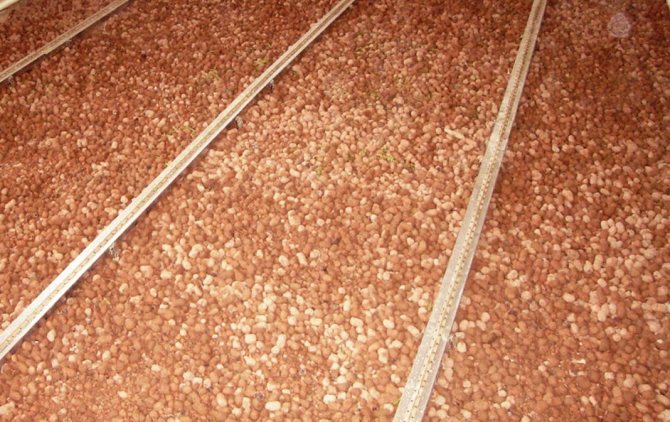
- Expanded clay. It is used to insulate ceilings and floors by backfilling the corresponding areas;
- Jute felt. This is a completely natural material that is produced from the plant of the same name. In ancient times, felt was used in the production of sackcloths and other products, having managed to note excellent thermal insulation properties. The main advantage of the material is moisture rejection. As a result, along with insulation, it performs the function of additional protection against moisture. The disadvantages include fragility, as a result of which flax is presented on the market today, in which jute is combined with flax for greater strength;
- Basalt wool. Its main advantage is its excellent fixation, which allows you to simply place the material under the frame without using dowels, etc. This is a mineral material, the result of processing some rocks. In particular, as the name suggests, basalt wool is mined from basalt. Today it is she who owns the highest coefficient of thermal conductivity. Basalt wool is not subject to combustion, guaranteeing fire safety;
- Ecowool. An excellent choice for thermal insulation. It is a product whose structure consists of cellulose, antiseptics and fire retardants. When using it, you can do without a vapor barrier, in addition, mice and rats do not eat the material. In Western Europe and North America, ecowool has been used for a long time, in Russia its advantages are being actively studied at the present time;
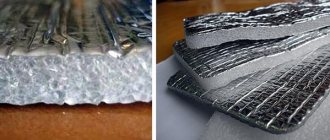
- Waterproofing. Most often it is foil and materials made on its basis.Provide protection of materials and walls from moisture penetration, keeping them dry;
- Foil polystyrene foam. Today, one of the most popular insulation methods, where polyethylene foam is covered on top with a protective foil layer. Has the advantages of all the materials described above. It is durable, easy to fit and has a long service life. Among the disadvantages, the possibility of corrosion should be noted.
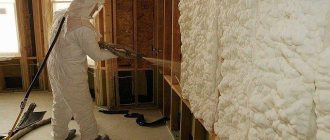
- Liquid insulation or polyurethane foam. It is used relatively recently, having already noted excellent sealing properties, heat and sound insulation, absolute resistance to moisture, almost infinite service life. It adheres well to any surface and does not require the creation of a frame.
Regardless of the type of material selected as insulation, the following technology should be adhered to in the process. First of all, the floor is insulated, then the walls are equipped and at the final stage the ceiling is completed with materials.
The specificity of insulation assumes the beginning of its application already at the construction stage, when builders use additional materials, protecting the foundation and basement.
Attention! It is important to use components that can easily withstand temperature extremes, exposure to the environment, not subject to decay and decay.
Thermal insulation of a bath from foam blocks from the inside
Useful video
In the video, pay attention to the explanation why a bathhouse, as opposed to a residential building, is usually better insulated from the inside:
Internal insulation of walls made of foam blocks begins with stuffing the frame. Its function is perfectly performed by boards or slats, with the indispensable condition of having sufficient indentation to accommodate the insulation. It is advisable to leave small holes in the upper part of the wall. They are called vents, providing additional ventilation. The windows are equipped with shutters or plugs are used, plugging them during the bath procedures. The rest of the time it is recommended to keep them open. As a result, moisture will not accumulate and the walls will remain dry.
After the frame is filled, the material selected as insulation is attached to it. Depending on the choice and specifics, it can be fixed with nails, dowels, or simply inserted into the gaps. As already noted, it is desirable to use a component that has a protective properties against decay. To date, jute felt has the best indicators for this item.
The most important stage in the insulation of bath walls is vapor barrier. It is mandatory to use it in 2 rooms, namely a washing room and a steam room. Without steam insulation, concrete and foam block will not be able to withstand increased exposure to moisture, not to mention maintaining the desired temperature, and will begin to deteriorate over time.
Along with the already mentioned foil and the materials created on its basis, mirror film helps to isolate the vapor. When laying the material, tensions should be avoided by joining its elements with each other or making an overlap installation. Vapor barrier is relevant for a steam room and a washing room, a dressing room and a recreation room can do without it.
Having laid the waterproofing of the wall, they are upholstered with a board. This is the final stage of internal thermal insulation. It involves the use of antiseptics. When applied to boards, they protect them from mold, mildew, bugs and other typical troubles.
External insulation
Outside, the baths are insulated using a ventilated facade technique with the required air gap. Styrofoam, jute felt and mineral wool have proven themselves here as materials. The main selection criterion here is the cost. In terms of its value, external insulation in a bath is significantly inferior to internal insulation, and it is left for later, and sometimes (if the climate and region permits) they are not used at all.
The floors and ceilings in the bath are insulated without fail, forming a single protective environment, without which the process cannot be considered complete.
So, if you own the technology, the insulation of a bath from foam blocks is quite easy. The main factor here is the competent choice of material and its competent location, and the emphasis is on internal work. If you have time and desire, the whole process can be done by hand. If, for one reason or another, such an opportunity is not available, it is enough to contact specialists. In any case, the owner will have at his disposal a warm and comfortable bath, always ready to welcome everyone.
See also: foundation and finishing of foam block baths.
parilochka.com
Features of outdoor work
When designing the structure of the cladding and the selection of thermal insulation, it is necessary to take into account the properties of the bath, caused by the material used for its construction.
We suggest that you familiarize yourself with Is it possible to build a bath from aerated concrete
Foam blocks
The specificity of the resource is its porous structure, since the production technology implies foaming of the concrete mixture with protein additives and sand. Therefore, in the course of warming, the foaminess of the raw materials leads to the fact that the blocks need to be protected from moisture as efficiently as possible. Otherwise, excessive dampness will lead to a decrease in the thermal insulation parameters of the structure and its operational life. You should not use polyethylene here, membrane films are more appropriate.
When insulating with a foam block, you need to use membrane films
Expanded clay concrete
In the process of warming a bath from expanded clay concrete blocks from the inside, the porous content of the blanks is also taken into account, they are made on a vibropress. It is an environmentally friendly and convenient material for construction; it absorbs moisture abundantly. In the course of arranging the "pie", it is necessary to provide waterproofing from kraft paper and foil-screen.
Cinder blocks
The budgetary resource can have different standard sizes, moreover, the low price is explained by the use of waste materials from the coal and metallurgical industries as raw materials. Products differ in size, weight, thermal conductivity.
As in the case of expanded clay concrete blocks, a ventilated gap should be maintained during the assembly of the internal insulation. For cladding, you can attract wood in the form of a block house, lining, it must be impregnated with compounds intended for use in a hot, humid microclimate. Planks should be sewn horizontally so that local replacement can be made as the lower segment wears down.
Gas silicate
Thermal insulation of a gas silicate block bath is carried out in accordance with the grade of the base material. If this category is from D800, then the structures are characterized by insufficient thermal insulation and high strength. The gap between D500-D800 is characterized by average parameters on both grounds, while blocks of the grade below D500 have excellent insulating properties and low strength.
When insulated, aerated concrete products need to protect air cells from moisture penetration and contact with high temperatures, otherwise the raw material will lose its durability and strength.
Initially, it is advisable to prepare and plaster the facade in order to achieve acceptable evenness of the walls, to fill in the existing cracks, cracks. Most often, the facade of aerated concrete baths is sheathed with mineral wool or expanded polystyrene. In the first case, the walls are first covered with roll materials to protect the insulation from moisture.
https://www.youtube.com/watch?v=t-Nzx6yvsrg
In the event that polystyrene foam plates are a priority, they can be fixed on external surfaces without worrying about laying the guides in advance; here special glue or polyurethane foam will come in handy.Further, the panels are additionally fixed with dowels, the joints and seams are filled with foam. A crate is stuffed on top for the installation of siding: such a sheathing will help protect the insulation from mechanical damage and exposure to ultraviolet radiation.
Interior decoration of the walls of the steam room
On top of the insulation, the walls of the steam room can be finished with any environmentally friendly material that does not emit any harm when heated, and has good resistance to moisture and high temperatures.
The most popular is the lining of hardwood lining - linden, cedar, larch.
You can also use a tile finish that is laid on sheets of GVLV (for example, Knauf-superlist with a straight (PC) or folded (FK) edge). For gluing tiles in a steam room, it is recommended to use:
- Plitonite "superfireplace" is heat-resistant, reinforced, for tiling walls in the area of the stove and chimney installation.
- Knauf tiled standard for gluing tiles to the level of the shelves.
- Knauf reinforced fixation "elastic" ("Flex") on all other areas.
When finishing with tiles during the period of warming up of its surface, condensation drops may appear on the tiles. To prevent this from happening, you should add water to the heater only after the tile has warmed up well enough. The oven must also provide consistent good draft to remove humid air from the room.
The better to decorate the bath inside
The choice of the type of material depends on the style direction. A modern manufacturer offers ample opportunities for creating a unique interior for a bath complex.
Plastic panels
Washer trim with plastic panels.
They are available wide (wall panels) and narrow (lining).
The advantages of this material are as follows:
- Moisture resistance.
- A variety of colors and styles.
- Easy to install.
- Affordable price.
- Durability.
For a foam block bath, plastic interior trim is not the best option.
The disadvantages of the panels include:
- Poor resistance to surface damage.
- High level of fire hazard.
- Low vapor absorption.
Combined finish with wood and decorative stone.
PVC siding
Siding is not susceptible to fire even when in contact with an open fire.
He is not afraid of accidental damage, scratches with sharp objects. In addition, it is plastic, thanks to this property, you can successfully hide the unevenness of the walls.
Wall decoration with siding is simple and affordable, it is easy to do it yourself, and the variety of colors presented and the cost of the material will suit the taste and wallet of the most demanding buyer.
We offer you to familiarize yourself with Insulating a house from a cinder block - How to insulate a house from a cinder block outside with your own hands: -instructions for insulating cinder block walls from the inside, photo and price
Ceramic tile
Decorating the bath with mosaic tiles.
Tiles are ideal for cladding surfaces in damp areas such as a sink or steam room.
Its advantages are obvious:
- Moisture resistance. The specially treated surface of the tile does not absorb moisture at all.
- Resistant to high temperatures. Modern technologies make it possible to produce heat-resistant tiles, which are used for facing fireplaces and stoves.
- Strength and durability. Correctly laid material will serve for many years without changing the qualities and appearance, it is almost impossible to break the tiles by accident, in the worst case, you can chop off a piece.
- Resistant to fire and aggressive chemical environment. Walls can be washed with any household means, and also not be afraid of fire.
- Environmental friendliness and hygiene. The tile is made from natural materials, mold and microorganisms do not form on its surface.
For the flooring, porcelain stoneware is used, which is thicker and stronger than wall tiles.The instructions for laying the material require the use of moisture resistant glue and the same grout for the joints in order to avoid washing out or the formation of fungus between the joints of the tiles.
Decorating with a pair of wooden lining.
A wide range of sizes, colors, types of processing allows you to choose a collection for any interior.
Tree
It is generally accepted that the best is the one made of foam blocks, the walls of which are finished with a wooden lath (clapboard). And although wood does not have many of the advantages inherent in other materials, consumers still prefer it more often.
What qualities of wood attract builders:
- Water vapor permeability. In a wood-lined sauna, steam is drier, the air is cleaner, and the walls "breathe".
- Low thermal conductivity. The well-finished smooth surface of the boards is pleasant to the touch and has an ambient temperature.
- Environmental friendliness. Being in a steam room with walls lined with natural wood is not only pleasant, but also useful. Essential oils from wood have a beneficial effect on health.
- Beauty of wood texture.
Steam room, lined with clapboard.
https://www.youtube.com/watch?v=BtA6Bqae0Qo
Aspen, linden, alder are used for facing the steam room. These rocks are resistant to deformation and do not crack from temperature extremes, in addition, they have healing properties that increase when heated. The sink and the rest room can be finished with larch, pine, cedar.
Features of the design of the walls of the bath
A feature of the design of the bath walls is the requirement for their thermal performance in combination with resistance to moisture, and in the steam room it is also resistant to high temperatures.
At the same time, unlike a country house, where a comfortable air temperature with the lowest energy consumption should be ensured in different periods of the year, the walls in the bath should retain heat only for the duration of its use, that is, periodically from case to case. This allows you to reduce the amount of construction work by reducing the thickness of the wall and installing a furnace of sufficient power, which quickly warms up the room.
It is believed that the walls in the steam room should be especially carefully waterproofed so that moisture from the room is not absorbed into the porous foam blocks. This is partly true, the porous structure of foam blocks reduces their frost resistance, and in case of wetting and subsequent freezing, such blocks can crack quite quickly.
At the same time, when visiting a bath, the amount of water used in the steam room can be only 2-3 buckets of water, which, you see, is not the amount of moisture that can wet the walls so much as to cause them to freeze.
A properly selected stove provides good draft, quickly "pumping out" moist air outside the bath. And in order to expel humid air from the interior of the bath into the street, after bath procedures, it is enough not to extinguish the stove immediately, but leave it to burn for another 15-20 minutes, throwing in 2-3 logs.
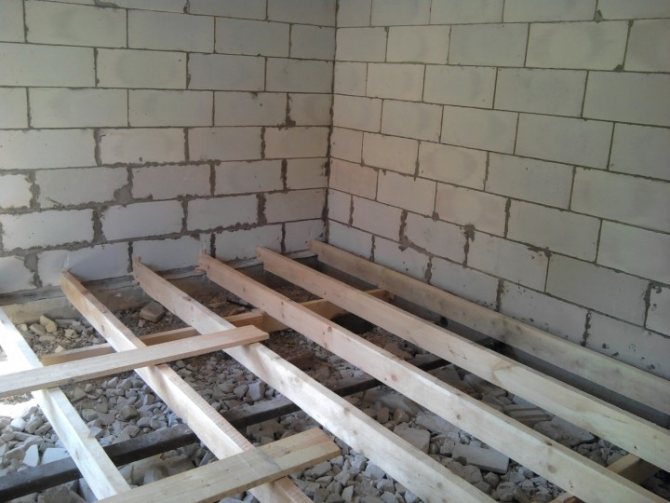
Stages of internal insulation
Regardless of the material from which the bath is assembled, the general vulnerability of the blocks is high hygroscopicity. In conditions of severe frosts, raw materials soaked in moisture are easily destroyed. In winter, after the firebox, the room cools down, no one monitors the temperature inside, and the frost resistance resource will quickly be exhausted.
Regardless of the specifics of the blocks, a single technology of internal cladding is used.
This is the first stage of bath isolation. General sequence of work:
- The soil base is covered with glass wool, slag or expanded clay. To achieve an optimal level of heat retention, create a layer at least 35 cm thick.
- Next, a lightweight aggregate concrete screed with reinforcement is assembled.
- A floorboard is sewn on top or ceramic tiles are mounted.
If you plan to arrange a concrete floor, the following guide to action is relevant:
- a rough concrete cushion is equipped with a coating or roll type waterproofing;
- the next layer is laid directly with insulation - mineral wool, polystyrene, expanded clay. The optimal bookmark thickness depends on the physical properties of the selected option;
- for arranging the ventilation gap, plastic headpieces are introduced, and they are covered with a reinforcing mesh on top. The latter should be hidden under the concrete screed.
The final stage here is the laying of ceramic tiles; if you wish, you can trim the concrete base with wood material. This method of strengthening the foundation minimizes heat leakage.
For the arrangement of wooden floors, experts recommend:
- create a subfloor by equipping the lower perimeter of the beams with cranial bars;
- fill the top of the fitted cheap wood;
- the subfloor must be equipped with a vapor-tight waterproofing. The film should cover the entire area with a 20 cm allowance along the walls. Fixation can be done using a construction stapler; double-sided tape will be needed to strengthen the joint zone;
- on top you need to lay thermal insulation and cover it with a film or roofing material.
We offer you to familiarize yourself with Wedge doors for a bath
After filling the finished floor, the perimeter must be equipped with skirting boards. Wood needs additional protection in the form of moisture-repellent, antiseptic, flame retardant impregnations.
The porous structure of the building blocks helps to reduce heat leakage, while the assembly of the auxiliary insulation cake will protect the structure from moisture accumulation in the smallest internal cells. In the case of cinder blocks, external insulation is not as important as internal insulation, so special attention should be paid to the study of the walls.
First of all, it is necessary to prepare the surface - to clean it of dust and dirt, remove the remnants of any finish, plaster so that a flat area is formed. Then you can start building up protective layers according to a certain algorithm:
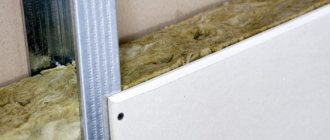
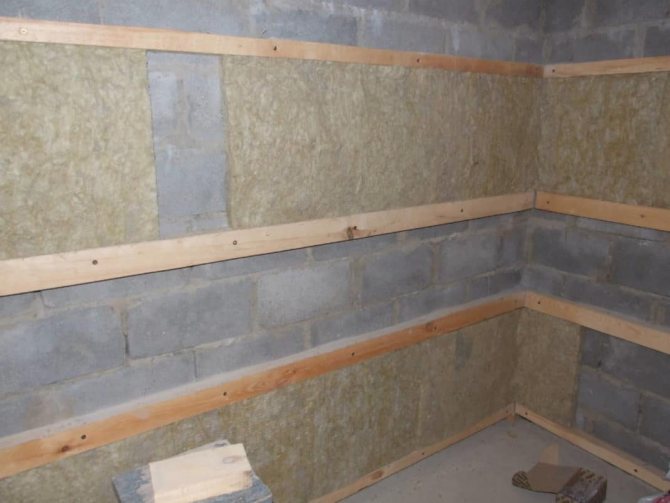
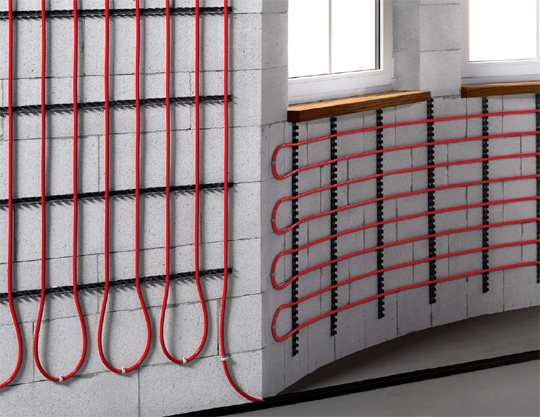
- Assembling a wooden lathing. Here you can use a budget bar, since it is undemanding in installation, it is only important that its thickness is at least 5 cm. The step (gap) between the vertical lines of the frame should be 3-4 cm less than the dimensions of the insulation boards. In this case, it will be more convenient to place the insulating material in the cells.
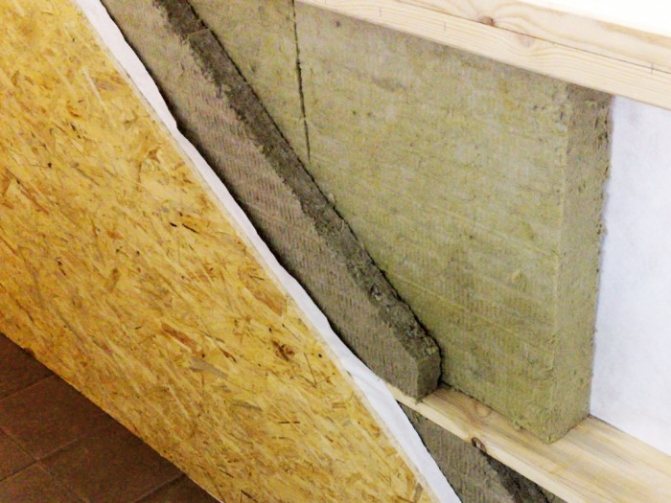
- Basalt panels must be placed in the resulting niches.
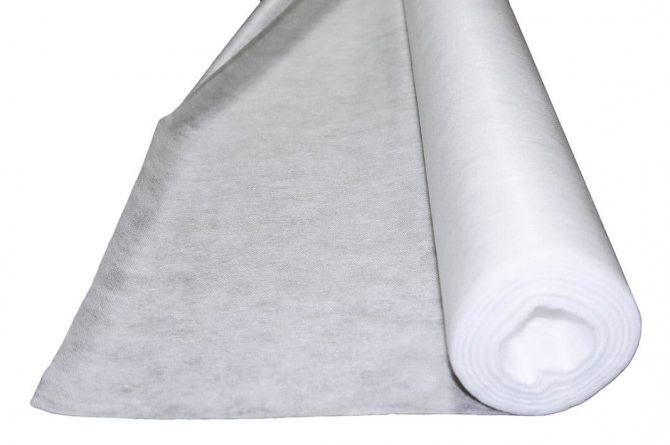
- Above you need to create a layer of vapor barrier. The best option is a foil membrane based on kraft paper. During installation, you need to ensure that the reflective layer is directed towards the interior of the room. The canvas is mounted with an overlap of at least 15-20 cm, the joint lines must be glued with tape. The membrane is attached to the frame using a construction stapler.
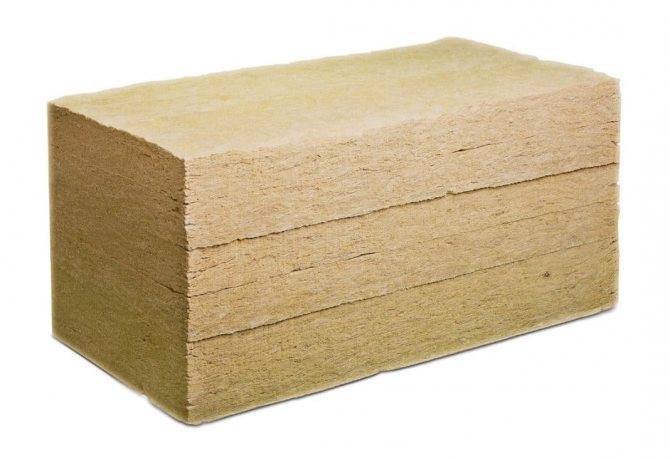
Basalt panels can be used to insulate the walls of a bathhouse from blocks.
To maintain the required ventilation gap, you will need to sew on a counter-lattice - it is created from beams that are mounted in the transverse direction. This measure contributes to the timely removal of condensate (moisture) from the foil side of the vapor barrier membrane.
At the final stage of the work, all attention is paid to the finishing wall cladding. It is recommended to cover the steam room with natural wood with a low resin content. Panels or lining must be filled horizontally to make it easier to timely replace the lower segments, which are inevitably destroyed due to frequent contact with water.
The kraft paper membrane can be replaced with foil-clad polypropylene - its characteristics help to protect the "pie" from adverse factors.
Ceiling
The ceiling needs additional reinforcement, as it is used in extreme conditions - with significant temperature changes, under the influence of hot steam. In this area, experts offer two methods of work - open and closed. If the attic of the bath is not equipped with a floor, the second method is relevant.
The ceiling is covered with a waterproofing membrane, a layer of granular expanded clay with a thickness of at least 25 cm is poured on top. Next, waterproofing is again laid in the form of a polyethylene film or roofing material, a construction stapler is used to fix the coating.
The old method of strengthening the ceiling structure in an open way is still practiced. The factory waterproofing film can be replaced with a homemade mixture of sawdust and oily clay, the substance should be applied in a thick layer - at least 4 cm.When the clay is dry, it can be covered with dry soil and oak leaves.
Closed technology is relevant for saunas, in the design of which the attic has its own floor - such auxiliary rooms can have their own functional significance.
The flooring is assembled directly on the logs, it is complemented by such components of the pie as a vapor barrier in a roll form, basalt insulation, roofing material for waterproofing (in this sequence).
We insulate the bath with our own hands
Before building a building, it is necessary to calculate the means and forces for thermal insulation. It is best if the process of warming begins during construction, more precisely, from laying the foundation.
Basic requirements for materials for bath insulation
Cheap solutions (impregnation, septic tanks) will not perform the role of good thermal insulation. Of course, moisture protection is necessary in any case, but this is a separate task. It is necessary to insulate the premises of the bath separately, using materials specially created for this. It is customary to pay the most attention to the inside of the washroom and steam room. The selection of insulation and thermal insulation is done with the expectation of a rough building material.
One of the most important requirements for insulation materials is non-toxicity. Because in the bath, under the influence of temperatures, toxic materials can easily cause poisoning. Non-hygroscopicity is also important; the insulation should in no case absorb moisture.
https://kakpravilnosdelat.ru/kak-uteplit-banyu/
When choosing a specific material, you need to rely on the following characteristics:
- resistance to steam and high temperatures;
- good fire-fighting properties;
- environmental friendliness;
- low hygroscopicity;
- the ability to maintain shape for a long period.
Types of heaters for a bath
All heaters presented on the construction markets are divided into three conditional groups:
Of course, even 50-60 years ago, only natural materials were used, which were brought from the nearby forests. This is foam, tow or moss. Today, these are already partly elite types of insulation, they cost serious money due to the need for manual collection. Many fans of natural materials insulate their buildings with rolled jute felt or tow. Such material can be purchased at hardware stores. With regard to moss, there are conflicting opinions regarding its use. They say that moss is not an ideal material for insulation, because it provokes the growth of mold or mildew.
However, the moss itself does not have these properties, most likely, the fungus is formed due to improper cutting of a wooden structure or poor ventilation.
How to work with different types of buildings
The installation procedure and the required amount of work depend on the material from which the bath is built.
Insulation of log cabins
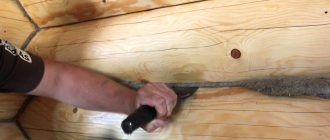
When working with a bar or log, you need to take into account the time for shrinkage, which can be 10 cm m more. Plus, gaps form between the crowns of such buildings, and it is in them that cold air blows in.It is best to insulate a log house or an assembly from a bar with jute fiber.
This material does not rot and has excellent thermal conductivity. Jute itself is a very fragile material, so manufacturers try to add flax fibers to it. But if friable material is already available, you can perform the classic caulking. There will be less work, and the building will probably retain more heat.
If it is decided to create a bathhouse from wood, then the insulation is laid during construction.
It is better to isolate all problematic parts of the log house in the process.
The work is performed in the following sequence:
Thermal insulation of buildings made of bricks or foam blocks
If log cabins are insulated in a primitive way, then you will have to work hard with masonry. And there are more financial investments specifically for work with insulation. Additional thermal insulation is necessary, otherwise a well-heated room will cool down in hours. Better to work on materials than stock up on fuel the rest of the time.
A widespread and proven method is a hinged ventilated facade. The working process does not take place from the inside, but from the outside of the bath. It is necessary to fix the layers of insulation to the walls, and sheathe the top with siding or clapboard. In the interval between the layers, a space filled with air is formed, due to which condensation will not form on the walls and rot and dampness will not follow.
The width of the frame for the ventilated facade is made greater than the thickness of the insulation, therefore, an air gap forms inside, preventing the formation of condensation
For a brick building, the following trick is often practiced: a steam room is made of wood indoors. Brick absorbs heat for a very long time, so it is easier to warm a small room in a steam room in a natural way if you use a small frame.
A 10x10 beam and a crate are enough. The process of insulating such an impromptu steam room inside a large bath is simple:
You can make it even easier: do not use a timber, but instead immediately fix the insulation on the frame. In this case, an additional layer of waterproofing will be required.
Calculation and selection of materials and tools
We insulate all surfaces of the steam room, washroom and dressing room. And for this you will need:
- Roll paper (for ceiling and walls).
- Beam-rail (5x5, for installation of insulation on the ceiling and walls).
- Foil.
- Insulating tape.
- Self-tapping screws.
- Aluminum adhesive tape.
- Insulation, calculated according to the area of walls, ceilings and floors.
Of the tools you will need:
- screwdriver;
- level and plumb line.
Do-it-yourself bath insulation
Any stages of warming are always performed according to the golden rule - they start from the ceiling and finish with the floors.
Ceiling insulation
Before starting work with the ceiling, you need to understand that in the steam room you need 2 times more material. After all, we are not working on a sauna, but on a Russian bath, where the steam should stay as long as possible.
The technology is as follows:
- We cover the entire surface of the ceiling with overlapping roll paper.
- We fix the bars on top of the paper; insulation will already lie between them.
- We cover it all with foil. It will become a normal, safe isolation ward. But it is necessary to mount the foil without saving. It is important that all connections are closed.
A layer of foil reflects heat, so the use of such a material for a bath is necessary - All joints on the foil are glued with aluminum tape. Usually, the foil for insulation comes with the material.
- Fasten the edges and joints with several layers of adhesive tape. We check our work for leaks. If there is not enough money for such a heater, then the foil is sometimes replaced with cardboard or thick paper without paint.
- Next, we mount the layers of insulation on the foil between the closed bars.
On the ceiling, it is better to lay the insulation in two or three layers with overlapping joints - We close the front part of the ceiling with clapboard under a tree.This material is resistant to high temperatures and will not tar.
For a frame bath, it is necessary to put insulation on the ceiling and walls, but for a timber and log bath, you can do without it. For example, if a sauna is made of a log, it is enough to pre-sew up its ceiling with thick boards - at least 6 cm.Mineral wool is most suitable as a heater for the ceiling - only it must be laid in a layer of at least 15 cm.
Video: insulation and finishing of the ceiling from the inside
Wall insulation
The best solution for wall insulation is a construction set made of materials that can be easily repaired or replaced.
The structure of the insulation of the walls of the bath resembles the device of a roofing pie
Video: insulation and foil upholstery in a pair of rooms
Thermal insulation of the floor in the bath
Finally, we will work on the floor. Indeed, a large amount of heated air usually leaves the room through it. Expanded clay is most often used as insulation for floors - it is an inexpensive and reliable insulation that prevents mold and condensation.
It is cheaper, of course, to sprinkle everything with slag, but expanded clay is more environmentally friendly and weighs less. When installing wooden floors, the material is placed between the logs. If a concrete floor is poured, then expanded clay is placed between each concrete layer.
Let's analyze the usual cycle of work on the insulation of a concrete floor.
Video: features of the device of the concrete floor in the bath
In addition to walls, floors and ceilings, attention is also paid to the insulation of doors, windows and window openings. They are treated with silicone sealants. It is customary to insulate external doors with natural materials. And it is not customary to save on them, otherwise in a few years, or even for the next season, you will have to redo everything.
The main task of the bath
: not only create good steam, but also keep it inside for a long time. This is especially true for a material such as a foam block, which, without proper insulation, willingly gives off heat, both inside the room and outside, which leads to rapid cooling.
It is noteworthy that the process of warming the bath begins
simultaneously with construction, from the foundation. It is recommended to use only those materials that are resistant to moisture, tolerate temperature extremes well, and are biologically difficult to destroy.
Some of the best heaters
are considered:
- Styrofoam;
- expanded clay;
- glass wool;
- basalt wool;
- jute felt.
All these materials have good thermal insulation properties, they are quite easy to attach, and are resistant to various temperature conditions.
Arrangement of the foundation
Arrangement of the foundation
Almost any soil is suitable for the construction of a bath from foam blocks. The space where the foundation is planned to be installed should be pre-leveled.
The level of the slope of the site is measured. To clarify it, it is enough to install metal or wooden rods with a step of about 1 m along the edges of an already dug trench, pull a rope between them and determine its horizontal position. If necessary, the level is changed artificially by digging a deeper trench in places opposite to areas with a strong slope. A slight difference in opposite edges is allowed, as it allows water to drain quickly, but too much tilt should not be allowed. If it is possible to choose a separate site for construction, it is necessary to give preference to areas with dense soil.
All debris is completely removed from the ground. The top fertile soil layer is also removed. It is imperative that all organic impurities are removed. If the ground is rocky, you will have to remove too large protruding rock elements. To compensate for the level of removed soil, backfill with cleaned soil is undertaken, which can be purchased separately.The complete elimination of all unnecessary parts from the entire surface of the earth will avoid rotting waste near the foundation after the construction of the bath, since this building, during active operation, is a constant source of moisture.
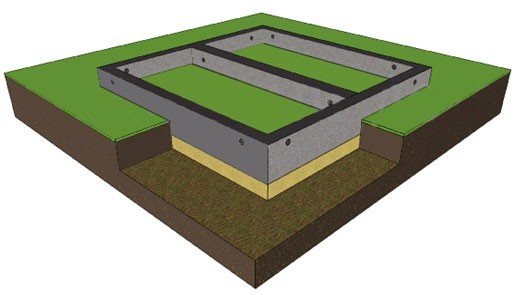
Foundation diagram
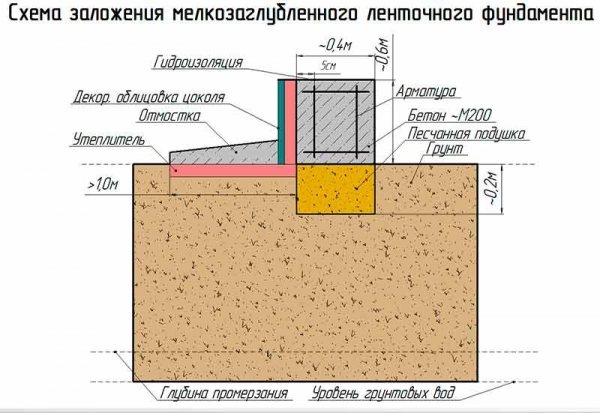
Usually, the basis for foam concrete baths is a strip foundation. If the structure of the building has only one floor, in most cases its shallow-buried version can be used, since it can withstand a moderate load from a relatively light building material. Special attention should be paid to the construction of the foundation, since the appropriateness of the foam concrete blocks and the durability of the entire building of the bath depend on its evenness and quality.
Trench arrangement

Trench arrangement
Foam blocks are strong enough, however, in the finished structure, they completely depend on the foundation. It should not be allowed to crack or warp, as the walls of the structure will change shape or break the integrity together with it. Depending on the depth of the future foundation, a trench is pulled out. The depth should be calculated separately for the sand bed and possible insulating layers, and not just for pouring pure reinforced concrete mortar. On average, the depth of the pit is from 50 cm to 1 m. Usually, a width of 30 cm is sufficient. According to this indicator, you can navigate only if the size of the foam blocks has already been assigned. It is necessary to ensure that the width of the foundation slightly exceeds the foam blocks. This is necessary in order to be able to freely lay all the insulating layers on both sides of the structure.
When deciding on the depth of the foundation, one should focus not only on the general indicators of the future bath, but also on the quality of the soil. In the case of clay and other weak soils, deepening should be carried out as low as possible. If the soil exhibits excellent characteristics and the weather conditions are moderate, a fairly compact foundation can be made. Separately, it is worth checking the ability of soils to heave and the presence of underground, melt water close to the ground. It is difficult to notice right away.
Photo of a trench under the foundation
This is how a prepared foundation trench, dug by hand, looks like
The level of heaving of soils can be clarified with a construction organization or geological surveys can be ordered. You should also inspect neighboring structures or ask neighbors about the condition of the soil. If the neighboring buildings are slightly skewed or the foundations are cracked, it is necessary to build a deeply buried foundation, as in this case this problem will be avoided. The foundation must be below the level of maximum freezing, and in cold areas requires additional thermal insulation.
Soil heaving forces
An easy way to equip a sewage system for foam block baths
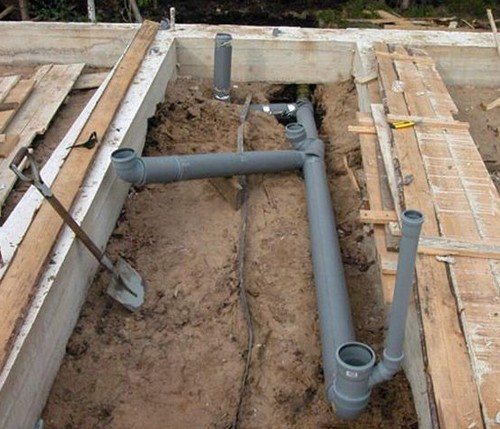
An easy way to equip a sewage system for foam block baths
A pit is equipped in advance or a separate drain is prepared in the form of a private sewer outlet, and, if possible, the system is connected to the central sewage system. In any place inside the structure, fenced off by the future foundation, you can create a special channel with a slight slope. Later, after laying the floor, a small hole is provided for it, through which the liquid will be removed from the room through pipes. It should be remembered that a pit or other place for drainage should be equipped outside the building contours.
Building the foundation
| Step | Illustration | Description |
| Step 1. | Sand pillow | The bottom of the trench is covered with an even layer of sand or gravel. The thickness of this backfill is approximately 20-30 cm. After its application, the material should be compacted. For this, water is sprayed onto the surface. You can also use pre-moistened sand immediately. |
| Step 2. | Formwork | Formwork is attached at the edges. Its thickness should not exceed 20 cm, optimally up to 10 cm.It is necessary to protect the concrete mixture from spreading. Wood planks and metal sheet materials are suitable. You can also use the fixed formwork, which comes with the assembly elements. The removable formwork provides for fastening with support posts or simply connected to each other with self-tapping screws, long screws. |
| Step 3. | Frame | Reinforcement mesh is made using special rods. Chairs for fittings or stones are installed, which also serve as a stand. Vertical reinforcing bars are installed, on which horizontal ones are attached. Elements should be mounted at all joints using welding or special steel wire. |
| Step 4. | Concrete mix is being prepared Fill | The concrete mix is being prepared. It consists of crushed stone, sand and cement, which are added in a 5: 3: 1 ratio. Immediately after bringing the concrete to a liquid state, it should be poured into the foundation structure, since if delayed, it may solidify before the end of the work. When pouring, air bubbles may remain in the concrete, therefore, to ensure the density and uniformity of the structure, it is necessary to release them by piercing the solution with a twig or using a deep vibrator. |
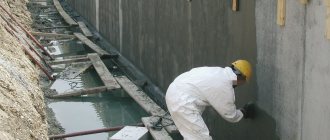
| Step 5. | Foundation tape hardening and waterproofing | The foundation must completely harden. For this you have to wait 3 weeks or more. If the weather is windy or rainy, it is necessary to wrap the foundation with waterproofing immediately after pouring, and in severe frosts, a heater is laid on top, which must be covered with waterproofing again. When the foundation is ready for use, it is necessary to cover it with one or two layers of roofing material, which performs the function of waterproofing. |
What materials can be used
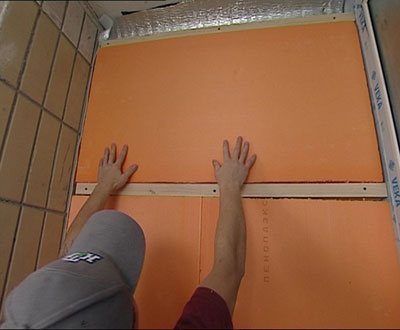
Fibrous, vapor-permeable and moisture-absorbing materials are not suitable for internal insulation work. In addition, it is necessary to avoid joints through which condensate will pass into the room. Therefore, such materials for insulation as mineral wool, penoplex (expanded polystyrene), liquid ceramics are completely unsuitable for these works.
Foamed polyurethane foam
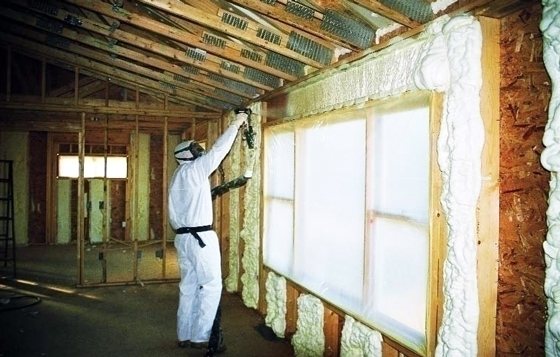
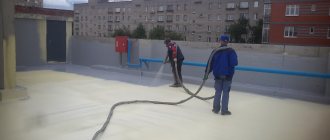
Applying foamed polyurethane foam to the wall
The use of foamed polyurethane foam will create a good water barrier and increase the thermal insulation properties of the walls.
However, the process of its application creates certain difficulties.
- In order to obtain the required thickness and an even surface, it will be necessary to make a formwork and fill it with parts... In this case, it will not work to use a metal or wooden frame, as it will then provoke bridges of cold and dampness.
- When the entire surface is processed, you need to close it with a layer of steam and waterproofing... To do this, a layer of polyethylene must be fixed on top of the polyurethane foam. It can be secured with laths, sealant or mastic.
- Since this is a material with a rather low density and strength, it will not withstand plaster... Therefore, you will need to make a plasterboard false wall on top. The frame will only need to be attached to adjacent walls, ceiling and floor.
- In this case, the dew point will be located either at the junction of the polyurethane foam with the wall, or inside it... Since air and moisture will not pass inside, condensation will not form there.
Double wall
Insulation scheme with a false wall
The next option is a double wall with underfloor heating as a thermal barrier.
- In this case, heating elements are mounted on the wall.... In frosts, when it is turned on, the dew point will move inside the wall.
- As in the first version, a second wall is mounted for finishing.... The insulation is attached from the side of the opening to the false wall while maintaining air gaps.
- However, this option will be very costly, and the high price for paying for electricity will also be added to the cost of installing heating elements.... In fact, you will not heat your home, but the outer walls.
Unusual use of the underfloor heating system on the wall
Penoplex and expanded polystyrene
Insulation of the loggia with penoplex
Despite the fact that expanded polystyrene is not very suitable for insulation inside because of the joints that will facilitate the penetration of moisture, it can still be used.
- Penoplex sheets have smooth edges and standard sizes of 100 * 100 or 100 * 50 cm, but they still cannot be perfectly joined... As a solution, you can try to fit them as tightly as possible and coat the ends with sealant before fastening.
- If we insulated the facade with penoplex or expanded polystyrene, we would apply the solution with separate cakes and press the sheets against the wall... But inside the building, the instruction is completely different, since air voids will form, in which condensate will begin to accumulate. Over time, this can lead to the appearance of fungus and deterioration of the finish.
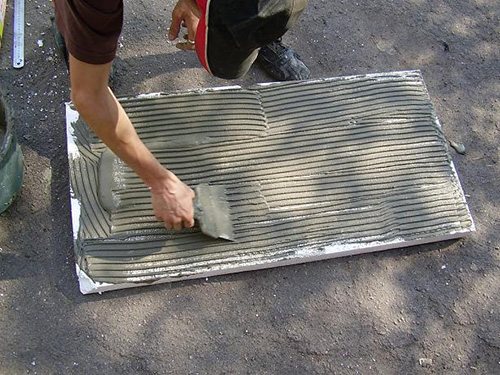
Applying the adhesive with a notched trowel allows the adhesive to be evenly spread over the surface
- To avoid this, you need to apply the glue evenly, over the entire area of the sheet.... Before applying, you need to treat the surface of the insulation with a needle roller so that the adhesion is better.
- To use this method, the presence of even walls is important, so it may be necessary to level them with a moisture-resistant mixture in order to avoid voids... The standard fastening to the umbrella dowels will not work either, since they will break all the tightness.
Advice! Carry out work only in the warm season, and dry the room as much as possible before starting. Use heat guns and space heaters to keep indoor humidity as low as possible.