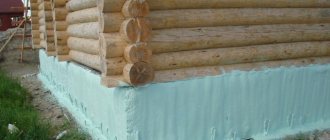
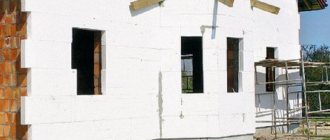
Having insulated the facade of the house, the owner is always faced with an unpresentable appearance of the insulation itself.
Since most often it is used as thermal insulation Styrofoam or penoplex, that is, a good way that will help get rid of this problem is facade plaster on foam plastic. The application of any decorative layer will protect the insulating layer from the negative effects of the external environment.
Protective functions of plaster
If polystyrene or penoplex is chosen as insulation, then with constant exposure to moisture and the sun, the material will eventually become very fragile and become unusable. Also, everyone knows that this material can be easily damaged mechanically, that is, broken, scratched or punctured.
It is almost impossible to somehow fix these damages, you need to replace the whole area. If foam plaster is used, then it performs a number of protective functions, due to which the insulation will last a very long time. A properly finished facade with plaster serves as a barrier against:
- The appearance of holes and dents with mechanical damage.
- Exposure to high humidity.
- Sudden changes in temperature, as well as from prolonged exposure to heating or freezing.
- Combustion. Styrofoam is highly flammable, but plaster will increase the level of fire safety.
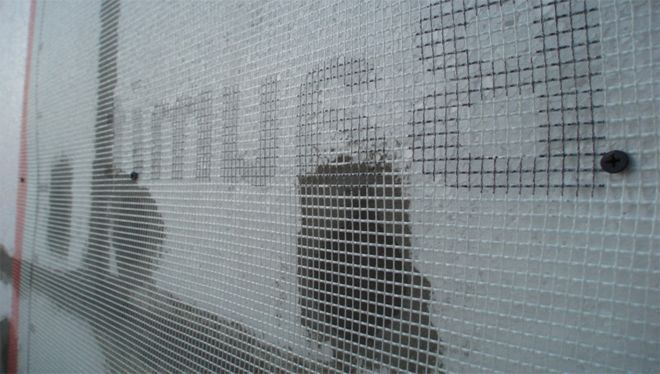
Fixing the mesh
The beginning of work takes place with cutting the mesh material, which is realized in roll form. The mesh is cut into pieces that are convenient for the craftsman to use.
Plaster mortar
Usually cut with a length equal to the height of the painter, it will be convenient for him to glue such a piece.
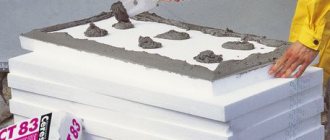
The solution is prepared strictly according to the instructions.
It describes in detail the consumption of the mixture per sq. M., With what working speed the batch solidifies.
From this data, knowing your abilities, you can knead so much so as not to spoil the material, to have time to scatter it on the walls, and it does not turn into a stone piece.
Mesh installation is not an unfounded statement, but a necessity for a strong fixation of the plaster layer. Thanks to the mesh, the plaster is firmly adhered to the wall, there will be no cracks and dumps.
There is a large selection of similar material on sale, the manufacturer, in addition to quality with a difference in density and cellularity, produces them in different colors. The best option is a product with good density and resistance to alkaline substances.
Sticking the cut pieces begins with difficult areas, these include:
- corners
- slopes
- openings
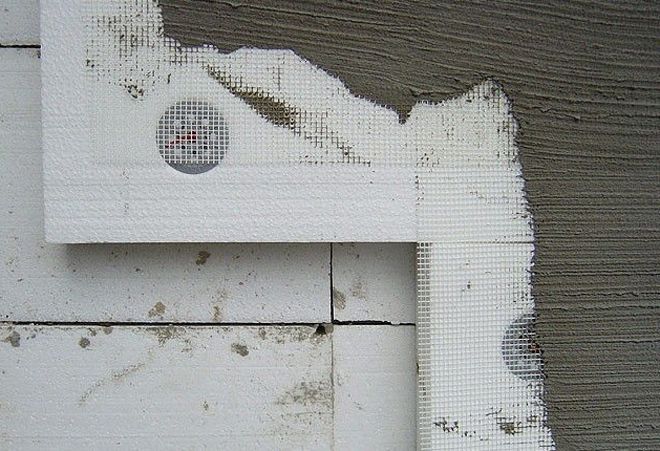
At the corners, the mesh is mounted as follows:
- cutting takes place in strips of 35 cm wide and one meter long
- the stripes are folded into two parts
- the mixture is applied to the corner surface using a spatula, according to the size of the cut parts
- the mesh strip is applied to the mortar laid at an angle
- work with a spatula, iron on the mesh, the solution will begin to appear through the cells
- the mixture is smoothed with stitching movements, from top to bottom and from corner to edge, avoiding the formation of waves
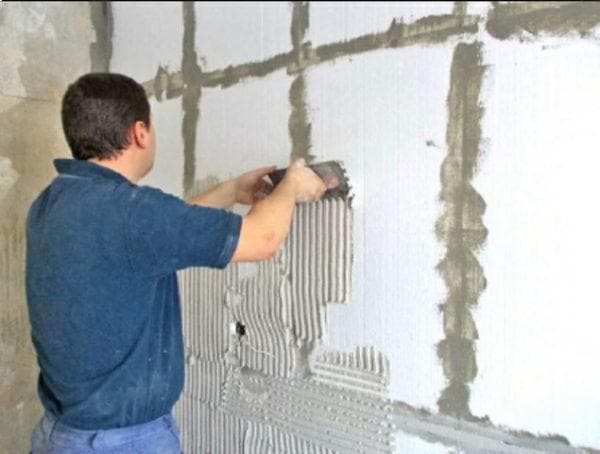
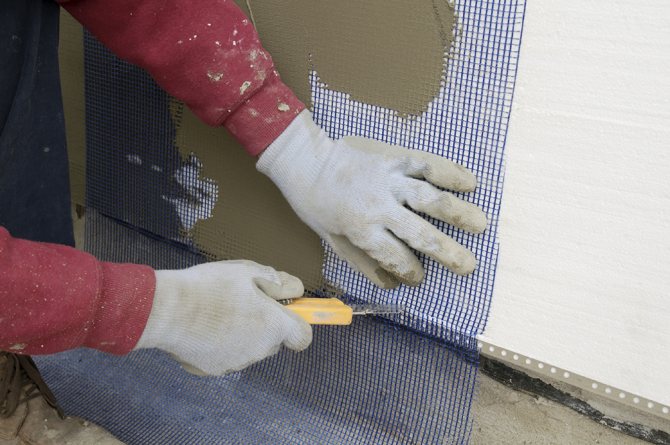
The next step is to start assembling the pieces on wall surfaces:
- A small amount of mortar is spread on a wide spatula from a narrow one. Smear on the wall along the length and height a little more than the cut mesh.
- A prepared piece is applied and passed over it with a spatula. Mesh cells must be completely filled with mortar. If a thin layer is applied, insufficient for drowning the product in it, an additional layer is applied by applying a secondary coating to the surface. Such actions take place until the mesh is immersed in the liquid mass.
- Moving to the side takes place with each new glued area. It is necessary to carefully work with a spatula, leveling out excess overlays. Make sure that you get a flat area without bumps and excess mortar. Each mesh sheet is overlapped with a 10 mm gap.
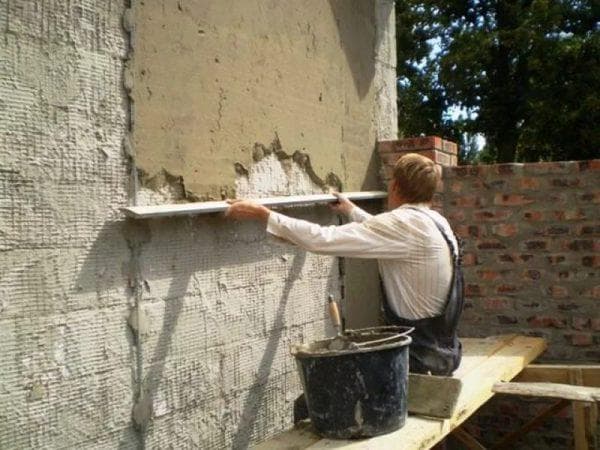
External plaster
The treated wall is given time to dry well and grouting begins.
This procedure is not loved by everyone, but it is necessary.
It will allow you to remove all the unevenness of the site after gluing.
Drying will end when the mortar has completely hardened, otherwise the mortar mass will be pulled behind the emery cloth or plastic float, removing the mesh plates from the place.
In warm weather, a few hours are enough for the base to harden. For an environment with high humidity, it will take a day.
Rub the glued areas with a grater in circles until a flat, smooth area is formed. A piece of wet mortar can get on the surface of the trowel, the plate must be replaced with a new one.
How to choose plaster
In order to protect the insulation material, manufacturers suggest using special formulations designed for application to foam.
There are only two types of them - acrylic and cement-sand. What is the best first or second facade plaster for expanded polystyrene now we will figure it out.
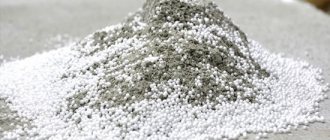
Cement-sand
If we talk about the price, then cement-sand mixtures are much cheaper. And, of course, the most popular ones. But the attractive price does not give a long-term result.
Such a coating will last only 2-3 years and then the integrity of the layer will begin to crumble, as a result of which the insulation will suffer from the external environment.
So that you do not have to re-install the heat-insulating layer, you should re-plaster beforehand, removing the unusable coating. It must also be said that cement-sand mixtures are gray in color. To give a more presentable look to the coating, you need to use staining.
Acrylic
Acrylic mixtures are an order of magnitude more expensive, but they will last much longer. In addition, they fit well on the base, you can choose mixtures that are already painted and at the same time you can make not only a smooth coating, but give it an interesting texture, for example, a bark beetle, a lamb or rain.
Apart from the high cost, the only drawback of acrylic mixtures can be considered color instability. Bright colors fade quickly when exposed to sunlight.
Considering all the advantages and disadvantages of plaster mixes, it should be said that it is better to choose acrylic as a decorative finish. They will last much longer and look much more attractive.
What plaster is needed
Before proceeding to the application of plaster to the foam surface, it is necessary to decide on the choice of the type of decorative material. Today, the most popular are:
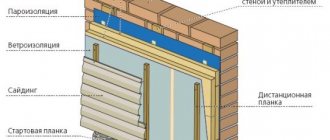
- Mineral compositions... When developing them, river sand, water and cement are used. Acrylic plaster is considered very popular. It is based on acrylic resins. This material has the ability to pass air, while not blocking the structure of the material. Has high vapor permeable properties. But how to insulate a brick house from the outside under plaster, and which material is the best, you can see here.

Facade plaster on polystyrene - Thin-layer materials... Such plaster is characterized by a wide range of shades and excellent decorative properties. The characteristic features of such a solution are high vapor permeability. When laying out the material, it is necessary that the layer thickness does not exceed 4 cm. But what is the texture of seamless decorative plaster, you can see in the article by the link.
- Cement-sand mortar. But this plaster has one significant drawback - it is low plasticity.As a result of this, the process of operating the house on the facade cracks are formed. But the advantages of plaster include the low price, ease of preparation of the solution and ease of installation.
Cement-sand mortar for plaster - Silicate. It is sold in buckets. It has an alkaline reaction and special care must be taken when working with it. On sale you can see the material with the addition of silicone. It has increased plasticity, and upon application it forms a uniform layer. In addition, such plasters have an increased resistance to fungi, algae and mold.
Perhaps it will also be useful and interesting for you to learn about the consumption of facade paint on plaster.
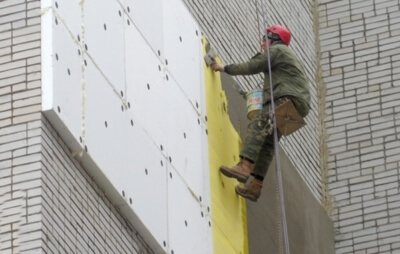
Training
After insulating the facade with foam, you need to carefully examine all the joints. If there are gaps somewhere, they need to be closed with polyurethane foam or sealant. This will protect against cold penetration. In addition, you should pay attention to how even the coating turned out.
How to properly plaster the facade using foam plastic? To check this, you should apply a building level or rule. If there are irregularities, they need to be eliminated.
The foam itself is a very smooth material and any mixtures or adhesives do not fit well on it. In order to increase the adhesion properties, you can use special primers or a regular needle roller. The tool will make small holes in the base, and the applied solution will penetrate into them and securely fix.
If a primer is used, then before applying it, you need to clean the base from dust and dirt that may settle during installation.
What tools will be needed for work
Any construction work begins with the selection of the right tools and the acquisition of the necessary materials. For finishing with plaster you need to purchase:
- container to prepare the solution
- construction drill with mixing attachment
- corners
- grout paper or plate
- scissors
- set of spatulas
- paint rollers
- plaster
- primer
- putty
Each master has his own abilities, developed over the years, and a preference for one or another brand of plasters. A mixture of a universal composition is used, you can immediately glue the mesh to it and level the solution on the wall.
Building mesh application
A different type of materials is used for each operation, which is better for the consumer to decide.
With the help of a universal plaster, it is possible to fix the obligatory masking net on the wall, and plaster the top layer quite decently with an economical consumption.
If you paint the walls, excluding the addition of dyes to the solution, you will need surface putty.
The material is also bought for the facade, after finishing, a smooth, smooth wall will turn out, applying paint of any color will give the building an interior comfort that can fit into any design landscape. The preparation of the mortar mixture must comply with the instructions on the packaging bag.
Do you need a reinforcing mesh
Even if the foam is prepared for applying the mortar using a primer, the plaster mixture is still not applied directly to it. In order to get a more reliable coating, a fiberglass reinforcing mesh is used.
It is best to choose a mesh with a density of 130/160 g / m2. On such a reinforcing canvas, plaster on foam plastic will fit well, but it is difficult to work with it when finishing corners.
How to do it right?
Unlike a concrete or brick wall, the coefficient of friction of foam boards is very low, therefore there are special plaster mixes for slippery surfaces, for example, for foam boards:
- "Stolit".
- Ecomix.
- Ceresit.
A regular solution made from sand, cement or lime will not work in this case.
These mixtures are sold in dry form, they are packaged in bags of different weights. On the packaging, the manufacturer indicates detailed instructions for cooking.
Attention
Professionals advise using a mixture of the same manufacturer when working at the same facility, since the solutions have differences in color, texture, viscosity.
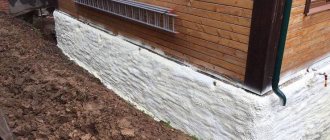
Outside
Plastering of foam boards from the outside is carried out in dry warm weather. If it is freezing outside or it rains, work must be stopped.
You should not try to close all the irregularities and cracks on the wall in one layer. The outer layer assumes a thick basting, so it is done in 2-3 approaches. First, there is a thin soil layer, after drying, a thicker layer is applied and to consolidate the success, the slabs can be plastered a third time. Such a triple protection will reliably cover the soft foam from the effects of ultraviolet radiation, wind, and rain.
With mesh
The most reliable way to plaster foam boards is with the preliminary installation of the mesh. But before that, you need to make sure that the plates themselves are additionally fixed with flat head screws. The mesh allows you to make a thick layer of plaster on the plane of the slabs, which naturally increases their mass.
- The mesh is attached to the plaster primer applied to the slabs. It should not be very thick, because the task is to glue the mesh to the slabs, and not hide it in a layer of plaster.
- After applying the first thin layer, a mesh is glued onto it. When the plaster is dry, trim off any excess mesh at the edges of the wall.
- Then a second layer of plaster is applied. So he just can completely close the network. If this fails, then after drying, you can put another layer - finishing.
After finishing the work, there are already 6 or 7 layers of insulation on the wall - a primer on the wall, an adhesive solution for foam plates, the plates themselves, a primer layer of plaster, mesh, the main layer of plaster. If someone thinks that this is where the finish ends, then he is mistaken.
We offer you to watch a video on the topic "Technology of plastering extruded PPP":
How to plaster correctly
All work begins with cutting the mesh for the corners. If slopes are to be processed, the length of the mesh should correspond to the length of the slope, while the width is 30 cm. For the corners of the house, 1 meter will be measured.
This length is much easier to work with. The width is the same as for the slopes.
Having prepared the solution according to the recipe indicated on the package, you can start plastering.
Do-it-yourself styrofoam plastering starts from the corner, and so let's get started:
- With a small spatula, apply the mortar to a large spatula. Then the solution is applied to the wall. The length of the strip should correspond to the length of the reinforcing mesh. How to properly plaster a wall on foam plastic video? In this case, the width on one wall will be exactly half the width of the grid plus 5-10 cm.
- The reinforcing mesh is folded in half across the width and applied to the mortar.
- We take a wide spatula and, smoothing the mesh, immerse it in the solution. The reinforcing element must completely penetrate into the plaster solution. If the previously applied layer is not enough, then it is applied additionally over the mesh. The spatula must be moved from top to bottom and away from the corner. This will create a smoother surface.
- Further on the wall, applying another solution, which will be slightly larger in size than the next piece of mesh.
- Each subsequent piece of the reinforcing mesh is superimposed on the previous one, by 5 cm.
- Everything is leveled and smoothed with a wide spatula. This is done throughout the area.
Plastering, instruction
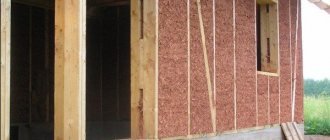
The question of how to plaster foam is asked by everyone who happens to be the owner of a cold corner apartment or a country house.Because the easiest way to insulate such a home is to clad the outer walls with this material. After that, accordingly, it is necessary to carry out plastering work on the foam.
Plastering a foam plastic facade with your own hands is not difficult. However, knowledge of certain subtleties does not hurt.
Solution preparation
You should not try to prepare the solution yourself. It is better to buy a ready-made mixture of proven manufacturers in specialized stores. You can recommend "Ceresit", "Economics" or "Stolit" (these are mineral plasters based on cement and sand). Pour the mixture into a bucket of water in accordance with the instructions, mix with a mixer nozzle on a drill or a regular spatula. The first option is preferable, the solution will mix better. Let it stand for 5 minutes and mix again. Now you can get to work.
Important... As practice shows, it is better to make a universal foam mixture a little thinner than the manufacturer recommends.
Plaster mesh, why is it needed. Mesh installation
Plastering grid required
Some "craftsmen" recommend plastering directly on the foam, covering its surface with glue or primer. They motivate this approach by the fact that polystyrene is a material on which none of the plasters will last long. Well, if it falls off anyway, then what's the point of bothering with the mesh. This approach is incorrect, because reinforcing the surface of expanded polystyrene boards with fiberglass mesh makes the coating stronger.
We cut the purchased mesh into pieces about a meter wide, as high as our working surface. If you decide to plaster a facade covered with foam with your own hands, take care of an assistant. First, it's easier to work together. Secondly, work can be done faster.
We apply a layer of the prepared composition to the foam, covering it with a surface the size of our piece of mesh. We work with a notched trowel. Then quickly but carefully press the mesh to the surface. You need to press well, completely pressing it into the composition. Then you need to smooth the surface with a spatula. Thus, the reinforcing mesh will be completely covered with mortar. We will glue the next piece with an overlap (about 8 - 10 cm, we do not coat them with a solution beforehand, otherwise the seam will turn out to be rough). In a similar way, we close the entire facade of the building with our reinforcement.
Advice. First, you need to close all corners with a reinforcing mesh and only after that proceed to reinforcing the facade.
Grouting mesh
Grouting mesh over foam
The surface that has dried up during the day must be wiped off. To do this, we take a wooden scraper, soak it for a while in water and gently rub it. You can use a plastic trowel with an emery cloth attached to it. We work without fanaticism, bringing the surface to an almost perfect condition.
Applying a leveling layer and trowelling it
At the end of the grouting work, proceed to the application of the leveling layer. We prepare a solution similar to the solution for gluing the reinforcing mesh, follow the instructions.
Advice. It is better to make the solution more liquid, it should drain from the spatula. This will make the coating thinner.
We apply the composition in small zones, overlapping the places of their joints. It is important not to place the joints of the grout zones over the joints of the mesh. Let the leveling layer dry for a day (but not more than 4) and rub it in the same way as we rubbed the mesh. Our base is now ready for the topcoat.
Primer
The dried and worn façade must be primed. This will improve the adhesion of the finish coat to the substrate. We use deep penetration primers containing quartz grains, for example, Ceresit CT 16. If you only plan to paint the resulting surface, then you can use a regular primer. For application we use a short-nap roller.We wet it so that the applied composition does not run down the wall.
Finishing the facade
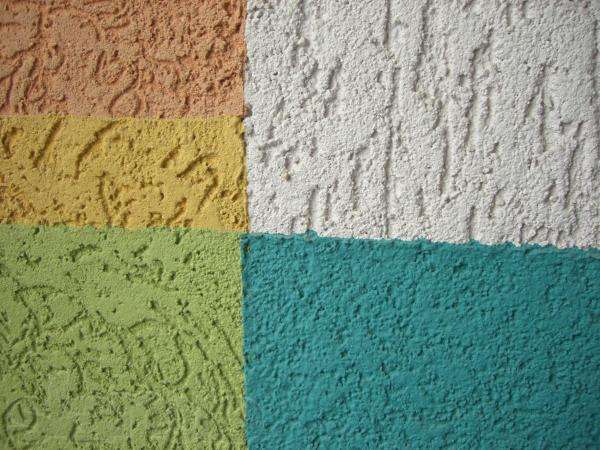
Varieties of finishing plaster
For finishing, we choose the option of plaster in accordance with our financial capabilities and desires. It is better to opt for acrylic plasters. They have some downsides. For example, they tend to attract dust. Therefore, if the house is located near the road, opt for mineral compositions.
If your home is located away from busy dusty roads, acrylic plaster is your choice. It is sold ready-made, in buckets. It should be applied in a thin layer, almost immediately after application, the surface texture is formed in accordance with their preferences (lamb, bark beetle, rain, spiral).
Important... This instruction is not the only correct one. Therefore, in addition to the knowledge gained, check out the video on the Internet, which will help you clearly understand the issue of plastering the facade with your own hands.