What is it?
When we talk about plastering work, we mean the complexity of their implementation and the need to attract experienced craftsmen. However, the problem is that ordinary cement plaster does not solve the problems of wall insulation.
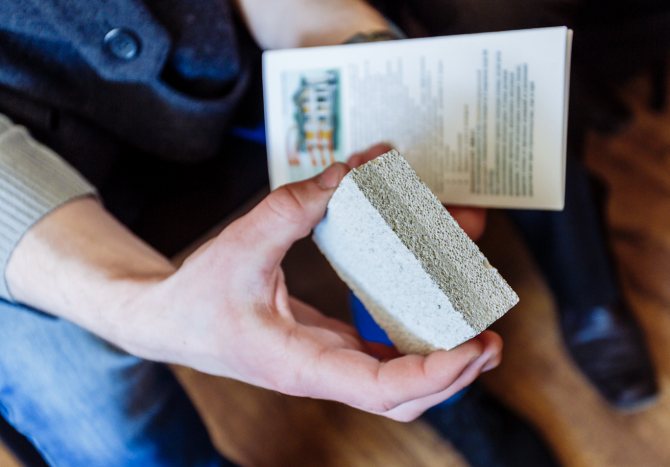
In order to create an additional insulating layer, heat-insulating plaster is used for external and internal walls. The material has a high energy efficiency, and its cost is quite acceptable.
What does it consist of?
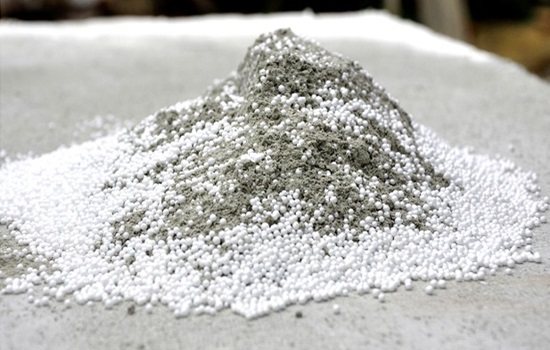
Typically, the plaster material is a mixture of sand and cement, which creates a coating with a density of up to 1,800 kg per cubic meter and a thermal conductivity of 1.2 W / mS.
Heat-insulating plasters are made of cement and fillers, which create air bubbles in the monolithic coating, which reduce the density and the ability to transmit heat. Various materials can be used as a filler:
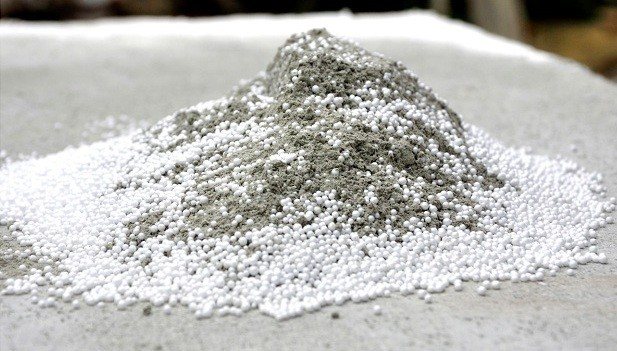
- perlite. It is formed when volcanic lava solidifying on the surface of the earth comes into contact with moisture. In the process of hydration, rounded nuclei, called pearls, are formed. A distinctive feature is a high porosity, the ability to absorb water in large quantities, ten times its own weight. In the preparation of the plaster mixture, as a rule, expanded perlite is used - small granules of grayish or white shades;
- vermiculite. A representative of a group of minerals, outwardly resembling small-sized scales of a brown-golden color. Swells from heating, fills with air. In this form, it is used in various industries, including construction, in the preparation of light concrete mortars and warm plaster compositions;
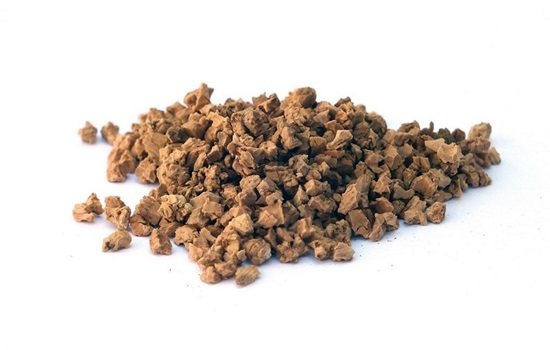
- small expanded clay chips. For production, special grades of low-melting clay are used. The granules are small, do not exceed five millimeters, and are often compared to sand. The filler is lightweight, airy, with minimal thermal conductivity;
- sawdust. Waste obtained from wood processing is also used as a filler. With their help, the plaster mortar is provided with porosity, while the structure of the mass and its homogeneity are completely preserved;
- polystyrene foam granules. They are used as insulation in the preparation of plaster mix. They are a product of the chemical industry, their analogs of natural origin are inferior in resistance to fires, biological influences and the period of operation. But they do an excellent job with the assigned function - they give the plaster mass porosity and reduce its ability to transmit heat.
In addition to the main listed components, modifiers can be added to the plaster mixture that increase elasticity, increase the service life, and protect against cracking.
Manufacturers add plasticizers and water repellents to dry formulations; for self-preparation, many use microfiber, detergents and ready-made modifiers.
Plaster with insulation, applied to the walls, is not inferior in its qualities to an analogue of sand and cement. Any kind of finishing is applied to it.
Technology of wall insulation from the inside with warm plaster
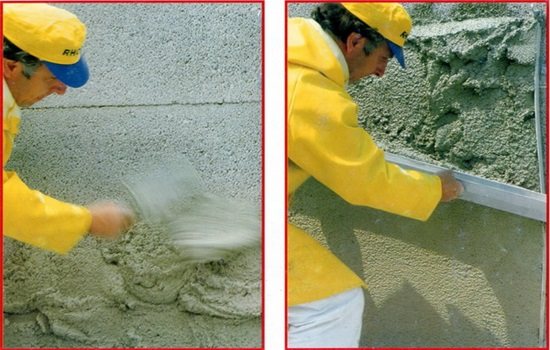
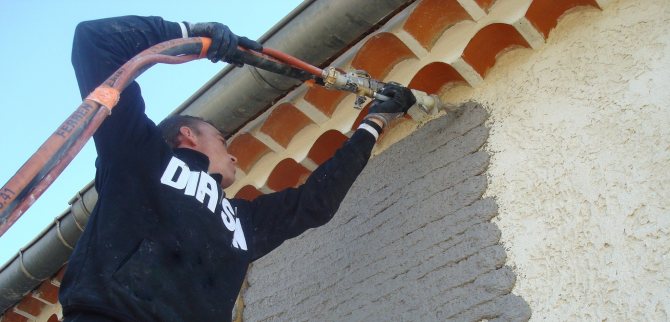
Warm plaster is applied to the walls by hand and machine. In the first case, a spatula, trowel, grater and other painting tools are used for work, in the second - a special mixing pump and a mortar gun.
Manual way of plastering walls
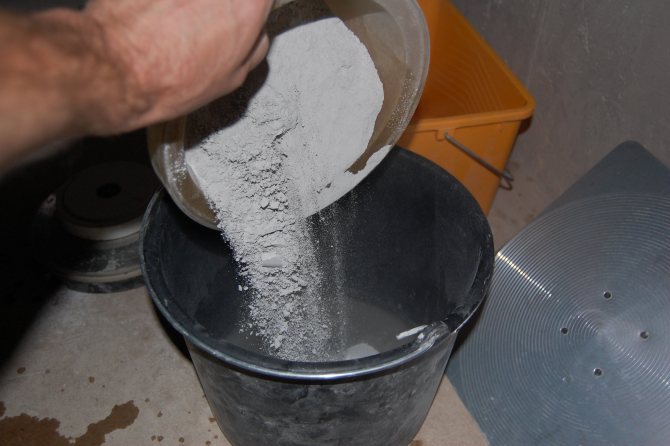
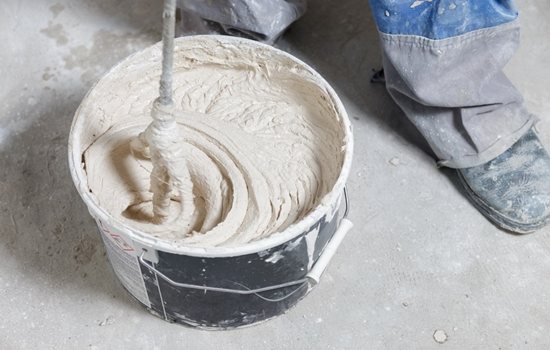
Before starting work, the contents of the entire package of warm plaster must be poured into a suitable container with a volume of 50-100 liters, add water in the amount specified by the manufacturer of the material, and then mix everything using a construction mixer. In this case, you need to know that the working capacity of the finished mixture in time is 2 hours.
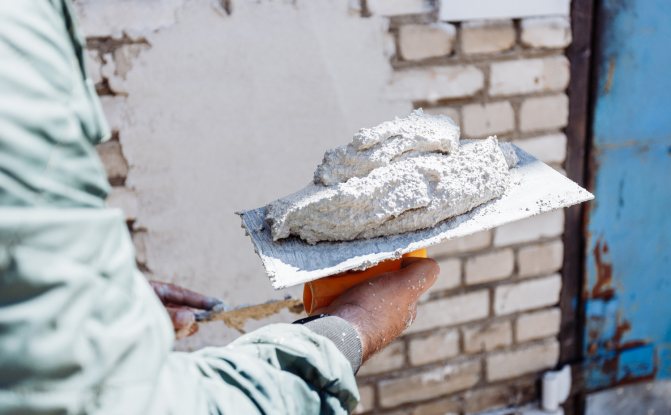
It is not difficult to check the required consistency of the mixture. To do this, you need to scoop up a little mortar with a trowel and tilt the tool strongly. If the plaster does not fall off from its surface, it means that it has acquired plasticity and is ready for use. Its consumption with a layer of 25 mm will be 10-14 kg / m2 of dry mixture, with its thickness of 50 mm - 18-25 kg / m2, respectively.
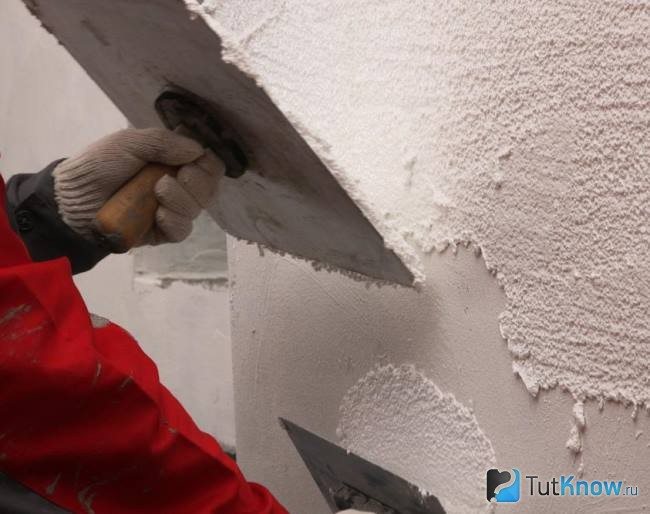
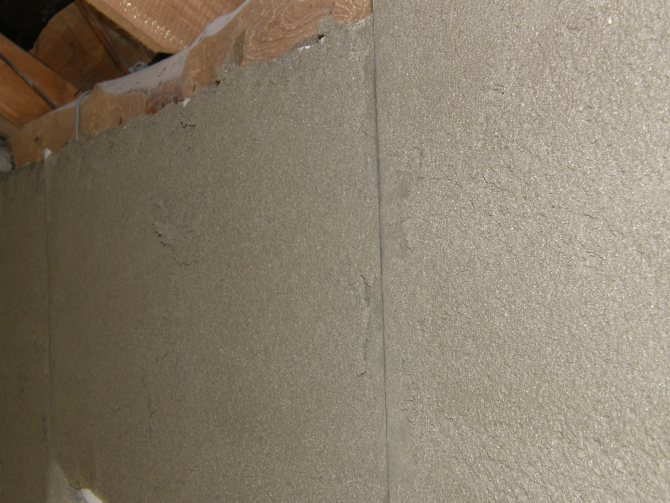
The insulating mixture should be manually applied to the walls in layers, the thickness of each layer should not exceed 20 mm in order to avoid the mortar from sliding off the surface under the influence of its own weight.
Each next layer of plaster should be applied no earlier than 4 hours after laying the previous one. Drying time of the coating may increase at high humidity and low air temperatures, for example, in autumn.
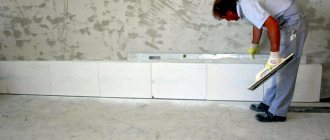
The working mixture should be applied to the primed wall surface from the bottom up, using a wide spatula, beacon profiles and a rule. The process of applying warm plaster without beacons and the quality of the resulting coating must be controlled using a 2 m long strip, a plumb line and a hydraulic level. The flat plane of the plaster coating can be checked by attaching a two-meter rail to it with an edge, as a rule, there should be no gaps between the tool and the wall. Small deviations of the finished coating from the horizontal or vertical, no more than 3 mm per 1 running meter, are allowed.
The removal of the lighthouse profiles from the coating should be done 4-6 hours after the completion of the main work. The vacated cavities must be repaired with a plaster mixture and leveled with a trowel.
It is recommended to check and accept works for delamination, curvature and cracking of the coating no earlier than 3-4 weeks after the completion of the plastering of the walls.
Mechanized method of plastering walls
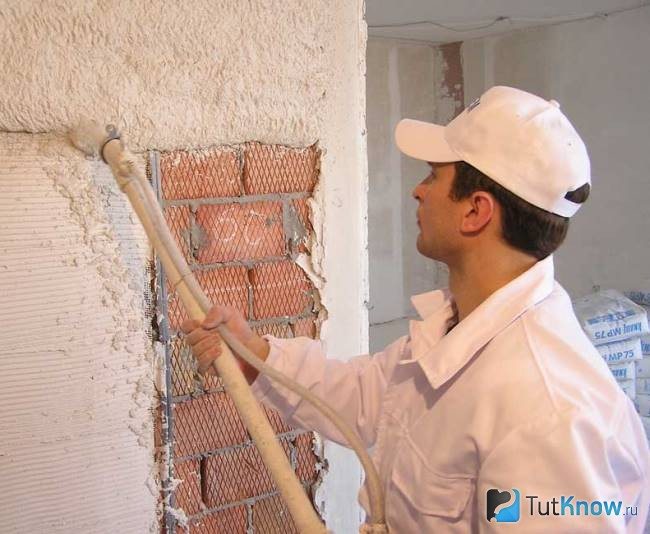
To apply a warm plaster coating by a mechanized method, it is necessary to first prepare the mixing pump for operation, and then pour the dry mixture into the machine's hopper. After that, in accordance with the desired consistency of the mixture, you should adjust the dosage of water with a pump. It should be about 500 l / h. Its exact value depends on the temperature in the house and the material of its walls.
After preparing and turning on the pump, the mortar gun, when distributing the mixture over the wall surface, must be held at a distance of 30 cm and perpendicular to it. The thickness of the plaster layer during application can be easily adjusted by the speed of movement of the mortar gun. The smaller it is, the more powerful the layer and vice versa.
Surface treatment should be done from the top corner downwards and then from left to right, while forming grips 0.7 m wide. The reciprocating motion of the gun should be such that the center of the spray mixture is located on the lower edge of the already applied plaster. The previous and subsequent grapples should be overlapped on the left side by 10 cm.
As in the previous case, the plastered surface must be leveled according to the rule, and after the mixture has dried, remove the lighthouse profiles and fill the empty channels with mortar.
After the end of the plaster spraying, the solution supply should be stopped by closing the air valve on the gun. Flush the pump, hoses, gun and tools immediately with water.
Important! The plaster mixture should not remain static for more than 15 minutes while in the pump or hose.
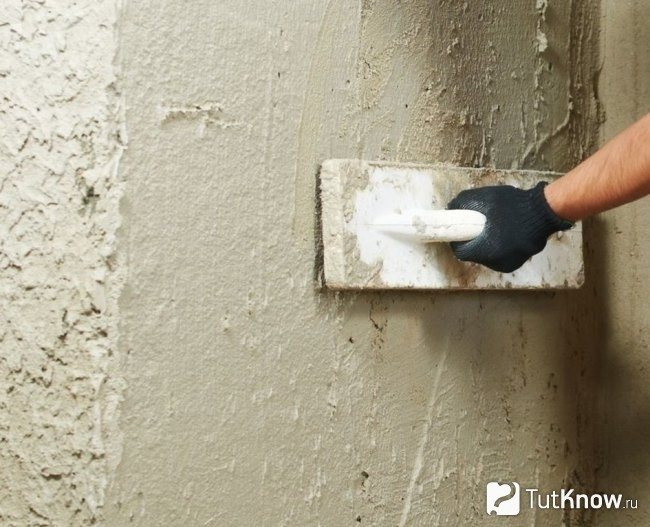
Finishing layer device
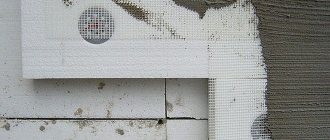
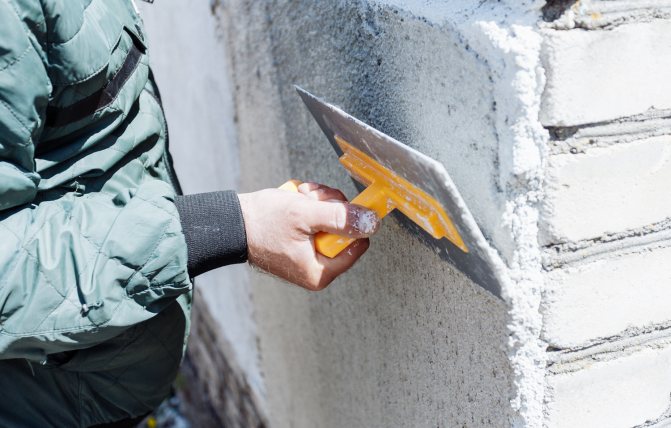
As already mentioned above, the walls need to be insulated with warm plaster made on the basis of polystyrene granules in finishing. Before applying the finishing coating, the trowel and the container intended for preparing the working mixture in it must be cleaned of all foreign particles that can disturb the appearance of the coating during its processing.
The top coat should be applied to obtain a uniform and presentable wall surface. Its thickness usually does not exceed 5 mm. After the finishing coat has been applied, it should be trowelled using a 300 mm metal or plastic trowel.
How to insulate walls with warm plaster - watch the video:
Summing up, we can conclude: warm plaster is a good alternative to other thermal insulation materials. It is especially effective for double-sided wall insulation. At the same time, the outside of the building additionally receives a beautiful finish, and from the inside it is environmentally friendly and reliable insulation.
Leading manufacturers
This insulating plaster has been produced recently, but manufacturers have already begun to compete. Today, the following brands are especially popular:
- mix "Umka". A renowned material, excellent for interior walls. The basis is made up of granular silicon balls. The composition is distinguished by good vapor barrier, resists moisture, protects against extraneous sounds, and retains heat perfectly. The filler does not smell, does not harm the human body. Granules add extra strength to the surface. After applying such a composition, there is no need for priming or wall reinforcement.
- "Bear" or "Warmix". Some confuse these building materials, although it produces them in an untreated state, represented by a dry mixture, immediately before use, diluted with water in the right proportions. The ready-to-use mass is characterized by high adhesion to various surfaces, which makes it possible not to cover the walls with primers. This building material creates good vapor barrier and protection from extraneous noise, it is used for outdoor finishing work.
- Knauf. A universal product approved for use on any surface. Even concrete floors are plastered and insulated with such a mixture. The composition can be applied manually or by machine mechanisms to save working time.
Views
From a technical point of view, the plaster composition has the desired properties due to the fact that it is based on insulating materials.
According to the composition of the mixture, they are divided into three types:
- plaster mass on a vermiculite basis. The additive is produced using thermally treated rock of mountain origin. Expanded vermiculite has antiseptic properties, protects walls from fungal formations. The mineral is light, it is poured into ready-made dry compositions;
- mixture with expanded polystyrene granules. Excellent material for storing heat energy. The composition contains cement and lime, filling components and special additives. Suitable for all surfaces;
- sawdust plaster. It is not able to withstand the effects of a humid environment, therefore it is not used for outdoor decoration. When insulating the inner walls with this composition, please note that during solidification, the room should be constantly ventilated. This type of plaster is applied to wood and brickwork and hardens within two weeks.
Separately, it should be told about the Knauf Grünband heat-insulating plaster composition. This product line is known to many, represents the most popular formulations.
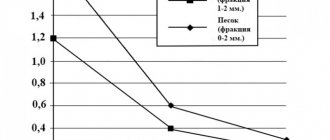
Fractions of the mixture do not exceed one and a half millimeters in diameter, application is possible manually and using electrical equipment.
This mixture is used for finishing facades, basements, and other rooms with a high moisture content.In addition, with the help of plaster, the facade surface is strengthened, the walls receive additional protection from mechanical damage, the formation of cracks is completely excluded. The structure of the plaster mortar is such that it can be used for decorative finishing.
Installation methods
Instructions for preparing the ready-mixed mixture are usually indicated on the package. To prepare a solution at home, a binder (cement, lime or gypsum), water and a free-flowing filler are mixed in a 1: 1: 4 ratio. The mixture is thoroughly mixed until the consistency of thick sour cream, after which it can be applied to the cleaned surface.
Plastering of internal walls is carried out according to beacons, the thickness of the applied layer warm plaster should not exceed 1 cm in one pass. If it is necessary to increase the thickness of the coating, then the first layer must dry, otherwise the plaster will fall off under its own weight. It is impractical to make a layer thicker than 3 cm, the thermal insulation properties are reduced from this, and the load on the base becomes critical.
Facade insulation plaster applied in a thin layer: 3-4 mm in the first pass, no more than 1.5 cm in total after preliminary application and drying of the reinforcing layer.
Advantages and disadvantages
The main advantages are:
- wear resistance, no deformation changes;
- high strength indicator;
- the absence of components in the raw material that pose a danger to human health;
- resistance to negative temperature conditions;
- high adhesion qualities;
- the ability to use on any type of surface;
- reinforcement is not required in most cases.
Unfortunately, there are also negative aspects:
- the thermal insulation capacity of such a composition is much lower than that of classic insulation materials. To achieve a similar indicator, it will be necessary to arrange a plaster layer that is one and a half to two times thicker than the usual heat-insulating layer;
- the mixture is rarely used as a finish. After drying, it requires final processing with materials that are more suitable in their composition than others.
Warm indoor plaster mix is not ideal. Like other goods, it differs in its positive and negative properties.
How to make the mixture yourself
You can prepare a plaster for insulation with your own hands by purchasing all the materials necessary for this on the construction market. So, we need cement, a material with a porous structure, plasticizers.
The porosity of the components allows the plaster mixture to perform insulation functions, gives it vapor-permeable properties, giving the walls the ability to "breathe". Mold does not form on such materials, because there is no main source for this - dampness.
The use of plasticizers for the cement base gives the mixture good plasticity and ensures adhesion to supporting bases.
For this reason, thermal insulating plaster compounds differ in characteristics that allow them to be used on concrete, wood, brick and even ceramic surfaces.
Technologically, the process of preparing a plaster mixture looks like this:
- one share of M500 grade cement is taken;
- four parts of perlite grains or vermiculite are poured;
- water is poured in such a way that the mixture gets a consistency resembling sour cream;
- plasticizers are taken at the rate of 50 g for each bucket of cement.
Plasticizers are diluted in water, the cement is thoroughly mixed with the granules. Water is poured into the dry mixture, mixing is performed until the required plasticity. The solution settles for fifteen minutes, after which it is completely ready for use.
Do-it-yourself plaster mix will cost you much less.
Do-it-yourself warm perlite plaster
You probably already noticed that all compounds for warm plaster contain components that determine their thermal insulation properties. Most often it is perlite or vermiculite, there are mixtures with expanded polystyrene. It is their low thermal conductivity coefficients that allow, on average, to obtain good values for finished coatings. By using these additives together or in place of certain fillers such as sand, as well as binders such as gypsum or cement, you can be sure of mixing the mixture with the desired properties.
Unfortunately, the prices for ready-made mixtures are not inspirational. But what if you prepare the solution yourself ?! Moreover, individual components such as cement, perlite, lime are relatively inexpensive. For example, a ton of M500 cement can be bought for 3000-4000 rubles, 20 kg bags of slaked lime - 170 rubles each, perlite (grades M75 or M100) - about 1500-2000 rubles. per cubic meter If the volume of work is large, and the budget for carrying out is limited, then it's time to "chemistry". We offer you several recipes for making warm perlite plaster with your own hands.
- 1 part of cement to 1 part of sand and 4 parts of perlite (calculated by volume) is mixed with water until the required consistency is obtained (thick sour cream);
- the proportion of cement and perlite by volume is 1 to 4. So, for 375 kg of cement, approximately 1 cubic meter of perlite sand is required. The mixture is mixed with 300 liters of water; PVA glue in a volume of 4-5 liters can be used as a plasticizing additive. The glue is mixed in water, where a dry mixture of perlite and cement is subsequently added;
- the volumetric ratio of cement and perlite is 1 to 5. For 290 liters of water, 4-4.5 liters of PVA, 300 kg of cement and a cube of perlite are used; - by volume: 1 portion of cement, 2 portions of sand and 3 portions of perlite. As an additive, you can use liquid soap or PVA in an amount of not more than 1% by weight of cement;
- 270 liters of water will require a cube of perlite and 190 kg of cement;
- 1 volume of cement, 4 volumes of perlite, approximately 0.1% of the mass of cement PVA glue;
- volumetric ratio of cement to pearlite in the range 1: 4 ÷ 1: 8. The additive can be liquid soap, dishwashing detergent, PVA - up to 1% by weight of cement;
- a solution is preliminarily prepared for mixing (hereinafter RZ): sodium salt of carboxymethyl cellulose (CMC) is dissolved in a measured volume of water in a volume of 0.5% of the estimated volume of warm plaster, as well as plasticizers - 0.5% by weight of cement added subsequently. All components are thoroughly mixed and the solution is allowed to settle until the viscosity of the CMC increases. Further, variations are possible depending on what density the plaster needs to be obtained (bucket - 10 l). For example, 12 liters of cement, 2 buckets of perlite, 2.5 buckets of sand are added to 12 liters of RH (the density of the resulting solution is about 1500 kg per cubic meter). 1.5 buckets of sand, 3 buckets of perlite, 1 bucket of cement are poured onto the same volume of RZ - a mixture with a density of 1200 kg in a cube is obtained. For 20 liters, you can mix about 5 buckets of perlite, 1 bucket of sand, 12 liters of cement - we get a solution with a density of about 800-900 kg per cubic meter
All these PVA and liquid soap can be replaced with superplasticizers, for example, from Polyplast. This component is very important, because it determines the behavior of the solution and the need for the mixture in the volume of mixing water.
You should understand that any recipes are given for guidance only. To succeed, you will have to experiment with the ratio of the components, check the resulting solutions in operation. And only after the mixture is ideally suited for your finishing conditions, you can knead large volumes. Pay particular attention to the water absorption capacity of the thermal insulation components. They actively retain moisture, which, if there is a lack of mixing water, may result in a violation of the cement mixture hardening technology.