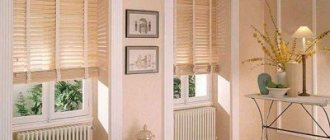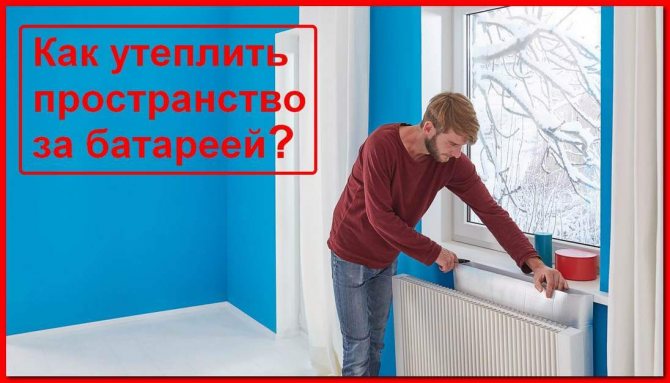
During cosmetic repairs, you can get free access to almost any area of the surface. However, in almost every room there is a place where it is very problematic to get close. This place is the surface of the wall behind the radiator. How the walls are finished behind the radiator, we will consider in detail in the material of this article. Including we will consider the issue of finishing the wall behind the battery without removing it.
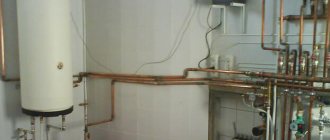
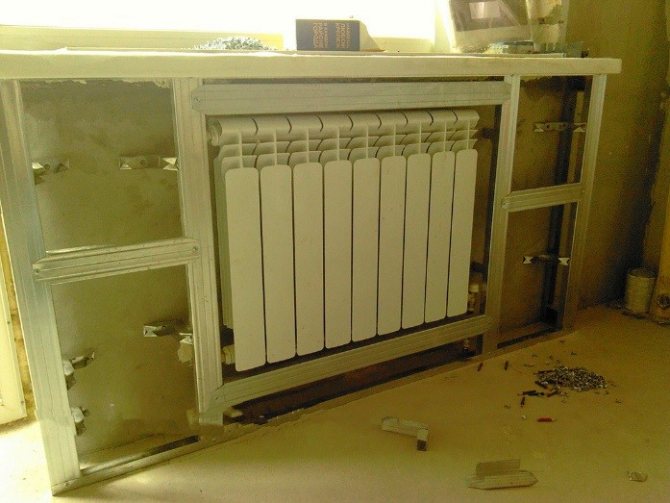
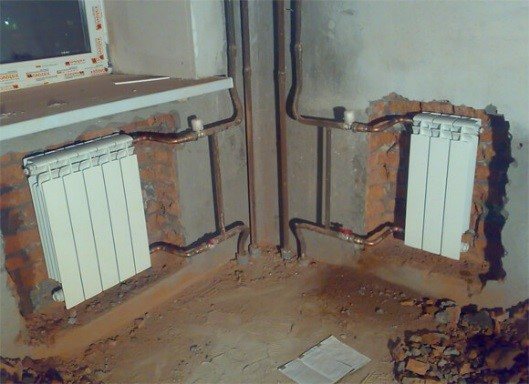
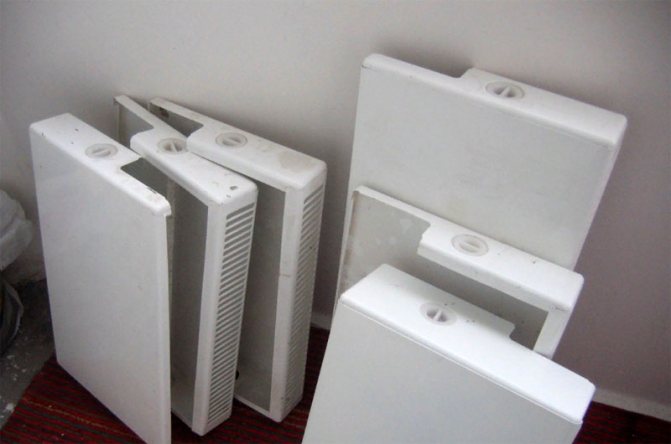
When working with the area behind the radiator, the first step, of course, is to try to remove the battery. Today, heating radiators are mainly found in two types: aluminum and cast iron. Moreover, both types of radiators differ in the way they are connected.
How to remove a heating radiator for wall decoration
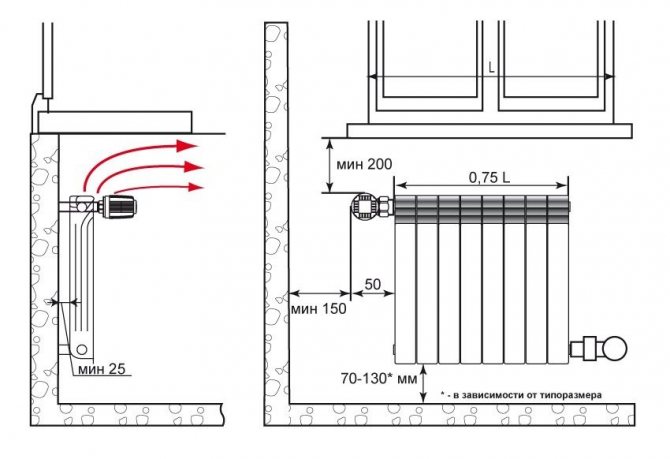
All radiators, both aluminum and cast iron, and from other materials, have the same general connection principle. Regardless of the number of sections, the battery has a tap that regulates the supply of hot water, a return shut-off valve, and a Mayevsky tap - an air vent designed to release an air lock from the radiator.
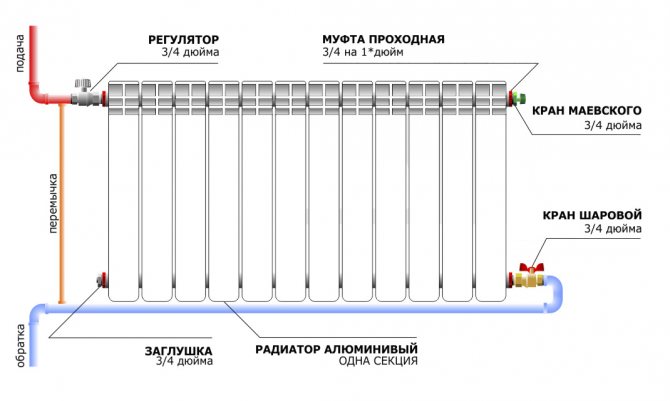
Battery connection diagram. With a small number of sections, the plug and the return pipe are interchanged.
On the supply and return of hot water in the radiators, couplings with union nuts are installed, to which the water regulation valve is attached by means of nuts at the top, and a shut-off valve at the bottom. After both taps, couplings with an external or internal thread are installed. And after the released couplings, either American couplings with clamping nuts, or couplings for crimping are installed. One way or another, the supply and return heating pipes are connected to the latter.
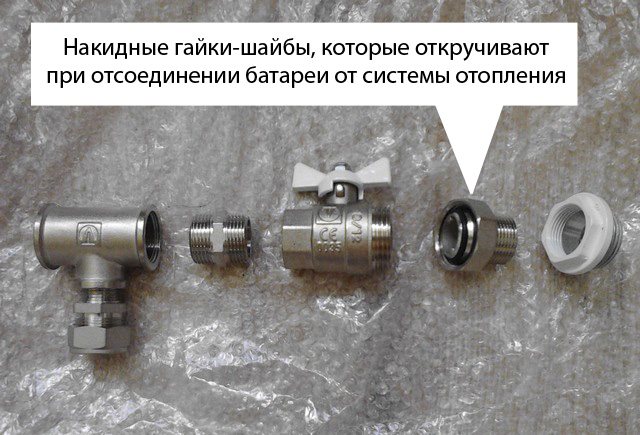
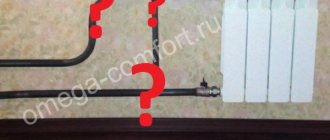
Nut that must be unscrewed to remove the battery.
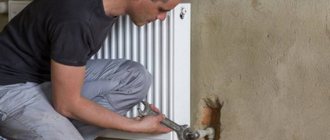
In order to remove the aluminum radiator, it is first necessary to close the water supply control valve and close the return valve. After that, you need to open Mayevsky's tap. Its external design can be different. Modern air vents have a comfortable grip. Old-style air vents are opened with a screwdriver, which completely unscrews the bolt.
At the next stage, a basin or a low bucket is installed under the battery to be removed and, using either 2 wrenches or 2 adjustable wrenches, the union nuts connecting the radiator couplings with the taps are unscrewed. Considering that the air vent was previously opened, then you need to wait until all the water drains from the radiator and remove the battery itself from the brackets.
How to disconnect a cast iron radiator from metal pipes
As a rule, in old cast-iron batteries, the pipe connection is as follows. At the inlet and outlet of the water in the radiator, there are cast-iron couplings of adapters - sleeves. The outer thread of the foot allows it to be screwed into the hole of the last section. The thread cut in the inner hole of the foot is designed to connect a 1/2 in. Metal pipe. After the buttress, a metal pressure washer is located on the thread of the metal pipe.
In houses of an old building on cast-iron radiators, as a rule, there are no taps for regulating the water supply and a shut-off valve. All shut-off valves are usually located in one place at the outlet and at the inlet of water to a gas boiler, or in the basement, if we are talking about an old apartment building connected to a central heating system.
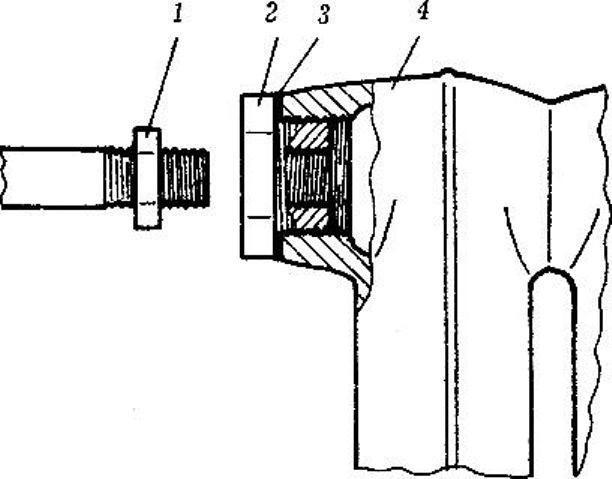
Connection diagram of a cast iron heating radiator.
In the figure, the numbers indicate:
1 - hold-down washer (lock nut);
2 - adapter sleeve (foot);
3 - gasket under the footboard;
4 - base of the cast iron section.
After making sure that the water supply to the radiator is shut off using 2 adjustable wrenches, initially the pressure washer is released on the pipe, about 4-5 cm.After that, substituting a container for collecting water under the battery, unscrew the case from the radiator section, which will move along the thread on the pipe towards the released washer. In this case, it is advisable to calculate and remember the number of revolutions, since the installation of the radiator will be backward sequential.
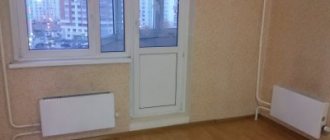
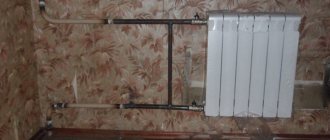
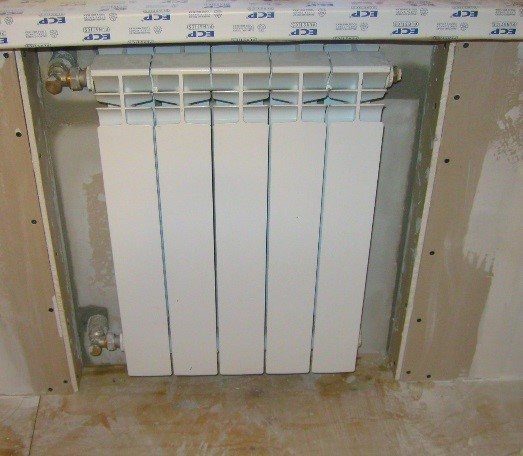
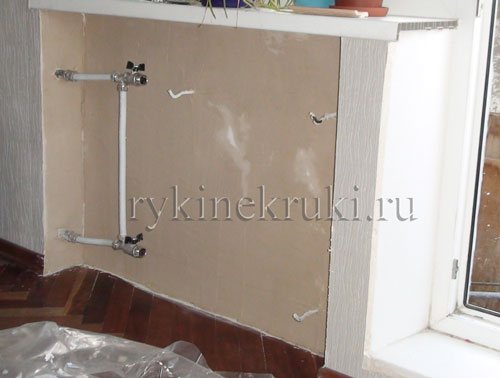
Wall decoration behind the battery without dismantling it
For various reasons, it is not always possible to remove heating batteries. For example, if the repair is carried out in winter and at the entrance and exit of the radiator, and there are no shut-off valves. In this case, there are two options. If the battery is installed close to the wall, that is, the gap is minimal, only 10-20 mm, then it is better to wait until the end of the heating season and still temporarily dismantle the battery. If the gap between the radiator is 4-5 cm, then the wall surface can be finished without removing the battery.
Plastering and filling behind the battery
Plastering the walls behind the battery without removing it will not work fully. That is, you can perform plastering with a cement-sand mortar, but without grouting. It will be necessary to finally level the walls behind the radiator with putty. To apply plaster or putty, an aluminum strip is used with a length of 150 cm or more and a width of only 3-5 cm. The thickness of the strip should be about 4-5 mm so that the strip does not bend during operation.
When plastering or puttying, the mortar is initially made of a thick consistency so that it does not drip from the aluminum strip. A solution is applied to the edge of the entire length of the strip, or putty and at an angle of 45 degrees, the strip is passed between the battery and the wall. The work is similar to the principle of plastering with a rule, but here the main inconvenience is associated with the battery located on the wall.
Painting, priming the walls behind the battery
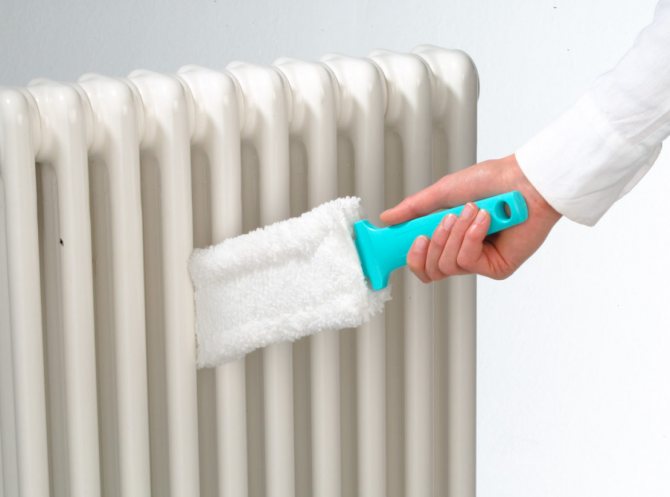
Given the small gap between the battery and the wall, priming and painting are more convenient to perform with a roller with a small diameter - a mini-roller. Mini-rollers rarely appear on the market, so they often have to be made independently from improvised means, using only its holder from a standard roller. You can also use homemade brushes or ottomans to apply paint to the wall surface. They use an aluminum wire with a diameter of 0.8-10 mm as a handle, which can be bent at the desired angle during painting. In addition, there are radiator brushes on sale. The radiator brush is a curved brush with a long handle.
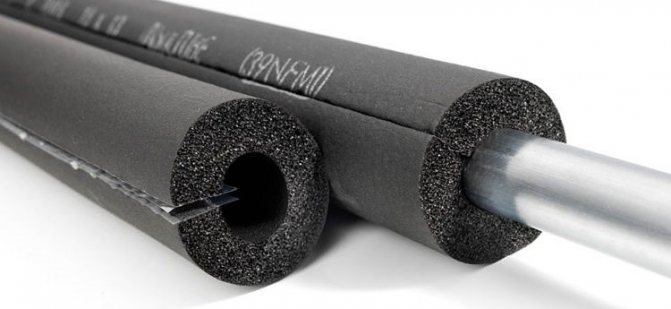
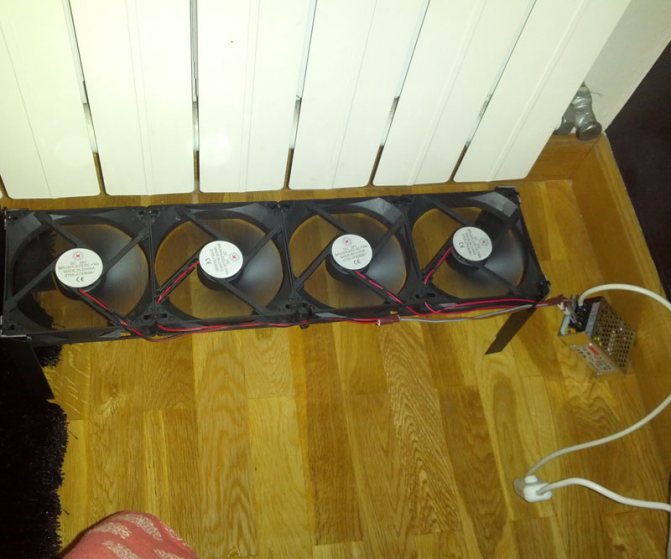
Polyethylene foam heat-reflecting shield
Substances have different ability to conduct heat.
To prevent energy consumption, the heat-reflecting screen must have a low thermal conductivity - no higher than 0.05 W / (m * K).
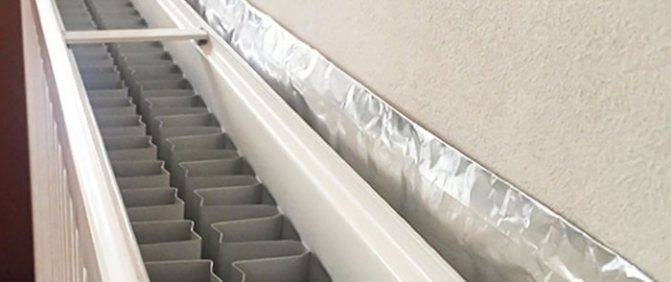
Polyethylene foam heat-reflecting shield
Indoors, it is not recommended to use structures made of flammable substances with a loose structure.
For example, mineral wool emitting formaldehyde and microscopic dust is not suitable for the screen.
Although her thermal conductivity coefficient is suitable - 0, 039 W / (m * K).
Heat-reflecting screens made of insulating materials based on polyethylene foam have proven themselves best:
They are hypoallergenic and safe for human health.
The thermal conductivity of different types of polyethylene foam ranges from 0.029 to 0.032 W / (m * K).
Four millimeters of this barrier will retain the same amount of heat as 10 centimeters of mineral wool.
For insulation between the wall and the heating device, a layer of 3-5 millimeters is enough.
A prerequisite: the heat-insulating screen behind the radiator must be duplicated with aluminum.
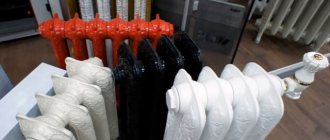
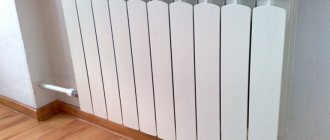
Screens for radiators
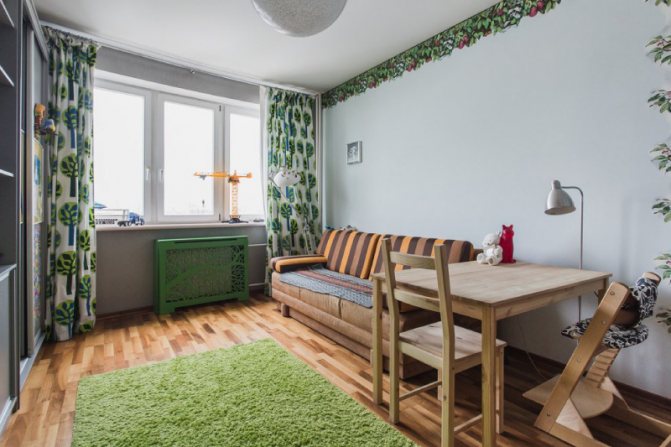
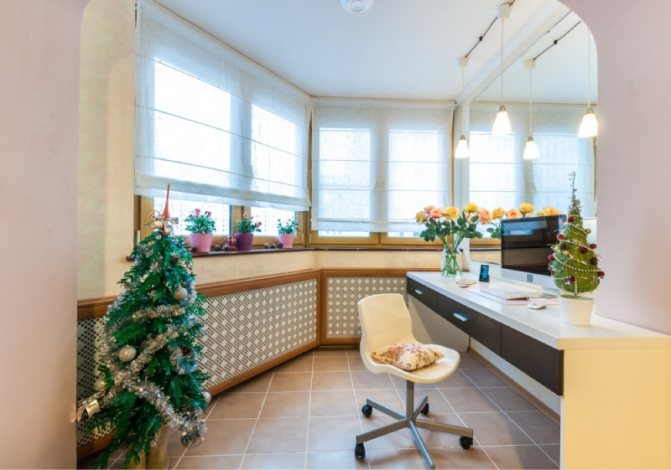
Another solution when decorating a wall behind a radiator and decorating radiators is to use screens for radiators. They are perforated panels of various materials and come in a variety of patterns and colors. Such panels cover the wall along with the batteries. Thus, part of the wall behind the battery itself is hidden from view. The disadvantage of this solution is some reduction in heat from the battery.

Screen for radiators.
If in the wall behind the batteries there is a recess for the battery - a niche, then the finishing technologies in this case are slightly different. You can find out more about them in a separate article: finishing a niche under a heating battery.
When an unsightly heating battery spoils the interior, the problem can be solved in several ways: replace it with a designer or trench model, or simply close it with a screen / box. The latter method has several advantages:
- A screen or box not only hides a bulky structure, but often decorates a room.
- The screen / box can be used to construct an additional console, decor shelf, bench, rack, desktop.
- A sealed battery is safer for children - the risk of burns and accidental shock is eliminated. However, one can argue with this argument, because it is in the children's room that heat loss is least needed.
- If the house is too hot and dry, then closing the battery will help create a comfortable microclimate for household members, their pets and plants.
- The screen prevents dust from settling on the inside of the radiator and thus simplifies cleaning.
- The heat transfer of a closed battery decreases on average by 10-15% or more (depending on the degree of closure);
- Screens and boxes often complicate the maintenance of radiators, and sometimes completely block access to them.
- Often, improperly sealed batteries lead to fogging of windows, and then to the appearance of harmful mold on slopes and walls.
- A screen or a box at least a little, but "eats up" the space around the radiator. After all, any elements should be installed at a distance of 5-10 cm from the battery.
- Battery shielding requires additional expense and hassle.
Further in the article we will tell you how to close the radiators without compromising the heat in the house and show, using 70 photos as an example, how to do this beautifully.
How to keep warm
The beginning of winter is the best time to remember how to save money on electricity bills. "What for?" - you ask. The fact is that the cost of electricity for space heating accounts for more than half of its total consumption in everyday life. To save money on saving heat energy, your home should be equipped with metering devices. For effective use of the heating system, it is necessary to equip reflective screens behind the heating devices. Insulation of windows and doors, glazing of balconies and loggias, the use of double-glazed windows will help to save energy. An increase in the thermal protection of an apartment in the absence of electricity costs for heating will allow rational use of thermal energy from central heating and save up to 30 percent of energy. We will give you 12 helpful tips on how to keep warm and save money. Insulate the windows
In most of our homes, energy consumption for heating is 3-5 times higher than in European countries with a similar climate.
Experts estimate that up to 50 percent of heat loss occurs through windows. Insulation of windows can increase the temperature in the room by 4-5 ° C and will allow you to abandon the electric heater, which can consume up to 4,000 kW / h per apartment per season, or from 5.5 to 7.8 thousand rubles - depending on tariffs for electricity.
Insulate the wooden frames with a sealant or replace them with plastic double-glazed windows.
Install a heat regulator on the batteries
When you are away or away from home for a long time, save: just set the radiator controls to a lower temperature. You can always reheat the room by setting the regulator to a higher value.
A thermostat can also be installed on the heating radiator, which, unlike a conventional valve, automatically maintains the room temperature.
During sleep, the air temperature in the apartment, according to hygienic standards, is recommended to be reduced by 2 ° C below that at which a person is awake. Reducing the temperature at night will save about 0.7 percent heat consumption.
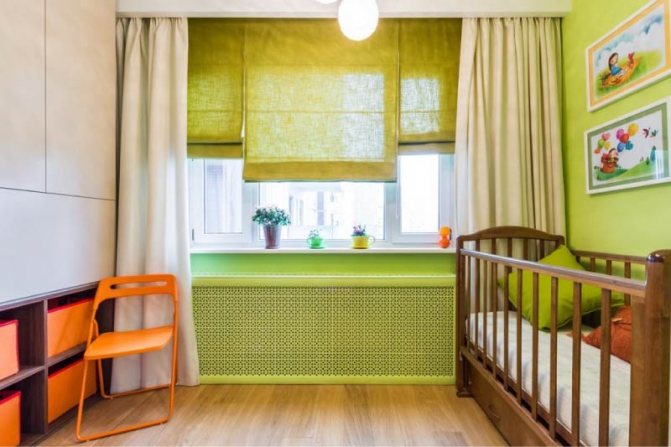
Do not hide batteries behind furniture or cover them with curtains. Obstacles prevent warm air from spreading evenly throughout the room and reduce heat transfer from radiators by 20 percent.
Hang thick curtains on the windows (not blocking radiators). Move the curtains back during the day, and curtain the windows again at night. Blackout curtains will help prevent heat leakage.
Install energy-efficient glass windows
It is recommended to install triple-glazed windows. The difference in payment in some firms for a triple-glazed window compared to a double-glazed window is insignificant.
Windows with heat-saving glass appear on the market. It is polished glass, coated with oxide metals using vacuum deposition technology.
The product is specially designed for use in double-glazed windows, which are distinguished by increased heat saving rates, as well as excellent sunlight transmission and transparency.
Install a heat-reflective film on the windows
Heat-reflecting film is an optically transparent material with a special multi-layer coating, which is installed on the inner surface of the outer window frame.
The film transmits 80 percent of the visible light, and inside the apartment reflects about 90 percent of the thermal radiation, which allows you to keep the room warm in winter and cool in summer.
Insulate the floor and walls
If you are making repairs, place a thin layer of expanded polystyrene or foam foam under the wallpaper. You can use thermal paint to insulate the walls, which will also help retain heat in the room.
It is known that 10 percent of the heat loss in residential buildings is the heat leaving through the basement. Therefore, do not let the heat escape through the floor.
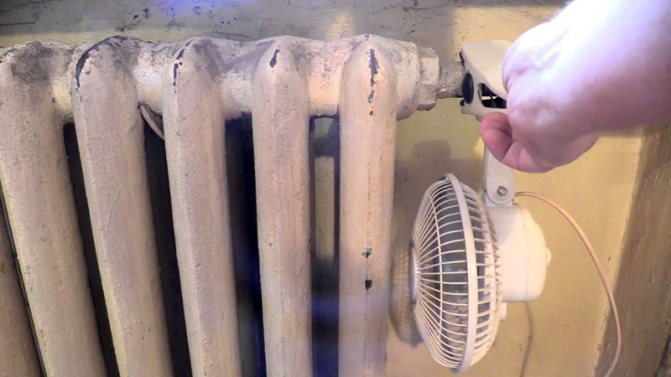
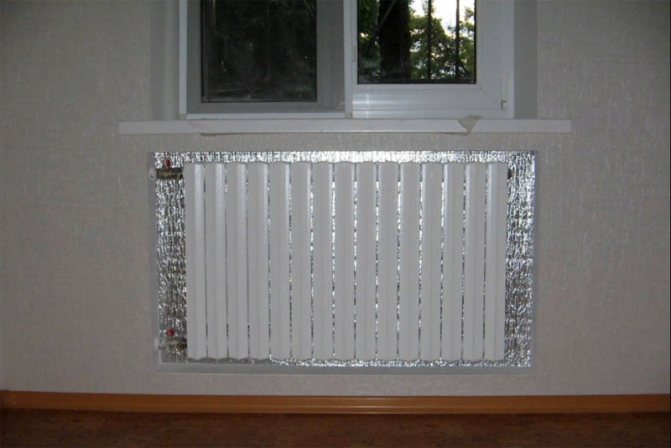
Install heat reflective screens
The wall behind the radiator can heat up to 50 ° C. It is irrational to spend so much heat on heating bricks or concrete slabs, especially if the apartment is cold. Install foam or plain foil heat-reflecting shields behind the batteries. This will increase the temperature in the room by an average of 2 degrees.
Close the front door tightly
If the front door does not close properly, insulating your own front door may not be effective.
This can be helped either by the installation of an inertial device - the so-called "door closer", or a combination lock. If such devices have not yet been installed at the entrance, this is a reason to contact an organization that provides housing and communal services. You have the right to insist on the insulation of the front door and windows in the stairwells.
Insulate the loggia and balcony
Especially carefully it is necessary to insulate the balcony door. On the lower part of the door, you can fix a decorative rug with buttons, and put a roller made of thick fabric on the threshold from the side of the room, pressing tightly against the door. You can fill it with foam rubber or scraps of fabric.
Insulate the front door
An effective way to keep the heat escaping through the front door is to install a second door, creating a heat-insulating vestibule. And in any case - you have two doors or one - you need to close the cracks between the wall and the door frame. This is done using polyurethane foam.
Ventilate "in a shock"
A constantly open window, surprisingly, cools, but does not ventilate.
But if you ventilate in one gulp, opening the windows wide for a short time, then the air will have time to change, but at the same time it will not “cool” the room - the walls in the room will remain warm.
Do not overheat the apartment
Some people love hot-heated apartments and then marvel at the high heating bills.
Always remember: Each additional degree of indoor temperature will cost about 6 percent additional energy costs.
Plant trees around the house
Trees will help protect your country house from the cold wind, and it will be easier to save heat in the house.
It should be planted with a live "wind breaker" at a distance from the house, 2-5 times higher than the height of the trees.
For the successful implementation of the state policy in the field of energy conservation in the region, the necessary regulatory legal acts and programs have been approved.
By order of the Government of the Tyumen Region dated October 26, 2009, a comprehensive program "Energy Saving and Increasing Energy Efficiency
in the Tyumen region "for 2010–2020. The goal of the comprehensive program is to reduce the energy intensity of the gross regional product in 2020 by 34 percent compared to the 2009 level. Programs in the field of energy conservation and energy efficiency have been developed and approved by all local government bodies, state and municipal institutions of the region, as well as organizations carrying out regulated activities. On December 19, 2013, the Tyumen Regional Duma adopted the Law of the Tyumen Region "On Energy Saving and Improving Energy Efficiency in the Tyumen Region".
Competently
Arthur Galimov,
Head of the Energy Saving Division of the Department of Housing and Communal Services of the Tyumen Region:
- The first step, which does not require any costs, is to break your own irrational habits. It is necessary to stop aimlessly pouring water, leave electrical appliances on without the need, and ventilate the premises for hours. In the future, during the replacement of household appliances and the selection of new building materials for the renovation of the premises, it is advisable to pay attention to the level of their energy efficiency. Scientific and technological progress has made such solutions as LED lighting lamps, induction cookers, and windows with low-emission glasses quite affordable for an ordinary consumer.
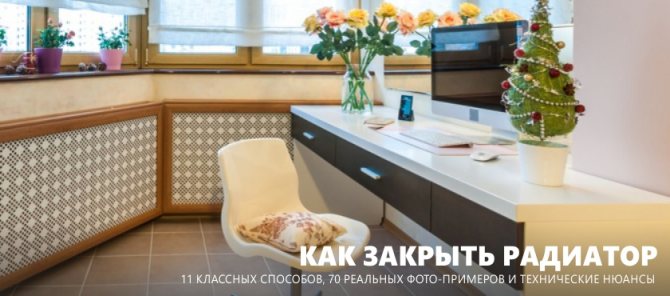
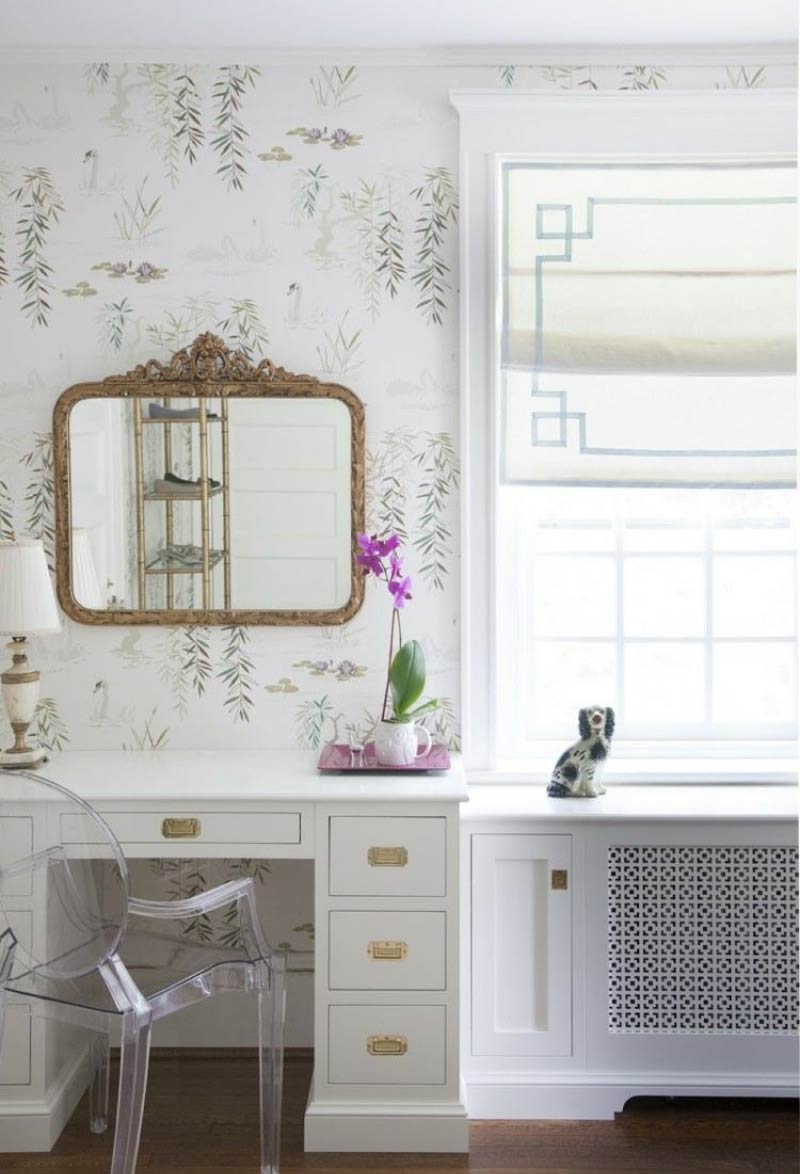
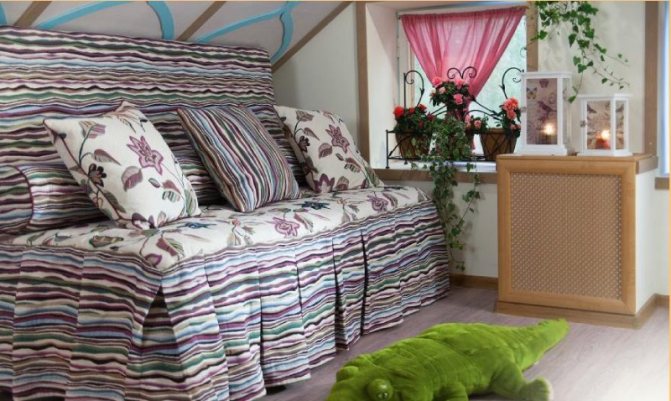
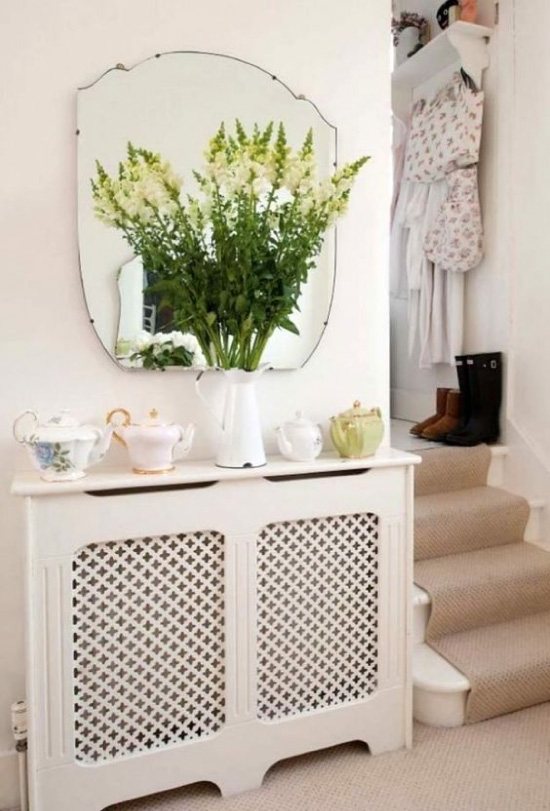
How to close radiators - 11 ways from a plasterboard box to a fabric screen
Decorative screen / HDF box
This option is one of the most popular because of the average price and beautiful appearance.
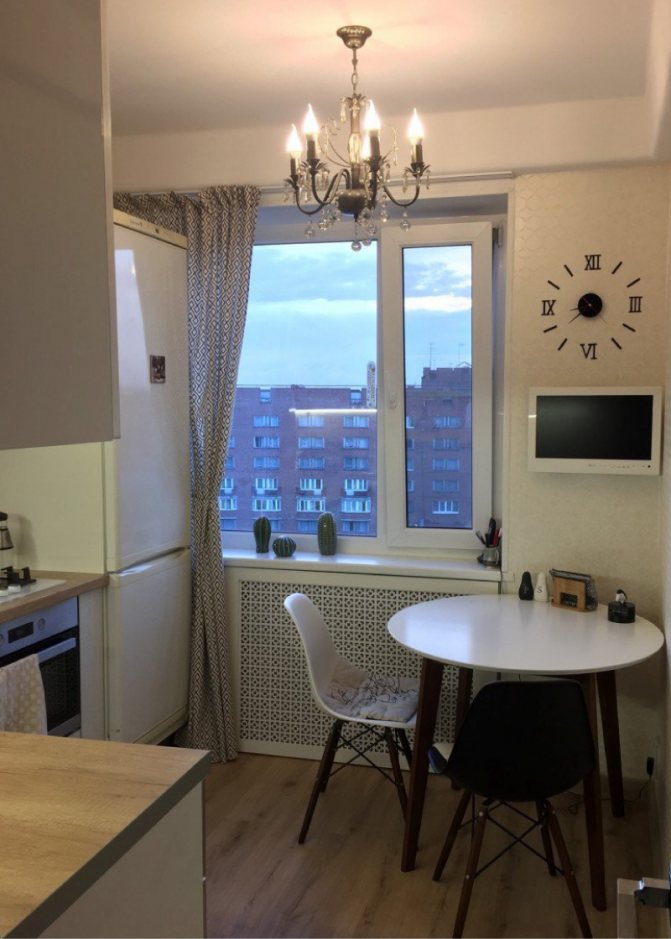
What is the difference between a box and a screen? The screen is designed for a battery located in a niche or under a windowsill (pictured above), therefore, only covers the front of it. The box completely covers the radiator on the wall from all sides.
The screen, like the panel of the box, is made of perforated sheet HDF (high density fiberboard, 3 mm thick), but the profiles of the box are made of MDF. Both materials are strong enough, durable and non-toxic when heated.
- Due to the original perforation, HDF screens / boxes look beautiful and fit into any interiors, especially classic ones.
- Heat resistance (the structure does not dry out like natural wood, and does not turn yellow like plastic).
- Easy to assemble and install without the help of specialists.
- Ready-made HDF screens / boxes can be white or imitate wood (wenge, beech, oak), and custom-made ones can be painted in any color, laminated, veneered with natural wood. True, the complexity of the design always affects the price of the screen.
- MDF and HDF do not tolerate prolonged contact with water. If the battery leaks or the pipe breaks, the elements of the box / screen may swell. Therefore, any emergencies must be dealt with immediately.
- Perforated panels, despite their thinness, are quite durable due to the high density of fiberboard. However, they must be protected from impacts and sharp objects.
- Slices of perforation in factory screens are not stained, and therefore are visible.
Price: from 1,500 rubles for a finished model and from 2,300 rubles for an individual order.
Selection tips:
- The size of the radiator recess must match the size of the inside of the screen.
- Screens and boxes for the battery can be either ready-made (assembled as a constructor) or made to individual sizes and designs (you can choose a perforation pattern).
Here is a small selection of photos of sealed batteries.
Drywall box
How to cover the battery with drywall? Using this material, you can sheathe the radiator with a box or create a niche for it in a false wall.
- Environmental friendliness;
- Can be used in damp rooms;
- Material is available;
- With a false wall, you can close pipes, expand the window sill;
- You can close the battery with a drywall box with your own hands without special skills in a few hours of work;
- You can think over the configuration of the box and false walls yourself, if you want to equip it with shelves and niches, additionally close the pipes leading to the battery. Next, you can see a photo of a closed battery in a plasterboard false wall with an enlarged bench-sill and a built-in niche for books.
How to make a niche for a radiator
If there is initially no niche provided for a heating radiator, but it is required to drown it in the wall, then it is worth approaching this comprehensively, having comprehensively studied this issue:
When it was decided to make the deepening by reducing the wall, it is necessary to coordinate this moment with the housing inspectorate. Reducing the thickness of the load-bearing wall may run counter to the requirements of an apartment passport. A home with disabilities cannot be sold, mortgaged or inherited without restoring its original appearance. Failure of the bearing supports can lead to the collapse of the building.
In addition, the remainder of the wall may be too thin to support the weight of the multi-piece cast iron radiator.
It is much easier to provide the desired recess by drowning the radiator in a plasterboard box. Then it is possible to make a niche of any size and hide the outgoing pipes under the sheets.
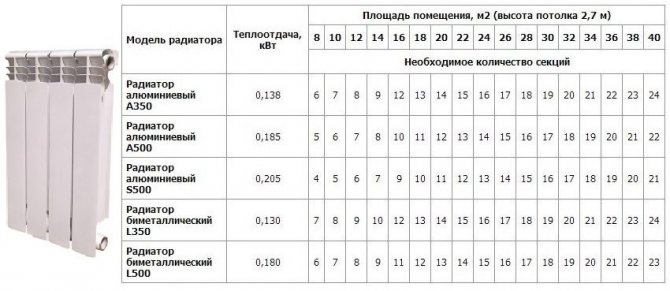
Thinking about the dimensions of a niche, you need to know the dimensions of the radiator that will be installed in it and the permissible size of convective air gaps. If the battery has not yet been purchased, then it is better to calculate the required number of sections, buy a suitable heating element, and only then start making a box for it.
The minimum gaps around the perimeter of the radiator should not be less than 50 mm, but it all depends on the size of the window sill, the depth of the niche, the design of the battery, and the place of its installation.
Do not forget about the insulation of the inner surface of the niche, especially if it had to be done by reducing the thickness of the walls. It is recommended to glue polystyrene foam boards over the entire area of the formed recess.
The following video shows how to hide the battery in a drywall niche:
How to close batteries correctly - technical rules and tips
Before closing the radiator, it is necessary to take into account several technical nuances:
- Keep in mind that heat transfer from a closed radiator is reduced in any case, whichever camouflage method you choose. The main thing is that the change is not significant. Ideally, the temperature drop in the room should be about 1-1.5 degrees.
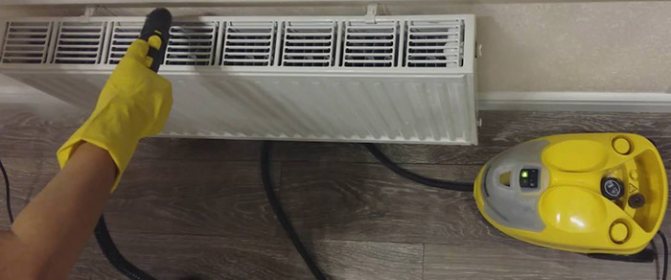
- Before closing the battery, put it in order: blow it out, rinse it (this is done at the end of the heating season) and paint it.
- Keep in mind that the tighter the grill weave, the better it masks the radiator, but the worse it conducts heat.Therefore, when choosing a screen for a battery, try to look for a middle ground or rely on heat saving.
- To minimize heat loss, the screen can be placed on its legs, and a groove can be cut in the center.
- When closing the battery, it is very important not to block the convective air currents, otherwise the room will blow and the windows will start to fog up, which will eventually lead to the appearance of mold on the walls. Ideally, the sill visor should protrude no more than 30 mm above the batteries, the top and bottom of the battery should be as open as possible.
- There must be a distance of at least 35-50 mm between the battery and the screen. There should be a gap of about 60-70 mm from the radiator to the floor and to the window sill.
- To solve emergencies, it is necessary to provide free access to the radiator. For example, the lattice of the box can be removable, folding (see photo), opening on hinges or sliding out on profiles.
Difficult option
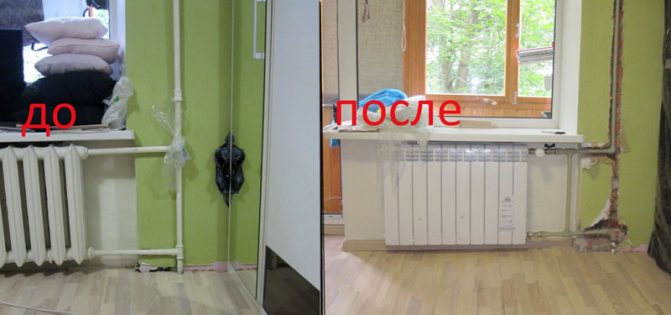
At the same time, the solution with the removal of the heater will be the simplest in terms of finishing work, and the most difficult in terms of preparation. The preparation will consist mainly of removing the battery completely. Not every home craftsman will be able to cope with this, and in winter, in the absence of a tap that shut off the water, this simply becomes impossible. If removing the radiator is not a problem for you, then the repair itself is not difficult - the technology for performing all the work will not differ from the rest of the room.
Therefore, there are only two ways to prepare everything here: remove the heating device yourself or call a foreman who will first remove it, and then, after a while, install it back. You will need to call it two times - for removal and installation, and this will require additional costs. In this regard, finishing the wall with a battery with its removal is one of the most costly and difficult ways to repair the surface. It is much easier to make repairs without removing anything.
A simpler approach
The complexity of the work in this case depends on what kind of material you need to decorate the surface. If this is paint, then everything will be very simple - you just need to purchase a special brush with a curved handle or make yourself a semblance of a thin roller, fixing a foam rubber coat on the wire. It is more difficult with other materials, and there are several finishing options:
The most difficult thing is with the tile - it does not bend, it is difficult to push it into the narrow space behind the radiator, and aligning the tiles relative to each other is even more difficult. In addition, you will have to cut grooves in some tiles, into which the brackets on which the heater hangs will enter. That is why wall decoration behind the battery with tiles is usually performed with the removal of the heating device.
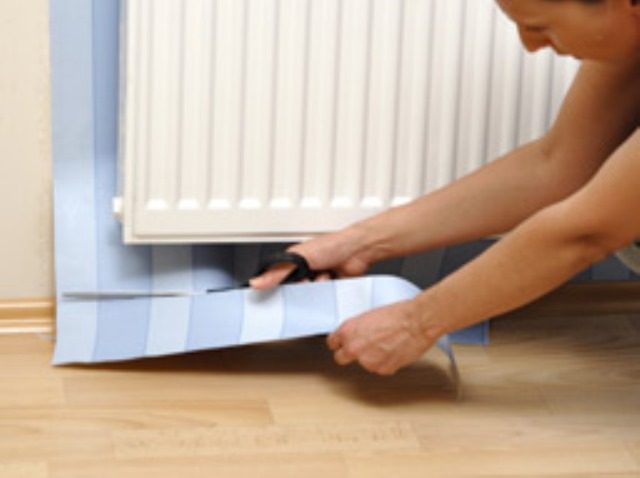
It is not so difficult to cope with wallpaper, and the most important point will be the tight pressing of the panel to the surface. The cut blade is smeared with glue, pushed behind the radiator and leveled there using a long brush with a curved handle or other suitable device. The bubbles cannot be completely removed, but in this place they are practically invisible and this moment will not be the most critical. The main thing is to glue a piece of wallpaper well so that it does not come off later.
The panels are also easy to attach. They can be fixed with glue or lathing. In the first case, the work is simple and there is no need to consider it separately. The second case is not that simple. You will have to arm yourself with a screwdriver with a very long sting in order to be able to screw the panels through the heater sections. In addition, the decoration of the walls behind the radiators with panels on the crate is possible without removing them only with the vertical arrangement of the panels. Otherwise, it is almost impossible to mount the crate. The most difficult case is with plaster and it is worth talking about separately.
In addition to all the above methods of decorating the surface behind the radiator, there is another universal option that is not suitable in all cases - finishing the walls behind the radiator with ceiling tiles. It is simply glued to the desired surface, easily pushing it into a narrow space. However, this method is not always suitable, since the decorated surface will be different from the rest of the space.
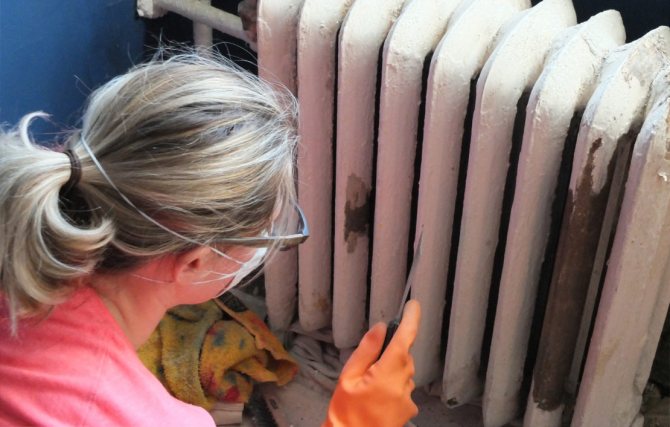
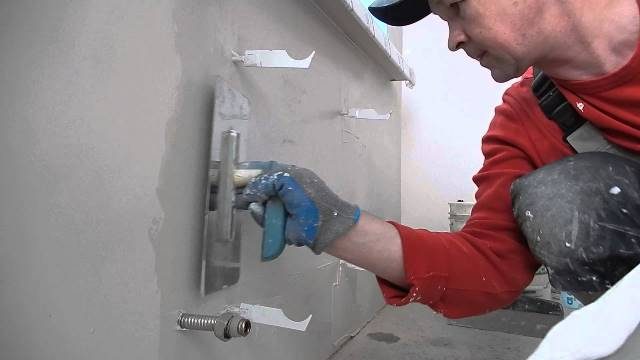
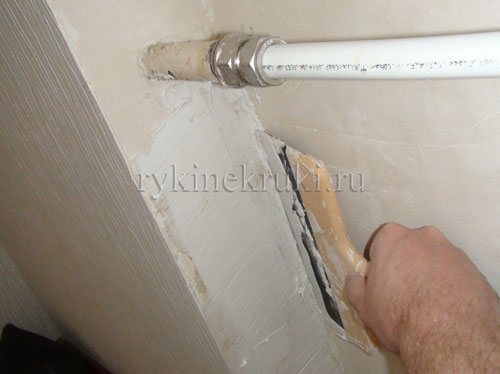
How to plaster behind a battery
Next, you need to align the wall. From our initial picture, it is clear that the wall will have to be plastered. It is in this place that you can breathe out once with relief: it is not necessary to plaster on the lighthouses! Even if you lie a little and make a slight curvature, then it will definitely not be visible under the batteries. Therefore, we take the plaster and begin to level the wall by eye. I have a separate section on How to plaster walls.
We take about 3 hours to prepare the plaster solution and the work itself (for a non-professional):
And now an important point that many people forget. The plaster takes a long time to dry. 2 to 7 days. (if, of course, we want to do everything using the right technology). It all depends on the thickness of the plaster layer, the season, the dampness of the room itself. But still we take an average time of 4 days. A sign of complete drying of plaster, for example, gypsum Rotband, will be a change in the color of the wall from cream to snow-white, as will be seen in the following picture:
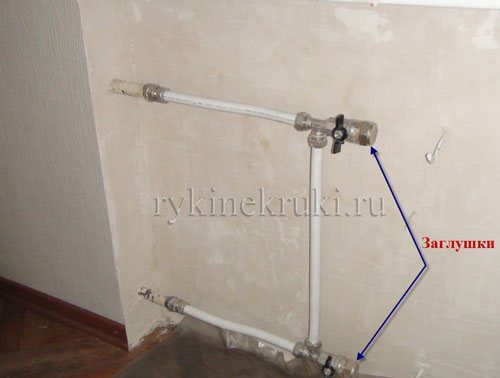
Yes, I almost forgot. If you are making repairs during the heating season, then I highly recommend that you install plugs immediately after removing the battery for your own safety. It is important to read about this here.
Plaster
It is very difficult to apply the solution to the plane. For work, you will need a thin metal strip, 3 - 5 centimeters wide and 10 - 15 centimeters longer than the radiator. The plaster or putty is diluted a little thicker than usual so that it does not run off the narrow strip of metal. The solution is applied to the edge of the strip along its entire length, and the strip itself with the applied mixture is passed in the space behind the battery, at an angle of forty-five degrees. The process is very similar to working with the rule - you need to perform plastering according to the same principle.
When the solution is applied to the entire area behind the heating device, the mixture must be allowed time to dry, and then, using the same metal strip, grind the surface by attaching sandpaper to it.
«>
How to putty behind the battery
As soon as you have received a snow-white wall, you need to prime it once (we take 2 hours to dilute the primer, apply it, and dry it) and immediately proceed to the putty. Here you can also do it easier than we did when filling large walls. It is not at all necessary to buy a dry mix and prepare it. It is quite possible to do with ready-made putty. This will significantly save time:

By reading my blog, you are probably making repairs. Add to your bookmarks
this page... All useful home improvement stores are located here.
The putty is applied in a thin layer. I think in 1.5 hours you can do it quite well:
Drying time of the putty is 1 day. The second time, I think, is not worth puttingty.