Homemade solid fuel plants are gaining extraordinary popularity. This is due to the rise in energy prices. Unlike electricity and gas, coal and firewood are still affordable. The demand for such equipment is growing, and the cost is increasing accordingly. The rise in price leads to the fact that not everyone can buy it. An alternative to expensive models can be homemade boilers for heating a private house, made according to drawings, diagrams and calculations of devices already tested in practice. They are cheaper, but in work they are not inferior to the factory ones.
Types of water gas boiler for heating a private house
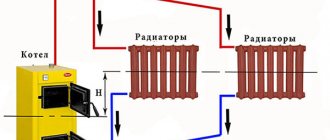
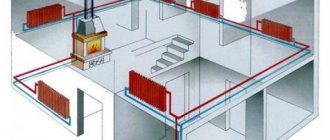
The principle of operation of gas heating boilers is as follows: The heat generated by the combustion of gas is transferred to the liquid, which then moves through the heating system, heating the room. There are differences in the design of different types of gas boilers.
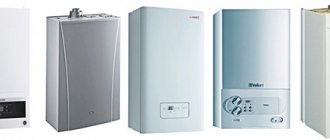
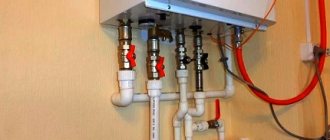
Wall
The main parts are:
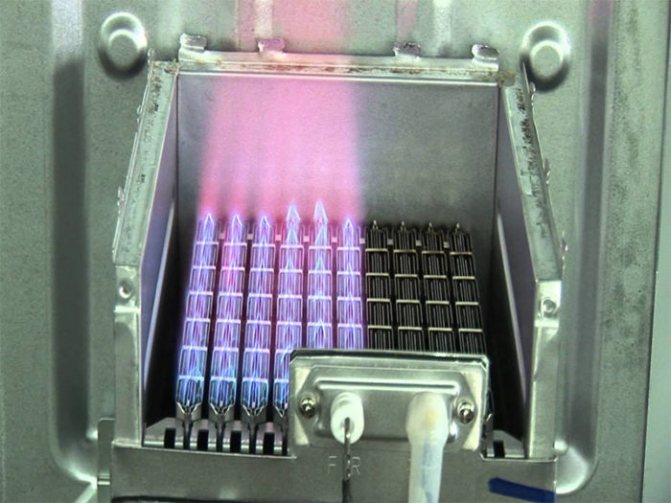
- Burner - rectangular structure with holes arranged in a certain order through which gas is supplied from the nozzles from below.
- The combustion chamber.
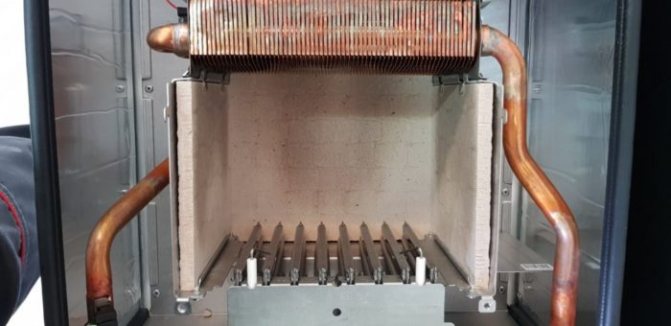
- Heat exchanger - one or two. The scheme with two units involves the installation of a primary device in the form of copper tubes with lamellar fins above the burner. This allows the heat of the gas flame to be transferred directly to the heat carrier with maximum efficiency.
- Secondary heat exchanger usually performed in the form of a set of thin metal plates, passing through which running water is heated from a hot coolant.
- Gas valve, controlled by the automation system, regulates the degree of fuel supply.
- Heating supply and return pipelines.
- Diaphragm tank.
- Electrical unit.
- Fan helps to leave carbon dioxide from the unit through the chimney.
- Circulation pump.
- Automation system - a set of sensors that analyze the state of nodes and points of connection to the input and output routes, and an actuator that generates the necessary control signals.
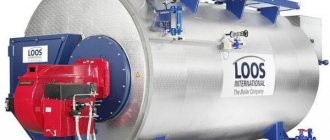
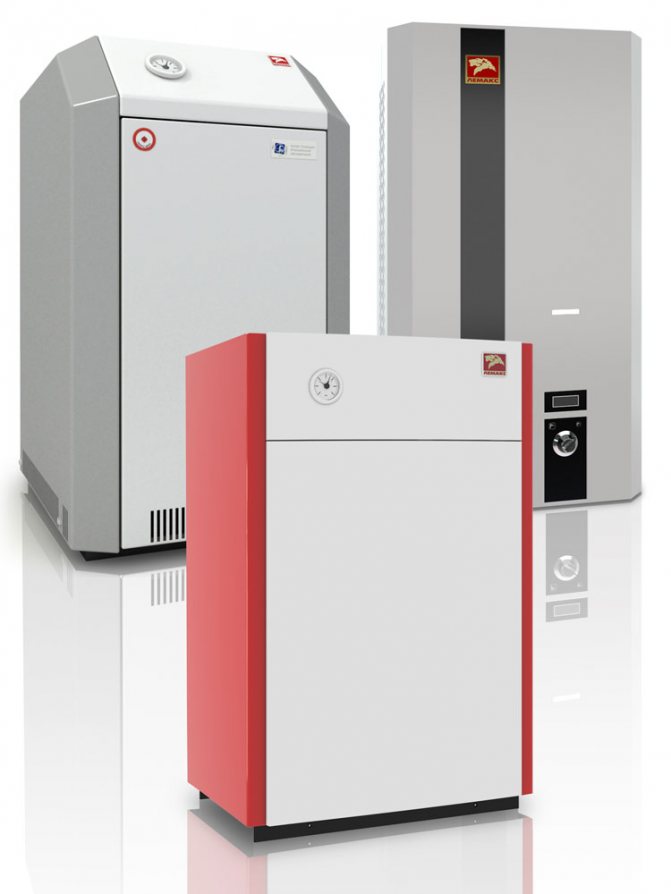
Floor
Differs from wall mounting method, and also, since its weight is limited, manufacturers equip it with a cast-iron heat exchanger, which is of higher quality and more reliable.
Floor-standing models - single-circuit units with an open combustion chamber, in which minimum of various automation and control devices.
- Burner.
- The combustion chamber.
- Heat exchanger.
- Expansion tank - excess liquid is drained into it.
- Gas valve.
- Electrical unit.
- Fan.
- Lamellar heat exchanger.
- Pump.
- Automation system.
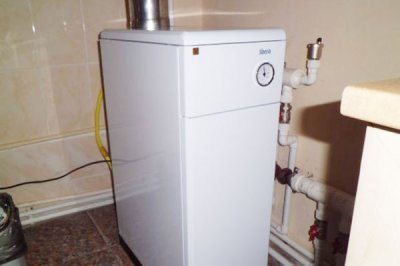
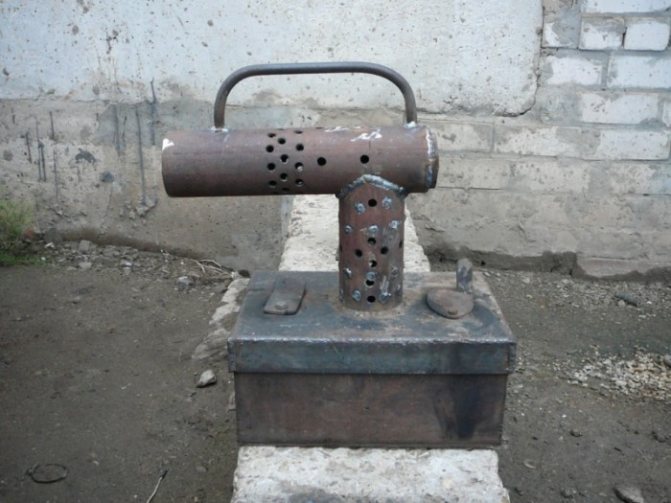
From a balloon
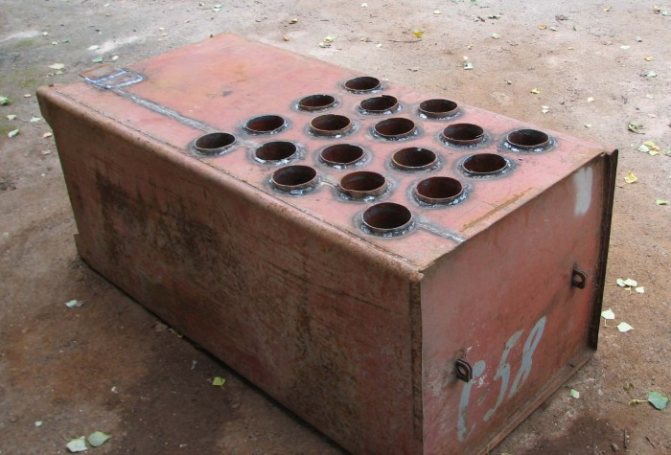
- The design is based on a gas cylinder for 50 l (heats the room up to 70 sq. m). A piston with a lower nozzle is immersed in the cylinder.
- The nozzle is a hollow tubethrough which combustion air enters.
- At the bottom of the piston, a "pancake" of a slightly smaller diameter is weldedthan a balloon. The arc-shaped blades welded to it create a vortex flow over the glowing fuel.
- Chimney.
- The upper part of the cylinder after installing the handles on it used as a cover.
- The pump provides forced circulation.
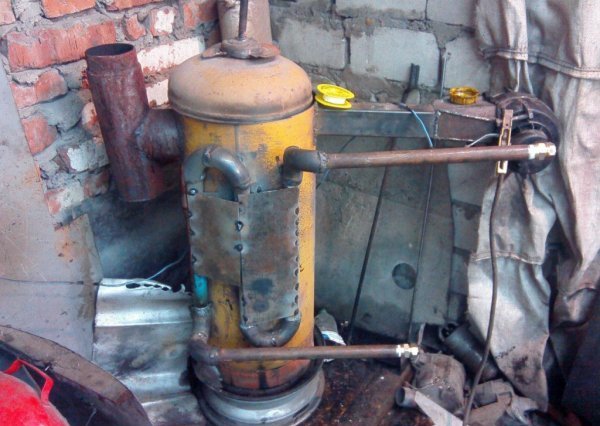
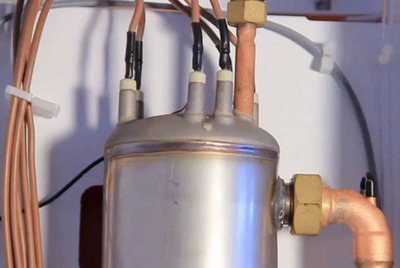
Photo 1. Gas boiler made from a cylinder. The device is connected to the heating water circuit.
How to make a gas boiler with your own hands
The manufacture of a gas boiler consists of several stages.
Project selection, drawings
Having made the decision to independently manufacture a gas boiler, find a suitable project with drawings... They should be detailed about heating boilers, connection, cooling, chimney, deflector and other nuances.
Attention! Before you start manufacturing, have a good understanding of the drawings and find photos of ready-made schemes. Any inaccuracy or change adversely affect future operation.
When making take into account the heat loss in each roomwhere heating is planned. Even in rooms with equal areas, the heat transfer will be different.
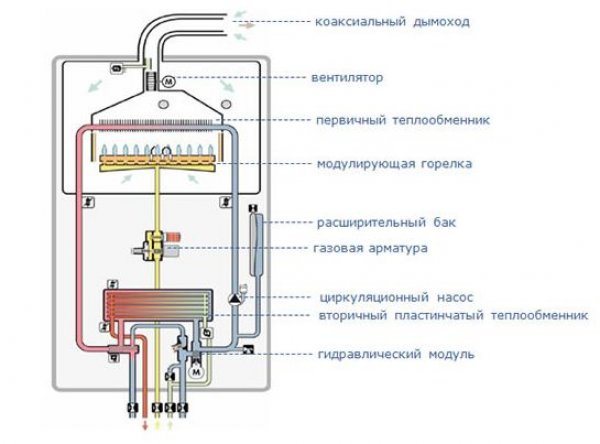
Photo 2. Drawing of a wall-mounted gas boiler. The arrows indicate the components of the heater.
Calculations are carried out with a margin of 10%, focusing on the real sizes of objects.
Reference. The easiest way to calculate: for every 10 sq. meters of area required 1 kW energy. Gas calorific value - 6.55 kW.
The amount of energy consumed by the boiler per day is divided by its calorific value and this is how the required volume of the boiler is obtained.
Thus, it is necessary:
- calculate the entire hydraulic system;
- take into account the costs of the chimney, including the deflector;
- determine in advance the diameter of the pipes;
- set the required pump power;
- calculate the resistance of the system.
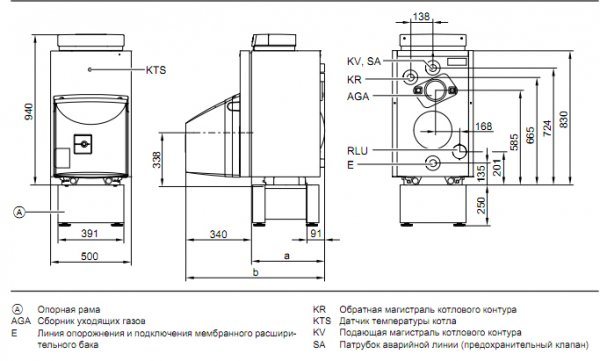
Photo 3. Drawing of a gas heating boiler. The dimensions of the device and its components are indicated.
Materials (edit)
After choosing a project the master calculates the amount of materials to the heating boiler. You cannot replace the mentioned metal with another to reduce the cost of the installation: it may turn out to be softer, and this will render the structure unusable.
Materials for work:
- metal and gas pipes;
- steel sheet;
- doors for creating a firebox;
- brick;
- fittings;
- clay;
- moisture insulating material (tar);
- cement;
- galvanized sheet metal.
Important! Some components like thermostat or deflector, it is easier to purchase in a specialty store, rather than create it yourself.
What to focus on when choosing purchased parts for gas boilers:
- It is better to choose thermostats programmableto control and regulate the boiler temperature with their help. Domestic analogues are not inferior to foreign models in quality.
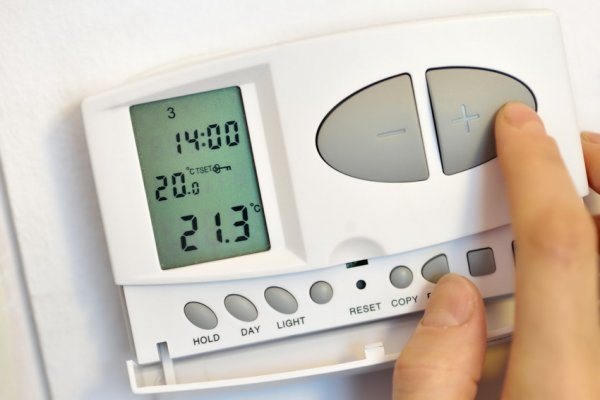
Photo 4. Programmable thermostat for a gas boiler. With it, you can set a suitable temperature.
- The deflector is installed on top of the chimney and provides exhaust... Fits in the form of a cone-shaped stainless steel umbrella.
- Automation includes: flame control module, overheat protection, traction controller, blast valve. For the stable operation of the unit, all of the listed devices are needed.
Tools:
- welding machine;
- soldering iron;
- a set of screwdrivers and keys;
- hammers;
- pliers;
- level;
- angle;
- roulette;
- welding tool;
- thermostat;
- automation;
- deflector.
Making a device, homemade heat exchanger
Construction stages:
- The easiest way to do it yourself is to make a floor gas boiler, which is installed on the foundation. So they rip out first a pit about 80 centimeters deep. Sand is poured at its bottom, poured with water and allowed to soak. Then stones, broken bricks and rubble are laid out a little below ground level.
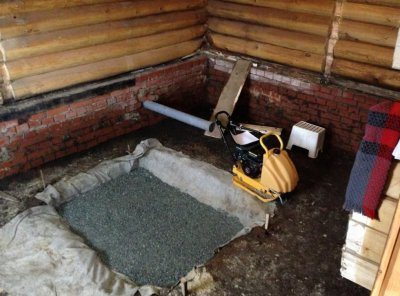
- Collect the formwork with the frame and fill it with concrete., a day later it is removed. The place under the formwork is covered with gravel and sand and covered with moisture insulating material.
- Lay out a wall of brick and cement compositionprotecting the main wall from the heated gas boiler. Height and width of the brick wall 10 cm morethan the dimensions of the boiler.
- Sheets are cut out according to the drawings, prepare corners, tubes, internal parts.
- Parts are assembled into a single system. Before this step, watch a video showing the process. Incorrect arrangement of components leads to inoperability of the structure. When performing welding work, one must not forget about safety: the foreman wears protective gloves, a special mask and work clothes.
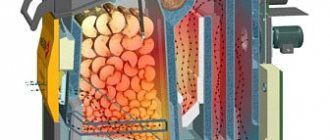
- A heat exchanger is made from a steel tank and a copper tube., thanks to which the water is heated in the boiler. Two holes are made at the top and bottom of the tank, corresponding to the diameter of the tube. The tube is bent into a spiral and inserted into the tank. Fittings are installed on the ends of the tube leaving the tank.
- After assembly, the edges are cleaned and the unit is painted. The latter is done so that condensation does not appear in the cold season and the metal does not begin to rust.
- After installing the boiler on the side, a chimney is welded to it - metal pipe not less than 20 cm, through which carbon dioxide will leave the unit. A hole is cut in the roof and the pipe is raised 30-40 cm over the roof. The gaps between it and the roof are filled with polyurethane foam and mineral wool.
- An uninterruptible power supply is connected to the boiler... The stabilizer is mounted side by side in a dry place where water will not get into. It must not be overheated or frozen.
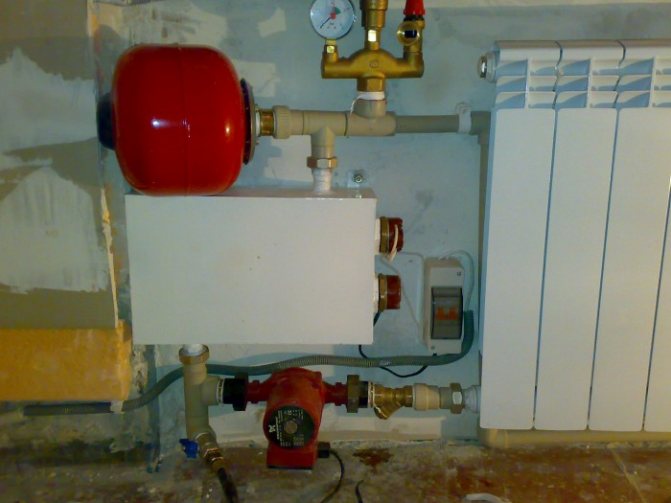
Heating connection
Legislation establishes that before installing a gas boiler the owner must obtain permission for installation in Gorgaz.
- On the direct and return heating pipelines, they acquire shut-off valves - "American" taps, allowing to dismantle the boiler in the event of an emergency.
- To the return pipe of the coolant install a filter for mechanical water purification.
- Install shut-off valves on the gas pipeline, to which the boiler will be connected, in the form of a gas cock and a gas filter.
- Connect the gas pipe supplying fuel... All joints and connections are sealed.
- Connect the boiler to the water supply network and the hot water supply line.
Drawings and calculations
To weld the boiler, use the ready-made drawings. In this case, you do not need to reinvent the bicycle. Use already proven methods and methods. There are not as many of them as it seems.
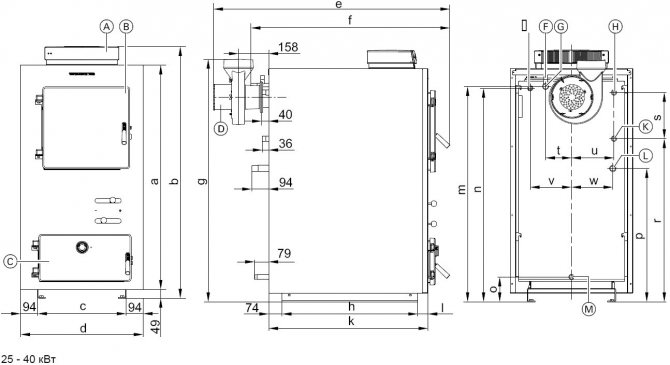
For construction, use a drawing of a gas boiler with dimensions and design features
In order for the boiler to create warmth and comfort in the house, it is necessary to make an accurate calculation of its volume. The simplest way of calculating is based on the assumption that 1 kW of energy is required for every 10 square meters of area. Another 10 percent is added to the result obtained in order to create a small margin to ensure a more comfortable operation of the boiler. For example: a house with an area of 80 square meters requires 8 kW of energy per hour. Another 800 W in reserve, total - 8.8 kW in 60 minutes. A little more than 211 kW will be consumed per day.
But kilowatts are not volume yet.
To calculate it, you need to take into account that the calorific value of gas is 6.55 kW - this number is constant, it is calculated scientifically and experimentally, therefore it is taken as a basis.
To calculate how much boiler volume is needed to heat a particular house, you need to divide the amount of energy consumed by the boiler per day by its calorific value. Returning to our example, we get: 211 / 6.55 = 32.2. This means that in a house with an area of 80 m2, a 33-liter boiler is needed (round up).
Difficulties in manufacturing, how to make a boiler more economical
The rules prohibit the supply of gas to the basements and basements of the building, therefore the owner must allocate a separate room in the house, corresponding to the standards, otherwise the installation of the unit will not be approved by the services.
Trying to save on the automation of heating equipment leads to overheating of the heating system and even rupture of pipelines.
Overheating also occurs due to lack of circulation. In this case, check the pump, filter and overheating thermostat.
Incorrect calculations the required power will lead to the fact that the heat received from the boiler will not be enough to heat the premises.
If the pressure does not rise when the boiler is warming up, then the tightness of the system may be compromised and need to tighten connections, then add a little pressure.
Problems can arise if, when drawing up a project the features of a particular object were not taken into account: power surges, poor fuel quality, insufficient gas pressure, proper ventilation is not organized, or recommendations on permissible distances from the boiler to other equipment and walls are not followed. During the repair, you will have to modernize the engineering work.
The nuances of placing the finished structure
There are three main ways to place a structure: inside, outside, or in a garage. Each of the options has its own characteristic features.
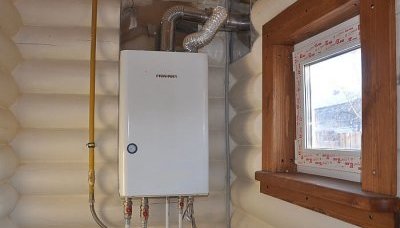
Accommodation inside the house
If a homemade gas boiler for heating and heating needs to be located inside the house, you will have to allocate a separate room for it. The room should be dry, with a stable temperature and low humidity. The boiler must be freely accessible. A natural or forced air circulation system is installed. An electric current is supplied for the operation of the automation. Most modern outlets have built-in grounding so there is no need to create a separate one.
Placing the boiler outside the house
If there is not enough space inside the house for the location of the boiler, it is placed in an extension. Basic requirements for the premises:
- The area of the room is not less than 5 sq. m.
- Stable temperature is above +7 ᵒС. To do this, you will have to insulate the extension.
- The building requires electricity and an electrical outlet.
All pipes leading and outgoing the coolant must be insulated. Otherwise, in winter, a significant amount of energy will be lost during transport from the extension to the house.
Placing the boiler in the garage
If it is not possible to place a room for the boiler inside the garage, it is advisable to build an extension. The garage contains a large amount of carbon dioxide emitted when the car is running, the boiler increases its concentration, which poses a health hazard.
If gas leaks inside the garage, a fire may occur due to gasoline vapors, containers with oil and other fuels and lubricants. Therefore, placing homemade equipment in this room is undesirable.