Decorating the stove in the house with your own hands. The presence of a primordial Russian stove in the interior of a private house fills it with a unique coziness, and a wide selection of facing materials allows you to create a stylish element that is combined with the room. Due to the fact that the stove surface is exposed to sharp temperature changes, doing it yourself is a painstaking process that requires strict adherence to technology.
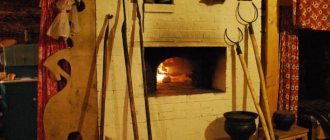
The Russian stove is an interior decoration and a mascot of the house.
Furnace design planning
Before choosing the material from which the finishing will subsequently be made, it is worth paying special attention to the design of the room. Most often, the presence of a Russian stove implies a rustic kitchen style, embodied in a rough finish on walls and floors, a whitewashed ceiling, chintz curtains and wooden floorboards. However, imagination and a little effort will allow you to create other unique design options that perfectly fit into the environment.
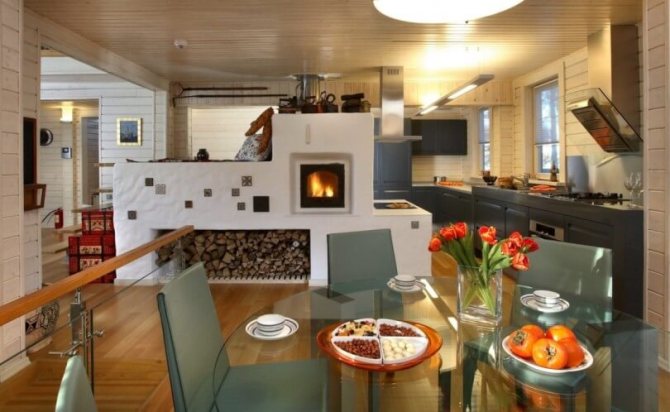
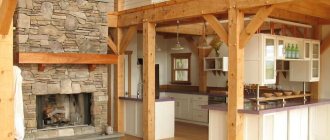
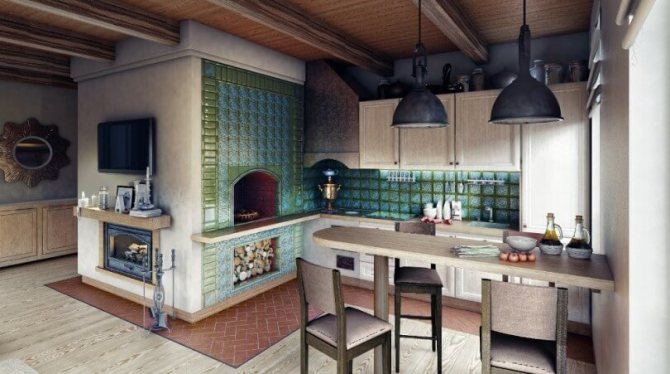
Russian stove in the interior of modern kitchen
Most often, refractory bricks are used to lay the stove with their own hands. As a rule, it does not need additional cladding and can be used as an independent decorative element. But, in the case of an obvious dissonance with the design of the kitchen or a violation of the integrity of the surface during the period of operation, the material needs additional finishing.
There are plenty of options: the stove can be lined with tiles or stone, used tiles in the decor, or simply plastered and painted in any of the colors presented in the palette. The choice will depend only on the complexity and cost of the work.
https://youtu.be/wXYV1dEvtpg
Do-it-yourself methods for finishing a Russian brick stove
Plastering
In order to cover a brick stove with tiles with your own hands, you need to carry out preparatory work and prepare the tool you need to work with:
- rack level and plumb line;
- construction trowel and spatula;
- paint brush (it is better to take a wide one);
- special tile cutter;
- a hammer or mallet with a rubber top;
- brush with metal bristles;
- convenient container for solution;
- refractory heat-resistant adhesive.
The Russian stove is rarely left unfinished. The simplest option for finishing work includes plastering and whitewashing the walls. They are sometimes hand-painted with gouache, acrylic or watercolors. The stove is decorated with several types of tiles, painted with heat-resistant paint.
Photo 1. Application of an ornament using gouache on a Russian stove, which was previously plastered and whitewashed.
Plaster
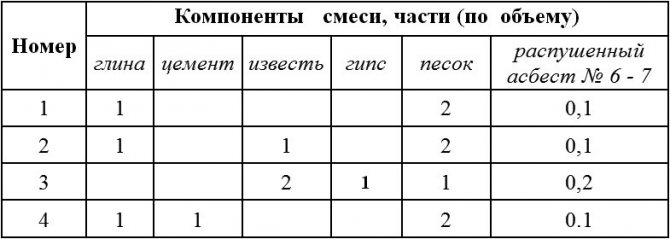
Plastering the walls of a Russian stove is a budget option for finishing. Its advantages are the cheapness of materials and their availability. The composition of the solution, which the stove-makers prepare themselves, includes several ingredients. The components are mixed and diluted with water to the desired consistency.
The solution contains:
- clay and sand;
- fireclay sand and fireclay clay.
Reference. To enhance the strength of the plaster, the mixture includes cement, fluffed asbestos fiber, slaked lime, heat-resistant glue, salt.
Clays are divided into fatty (very viscous, plastic), normal and lean (not plastic, saturated with coarse particles). For preparation of the solution, fatty and normal clays are the best. Sand is added to the former, and the latter can be used undiluted for plastering.
Photo 2. The process of plastering a Russian stove with a Dutch order using clay mortar.
Normal clays contain an optimal amount of granular material and are an ideal natural mixture for kiln work. Skinny clays are also used, but at the same time they add the right amount of oily clay to them.
Important! To apply the first layer of plaster, the solution is made of the same density as for masonry. It does not flow over brick walls and adheres well to bricks and seams. The second (outer) layer is made from a more liquid solution.
Whitewash
Slaked lime and chalk are used to whitewash a plastered oven. These materials are pure white in color and can be easily applied to plaster.
Slaked lime is sold as a powder, packed in sealed plastic bags.
The material is poured into a container, filled with water and stirred with a spatula. The ratio of water and lime is not strictly specified.
You can dilute a thick mass that resembles a toothpaste in consistency, and then dilute it with water as necessary.
Salt is often added to lime. This substance gives strength to the solution. The stove wall will not crumble and dust. If you accidentally lean against a stove whitewashed with salt, there will be no white marks on your clothes. The salt will make the wall of the appliance shine. Building paints are also added to the lime mortar.
Lime is considered a safe material, but corrodes the skin if it comes into close contact. Therefore, whitewashing is carried out in rubber gloves.
Chalk is well applied to plaster. A surface whitewashed with a chalk solution "smears" hands and clothes when touched. To increase the strength of the whitewash, laundry soap crushed into shavings, liquid carpentry glue, skimmed cow's milk are added to the chalk solution. Building paints are introduced into the solution, as well as into lime.
The stove is painted over plaster and non-plastered bricks. Several types of paints are suitable for finishing work:
- water-based;
- organic;
- silicon-organic;
- silicate organic.
All of these paints have common properties. They are water-resistant, heat-resistant, do not get wet from moisture.
The paint is applied with a brush, roller, building spray. To make the layer strong, staining is carried out twice. Hard-to-reach places are painted over with brushes of different widths.
Important! Only completely dry plaster or brickwork is painted.
The Russian stove can be decorated with any tile, this will improve the appearance of the heating structure and allow it to harmoniously fit into the interior of a modern home. Most often, three types of tiles are used: terracotta, clinker and majolica.
Reference. The tile is used for continuous cladding and for creating decorative compositions on the whitewashed or painted walls of the Russian stove.
Terracotta tiles are made from kaolin clay. This is a heat-resistant material that, when heated, keeps the heat of the oven for a long time.
For facing ovens, rectangular tiles are produced, the dimensions of which correspond to the dimensions of the oven bricks, this helps to create an imitation of brickwork.
The color palette of terracotta tiles is warm; brownish, orange, cream tones prevail in it.
Clinker tiles are a finishing material made of various types of slate clay. Dyes give the clay a wide variety of shades. This tile is durable, has heat resistance, remains warm for a long time after heating.
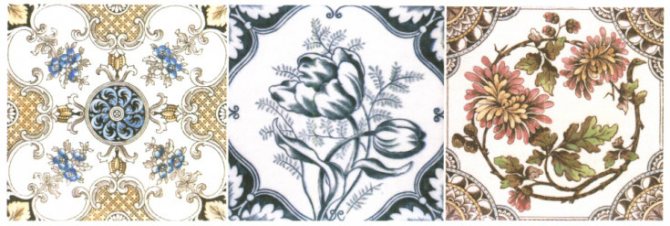
Majolica - ceramic tiles covered with heat-resistant enamel (glaze). Ornaments and drawings are applied to the glaze. This is a very beautiful material that will make the simplest Russian stove unique. Depending on the style of painting, it is called Gzhel, Metlakh, Egyptian tiles.
Furnace surface finishing with plaster
Decorating a design with plaster is the easiest way to finish.Previously used clay compositions have already lost their relevance, due to the appearance of dry heat-resistant mixtures.

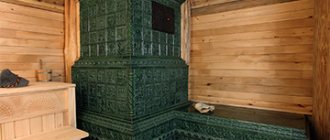
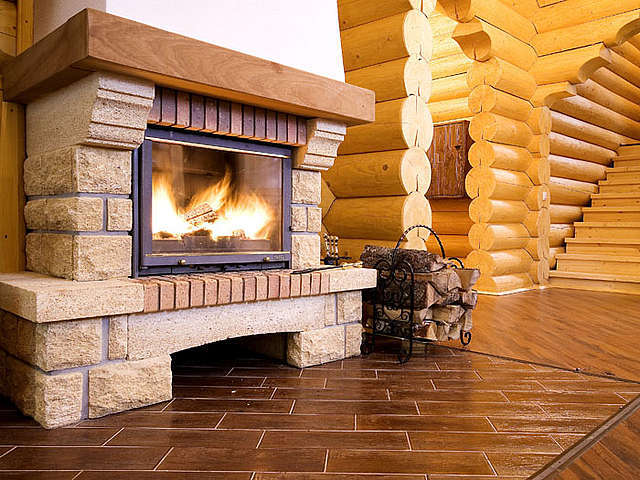
Russian stove finished with plaster and decorative tiles
It is important to remember that before starting the facing work, it is necessary to withstand a month from the date of the end of the laying of the furnace. This interval is necessary for complete shrinkage of the structure.
Before you start plastering brickwork, it is necessary to carry out certain preparations:
- remove residual solution and dust;
- deepen all seams by 10 mm;
- evenly prime the surface;
- cover the structure with a fine-grained mesh;
- heat the stove and moisten the walls with water.
The plaster is applied in several layers until an even layer is obtained.
The direct process of plastering consists in layer-by-layer application of the solution at intervals of 4 hours - for complete drying of each layer. The first batch of the solution must be sufficiently liquid. Its task is to level the surface and form corners. On average, three to four coats are applied to obtain an even surface. The result of this work will be a durable finish.
What else can you decorate the oven with?
Stove-makers are often asked the question: is it possible to take sheets of drywall as a decoration for stoves?
It is absolutely impossible to do this, since an insulating layer must be placed under the plasterboard sheathing, and in this case the stove will perform only a decorative function.
In the case of installing a false fireplace, it can be made of gypsum fiber panels, and then glue vinyl wallpaper on top under a stone or brickwork. Installing a decorative fireplace and wallpapering it is not too expensive work, it will add zest to your living room.
Recently, glass wallpaper or fiberglass mesh has been produced for finishing furnaces. They are fireproof and recognized as completely harmless, since they do not emit toxic substances when heated. After gluing with fiberglass or fiberglass mesh, they can be painted in any color that suits the interior of the room.
These are two different materials, but the principle of manufacture and all characteristics are suitable for finishing furnaces.

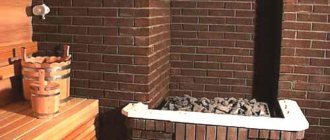
Sometimes refractory bricks are used to decorate fireplaces and stoves. It is a heat-resistant material used in blast furnace production. It is expensive and is not widely used in household brick heaters.
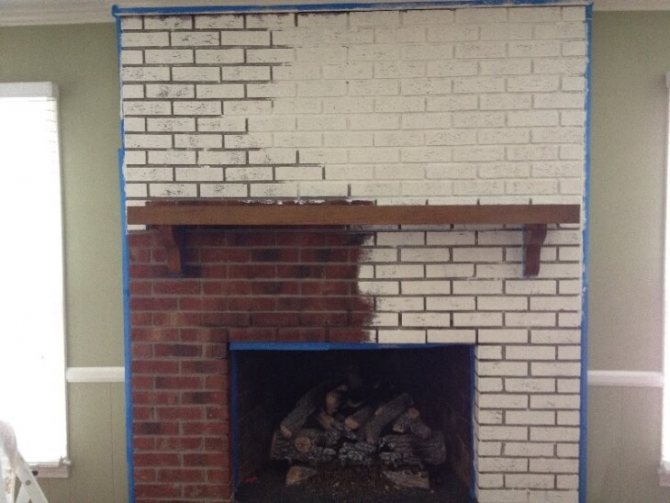
Furnace dyeing process
The basis for painting a stove in a private house can be both a plastered surface and brickwork in its natural form, provided that its integrity is not violated. There are many options for paints and whitewashing. You can choose a suitable option for painting the stove surface, taking into account the level of complexity of the work, the financial base and the general design of the kitchen.
Lime staining of the kiln
The easiest way to paint the stove with your own hands is to whitewash chalk or lime. To strengthen the composition, salt is added to it, which during the operation of the structure will prevent the coloring composition from shedding. It is necessary to paint with a chalk or lime composition in several layers, this will determine not only the quality of the coating, but also the aesthetic appearance of the furnace.
There are also a number of heat-resistant paints, which are distinguished by their ease of application and a wide range of colors. The most common types among them are:
- alkyd;
- organo-silicate;
- silicon organic.
Painting the oven after preliminary preparation
With their help, the surface of the stove can be painted in any color, as well as make a unique painting with your own hands. The painting process itself is not difficult, it is only important to carry out preliminary surface preparation. For this you need:
- remove the remnants of the previous finish (if any);
- wash the surface thoroughly;
- if there are greasy stains, remove them with a soda solution.
Note: The oven can be painted without prior priming.
The stove surface (brickwork or plaster) is painted with a medium-pile roller. The brush is only used to paint seams and hard-to-reach areas.
It is best to paint the oven with your own hands in several layers, at intervals for complete drying.
Tip: Before you start painting, it is advisable to heat the stove a little. Any paint adheres better to a warm surface. But after the completion of the work, the oven can be heated no earlier than after 2-3 days.
What are the principles for determining the installation location
It is worth understanding that the question of where the stove should be located in the house is extremely important and responsible, therefore, it is worthwhile to approach the search for an answer with special care.
The principles for determining the location are as follows:
- Any stove should be as close to the central part of the house as possible so that the external chimney does not go far from the ridge.
- The correct location of the device will be in the event that other communications are not carried out under it, for example, water supply.
- When installing two ovens in one zone, it is still better to design for each foundation in order to protect yourself from the rapid destruction of products.

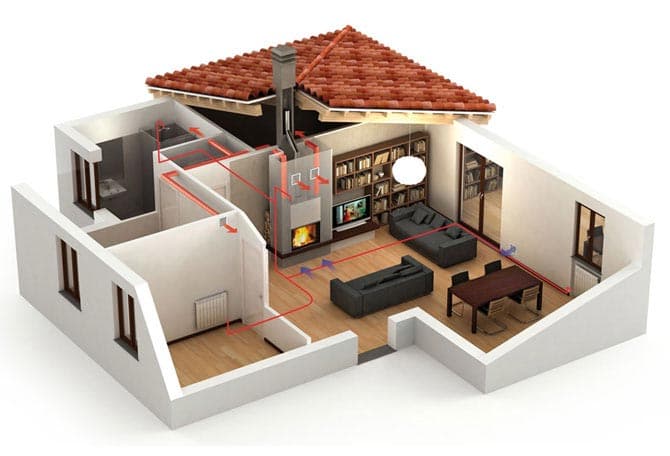
The location of the pipe relative to the ridge of the house
In addition, it is worthwhile to clearly understand that one structure must heat at least two rooms, otherwise its installation will not be advisable.
Good to know: How can you paint a red brick stove, what composition to use
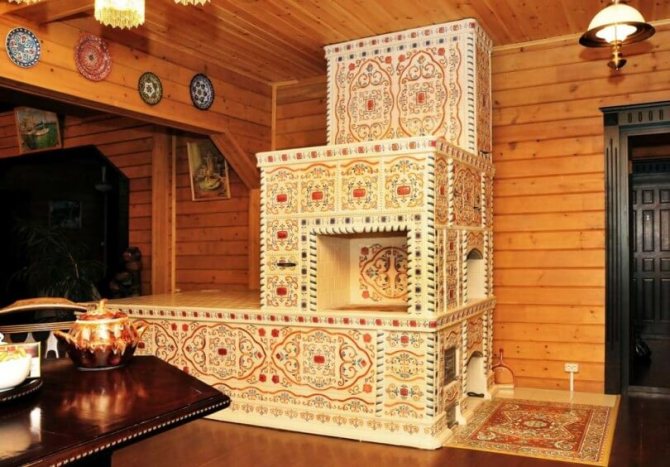
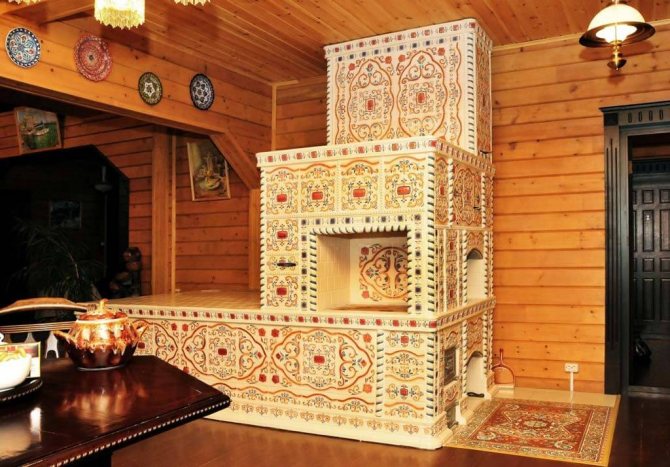
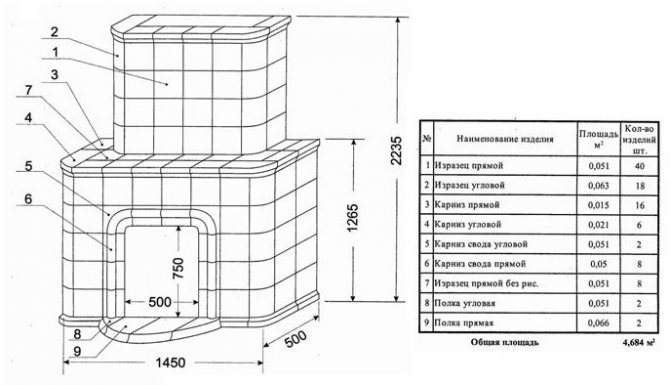
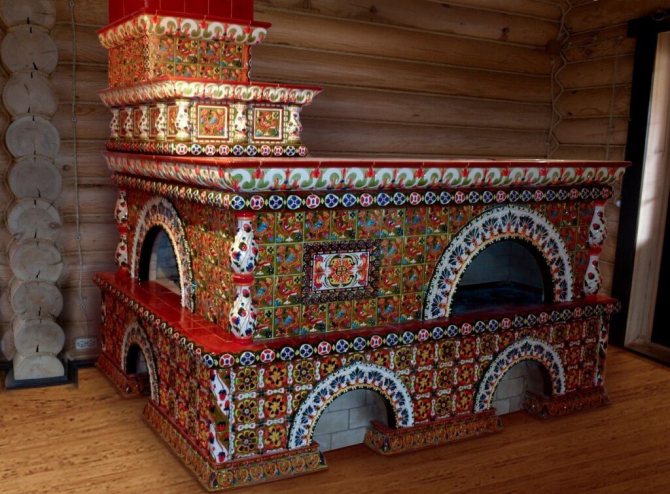
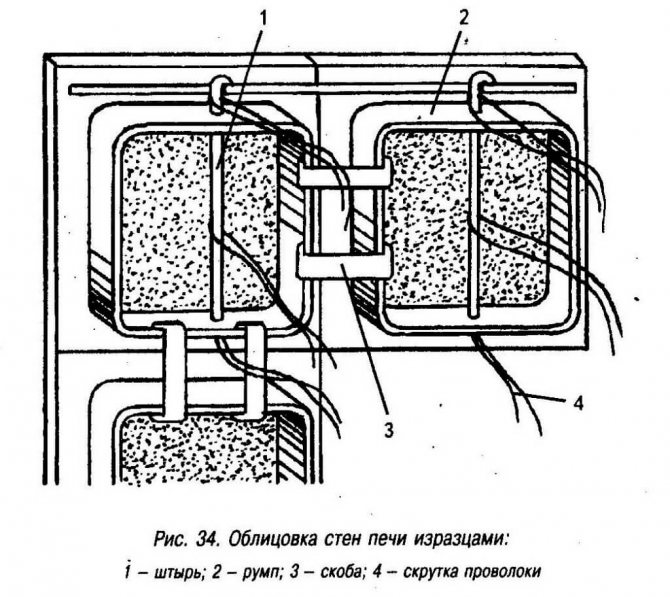
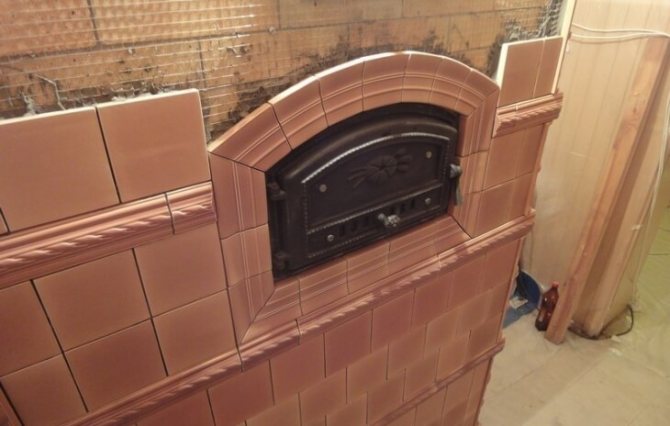
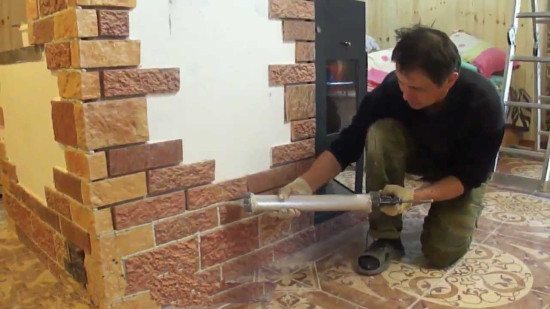
Facing the stove with tiles
Tiles are a unique and antique type of decoration. The material is presented in the form of ceramic tiles on one side, and on the other - a rump, with the help of which the installation process is carried out.
The color scheme of the tiles is varied, in addition, they can have different relief and pattern. A stove lined in this way will have a unique look. However, the cost of the material can significantly surpass other types of cladding. This is due to the fact that the painting of the finished tile is carried out manually.
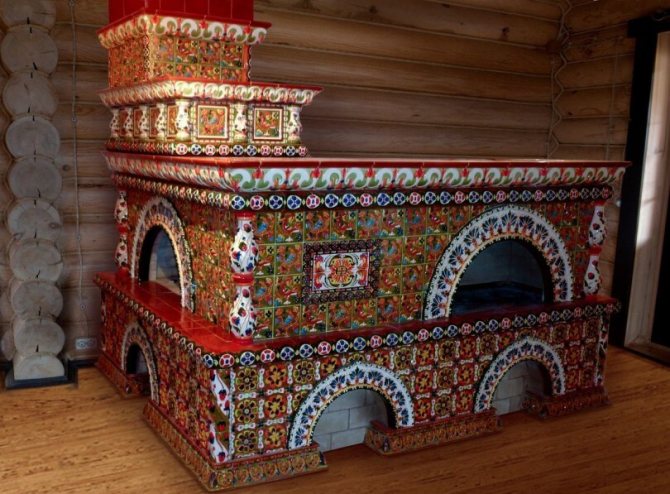
Russian stove is decorated with tiles
To cover the stove with tiles, you must adhere to certain technical recommendations and follow it in the following order:
- The tiles must first be soaked in water. Then you should overlay them on the oven without using a solution - for even distribution of parts. Next, you should remove all the rows, except for the bottom one.
- Laying the rows, starting from the bottom, on a clay mortar. In this case, the steel pins inserted into the holes of the tiller must be connected to each other with a wire, pressing the tiles to each other.
- Adjacent tiles are additionally fastened together with elastic steel staples.
- The final stage is grouting with clay mortar.

Scheme of fastening tiles to the surface of the stove
Important advice: Horizontal joints are trowelled with a gap of a few millimeters, taking into account the shrinkage of the tiles.
A stove faced with tiles in a private house is a reinforced, monolithic structure with an almost unlimited service life.
Porcelain stoneware
Its creation falls on the 80s of the last century. Porcelain stoneware is intended not only for finishing stoves, but also widely used in construction.
For its production, several varieties of special clay are required with the addition of quartz sand, various types of natural dyes and a fine fraction of marble or granite to the mass.
The whole mass is well mixed and pressed at rather high temperatures under pressure. The result is a durable product that is not afraid of strong shocks and high temperatures, perfectly retaining heat.
This is a monolithic material, which can be given, during manufacture, any color.
Thanks to modern technologies, porcelain stoneware can be made in the form of majolica, terracotta or tiles.The cost of such material is also not great, in comparison with the original ones.
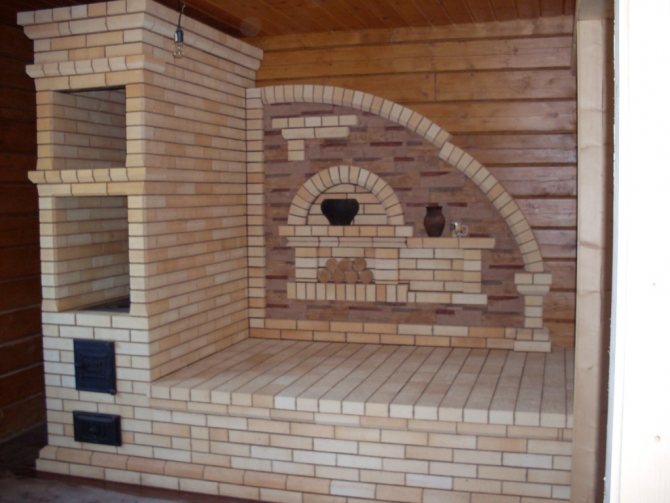
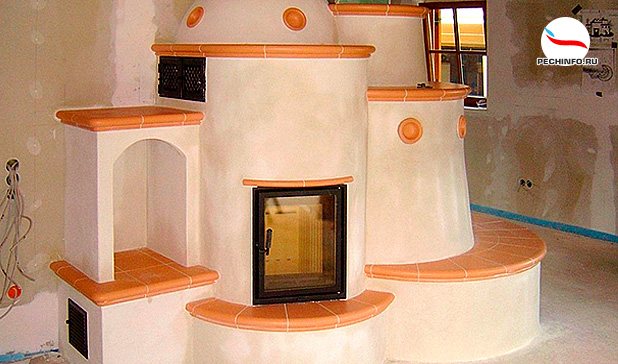
Furnace decoration with tiles
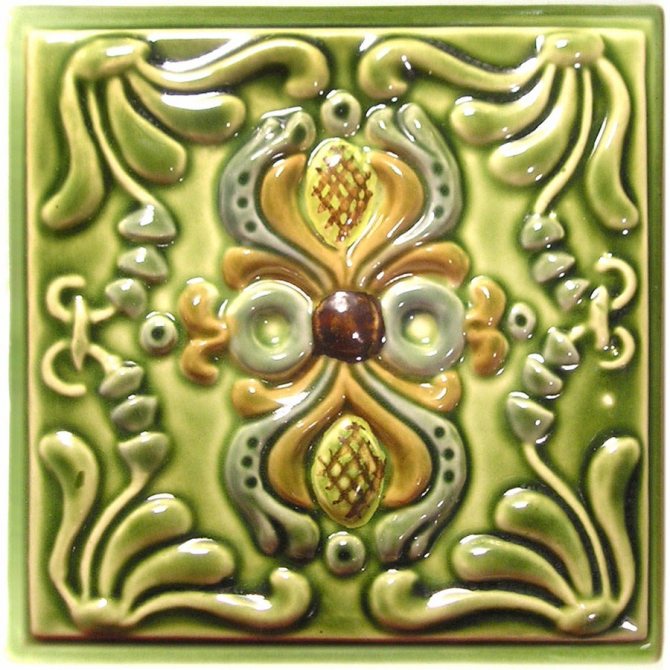
An alternative to tile design can be finishing the stove in a private house with ceramic tiles. Majolica, a glazed tile made by pressing and double firing, has special decorative data. The facing material is made of colored clay, and the front part is decorated with bright painting. It is much easier to cover the stove with its help than with tiles, and the final design will organically fit into the space of the rustic kitchen.
Non-glazed terracotta tiles can be a budget option for finishing. In terms of strength, it is not inferior to majolica, moreover, it has more pattern options: imitation of brick or natural stone.
The process of lining the oven with ceramic tiles
As the most durable finishing material, you should pay attention to clinker - a type of ceramic tile made from highly plastic types of clay. This material can be used to overlay not only the oven in the kitchen, but also any other surface subject to sudden temperature changes.
In order to overlay the surface with any of the types of tiles with your own hands, you must use a special heat-resistant water-based composition.
Note: Before tiling the oven, carefully plaster and reinforce the surface.
Clinker tiles
European material created for facing fireplaces and stoves as opposed to decorative bricks in the houses of Holland, Norway and a number of other Northern European countries.
Usually, several types of clay are pressed, with the addition of certain parts of chamotte, various dyes, and fired. The result is a tile with a pleasant shade of beige, from milky to bright orange.
It is a material with a thickness of 9-12 mm, with a microporous structure, capable of retaining heat well.
Stone cladding
The surface of the stove can be faced with natural or artificial stone. This method is becoming more and more popular every year. This is due to both the refractory qualities of the material and the aesthetic ones. In addition, after a certain period of operation of the oven, you can add variety to its design by simply painting the surface in the desired color.
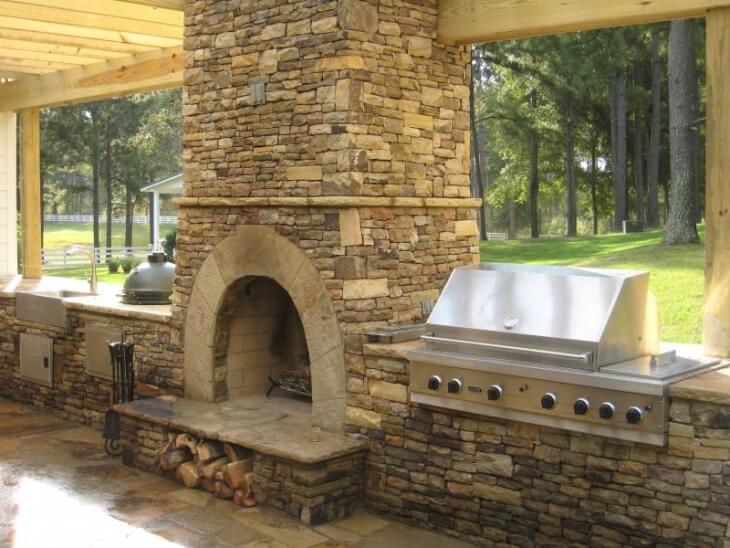
Furnace finished with stone
The nature of the work carried out on laying the stone has a certain similarity with the design of tiles. But there is also a certain difference, which lies in the fit of the material. Especially if the question concerns natural stone, which has a variety of shapes and sizes.
The cladding process consists of the following steps:
- Priming the oven surface to ensure a high level of material adhesion.
- Laying the bottom row of stones using a level. The work uses a special heat-resistant solution consisting of cement, sand and synthetic additives.
- Small pieces of drywall can be used to join the seams.
- Stone trimming is done using a grinder and a concrete disc.
Tip: Cutting the stone must be done at low speeds of the grinder, in order to avoid chips.
The stove is a special design element of a modern country house It is possible to create a unique kitchen design in a private house with a stove not only with the help of one of the types of finishes, but also by combining several at once. Alternatively, the surface can be plastered, and the corners can be overlaid with natural stone. Or use a combination of brickwork at the bottom of the oven, and paint the top to match or with a patterned pattern.
By decorating the stove with your own hands, you can create a unique piece of furniture that will fill the house with comfort and warmth.
Choice of cladding method
Materials for cladding and whitewashing of the stove are selected in accordance with the design of the device and the style of the interior. The choice of finishing options is influenced by:
- the cost of basic and auxiliary materials;
- the cost of services of a stove-maker;
- individual preferences of the owners of the house.
If the baking roof and hob play a decorative role and are practically not used, you can choose any type of finish. If the outer cladding will constantly experience mechanical stress, periodically covered with soot, it is reasonable to opt for a cladding that is easy to clean or restore.
If the solution contains fast-setting components, prepare it immediately before use. If the solution does not include such ingredients, it can be made in advance and stored in a sealed container. Plastering includes the following steps:
- The surface of the oven is moistened with water from a spray bottle.
- On a wide spatula, take portions of the solution and apply (or throw) them on the wall.
- Using a wide trowel, the solution is leveled along the wall. The grater is carried out from the bottom up, parallel to the floor.
- The procedure is repeated until the entire wall is covered with plaster.
- Using an angle leveler, float, another tool, level the corners.
- The wall is left to dry for half an hour and the second layer is applied.
- The solution is slightly diluted with water to make it more plastic.
- The solution is applied (thrown over) with a spatula on the wall.
- Using a wide grater and a rule, the surface is leveled.
- The corners are finally leveled with an angle leveler and a float.
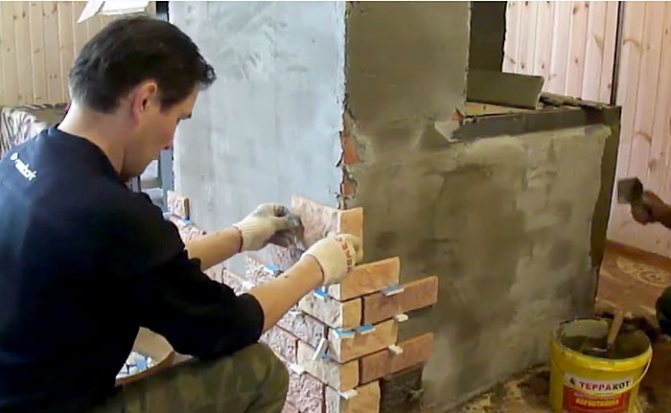
Tiling is carried out using ready-made mixtures or clay mortar with cement. To apply the mortar, a trowel, spatulas, a hammer, a grinder for cutting tiles are required. Working with terracotta tiles includes the following steps:
- The brickwork is moistened with water from a spray bottle.
- A primer (Premi or other) is applied to the wall with a brush.
- A solution is applied to the wall with a trowel, a wide spatula.
- The mixture is leveled with a grater. The layer thickness is 4-5 mm.
- The tile from the inside is smeared with mortar and glued to the wall.
- Plastic dividers are installed between the tiles.
- After the solution has set, remove the spacers.
Heat-resistant mastic or clay mortar with glue is introduced into the seams. To do this, use a special syringe.
Attention! Plastering and laying of tiles are carried out at a temperature not lower than plus 5 degrees and not higher than 25 degrees.
Decorative rock
The stone for facing the Russian stove is rarely used, it does not really match the appearance of the structure. Most often, the portal or base of the furnace is trimmed with a stone, but it can be used for the entire body.
Materials and tools
For finishing you need:
- facing stone (you can use hewn and wild stone, pebbles);
- glue solution (clay or cement);
- level;
- comb;
- rubber hammer;
- solution container;
- metal grid;
- fasteners for the mesh;
- construction mixer.
The best solution for a stone is clay in a ratio of 1: 2 (clay and sifted sand, respectively). For large-format stone, it is better to take a cement mortar with a 1: 2: 1 ratio of components (cement, oily clay, sand, respectively).
Instructions

Scheme
- Before starting the cladding, the surface is reinforced with a metal mesh, which is attached to the seams of the brickwork. Next, the mesh is covered with a layer of plaster (as for conventional plastering of the oven). The surface should dry, after which it should be leveled and sanded.

- The cladding starts from the bottom row, the glue is applied with a comb on the surface of the stove and tiles, then each element is firmly pressed against the wall. Using a rubber hammer, gently tapping it, give the stone the required position. When laying, it is not recommended to make very wide seams, as the surface will not look very nice.
If necessary, individual stone plates are trimmed with a grinder, this should be done as the finish is glued.All excess solution is removed immediately, since after drying it will be almost impossible to remove them.
Varieties of ovens
The main classification involves the division of furnaces into metal and brick:
- A brick oven is a classic option. The brick cools down for a long time, so such a stove will heat up even after the fire has extinguished. Stone stoves for a home can heat a large home with several floors. Bricks cannot be red-hot, so there is no need to protect walls, ceilings and floors. Brick stoves have a low cost, especially if you do the laying of a structure with your own hands according to drawings and diagrams. For construction, you need to choose a refractory fired brick, but you can make it yourself. The layout of houses with a Russian stove requires the construction of a powerful foundation, if it is not done, the building may be skewed;
- The metal oven takes up less space. They are more aesthetically pleasing, you can make a case of unique sizes and shapes. They serve for over 50 years without the need for repairs. The rooms heat up quickly enough regardless of the type of fuel. The price is pretty low. The structure cools down at the same high rate as it heats up. They also have a high risk of fire, but if all operating conditions are observed, you do not need to worry about this. Do not place it near flammable objects and surfaces. It is important to provide protection with ceramic tiles.
You will be interested in: How to arrange a 10 sq. m convenient and safe
By the type of construction, the most popular types are the traditional Russian stove, fireplace stove and cast iron stove. There are also electric fireplaces that can be installed both in an apartment and in a wooden house. It can be delivered in half an hour. The device heats up the room and the flame is visualized.
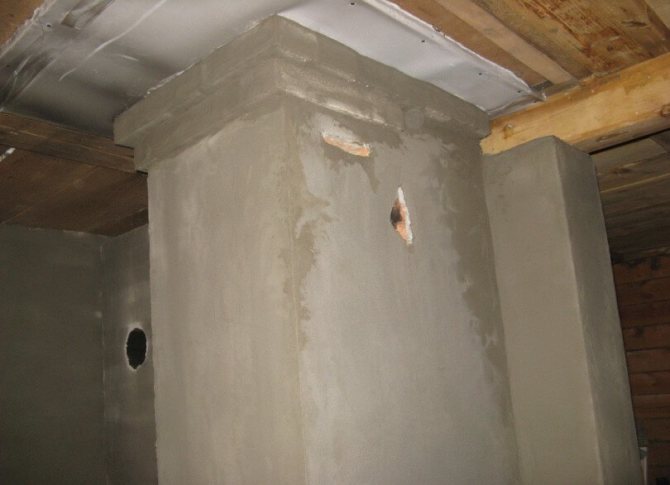
Brick oven plaster
Plaster can rightfully be considered the most budgetary type of finishing. There is a wide variety of folk and modern methods. Most mortars are based on clay. On its basis, asbestos, cement or gypsum can be added to the finished mixture. A large selection of ready-made dry mixes is presented on the construction markets. Such compositions are not inferior in quality to traditional ones. They have good heat-resistant properties, are durable and reliable.
Basic rules for plastering brick ovens
- The new oven should dry and shrink. To do this, it is heated several times, gradually increasing the heating temperature. It is possible to start facing work only a month after the completion of the masonry.
- The surface of the stove is cleaned from the remnants of the masonry mortar. Seams are selected to a shallow depth, and reinforcement is made.
It is advisable to reinforce the surface with steel mesh or fiberglass.
- To make the plaster dry faster, before starting work, the oven is heated.
- The first layer of the solution is made more liquid. Apply it by filling voids and forming corners. Subsequent layers are leveled and sanded to a flat surface.
The plastered stove can be whitewashed or painted later. For these purposes, there are a large number of different formulations. The cheapest and most environmentally friendly mixtures are lime and chalk. However, such dyes have several disadvantages. They can smear and crack if no binders are added to their composition.
In the modern market of paints and varnishes, paints on a polymer and organosilicon base can be distinguished. These dyes withstand high temperatures, moisture and UV radiation. Wishing to emphasize the structure of red brick, such compositions can also be used to cover an unplastered stove.