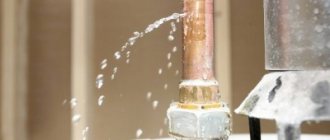
Soldering the cooling radiator
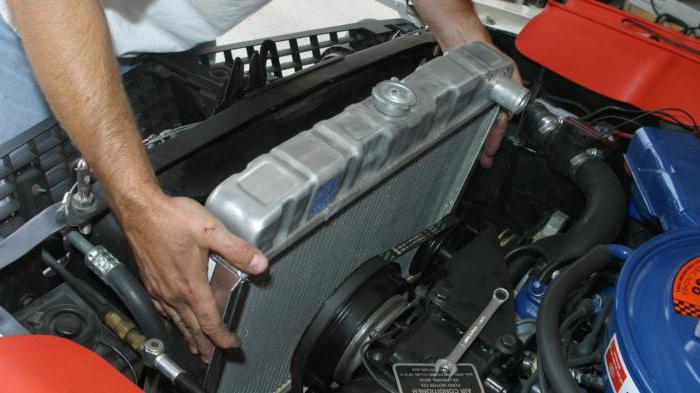
1)... First of all, we need to remove the radiator. We drain the coolant into a special container, disconnect all the pipes, tighten the mounting bolts and take out the assembly.
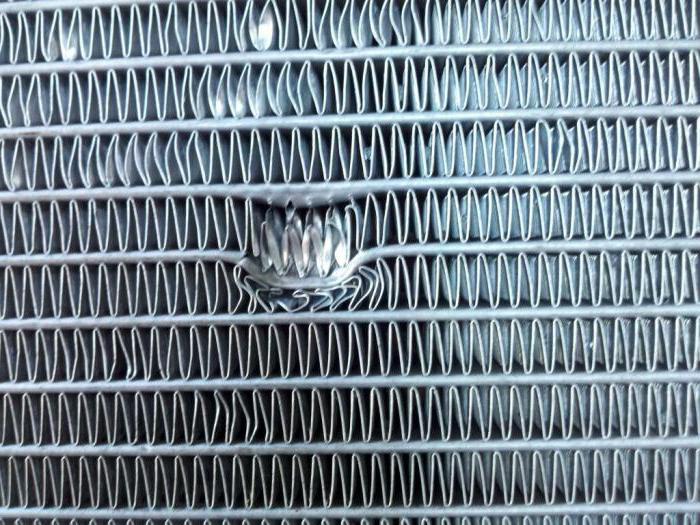
2)... Next, we need to determine exactly where the leak is.
- Visually... Before removing it, we start the engine, warm it up to 80 degrees and try to find the leak with a glance. After dismantling, we also carefully examine the unit. In cases with a large defect, it will not be so difficult to find the leak.
- If anything—it didn't work... We lower the dismantled radiator into the bathroom, connect a working compressor to one of the nozzles to inflate the tires. The exact location of the defect can be identified by air bubbles.
3)... After that, we will need to decide on the soldering method.
- Small breakdown... In cases with a small breakdown, pour solder into the problem area.
- Extensive damage... In cases with relatively extensive damage, it will already be necessary to put the patch and solder it along the contour.
Instructions
- Soldering iron (from 100 W and above);
- Flux;
- Solder;
- We clean the place of soldering from dirt and dust, dry it.
- Next, we apply rosin or soldering acid here (which is the most preferable option).
- In cases of a small hole, spread the tin evenly over the area to be treated.
- If the damage is large, then we put a copper or brass patch, after which we carefully solder it around the perimeter. The patch can be cut from the old cooling heatsink. Low-melting solder is recommended to use grades POSS 30-0.5 or POSS 25-2.
- In cases where the radiator is aluminum, then this has its own peculiarities. The entire process can tear off the instantly formed oxide film, and therefore it is recommended to use reactive flux and aluminum solder.
- If the tube is damaged and it is possible to access it with a soldering iron, we warm up the soldering point, carefully remove the tube. Further, depending on the nature and area of damage, we either solder or replace it with a new one.
- If, nevertheless, there is no external access in the tube, then you can proceed as follows. Into the inside of the tube, we introduce a heated rod of a suitable diameter. After the solder has softened, remove it together with the tube.
How to fix a leak in a radiator with a sealant?
Sealant is a special compound for sealing cracks and holes in the cooling system and in particular in the radiator.
Sealing agents are of several types:
- Powder... We fall asleep in the radiator when a coolant leak occurs. The simplest and most popular option among domestic car owners is mustard. Some motorists even use tobacco and other equally exotic substances for these purposes.
- Dignity... The advantages of dry products include low cost and the ability to eliminate small defects (up to 1 mm).
- disadvantages... There is also a significant drawback, which is that not only the leaks are clogged, but also the radiator channels in the cooling and heating system of the passenger compartment.
- Liquid preparations... The basis of preparations of this type is polymers with the addition of small metal particles. As a rule, such funds are used to eliminate leaks in the engine block, but also partially in radiators. The principle of operation is as follows: polymers cling to small roughness and sharp edges and envelop them.
- Dignity... The advantages of this option include the fact that the sealant is constantly in the coolant and, when it is replaced, is removed from the cooling system.
- Disadvantage... Only small holes (no more than 1 mm) can be closed with a polymer preparation;
- Modern means of polymer type... Means of this type have special fibers in their composition. A striking example of such a substance is the LAVR STOP LEAK radiator sealant. Thanks to the fibers, the adhesion of the particles of the agent between themselves and the edges of the cracks is improved.
- Dignity. The main advantage of this option is that a hole up to 2 mm can be closed in a few minutes.
- Disadvantages. High price.
Car radiator sealant - application
The main mistake of most car enthusiasts is that they do not know the main function of the rattler. And it is simple - elimination of coolant leaks during its temporary use. Therefore, it is recommended to use a rattler only in cases where it is not possible to eliminate the leak in stationary conditions or in a garage.
If a sealant was still used to eliminate the cause of the leak, then, if possible, drain the coolant, flush the system and make a full repair of the radiator.
Driver's actions when using sealants:
- A temperature sensor can indicate a leak from the radiator while driving. If the car is parked, then a puddle of coolant can tell us that it is necessary to check its level.
- In cases where such a problem still arises, then we turn off the engine, wait until the coolant cools down and proceed to inspect the damage. If the liquid still continues to flow, we install a container under this place to collect it.
- Remember! Do not open the radiator cap of a car while the engine is running or hot, as this can cause serious burns.
- If you have a powder or liquid product on hand, then place it in the radiator in accordance with the instructions.
- Then we start the engine for a few minutes, turn it off and after a while again check for a leak on the operating unit.
- If the leak is small and the sealant was used in accordance with the instructions for it, then the coolant should no longer leak.
- In cases where the defect still could not be eliminated, then this may indicate to us that the hole is large. In this case, soldering is no longer necessary.
How to choose the right sealant?
To facilitate the selection, a summary table with two characteristics will help: the time of clogging of holes of different diameters and the level of deposits. To evaluate the latter parameter, the weight of the thermostat was used before and after the application of the additive. Such testing of sealants was carried out at the Department of Internal Combustion Engines of the St. Petersburg Polytechnic University.
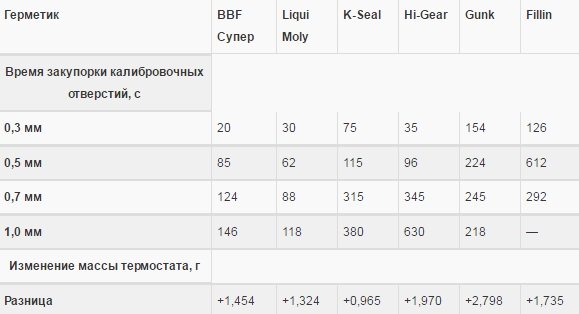
The table shows that sealants cope with microcracks successfully, even large holes are closed for 2-10 minutes.
How to repair a crack in a bimetallic heating radiator
Any repair without the involvement of specialists is a troublesome and unpleasant task that requires both financial costs and investment of time in it.
Do-it-yourself repair of bimetallic radiators can be done quickly and without problems, subject to three conditions: adhere to the sequence of actions, have the necessary tools for this and be able to independently determine the cause of the breakdown.
Knowing how to disassemble bimetallic radiators, the rest of the work will be easy. They can be soldered, cracked and flushed just like other sectional structures such as cast iron, steel or aluminum.
The uniqueness of this type of heaters is in their design. Combining two types of metals in one design is an opportunity to take the best from each of them, while replacing their weaknesses.
On sale there are:
- Combination of a stainless steel core with an aluminum sheath. In this case, these metals complement each other in the following:
- Steel has a thermal conductivity of only 47 W, which is quite a bit for high-quality heating of a room. Aluminum has a heat dissipation of 190 W. By heating from the core, the casing effectively transfers heat to the room.
- Aluminum is "afraid" of water, namely high acidity, as it causes corrosion in it. Stainless steel is named so because it is not afraid of any coolant. Installation of steel collectors inside the aluminum body protected it from interaction with water. Due to this, the service life of bimetallic radiators is 20-25 years, while for models consisting exclusively of aluminum, it rarely exceeds 10 years.
- The strength of steel allows batteries of this type to withstand any water hammer, which gives consumers the ability to install them in homes with a centralized and unstable heating system.
Thus, the combination of two such different metals has created a strong and reliable structure, although its heat transfer is slightly lower than that of aluminum counterparts.
- The combination of a copper core with an aluminum top is a real breakthrough as these metals cannot even be kept close, but together they create the device with the highest heat dissipation. Separation of copper and aluminum ensures their durability and strength of the entire structure.
- Semi-bimetallic radiators are equipped with vertical steel headers only, while horizontal ones are made of aluminum. They are cheaper, but less durable, although they have a high level of strength and heat transfer.
This is how a bimetallic heating radiator works. If such a reliable structure is out of order, it means that mistakes were made during its installation.
Before proceeding with the repair of the radiator, you should deal with the cause that caused the malfunction. As practice shows, there are several main reasons for the breakdown of a bimetallic battery:
- Wrong model selected. If you do not correlate the indicators of the heating system with the technical characteristics of the battery, then it may turn out that they do not fit together.
- Incorrect connection to the system. For example, if the pipes or adapters to them are copper, and the case of the radiator is aluminum, then the contact of these metals will provoke the formation of corrosion.
- Too dirty coolant can destroy even the most expensive and high-quality heating devices, leaving deposits in the form of suspended solids and debris on their walls for many years. When bimetallic radiators do not fully warm up, the most common reason for this is their clogging.
- "Looseness" of nipples and gaskets often cause not only temperature changes, but also water hammer. The former need to be periodically checked and tweaked, and the latter should be changed.
- When noise is heard in the batteries, airiness may be the cause, but the question of why bimetallic radiators click is best answered by specialists. The reason may be caused by internal damage, which can only be determined by employees of the heating network using special equipment.
It is possible to repair bimetallic heating radiators during the heating season only if the following signs are manifested:
- The battery does not heat up or only heats up in one part.
- A leak appeared at the joints of the connections or in the battery itself.
- Loud noise and crackling noise in the heating system.
If there are no obvious reasons why bimetallic radiators are not heated, then you should call the masters who, with the help of special devices, will find a breakdown. Only if the reason for the poor performance of the battery is established, can it be dismantled and repaired.
Not a single, even the most reliable heating system is immune from breakdowns.It is difficult to expect that with the quality of the coolant in the city heating system, the radiators will work flawlessly for years. As a rule, the first sign of why bimetallic radiators do not heat well is their clogging.
To rectify the situation, it is enough to clean the system. To do this, you need to know how to flush bimetallic radiators at home. In this simple work, the main thing is to follow the sequence of actions.
- Before removing the battery, disconnect it from the system and prepare the site. On the floor, you need to lay a waterproof fabric, move the furniture and remove the curtains from the window. In the event that there is no shut-off valve on the radiator, you will have to drain the water from the entire system.
- With a pipe wrench, the battery is disconnected from the heating system pipe and leans over the tank so that water flows out of it. Only completely draining the water can the radiator or its sections be transferred to the bathroom to continue cleaning. The bathroom should be pre-covered with a cloth, even safer if you put a wooden pallet in it. This will protect the coating from possible scratches and chips.
- The plugs are removed, into which water is supplied under strong pressure until a clean stream flows from the radiator.
- In the event that there is so much scale that the water cannot break through it, you will have to use special chemical solutions designed for such work, for example, "Mole". The tool (you can even use ordinary table vinegar) is poured into the battery and left for several hours. If the scale layer is very dense, you can leave the radiator to settle overnight.
- After the chemistry dissolves the scale, the "insides" of the battery are thoroughly rinsed under the pressure of water until it becomes transparent at the outlet.
- All the plugs are put in place, and the reassembly of the bimetallic heating radiators begins. It is not difficult to carry out such work with your own hands.
By following all the steps consistently, any beginner can cope with such a simple job as cleaning batteries. It is more difficult if they have leaked, which will have to be eliminated either by soldering, or with glue, or by cold welding.
A crack on a bimetallic radiator is an extremely unpleasant event, since the repair of aluminum products is always difficult.
This metal tends to oxidize on contact with oxygen, which causes it to form an oxide film. It appears immediately, as soon as a piece of metal is "exposed". That is why it is difficult for a beginner without proper experience to repair a bimetallic radiator. Professionals know how to solder an aluminum frame, but this does not mean that this work cannot be done independently.
The main thing that the master will need is a flux, with which you can solve the problem with the appearance of an oxide film. Special means for soldering aluminum can be bought at the store, or you can prepare it yourself.
After the issue of removing the oxide has been resolved, you can perform conventional soldering using an iron-rosin mixture as a solder.
This method will pay off in the event of a small crack or hole. When urgent repairs are required, epoxy glue can be used as a temporary solution. The principle of cold welding is considered one of the best ways to eliminate cracks and holes in aluminum products, and a bimetallic radiator is no exception. Funds for this work are sold in building materials stores.
As practice shows, if a section of a bimetallic radiator has suffered badly, then it is easier to replace it with a new one than to try to fix it and be afraid that a new leak will occur at any time.
Summing up, the following conclusions can be drawn:
- Expensive bimetallic radiators also break down.
- They can be repaired by yourself, provided that the cause of the breakdown is correctly identified.
- The collectors of these batteries are clogged with dirt in the same way as with heaters made of other types of metals.
- Flushing the batteries every 2-3 years is a good prophylaxis that allows you to keep the heating system clean and prolongs the "life" of all its elements.
Thus, the repair of bimetallic radiators is not difficult if you follow the sequence of actions.
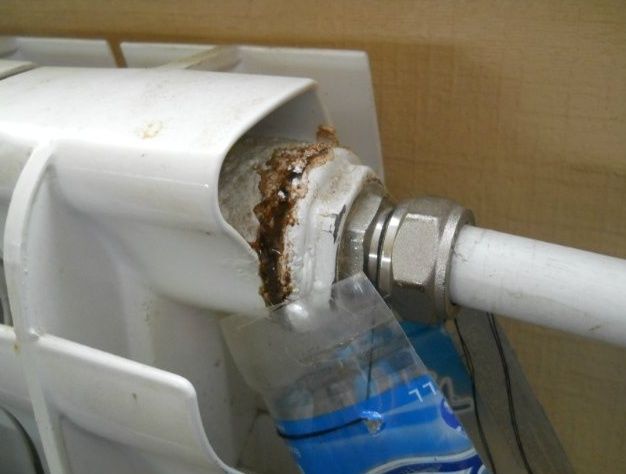
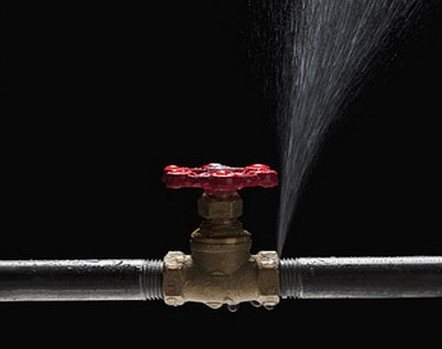
The method of eliminating a leak in the heating system largely depends on the place where the leak appeared. The leak could be:
- on a solid pipe;
- at the junction of pipes and radiators, pipes and fittings (adapters, tees, etc.);
- between battery sections;
- directly on the radiator.
Depending on the scale of the disaster (how else to call it?), The actions differ. If these are only the first calls - a few drops per hour or a very thin trickle - you can try to eliminate it yourself, using available or purchased means.
You can also close up the leak in the radiator and pipe with your own hands. The main thing is that it flows slightly
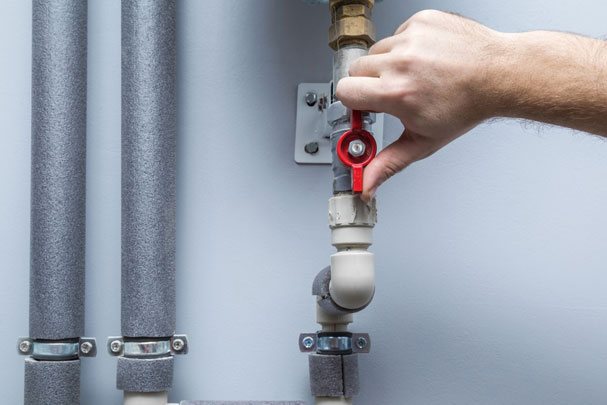
If it flows strongly, the first thing for residents of high-rise buildings is to call an emergency team. The next step is common for everyone: shut off the coolant supply. There are several options:
- The radiator is leaking. At the same time, there are shut-off valves at its inlet and outlet. Then just turn off the taps. For owners of individual heating, everything is simple, but for subscribers of centralized heating, there are several situations. The radiator is installed with a bypass, then when the device is turned off in your apartment, nothing happens to the common riser, the heating continues on. No problem, you can do the repairs calmly.
- There is no bypass. Then you need to either inform your neighbors and (or) the DEZ, ZhEK, etc. and then deal with the problem.
We really do not like to call emergency gangs and often try to fix everything ourselves. There is a chance to eliminate the leak with your own hands, if it is not flowing into the radius. Then let's try to localize the problem.
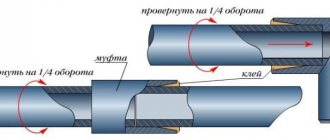
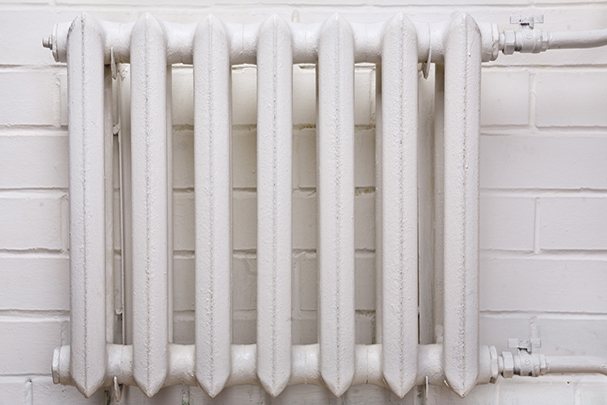
The difference between new and used pipe is obvious
Heating pipes are constantly corroded. Over the years, the wall, which was more than 1 mm thick, becomes thinner: steel gradually rusts, rust particles are carried away by the coolant. And one day, in the thinnest place, water seeps out.
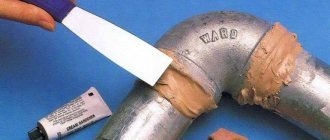
The easiest and fastest way to "cure a pipe" is a piece of rubber and a clamp. Instead of a clamp, you can use a wire
If you see somewhere an incomprehensible stain on a pipe, paint swells, a rusty drip or a couple of drops appears - this is the future place of a leak. Do not wait for it to appear, if possible, immediately change the pipe (when the heating is not working). If this is discovered during the season and replacement is not possible, immediately eliminate the threat.
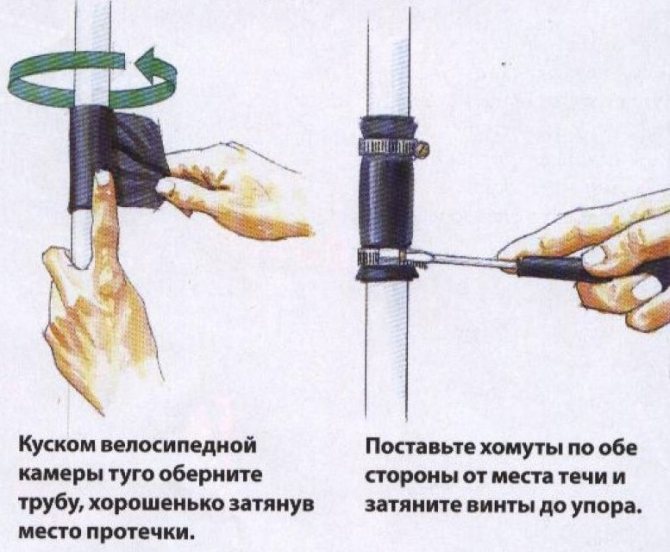
If it is already flowing, the water is not too hot, and the pressure is tolerable, you can try to apply a clamp. The easiest way is to wrap it with rubber. Any one at hand will do: a bicycle or car camera, a piece of a boot, even a rubber glove. From all this, cut into rubber strips. The main thing is that they overlap the damaged area in width. Start winding, slightly stepping back from the leak, pull tight so that the turns fit snugly one to the other.
If the leak has stopped, consolidate the success: from the sides and in the middle, right at the place where there is damage, fix the applied bandage. For this purpose, you can use a wire (tighten with pliers) or car clamps (a very useful thing in the household, you can buy "in reserve").
If there is a piece of tin, you can cut a strip to the size of the patch, apply it and tighten everything with bolts. If there is no tin, but there is wire, use it: tightly, turn to turn, go through the entire patch. It will turn out reliably, most likely, it will be worth it until the end of the heating season.
These are industrial clamps for eliminating leaks on a pipe or joint. Convenient and fast
It was a "popular" method, but there are clamps for repairing factory-made pipes. It is a piece of metal with rubber attached to it from the inside. Its edges are tightened with bolts. There are they of different diameters and widths - for different damages. A very handy thing. How to use it can be seen in the video: a minute - and the leak is eliminated.
If the previous method did not work, turn off the heating. There is a possibility - change everything that is leaky. No, we are trying to eliminate it using more artisanal methods, but using more serious means. If necessary, drain the system, if it is possible to do without (damage at the top and without pressure does not flow), we work like this.
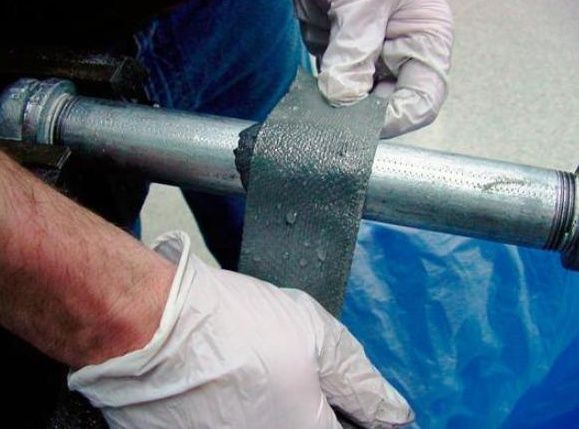
We glue it with epoxy glue... You need epoxy glue, fiberglass or plain thick fabric. We cut the material into strips, two pipe diameters wide or a little more. The length of the strip should be enough for 6-8 turns. First, we carefully clean the leak, remove everything that can peel off, then wipe it dry. Smear the pipe with glue, wrap it with a cloth. Coat again and again on top of the fabric. You do not need to smear the top layer. The edges are pressed with clamps (or wire). Such a patch dries at a temperature of 20-25 o C in 2-3 hours, at a lower temperature - up to three days. The edges and middle of the dressing can be secured with clamps or wire.
To eliminate the leak, use a fabric impregnated with waterproof compounds
You can turn on the heating after hardening, but turn the taps very smoothly and slowly: even a slight water hammer will take your patch away.
For greater reliability, bronze or aluminum powder is added to the epoxy resin. It is easy to do it: use a rasp to grind some unnecessary bronze or aluminum part over a sheet of paper. Add this powder to the "epoxy" and mix thoroughly. With such an addition, 4 turns of tack will be enough, but we put the turns tightly, with good tension.
Epoxy can be replaced with diluted zinc white. The paste should be thick, it will take 5-6 turns.
You can use ready-made compounds: heat-resistant sealants for heating systems or two-component compounds. But when choosing a sealant, remember that it is better to take neutral (“neutral” should be written on the package). If an acidic sealant can still be used for cast iron, then the acidic sealant of aluminum will corrode, and instead of a small leak, after a while we will have a large one.
The composition, which is called "cold welding", helps to close small leaks well and quickly. There are two types of it:
- Liquid based on epoxy resin. It is used to impregnate "bandages" for pipes or radiators. What they are good about is that some can be applied to damp surfaces, which means that you can not turn off the heating (or at least not drain the system).
- Special putties of the same name. Outwardly, they look like plasticine blocks. There are one-color and two-color.
"Cold welding" is very similar to plasticine, but you only need to work with it with gloves
They work with hard "plasticine" compounds in gloves. They are reactive, so you need to be careful. In order to cover up a hole in a pipe or radiator, you need to cut (pinch off) a piece, knead it in your hands (gloves are worn) until soft. The two-color ones need to be mixed to make the color uniform. In this case, the composition becomes sticky. It is applied to the hole, rubbed with a metal spatula (so that the putty does not stick to the spatula, it is moistened with water). Everything hardens in about 5 minutes.If, after sealing the hole with pressure, it squeezes out part of the plug (first a bubble forms, then it bursts), rub again with a spatula. Gradually, the whole hole will heal. If space permits, put a clamp on top, or tighten with rubber in several turns, secure with wire or clamps.
It is possible to eliminate the leak at the joints of the pipes with the same home-made or factory clamps. If there is a difference in diameter, you can first wind up the rubber band and then make or put on a clamp.
If the connection is threaded and drips from under the winding, you can pour alcohol on the tow, and then spread it with BF glue. It is alcohol-soluble. Once on the alcoholized tow, it liquefies and can leak into the compound. Then, when the alcohol evaporates, the glue dries up, the "drops" stop. But this method works only if you have exactly "drops", and not a "fountain". And one more thing: such a processed connection is very difficult to disassemble later.
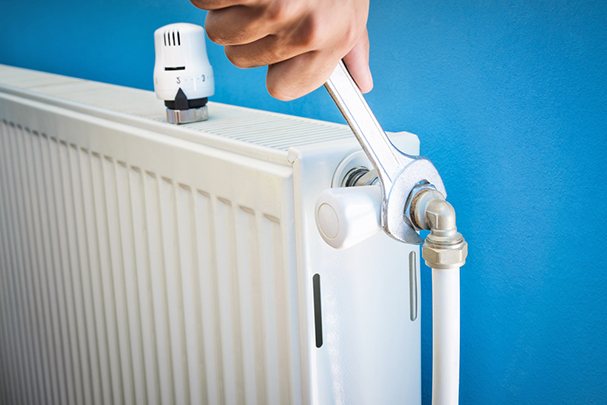
If it is possible to stop the system or turn off the radiator (if it leaks at the point of connection with it), it is better to repack the threaded connection. To do this, carefully and slowly unscrew the nut (lock nut). It needs to be turned away and then wrapped. Do not make significant efforts - there is a great chance to break, and then you will definitely have to stop the system and redo everything. Having tightened the nut, remove all tow or fum tape, remove the remnants of the sealant, in general, thoroughly clean the threads. Wipe it to a clean state, you can treat it with a degreaser (acetone or pure gasoline).
If it leaks under the locknut, it can be repackaged. Please note that no excess tow - just a little, and on top of the paste
Take a roll and paste (sealant), wind up flax and grease everything with paste. Now you can spin. First with the hand, then with the key. But here, too, you need to work carefully: it is very easy to break the thread. Therefore, do not hold the key by the edge, but in the middle - this makes it easier to calculate the efforts. Do not overdo it with the amount of tow. If cast iron, in principle, no matter how much winding you wind, then aluminum and bimetallic, as well as steel from a large amount can crack. A microcrack first appears in the collector, into which water seeps. Metal corrodes, paint swells, a section (or the entire radiator) is damaged.
But this is all in those cases when the threaded connection is flowing. If the fitting under the press has leaked (metal-plastic pipes), you can try to simply tighten it. In the case of copper pipes, only the option with soldering will work. If there is a leak at the junction of polypropylene pipes, there is also only one option - cut out the damaged piece and weld a new one.
It doesn't matter what you use. The result is important
If a leak appears between the sections, this means the rubber or paronite gasket has become inelastic and / or the coolant has corroded it. There is one more possible reason - corrosion "ate" the nipple. In any case, for overhaul, it is required to disassemble the heater into sections and replace the damaged part.
If the heating does not work or the radiator can be turned off without stopping the system, it is removed, disassembled, old gaskets are removed, new ones are installed and assembled again. Read how to assemble / disassemble the battery here.
If not, you can temporarily seal or close the leak. With aluminum or bimetallic radiators, this trick is very difficult to accomplish - the distance between the sections is very small. And with cast iron type MS-140 it is really possible to do it.
First you need to clean up the leak
First you need to clean up the place where the coolant leaks: remove everything to the metal. Where there is access, remove with a spatula or metal bristle brush. Where there is no access, we take a metal cable and peel it off with it.We pass it around the collector in the place where processing is required, and we pull it by one, then by the other end. After a while, everything that can fly off flies off.
On the cleaned surface we will lay the same composition as for pipe insulation: epoxy resin and metal powder or "cold welding". Only strips of fabric are needed that are narrower and longer. Wipe dry and clean, apply the composition, wrap it with a cloth, still spread it with glue, another turn. So 4-5 turns. Do not smear the top one. For reliability, you can pull off the top with a clamp.
If there is a ready-made iron putty, you can apply (or make) it. Then 3-4 turns of fabric, smeared with the composition, will be enough. The simplest recipe that is suitable for eliminating a leak in a cast-iron battery: add drying oil to lead red lead, grind to make a gruel. Apply it between sections. If there is white lead - mix with red lead, add drying oil. The consistency is the same: gruel.
In any case, such a radiator repair is only a temporary measure. After the heating season is over, repackaging is required.
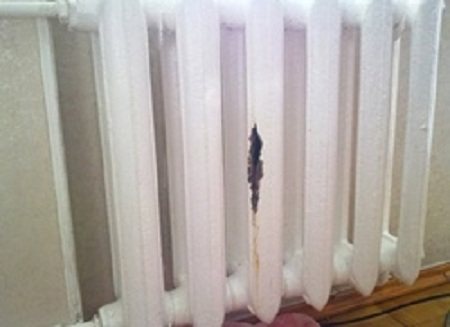
Such troubles usually happen with two types of heating devices: steel and cast iron. If the hole is small, you need to clean everything around, seal the hole with a wooden plug. Coat the top with sealant, "cold welding". The solution is not aesthetic, but you can hardly think of a better solution here. It is possible to try to seal the leak in the battery only with the help of "cold welding".
You can eliminate a small leak, sometimes there is nothing to help the grief
There is one more advice - to wrap a self-tapping screw in a hole. Find a suitable diameter, coat with sealant or sealing paste. An unusual solution. May work if the hole is small.
But all these are only temporary options. Such a radiator (if it is panel) or a leaked section must be replaced.
For hidden laying, pipes are used reliable. But even in this case, leaks can occur. Breaking walls or floors is an option, to put it mildly, "not very". There are two ways to eliminate this heating leak:
- The method is old-fashioned, but working. It will help, by the way, in cases of open wiring - if there is a drop somewhere, but it is difficult to get there. Elimination of a leak in the heating system in this case is simple: a couple of packs of mustard powder are poured into the expansion tank and the system is started with such a coolant. After a couple of hours, the leaks heal: they are clogged with suspension. So it is possible to "clog" small leaks in the boiler. Then the mustard coolant is drained, the system is flushed and started with clean water. The method is working, but risky: at the same time something else can clog, and filters and mud collectors will have to be cleaned for sure.
- On the same principle, but only with the use of polymers, the work of factory sealants for heating systems is based. They are poured into the system for a certain period of time. Circulating through the system, polymers settle on the walls, in those places where there are leaks, they are not carried away by the coolant flow. A plug will gradually form there. When the leaks are blocked, the composition is drained, clean water is poured into the system and the heating continues to operate.
Heating system sealants seal all leaks
Of course, it is cheaper to use mustard, and much cheaper: a 1 liter canister of such a sealant (added at the rate of 1 * 100) costs from 6 thousand rubles. But the result may be different: mustard is organic, and there is a suspension of polymers in the sealant. Moreover, there are ready-made sealants for antifreeze, for water, for leaks of varying intensity.
And, by the way, this is almost the only way to eliminate the leakage of antifreeze: it is very fluid, and often also poisonous (ethylene glycol) and you need to work with it extremely carefully. It is impossible to live in a room where ethylene glycol flows: its vapors are also toxic.
There are enough ways to eliminate leaks in the heating system.But everything, except for the replacement of the damaged part, only gives only some respite - to survive until the end of the heating season. Then you need to change pipes or radiators, reseal connections. Read how to change radiators here.
Sometimes it happens that people living in a private house or apartment have to deal with the elimination of problems associated with the leakage of batteries or pipes in the heating system.
Most people believe that it is very difficult to do this and there is no way to do without a specialist, but in fact, in order to solve the problem that has arisen, you just need to perform some actions in a certain order.
How to fix a leak in a heating battery photo
In this article, we will tell you exactly how and what you need to do to eliminate the leak and protect your belongings from the harmful effects of hot water. This algorithm, of course, will not help in a large accident, but using it, you will be able to prevent serious consequences that may arise from a small breakthrough.
Elimination of leaks in the heating system photo
Elimination of leaks in the heating system
The elimination of the leak in the house heating system can be carried out in several ways.
The sequence and essence of actions can be different. It all depends on how much the pipeline is leaking. Most often, a leak appears where the radiator sections are connected and at the junction of the battery with the pipeline.
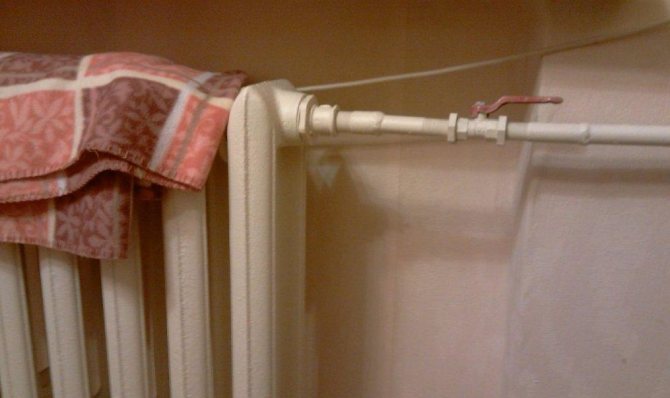
If you are faced with the cases described above and you urgently need to eliminate a serious accident when hot water flows out under pressure, then you should throw a blanket over the leak and immediately call the emergency service.
A thrown blanket will give access to the battery, and you can try to wipe off the water.
Eliminate a leak in a heating pipe photo
Eliminate the leak in the heating pipe
If it is a pipe that started leaking, then to eliminate the leak you will need clamps, a rubber chamber, a bandage that is designed for the pipe, wire and cold welding.
If you have all this, then in order to eliminate a breakthrough in the internal heating system, you will need to follow the steps described below.
Seal the hole that has formed in the pipe with a small piece of rubber, which you can get from an old bicycle tube or tire. The rubber should be soft. It is necessary to wrap the flowing pipe with it and fix it with clamps or wire.
There should be three clamps. One of them should be located directly in the place where the leak occurred, and the other two - on the sides of the breakout.
You can also effectively eliminate a breakthrough in a pipeline using a pipe bandage, which can be purchased at a store that sells plumbing fixtures.
The tubing band is made from a thick piece of rubber. Something like a clamp. The bandage is fixed to the pipe with bolts along its entire perimeter.
If a water leak occurs where the pipeline is attached to a tee, fitting or elbow with a threaded connection, then a piece of rubber will have to wrap the leak point as tightly as possible. It is fixed with two clamps, one of which is superimposed on the pipe itself, and the second on the fitting.
Eliminate the leak in the heating pipe
If you are unable to achieve the desired result, then you will need a bandage made at the factory. The factory rubber band will have to be replaced with a rubber band, which is used to eliminate the difference in diameter.
Cold welding is the most effective way to help repair a break in a pipeline.
Before starting cold welding, the material for it must be kneaded with hands slightly moistened with water until it becomes plastic and starts to stick.Applying the resulting mass to the pipe, it should be smoothed and pressed.
It takes about 1/3 hour to hold. The polymerization will be complete in about 3-4 hours.
After the heating season is over, you should remove everything and replace that part of the heating system that is worn out.
How to fix a battery leak photo
How to fix a battery leak
If your radiator is leaking, then the gap that appears can be repaired using the most ordinary self-tapping screw. He will not be able to cope with the breakthrough completely, but will noticeably reduce the amount of water flowing out.
This will allow you to stock up on time, which will be enough for specialists to come to you.
If there is a depressurization of the radiator at the joints of the sections, then the breakthrough can be eliminated using a cloth soaked in epoxy glue.
It should be carefully wound around the place where the leak has appeared so that the battery is completely sealed. This action helps not only eliminate the breakout. but also helps to avoid calling specialists.
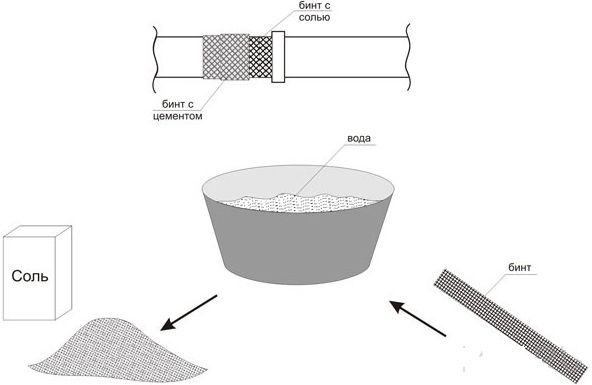
If the leak is very small, it can be repaired using regular salt, tape, and a piece of thick cloth. In this case, the sequence of actions should be as follows.
Sprinkle salt on a piece of cloth.
Wrap a cloth around the crash site and press down as tightly as possible.
Fix the fabric with tape or other similar material.
If none of the above methods helped you achieve the desired result, then wrap the entire radiator system with a cloth that absorbs water well.
This will help you keep hot water away from your property, which can be detrimental to your furniture. After that, you should call specialists who will help you cope with your problem and effectively eliminate the formed leak.
It is also worth saying that in some cases a worn out pipeline or radiator will have to be replaced completely with new models.
It is necessary to replace the heating system immediately after the heating season is over. Repairing the leak using any of the above methods is a very effective, but still temporary measure.
In everyday life, situations associated with a breakthrough in the heating system do not happen so rarely. The methods that have been described will help you not only save your things, but also prevent a small one from turning into a disaster. Only masters from the emergency service can completely eliminate a major problem, but it is imperative to reduce the amount of water flowing out. I would like to note that the most important thing is to know how to prevent an accident, and not how to eliminate it when the heating season has already begun. For preventive purposes, it is best to flush the heating system every year and carry out hydraulic tests, which will help not only improve the heating of the premises, but will also make it possible to detect weak areas and places where breaks, cracks and fistulas may appear in time.
Eliminating a heating system leak with a video sealant
Do-it-yourself repair of cracks in the ceiling is easy
A heating radiator complete with pipes of the heating system is a design with a low level of reliability in terms of tightness of joints and strength of elements.
Connections of pipelines supplying hot and withdrawing chilled water with a radiator, joints of sections (and there are often more than 12 of them!), Plus corrosive wear of the walls of a cast-iron radiator, are a kind of concentrators of deformation changes leading to depressurization of the heat-conducting path. They are manifested both in drip leakage of joints (“crying”, as they say in everyday life), and in a catastrophic outflow of water from a torn radiator.
If we consider the scheme for supplying hot water to the heating battery and the subsequent removal of cooled water, then on the way of advancing the coolant, which is central heating water, a lot of possibilities for various leaks are obvious:
- leak at the junction of the inlet or outlet pipe with the radiator pipes;
- depressurization of the docking joints of the radiator sections;
- flow through the fistula in the radiator section.
Naturally, it is necessary to stop the circulation of water in the system. This is achieved by calling the emergency service or by shutting off the taps available in the apartment for supplying water to the system. If it is not possible to quickly shut off the water supply, wrap the entire battery with a piece of cloth that absorbs water well. At least the room will be protected from hot water streams. The repair team will still arrive quickly and fix the leak in its own way.
How to do without repairmen? How to glue the heating battery. Definitely, the radiator cannot be repaired. It is necessary to apply a rubber or fabric sealing strip over the pipe or section and tighten it tightly.
Most often, to eliminate the leak, a clamp is used, which consists of two plates equipped with rubber from the inside, tightened with bolted joints. The plates provide the required tightness, and the rubber gasket prevents water leakage.
Instead of a traditional metal clamp, you can use a strip of rubber tightly wrapped around the leak and secured on top with wound layers of wire or filaments. Slightly safer will be a piece of cloth impregnated with ordinary epoxy glue and wrapped with effort around the leak. Instead of a clamp, a rubber harness, a bicycle tube will come in handy, the main thing is an error-free winding of the leakage point and a uniform tightening from above with a soft wire.
Corrosion processes inside the radiator can even affect cast iron, leading to cracks, fistulas and holes in the walls of the sections. This is already more serious than a leak between the sections, but here you can correct the situation on your own.
The main ways to seal openings on a radiator are:
- the use of epoxy;
- use of cement;
- use of cold welding.
Rag tapes, impregnated with a mixture of epoxy resin and aluminum or bronze powder paint, are wrapped in several layers around the damaged area. For fixing, a metal clamp with gaskets is applied from above, which is then “tightly” tightened with bolts.
Instead of rag tapes, strips of medical bandage are preferred here. They are soaked in cement mortar and the damaged area is wrapped in a thick layer.
Its strips are like plasticine for children's modeling. A piece is kneaded until a homogeneous softened plastic mass. Then, with pressing movements, it is stuck to the damaged area.
It is important! Be sure to check the expiration date! It is 2 years from the date of issue.
How to fix a leak in a radiator with cold welding?
To eliminate the leak from the radiator, you can also use "cold welding" - heat-resistant sealants-adhesives, which contain metal powder. It is produced both in finished form and in the form of separate components, which must be mixed with each other to obtain a homogeneous mass.
This is "plasticine" which is applied to the damaged part, after its preliminary cleaning and degreasing. Cold welding takes only a couple of minutes to set, but it takes about 1 hour to fully cure.
Due to the fact that cold welding holds well enough and has a coefficient of thermal expansion similar to metal, such a patch on a leaked radiator can sometimes last for several years.
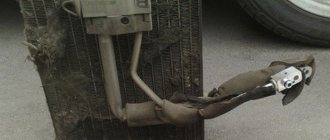
What other ways are there to fix a leak?
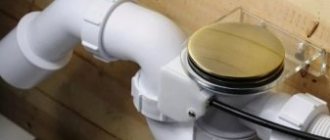
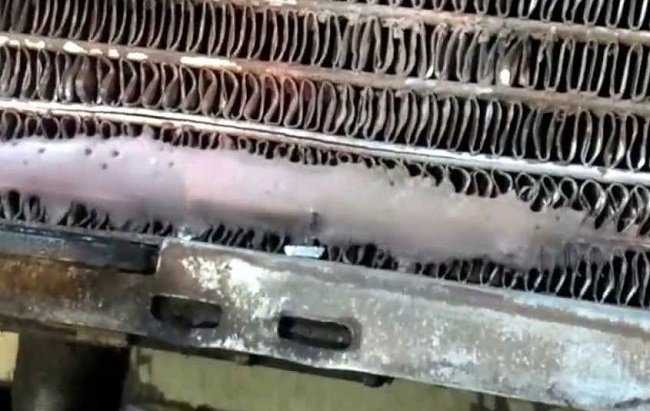
For quick repair of leaks from punctured radiator tubes... You can drown the radiator tubes. To do this, bend both torn edges of each tube and clamp it with pliers. This method is suitable only if no more than 5 tubes are punched and if the radiator is aluminum, and there is no way to solder.
When the radiator is aluminum and its plastic tank is punctured... If the length of the hole is not too different from the width, a rubber plug can be used to seal the hole. From rubber (thickness not less than 1 cm) we cut a cork in the shape of a hole. In the center we make a hole with a diameter of 5 mm in it. Insert the M6 screw into the hole, onto which we screw the corresponding nut. Insert the plug into the hole.
The heating battery has leaked - what to do, how to cover up the leak?
From the author: hello dear readers! Heating radiators are very simple and reliable equipment that brings warmth and comfort to any home. Its design can be called elementary - in most cases, it consists of a body, inside which a coolant circulates.
However, even such a simple device can fail. As a rule, such cases are unexpected for the owners. Sometimes the situation can only be resolved by urgently calling the emergency team. Fortunately, owners are often able to cope with the problem on their own. You just need to know how to seal the leak in the heating battery so that the equipment can serve for quite a long time.
However, let's initially decide when it is still necessary to call the emergency service, and not try to fix the situation on our own. If you live in a private house, then at any time you can turn off the heating system and calmly start fixing the leak or replacing the radiator, so such cases may not be considered. But if you live in an apartment connected to centralized heating, then it all depends on how the radiators are connected. There are two options:
- with the presence of shut-off valves. If there is a valve on the pipe to which the battery is connected, then with its help you can shut off the coolant current. But at the height of the heating season, this should be approached with caution. In many cases, closing the valve will lead to the cessation of the supply of the coolant and to the neighbors in the riser - this depends on the wiring diagram of the heating system. In such situations, the valve can only be closed with a bypass. This is a piece of pipe that forms a bypass path for the coolant current. Thus, the liquid can freely circulate further along the route while you are repairing the radiator;
- without shut-off valves. If there is no way to shut off the coolant flow, then if a 100% leak occurs, it is necessary to call the emergency team. Firstly, in this case, it is possible to shut off the liquid supply only with the help of a valve on a common riser - as a rule, residents of an apartment building do not have access to it. Secondly, this must be done urgently, even in a situation where the leak is not so strong - for example, water drips in a thin stream. Remember that this can suddenly turn into a real fountain, and practically boiling water runs in the pipes. Employees of any emergency brigade can tell you about cases when a delay led to a powerful flooding of an apartment, which is very difficult to eliminate, given the temperature of the liquid. And even before the flooding, the water "torn" from the radiator can leave serious burns on the people nearby. In general, you should not delay - at any time of the day or night, if you notice a leak, immediately call the emergency gang.
In the second situation, while you are waiting for the arrival of the emergency team, you can make things a little easier. If the leak is strong - the coolant literally splashes out of the battery - then throw a blanket over this place. You will not save an apartment from flooding, but at least protect family members from burns.
If the leak is small, the liquid runs in a thin stream, then you can do with "little blood". Wrap a piece of cloth such as a towel around the battery where the leak is. Lower the ends of the tourniquet into a basin.Thus, you direct the coolant into the container, and not onto the floor. You can also try to completely eliminate such a leak. But let's talk about this in more detail.
Temporary solution
So, if water is running in a thin stream from anywhere in your radiator, and you do not have the opportunity to stop the coolant supply, then you can try to cover the damaged area so as to prevent further troubles. To do this, you need something rubber: for example, an old rubber boot, a camera from a bicycle or car wheel, a household or medical glove - basically anything, as long as it is made of rubber.
The algorithm of actions is simple.
- Cut the rubber into strips. The longer they are, the better. The width of each strip must be such that it is possible to completely block the leak.
- Now with the resulting strips, you need to wrap the damaged area. Begin the process near where the water is flowing, gradually working towards it. In this case, the turns should slightly overlap each other. It is necessary to wind the rubber as tightly as possible - the tighter the fit of the strips, the more reliable the effect will be.
- After the winding is done, it must be fixed. To do this, make a strapping with a cloth harness - it must be placed over the leaking place. Instead of fabric, you can use strong wire, and it must be wound in the same way as rubber, in turns over the entire width of the original winding. An automobile clamp is also suitable - this is generally a rather useful thing that can be useful on the farm many times, therefore it is recommended to purchase more of them for the future. Another option for securing the patch is a sheet of tin. It can be pulled over the rubber using bolts.
Of course, this solution is only temporary. Ideally, after repairing the leak in this way, it is still advisable to call the emergency service so as not to risk it. But in many cases, such a rubber patch helps to hold out until the end of the heating season, and there you can safely do more global repairs or replace the battery.
You can simplify your life even more if you purchase special plumbing clamps to eliminate such troubles. They are designed specifically for pipe repair. Such a clamp is a metal product with rubber attached to the inner wall. That is, in fact, this is the same patch described above, but its application is much more convenient - it will take about a minute to fix the leak.
If this solution did not work, and the coolant still continues to seep out from under the patch, then it is nevertheless necessary either to call the emergency team, or, if possible, to independently stop the heating system and start serious repairs. There are several ways to fix a leak. The simplest of these is gluing.
Gluing
The sealing procedure is only suitable for small leaks. But she copes with them perfectly, often such repairs can extend the life of the radiator for several years. For its implementation, it is necessary, first of all, to stop the supply of the coolant in order to remove the pressure under which the liquid seeps out.
Next, you need to act according to the circumstances. If the "hole" is located in the upper part of the battery, and when the heating system stops, water stops flowing from the damaged area, then you can start repairing. If a leak has formed in the lower part of the radiator, then before the procedure for "treating" the equipment, it is necessary to drain the coolant either from the entire system or from a specific element (usually this is possible if there is a bypass that allows the fluid to bypass the equipment being repaired).
Naturally, before gluing, it is necessary to wipe and thoroughly dry the area with which you will be working.In addition, peeling paint and similar debris must be removed from the surface. Otherwise, the result will not be able to please with quality.
As for the means used for repairs, one of the most affordable (including at a price) is epoxy glue. In addition to it, you will need strips of regular fabric or fiberglass. The latter is advantageous. But, if you decide to use a regular fabric, then take a dense material.
Epoxy can be applied in its original form, that is, immediately after purchase from a store. But you can also slightly improve the composition, giving it greater final strength. For this, an additive is added in the form of a bronze or aluminum powder. The powder is very easy to obtain by rasping any part of the corresponding metal - of course, after placing a sheet of paper under the place of work, on which the powder will collect. Add the resulting material to the epoxy and mix well.
If for some reason you cannot use epoxy glue, then instead of it you can take zinc white, diluted to a thick paste. In any case, the work is carried out in the same way.
- Cut the fabric into strips. The width of each of them should be twice the diameter of the area to be repaired. Calculate the length so that you can wrap the element 6 or 8 times.
- Cover the area to be repaired with epoxy or zinc white. Naturally, this must be done not only on the leak itself, but also at some distance to both sides of it.
- Wrap the fabric strip tightly over the adhesive treated area. Then coat it and repeat the procedure with the next strip.
- After all the fabric strips have been wound (the top one, of course, does not need to be smeared with glue), secure the whole thing from both ends with clamps or strong wire.
After carrying out all the procedures, you must wait until the adhesive is completely dry. If the temperature in the house is in the range from 20 to 25 degrees above zero, then it will take about 2-3 hours for the epoxy to harden. If the room is colder, you will have to wait longer, sometimes up to three days.
The start of the coolant after the patch has dried out must be done very carefully. Open the shut-off valve slowly. If you allow water hammer to occur, the patch is likely to fail. For the same reason, it is not recommended to use this repair method in houses connected to a centralized heating system, since it is characterized by periodic water shocks. Therefore, in order to eliminate a leak in a radiator located in an apartment building, it is better to use more serious methods - for example, replacing a leaky section. You can find information on how this work is done with cast iron and aluminum batteries on our website.
Elimination of leaks at joints
Very often, the coolant begins to flow where some elements are joined - for example, a pipe and a radiator are connected. There can be quite a few reasons for this. Most often, the problem lies in the wear of the material with which the threads were sealed during installation.
If the coolant does not hit with a fountain, but only slightly undermines, and at the same time, for some reason, you do not have the opportunity to stop the heating system for a full repair, then you can try the following method. Place a small amount of alcohol on the tow that is wrapped around the joint. Then apply BF glue there.
When it interacts with alcohol, it will become liquid and will be able to flow inside the connecting element, and then it will harden there. But the disadvantage of this method is its low reliability. In addition, sometime later you will have to disassemble such a glued joint for a very long and painful time.
Therefore, it is still desirable to provide yourself with the possibility of a normal repair. It consists in disassembling a leaking threaded connection, and then reassembling it, making it better. Naturally, this procedure can be carried out only after stopping the supply of the coolant to the repaired segment of the system.
- Unscrew the nut carefully. This should be done slowly so as not to damage the threads.
- When the surface of the thread is free, remove from it all the seals that were used during the installation. As a rule, this is tow or FUM tape. Do not forget to clean the sealant as well. You can walk a couple of times with sandpaper, bringing the cleanliness of the thread to the ideal. Finally, it is advisable to degrease the surface with acetone or the like.
- Then do everything in the reverse order. Screw on a new FUM tape, wrap linen tow on top, grease the whole thing with a high-quality sealant and assemble the connection. Tightening the nut must be done no less carefully than untwisting it. This is especially true for old radiators, where the elements are already "breathing in the bud".
If your heating system is equipped in a modern way - that is, special fittings are used to connect the elements - then the work is much easier. Press varieties can be simply tightened, threaded ones can be tightened. If the pipeline (and, accordingly, the fittings) is made of polypropylene, then in this case there is only one way out - you will have to remove the leaking section and replace it with a new one.
In the event of a leak at the joints of the radiator sections, the problem usually lies in the deformation or wear of the gasket. Ideally, this element should be replaced with a new one. To do this, the battery must be disassembled into sections - step-by-step instructions for carrying out this work are on our website. For disassembly, you will need a special plumbing wrench and a lot of patience, but it is quite possible to complete all the steps.
After disconnecting the sections from each other, clean the joints from all dirt - of course, initially remove all old sealing materials. Then put in new shims. It is better to take non-rubber and non-silicone ones, since they do not tolerate high temperatures too well and, as a result, do not last so long. The best option is paronite, which will perfectly cope with its functions for many years.
After installing new gaskets, reassemble the radiator and reconnect it to the system. If during disassembly you find that the problem is not in the seal, but in damage to the section itself, then the best option would be to replace it.
If it is not possible to disassemble the connection, you can make the same gluing using the method described above. Before starting work, be sure to clean the area to be repaired from dirt and paint. The troubleshooting procedure is carried out in the same way: we smear the area with adhesive, tightly wind the strip of fabric, smear it again, etc., at the end we tighten the edges with clamps.
Instead of conventional epoxy, you can use a special agent called cold welding. Working with them is about the same. Some compounds can be used even on wet surfaces, that is, if it is not possible to stop the coolant supply.
Cold welding can be liquid or solid. In the first case, the work is carried out according to the same principle as with conventional epoxy glue. In the second case, the product is kneaded and then used as a putty. When using it, be sure to wear gloves, since the composition is chemically active and can negatively affect the skin.
Regardless of what means you use to seal the leak between the sections, remember that this solution is temporary.After the end of the heating season, you will still need to take this issue more seriously, disassemble the connection and fix the problem. Good luck!
Causes of damage
There are not many reasons that cause radiator problems. All of them can be divided into two types. These are mechanical reasons and natural wear and tear, which contribute to various damages that compromise the integrity and tightness of the device. Even a small stone that accidentally flew out from under the wheels can cause breakdown and leakage of the radiator.
But sometimes auto mechanics are faced with a different factor - these are head-on collisions with other cars. Even a minor hit to the bumper is enough to cause a breakdown. In addition, various repair work that is done by novice car enthusiasts can be attributed to mechanical reasons. This often leads to damage to important parts and components of the device.
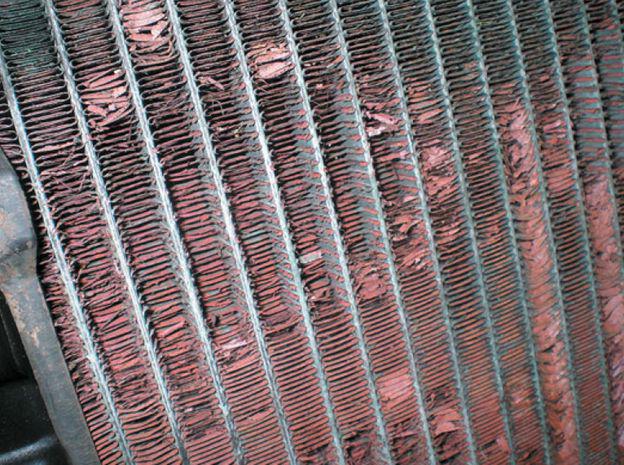
Corrosion processes, as well as natural wear and tear, are the second group of reasons that cause radiator leakage. It must be remembered that even minor scratches or chips can very quickly turn into a hotbed of active corrosion. If you do not pay attention to this problem in time, then as a result of the destructive process a hole will appear through which the coolant will flow out of the system. Minor cracks are difficult to spot. But if you seriously get down to business, then often all such damage can still be found.
These are two groups of typical causes that can provoke depressurization and damage to the heat exchanger and subsequently coolant leakage. In addition, there are also some troubles during operation, which can cause incorrect circulation of antifreeze in the system.
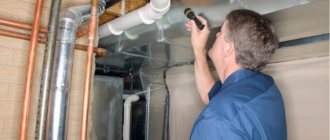
How to identify a leak?
If the engine began to overheat frequently, and more recently the coolant poured into the tank has quickly gone somewhere, it is urgent to diagnose the radiator for holes. To find out where the hole is, you need to dismantle the radiator and carefully inspect it.
But it is not always possible to find the hole visually. Then you should use other diagnostic methods. So, how to check the radiator for leaks:
- For this, all openings of the device are closed with plugs.
- Then the part is lowered into a suitable container of water.
- Next, you need to observe - if bubbles appear, then there is a breakdown in those places on the radiator.
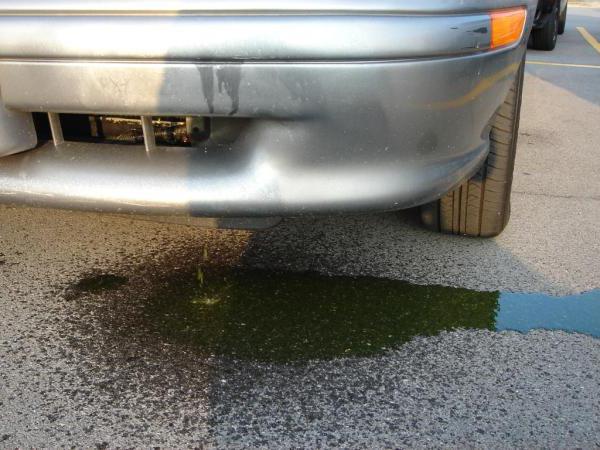
Diagnosis of leaks from the pipes or from the heat exchanger itself will not be a problem. But if no fluid leaks are observed, and the temperature of antifreeze or antifreeze during the movement quickly rises to critical values, then it is much more difficult to find out the cause. Usually this situation occurs if there is not enough coolant or the radiator is not working efficiently. If traces of coolant are found under the hood, it is necessary to urgently repair the radiator.
Car radiator leak - elimination + VIDEO
As you know from the physics course, when the motor is running, heat is always generated. The engine of a car does a huge amount of work and at the same time gets very hot. Even in the very first cars, an engine cooling system was used, without which no car could function normally.
There are several types of engine cooling systems:
In the overwhelming majority of modern cars, it is the liquid system in which cooling is achieved by means of a coolant - antifreeze, antifreeze or plain water. The main element of the cooling system is the radiator, which acts as a heat exchanger.
The radiator has a fairly simple design:
- upper tank - heated liquid enters it;
- core - consists of many thin plates and vertical tubes;
- lower tank - already cooled liquid flows into it.
Cooling occurs due to the fact that the flow of liquid flows into tubes, of which there are a lot. And small volumes of any substance are much easier to cool than large volumes. An important role in cooling is played by the fan impeller, which rotates to create air currents for faster cooling.
It is clear that if the cooling system ceases to function normally, the engine will overheat very quickly and fail.
Over time, cracks can form in the radiator pipes. The reasons for their appearance can be very different:
- mechanical damage;
- corrosive processes - improperly selected antifreeze or antifreeze;
- cracked seams at the joints of the pipes - the seams crack due to old age, as well as due to an increase in pressure inside the radiator.
It is also important to pay attention to the fact that a small leak of antifreeze can be detected only when the engine is running. Even if the leak is very small - a few drops per minute - you will still notice that the liquid level in the reservoir is decreasing. We already wrote on our auto portal Vodi.su that a good antifreeze or antifreeze is quite expensive, and there is no desire to constantly add it to the radiator. Therefore, it is necessary to take measures to eliminate the increased consumption of antifreeze.
"Treatment" with a sealant
By the way, motorists from the last century used mustard to eliminate leaks. Mustard powder was poured into the radiator, and so it was possible to get home. But this method has a significant disadvantage. After using mustard, you will need to rinse the radiator.
Mustard is no longer relevant today. If a radiator leak is found on the road, repairs can be performed using special sealants. What is the principle of the composition? It is poured into an expansion tank or into the radiator itself. Then, through cracks and holes, the agent will flow out and harden. When combined with air, the sealant creates a durable polymer-based film.
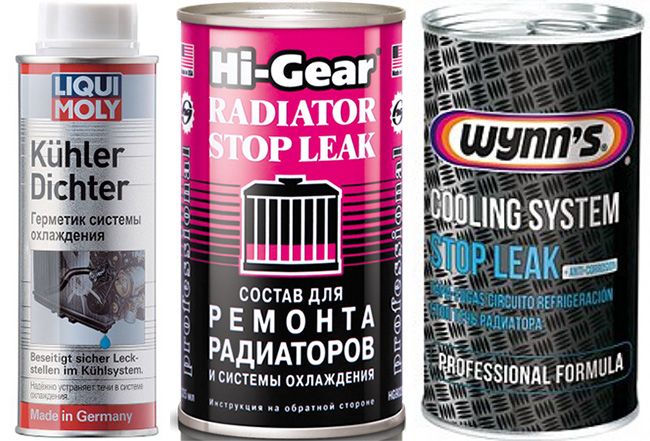
Popular car radiator sealants
Today, the most popular among Russian motorists are three types of liquid sealants designed to eliminate small leaks in the engine cooling system: Liqui Moly Kühler Dichter, Hi-Gear Radiator Stop Leak and Wynn's Cooling System Stop Leak.
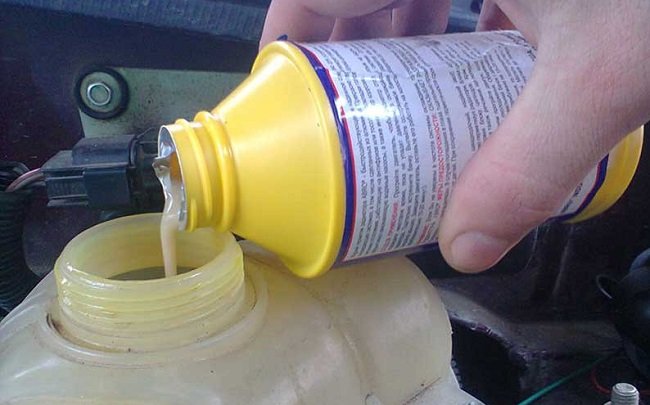
The method of application for the above formulations is approximately the same:
- We warm up the engine to operating temperature (so that the thermostat opens and the coolant circulates in a "large cycle").
- We unscrew the radiator cap (taking precautions).
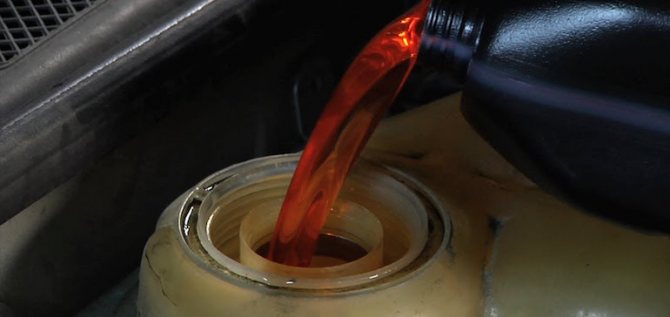
- Thoroughly shake the container with the sealant, and pour it into the coolant.
Cold welding
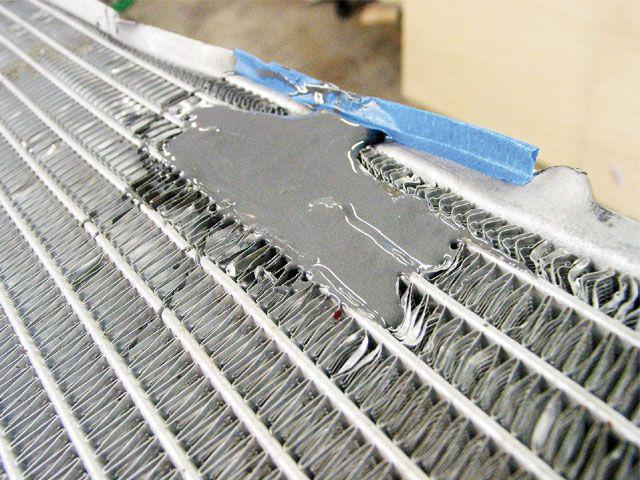
A radiator leak can be eliminated in a more reliable way than a sealant. In this situation, heat-resistant adhesives with metal powder will help - cold welding.
The radiator or its damaged area must be thoroughly degreased and additionally treated with sandpaper until a slight roughness appears. Then a metal sealant is applied to the place of damage. The setting time takes about 3 minutes. But the full time required for hardening is from several hours to a day.
Heat exchanger repair by soldering
Soldering the engine cooling radiator is already a serious repair that will require some skill. To repair the device, you will need a welding machine or a large soldering iron.
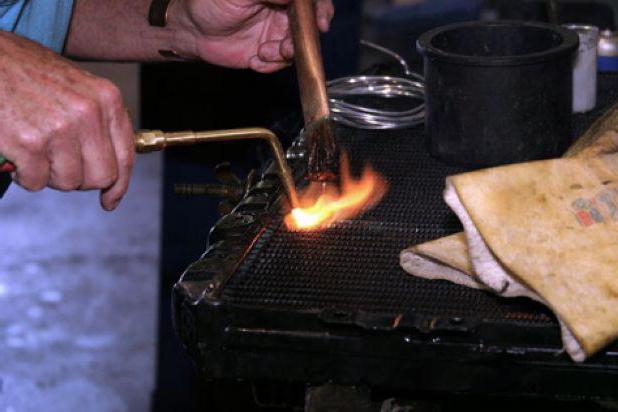
You should also prepare the filler materials. The choice depends on the material of the radiator. Most often, aluminum or brass additives are used. Ordinary acetone is used for degreasing.
Soldering process of aluminum products
Soldering an aluminum engine cooling radiator is an effective solution to repair various types of damage. But it is better not to carry out self-repair of such a plan. Soldering an engine cooling radiator is a rather complicated and time-consuming process.There are also many nuances in the preparation of flux. A soldering iron is best to select a powerful one - at least 50 watts. It should be warmed up well before use.
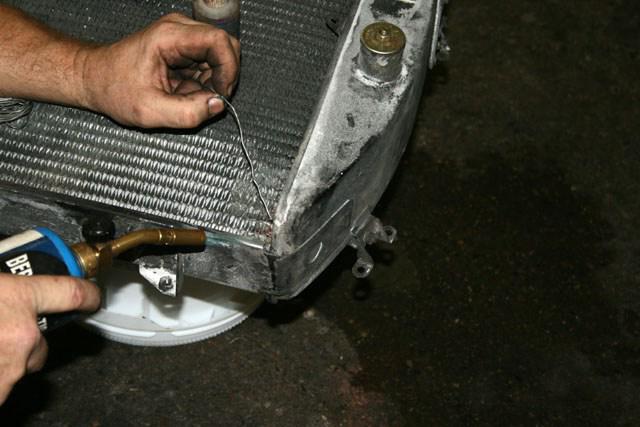
If the radiator has thick walls, it is also advisable to warm them up. The solder must contain at least 50% tin. You can use POS-61. If there is less tin, then one should not expect high quality from the soldering.
The flux is applied to the surface in a thick layer. Soldering is done in a circular motion, and the solder is literally rubbed into the damaged surface. This is a reliable way to repair cracks.
Copper radiators are repaired with more powerful devices with POS-60 and POS-40 solders. As for the technology, it is no different from the aluminum brazing process.
The better to glue a leaking cooling radiator: rules of work and advice to the master
It's no secret that a car radiator is one of the most important automotive parts in a vehicle's engine cooling system. Its main purpose is the timely removal of heat from the internal combustion engine into the atmosphere. This is due to the circulation of liquid through the channels, of which there are quite a lot of them in the heat exchanger of the car. So, the article describes solutions that are relevant for car owners on how to solder a car radiator, and what inventory should be prepared for these purposes.
Every driver should understand that the key to the correct functioning of the cooling system is its tightness. This means that even the smallest and most inconspicuous crack will completely disable it. Before working on soldering a part, it is important to study the process of repairing an engine cooling radiator with your own hands, and also determine which glue should be used in each case.