Installation of valves on radiators
The next stage in the installation of the heating system is the installation of shut-off and control valves in the passage plugs. The radiators are equipped with "full bore" ball valves or valves, in which the movement of the coolant is manually controlled. Thermal heads are now produced, which have automatic flow control.
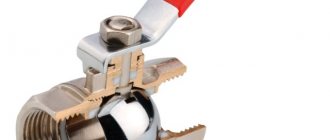
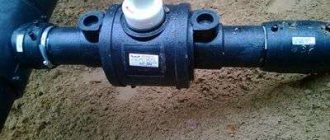
Taps for heating systems can have different designs, but taps with an American connection with union nuts are considered the most practical. The advantage of taps with an American connection lies in their design, which allows you to remove any type of radiator without shutting down the heating system. The flow of the coolant with the help of such a valve is quickly shut off, and to remove the battery, you just need to unscrew the threaded connection.
The use of American taps is especially in demand when the heating system is forced to start when heating devices are installed on a rough wall. Their use allows you to easily remove the radiator and finish the finishing work of the wall section without turning off the heating system (close up the grooves, putty or plaster the walls, glue the wallpaper, and so on). The most important thing is that valves with a detachable American connection can be used many times, regardless of the type of gaskets (rubber or parasite) or the option when the sealing is carried out only with the help of tapered parts made of stainless steel.
Valves with union nuts can be straight or angled. They are chosen depending on the pipeline supply system to the radiator (from the wall or slopes of the niche).
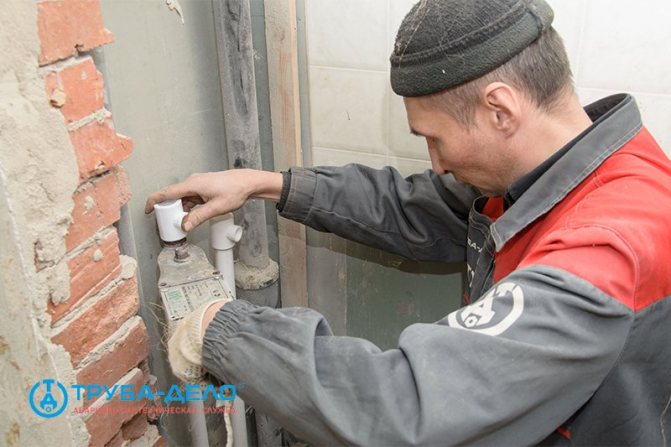
The valve is screwed into the plug with the American connection using a special key, which is inserted into the pipe. The key section can be of very different shapes. It is easier if a hexagon is used, for work it is enough to choose the right size. It is more difficult when two protrusions are made in the "American" connection, you have to look for a suitable profile for a reliable hook.
In work, sometimes they use an adjustable wrench or pliers, but more often craftsmen make an L-shaped wrench with a square section. Its ends are slightly tapered. This allows you to work with different manufacturers of cranes with an American connection.
The connection of the passage plug is sealed with the "American" branch pipe by means of a winding. Plumbers use imported linen and investment paste (UNIPAK type) for this purpose. FUM tape is used when the thread profile does not have sharp corners. Also, the thread must have a special notch that prevents the sealing material from rolling.
The two parts must be checked for thread compatibility by connecting them without tow. The degree of density of the collected compound indicates how much tow should be used. With a large layer of winding, cracks may form or thin-walled parts may deform. An insufficient layer is often the cause of joint leakage.
The winding must be collected in a thin bundle and wound in the direction opposite to the direction of the thread of the branch pipe. You must start at the edge of the thread that extends outward. It is necessary to fill the entire depth of the thread with flax fibers, pressing the previous one with each new turn and preventing the winding from scrolling. Next, the part is lubricated with UNIPAK paste, which is then screwed into place.
If the heating system is installed using metal ball valves, threaded couplings are screwed onto them using winding, which are necessary for switching to polypropylene pipes. The Mayevsky crane supplied with the radiator fittings is supplied with a rubber gasket, so it does not need rewinding.
The radiators prepared for work are installed in their place, after which you can start installing the pipes. After completing the installation of the heating system, you need to start it, having previously filled the riser from the bottom up with a coolant and bleed the air. It is necessary to open the supply valve and check the connections for leaks.
Smart battery replacement is a good way to increase heating efficiency in your home or apartment and reduce the cost of paying bills. This work can be done quickly and easily with your own hands, but if you are not familiar with the intricacies of the process, it is better to turn to professionals.
Ball valve device and their types
For installation on radiators, ball valves are usually used. It is a relatively simple device that consists of the following elements:
- gate;
- stem with seal;
- sealing washer;
- sealing seats;
- body and adjusting nuts;
- control knob;
- body.
The shutter is a metal ball with a hole in the center. The handle allows you to move the shutter to one of two positions: “closed” or “open” - by turning it 90 degrees. Such a simple device provides a robust design and a relatively low price.
Most often, ball valves are made of durable brass or similar alloys; they also use durable modern plastics and effective lubricants in their production. Another advantage of the ball valve is its compact size. For a small device, it is easier to find a suitable place in the system.
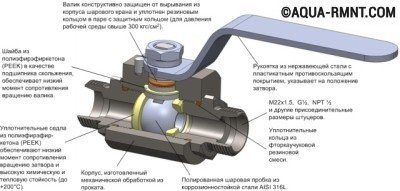
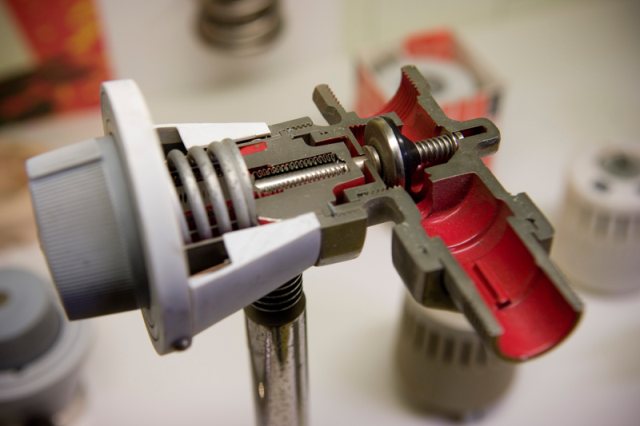
The diagram shows in detail the device of the ball valve, which allows you to understand the principles of operation of this simple and reliable design.
Depending on the bandwidth, there are:
- full bore;
- standard;
- partial bore ball valves.
The former pass 90-100% of the coolant flow, the latter - about 70-80%, and the third - only 40-50%. For installation on a radiator, it is recommended to install full-bore structures, which will ensure that there are no significant obstacles to the coolant, which has a beneficial effect on the efficiency of heating the room.
On sale you can find ball valves made of plastic, but they are not suitable for hot water supply or heating pipelines, since they do not tolerate high temperatures well. Brass ball valves for radiators are also distinguished by the method of installation:
Coupling valves are usually recommended for use in the installation of heating systems, they are also suitable for water and gas pipelines. They are used both in residential premises and in the arrangement of public buildings. They are small devices, easy to operate and very reliable. They are easy to install and usually do not require sophisticated equipment. Such structures are mounted on pipes with a cross section of no more than 40-45 mm.
When choosing valves for pipelines of larger diameter, it is recommended to pay attention to flange designs. They are designed for pipelines with a diameter of more than 50 mm. During installation, it is imperative to use special gaskets to ensure sufficient strength and tightness of the connection between the valve and the pipeline. Flanged ball valves are robust enough to be used in heating systems.
Distinguish between collapsible and non-collapsible flanged valves.The first ones have a collapsible body, which will be very convenient when replacing worn out or deteriorated parts. Most often, replacements require gaskets, sometimes you have to install a new shutter, etc. Non-separable flanged valves have a one-piece body. In the event of a breakdown, you have to completely replace the entire structure.
Welded structures are installed by welding, as the name implies. Since the dismantling of such a structure cannot be called simple, devices of this type are installed in places with limited access. Ball valves should be welded only by specialists who have the required qualifications.
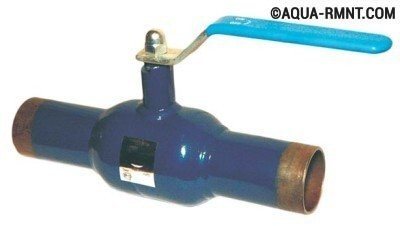
A welded ball valve is difficult to install as it requires skillful welding. Such devices are installed in places that cannot be easily accessed.
In combined designs, several installation methods can be combined. Such cranes can be straight-through, corner, multi-way (for example, three-way). The latter type is not often used in the installation of heating systems, since it is used in systems where it is necessary to mix or redirect different media.
Although for heating systems it is best to use taps made of brass or its alloys, you can find on sale silumin adjusting structures, which are less durable and cheaper. Outwardly, they are very similar to brass taps and can be passed off as expensive originals by unscrupulous sellers. Before buying, you should consult with a professional craftsman who will help you distinguish a fake and make the right choice.
Procedure for replacing heating radiators
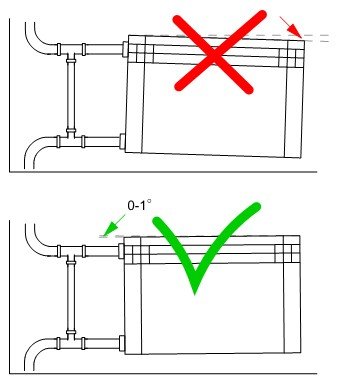
Correct and incorrect installation of radiators. Click on the photo to enlarge.
If it is necessary to replace heating devices for central heating, it is necessary to coordinate the forthcoming work with the housing office. It is necessary to shut off the system and drain the coolant (in a private house this is also important).
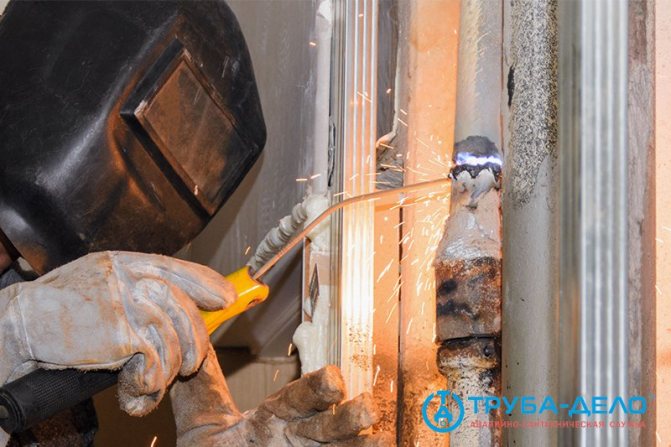
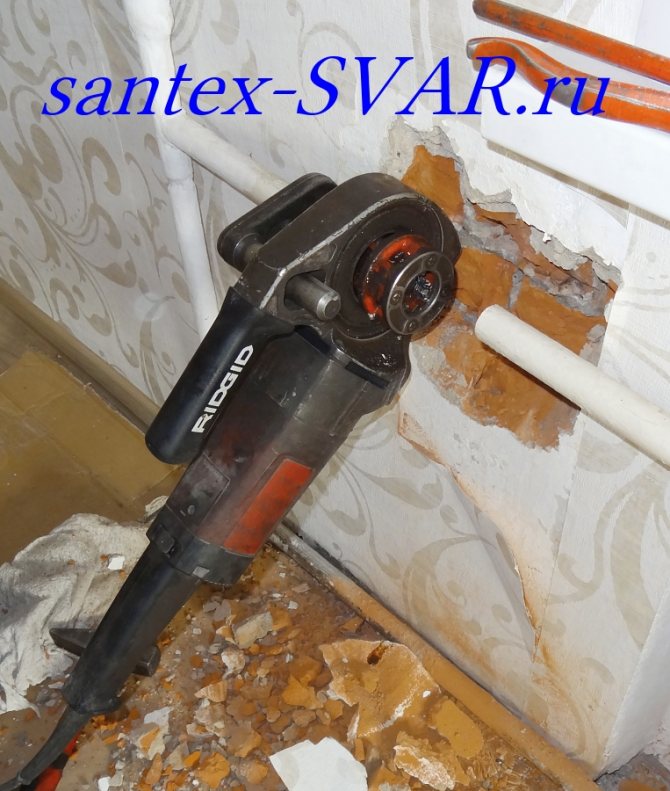
We inform and agree with the neighbors below and above about replacing the risers below and above the floors on the floor. We dismantle old pipes and radiators. If the old heating system does not have special threaded connections, we use a gas cutter or grinder.
We prepare and install new radiators. It is better to replace old batteries with any new type of radiators, the main thing is that the structure is securely fixed.
We cut a new thread on the risers. Currently, welding is not used when connecting a pipeline. Radiators are connected to pipes by means of threaded connections. This simplifies installation, they are reliable and practical in operation. We assemble the piping system and connect the heating devices.
Installing a tap on a radiator
Replacing the heating radiator.

Published from input Thermostat 20 December 2018 Tags: Khrushchev, Cast iron, Regulation, Dirty_pipes
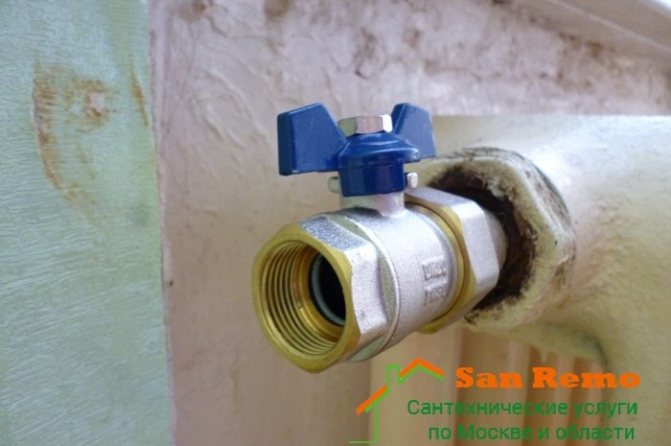
It is very hot in the apartment - It is not freezing with a bottom supply in the heating riser. When it is cold in the apartment, they also want to install a tap in front of the radiator - but already on: often there are thoughts that a lot of water goes through it past the radiator.

If you have thoughts:
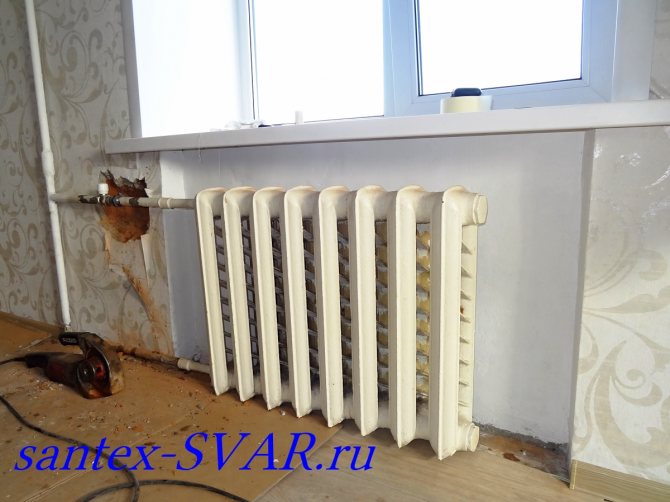
In short: who does not want to be a Bedouin on a camel in an Arab country - one way: to put a control valve on an old cast-iron battery.
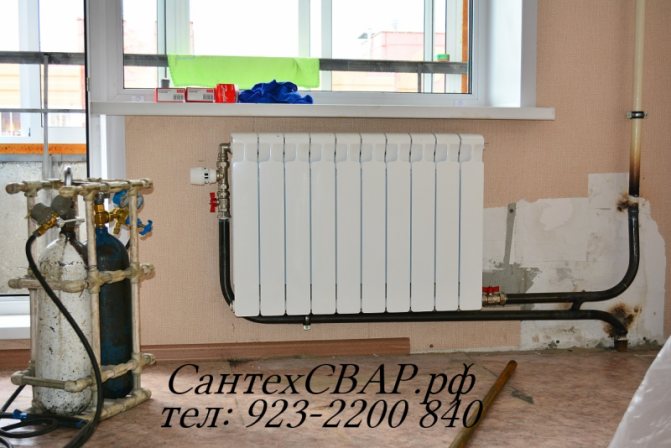
Often, before installing the batteries, customers squeal: I want 26-28 degrees. But it also happens vice versa - who suffers from the heat in the apartment: it is literally impossible to sleep! Or to live in drafts with constantly open windows - this is unacceptable with small children!
It is better to install a tap on a very hot radiator during the heating season: start or end - since work on old brittle cast-iron batteries and rusted pipes is very dangerous: it will burst and you will not notice. A pressure test is required at heating start.
You also need to be mentally prepared for the following big expenses: purchasing for a new radiator and a complete new installation. Probability: fifty-fifty - 50 to 50%.
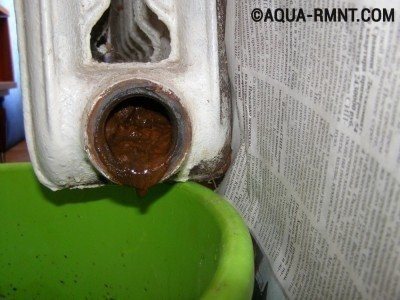
There is a decent length pipe between the riser and the battery: there is where to put a new tap. And the old welds on the riser and the rusted end cap on the end of the battery are safe.
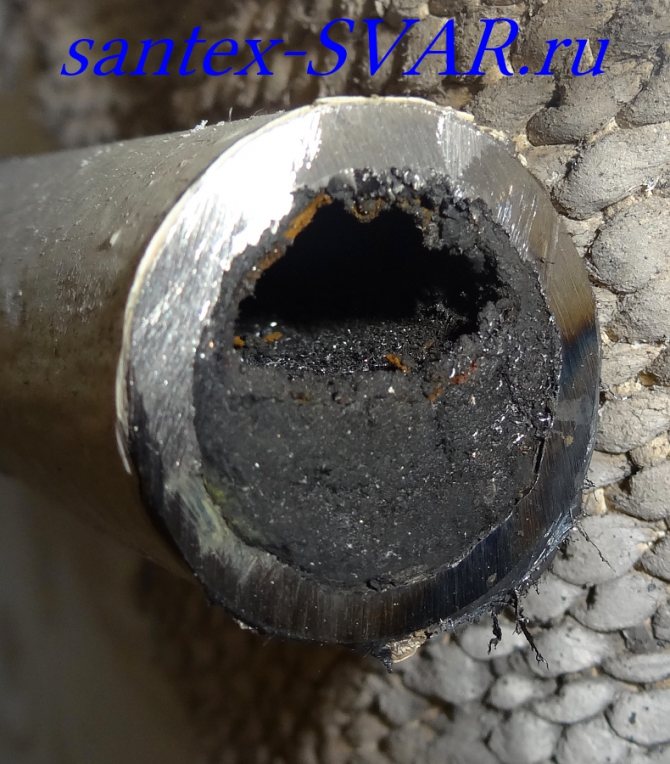
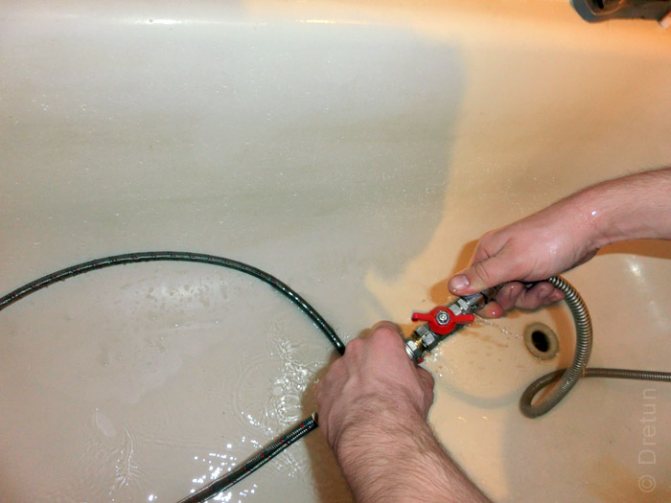
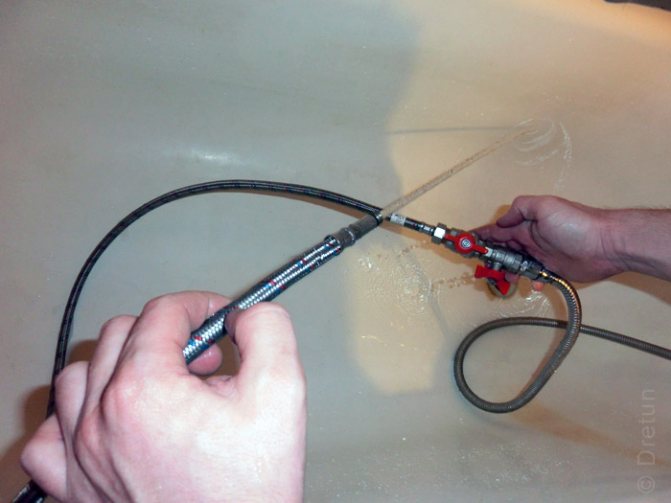
They stabbed the pipe and immediately stunned the client with terribly dirty pipes: the jaw did not drop, but immediately fell on the collarbone with a clatter. In general: we presented this cut piece of pipe to the customer.
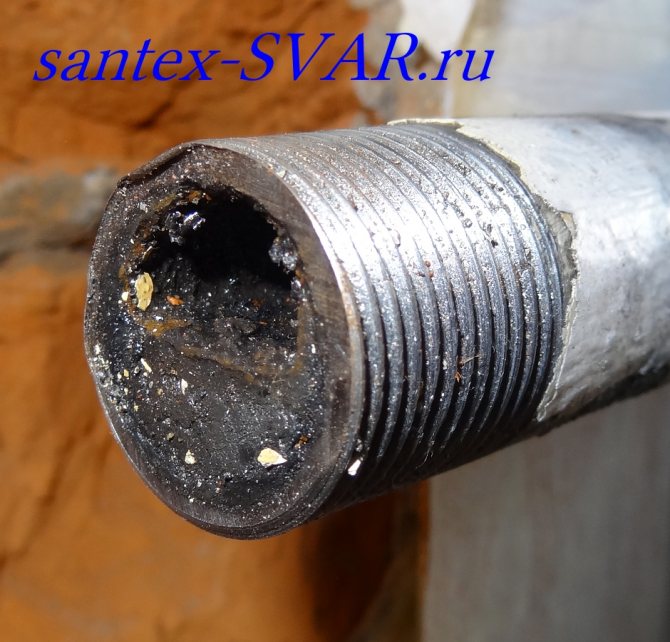
On such dirty pipes, it is better to install full-bore valves: there is less chance of clogging and failure. But they installed an Itap control valve with a smaller bore than FAR.
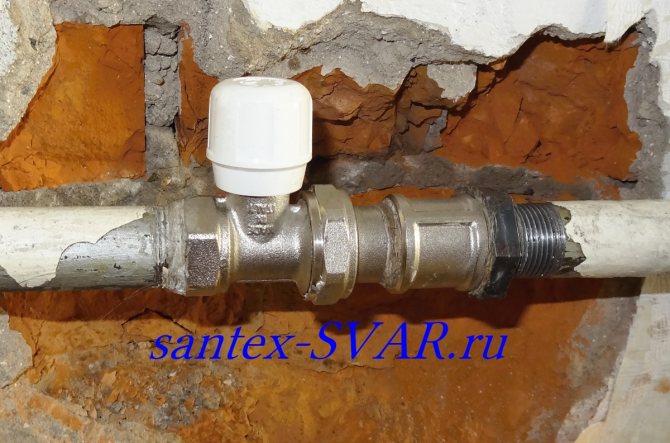
And at such a minimum flow area, the cast iron was fired up like a steam locomotive. We worked at a minimum salary: the pipe bender and gas welding were not pulled out - otherwise it is easy to accelerate to the end: to a complex replacement.
If in the process of threading or screwing on taps, something burst: at the start of heating immediately leaks. Gas welding is always in the car near the entrance (figuratively: plumbing resuscitation - rapid restoration of heating in winter). And immediately the complete installation of a new radiator (already with the replacement of drains and an offset bypass).
These old Soviet cast irons are now sold new, but who doesn't like their design
large gaps between sections and roundness of each section on the front surface - there are more beautiful KONNER Modern. the Belarusian flat model falls under the same 2 factors of design change.
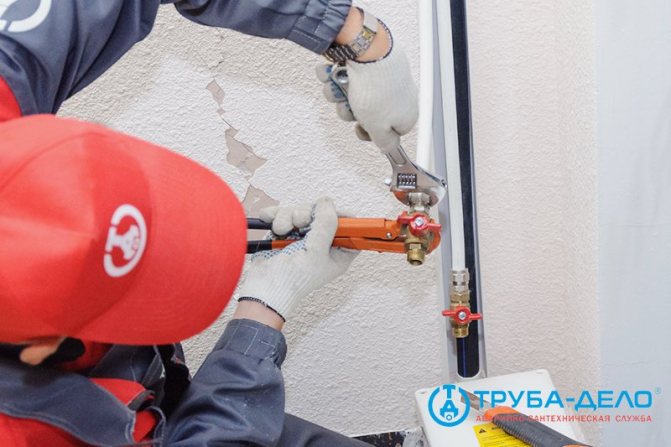
Installation procedure
The easiest way to install is a flanged ball valve, it is a very popular design. To install such a crane, you must:
- Choose a suitable location.
- Wrap the tap thread with a sealant, for example, FUM tape.
- Screw on the tap.
- Check connections for leaks.
When figuring out how to properly put the crane on the battery, you should take into account a number of nuances that will help you to competently perform these operations. For example, if a faucet is cut into an already finished system, a small section of the pipe should be cut and a suitable thread should be cut if there is none. You can see more useful information on installation in the video:
Of course, before starting work, you will need to remove the coolant from the heating system. The owners of private houses with individual heating will not have any problems, but the tenants of the apartments will have to coordinate this event with the management company.
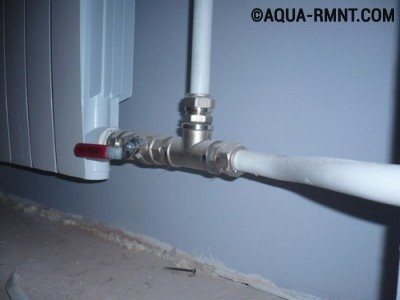
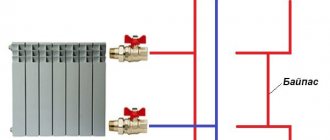
The ball valve is installed in the area between the battery and the bypass - a special jumper that circulates the coolant in the system, even when the valve is closed
The tap is installed in front of the battery and behind the jumper that connects the “inlet” and “outlet” of the coolant, so that when the flow is cut off, the coolant does not stop circulating through the system. If there is no such jumper (professionals call it a bypass), this problem must be solved when installing the tap on the radiator. When installing a crane, two points should be taken into account:
- There should be no obstacle to the adjustment knob in any position.
- Provide free access for the user to the tap.
Before purchasing a crane, of course, you should make sure that the diameter of the valve and the pipe on which it will be installed match each other. It is also worth clarifying the type of thread. For a flanged valve, these elements can be performed as follows:
- both threads are internal;
- both threads are external;
- combination of internal and external threads from different sides.
Flanged valves have a special marking in the form of an arrow, which indicates the direction of flow of the working medium, i.e. coolant. Do not neglect these instructions when installing the crane.
To avoid leaks, FUM tape or other suitable sealant should be used correctly.In the case when the valve is installed on a pipe with an open thread (it is clear that the thread on the valve flange will be of a closed type), the seal is wound clockwise. In this case, the master is located facing the pipe hole. If the open thread is on the flange, the seal is also wound clockwise, but already facing the tap, and not the pipe.
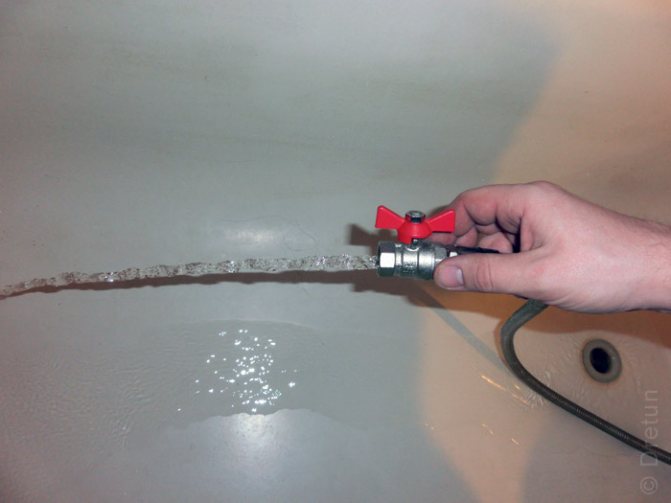
When the FUM tape is wound correctly and in sufficient quantity, noticeable effort will be required to screw the threads. At the end of the work, part of the seal may protrude slightly at the joint, this is a completely normal situation, characteristic of good sealing. If the valve turns easily, too thin a layer of sealant has been used. In this case, wind some more FUM tape, and then screw the valve tightly to the pipe. Compliance with these simple rules will help to install the valve correctly and provide a sufficiently high sealing.
At the end of the work, it is imperative to check the connection by filling the system with water, preferably at increased pressure. Failure to observe this rule can lead to flooding of the room due to improper sealing of the joints. Most often, residents of apartment buildings suffer from the consequences of unfair work, since filling the heating system with water before the start of the heating season is usually carried out without warning on a weekday.
Helpful tips for choosing
Several features are described below in order to determine which products are best to use.
Locking mechanism
Thermostats have two types of locking mechanism: a valve and a valve with a cone (stem). The latter is preferred, it allows for smooth adjustment. The temperature is manually set using a stop ring mechanically. There are also electronic mechanisms, they are more autonomous.
It is better to install ball valves than valves, which have a number of disadvantages: the gland will wear out faster, overgrow with deposits, and close for a long time. Disadvantages of the Mayevsky crane: low permeability, it requires a special key or a screwdriver, which is inconvenient to use. If you accidentally twist its stem, it is very difficult to twist it back, overcoming the pressure of the water. Instead, it is recommended to install a conventional valve or special automatic radiator air vents. The optimal and affordable option if temperature control is required is a faucet with a thermal head.
Housing and connections
It is better to install on batteries not standard ball valves, but full bore. In residential, houses and apartments, such mechanisms with a sleeve connection are used.
It is better to choose faucets for heating radiators with a steel or bronze body, but most often they use brass ones, since they are cheaper. The imitation brass is silumin. It is not worth buying a product made from it, it is a very soft metal. Polymer materials are no less reliable, but they have large dimensions. To replace them, you need to cut a piece of pipe.
Products with polymer rather than rubber gaskets are more durable. Taps for adjusting the coolant on heating radiators exclude the possibility of changing them without draining the water, this can be done with straight-through taps or with an American installed (towards the battery).
Products of the firm Itap (Italy), Danfoss are considered to be of the highest quality. The approximate price range is 700–2000 rubles. In the middle price range, there are products of the Oventrop brand - 550–950 rubles. For a limited budget, Luxor is suitable - 450-800 rubles. Chinese or Turkish stamps.
Fuel supply valve
| Purpose and device of the valve-regulator. The crane is used to smoothly control the amount of liquid fuel (fuel oil, oil) supplied to the furnaces.The fuel can be heated up to 200 ° C and supplied under pressure up to 20 kgf / cm2.
Part drawings 4, 6, 8, 11, 15, 18 and 19 are not given. Children. 4 - screw М3х5, GOST 1491-72; children 6 - rivet 2x5, GOST 10299-68; children 8 - bolt, GOST 7805-70; children 11 - screw М3х5, GOST 1476-64; children 15 - stuffing box, AP grade, GOST 5152-66 (cord, the section diameter of which is wounded 4 mm); children 18 - bolt, GOST 7805-70; children 19 - cylindrical pin 3x14, GOST 3128-70. The listed details should be found according to the GOST number in technical reference books. Select the missing dimensions of standard parts in the GOST tables, taking into account the purpose of these parts in the assembly unit. The designations of standard parts in the specification of the assembly drawing must comply with the conventions adopted in GOST. The three-dimensional model of the valve-regulator according to which this article was compiled can be downloaded in the download section. |
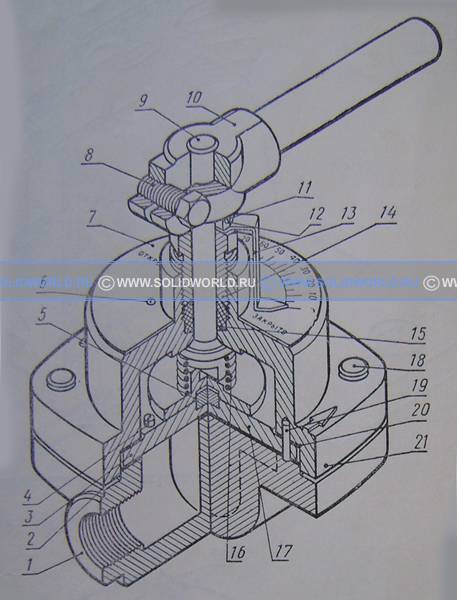
Table of Contents | Read comments (1)
1
| Commented: Alexey | 12.05.13 |
| Reference to the model The fuel supply valve is broken, refill, please! |
Installation of radiators
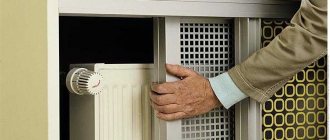
Let's figure out how to properly hang the battery with our own hands. Regardless of the type of radiators chosen, before installing them, you should carefully prepare the installation site. Very often, batteries are installed under windows to provide the necessary air convection.
When making major repairs to a private house or apartment, the outer walls are often insulated, and the inner ones are sheathed with plasterboard. Before insulation, metal frames are mounted. In this case, before installing new batteries, it is necessary to solve two problems: to determine at what distance the radiator will be located from the supporting base, and to install the fasteners in advance (it is impossible to mount a radiator on drywall, especially cast iron).
For this, the wall on which the battery will be mounted must first be sheathed with a frame. If the alignment or plastering of the walls is done from scratch, special beacons are installed. In the case when the frame is mounted, inserts with a thickness of 25 mm are made in the places where the fasteners are installed. The used material is OSB or plywood. The inserts should rest on the bottom of the floor and go into the UD-profile. Each heater needs two or three inserts, depending on the number of brackets planned (4 or 6).
After preparing the base, a marking of the location of the fasteners is made. On temporary stands, the battery is set to the design position using a level. If the radiator is installed near the window, this is done in the center of the opening at a distance of 100 - 150 mm from the floor and about 100 mm from the window sill. After marking, the battery is removed and holes for the brackets are made with a puncher. They need to be screwed in so that a distance of 30-40 mm remains from the rear of the radiator to the wall.
Heavy cast iron radiators with more than ten sections should preferably be fastened with at least six brackets. For other types of batteries, four are sufficient.
Why do you need a set of plugs for piping radiators?
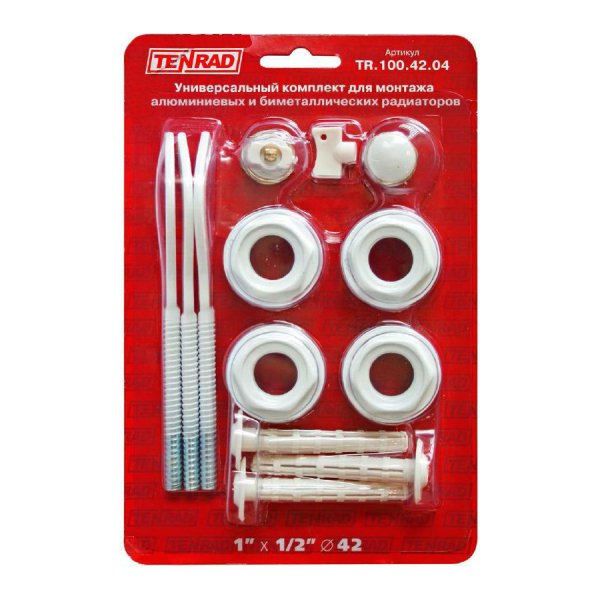
A set of plugs for piping radiators. Click on the photo to enlarge.
Each radiator has four open entrances (two on each side). This is done so that there are no problems when connecting heating devices, since the connection can be different: one-sided, cross, bottom, one-pipe. Before installation, depending on the connection option, the radiators are prepared accordingly. Some entrances are closed with blind plugs, others are made with 1/2 or 3/4 inch threaded connections.
The procedure in which plugs and valves are installed is called “packing” threaded connections and is the most important stage in the installation of a heating system. The reason is that after strapping the radiators and starting the heating system, leaks can most often appear in these places.
The most common and effective type of battery connection in an apartment is considered to be a one-way connection, in which the supply is connected at the top of the left or right side of the radiator, and the "return" is connected from the same end of the battery at the bottom. To release air from above, on the opposite side of the radiator, a Mayevsky valve is installed, and the lower inlet is closed with a plug.
Each heater must be equipped with a set of four plugs, three of which are through-type and one is blind. We determine the thread (right or left) at the entrances to the extreme sections of the radiator. We select the plugs accordingly. The plug threads can be 1/2 "or" in diameter. We choose the diameter depending on the supply pipe. When entering the twentieth pipe (outer diameter - 20 mm), a plug with a ½ inch bore is selected. If the twenty-fifth pipe is supplied, take a ¾ inch plug. Such pipes are installed in a vertical one-pipe system when the battery is part of the riser.
It should be borne in mind that the plugs have sealing gaskets, so there is no need to apply any coils. When screwing in the plugs, it is necessary to apply a noticeable effort, first using a knife to clean the base, to which the plug gasket is adjacent. This operation is best done even with new heating devices.
Reinforcement designation
A crane installed near the radiator can perform one of the following functions:
- Changing the amount of coolant entering the radiator. Thus, they regulate the heat transfer of the battery, and, accordingly, the temperature in the room;
- Complete disconnection of the radiator from the heating system. Most often this is done for repair work;
- Resetting the working environment. It is carried out when performing repairs or for flushing the battery;
- Air release.
Since the pressure drop in the heating system is very small, even a small airlock can stop the circulation of the coolant. By bleeding the air, we eliminate the cause of the blockage and restore the functioning of the system.
In apartments and private houses, ball valves are installed on the radiators of heating systems. Such a valve is also called a plug valve. Inside it there is a metal ball rotating around an axis perpendicular to the pipeline axis. A through hole is made in the ball, the cross-section of which is equal to the cross-section of the pipeline (the diameter of the ball itself exceeds the lumen of the pipeline). By rotating the handle, the user turns the ball, while the axis of the channel made in it either aligns with the axis of the pipe (water flows through the faucet), or occupies a position perpendicular to it (water does not flow through the faucet). The tightness of the seating of the ball in the seat is ensured by a plastic sheath covering it.
Cocks regulating the temperature of batteries
Control valves for heating radiators are of the following types:
- standard;
- with thermal head.
The most successful way to solve the problem with the temperature of the coolant is to install a thermostatic head. After adjusting it with a trimming throttle, it will serve throughout the heating season.
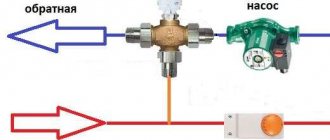
The control valve on the heating radiator will maintain a comfortable temperature in the room. The thermostat is mounted on the supply line of the supply pipe in such a way that the thermosensitive element is not heated due to the upward flow of hot air masses. A choke is considered a cheaper option, but it must be adjusted manually depending on the required degree of heating of the premises in the house, which of course is not very convenient. After all, both the radiator and the rooms have great inertness: the air temperature can only stabilize after a few hours after the throttle passability has been changed.
Also, to regulate the movement of the coolant through the pipe, a conventional plug valve is used. In principle, it is not intended for this, but with its help, customization is possible.
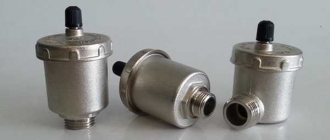
A few words about the Mayevsky crane
In addition to conventional ball valves, there is a mechanism that is designed specifically for radiators - the Mayevsky valve. This device is necessary not to regulate the flow of the coolant, but to remove air that has somehow got into the flow. The device is based on a needle mechanism specially designed for this purpose.
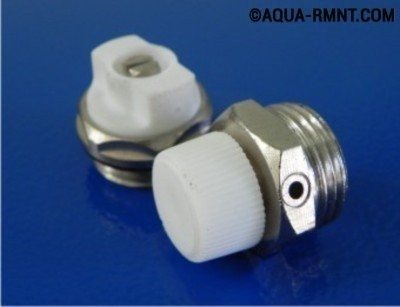
The Mayevsky crane is a small device that is usually installed at the highest point of the heating system in order to bleed air trapped in the pipes
There are two types of Mayevsky cranes - a simple mechanical model and an automatic device. The first is controlled manually, the second is adjusted accordingly, and it is turned on when necessary. Removing air from the heating system prevents the formation of air pockets and increases the efficiency of the system.
Mayevsky's taps are installed at the highest point of the system, where air accumulates. If the system works with forced circulation, it is recommended to turn off the pump and wait a while before turning on such a valve.
When choosing a crane for a cast-iron battery, it should be remembered that a lot of contamination accumulates in such structures, which create an additional load on the crane.
Mayevsky's automatic faucet is usually used only in autonomous heating systems. In this case, home owners can control the quality of the coolant, regularly clean the system, etc. In apartment buildings with centralized heating, the manually operated Mayevsky crane models are used, they are more durable and better resist pollution, which is characteristic of the coolant in public systems. Automatic models in such conditions very quickly clog up and break. Those who have old cast-iron radiators in the house should be especially attentive to the condition of the taps on the radiators.