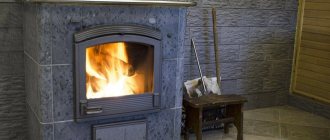
Why plaster walls with tile glue
In practice, there are often cases when instead of plastering walls, as well as floors in bathrooms and toilets, they are covered with tile adhesive. Is there any point in performing such work, no one can give an unequivocal answer. The number of different opinions is practically equal to the number of specialists in this issue. For the final clarification of this issue, it is worth considering the varieties and features of existing adhesives and the possibility of their use.
Types and properties of tile adhesive
The assortment of building stores has a large number of varieties of tile glue. The difference between them is in cost and composition. The latter difference can determine their strength, the ability to bond with the surface to be coated, the time it takes for the adhesive layer to dry completely and its viscosity.
According to their composition, all available glue mixtures can be divided into two large groups:
- Dry mixes based on sand or cement;
- Ready-to-use solutions, the preparation of which is carried out on a polymer base.
The first type of glue requires dilution with water without fail. The entire volume of the material obtained should be consumed within a few hours.
The level of its bonding properties is determined by the presence of added plasticizers in the composition. Its features include the following properties:
- If we compare it with cement, then it provides a faster setting of the applied mixture, as well as a more durable retention of it on the surface to be treated;
- Stable even in the presence of low temperatures and high humidity. This condition is characteristic exclusively for universal species.
- Low degree of fluidity, sufficient level of plasticity.
The above parameters make it clear that this type of mixture by its own indicators is an order of magnitude higher than an ordinary putty. The application of glue in a thick layer exceeding 1 cm should not be allowed due to the possible formation of cracks in the future. The main feature of the work is layer-by-layer application.
The second type of glue does not require the addition of water. But its cost is much higher than the previous type of mixtures. It can only be used on perfectly processed surfaces, and applied with a thin brush in neat layers.
Types of work in which glue is used
All materials used in construction have their own purpose. For leveling the walls, plaster is most often used together with putty. The first allows you to eliminate the presence of deep irregularities, the second gives the finished surface smoothness.
Carrying out work with its use is carried out in the same way as applying plaster to the walls. With careful and high-quality execution, such a wall or floor covering will serve for a long time. If, when applying such a mixture, all the developed technology is observed, then the result will be a long-lasting high quality plaster.
amstafkomanda.ru

Decorating the bath with your own hands
In order for the bath to be beautiful, you need to choose reliable and high-quality finishing materials and mount them in accordance with the specifics of the premises described in the previous sections.
Choice of finishing materials
The optimal choice for each owner of the bath will be a choice that takes into account the size of the building, personal taste and financial component. In order not to be mistaken when buying material, you must first:
Calculation of the area of premises
To determine the need for materials, it is necessary to know the area of the surface to be trimmed. All calculations are done in meters.
For the floor and ceiling, we multiply the length of the room by its width. To get the area of the walls, we calculate the perimeter of the room: add the length and width and multiply by two. The product is multiplied by the height of the ceilings. Subtract the area of doors and windows from the obtained result, if any.
In rooms with complex combined finishes, the area of each site is calculated separately.
How to buy quality materials and prepare them for installation
When choosing a material, one must pay attention first of all to the quality of the product.
Calculation of material requirements
- Find the area of one board. So, with a standard length of 6 m and a thickness of 90 mm, the area of the board will be 6 ∙ 0.09 = 0.54 m 2.
- Calculate the area of the surface to be trimmed. Suppose that it is necessary to upholster the walls of a room measuring 3 x 6 m with a ceiling height of 2.5 m. The surface area is: (3 + 6) ∙ 2 ∙ 2.5 = 45 m 2.
- Calculate the number of boards. To do this, we divide the surface area by the area of one board: 45 / 0.54 = 83.3 boards.
For example, we give the specification of the material for finishing the steam room:
In the same way, the need for wood for the rest of the rooms is calculated.
To calculate paint and varnish materials, the surface area should be multiplied by the paint consumption, which is usually given on the package in liters per square meter. The piece will show you how many liters of paint you need to buy.
All goods must be bought with a margin of 10%, taking into account the allowance for waste and defects in work.
Required tools
To finish the bath with your own hands you will need:
- Perforator.
- Screwdriver.
- Building level.
- A hammer.
- Furniture stapler.
- Plane.
- Hacksaw or jigsaw.
- Self-tapping screws, nails or clamps.
Step-by-step instructions for decorating a bath
The work is carried out after laying the electrical wiring and ventilation ducts, starting from the floor. The floor of the steam room is raised 10-15 cm above the level of adjacent rooms. After the clean floor has been laid, they begin to decorate the walls. The ceiling is the last to perform.
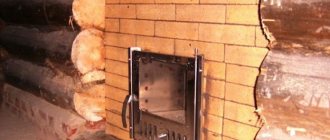
- Making a frame for insulation. The frame is assembled from a beam of 100x40 mm, impregnated with a fire retardant and fungicide. The beam is attached with screws or dowels to the wall at intervals equal to the width of the insulation plate minus 5 mm.
A frame made of wooden beams is mounted on the walls and ceiling - Insulation installation. Between the beams of the frame, plates or mats of insulation on heat-resistant glue are laid with additional fastening with dowels, 5-6 pcs. by 1 m 2.
- Installation of heat-reflecting material. Aluminum foil or foil-clad fire-resistant film, for example, foil-clad penofol, is fastened with staples using a construction stapler to the thermal insulation layer.
A counter-brace is mounted on the heat-reflecting layer under the finish coating
Wall cladding. The lining is attached to the frame in accordance with the selected layout. The nails are driven into the grooves so that they are not visible on the finish. Nail the plinth.
To decorate the premises in the bath, you can choose different types of wood with different shades of color
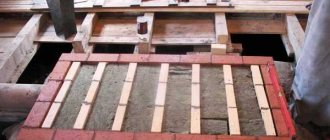
Installation of the false ceiling frame. The frame of the filing ceiling is attached to the floor joists or to the walls made of 100x50 timber with a vertical orientation. The distance between the beams should correspond to the width of the insulation board minus 5 mm per spacer.
The installation of the ceiling is started after the wall cladding
Installation of heat-reflecting material. Foil or foil material is attached in the same way as on the walls.
Sheathing of the ceiling with clapboard. It is carried out in the same way as wall upholstery. The section of the ceiling above the stove is protected with a non-combustible material: stainless steel sheet or panel material. Ceiling plinth is attached.
A foil vapor barrier is attached to the insulation, and then lining is nailed onto the finished crate
Video: interior decoration of the steam room
Having familiarized yourself with the requirements for the premises of the bathhouse and having studied the information on the correct execution of the finishing, you received the necessary theoretical knowledge. Performing work does not require special professional skills and is within the power of any homeowner.
Bath, sauna [We build with our own hands] Nikitko Ivan
Plastering and painting
Oddly enough, oil paint is also an acceptable material for the interior lining of the bath (however, only in the dressing room and washing compartment, and only if you have brick walls).
Let's talk a little more about plastering brick walls in the locker room and washing compartment. First, you should clear the masonry seams by 1.5–2 cm. Then moisten the surface.
The plastering process itself consists of three stages: spraying, priming, covering.
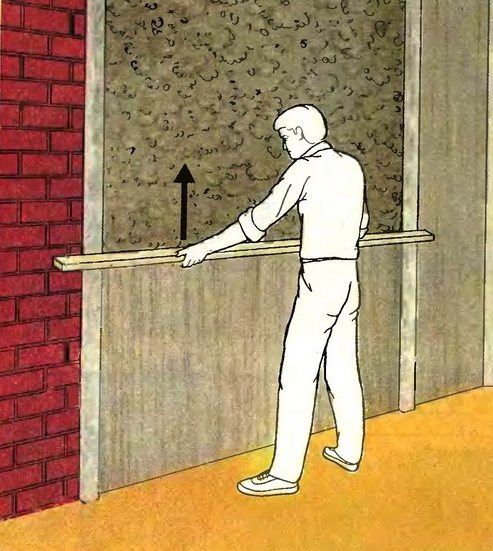
It is best to apply the plaster using beacons set in such a step that it is possible to level the solution between them using a rule. Remember: the thickness of the beacons is certainly equal to the thickness of the plaster layer (without covering).
If the weather is dry and hot, it makes sense to periodically moisten the newly applied plaster, otherwise it will dry faster than it is envisaged by the technological process and will crack immediately.
If defects suddenly appear, such as an incomprehensible roughness or drips of solution, they can be immediately cleaned using the end of a dry wood or a scraper.
From the book Loggias and balconies the author Korshever Natalya Gavrilovna
Coloring of glass Painted glass is required for the arrangement of stained-glass windows on a glazed balcony or loggia. Cut-to-size glass is thoroughly washed and degreased. The selected drawing is made on a sheet of paper in full size. The contours of the drawing are transferred to the glass
From the book Complete apartment renovation. How a woman to cope with the repair of the author Shtukina Lyudmila Vasilievna
Plastering the walls Question. In what cases is it necessary to carry out plastering work? If the unevenness of the wall exceeds 5 mm, then it becomes necessary to carry out plastering work. Or, for example, if vertically installed doors protrude significantly beyond the plane
From the book Natural cosmetics: soaps and masks, creams and tonics without chemistry with your own hands the author Yankovskaya Elena
Henna staining Pour henna from a bag into a bowl (for short hair you need 50 g of henna, for long hair - 200 g) and pour boiling water, stir thoroughly so that there are no lumps. In order to get a very rich color, you can add a few drops to the resulting mixture.
From the book Home Master of the author Onishchenko Vladimir
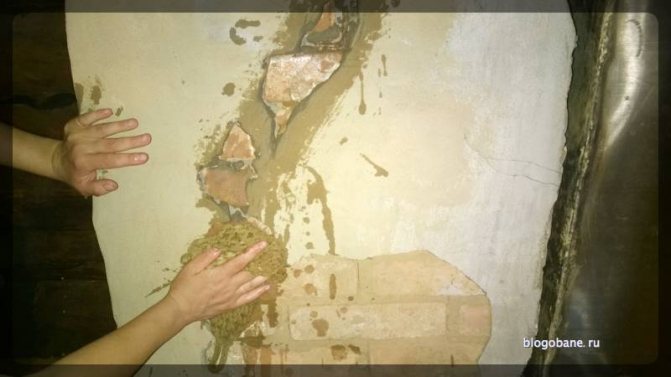
Plastering of the broken spots The broken spots of the plaster and especially its edges should be well moistened with water. The better the edges of the old plaster are moistened, the more firmly the applied solution adheres to them and the more solid the plaster is. In case of insufficient wetting
From the book Exterior decoration of a country house and cottage. Siding, stone, plaster the author Zhmakin Maxim Sergeevich
Plastering slopes and plugs Before plastering window slopes and plugs, they must be covered (fill the groove between the wall and the window or door frame) and prepare the surfaces (if required) for applying thick plaster
From the book Burning wood [Techniques, techniques, products] the author Podolsky Yuri Fedorovich
Plastering of internal slopes Plastering of the upper slopes begins with the fact that the rules are hung strictly horizontally on the upper parts of the slopes. Having plastered the top of the slopes, the rules are hung strictly vertically on the sides of the slopes and plastered
From the book Handbook of the master of painting the author Nikolaev Oleg Konstantinovich
Plastering plugs Plugs are plastered in the same way as slopes. The solution is leveled with a small, at the ends of which two notches are made. Cutouts are necessary to leave gaps between the boxes and the plaster. The dimensions of the gaps are the same as for the slopes. If a
From the book Practical summer shower and toilet in the country the author Dobrova Elena Vladimirovna From the book All about tiles [Laying with your own hands] author Nikitko Ivan From the book Building a house quickly and cheaply author Simonov Evgeny Vitalievich
Plastering the surface for painting The highest quality paint layer is obtained if it is applied to thoroughly dried plaster. In this regard, when decorating rooms of any type - wood, concrete, brick or block - walls and ceilings,
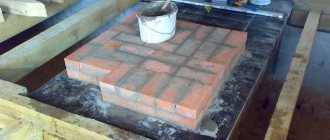
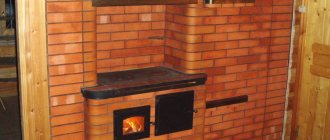
As soon as a new stove is folded in the bath, or repair work is carried out on its surface, any attendant asks one question: "How to plaster the stove?"
Under the influence of heat, moisture, expanding when stones and bricks are heated, cracks appear on the stove. The fine web of cracks gradually turns into solid holes. Therefore, repairing the stove in the bath is a common thing.
There is no need to wait until the crack turns into a hole. It's time to get down to business right away. Plaster solutions will help to resolve the issue of repairing the furnace. The main purpose of these solutions is to give the queen of the stove its original appearance.
Furnace finishing components are as before: clay, sand, lime, cement, asbestos. These are binders, and their mixture with water is called a solution.
The most important purpose of binding solutions is to bind the masonry of the furnace together. A prerequisite for obtaining a high-quality solution is the good quality of the raw materials.
Therefore, sand, cement and asbestos must be sieved through a fine sieve before starting work. The clay is pre-soaked in water and filtered through cheesecloth, and then thoroughly mixed until smooth. Clean, dry clay will reduce the strength of the mortar.
An important point in the preparation of mortars for plastering ovens is the correct observance of the proportions. The most important is the ratio of clay and sand, based on the proportion of one part of clay - two parts of sand. The components are mixed in dry form (with the exception of clay), and filled with clay or lime water. The more water you add, the thinner the solution will be, so you need to pour water in carefully, in small portions.
There are many types of solutions, I will give recipes for the most popular and simple ones.
Is it possible to plaster with tile glue
Alina asked a question:
If it doesn't bother you. Please give some advice. We still have a whole bag of tile glue. We didn’t calculate when we took the kitchen and bathroom renovations. Can you plaster with tile adhesive? We have nowhere to use it for its intended purpose (in such quantities), but it would be quite enough to plaster the wall of a veranda built of blocks. It needs to be used somewhere before it gets damp. Can they be plastered or just glued tiles? Give answer. I really don't want to re-do the work if it falls off. What size spatula should I use? As I understand it, a notched tile will not work? Or do you need to take two, one large, the other smaller?
Tiler's answer:
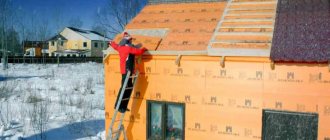
Take a closer look at the foam blocks. They do not require large expenditures of plastering materials. And they do not need additional insulation. But this is a small nuance. Let's get back to business.
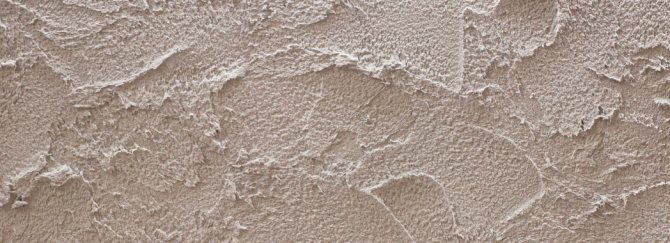
Isn't it a pity? Plaster is cheaper. I am answering your question. Tile adhesive can of course be used instead of plaster. It holds up better, lies well, but requires subsequent finishing putty. It's about its structure. It is coarser than gypsum mixes. This makes the surface rough to the touch. If you are satisfied, you can skip the finish line. But this is a matter of taste.I'm used to doing my job well. This is a fairly simple process if you follow the sequence of actions step by step.
- If your masonry is uneven (and most likely it is), you will need to do several layers. For better adhesion to the surface, treat with a primer. A solution in several layers has a large mass. This will avoid the risk of repeated repairs.
- After priming, dilute the solution with a consistency close to sour cream. Take a wide molar brush and paint over the entire wall well. After that, leave to dry for a day. Repeat the procedure if necessary. But maybe once will be enough.
- Level the plaster profile. Fasten properly. Take the rule (this is the tool). It will save you time. Of course, you can use a regular spatula, but this is a long and laborious job. At this stage, the plaster is made with tile adhesive. The mortar should be thicker, lay down well, not stick too much to the trowel. Place the mortar on the wall with a trowel. After that, align with the rule. Do this with each section of the wall in order to completely plaster it.
- Leave to dry. After a day, you can shoot a profile. With tile adhesive, it is necessary to cover the voids from the profile, using a spatula. Then align the corners.
- The surface is prepared for the application of the filler. But you don't have to.
As you can see, the composition is quite suitable not only for gluing tiles. Compared to conventional gypsum plaster, it is moisture resistant and has increased adhesion. When it comes to tools, you definitely need a medium sized trowel, an angled trowel. Be sure to rule, otherwise your work will be done crookedly. A trowel for laying mortar is also necessary. And the last piece of advice. Since the glue dries quickly. You will have to scrape it off periodically. Do not dilute it in large portions. Do not leave the solution on for long. Otherwise, it will dry out. This will increase the consumption of materials.
izplitki.com
Plastering walls with an adhesive mixture
Now let's look at how to properly perform plastering in order to end up with a high-quality and durable rough finish. Like any other construction work, this procedure is performed step by step.
Preparation of the base
First of all, it is necessary to prepare the base with high quality. It should be free of crumbling or peeling areas, as well as dirt that impairs adhesion.
In particular, concrete slabs must be cleaned of the oil used in their manufacture. You can use warm water and detergents for this. If there are traces of mold or mildew on the surface, then it must be cleaned with a metal brush.
The final stage of preparation is the application of a primer, which will not only improve the adhesion of materials, but also protect the base from the effects of microorganisms. The solution is applied to the walls in two layers.
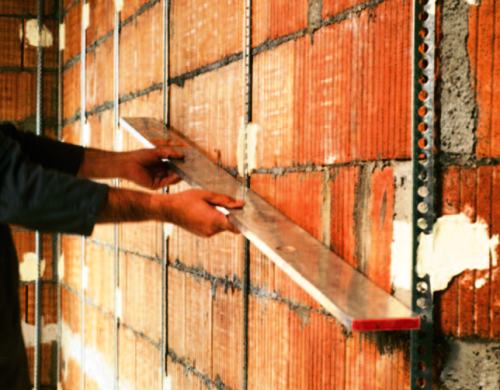
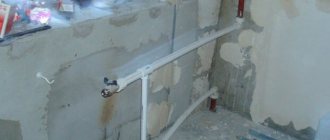
In the photo - checking the quality of the installation of beacons
Installation of beacons
This stage is quite difficult, as it requires extreme accuracy - all guide beacons must be located strictly horizontally, in one plane. It depends on how smooth the walls turn out to be, i.e. what the plaster is done for.
As beacons, a special plaster profile should be used, which is fixed on the wall with lumps of gypsum or the same adhesive solution. To adjust the position of the beacon, self-tapping screws can be screwed on both sides. In this case, the profile with its edges "lies" on their hats.
Note! When installing plaster beacons, it is necessary to check their position several times with a building level.
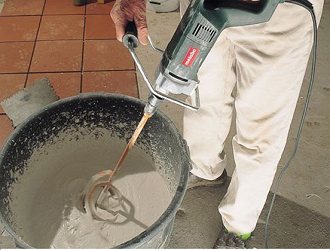
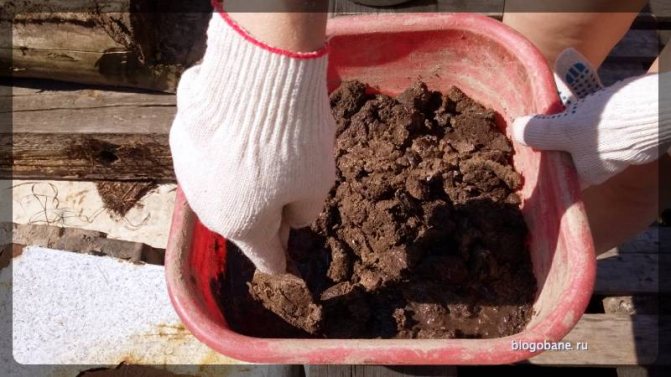
Preparation of the solution
Preparation of the solution
The peculiarity of the preparation of the solution in this case is that it can turn out to be too greasy, which will lead to cracking of the surface. Therefore, sand is usually added to it.
The fat content is determined during its preparation, if the solution sticks strongly to the instrument, then it is necessary to add sand. As a result, the composition should only slightly adhere to the trowel.
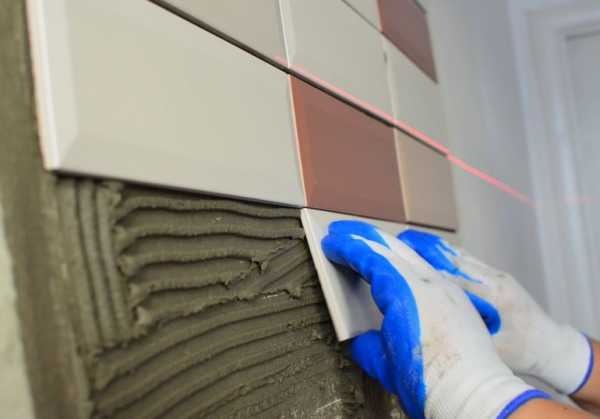
Applying the composition to the wall
After preparing the base and performing the mortar, you can proceed directly to plastering.
The instruction looks like this:
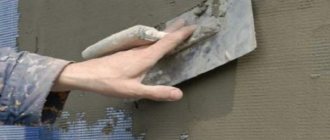
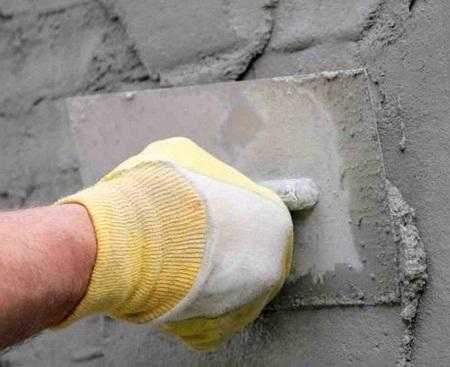
- The first layer is applied with a creamy consistency solution using a trowel. The mixture should fill all depressions, cracks and completely cover the surface of the wall. However, the thickness of the first layer should be no more than one centimeter, preferably even slightly less.
- After the first layer has dried, which usually takes a day, you can apply the second layer in the same way. If at the same time the required thickness is achieved, then the leveling of the surface should be performed using a rule that presses against the beacons and stretches from the bottom up.
- The final step is to align the corners. For these purposes, you can use a special angled spatula.
Rule surface alignment scheme
This completes the plastering procedure. If technological errors are not allowed in the process of its application, then the adhesive plaster will turn out to be quite durable and of high quality.
Plaster instead of tile adhesive - Construction portal
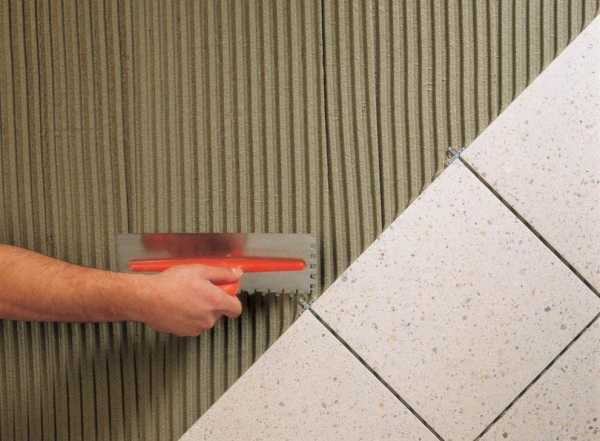
Plastering walls is one of the most important processes that is performed before laying tiles.
When repairs are done with their own hands, more than one problematic question arises for home craftsmen. Example - can you plaster the walls in the bathroom before tiling? So plastering the walls is not something that is possible - it is necessary, it will affect the quality of the finishing work. And the tile will take better, and aesthetically everything will be flawless.
Material content:
The content of the article:
Do I need to plaster the walls before laying the tiles
If you were covering the walls in the bathroom, for example, with plastic panels or instead of tiles you decided to use moisture-resistant drywall, you won't need wall plastering. But only before laying the tiles, plaster the surface without fail.
It is imperative to plaster the walls if they are uneven and damaged.
The choice of the mixture will involve two options:
- Gypsum-based mixtures. Not the best option for a bathroom, as gypsum is hygroscopic.
- Cement-based mixtures. And this option is exactly for the bathroom. It is intended for work in rooms with high humidity.
Also, when choosing a solution for wet rooms, make sure that it already contains antibacterial additives and the necessary plasticizers, which will protect against possible cracks on the walls. Sanitizing plasters are considered an excellent option - the walls are waterproofed, the walls are protected from efflorescence and mold stains, the material is environmentally friendly. Sanitizing compounds are intended only for internal work.
Is it possible to put tiles on gypsum plaster
As discussed above, this is undesirable. Yes, in some situations it is possible to apply gypsum plaster, but only if certain conditions are met. And these conditions are not always possible to fulfill.
So, the rules for applying gypsum plaster:
- The plastered walls will be completely finished with ceramic tiles, and the seams will be covered with a special moisture-resistant grout;
- The layer of gypsum plaster will not be more than 2 cm;
- The plastered surface will not be smoothed;
- Before laying the tiles, the surface will need to be treated with a special primer a la Aquastop.
Professionals in most cases do not recommend installing tiles on gypsum plaster.
Nevertheless, the use of gypsum plaster is undesirable. Cement is many times better, gypsum plaster is simply not intended for work in the bathroom. Use it only in exceptional cases.
Preparatory work: plastering the walls in the bathroom under the tiles
Clean the walls thoroughly, get rid of the old coating. If there are stains on the walls, they need to be removed. Rust stains can be removed with a mild acid solution. If it seems to you that the walls are too smooth, process them with a notch, they will become rough to the required degree.
Work begins with the application of a starter layer. The first layer is applied with liquid plaster. First, the base is moistened with some water, then the liquid plaster solution is "pounced" on the walls with a trowel. The starting layer should not be thicker than half a millimeter. And there is no need to smooth and level this layer.
Base and finish layer: plaster under the tiles
The main layer is also called rough. It must be applied over the starter layer, and its thickness is the same - half a centimeter. If a layer of 5 mm, as it seems to you, is not enough, then after the first rough layer dries, apply the same second one. Only the plaster mixture should be thicker.
Plastering the walls can significantly extend the life of the tiles.
When you apply a draft layer, the plastering will take place like this: you throw the mortar on the wall, and level it with a special tool, a long trowel. In this case, movements can be in any direction.
The finishing layer of plaster is applied as follows:
- This layer is very thin, about 2 m;
- It is applied after the base layer has completely dried;
- Before applying this layer, the walls must be moistened with water, then work with the mixture and a spatula.
Then a special trowel evens out the still uncured layer. This is done in a counterclockwise circular motion. So, you were able to plaster the wall with high quality, it remains to wait until it dries and you can lay the tiles.
Types of plaster: is it possible to plaster with tile adhesive
Experts assure that in some cases, subject to certain conditions, the plaster mixture can be replaced with high-quality tile adhesive. It is produced both with a ready-made solution and with a dry mixture. Dry mixtures are traditionally diluted with water, and ready-made solutions containing polymers do not require dilution. But polymer compositions for plastering are not suitable, you can use only a dry mixture.
Before plastering the wall with glue, it must be prepared in the same way as in the case of the plaster mixture. The wall must be clean, if necessary - certain areas will have to be putty. Then a primer is applied to the wall in two layers.
Plastering with tile adhesive is recommended if you have the appropriate experience.
Tile adhesive plaster:
- Install beacons using a level and plumb lines;
- After that, you can apply the adhesive itself. The first layer should have the consistency of sour cream.
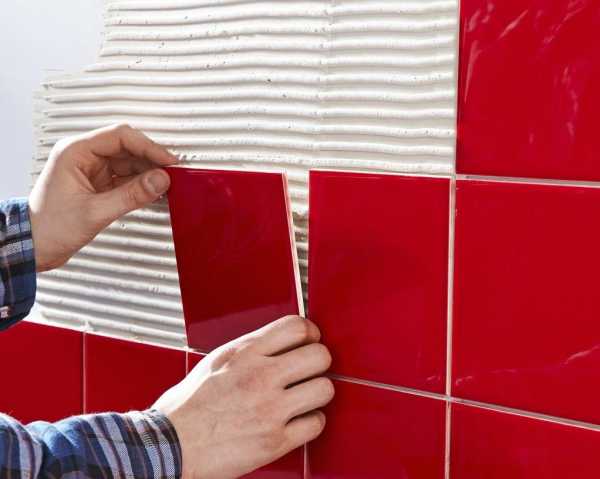
- Thoroughly trowel the walls with the mixture, trying to fill in all the cracks. This solution will dry out in a day. Then you can plaster further.
- For the second layer, you will need a thicker mixture. At this stage, it is required to achieve the desired layer thickness, therefore, at the end, the walls will be leveled. First, the rule is used, and the corners are conveniently formed with a special spatula.
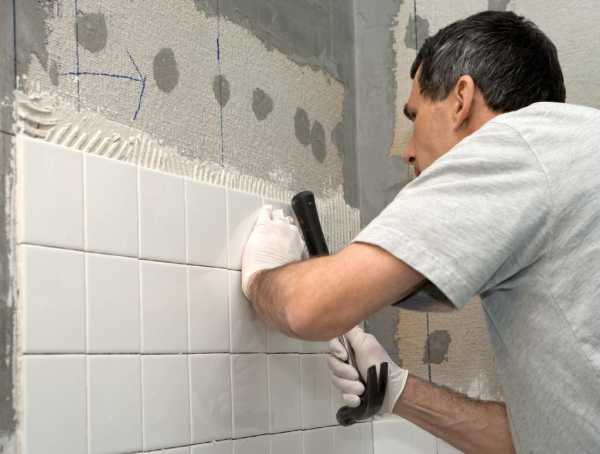
- After this layer has dried completely, you can also glue the ceramic tiles to the surface.
As you can see, there is nothing hyper-complicated in this method either. The main thing is not to forget that the glue is not needed polymer, but in the form of a dry mixture. And to achieve the correct consistencies, as well as a two-layer application. Then everything will work out.
Plastering walls in the bathroom for tiles (video)
Of course, plastering the wall before cladding is not a desirable process, but an obligatory one. This makes your repairs of high quality and durable.So do not neglect the rules of competent repair, and the next one will not be needed soon.
Good work!
Source: kitchenremont.ru
Does the bath need finishing
Regardless of what kind of bath you have - Russian, Finnish or Turkish hammam, the bath is a high temperature and high humidity. Without finishing, without insulating the walls, floor and roof, you will have to heat the steam room for hours, and with it the surrounding air, literally throwing money away.
Due to the difference between the external and internal temperatures, moisture will settle on the walls with condensation, which over time will lead to the formation of fungus, mold and rotting of wooden structures. If the building is made of masonry material (bricks or blocks), a steam room without finishing threatens with burns if it comes into contact with a hot wall. Only in the case when the bath is cut from logs or folded from a bar, it is possible to leave it without additional finishing, if the thickness of the walls provides the standard resistance to heat transfer. If this is not the case, we go back to reading the first sentence of the paragraph.
If the bathhouse is made of logs, complete interior decoration can be omitted.
There are many safety requirements for the decoration of the bath:
The walls and floor of the bath are most often insulated with stone or basalt wool, but this is not the best option: mats and slabs of mineral insulation contain a small amount of bituminous binder, which evaporates under the influence of high temperature, as well as tiny particles of fibers that cause irritation when they settle on the skin.
A safer and more economical option - foam glass insulation - avoids these disadvantages. The vapor barrier is performed with aluminum foil or foil-coated polyurethane foam, which belongs to the group of non-combustible materials and will serve as an additional heat insulator.
We use glue instead of plaster: advice from experienced
Today, the choice of building materials in any store is huge. When planning to make repairs, you do not need to look for acquaintances who can sell imported wallpaper or scarce tiles from under the counter. And cement mixes no longer need to be mixed by ourselves.
However, on the forums, the question is often asked: "Is it possible to plaster with tile glue?" As a rule, the reason for such a craving for experimentation is banal economy. Firstly, it happens that tile adhesive costs an order of magnitude cheaper than a plaster composition from a good manufacturer. And secondly, if you are going to glue ceramic tiles in the bathroom and have already purchased the necessary materials with a margin, then plastering the walls with tile adhesive will help solve the problem of unexpectedly revealed surface irregularities.
Is it possible or not?
Manufacturers of adhesives based on Portland cement (for example, Ceresit) themselves sometimes indicate on the packaging the possibility of using glue as a leveling material. Plastering with tile glue, as practice shows, fully justifies itself if the instructions for use are followed (that is, the thickness of the layer must not be exceeded, it is imperative to wait until it dries, it is recommended to apply a primer before and after application).
However, when replacing one material with another, as in the case of using tile adhesive as a plaster, one must also bear in mind the differences in technical characteristics. If we compare, for example, SK KVARTs tile glue and the universal DSP M-150 of the same brand, we will see that the compressive strength of the cement-sand mixture is higher. In addition, dry mix is much cheaper. And, by the way, this universal plaster is used no less often instead of tile glue.
And if you connect?
The inquisitive mind of folk craftsmen went even further: on the net you can also find questions about mixing the above two compositions. According to the experimenters themselves, the resulting material is resistant to cracking and durable. But the exact proportions of adding glue to the plaster are difficult to determine.After all, it is necessary to proceed from the characteristics of this or that glue and plaster mixture. Therefore, we do not recommend carrying out such tests on the walls of your own home. Especially if you are new to decorating.
What plaster to take
The choice of a particular type will depend on the area to be treated and the desired topcoat.
For Bath
For bathrooms and combined sanitary facilities in apartments and offices, all types of moisture-resistant plaster are suitable, except for facade and epoxy. Epoxy is less toxic than the front one, but it has an unpleasant odor that disappears for a long time without normal ventilation. Otherwise, when choosing, you must rely on the desired effect and type of surface finish. For example, it is better to avoid plaster under the tiles.
Expert opinion
Shablovsky Sergey
Foreman in the plasterer's team, more than 10 years of experience.
Very often, craftsmen take acrylic varieties. They easily hide irregularities, shine beautifully, can be decorated and painted. Sanitizing types for painting and tiles are also popular in bathrooms.
For a bath
For interior decoration of the bath, gypsum and cement plasters are popular. They are resistant to heat and do not ignite near ovens. An unsightly view is easily covered with tiles, siding. The risk of crackling is compensated by the condensate hoods.
Recreation rooms, rooms with pools and hot tubs are best finished with polymer plasters, silicone, silicate plasters. In showers, it is better to use sanitizing types, since there is great direct contact with water.
Utility rooms
In utility rooms remote from water, basement floors with low traffic, all types are used, including mineral ones. The main condition for this is the possibility of ventilation or high-quality artificial ventilation.
Cellars and cellars
Basements and cellars often suffer from dampness. Moisture-resistant compounds are vital there. To save money, most craftsmen take gypsum-sand mixtures, sanitizing plasters. Mineral, polymer and silicone types are practically not used due to the lack of the ability to ventilate the premises.
In the case of ambient water, additional waterproofing must be carried out on the outside.